Another week, another post from the depths of paint despair. I always start off optimistic about a paint job, and then end up becoming slowly disenchanted with the work as time goes on. As I mentioned before, the paint in this room is pretty involved, and from the outset, I budgeted myself two weeks just to paint. As of the time of this writing, it’s been exactly two weeks since I put the first coat of paint on a surface, and I probably have one more day of painting before I’m officially done.
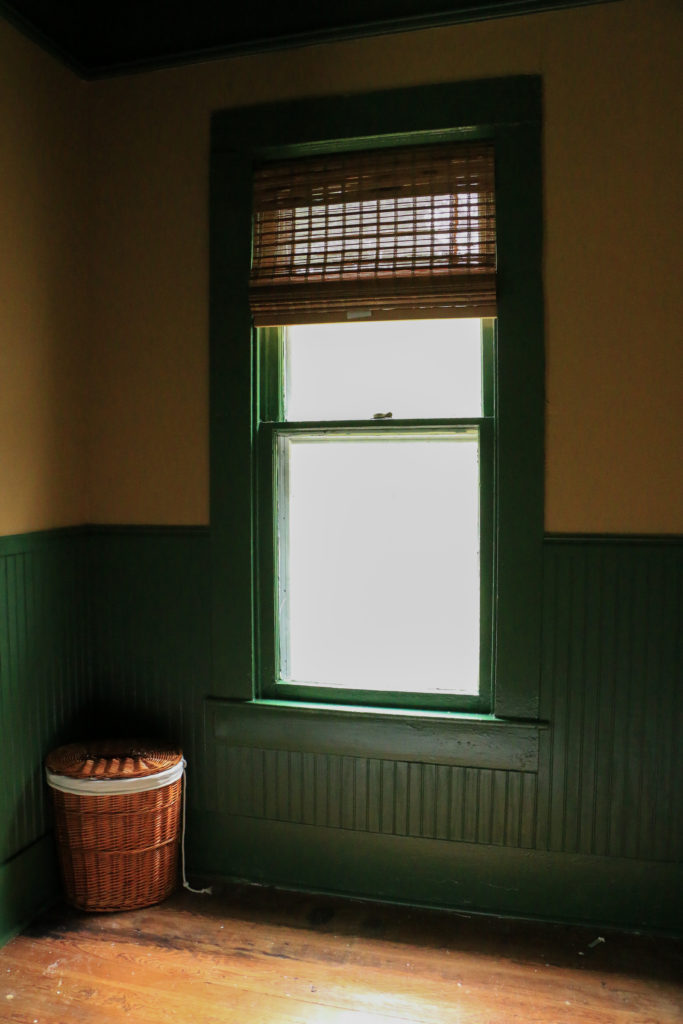
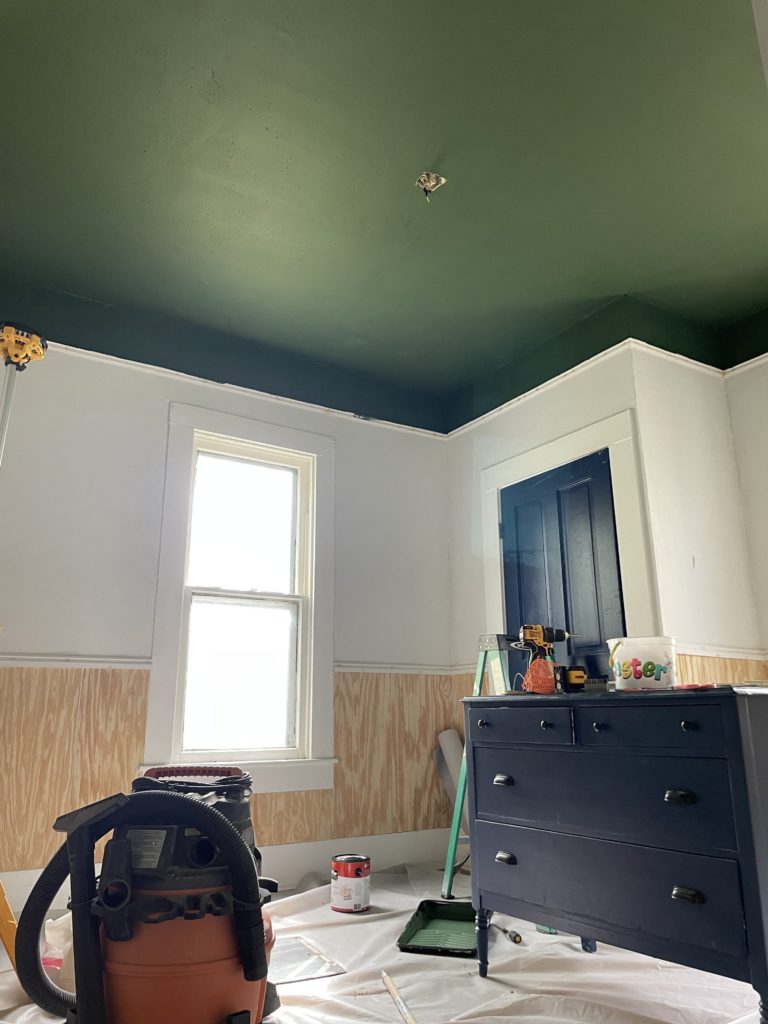
I have shown you guys the green paint that is the majority of the room, but I haven’t talked about here what my plans were for the upper portion of the wall. I am doing a faux wallpaper look (more on that later I promise!) using just paint. I’ve done it with a few different methods in the past, and so I’m lovingly referring to this “wallpaper” as Fake Wallpaper3.0. While I’m not ready to show you what the wallpaper is, I want to share what color I painted the wall as a base for Fake Wallpaper3.0. I’m going for a moody, English country style, and so I chose Windswept Leaves by Behr to help darken the space. It’s not transferring super well in the photo I snapped today, it’s a lovely camel shade and less of a gold, but I think it’ll serve as the perfect backdrop for what I’m hoping to achieve with the faux wallpaper.
Does it not bring some drama to the situation? I’m excited to show you what’s coming next, but I’ll have to leave you in some suspense! Be sure to check out the other ORC guests this week as they reveal their progress too. That’s all for today, have a fabulous day!
Three weeks in and I’m starting to feel like I can *see* this room. (If you haven’t caught up on weeks one and two, you may want to do that first.) You know when you still have so much left to do, but all of a sudden there’s a point in a project where you can start to see your vision come to life? That’s where I am this week.
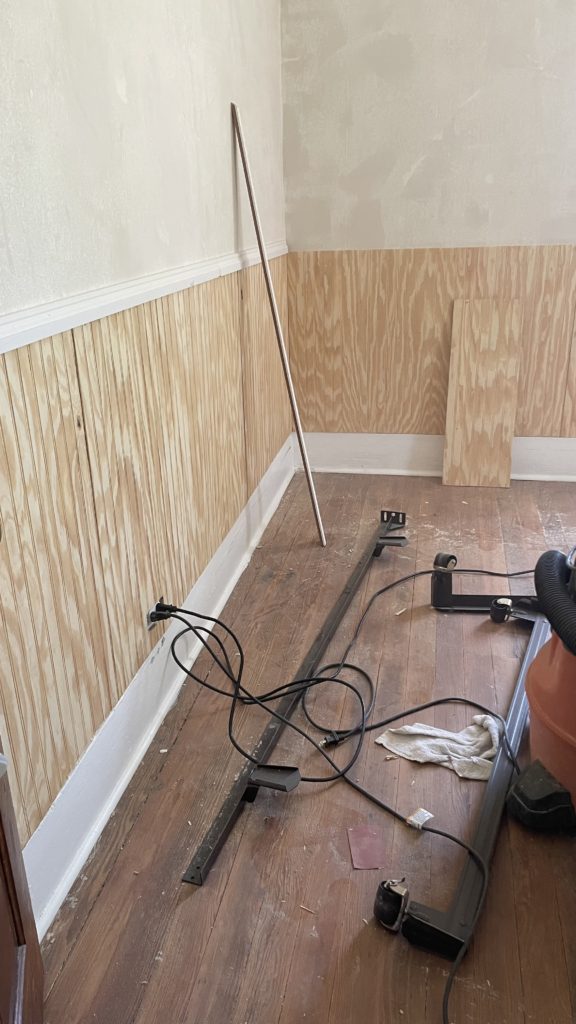
We finished last week with beadboard up on the wall and that was it. I had to do a lot of work to actually finish out the beadboard so it looked good, and even more to do before I could start getting paint on the wall, but I was determined to start getting color on this week. Thankfully Ethan was home this week and able to help me. I wouldn’t have gotten as much done as I did without him, but we made it with not a moment to spare!
Let’s walk through what we did this week.
First thing we did was add the chair rail to sit along the top of the beadboard. It immediately looks so much more professional with just that simple addition. It’s easy to gloss over all of the finish work, but it takes hours to fill nail holes, sand, caulk seams, and clean up in between each of those steps, so I don’t want to negate that work.
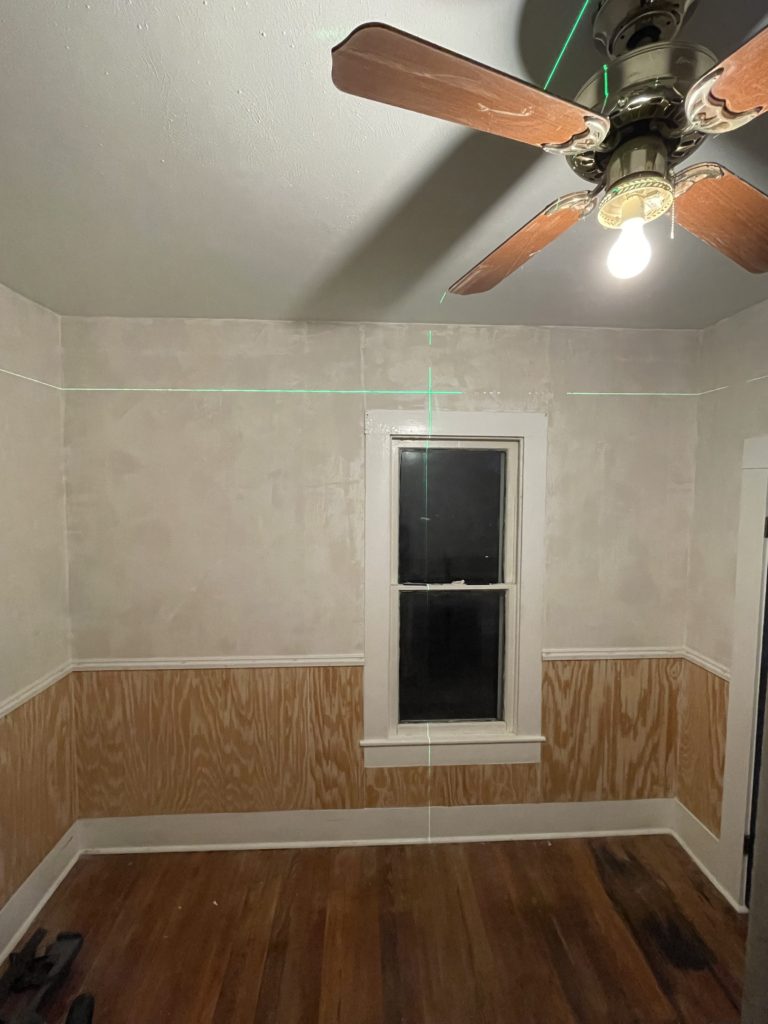
Once we completely finished the beadboard, we were ready to install picture rail. A lot of people don’t know what picture rail is, and if you had asked me a few years ago, I wouldn’t have known either. Picture rail is a type of decorative molding somewhere near the ceiling. Sometimes it’s installed right up close to the ceiling, mimicking the look of crown molding, and other times it’s installed 10-12 inches down on the wall. It’s most common in historic homes and in art museums. The profile of the rail or molding is round, and the purpose is to hang a round hook from the top to be able to hang and display art. In older homes it was common to have plaster walls, which are notoriously difficult to hang things from. Enter the solution. You can easily hang things without any nails, screws, etc. It’s super practical!
Since our second floor has nine foot ceilings, we decided to install it a little bit down on the wall, and our laser level came in handy…for demonstrating once again how nothing in this house is actually straight. If you look closely above the window you can see how the top of the window does not line up with the laser. Thankfully once I hang curtains you won’t be able to tell. Remember that because this room is totally crooked, I’m trying to give the illusion of straight visual lines.
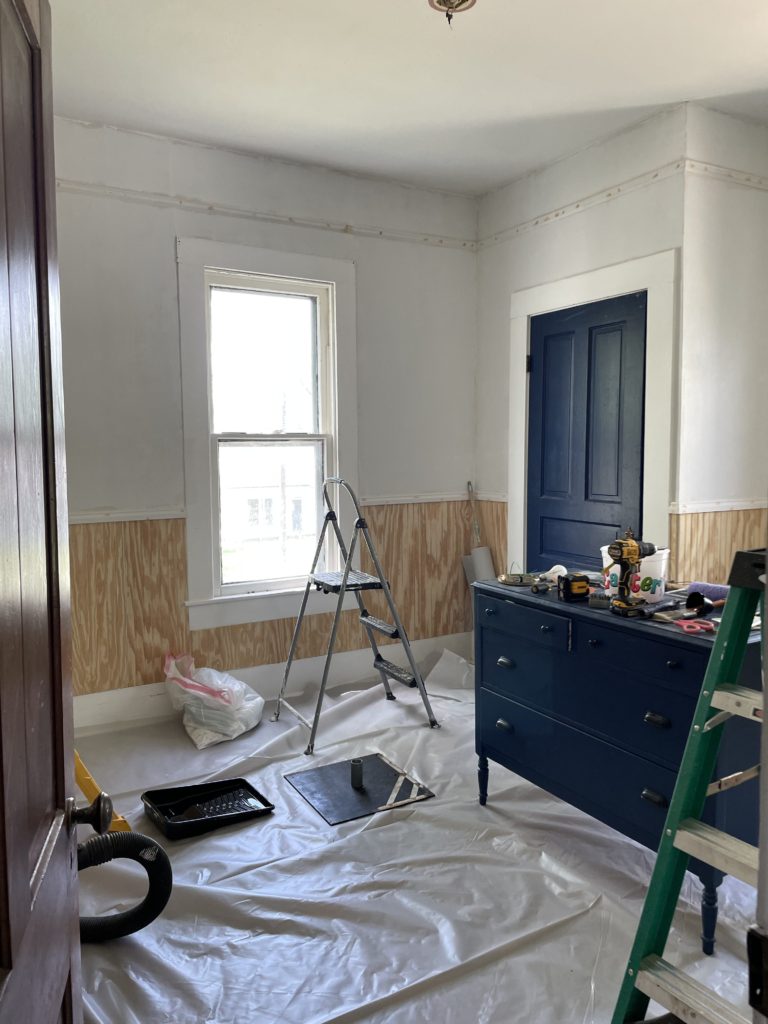
So picture rail was hung (that was 100% Ethan, all I did was stand back and make sure it was lined up and pass the nail gun), caulked, wood filled, and sanded. I am so glad we added this, it is definitely in keeping with the historic feel of our home, and definitely helps with the traditional style I’m going for in this room. I also primed all the walls that had been floated last week.
Then, my dear friends, it was time to start painting. I don’t usually do this, and certainly can’t recommend this, but I did not want to waste time with painting different samples on the walls, so I picked straight from the chip and oh.my.gosh. I am in love.
This is after just one coat of Behr Equestrian Green (we love to see a paint color name on theme!). I did paint a second coat since this photo was taken. It’s my first time painting a colored ceiling and I’m wishing I had done it sooner! I also decided to extend the color on the wall above the picture rail as well, which I’m really pleased with.
So, that’s the update. The next weeks will be painting myself into oblivion, as there is so much painting yet to do, but I’m really excited to keep you posted. Make sure you check out the other bloggers who are doing the One Room Challenge, things are starting to get really good! That’s it for today, have a fabulous day!
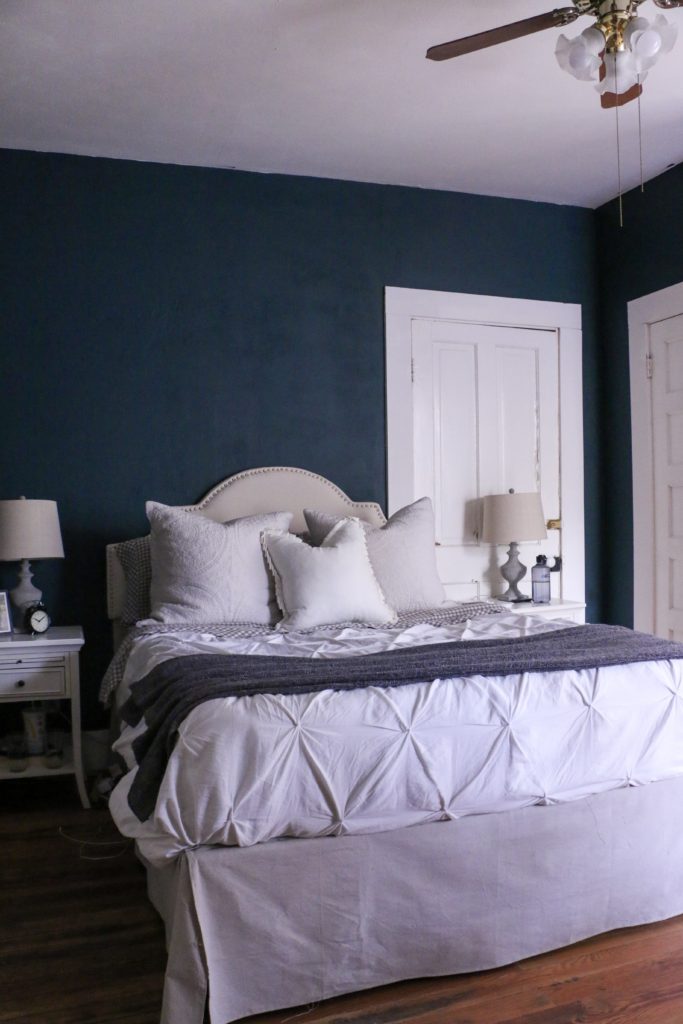
Hi guys! Glad you’re here! I wanted to share with you a project that was a big undertaking in our master bedroom. If you remember a couple of months ago, we were working on getting one of the upstairs rooms livable to move our master upstairs. You can read all about that here . Over the last weeks, I kept some of the progress live on Instagram, when we revealed the paint color, and the new rug.
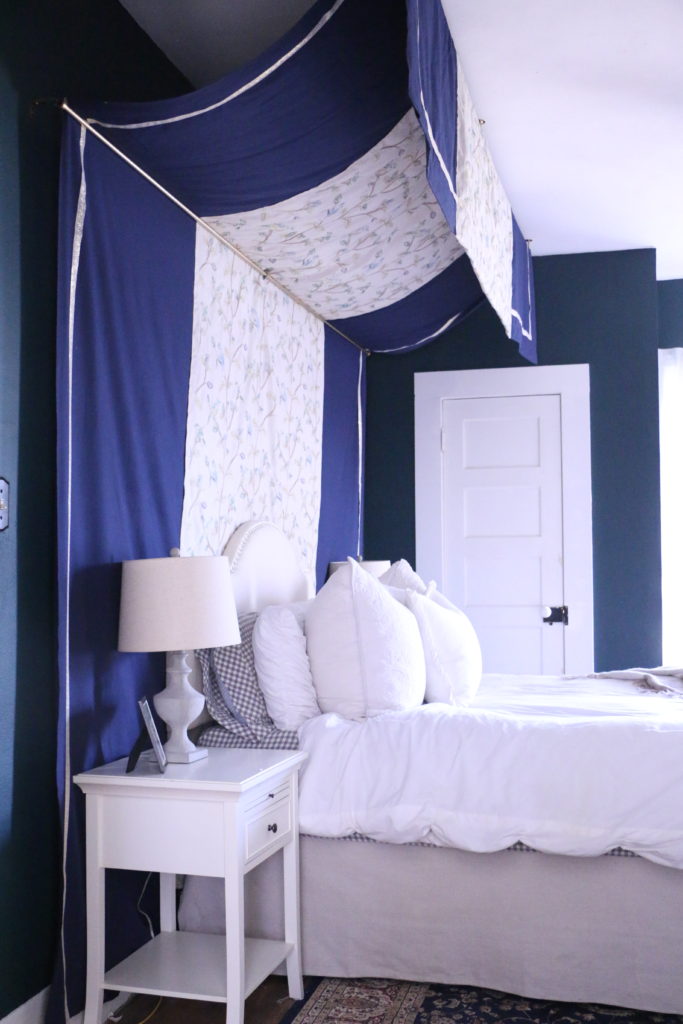
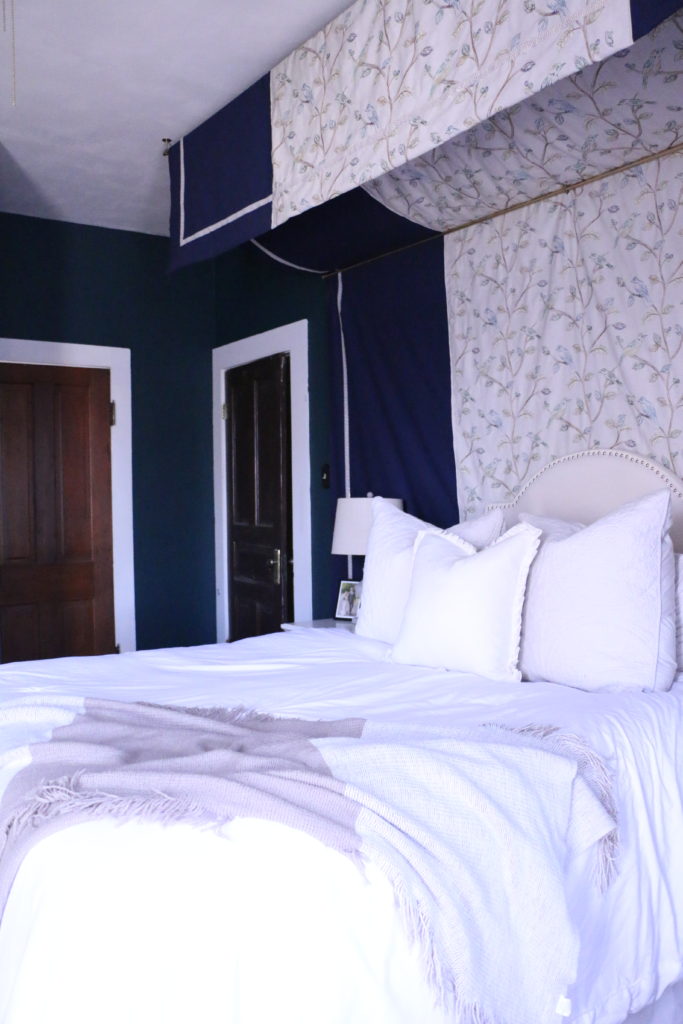
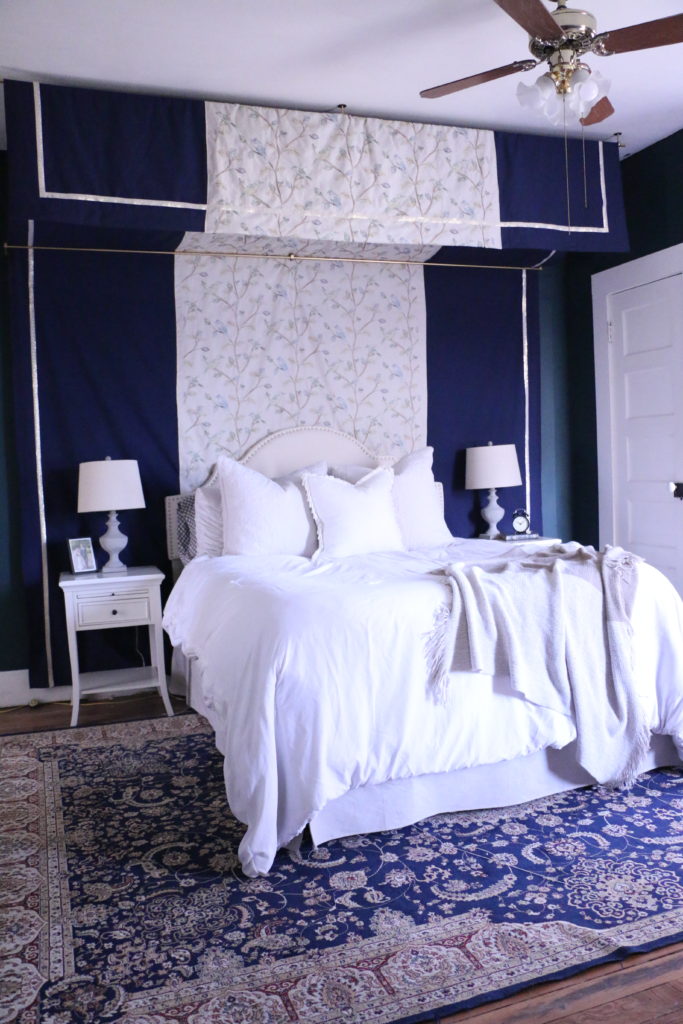
If you remember, this room has six doors in it, leading to various places, meaning that there was no good spot to put a bed. We ended up putting the bed in front of a door, and I started coming up with some ideas on how to cover that door or make it less obvious. I thought about painting the door and door trim the same color as the wall, or putting a privacy screen behind the bed, or even making some kind of false wall contraption that would rest behind the headboard. Then I stumbled upon this on Pinterest from Design Sponge, and I knew this was what I was going to do.
She had a great tutorial that I used, but because I was trying to cover a door behind the wall, I needed it to be wider than the bed itself. It ended up being a 10 foot width that I needed to cover, by 15 foot length. Trying to find fabric of that size was a nightmare. I first tried a large dropcloth and dying it the color I wanted, but that ended up being a massive fail because the fabric was so large and it didn’t fit in my bathtub where I was trying to dye it.
So I ended up buying a bolt of 60″ wide fabric (ten whole yards), cutting it in half, and sewing the two pieces together so that I had one 10x15ft piece of material. The only problem was that now there was a seam down the middle of where it would be hanging on the wall, so I decided to add an accent material up the center of the canopy to cover the seam.
The accent fabric was a nightmare. I ordered from one place, only for it to be out of stock. I ordered the same fabric from another location, only for that one to be out of stock. I finally just walked in to Hobby Lobby and found this fabric. It’s no longer listed on their website, so I think it might be discontinued, but I liked that it had blues and greens in it, and would probably work well in the room.
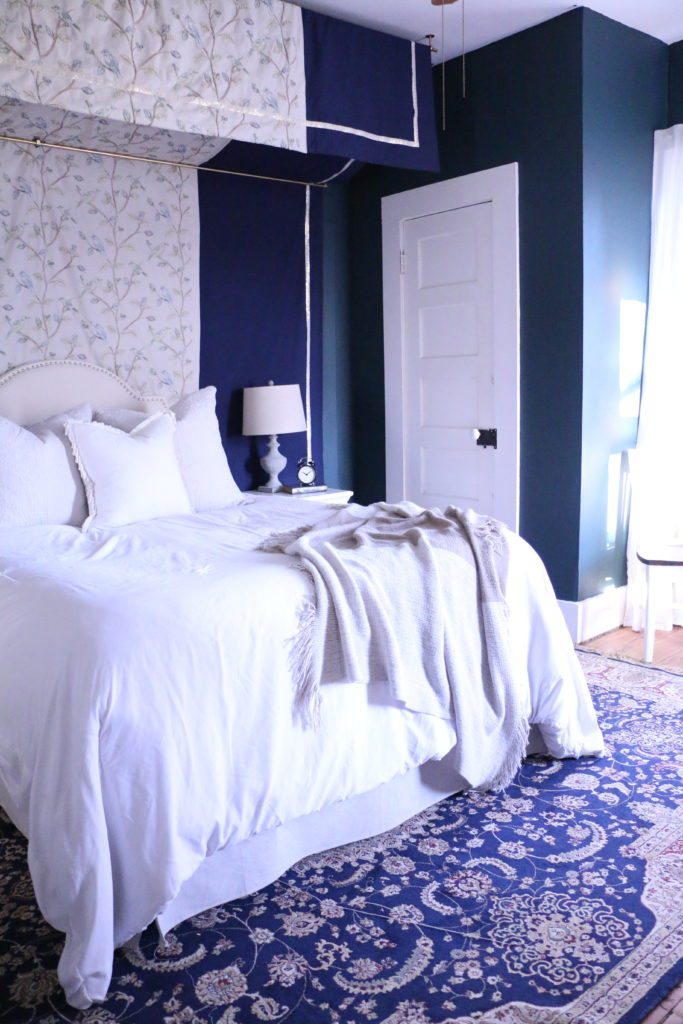
I used my accent fabric just in the middle of the canopy, and then hung it up. One rod is mounted on the wall, and the other from the ceiling. Hanging was also a nightmare, because this canopy was super heavy, and these are tall ceilings. I used a dab of hot glue once we had it in place to prevent it from shifting.
I also used hot glue (because hot glue can do all things) to add the greek key ribbon trim. Before the ribbon was added, I wasn’t too sure about it overall, but I do think the trim polished the whole thing off and made it look more finished.
The goal here was to cover that unsightly and unused door, and I think that this definitely fits the bill. And the best part is that the door is still totally accessible so the next time we need to move furniture upstairs, we can open the door! I’m really loving the way this project turned out, and it’s true what they say: necessity really is the mother of invention. What do you think?
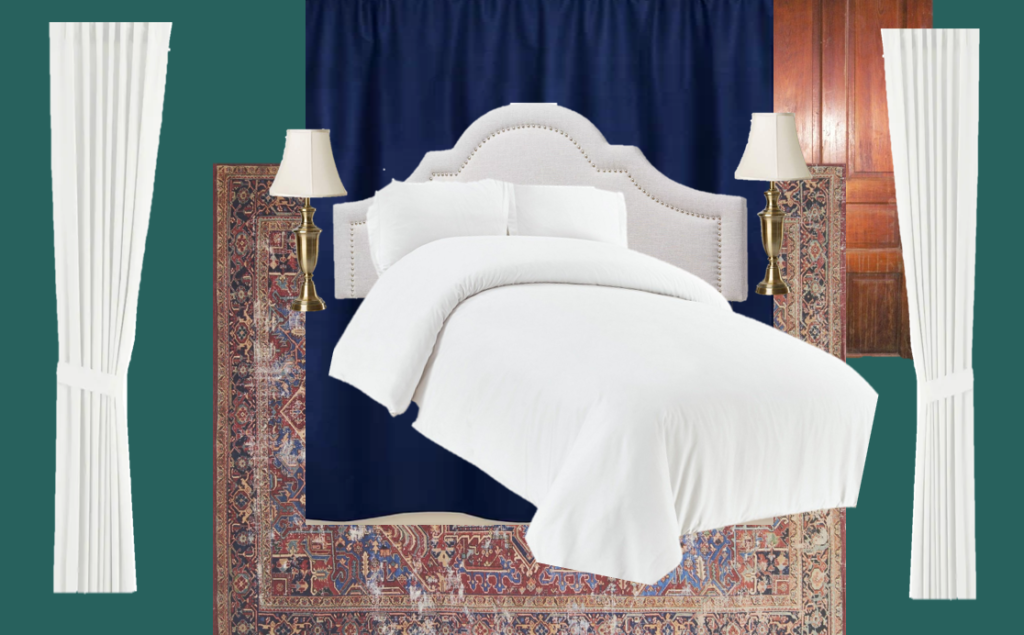
And just for fun…take a look at the original mood board for the space! It’s so fun to see it coming together!
The rest of this room is evolving slowly, and I have some continued plans for the space, but all in due time. That’s all for today, friends, have a fabulous day!