Browsing Tag

renovation

House Progress

Spring One Room Challenge Week Four: What Sheen of Paint Should I Use For…?

Week One | Week Two | Week Three

It’s week four of the One Room Challenge and I didn’t officially cross off one single item off the list. I’ve been working on trim painting all week (with a break over the weekend) because there is so much trim. I’m knee deep in paint, and honestly there’s no end in sight. The paint in this room is so much more detailed than just slapping a coat of paint on the wall and calling it a day. There will end up being three different colors (you’ve only seen one so far!) and three different sheens (you’ve seen two so far).

I figured this might be a good opportunity to chat about the three main sheens of paint I use throughout my home and for what purposes. Of course, rules are meant to be broken, but this is a general guiding principle and what I’ve found works best in my own house.
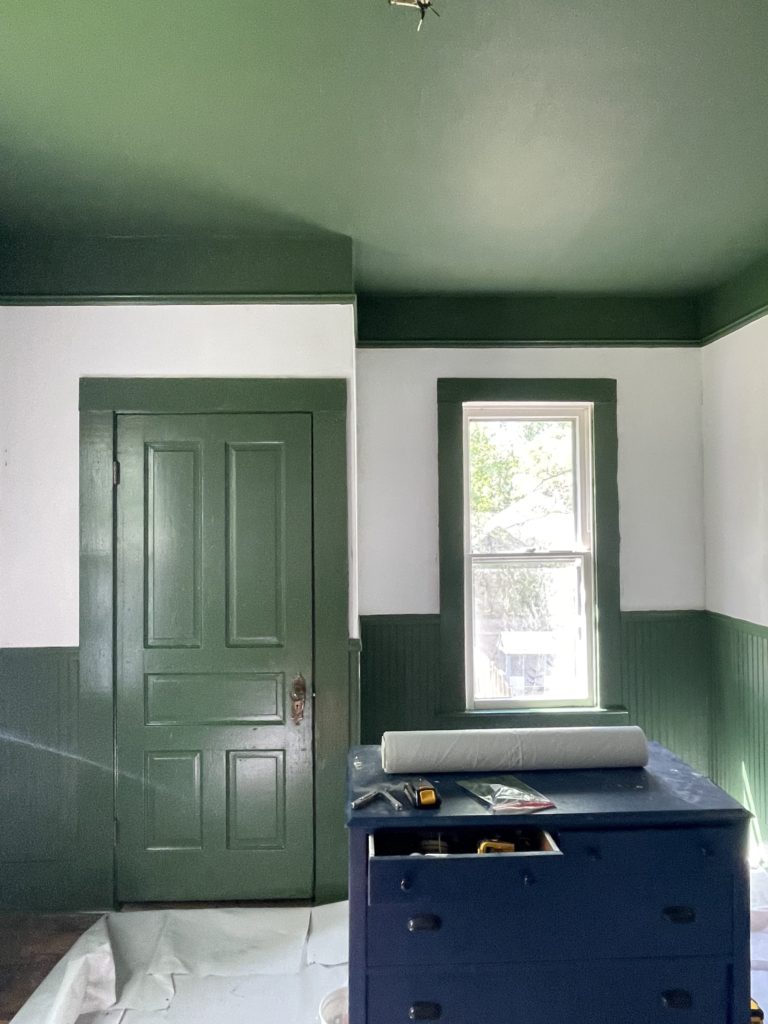
Flat Finish:

Honestly this is good for one thing and one thing only. Ceilings. You can see even in the terrible quality iphone photo above that the paint on the ceiling absorbs the light. It’s dark, but it won’t reflect light, which I guess is helpful for sleeping? I don’t know guys, I’m not an expert. It’s been said that flat paint can’t get wet, and that might be an outdated assumption as paint technology has improved over the years, but I’m still not taking any chances. I’ll leave it to the ceilings.

Semi-Gloss Finish

I use semi-gloss on all of my trim, painted doors and cabinets, and walls in my bathroom. (That last bit might be contentious in some circles, so don’t quote me on this, this is just what I find works for my house.) You can see in this picture that even though the ceiling and the trim are the same color, they reflect light completely differently. Semi-gloss is also much more wipeable, making it a good contender for trim. Have you cleaned the trim next to your doorknobs lately? That gets gross so quickly. Or maybe that’s just my house with toddler granola bar fingers running around. But I digress.

Eggshell Finish

Lastly, I use eggshell finish on almost all of my walls. It falls in between flat and semi-gloss, as it’s somewhat wipeable but it’s also a little more forgiving that flat. I’ll be painting the walls with eggshell finish, although I haven’t started yet, so there’s no visible example of it in this photo. But trust, eggshell is the way to go on *most* interior walls.

Like I said, rules are made to be broken, but this has worked for me. When I rolled up to Home Depot to get my paint order with very specific color and sheen requests, I know the employee was side eyeing me, but what can I say, I’ve painted a lot of rooms!

I probably have about two more weeks of painting ahead of me, as I have some more to finish on the trim (looking at you, windows), and then I’ve got the walls as well, but I can’t wait to see all of it come together. It’s getting so good! Be sure to head over to the One Room Challenge’s Blog page so you can see what everyone else has been up to this week. That’s it for today, have a fabulous day!

DIY Projects, Home Decor

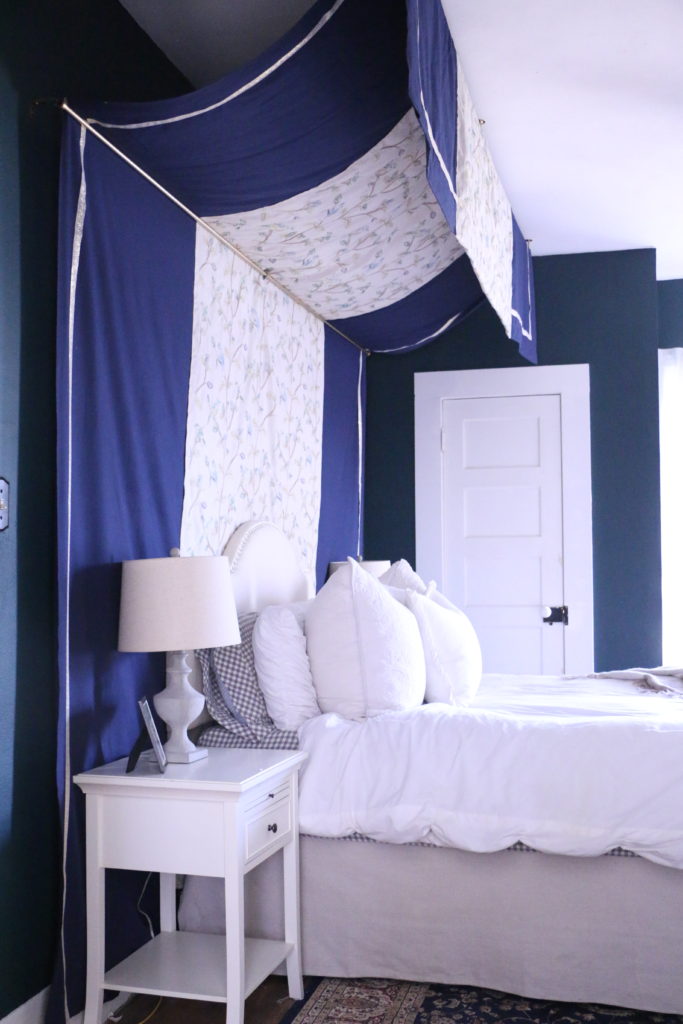
DIY Bed Canopy

Hi guys! Glad you’re here! I wanted to share with you a project that was a big undertaking in our master bedroom. If you remember a couple of months ago, we were working on getting one of the upstairs rooms livable to move our master upstairs. You can read all about that here . Over the last weeks, I kept some of the progress live on Instagram, when we revealed the paint color, and the new rug.

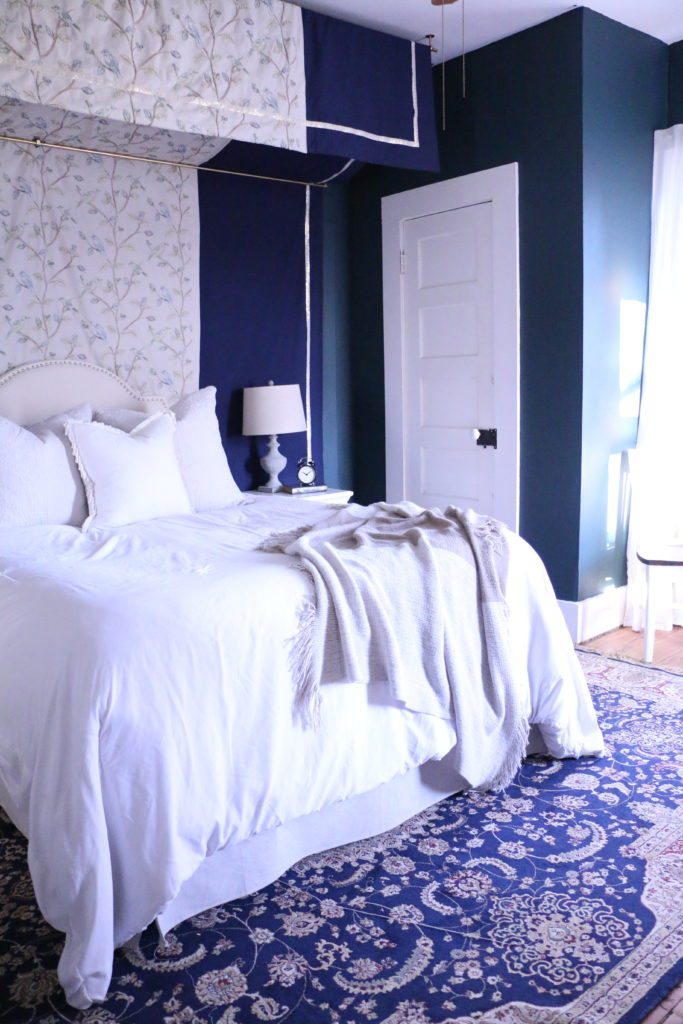
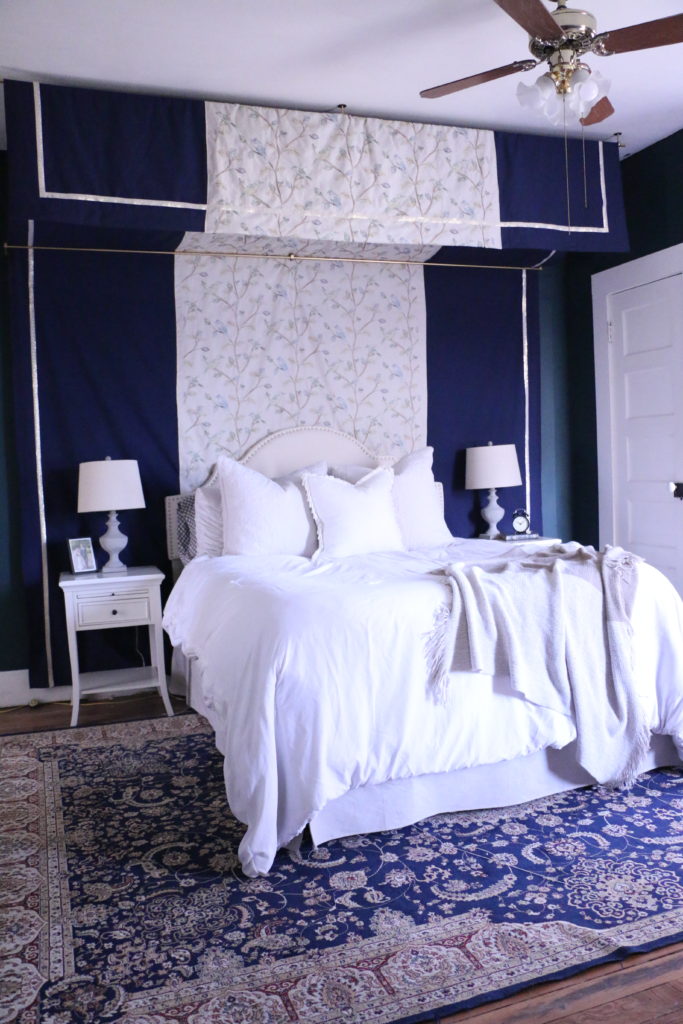
If you remember, this room has six doors in it, leading to various places, meaning that there was no good spot to put a bed. We ended up putting the bed in front of a door, and I started coming up with some ideas on how to cover that door or make it less obvious. I thought about painting the door and door trim the same color as the wall, or putting a privacy screen behind the bed, or even making some kind of false wall contraption that would rest behind the headboard. Then I stumbled upon this on Pinterest from Design Sponge, and I knew this was what I was going to do.

She had a great tutorial that I used, but because I was trying to cover a door behind the wall, I needed it to be wider than the bed itself. It ended up being a 10 foot width that I needed to cover, by 15 foot length. Trying to find fabric of that size was a nightmare. I first tried a large dropcloth and dying it the color I wanted, but that ended up being a massive fail because the fabric was so large and it didn’t fit in my bathtub where I was trying to dye it.

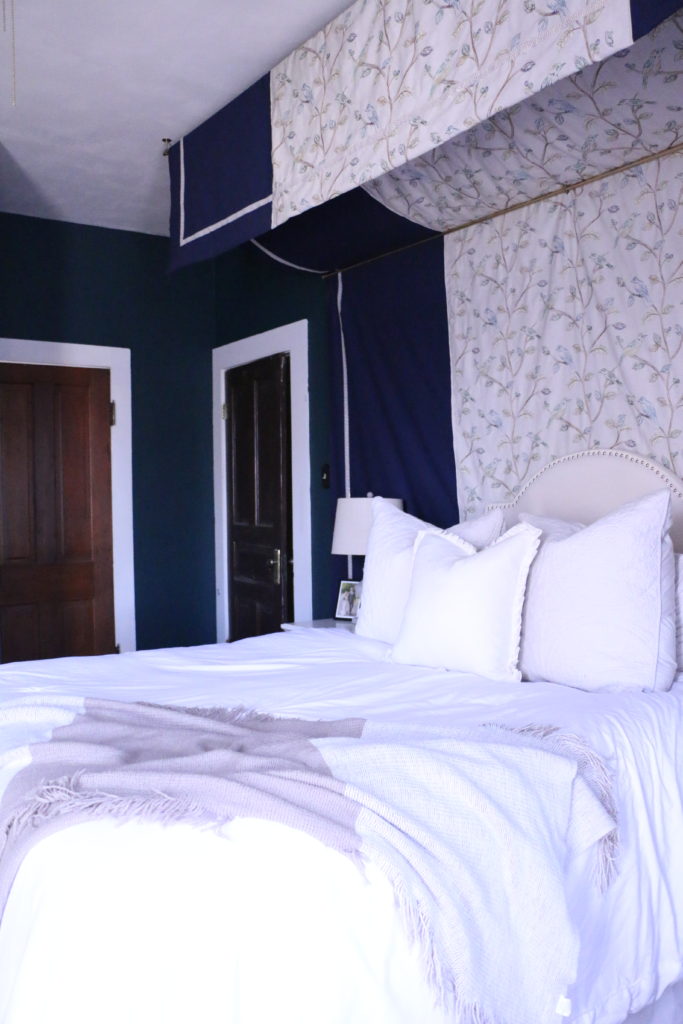
So I ended up buying a bolt of 60″ wide fabric (ten whole yards), cutting it in half, and sewing the two pieces together so that I had one 10x15ft piece of material. The only problem was that now there was a seam down the middle of where it would be hanging on the wall, so I decided to add an accent material up the center of the canopy to cover the seam.

The accent fabric was a nightmare. I ordered from one place, only for it to be out of stock. I ordered the same fabric from another location, only for that one to be out of stock. I finally just walked in to Hobby Lobby and found this fabric. It’s no longer listed on their website, so I think it might be discontinued, but I liked that it had blues and greens in it, and would probably work well in the room.

I used my accent fabric just in the middle of the canopy, and then hung it up. One rod is mounted on the wall, and the other from the ceiling. Hanging was also a nightmare, because this canopy was super heavy, and these are tall ceilings. I used a dab of hot glue once we had it in place to prevent it from shifting.

I also used hot glue (because hot glue can do all things) to add the greek key ribbon trim. Before the ribbon was added, I wasn’t too sure about it overall, but I do think the trim polished the whole thing off and made it look more finished.

The goal here was to cover that unsightly and unused door, and I think that this definitely fits the bill. And the best part is that the door is still totally accessible so the next time we need to move furniture upstairs, we can open the door! I’m really loving the way this project turned out, and it’s true what they say: necessity really is the mother of invention. What do you think?

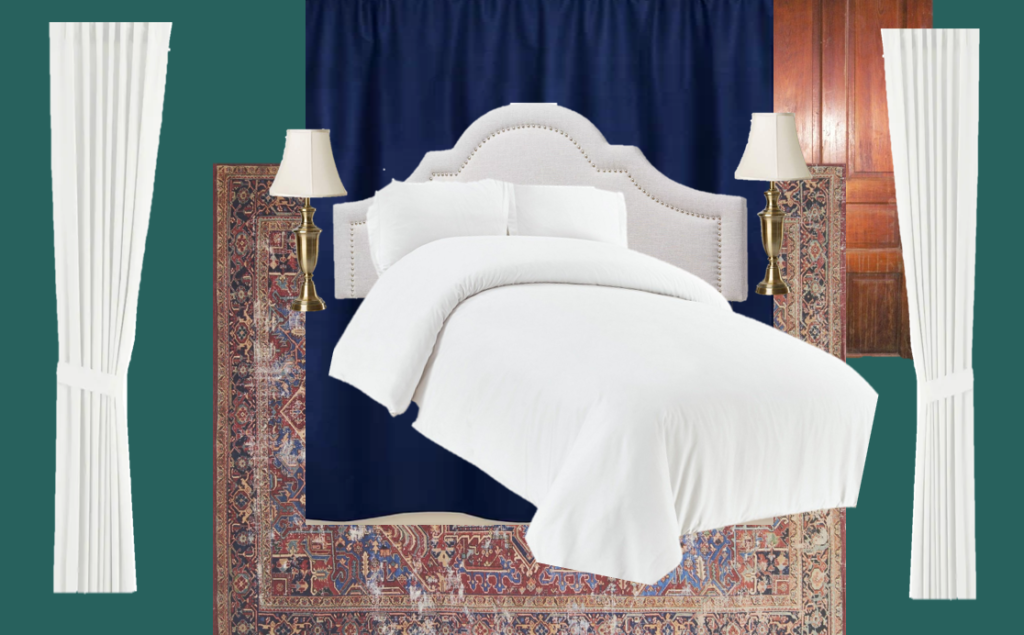
And just for fun…take a look at the original mood board for the space! It’s so fun to see it coming together!

The rest of this room is evolving slowly, and I have some continued plans for the space, but all in due time. That’s all for today, friends, have a fabulous day!

House Progress

We’re Moving the Master Upstairs… What??

YEP. You read that right. And if it seems totally random, that’s because it is. So I figured I owed it to you guys to walk you through my thought process and plans before I take you along for the ride.

So, flash back to about two weeks ago. We were driving home from being out of town for several days, and we were going to be arriving very late. While we were gone, it had gotten cold for the first time in the season, so we were anticipating walking in to a cold house because the furnace had not yet been turned on for the season. Our house is two floors, and has two separate thermostats and HVAC systems (one for each floor). Our son’s room is upstairs, directly above our current room. And for whatever reason, although he has been sleeping in his own room since he was about two months, I started to freak out and panic that having a separate system upstairs was terrifying because something could happen upstairs and we would have no idea downstairs because the HVAC systems are completely independent from each other. So, in the car that night, I started talking to Ethan about the possibility of moving our room upstairs (we have two additional rooms up there we aren’t really using), the pros and cons of the situation, and the timeline of when it could happen if we decided to do it.

We got home that night, and had pretty much decided we were going to move our room up there, it was just a matter of getting some work done. The room we are talking about is one of the untouched spaces in our house, which have been completely neglected since purchasing.

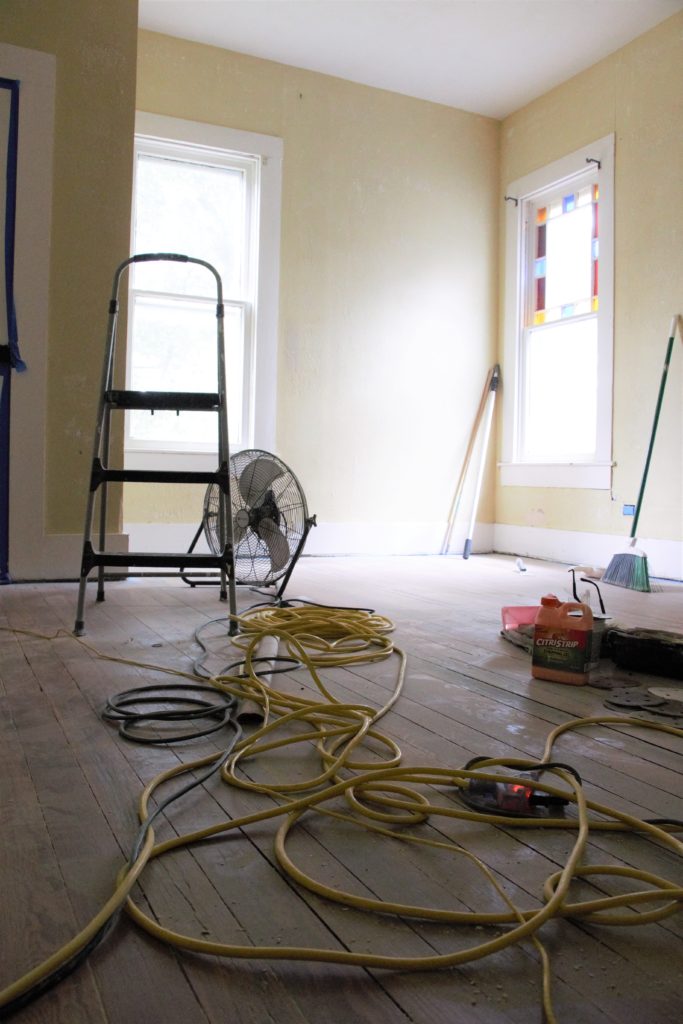
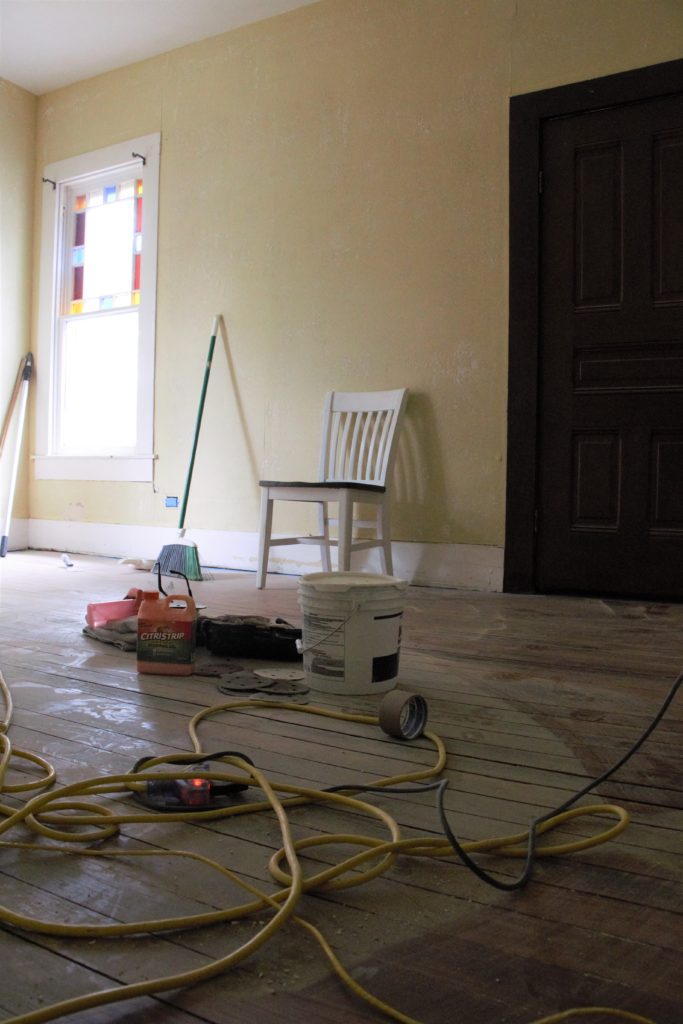
So, this week we started working! It’s been slow going because we have a one year old and can basically only work during naptime or at night. Not to mention the fact that whoever lived in this home before had some weird love affair with wall texturing compound, and sprayed? dabbed? rolled? (I don’t even know how this could have been installed) the spikiest, sharpest wall texture known to mankind. So we have the absolute pleasure of sanding and scraping every surface of the room before we can do anything else.

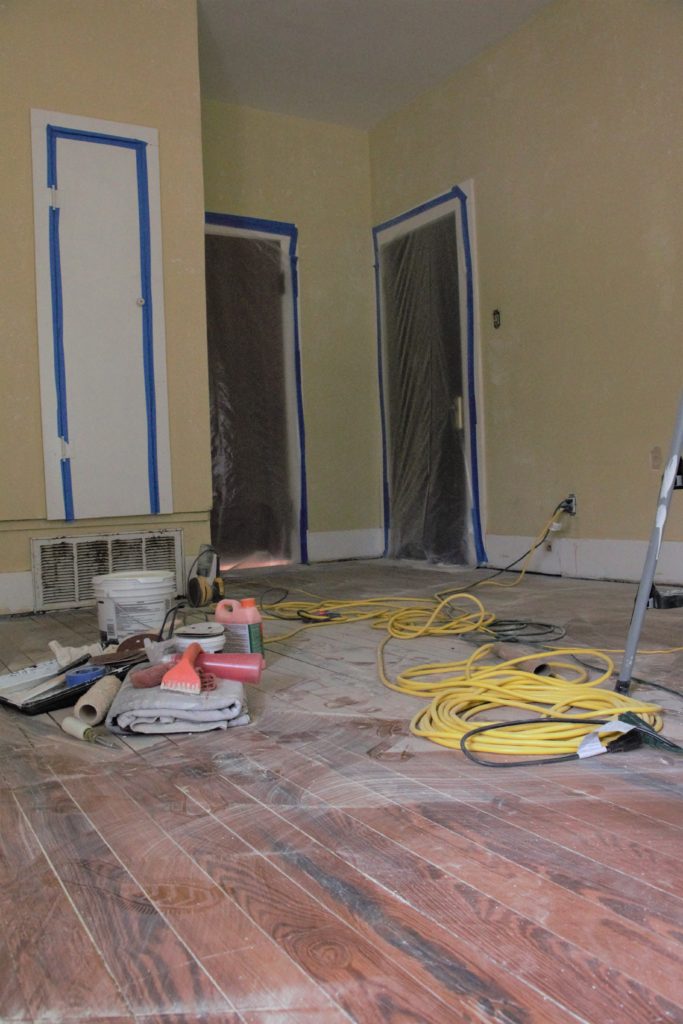
So, y’all want to see some before pictures?

Keep in mind, this isn’t going to be a glamorous before and after renovation. This room has six doors. SIX! Plus a half door to house the HVAC unit. Because of all the doors, there’s no logical space to put the bed. Also, this is going to be a very much phase one renovation. Meaning, we have larger plans down the line, but it’ll take a bit to get there.

So, let’s walk through the pros of using this room. Obviously, safety. Biggest benefit hands down. Also, with our current master being in the front of the house downstairs, our “Christmas Tree Window” is where our bed is. I’m most excited that if we can get our room situated upstairs, we will have a tree visible from the street outside. Another benefit will be the proximity to the third bedroom (the one we will use as a nursery for our next child someday). The new nursery will open right into the master, which will be super helpful for those first months. (Phase Two renovation will eventually separate those rooms with a hallway and an additional staircase, but that will come later on.) Right now, we don’t have a closet in our room. Our room was the original parlor to the house, but was turned into a bedroom when the addition was made in the 1950’s. We have been using the downstairs coat closet as our main closet for a year. Which has been fine, but I can almost guarantee that a neighbor at some point has seen me run pantless through the living room to the hall closet to get dressed in the morning. The upstairs room has two closets!!!

The cons: need I say again..SIX DOORS. It’s an awkward layout for sure. It has a door the a lower level roof for goodness sake. I have some design plans to work with it for now, so we’ll see how that turns out. Also…the dungeon bathroom. It has graced my Instagram stories mayyyybe twice. Our upstairs bathroom is a scary place. And it’s low on the list of priorities. To be honest, I’m pretty scared to use it. So I’ll be using the bathroom downstairs still. Which I’m sure will be annoying in the night. Or on those cold mornings getting ready for work.

So, at the risk of getting too wordy already, let’s talk about the plan for the space. Y’all want to see my super sophisticated moodboard that I literally made on my lunch break? Well, you’re in luck:

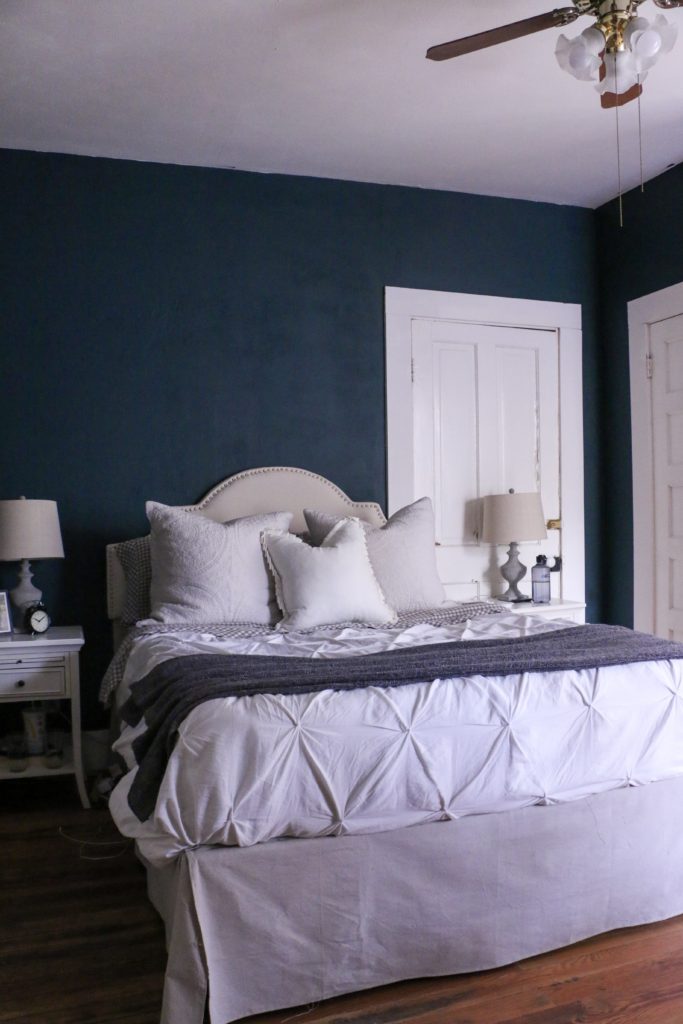
When we bought the house, we bought ten gallons of the same white paint color and just went to town with it in every room. We don’t have any more of that paint, so I will have to buy more regardless. I’m really inspired by dark, saturated blues and greens right now, so I’m thinking something like this. None of the things in this photo are exact things I plan on purchasing (except the headboard, which is what we already have), but are more or less ideas for the space. I will likely thrift a lot of items, or try to source some on FB Marketplace. I plan on stripping some of the painted over doors, with a bright, crisp, white trim. Moody and dark, with brass accents. And don’t even get me started on a timeline, because who knows when it will be finished. But, I do plan on priming it and moving us up there this weekend. Everything else can be done after we are sleeping in the room.

So anyway, that’s the plan. I’ll keep you along for the ride! That’s all for today friends. Have a fabulous day!