Browsing Tag

old house

House Progress

We’re Renovating Our Kitchen!

Eeek! I’ve been waiting four years to say those words out loud. And honestly I thought it would be a few more years before I did. We had plans to work on some rooms downstairs this year that would be smaller budget items.

But then a leak in the kitchen ruined the subfloor under our kitchen cabinets, and our plans changed. Due to extensive water damage, we are having to replace floors, cabinets, countertops, etc. So since a kitchen renovation was on the long term horizon anyway, we are diving in and going for it. It’s been pretty stressful up until this point, trying to work through finding the source of the water (it took three different specialists!), and trying to get contractor recommendations on an unplanned timeline. On top of things, our fridge died. It’s like the kitchen just decided it was her time to go, and she all went at once!

But now that we have wrapped our heads around the initial shock and urgency behind the situation, I’m getting excited about the design.

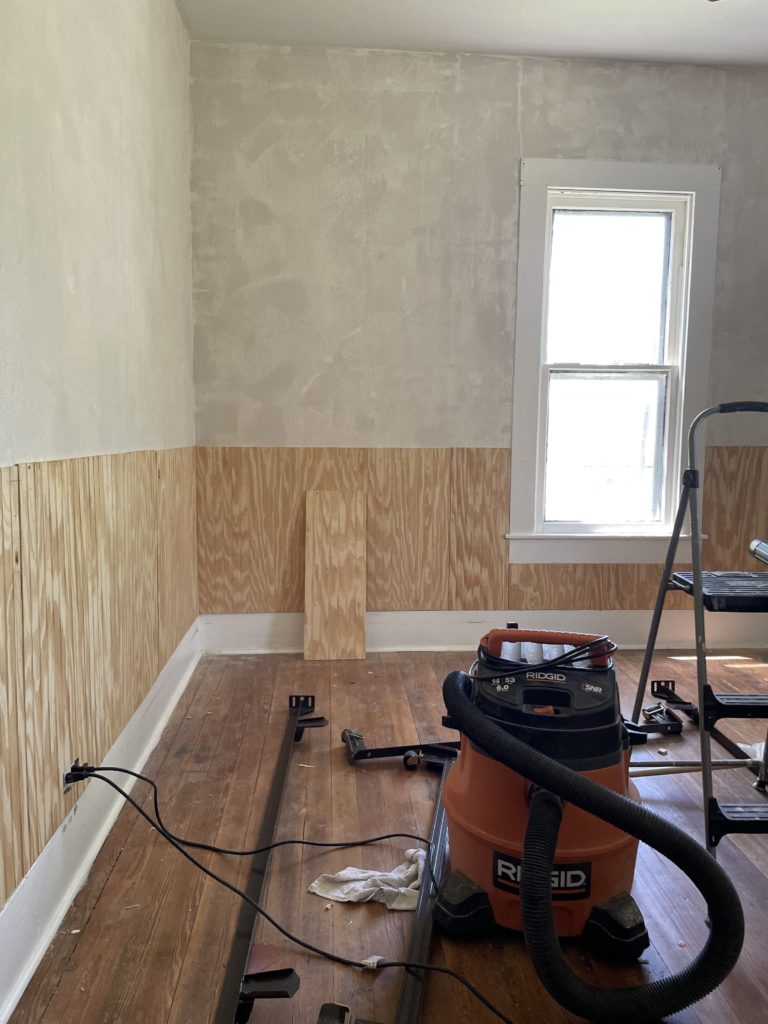
Our kitchen is currently a timestamp of the year 1997. The kitchen that was put in almost 30 years ago is dated, but I’m grateful to have had solid wood quality cabinets that have lasted. They’ve served us well until this point.

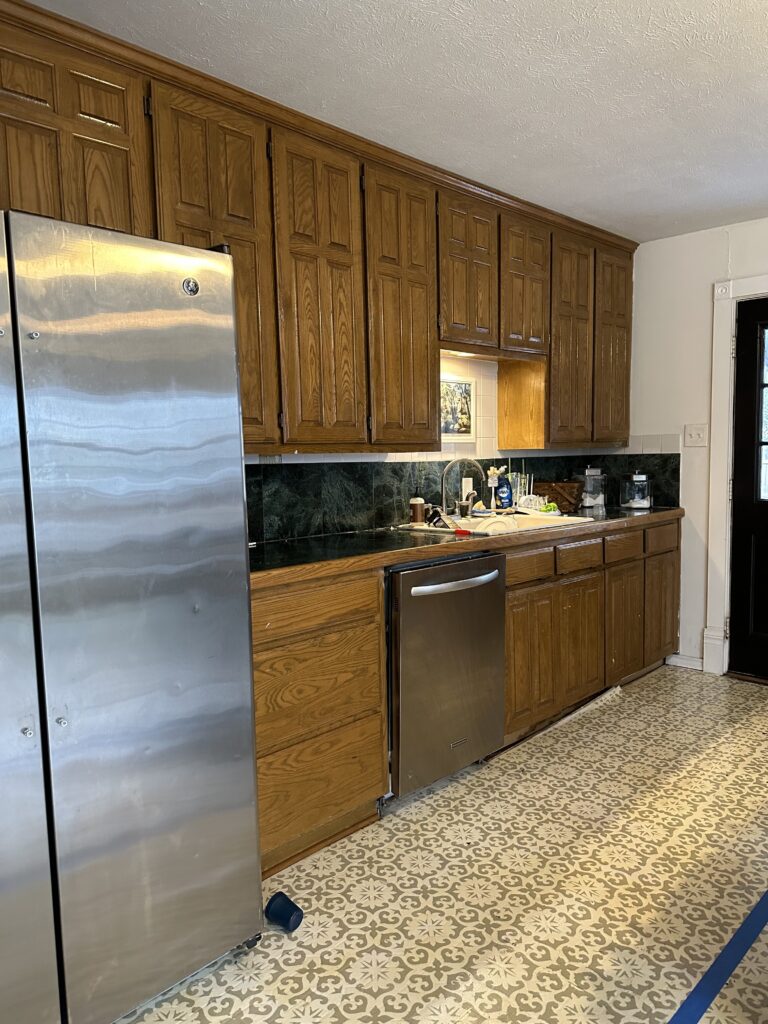
The only thing I did in this space was paint the floors before we moved in. I’m super excited to have the kitchen feel a bit more like the home it resides in, a Victorian built in 1895.

Of course we won’t have a truly period appropriate kitchen, we believe our home was built without plumbing, so there goes that, but I don’t want visitors to walk into the kitchen and be able to pinpoint an exact date. I’ll be using modern reproductions of historic materials, and adding free standing furniture pieces to contribute to an unfitted look. (Fitted kitchens where the cabinets are mounted to the wall were popularized in the mid twentieth century, whereas before that kitchens were a collection of different tables and shelving pieces.)

I plan to find salvaged and antique pieces to help contribute to the overall feel of the room, so although I have some photos listed below, they are general ideas and the actual execution will depend on what I’m able to find.

I’m calling it the historic-ish kitchen, because that’s just what it’ll be…ish. I’ll be sure to share updates here as things get rolling (demo is happening soon!), but if you want more up to date information, be sure to follow along on Instagram where I share much more in real time.

Now, I’ve got to get back to scrolling Facebook Marketplace incessantly in between planning the next antique store to check out, but I will keep you updated as soon as I have more! That’s all for today, friends! Have a wonderful day!

House Progress

Spring One Room Challenge Week Two: Old House Challenges

I can’t believe we are already onto the second week of the One Room Challenge! If you missed last week’s post with the design plan for the space, be sure to check it out here. I have been hard at work this week, feeling both frustrated and excited.

My first task was to float the walls along the upper section of the room with joint compound. This room has an “orange peel” texture that’s pretty common in homes here in the south, as well as in new construction. It’s not appropriate in a historic home, and I personally just don’t like the look of it, so I decided to smooth it out. It requires a large putty knife and lightweight joint compound, and it’s akin to frosting a large cake.

Once it’s applied I had to sand, which was a serious arm workout. It’s an underestimated task to be sure, but it’s not technically difficult.

Then came the head scratchingly difficult part. In typical old house style, the room is completely unlevel. The floor on one side of the room is two inches higher than the other side, making the entire wall slanted. I wanted to add beadboard to the lower portion of my wall, but it wasn’t as simple as measuring the height from the floor up and making straight cut across. I wanted to give the illusion of a straight line, so that meant each piece had to be cut at a slight angle. I don’t know if this is even making sense. It barely made sense to me. I purchased a laser level, and it was my saving grace for installing these beadboard panels at a straight-looking-but-not-actually-straight height.

For the first portion of the week, Ethan was out of town working, so I was attempting to figure out how to get everything installed correctly by myself. Needless to say, once he returned from his trip and was able to help me, things went a lot more smoothly.

We finished up the beadboard late last night, and although it’s not pretty progress, I do think it will be the most laborious and difficult part of the process, so I’m glad to have it checked off the list during the first week.

Next, I will need to fill nail holes and sand the beadboard to prep it for paint, then install the chair rail that will sit on top of the beadboard, and the picture rail that will sit higher up on the wall. Those will hopefully go much quicker than my beadboard install (and I really hope I don’t come back next week completely regretting these words)!

Now, I have to get back to work, but be sure to check out some other projects being completed this season over on the One Room Challenge Blog. There are some projects that I really can’t wait to see come to life! That’s it for today, friends. Have a fabulous day!

House Progress

Status Update: Year Two

Today marks the official two year anniversary of owning this old house of ours. Today I wanted to look back at this past year, year two, and see all of the things we accomplished. I’m going to share a few (not all) of the big projects we’ve done in the last 365 days.

If you’ve never seen the before pictures of our house, you might want to start there, just for fun. This last year kind of unintentionally became the year of getting the upstairs more livable. One year ago, our master bedroom was downstairs and the only thing we had done upstairs was our son’s room. In the fall, we updated one of the bedrooms upstairs and moved the master up there.

Then, over my winter break from school, I decided to do a bit of work on our upstairs bathroom.

We also worked on finishing the third bedroom upstairs this year when we found out we were expecting our second child. The nursery is one of my favorite rooms in the house, and I cannot wait to get to use it very soon!

During Spring Break (are we sensing a pattern here? it seems like every time there was a break from school, I did a project!) I painted the porch floors on all three of our porches. That ended up being a lot of work over an extended period of time, but made a huge impact.

In a spur of the moment decision late last summer, I decided to paint some dalmatian spots on the wall between our living room and dining room. Best decision ever!

We’ve also done tons of work in the yard, and countless small projects around the house to help move the progress along. It’s crazy to see how far we’ve come. They say that people overestimate how much they can get done in a day, but underestimate how much they can get done in a year, and it’s so true! Last summer I could not have imagined the progress we have made. I can’t wait to see where we are by the end of year three! Hopefully some work in the downstairs areas… I’m getting real sick of looking at a few things downstairs. LOL! Well, that’s all for today, friends. Have a fabulous day!