Hi guys! Glad you’re here! I wanted to share with you a project that was a big undertaking in our master bedroom. If you remember a couple of months ago, we were working on getting one of the upstairs rooms livable to move our master upstairs. You can read all about that here . Over the last weeks, I kept some of the progress live on Instagram, when we revealed the paint color, and the new rug.
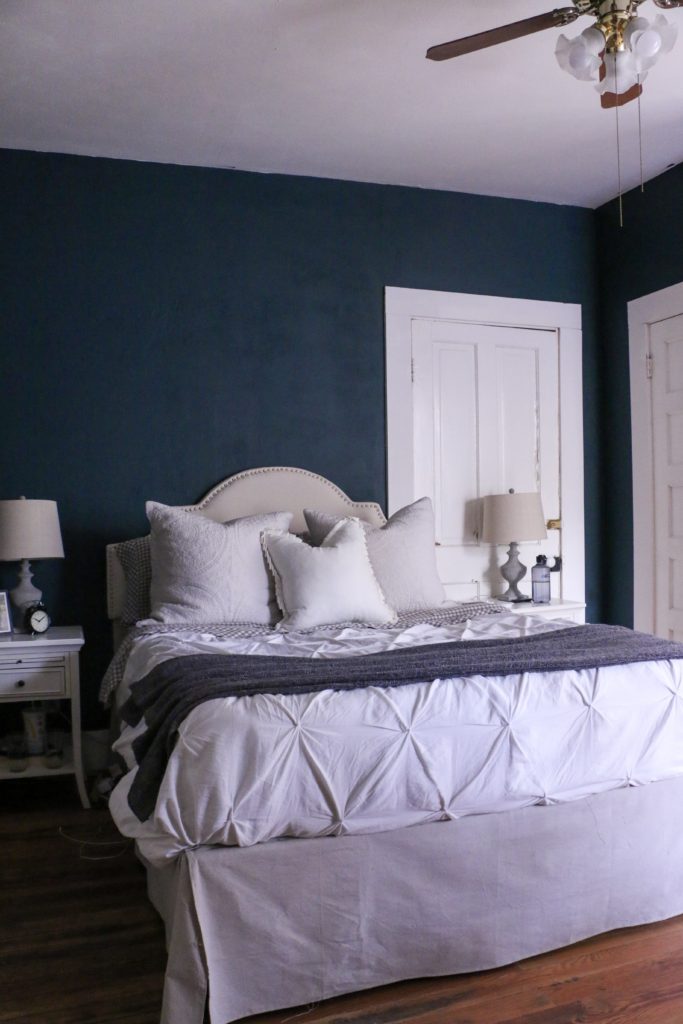
If you remember, this room has six doors in it, leading to various places, meaning that there was no good spot to put a bed. We ended up putting the bed in front of a door, and I started coming up with some ideas on how to cover that door or make it less obvious. I thought about painting the door and door trim the same color as the wall, or putting a privacy screen behind the bed, or even making some kind of false wall contraption that would rest behind the headboard. Then I stumbled upon this on Pinterest from Design Sponge, and I knew this was what I was going to do.
She had a great tutorial that I used, but because I was trying to cover a door behind the wall, I needed it to be wider than the bed itself. It ended up being a 10 foot width that I needed to cover, by 15 foot length. Trying to find fabric of that size was a nightmare. I first tried a large dropcloth and dying it the color I wanted, but that ended up being a massive fail because the fabric was so large and it didn’t fit in my bathtub where I was trying to dye it.
So I ended up buying a bolt of 60″ wide fabric (ten whole yards), cutting it in half, and sewing the two pieces together so that I had one 10x15ft piece of material. The only problem was that now there was a seam down the middle of where it would be hanging on the wall, so I decided to add an accent material up the center of the canopy to cover the seam.
The accent fabric was a nightmare. I ordered from one place, only for it to be out of stock. I ordered the same fabric from another location, only for that one to be out of stock. I finally just walked in to Hobby Lobby and found this fabric. It’s no longer listed on their website, so I think it might be discontinued, but I liked that it had blues and greens in it, and would probably work well in the room.
I used my accent fabric just in the middle of the canopy, and then hung it up. One rod is mounted on the wall, and the other from the ceiling. Hanging was also a nightmare, because this canopy was super heavy, and these are tall ceilings. I used a dab of hot glue once we had it in place to prevent it from shifting.
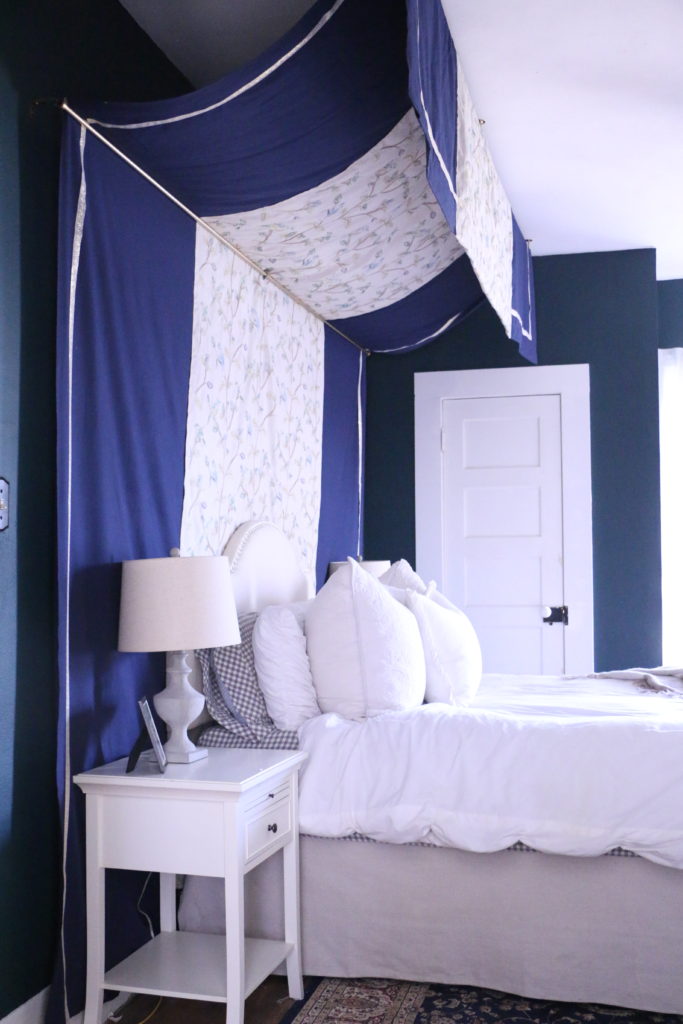
I also used hot glue (because hot glue can do all things) to add the greek key ribbon trim. Before the ribbon was added, I wasn’t too sure about it overall, but I do think the trim polished the whole thing off and made it look more finished.
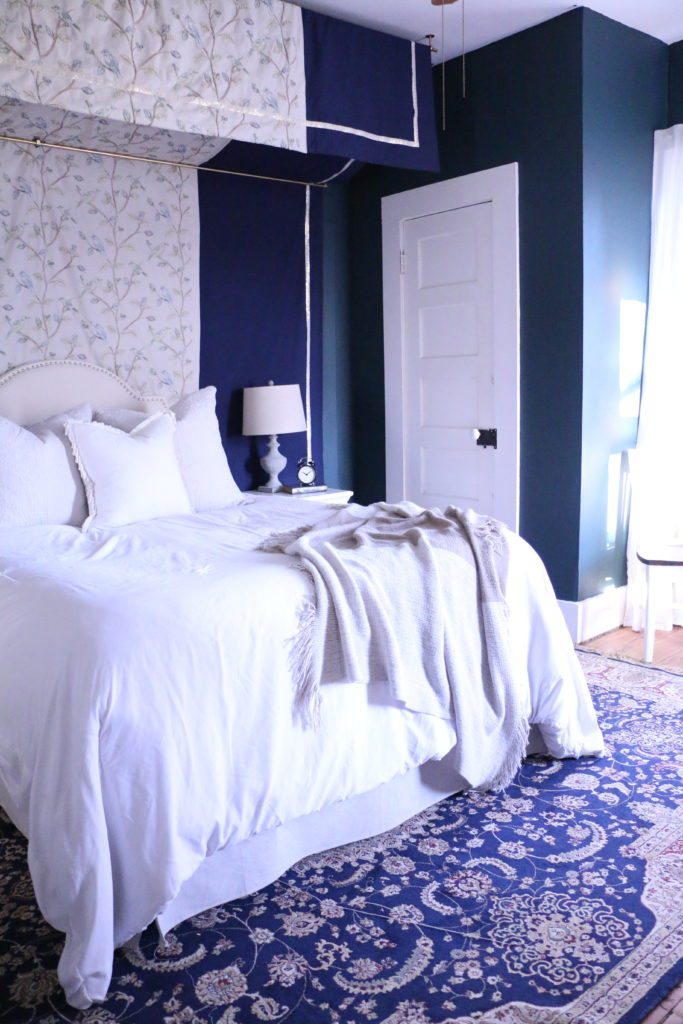
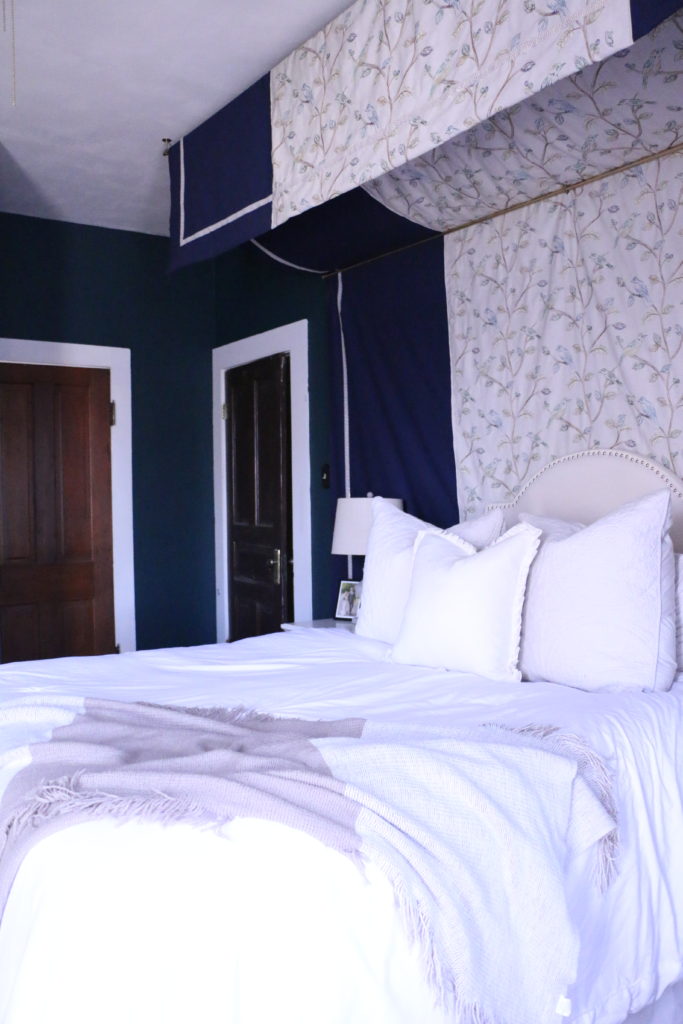
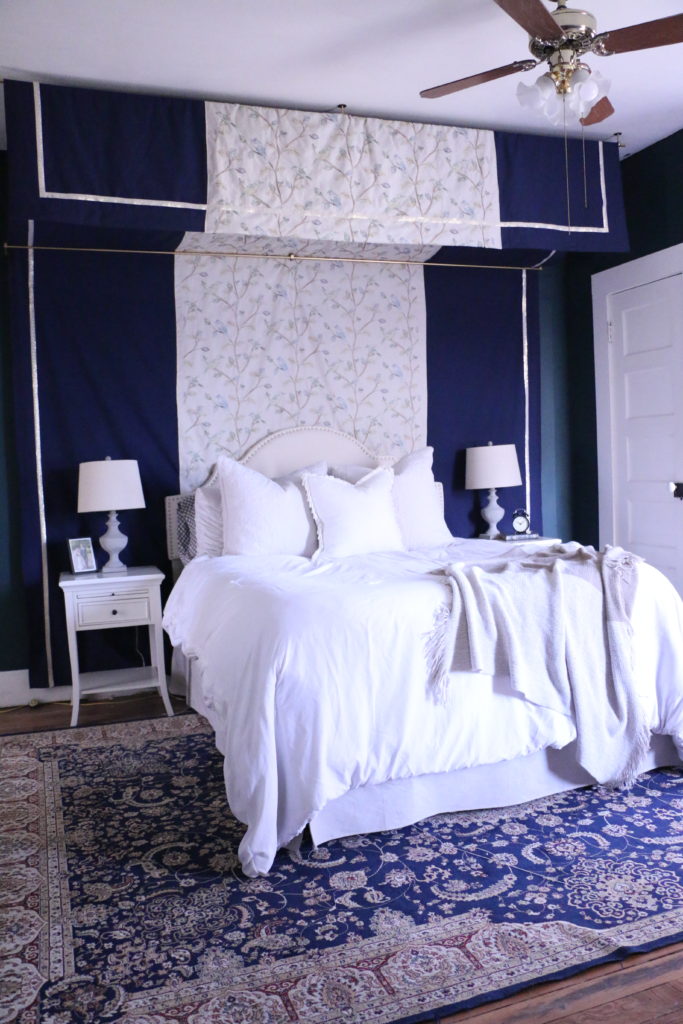
The goal here was to cover that unsightly and unused door, and I think that this definitely fits the bill. And the best part is that the door is still totally accessible so the next time we need to move furniture upstairs, we can open the door! I’m really loving the way this project turned out, and it’s true what they say: necessity really is the mother of invention. What do you think?
And just for fun…take a look at the original mood board for the space! It’s so fun to see it coming together!
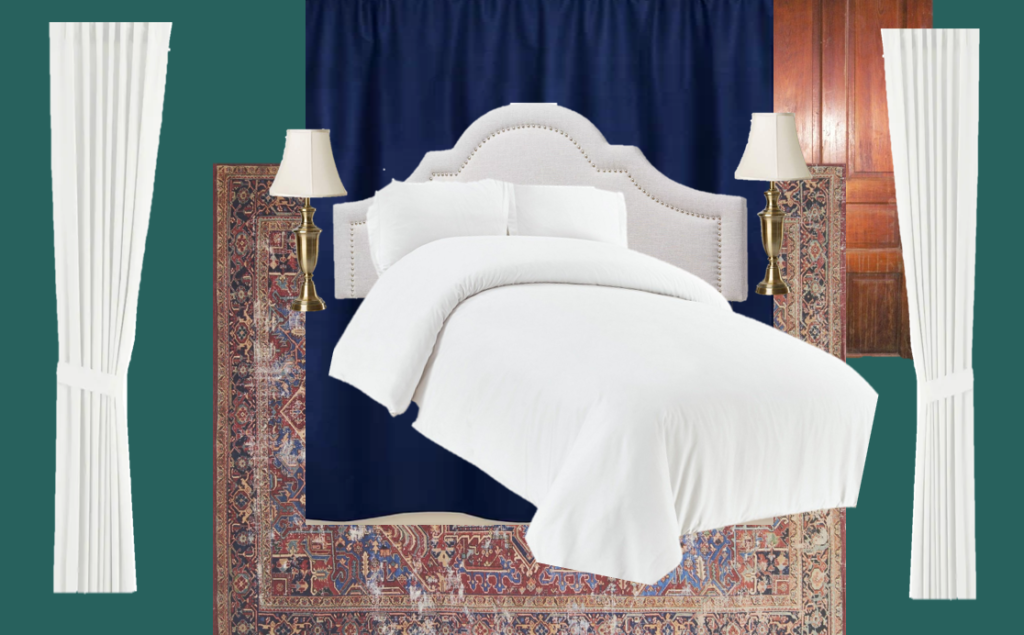
The rest of this room is evolving slowly, and I have some continued plans for the space, but all in due time. That’s all for today, friends, have a fabulous day!

1 Comment
Totally transforms the room! Such an amazing DIY.