Browsing Tag

room tour

Room Tours

Our Living Room Reveal

Here we go, here we go, here we GOOOOOOOOO. This room has been a long freaking time coming. I have been dreaming of this space for years on end, but really was low priority while we did other projects.

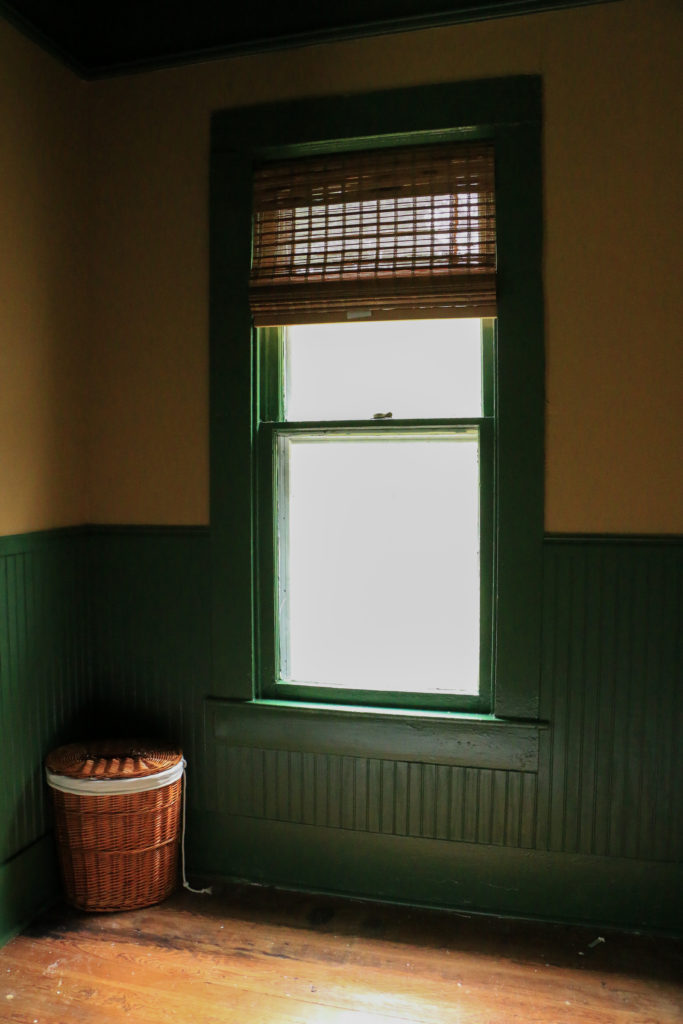
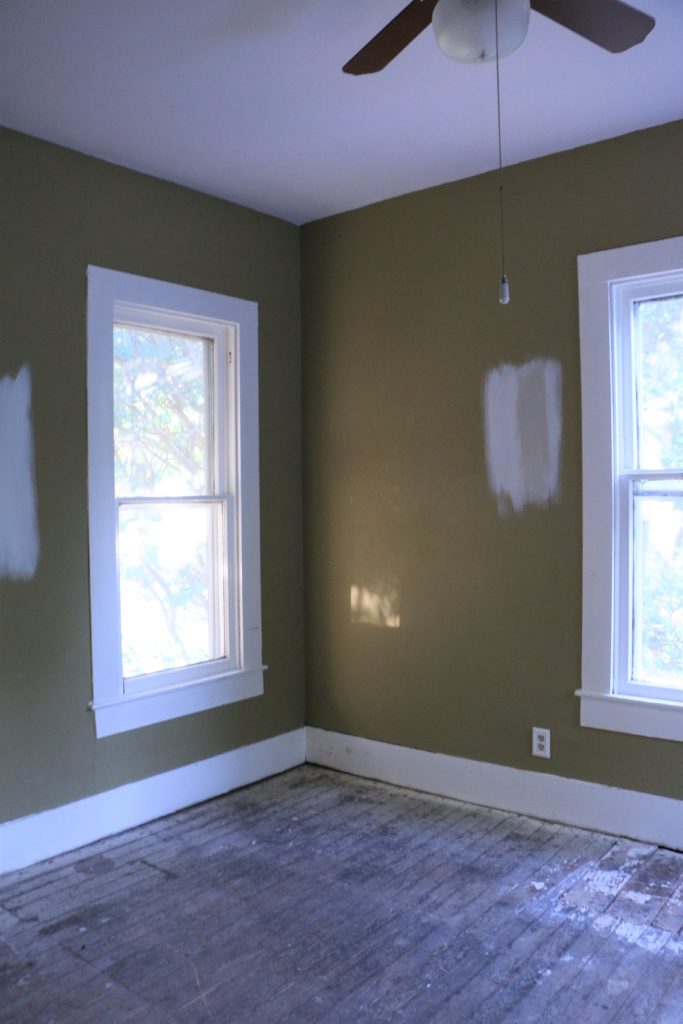
Let’s start from the very beginning (a very good place to start). This is what the room looked like when we first moved in, almost seven years ago. The carpet and upholstered walls were soaked with cat urine, the layers of flooring over the original pine were disgusting, but protected the original floors well.

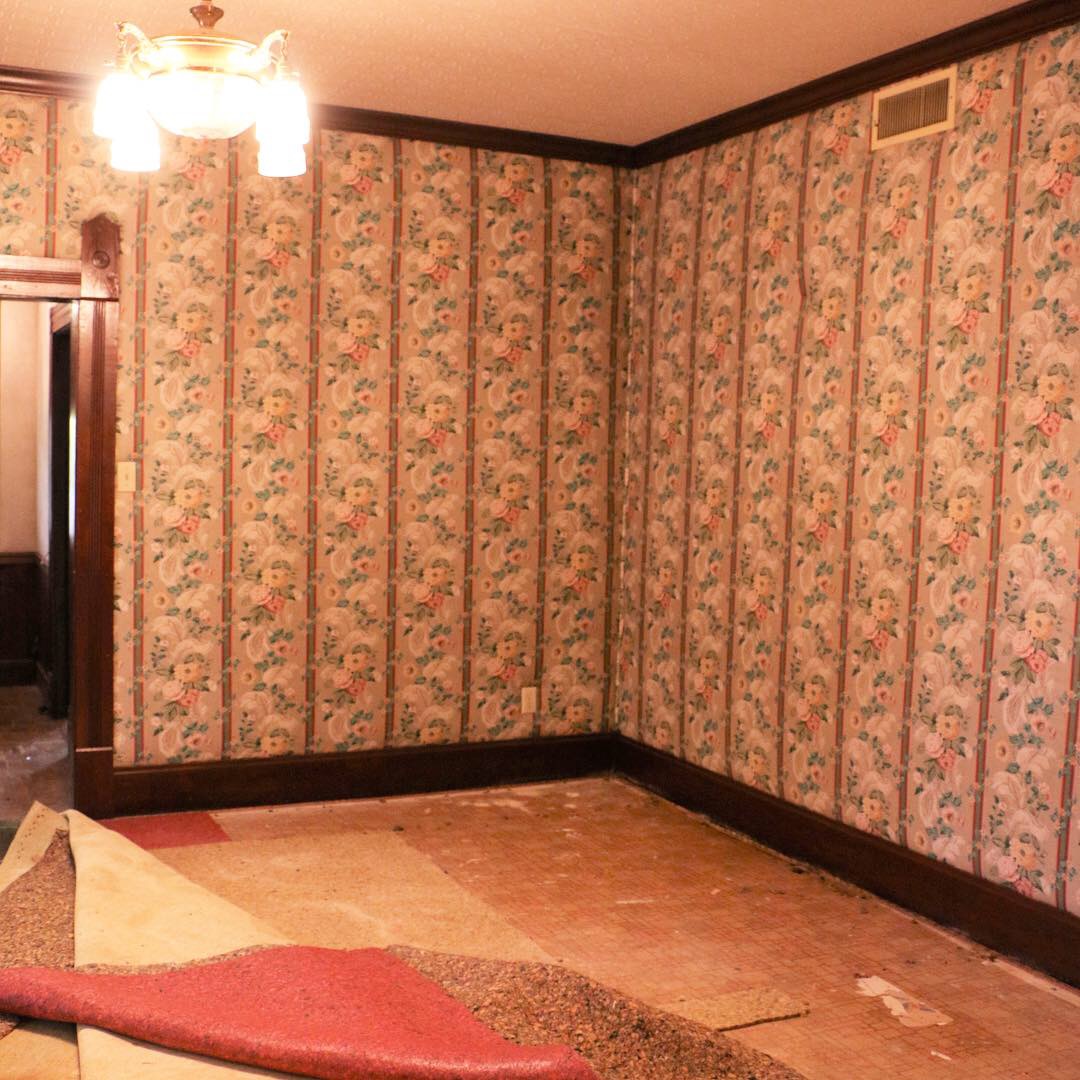
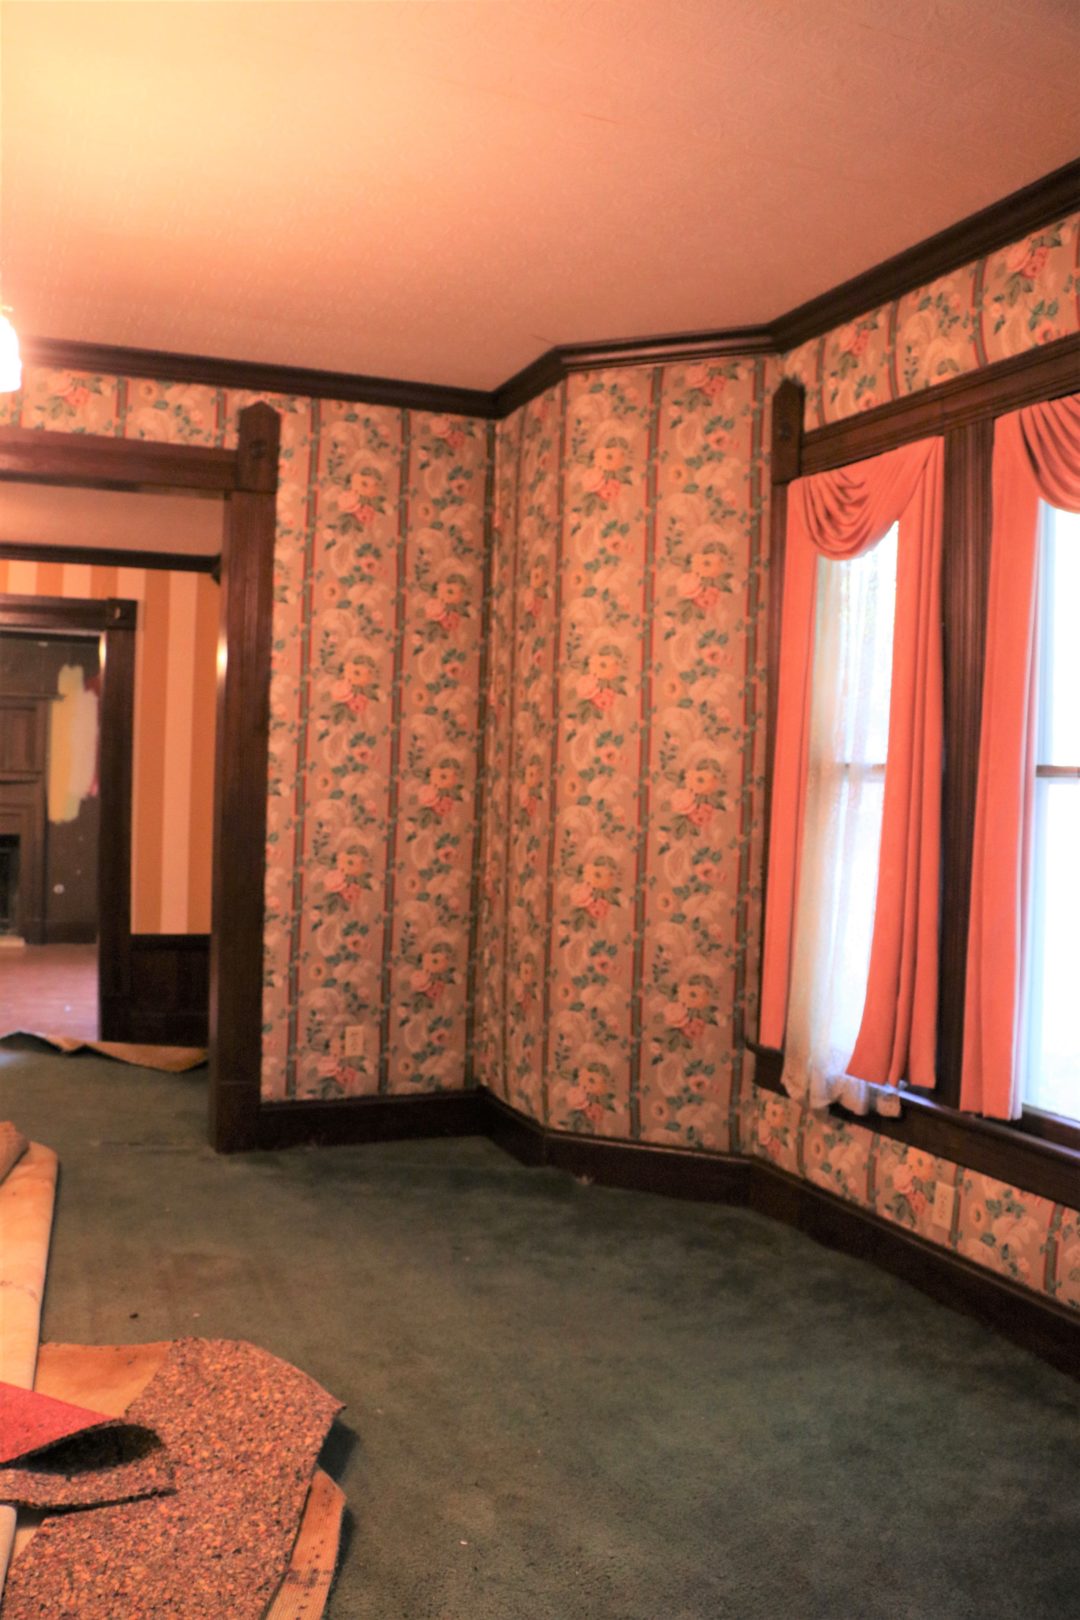
I cannot even believe we bought this house in this condition. I hardly can even remember what poor condition it was in!

The first months we owned the house were a mad dash to get it livable. We cleaned everything out of here, drywalled, refinished the floors, and painted everything white. I didn’t have time to make decisions, we just rushed to get it to a baseline living condition. Once we were in that baseline living condition, we had various projects we had to get done in a very specific order.

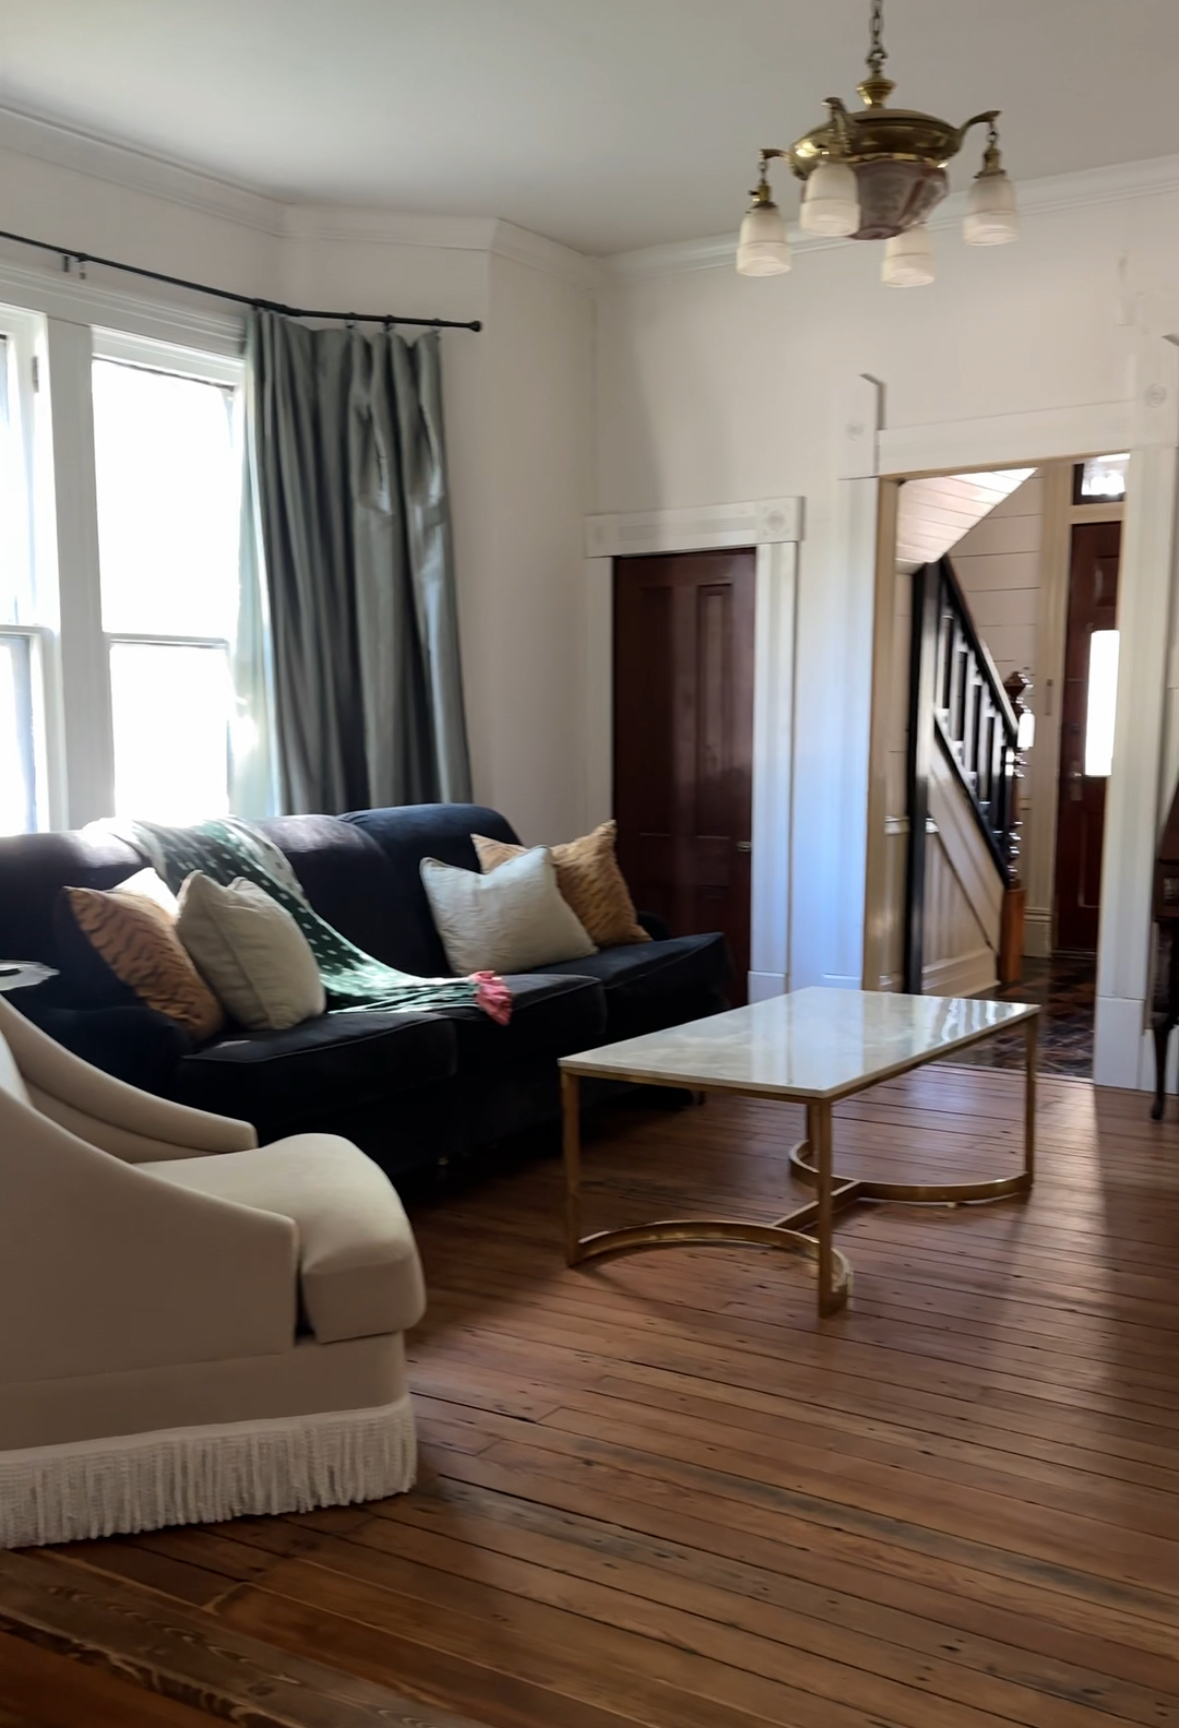
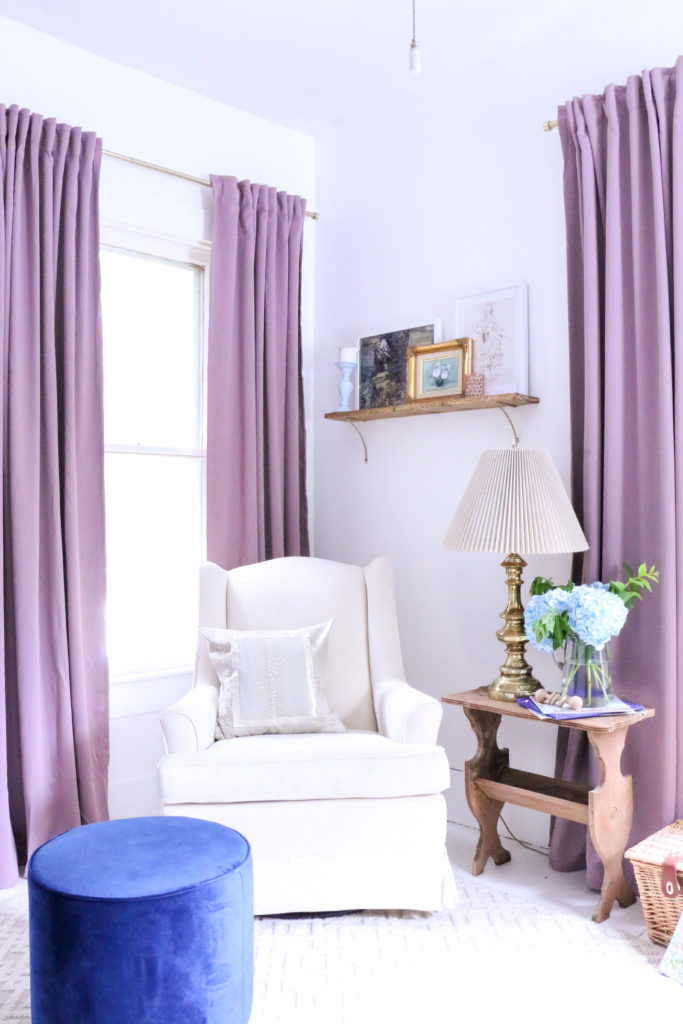
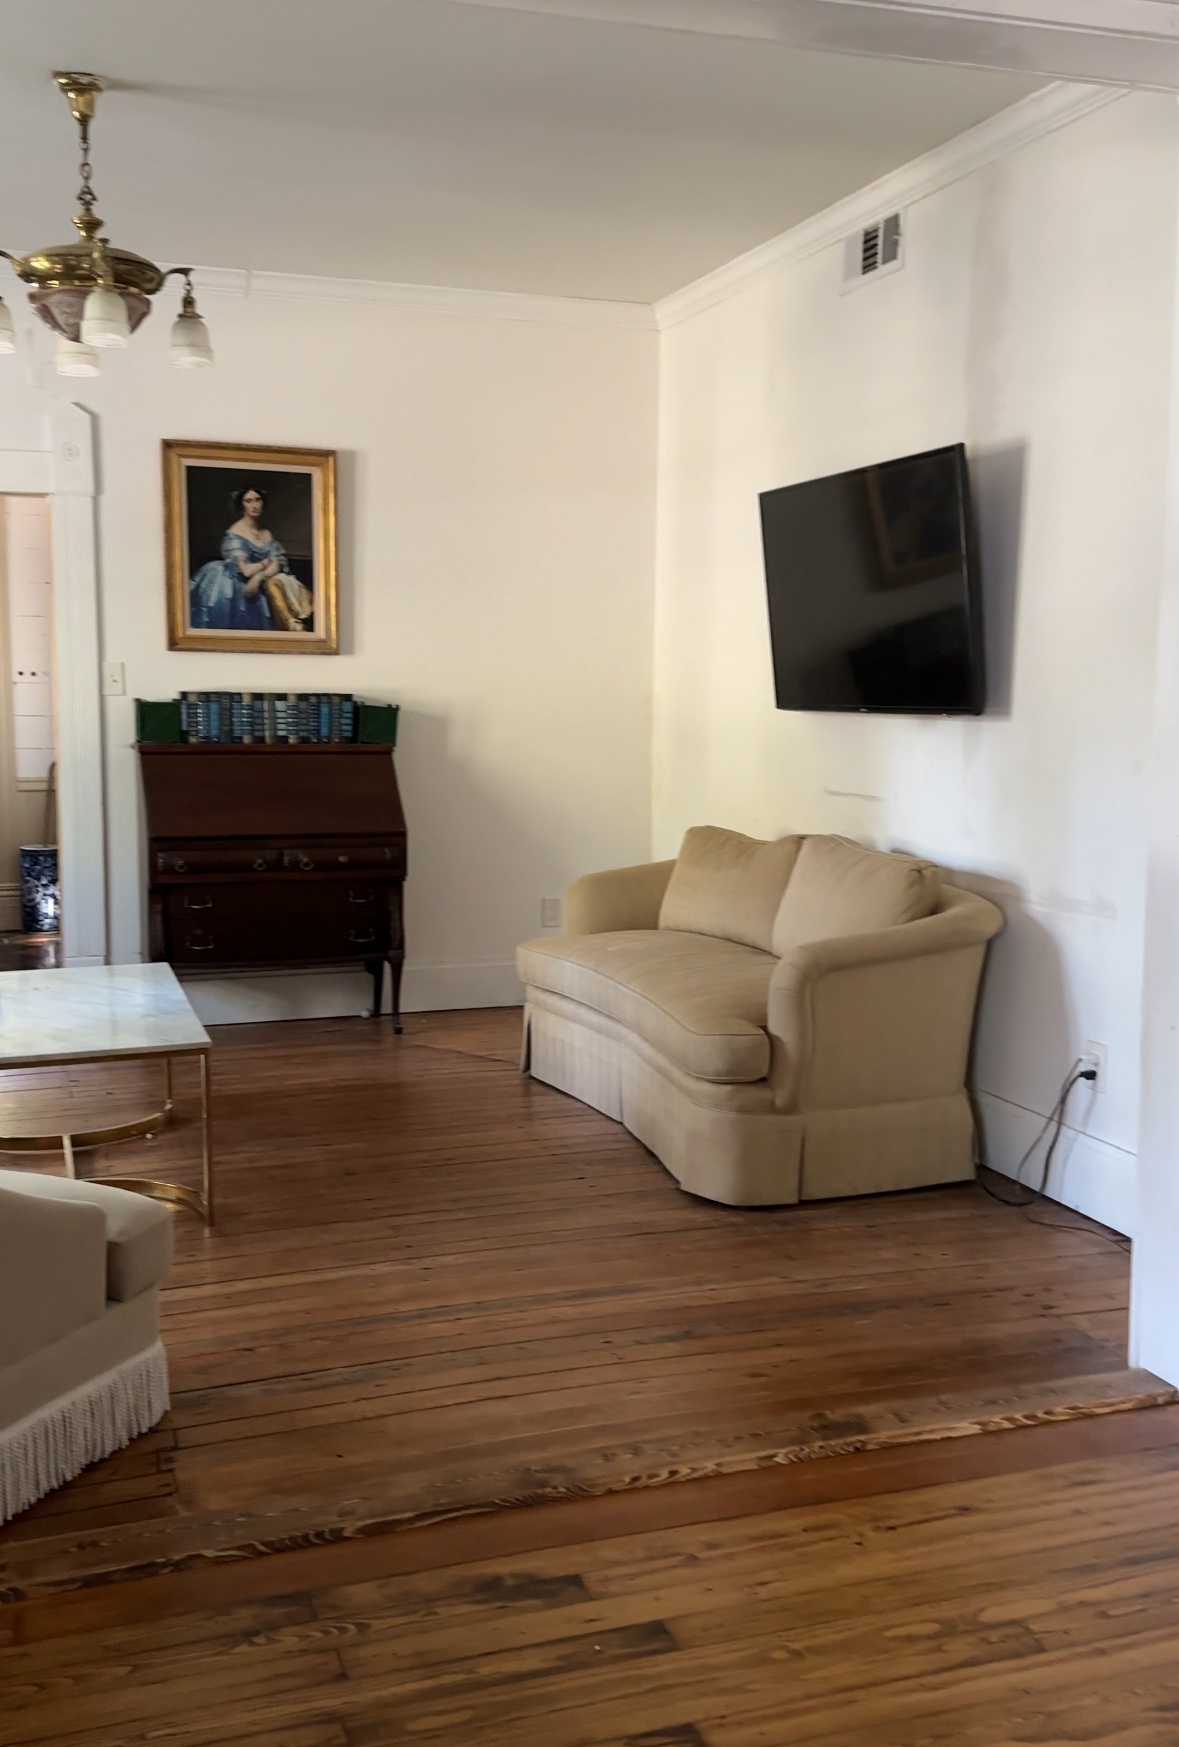
This white room was really on the backburner for the longest time. It was FINE, but completely uninspiring. We did have rugs and some other furniture in here, but I took these photos mid-prep, so they are slightly more bare than what we’d been living in these past few years.

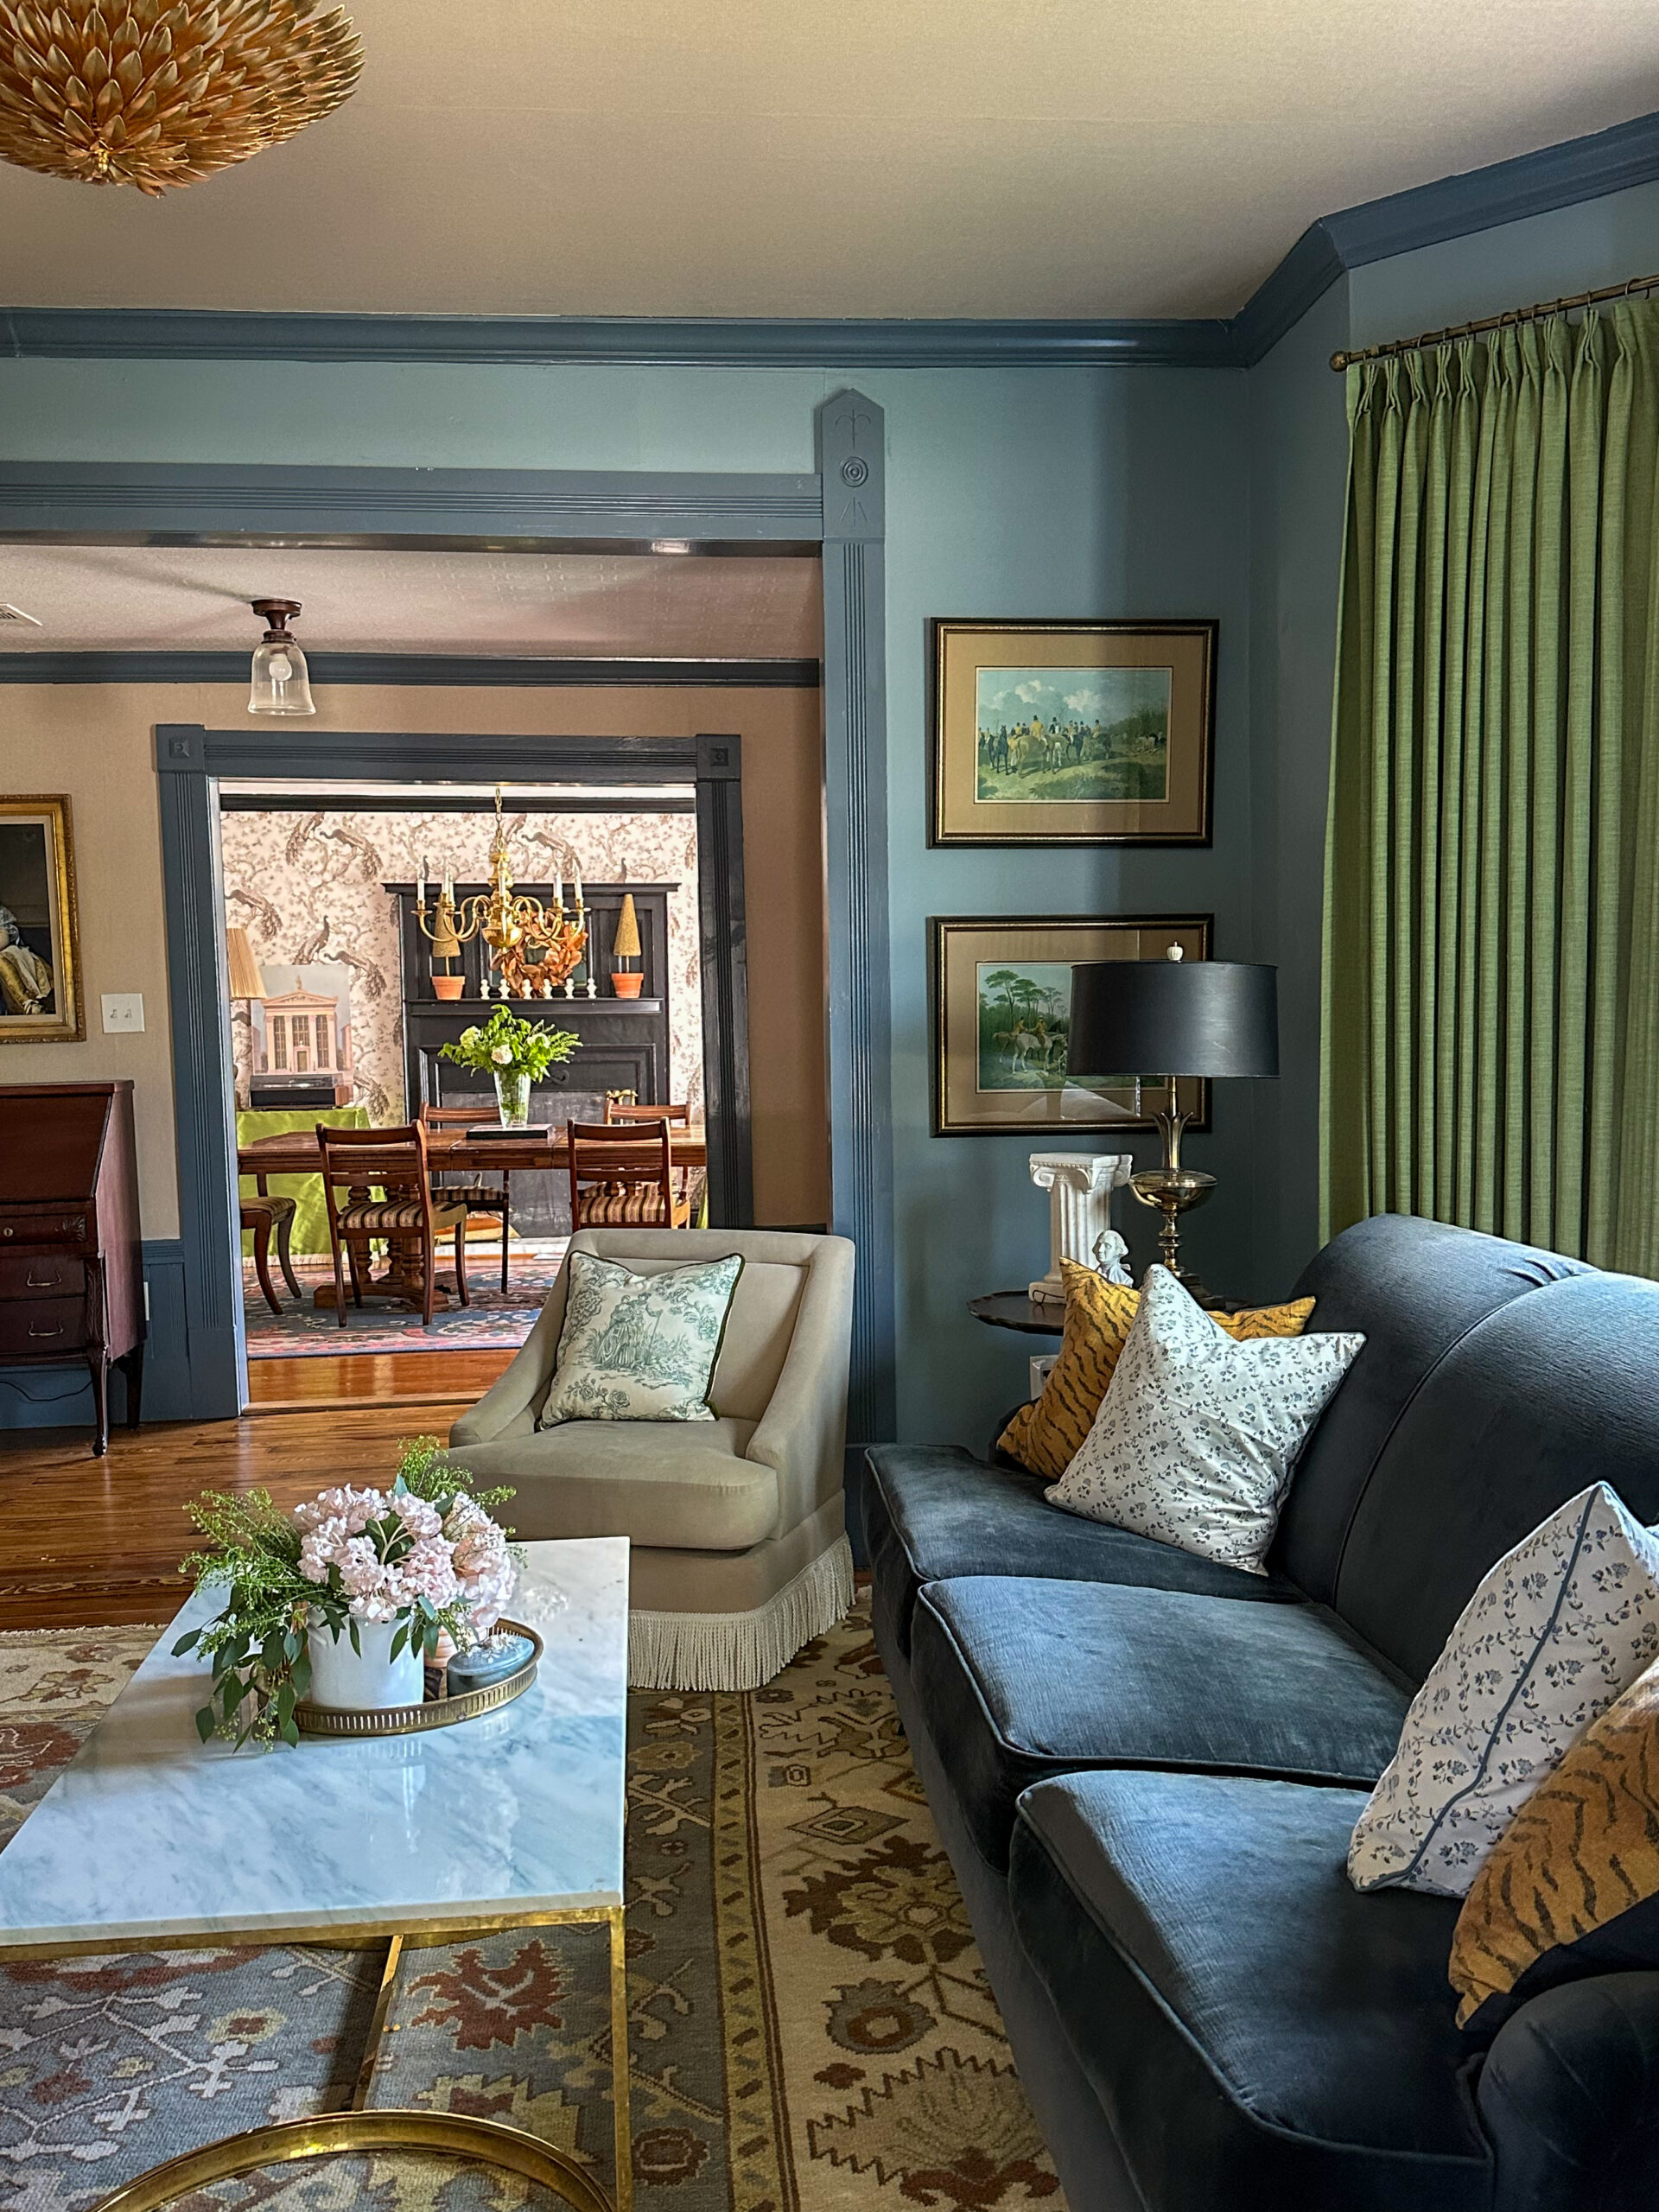
And now, ladies and gentlemen, feast your eyes, because this living room is FINALLY finished!

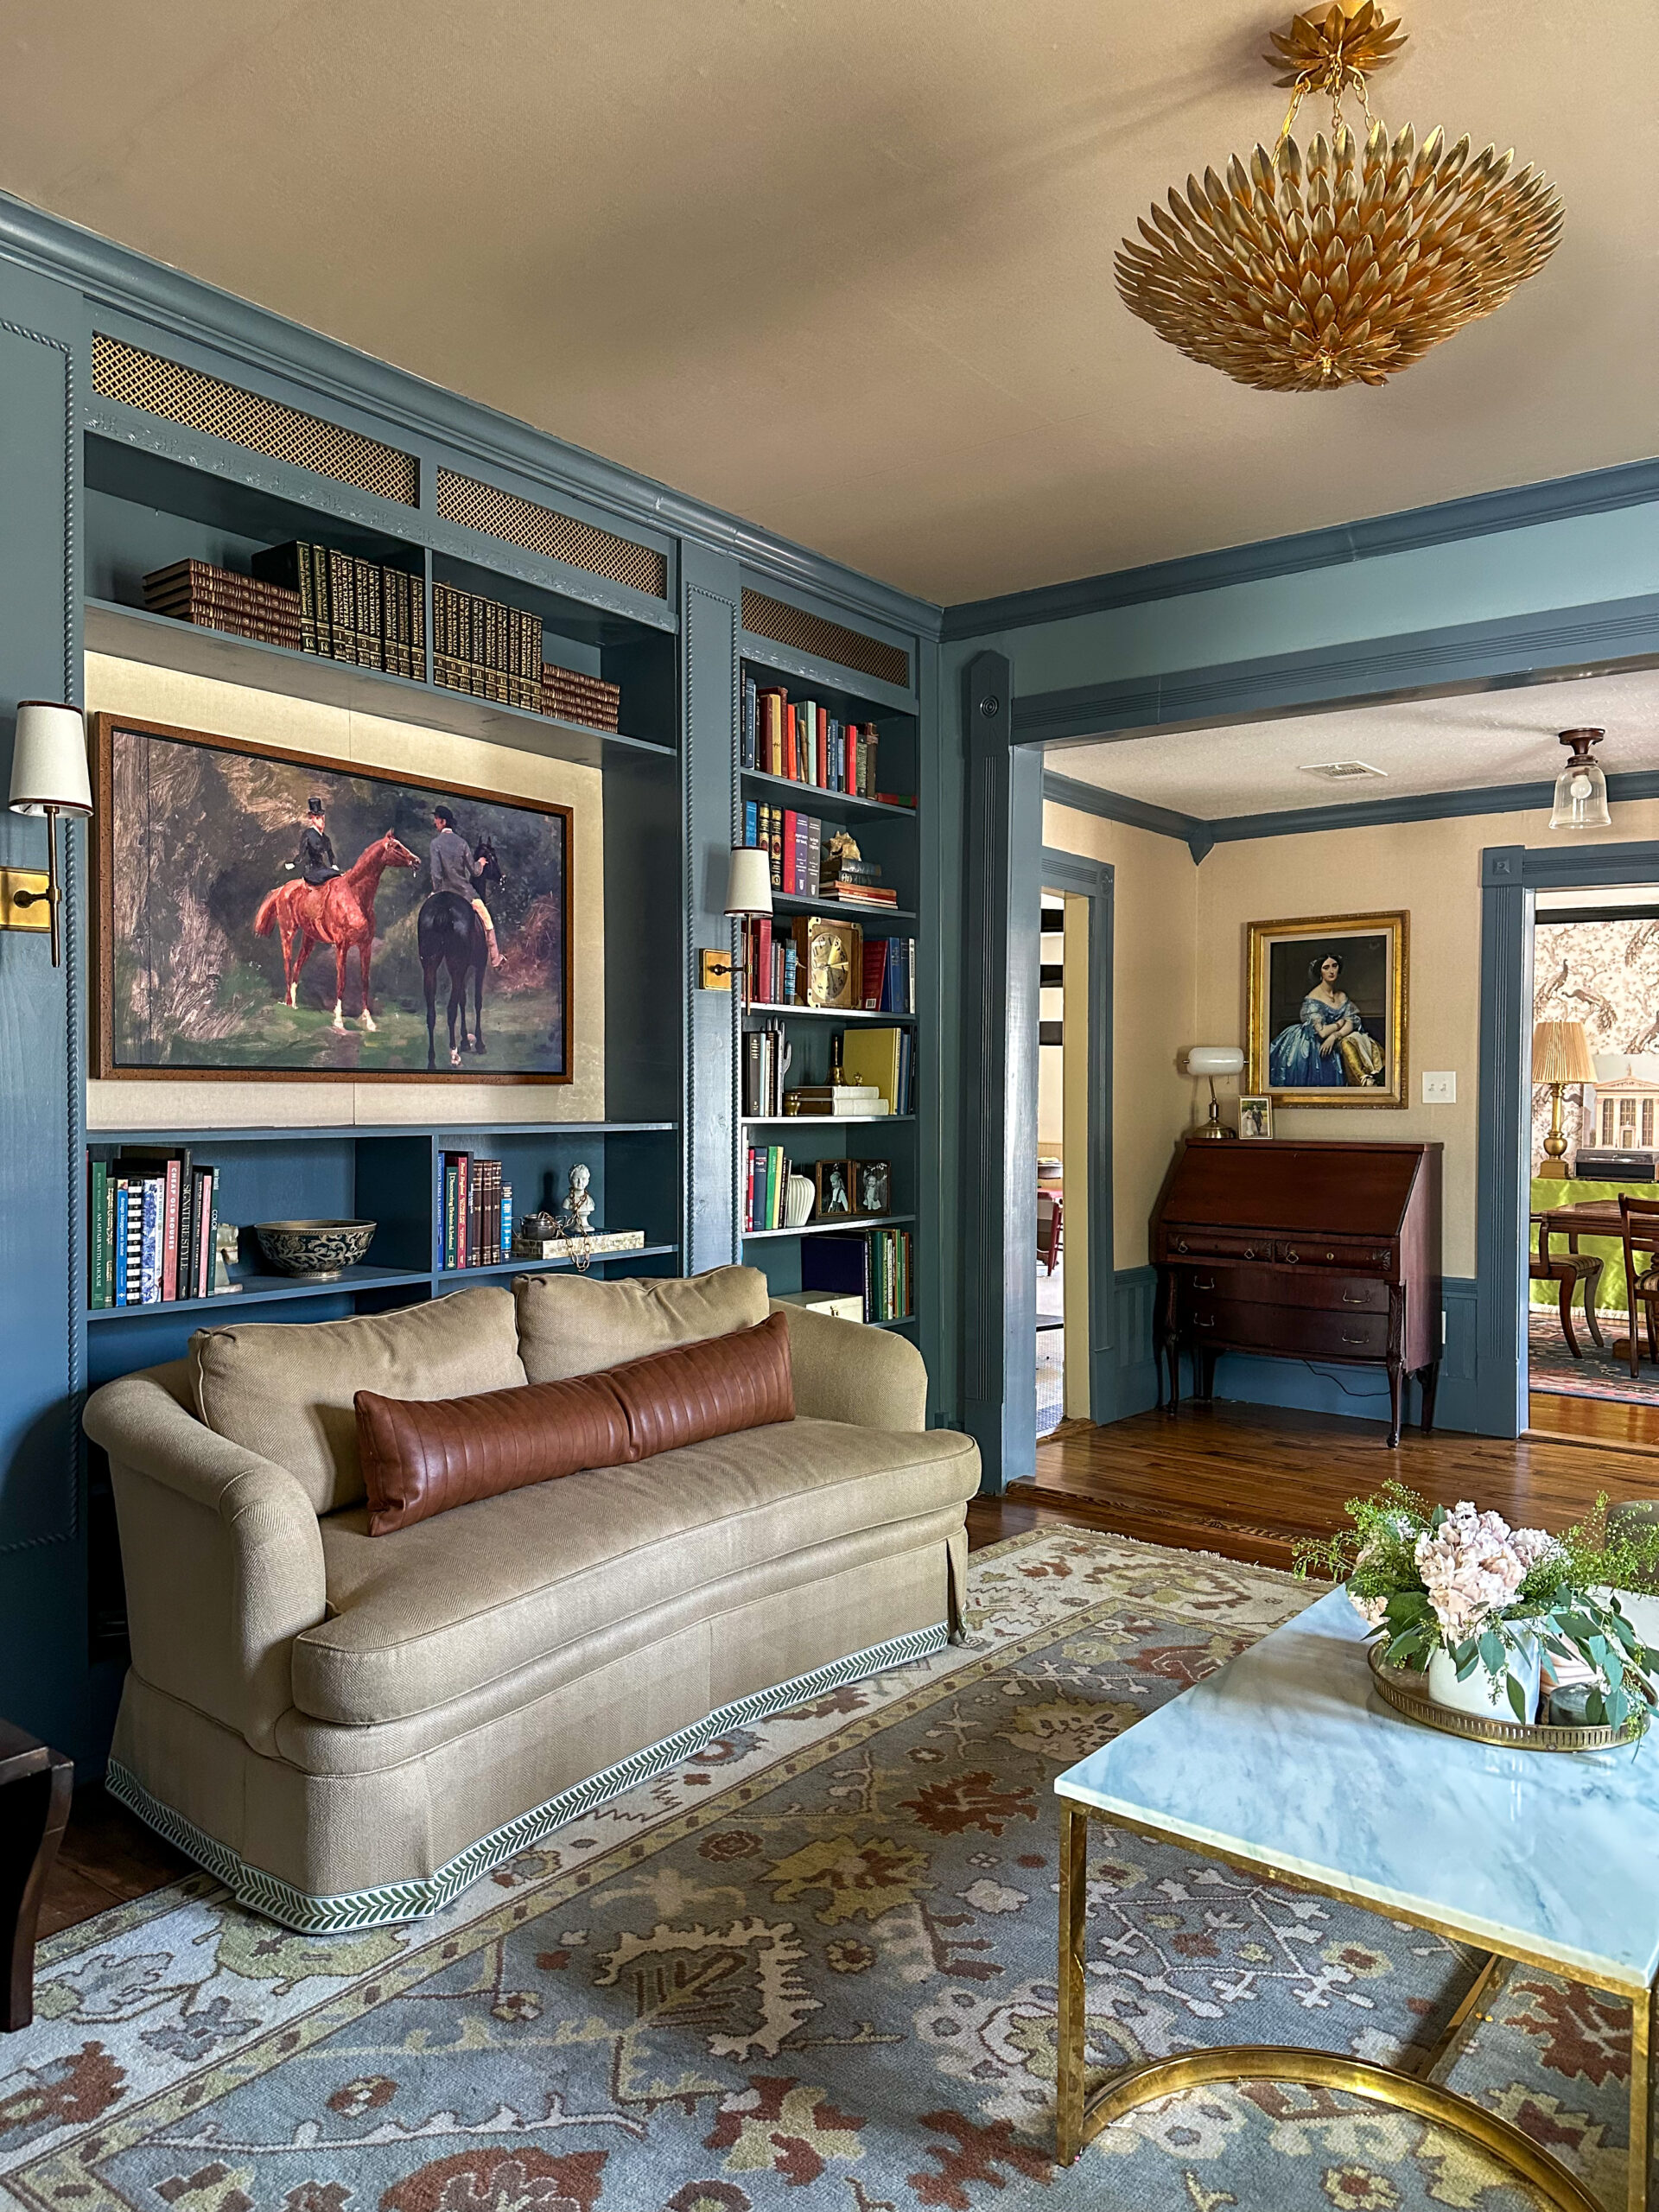
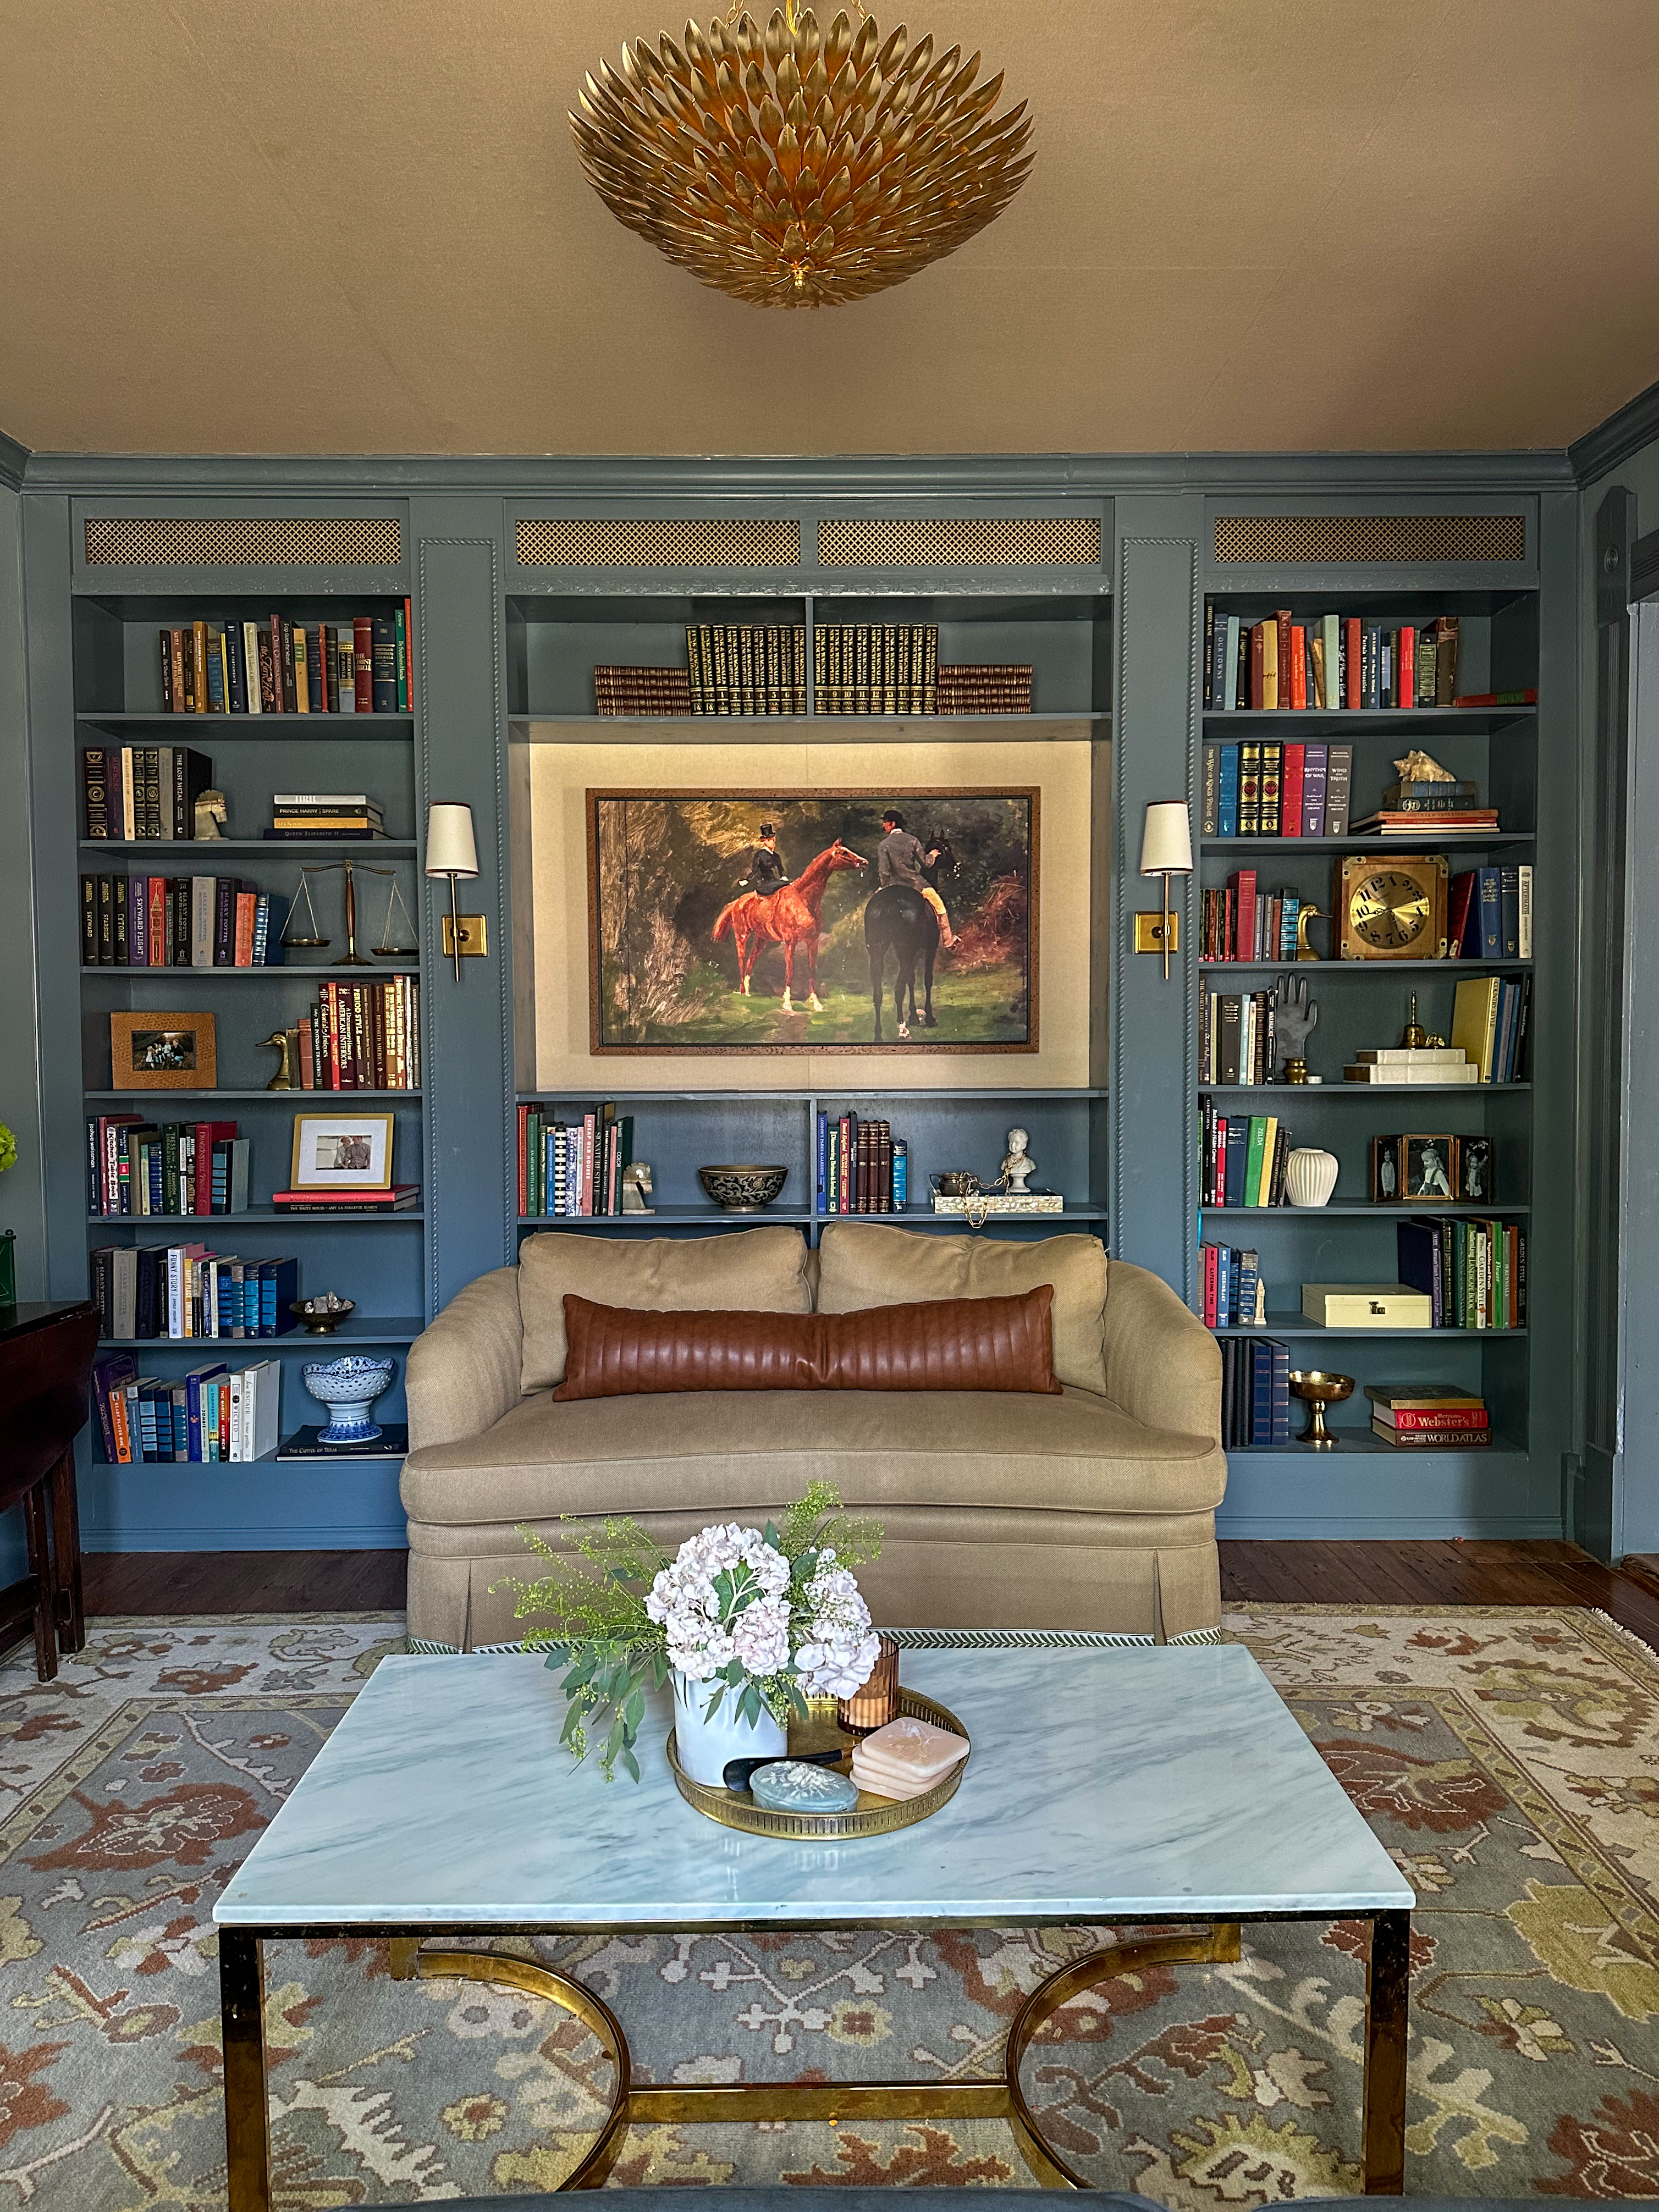
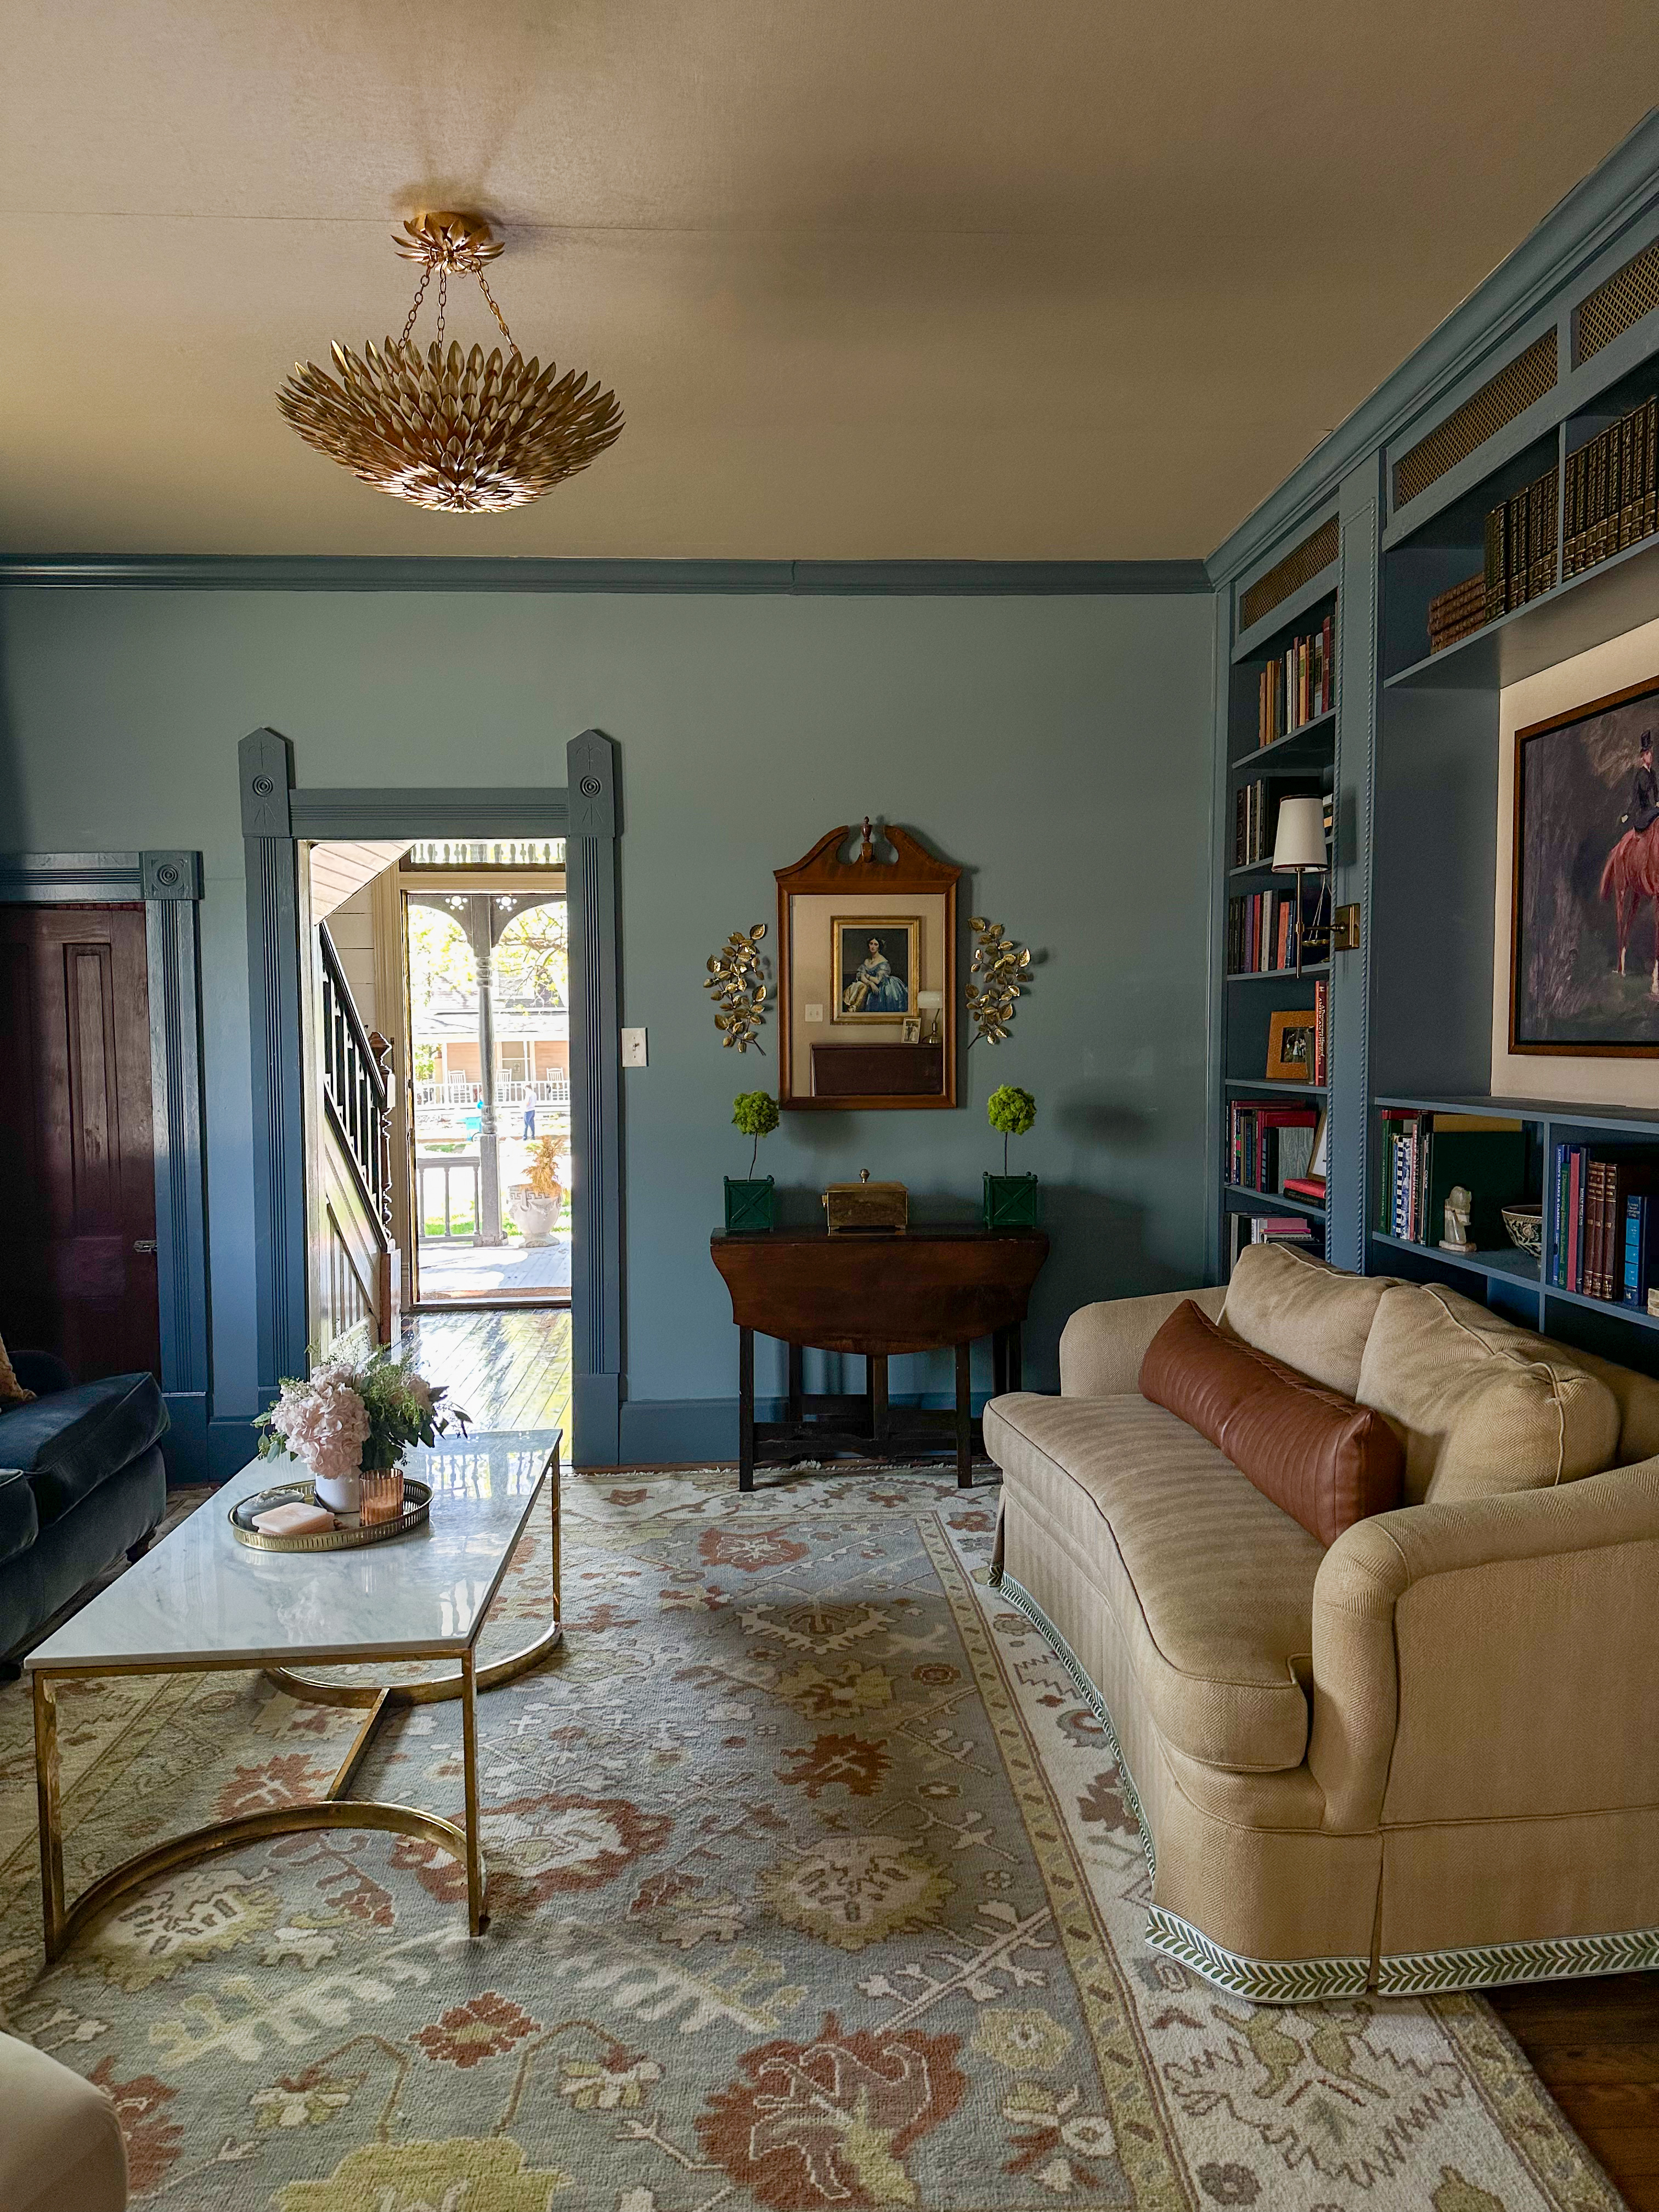
The biggest undertaking was planning a whole wall of built in shelves. We’d never done anything like this before, but I’m delusional enough to believe we could pull it off, and thankfully Ethan went along with it. With a whole lot of Youtube and a lot of trial and error, we (mostly Ethan) built this whole wall that’s now the focal point of the room.

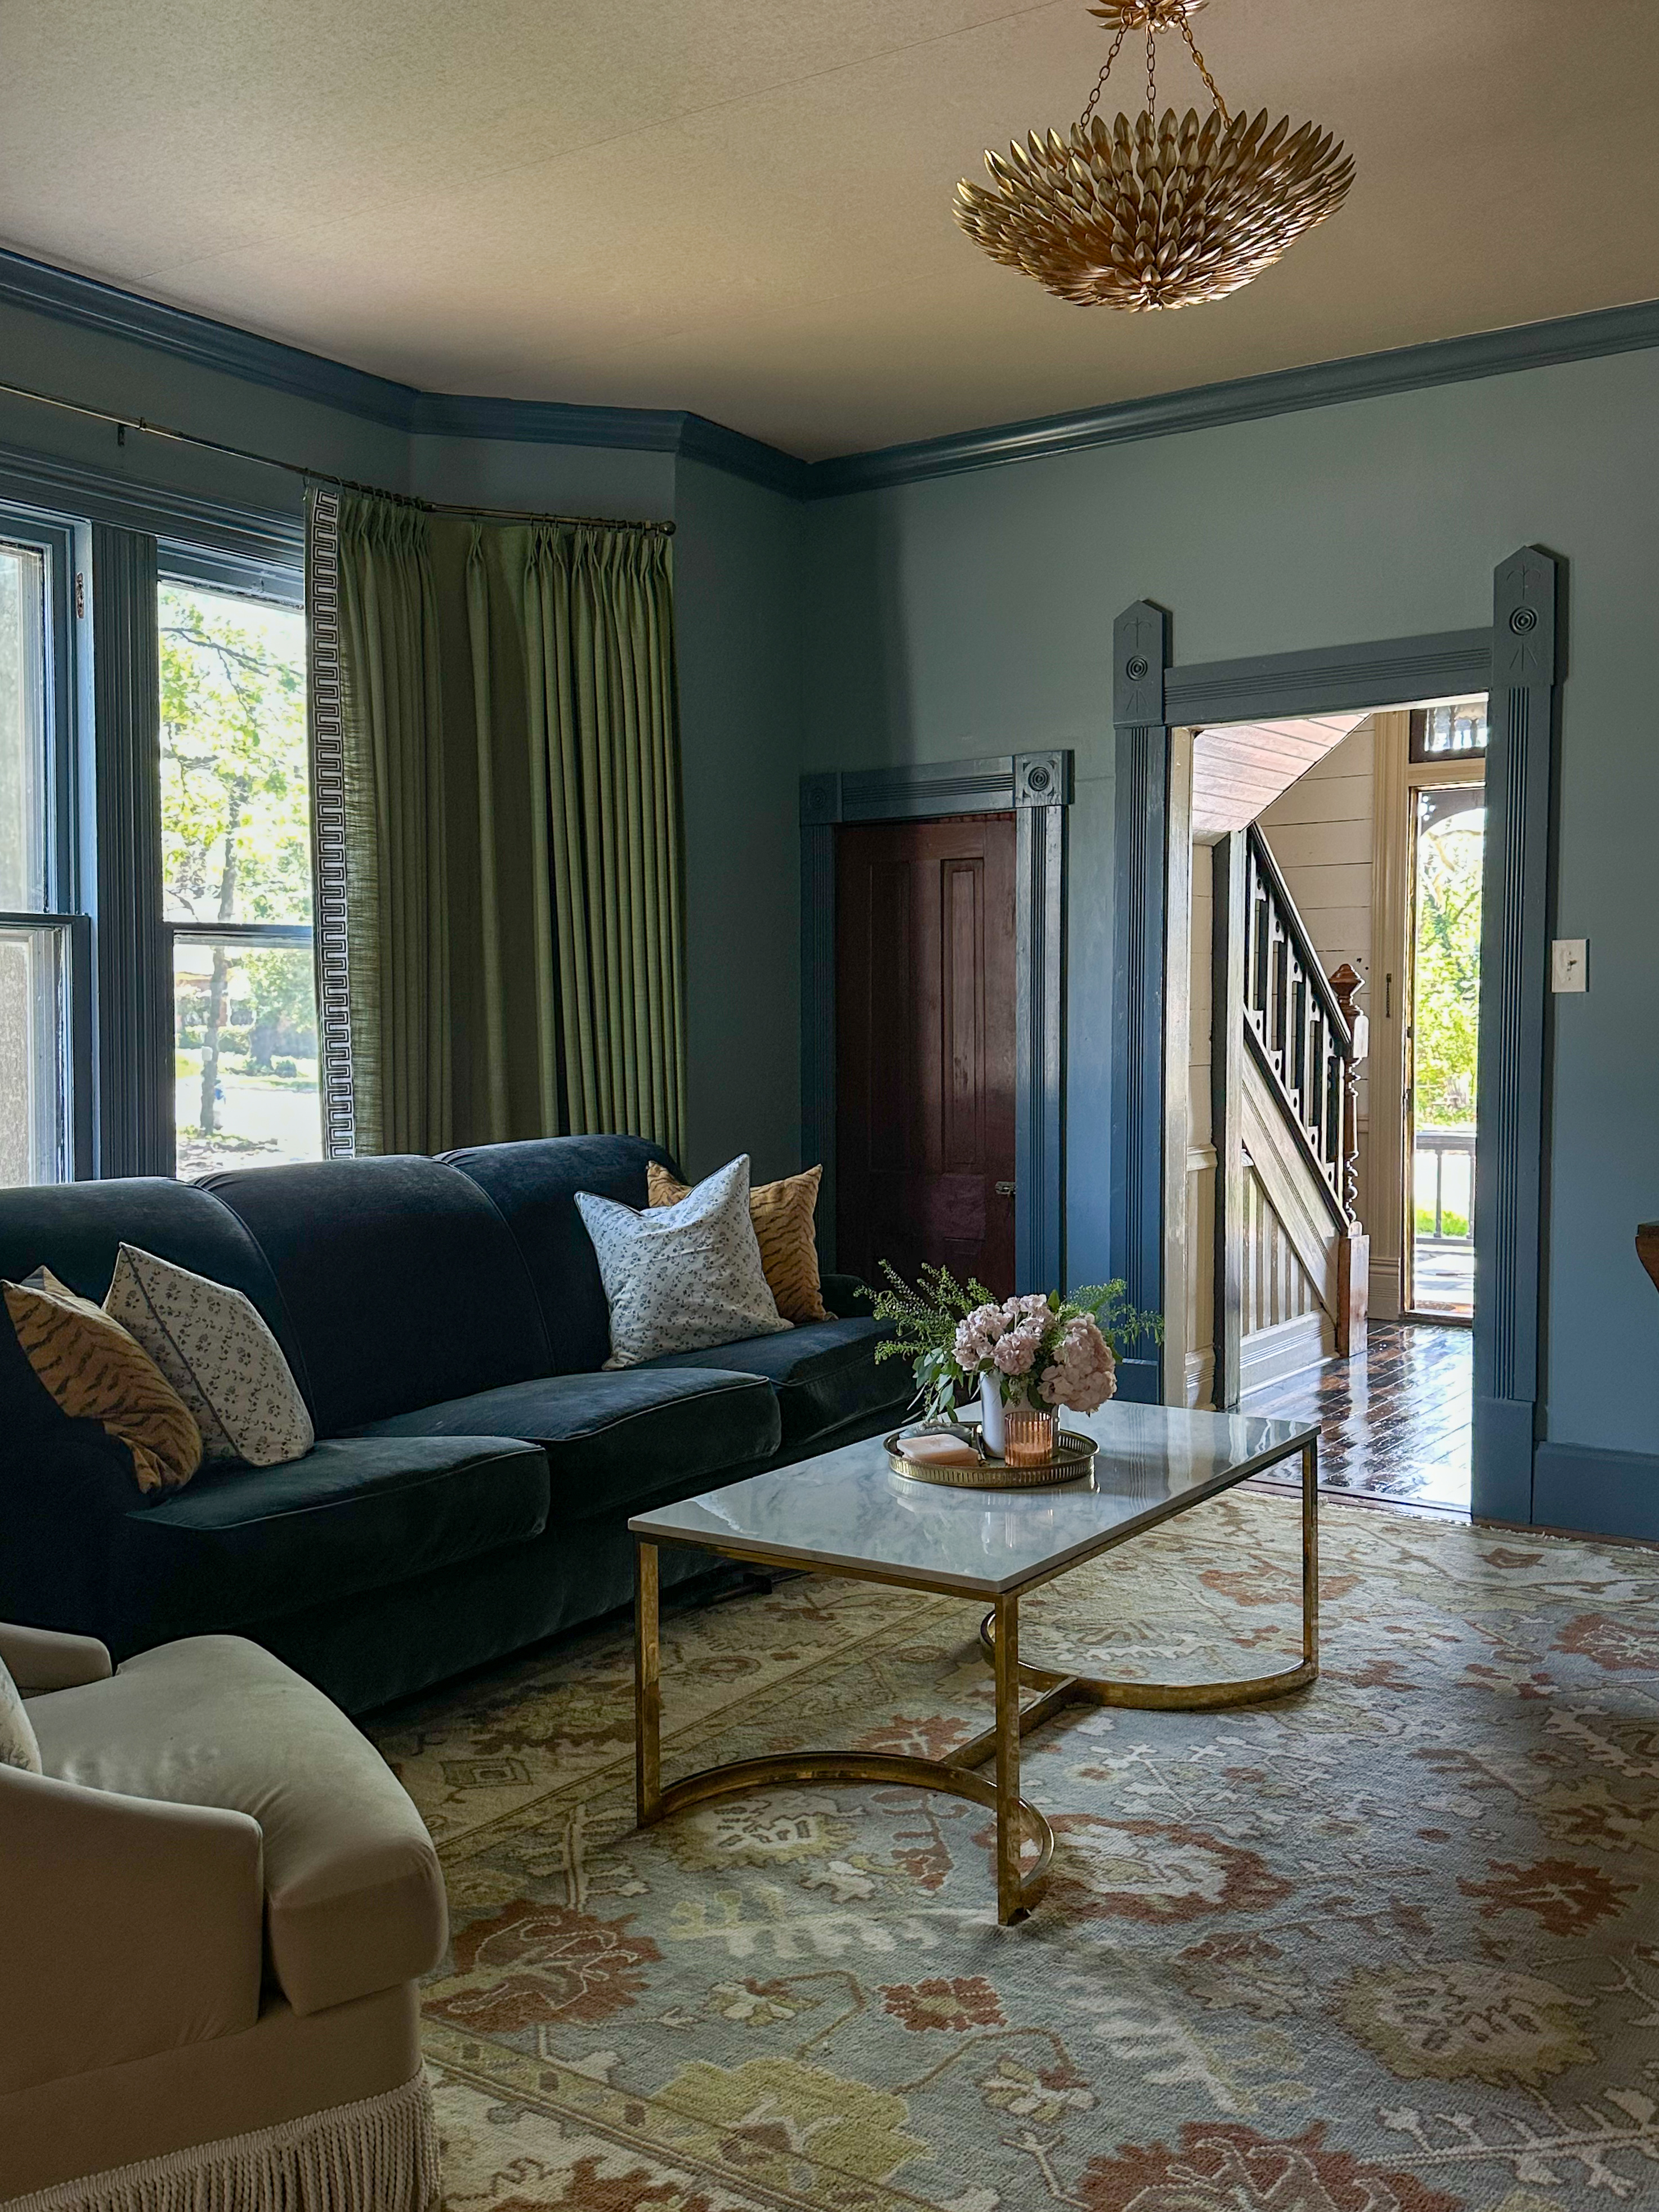
All of the furniture was existing in the room, but it looks completely transformed in the space. It was mostly thrifted over time, a mixture of antique and modern pieces. Previously things looked like a random collection of pieces, now it truly feels cohesive, like it all fits together.

I knew moment I saw it I wanted this light fixture. No other light fixture compared. It was a little out of my budget, but I stalked sales until I finally found it at a price I was comfortable with and I went for it. And I was absolutely not wrong, it is my favorite light fixture we own, and totally makes the space.

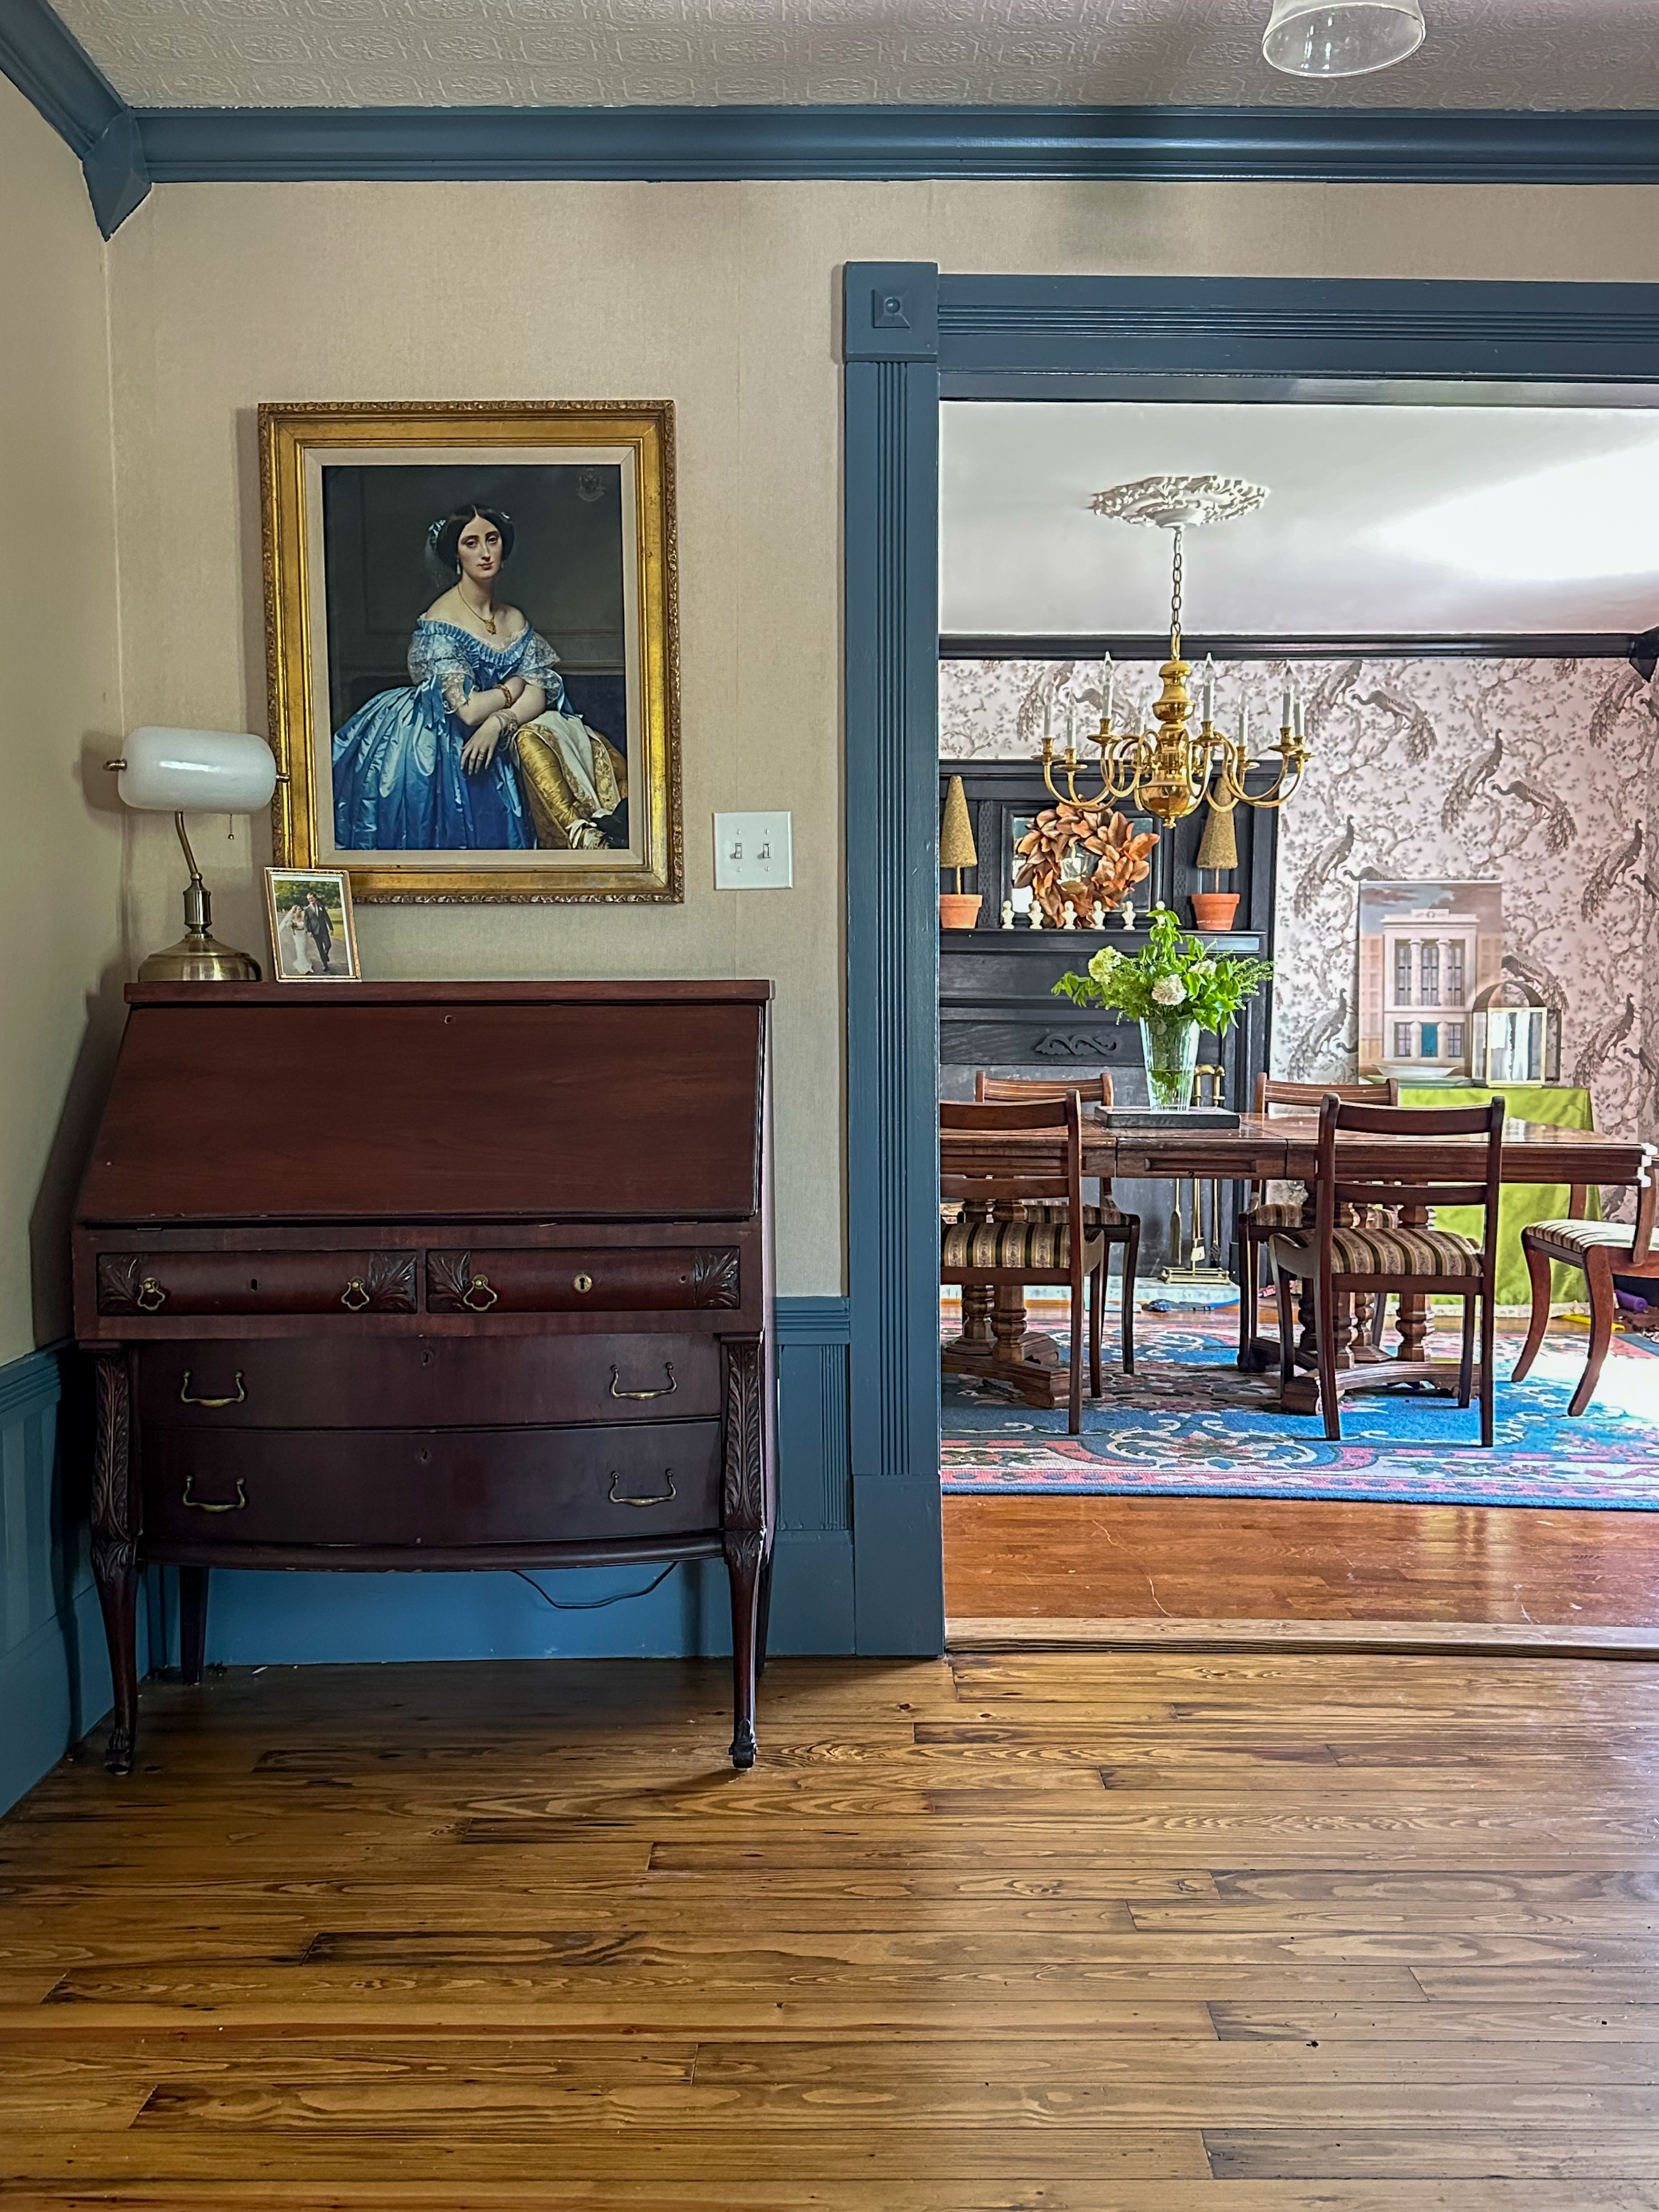
One thing I really wanted to plan strategically was how the living room flowed into the smaller passthrough space adjacent to it. Because our home has a back addition that was added about 60 years after it was first built, there are some areas where the floors and cased openings give clues that it did not used to be one space. This particular space next to our living room is wider than a hallway, and feels like it’s part of the living room, but feels separate at the same time. The ceiling height is different, and it had some pretty textured wallpaper I wasn’t interested in taking down. A friend of mine said to treat the two spaces as sisters and not twins, which really stuck with me. I used a grasscloth wallpaper on the ceiling of the main living room, and carried it through on the walls in the secondary space. Sisters, not twins. The wall color in the main living room is Sherwin Williams Debonair, and all of the trim is Sherwin Williams Stargazer.

The sconces on the bookshelf wall were a last minute addition. I had intended to use some antique sconces we had in our garage when we moved in, but they ended up being smaller than a modern standard size, and we had already had electrical run, so we purchased these instead. I dressed up the shades with some velvet ribbon to add an extra oomph, but I’m super happy with them.

After envisioning what this room could be for so long, it feels surreal to actually be living in it. Home takes time, and although we are a little slower than most, I’m so pleased to finally be living in a space that feels like a reflection of our family and our taste.

Although most of the items in our space were collected secondhand over time, below are the sources for items still available. Anything not linked is custom, or vintage.

coffee table | curtains (these are customizable, ours are the green color) | Frame TV (ours is the 55″, the perfect not too bug size, in my opinion) | throw pillow covers (ours are the powder blue color)

Thank you, for those that have followed along with this project over on Instagram, as I’ve been sharing things. Your excitement has meant the world. That’s all for today, friends. Have a fabulous day!

House Progress

Spring One Room Challenge Week Five: Paint Diaries

Week One | Week Two | Week Three | Week Four

Another week, another post from the depths of paint despair. I always start off optimistic about a paint job, and then end up becoming slowly disenchanted with the work as time goes on. As I mentioned before, the paint in this room is pretty involved, and from the outset, I budgeted myself two weeks just to paint. As of the time of this writing, it’s been exactly two weeks since I put the first coat of paint on a surface, and I probably have one more day of painting before I’m officially done.

I have shown you guys the green paint that is the majority of the room, but I haven’t talked about here what my plans were for the upper portion of the wall. I am doing a faux wallpaper look (more on that later I promise!) using just paint. I’ve done it with a few different methods in the past, and so I’m lovingly referring to this “wallpaper” as Fake Wallpaper3.0. While I’m not ready to show you what the wallpaper is, I want to share what color I painted the wall as a base for Fake Wallpaper3.0. I’m going for a moody, English country style, and so I chose Windswept Leaves by Behr to help darken the space. It’s not transferring super well in the photo I snapped today, it’s a lovely camel shade and less of a gold, but I think it’ll serve as the perfect backdrop for what I’m hoping to achieve with the faux wallpaper.

Does it not bring some drama to the situation? I’m excited to show you what’s coming next, but I’ll have to leave you in some suspense! Be sure to check out the other ORC guests this week as they reveal their progress too. That’s all for today, have a fabulous day!

House Progress, Room Tours

Baby Girl Nursery REVEAL

It’s finally finished! The room we’ve been working on for months is done and I can’t wait to share with you all the details. If you haven’t been following along, you may want to catch up with some of the older posts pertaining to the nursery. First, I shared the original moodboard, how I did the DIY wall stencil, how I stripped the painted doors in the room, and the updated list of what projects were still left as of a month ago. Now that all those things are crossed off my to-do list, I’m finally ready to share.

Before we have a look at the photos though, let’s take it wayyyyy back to early April when I was in the planning stages of the room. This was the moodboard I came up with, mostly based on a few things I already had found (art) and furniture I knew I would be reusing from our son’s room (crib and rocker).

Now the whole thing has come to life and I could not be more excited.

The artwork over the crib was purchased at a flea market before I even knew I was having a girl back in… February? March? I snagged it because it was only ten dollars and I knew if I had a girl it would be perfect for above a crib. Luckily I am actually having a girl, otherwise I would just have this painting with no place to put it. It came without a frame, so it took me a while to track down a frame that fit, but I did eventually. I bought some random ugly artwork just for the frame, threw away the print inside, and used Rub ‘n Buff in the color Gold Leaf on the frame to make it look a little more aged. Here’s what it looked like before:

It’s so 2002 chic, am I right? Anyway, our crib is the same one I used in our son’s room, I just dyed the crib skirt with some RIT dye to change it up a bit.

The footstool, curtains, rug, and curtain rods were all new purchases for this room. The rocker was one we already had from our son’s nursery. You can see in these photos some shelves both with artwork and with books. Ethan built the book display shelves with a lip on the front to keep books from falling over. I stained them with my favorite stain color, Varathane Early American.

The pillow was something I whipped up in 30 minutes on a sewing machine on a whim after an unplanned Hobby Lobby trip. I used a pillow I already had and made a new cover for it with $3 worth of fabric. I used some leftover trim from another project.

The lamp was a Facebook Marketplace find, the table was a flea market find a few years ago, and the picnic basket was something I’ve had forever (it’s full of baby toys). The little doll quilt sticking out was made for me by my Great Grandmother when I was young.

Moving to the other side of the room, the dresser was Ethan’s when he was younger and I repainted it. The basket was a thrift store find, and the tassel on the doorknob was an estate sale find. The tree was found randomly on clearance one day just after I had started browsing Facebook Marketplace for faux trees. It was meant to be!

The artwork and decor on both shelves are a combination of thing I had and repainted, or things that were picked up at flea markets and estate sales. The actual art prints are from a source I recently discovered and am currently obsessed with. The Smithsonian Museum has something called Open Access which is an online catalog of millions of photographs, paintings, pictures of sculptures, etc. They’re all free and available to download without copyright infringement, so I like to search for different art prints and have them printed as posters. It’s a super affordable way to get high quality prints that aren’t just the same thing everyone has from the same box store!

The nursery is a such a happy room, and I absolutely love it! Although, it’s now time for it to be filled with the ugly but necessary baby accessories that aren’t pictured in these photos…

I love that just like the rest of our home, this room encompasses a little bit of old, a little bit of new, a whole lot of DIY, and a whooooooole lot of thrifted and secondhand finds. I wouldn’t have it any other way. Now we just need a baby sleeping in the crib!

And, just for fun, let’s throw this waaaaaay back to two years ago when we first bought the house (and let’s be honest, also a year ago because we did nothing in here for a long time).

Now that’s crazy, right? So, what do you think? Do you see what I saw with the original moodboard? I am so glad you stopped by to see our baby girl’s nursery! That’s all for today, friends. Have a fabulous day!

*This post may contain affiliate links.