Browsing Tag

makeover

House Progress

Backyard Updates

Backyards are a tricky thing, aren’t they? I don’t have a green thumb, I have a giant dog who ruins grass, and I have never particularly enjoyed being “outdoors.” But, part of being a homeowner and making improvements to your home includes the outdoors as well. My toddler loves to be outside. Now that the weather is nice, he would rather be outside playing with the hose and some trucks than doing anything inside. So, I’ve been spending more time than ever in the backyard lately.

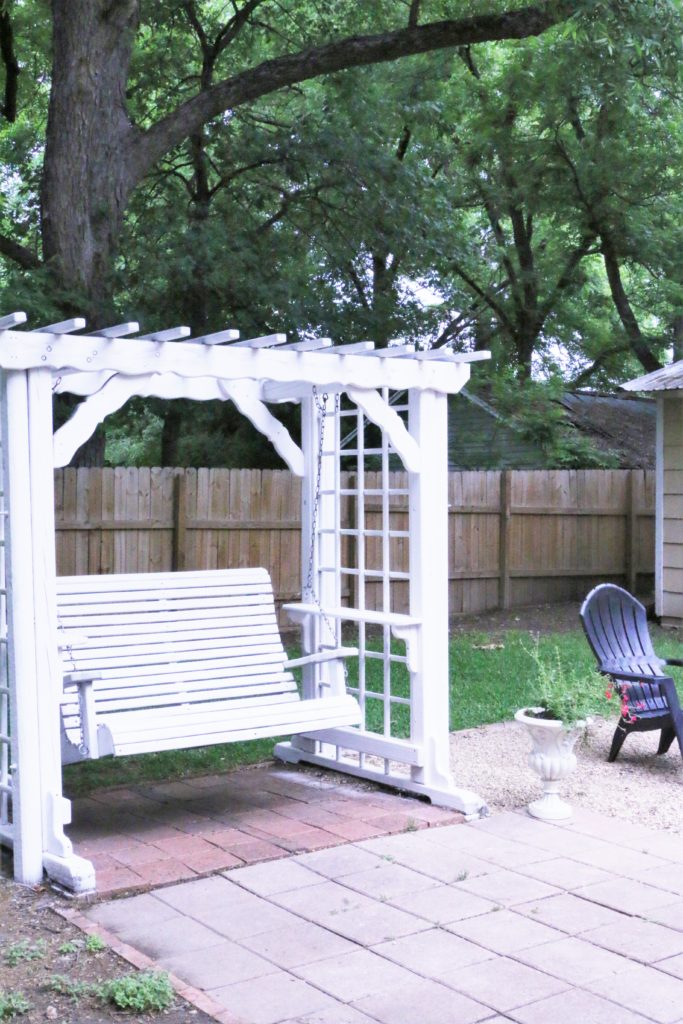
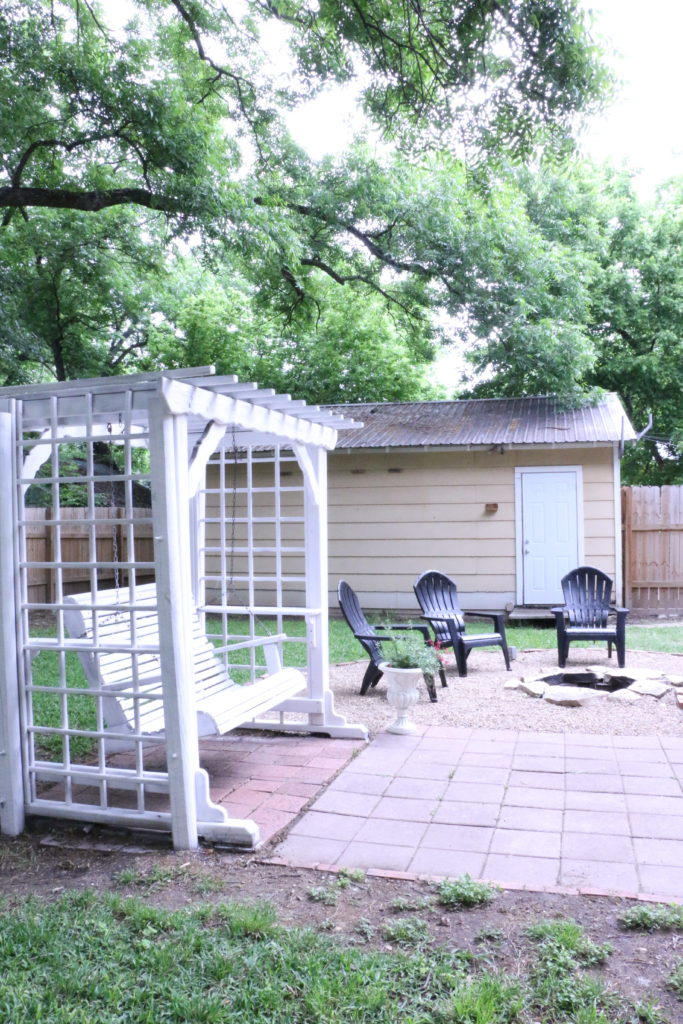
After painting the porches, I had a lot of paint left over. I accidentally overbought. Which turned out to be a blessing in disguise because I had extra paint for projects on a whim. Since spending so much time in the backyard, I’ve been able to dream up more things I wanted to do with the space, and it’s been nice to have supplies on hand. We have this swing and arbor in the backyard that came with the house. It was pretty sad looking, and we thought about taking the swing down and making some kind of grilling station, but the more we sat in it, the more we thought it should stay. I was swinging one day when I realized I had extra white paint from the porch railings, I might as well just paint the thing.

So I did. I used my paint sprayer and sprayed the whole thing.

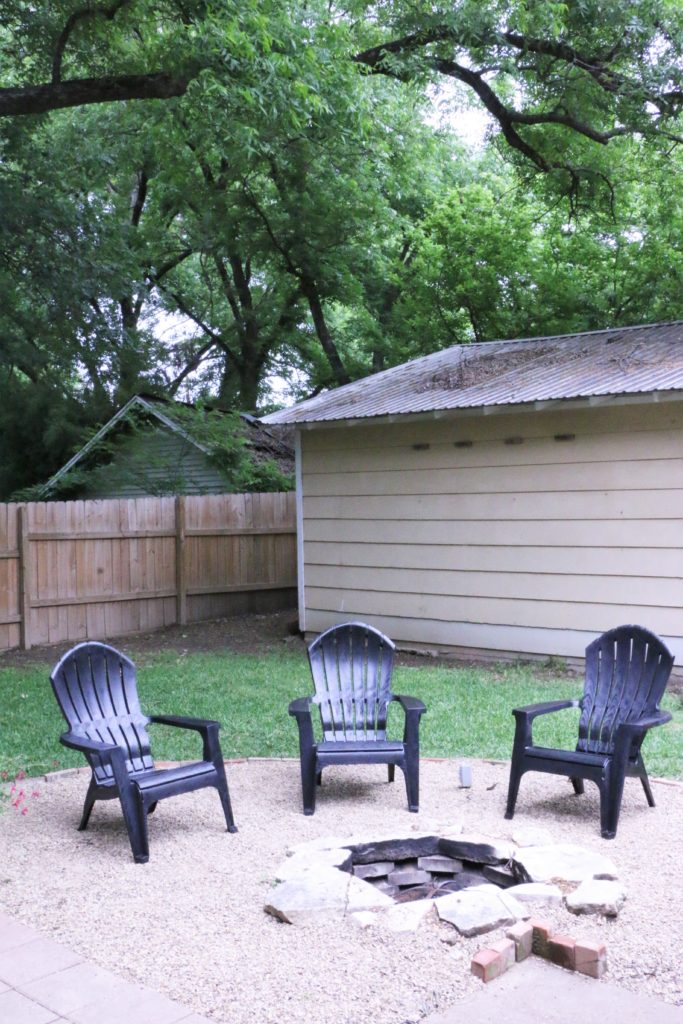
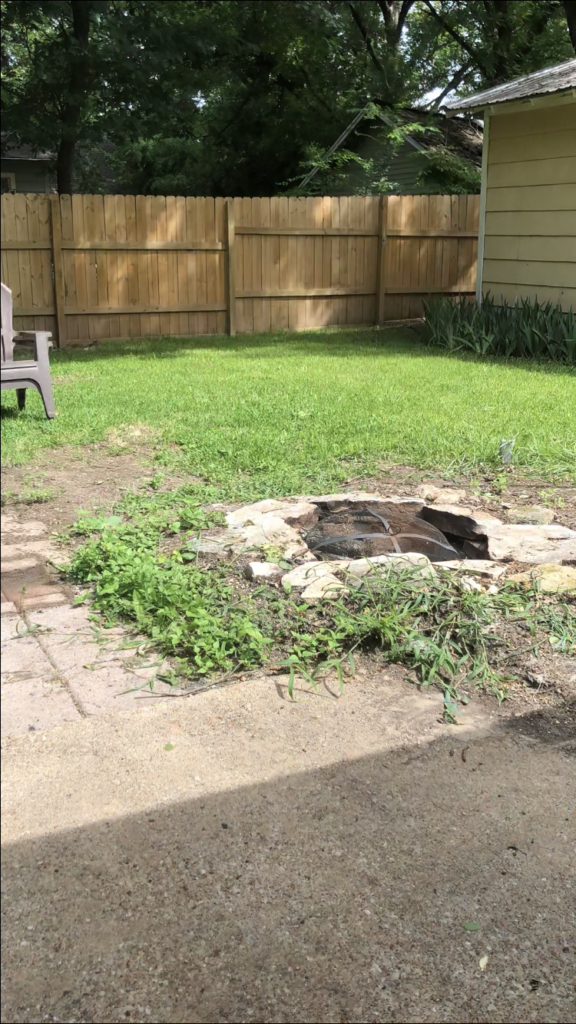
As for the pea gravel firepit to the right, you may remember my early stages of this from last summer. Well, we bought pea gravel last summer, but it wasn’t enough, so we just sat around with a half pea graveled firepit for a year. I told Ethan I wanted to finish off the firepit for Mother’s Day, so my Mother’s Day present was literally a truckload of pea gravel and a wheelbarrow. Some people get perfume, I got literal rocks.

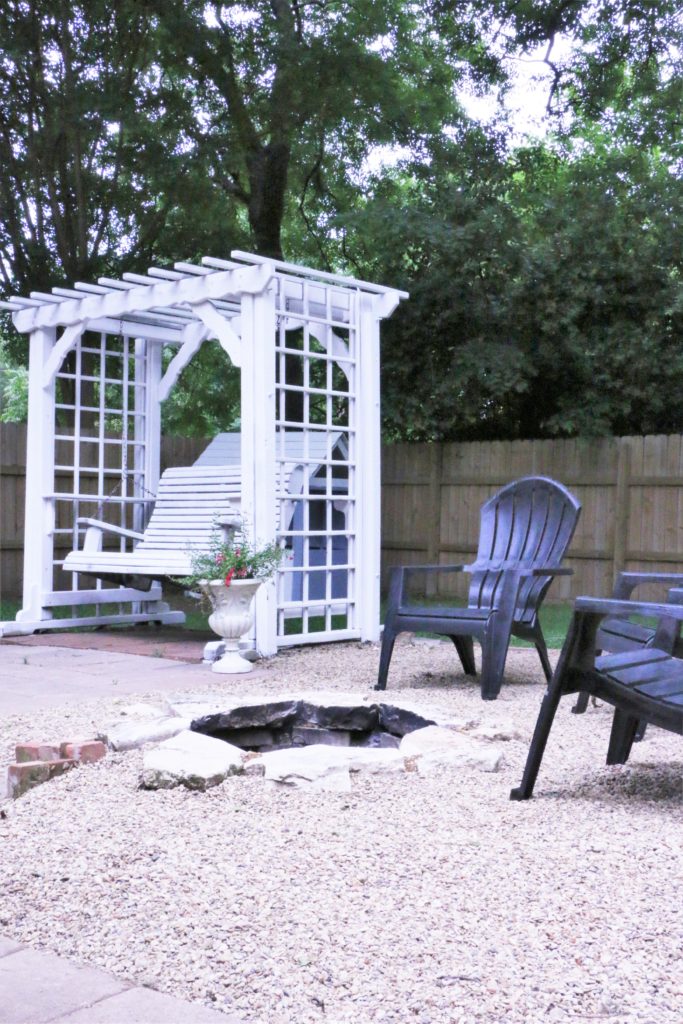
But we sat out here on Mother’s Day and made s’mores for dinner and it was wonderful. It’s already a much used space. My son is also loving the fresh pea gravel for his shovels and dump trucks.

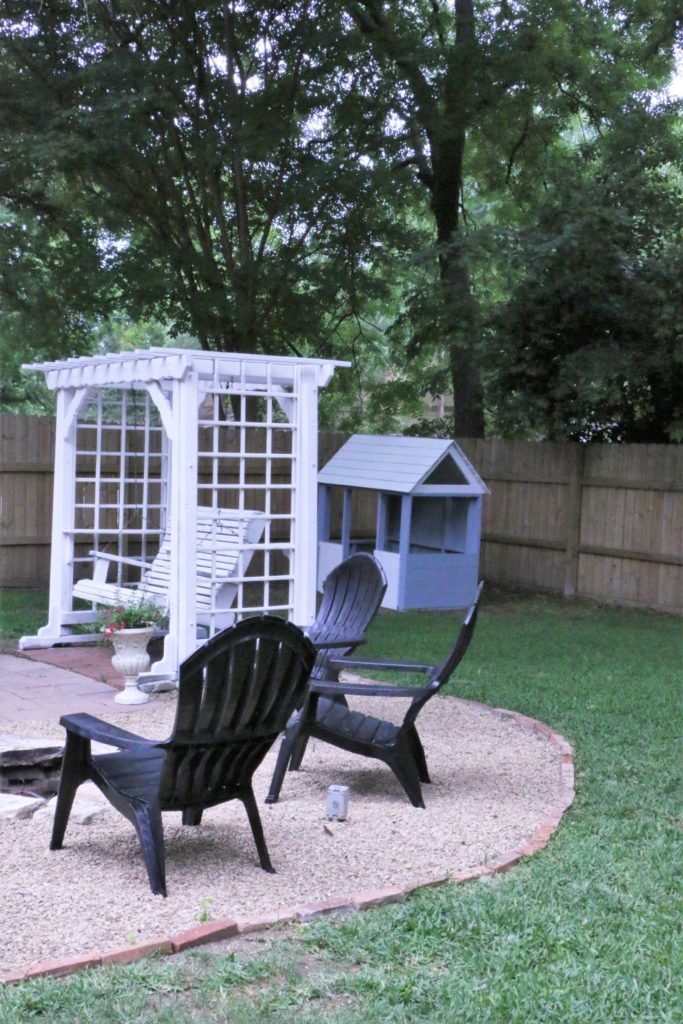
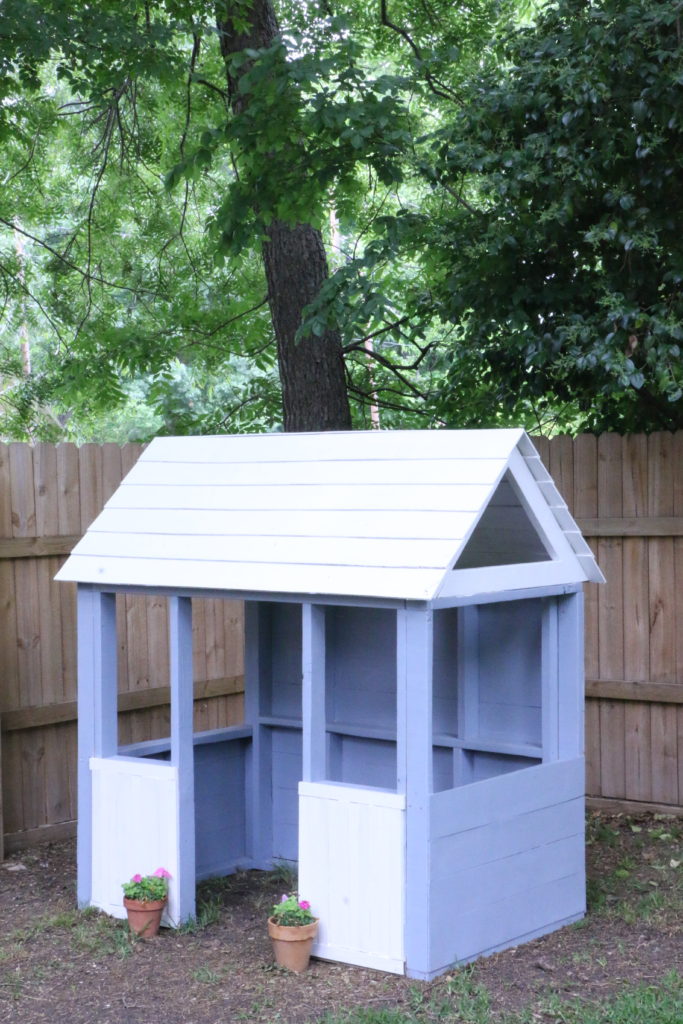
We (and by we, I totally mean I, with Ethan just along for the ride) also decided to build our son a playhouse. We used all scrapwood we had in the garage and leftover paint from the porches. We don’t have plans for this, but basically it went something like this: I looked at the piles of wood in the garage, drew a picture of what I thought could work, and Ethan built it two days later.

It is definitely a more family friendly backyard now, and we enjoy spending time out here so much now that things are fresher and nicer to look at. 🙂 Now we just have to do something about the dead grass…

My favorite thing about this yard is what it looked like just a year ago. Everything we’ve done in the last two months has been one project leading into another as far as supplies go, and I love the way one thing inspired another.

I wish I had photos of when we first bought the house two summers ago…there was no fence, there were awful metal garden bed edgers that were just full of weeds, there was a broken chimnea in the middle of the yard. It was in rough shape. I’ve heard it said that with outdoor spaces, you just do a little more each year, and soon enough you have a space you can really be proud of. I have so many more plans for next year already. I’m already focusing on learning more about gardening and have big, green plans. Maybe next year! Well, that’s all for today, friends. Have a fabulous day!

Furniture Makeover, House Progress

Plans for the Playroom/Office + A Furniture Makeover

About five months ago, we moved our bedroom upstairs with the intention of turning the downstairs room into a playroom/office. It’s been pretty slow going. Drywall removal, wallpaper removal, and nail-in-shiplap removal has taken some time, and it’s not really fun work that keeps you motivated to do more.

But with our impending nursery project coming up, and the general house re-shuffling that comes with preparing for a new baby, I feel inclined to get moving on this playroom. I bought a set of chairs for five dollars a while back from a thrift store, and I knew they would be perfect in our playroom when we eventually got around to finishing it. The chairs didn’t come with a table though, so I searched Facebook Marketplace until I found one for ten dollars. So for my total price, I was at fifteen dollars. I knew however, that it was going to need a lot of work so I just stuck them in my garage and ignored them for a while.

Because of our current social distancing situation, I wanted to paint the table and chairs without going to the store to purchase anything. Luckily for me, I have a hoard of supplies in my garage, so I found a leftover sample we had used to test colors and got to work. The table was in the roughest shape. It needed to be sanded, stripped a bit, wood filled, glued back together, and clamped overnight. The painting was actually the easy part!

It’s not 100% done yet, but someone is already enjoying it!

So now that the table is almost done, I figured it would be time to work on a mood board for the space. I always find it helpful to visualize everything together in a space when I’m planning a room. I used everything I already had that I knew would go in the space, and then worked from there. So here’s what I came up with:

Obviously my table and chairs are a second hand DIY version, but I wanted to visualize what it might look like, so I included something similar. Here are a few similar options that I love: option 1, option 2, or option 3.

Our couch is the Sven Sofa from Article in the Grass Green color. It’s currently in our living room while we work on the playroom, and it’s the perfect sofa for littles. The long bench cushion comes off, and our son loves taking it down and climbing all over it.

As far as wall colors, I’m not 100% certain on what I want in the space, but I think I want to go in a beige direction. Gasp! The color on the background is Benjamin Moore Athena, but it’s just an example for now. Once we can safely leave our house again, I’ll get around to testing some actual colors.

I think the beige wall color will look really good with this rug, which I totally have my eye on. I think it’ll be just the right amount of fun for a playroom, but also the right amount of sophistication for an office.

The desk is a picture of our current desk, as we plan on putting our desktop computer in the playroom as well. It’s painted in Behr’s America’s Cup Navy. I need some new hardware, as you can see. 🙂

Other ideas for the room include built in shelves around the french doors for toy storage, and large framed fabric panels to tie the blue and green furniture together. Although I have some ideas in my mind, I just included some inspiration photos, not necessarily the exact thing I will end up going with. If you’re wondering, the fabric is here, and the built in photo I used for inspiration comes from this blog.

And just for good measure, I included some photos of actual toys that we have. You know, to make it more realistic. Most of our son’s toys come from IKEA, because they have the cutest toys.

So that’s the plan! I’m not exactly sure when we will get to finish this because of social isolation and all, but we definitely are going to get started on getting the last of the wallpaper residue off the walls. Baby steps. What projects are you planning during this time?

That’s all for today, friends. Have a fabulous day!

*This post may contain affiliate links.

House Progress

The Power of Paint (A Phase One Bathroom Makeover)

Hi there! Thanks so much for stopping by today! Boy oh boy, do I have a before and after for you today! First, let’s get the backstory. We bought our home from a realtor who had purchased the house at auction following a foreclosure. That realtor listed it for sale, but went back and forth about whether he wanted to flip it himself. When we bought it, there were a few random half hearted attempts at restoration work. One random door frame stripped of paint, carpeting partially pulled up, wallpaper torn off in just a small section of a room. That was the case in the room I’m going to show you guys today.

So the upstairs of our house has three bedrooms and a full bathroom. When we did our first big amount of work in the months before we moved in, the only room we touched upstairs was the first bedroom for our son, leaving the bathroom and two bedrooms untouched. The house was built in 1895 with no indoor plumbing, and therefore no bathrooms. I’m not sure at what point it was added, but at sometime, a bathroom was poorly shoved into what would have once been a spacious hallway between the three upstairs bedrooms. This leaves us a bit perplexed as to what to even do with the bathroom, because the floorplan of the second story is a bit wonky. I’d love to someday see that turned back into a hallway, but alas, we need more than the outhouse that was originally here. Knowing that this bathroom was going to involve some structural changes, and that our needs in the house/bedrooms may change as we have more kids etc., the upstairs bathroom was literally at the bottom of the priority list. Out of sight, out of mind.

Until, that is, we moved the master bedroom upstairs. Then all of a sudden this upstairs bathroom was a little more on the forefront of my mind. I lovingly nicknamed this room “the dungeon bathroom,” because I was so scared to use it. Everything was fully functional, but the carpet (yep, this thing had carpet) that had been in there had been waterlogged and soaked through the subfloor. My brother actually pulled up the carpet and old subfloor and laid down new plywood. And that’s the extent of work we had done in the dungeon bathroom. But now our bedroom was right next to it, and it was a pain to go all the way down the creaky stairs right outside of our son’s room in the event that I needed to go to the restroom in the middle of the night. So I knew I needed to do something. But again, of all the “big projects” we have planned for the next couple years, this one is quite literally the last one on the list. So I decided to give it a little cosmetic facelift, a Phase One makeover to tide us over until we would eventually remodel this bathroom. So, without further ado, here is the dungeon bathroom.

For days, I worked during naptime and after my son went to bed to scrape wallpaper. Most of the wall had two layers of paper, but in some areas, I found four different papers laid on top of each other. It was grueling. I used a handheld steamer and a wallpaper scraper and would work in tiny six inch square sections. It took a long time, and my arms arched.

As I scraped the wallpaper, I found that some of the drywall had been damaged, and had simply been disguised by the paper. That meant we had to do some patch work on the walls. I had to sand it all down to get the gunky wallpaper paste completely gone. All of this was before I ever started painting!

I originally planned on only using products that I had on hand to do this bathroom, but I ended up purchasing the wall color because I didn’t have as much paint in the garage as I thought I did. The color is Behr French Colony, and I think it’s a lovely blue-grey.

A shower curtain over the shower stall helps disguise that whole lotta ugly.

I also painted the plywood subfloor using some paint I had on hand. The floor is painted with Behr Tanglewood.

As you can see, I didn’t change any of the fixtures, the only thing I changed was paint. Isn’t that crazy?! Paint is so powerful!

Because this room is directly next to our bedroom that’s painted such a bold color, I was really concerned about how these two colors would look when coming up the stairs and they were both visible. I think they go complement each other nicely. (Bedroom is Behr Thermal.)

The 1920’s light fixtures stayed, and I think they look so much more elegant now without the dated wallpaper.

All of this to say this: just don’t wait. I would have loathed this bathroom another two to three years until it finally was time to gut it. Instead, I can enjoy the space, and it doesn’t give me the heebee-jeebees every time I go in there! I think there is power in a can of paint, and so much power in doing a “Phase One” project, something that is just enough to tide you over while you’re waiting for the big project.

Before we go, here’s one more before and after from the same angle. I can’t even believe the only difference is paint.

Alright guys, that’s all for today. Have a fabulous day!