Browsing Tag

home decor

DIY Projects

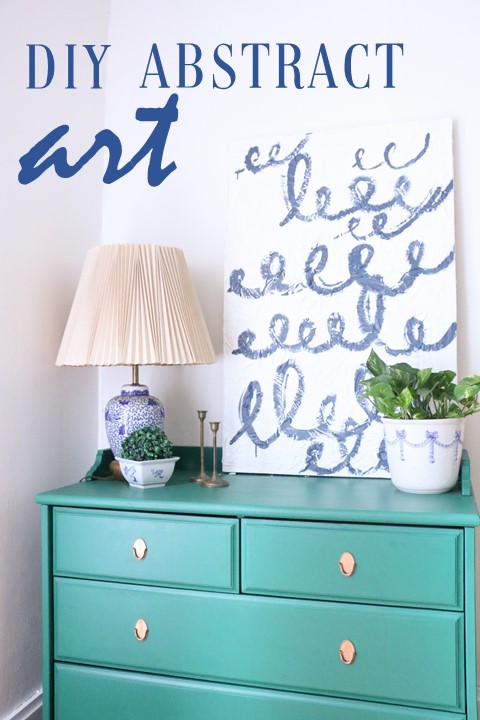
DIY Abstract Art

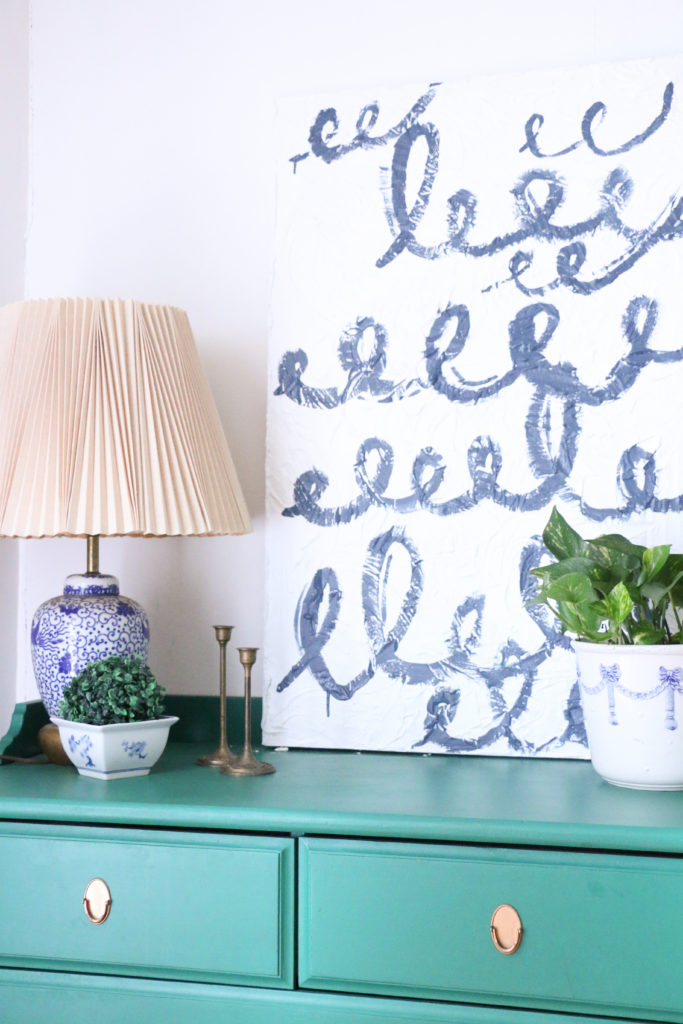
Last week I shared a post with several ideas for free and low cost art (you can read that here). This week, I’ve been super bored around the house with no big projects that I’ve been working on, and so I was itching to do something. I had been inspired by some abstract paintings I’d seen online, and figured I could make something similar with items I had in my garage. File this under: free projects. (If you don’t have a garage full of leftover renovation junk, this might not be free for you. But still super low cost! So, let’s get started!

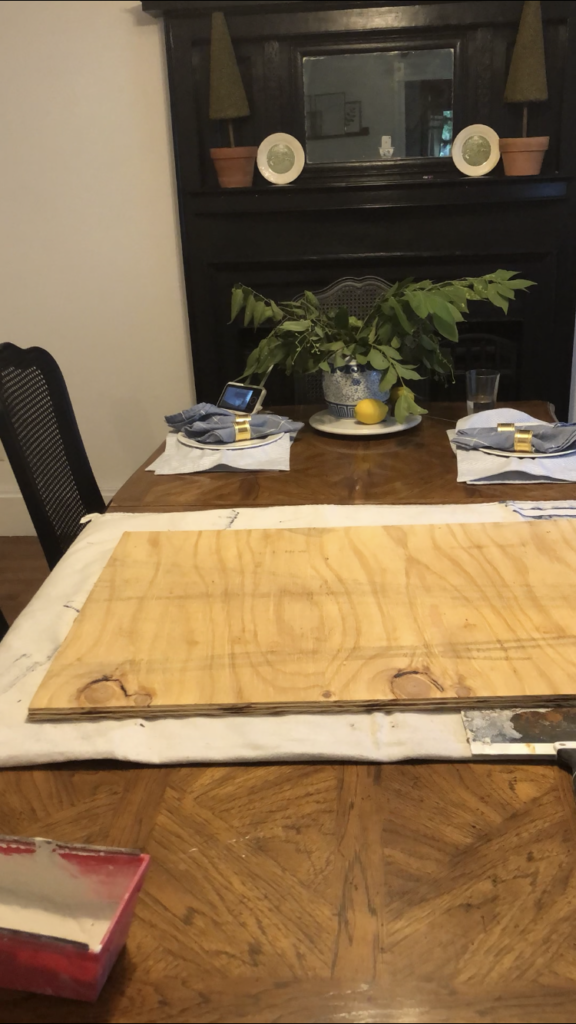
The first thing I did was grab some plywood from the garage. Mine is smooth, but pressed wood would work as well. I used a board that was 24×36 inches, but any size will work! I also grabbed some drywall mud, a drywall mud pan, and a putty knife.

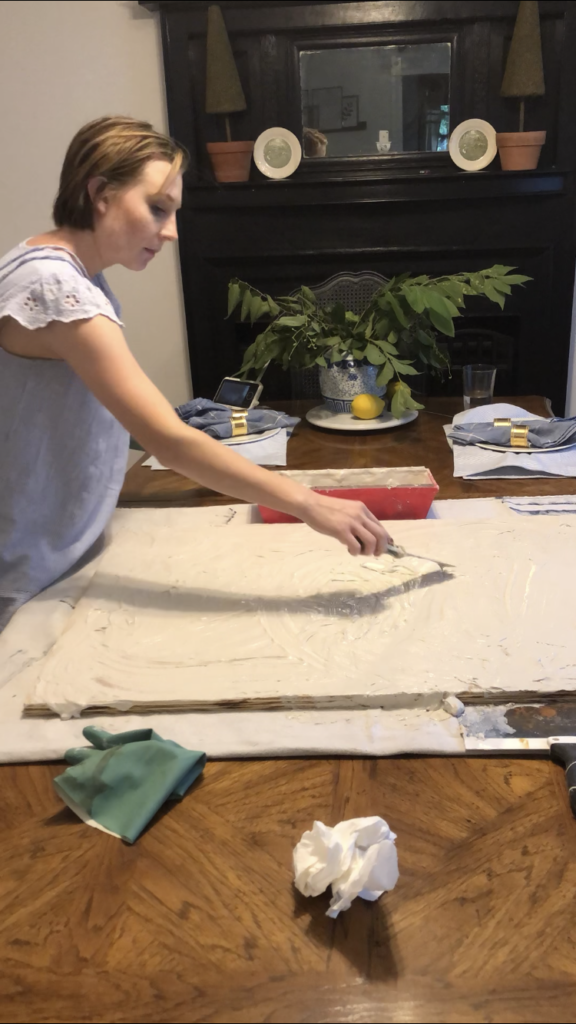
These photos are screenshots from a video I filmed at 8 pm while starting this project, so probably not the best quality. But bear with me. I started out scooping the drywall mud slowly onto the board, but quickly realized it would be easier to just pour a bunch on the board directly and move it around with my (gloved) hands.

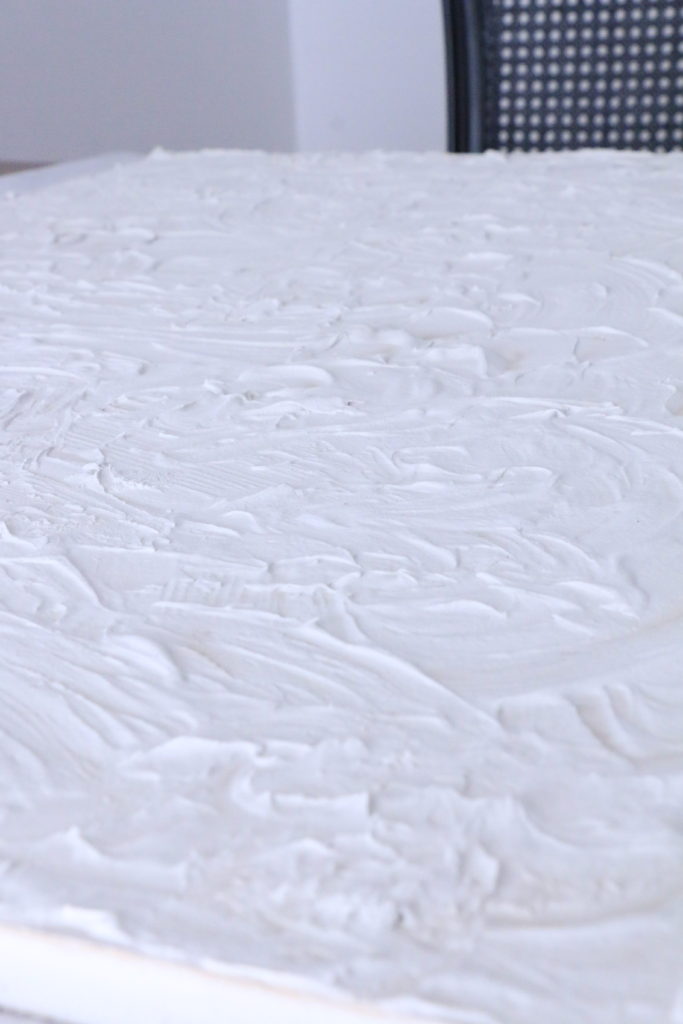
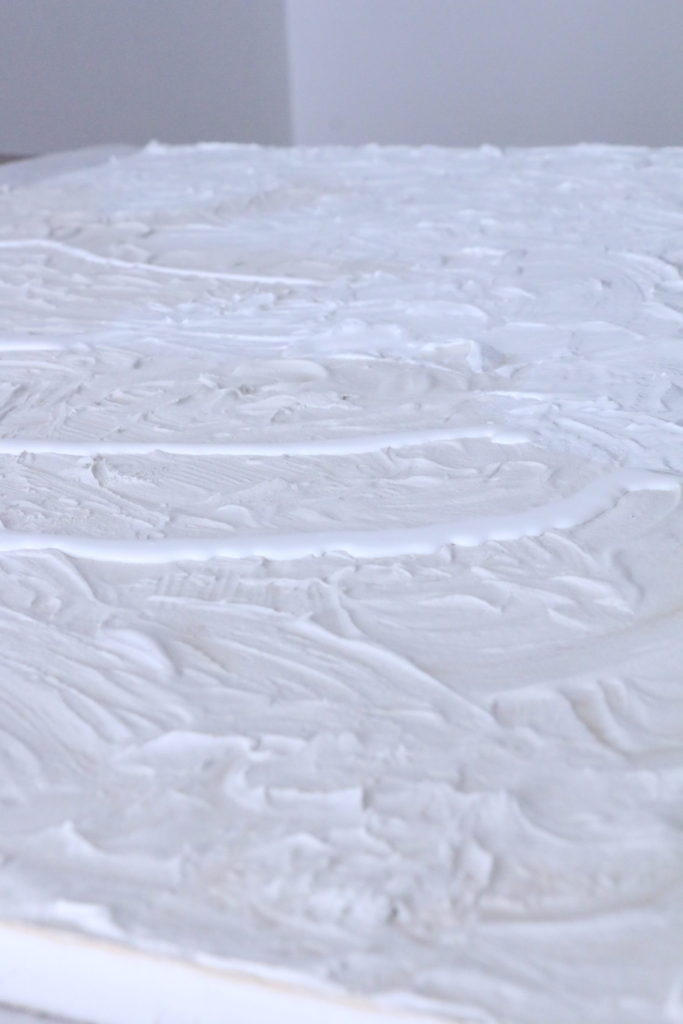
Then, using both a putty knife, and my hand, I just gobbed it all around until the whole board was covered, and there was textured look to the entire thing. The goal was to make it look like super textured. I let it dry overnight, and when I woke up the next morning, it looked like this:

Exactly what I was going for! Then, I poured white paint over the entire thing and brushed it over the mud texture.

This step isn’t technically necessary, but I wanted it to be a brighter white. I used Behr Ultra Pure White, which is just what the color is with no tint in the paint can. You could also choose to do a different color here completely, depending on what you wanted your background to be.

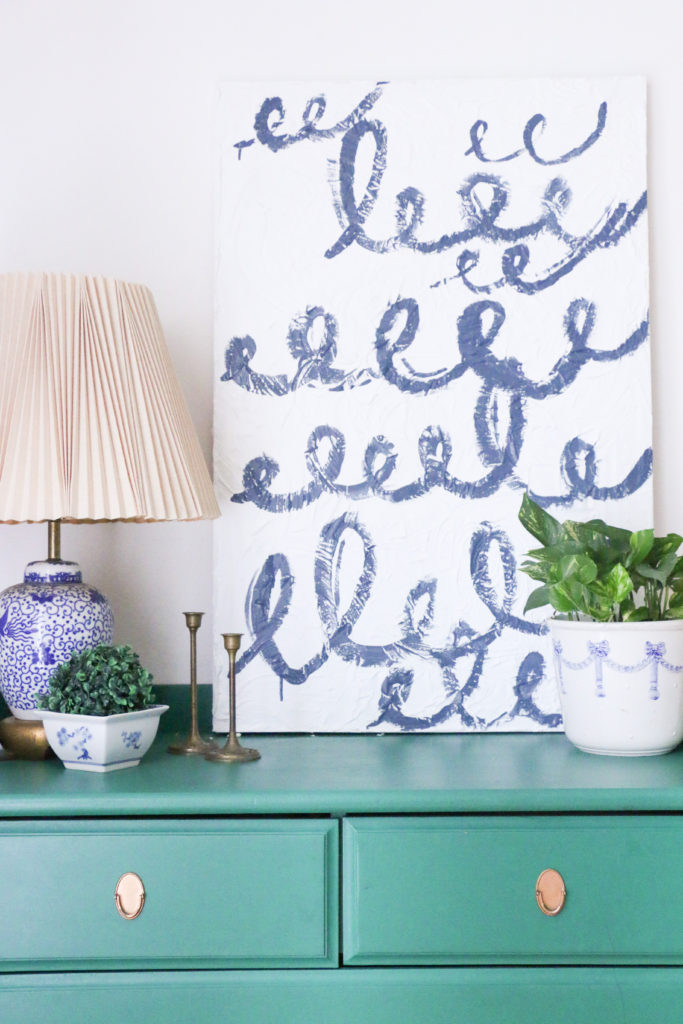
After the white was dry, I did the final step. Unfortunately, I didn’t get any pictures of this step, because I was being climbed on by my toddler and forgot to take any photos! However, this is the fun/easy part. I just took a small craft brush, some blue paint I had on hand (Glidden America’s Cup Navy) and painted on some loopy squiggly lines. I didn’t really have a plan, I just went for it. You could do this in any color with any shape/line.

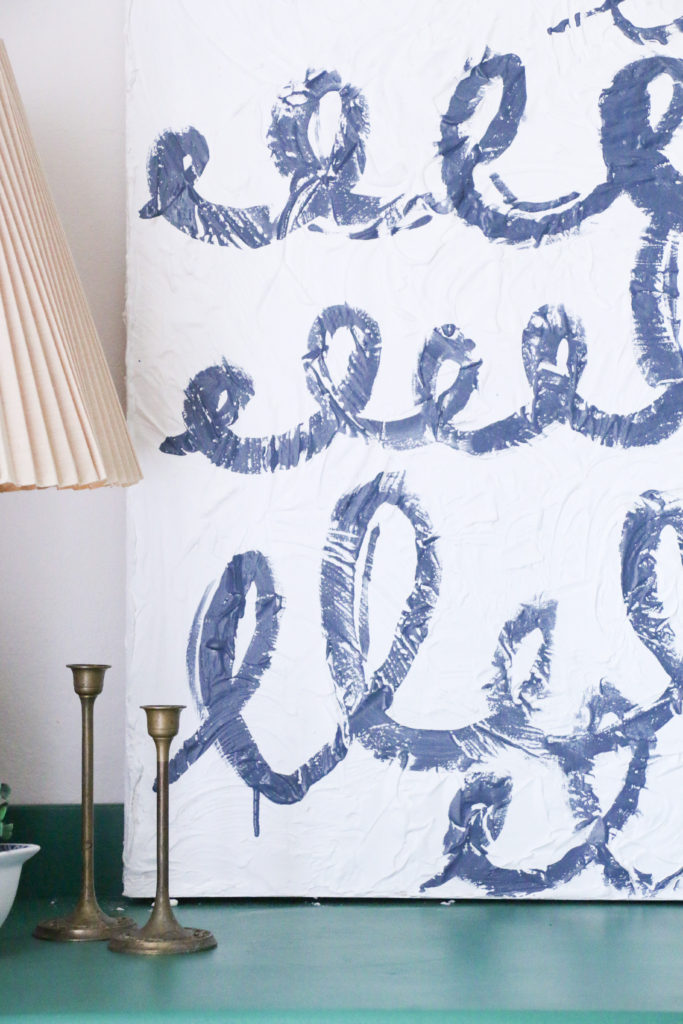
Some of the paint ended up dripping down, which I actually love. The messier the better with this!

You can see in some areas I went a little thicker with the paint, and in others I let the texture show through.

Overall, excluding dry time, this project took probably 45 minutes of active work. And now I have a larger piece of “art” that I didn’t have to pay for. And I absolutely love the way it turned out! You know that blue is totally my color, and so I think it works perfectly in the dining room where I have lots of blue and white going on.

What do you think? Would you try this? Let me know if you do! Well, that’s all for today, friends. Have a fabulous day!

*This post may contain affiliate links.

House Progress

The Power of Paint (A Phase One Bathroom Makeover)

Hi there! Thanks so much for stopping by today! Boy oh boy, do I have a before and after for you today! First, let’s get the backstory. We bought our home from a realtor who had purchased the house at auction following a foreclosure. That realtor listed it for sale, but went back and forth about whether he wanted to flip it himself. When we bought it, there were a few random half hearted attempts at restoration work. One random door frame stripped of paint, carpeting partially pulled up, wallpaper torn off in just a small section of a room. That was the case in the room I’m going to show you guys today.

So the upstairs of our house has three bedrooms and a full bathroom. When we did our first big amount of work in the months before we moved in, the only room we touched upstairs was the first bedroom for our son, leaving the bathroom and two bedrooms untouched. The house was built in 1895 with no indoor plumbing, and therefore no bathrooms. I’m not sure at what point it was added, but at sometime, a bathroom was poorly shoved into what would have once been a spacious hallway between the three upstairs bedrooms. This leaves us a bit perplexed as to what to even do with the bathroom, because the floorplan of the second story is a bit wonky. I’d love to someday see that turned back into a hallway, but alas, we need more than the outhouse that was originally here. Knowing that this bathroom was going to involve some structural changes, and that our needs in the house/bedrooms may change as we have more kids etc., the upstairs bathroom was literally at the bottom of the priority list. Out of sight, out of mind.

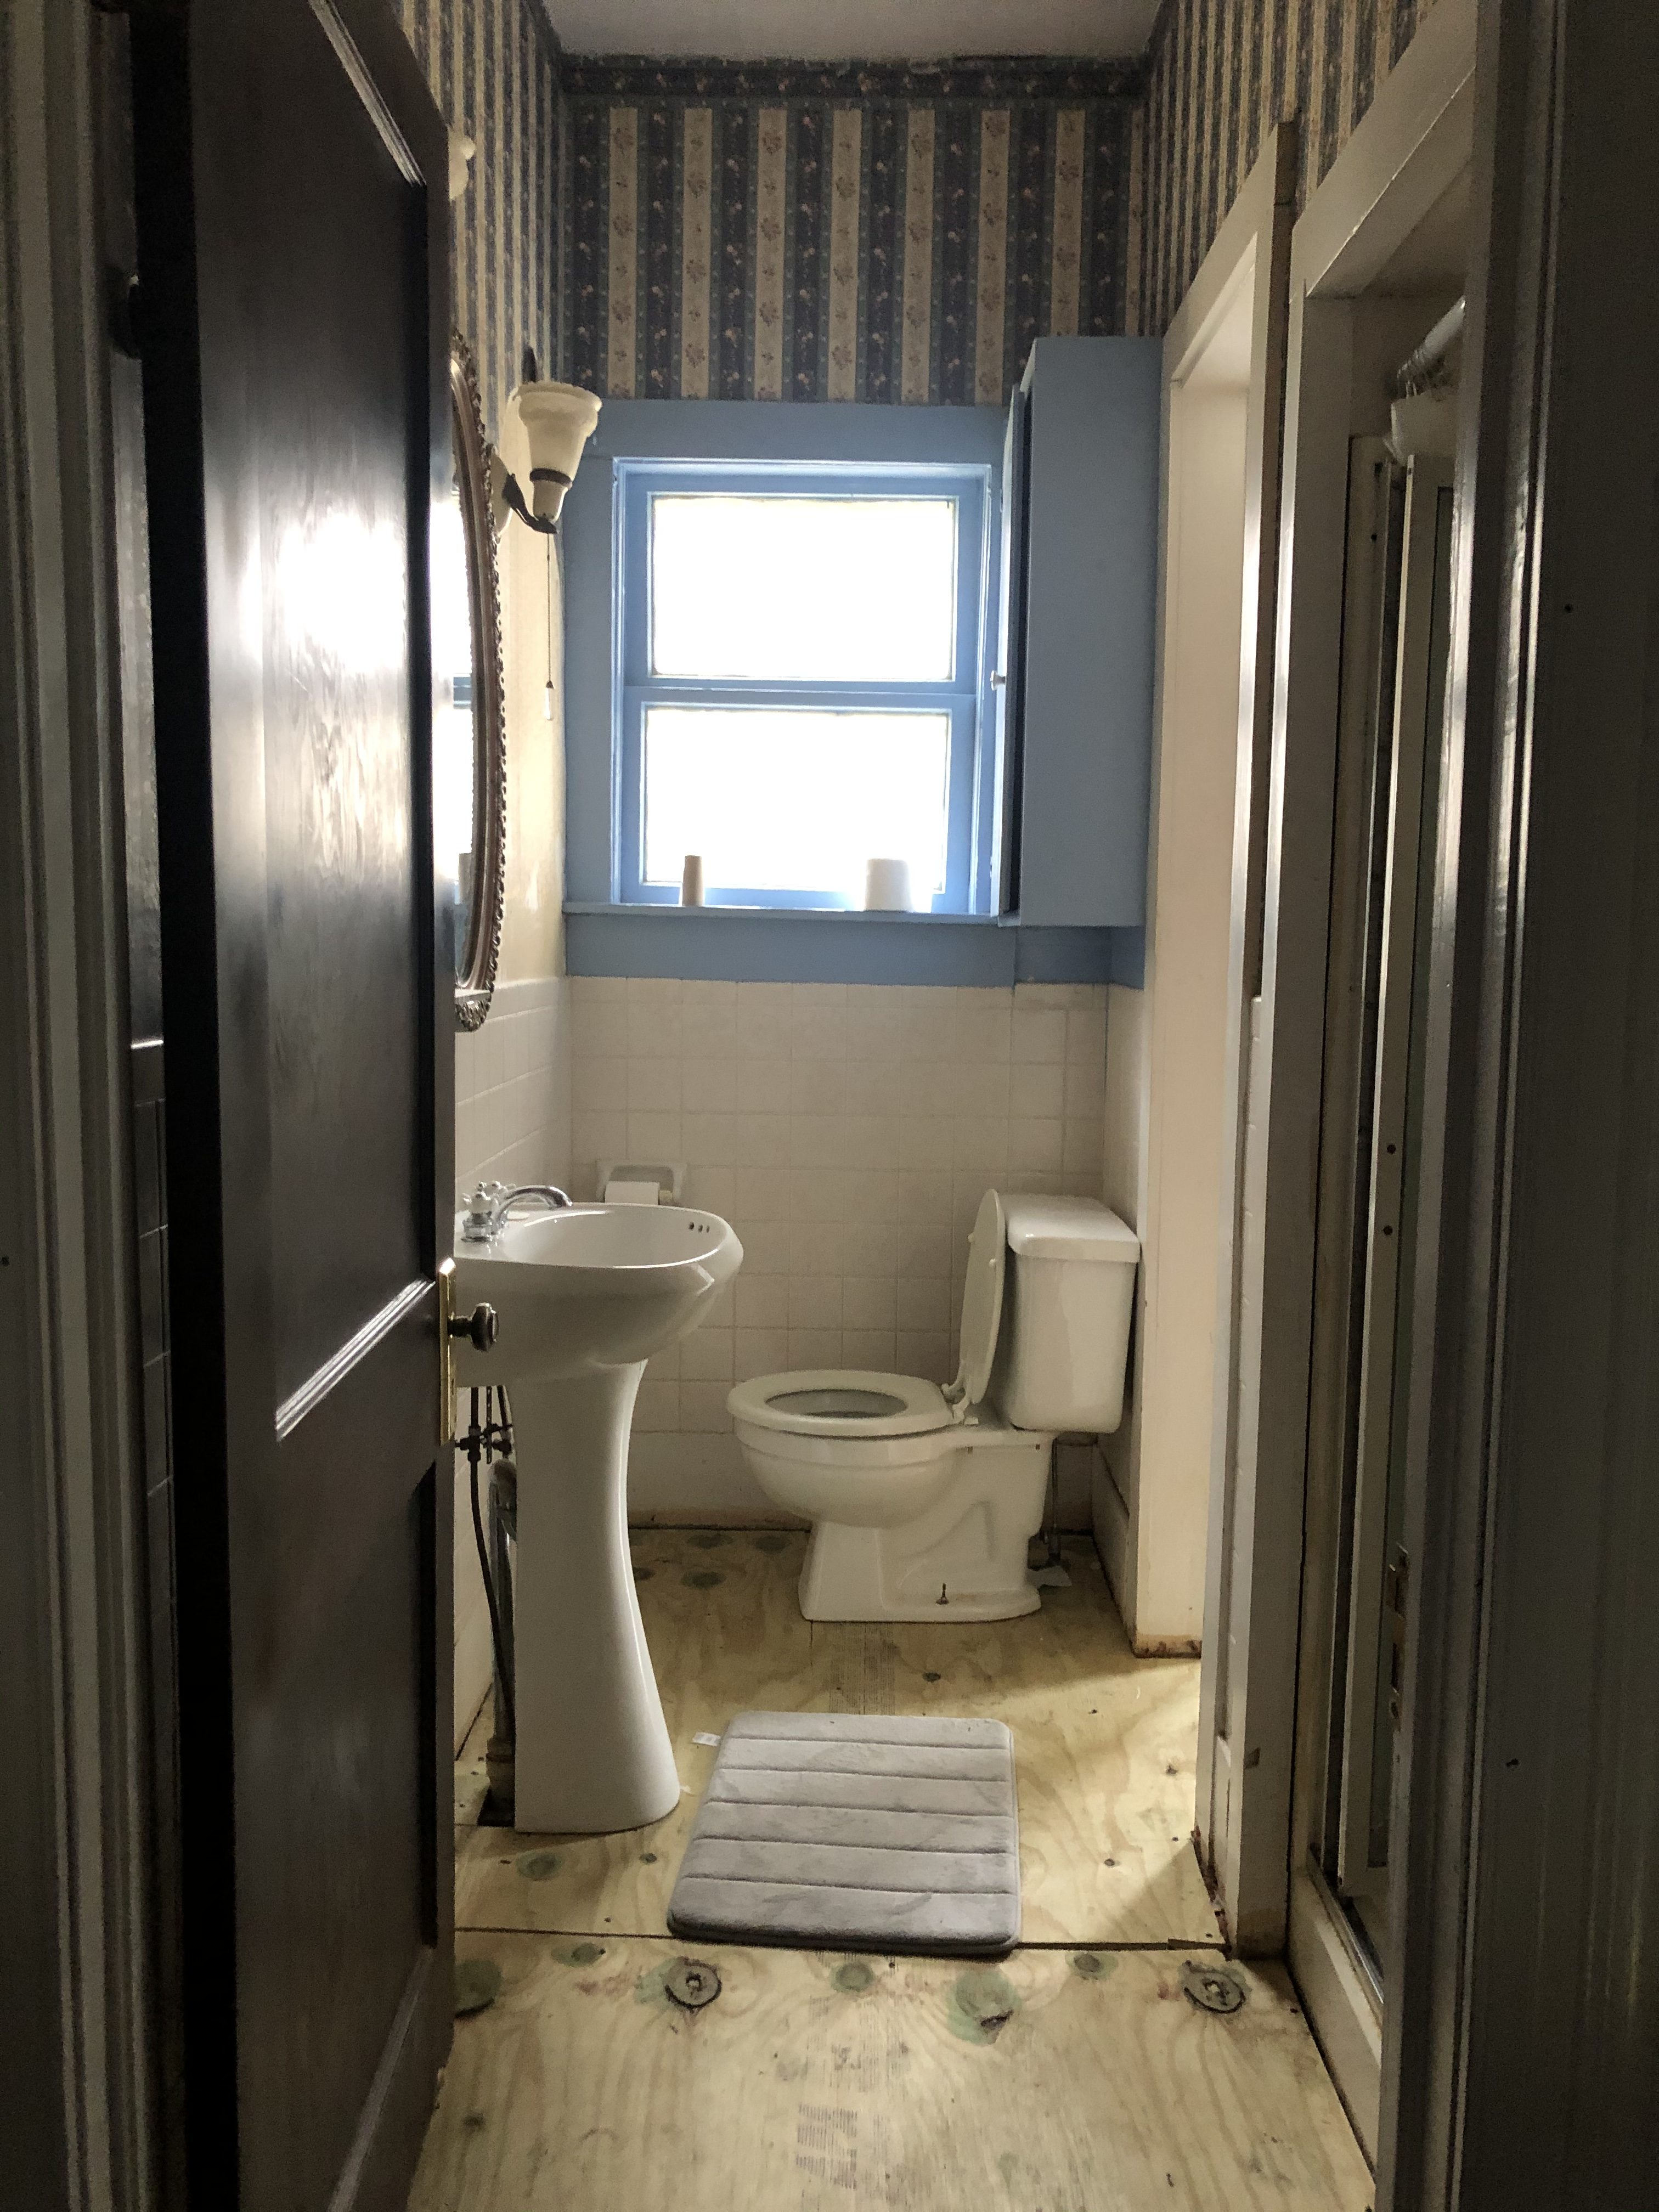
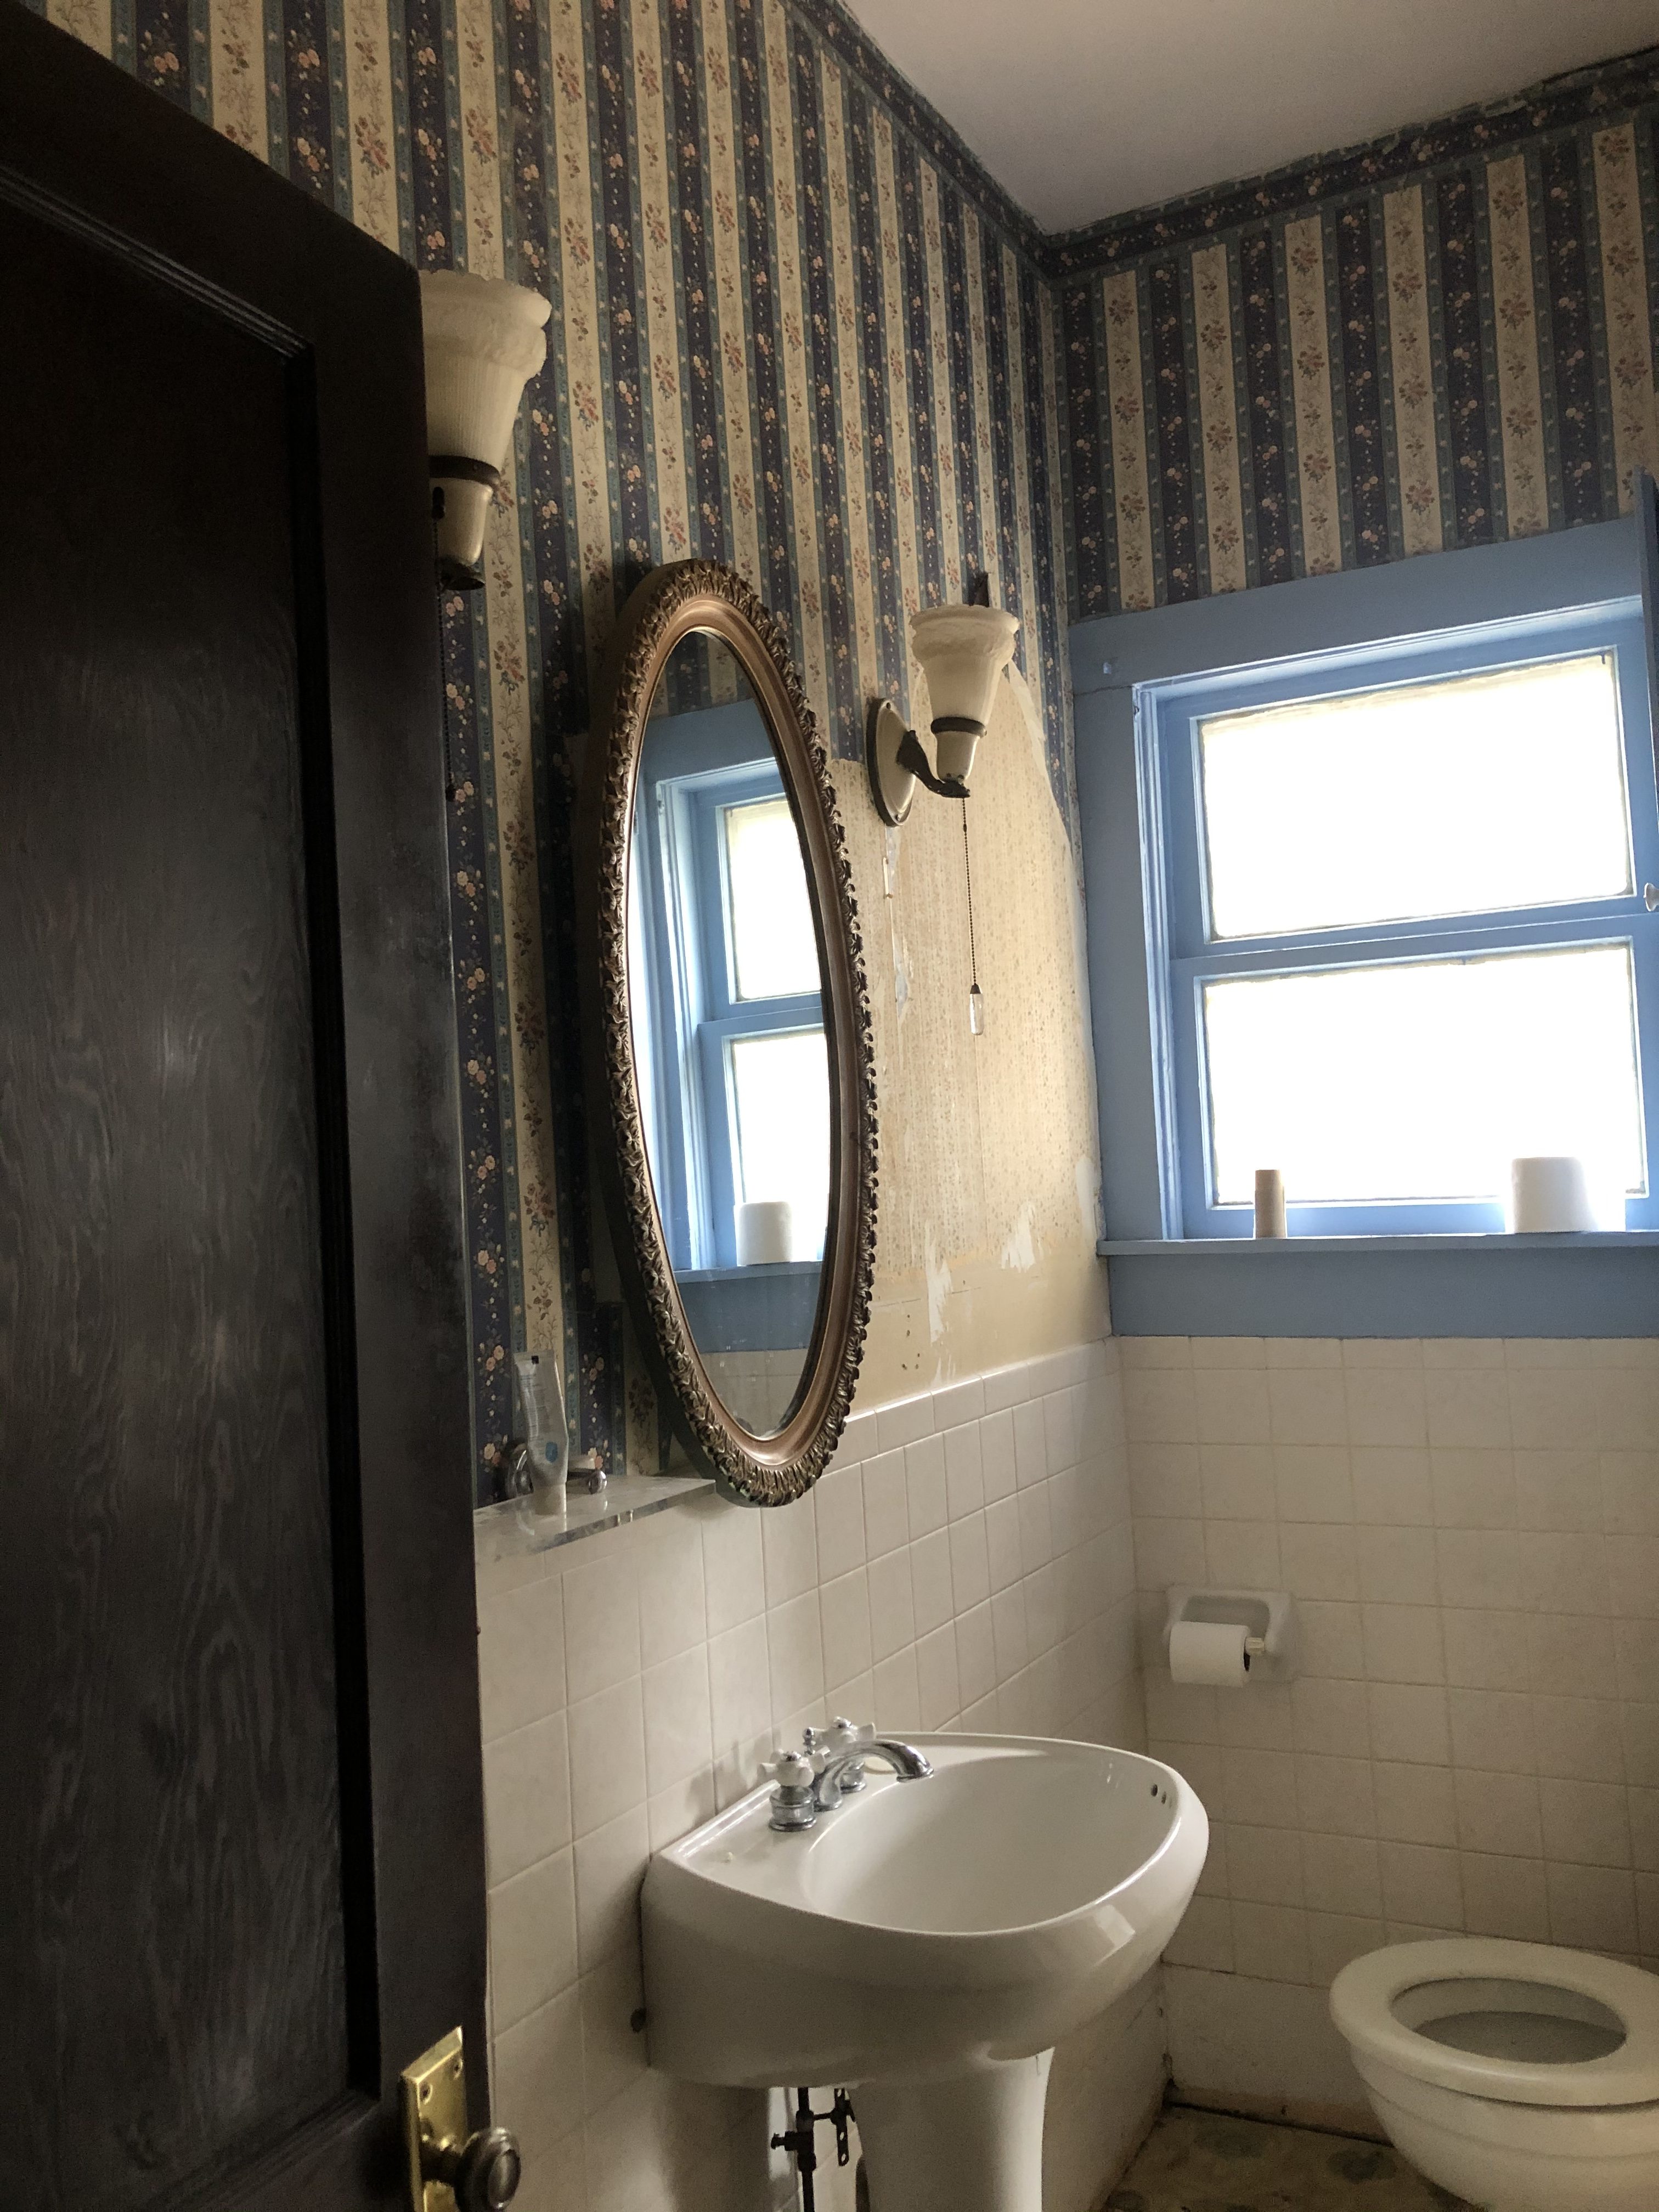
Until, that is, we moved the master bedroom upstairs. Then all of a sudden this upstairs bathroom was a little more on the forefront of my mind. I lovingly nicknamed this room “the dungeon bathroom,” because I was so scared to use it. Everything was fully functional, but the carpet (yep, this thing had carpet) that had been in there had been waterlogged and soaked through the subfloor. My brother actually pulled up the carpet and old subfloor and laid down new plywood. And that’s the extent of work we had done in the dungeon bathroom. But now our bedroom was right next to it, and it was a pain to go all the way down the creaky stairs right outside of our son’s room in the event that I needed to go to the restroom in the middle of the night. So I knew I needed to do something. But again, of all the “big projects” we have planned for the next couple years, this one is quite literally the last one on the list. So I decided to give it a little cosmetic facelift, a Phase One makeover to tide us over until we would eventually remodel this bathroom. So, without further ado, here is the dungeon bathroom.

For days, I worked during naptime and after my son went to bed to scrape wallpaper. Most of the wall had two layers of paper, but in some areas, I found four different papers laid on top of each other. It was grueling. I used a handheld steamer and a wallpaper scraper and would work in tiny six inch square sections. It took a long time, and my arms arched.

As I scraped the wallpaper, I found that some of the drywall had been damaged, and had simply been disguised by the paper. That meant we had to do some patch work on the walls. I had to sand it all down to get the gunky wallpaper paste completely gone. All of this was before I ever started painting!

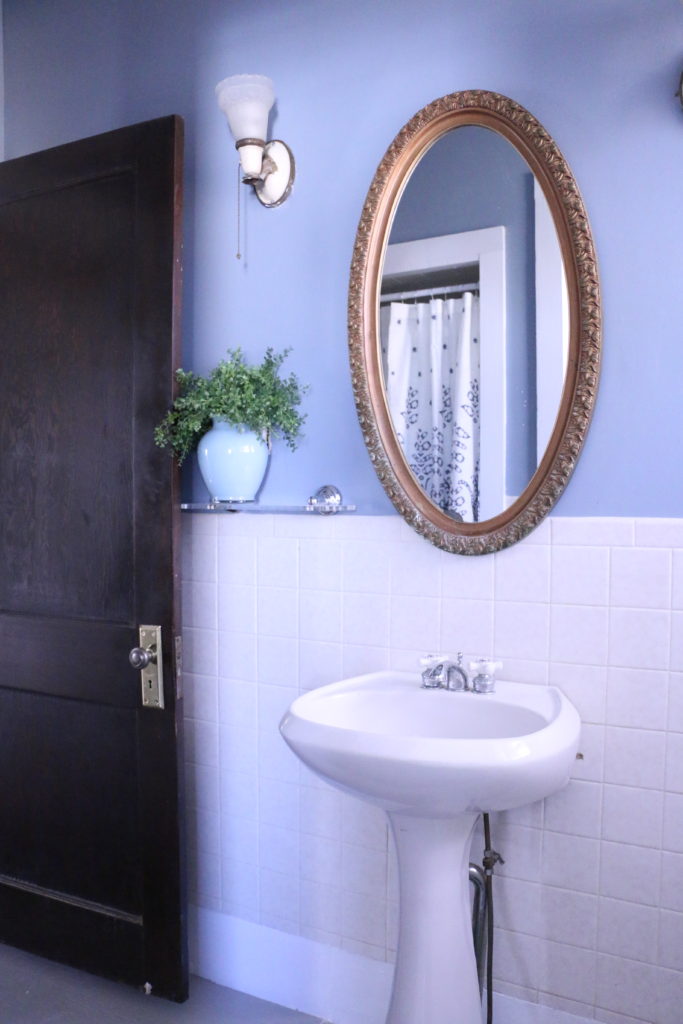
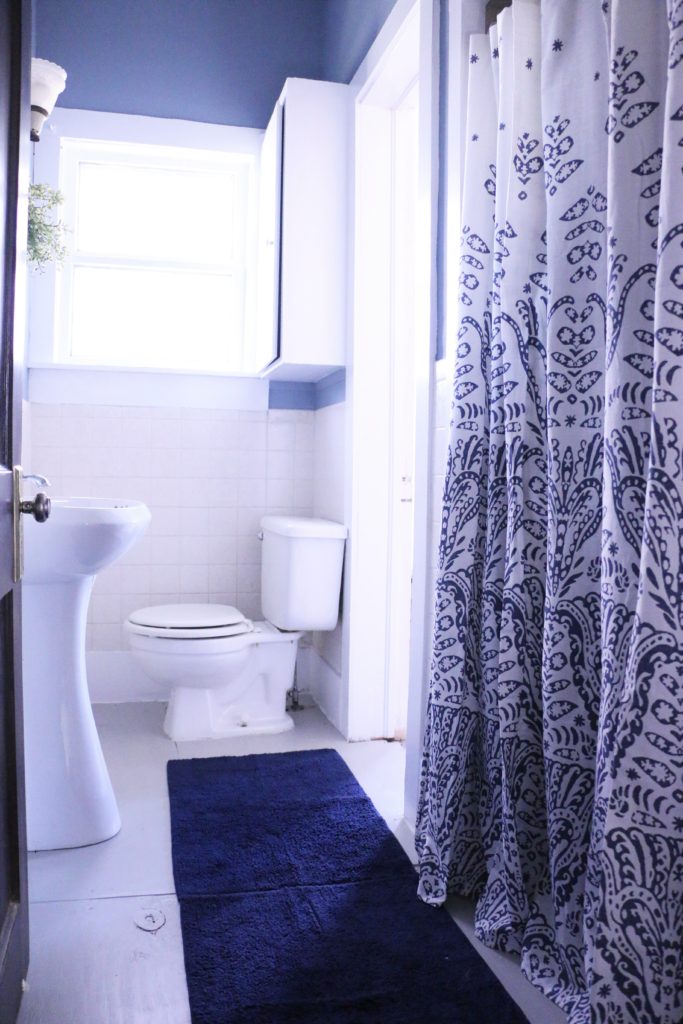
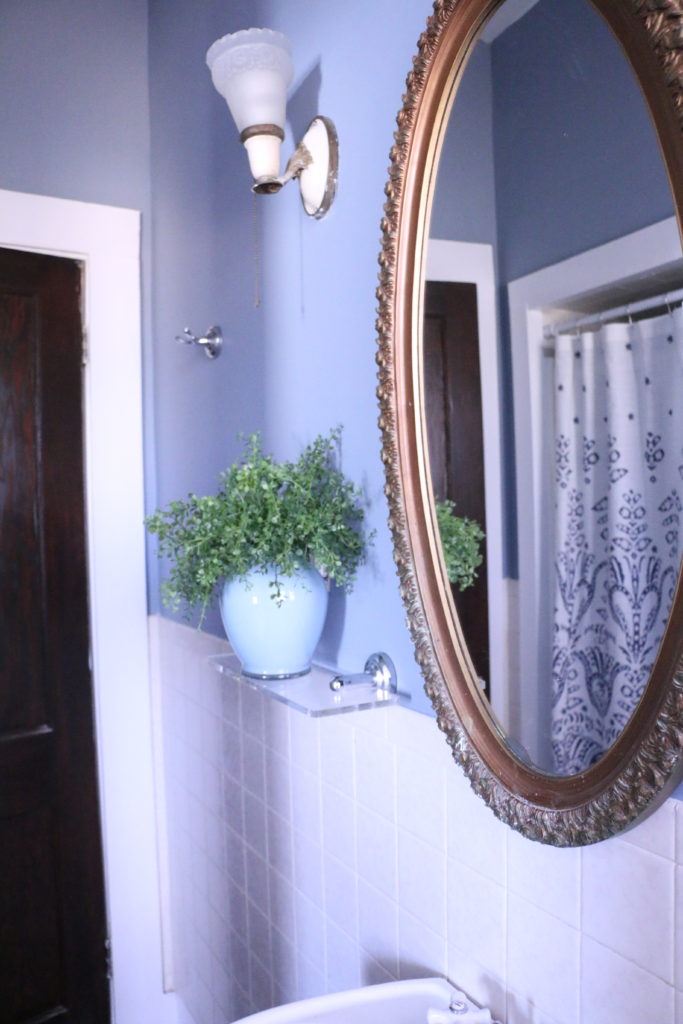
I originally planned on only using products that I had on hand to do this bathroom, but I ended up purchasing the wall color because I didn’t have as much paint in the garage as I thought I did. The color is Behr French Colony, and I think it’s a lovely blue-grey.

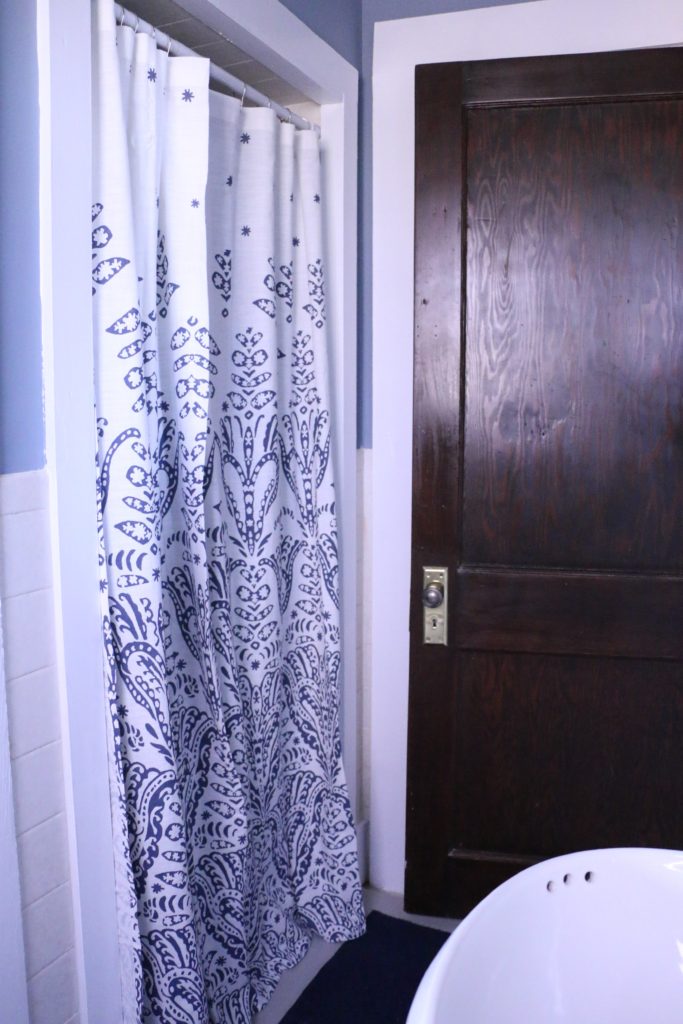
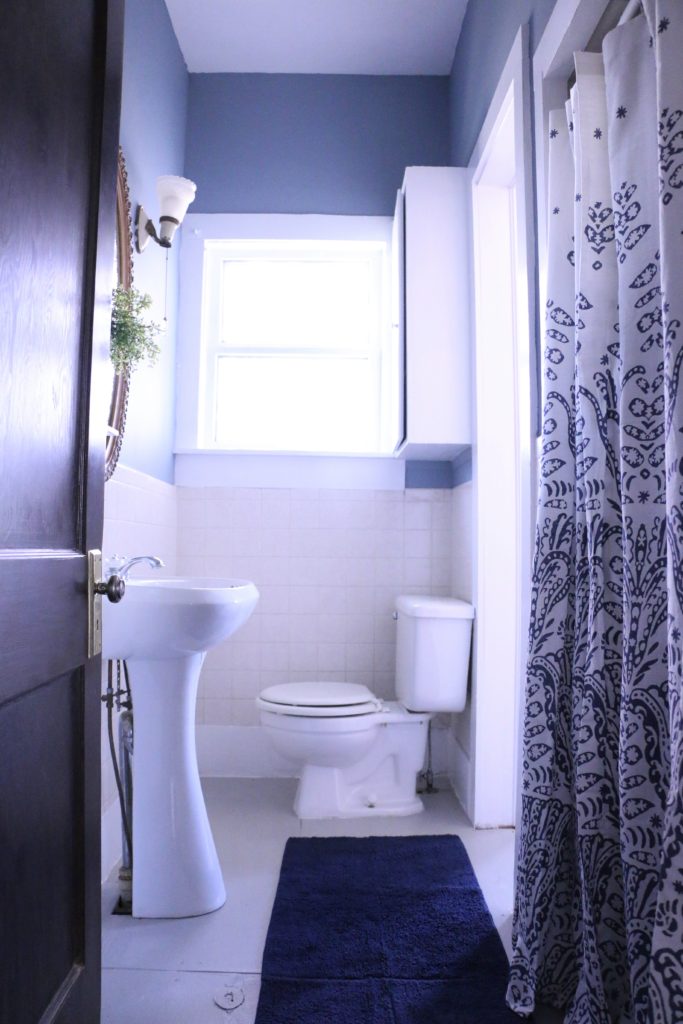
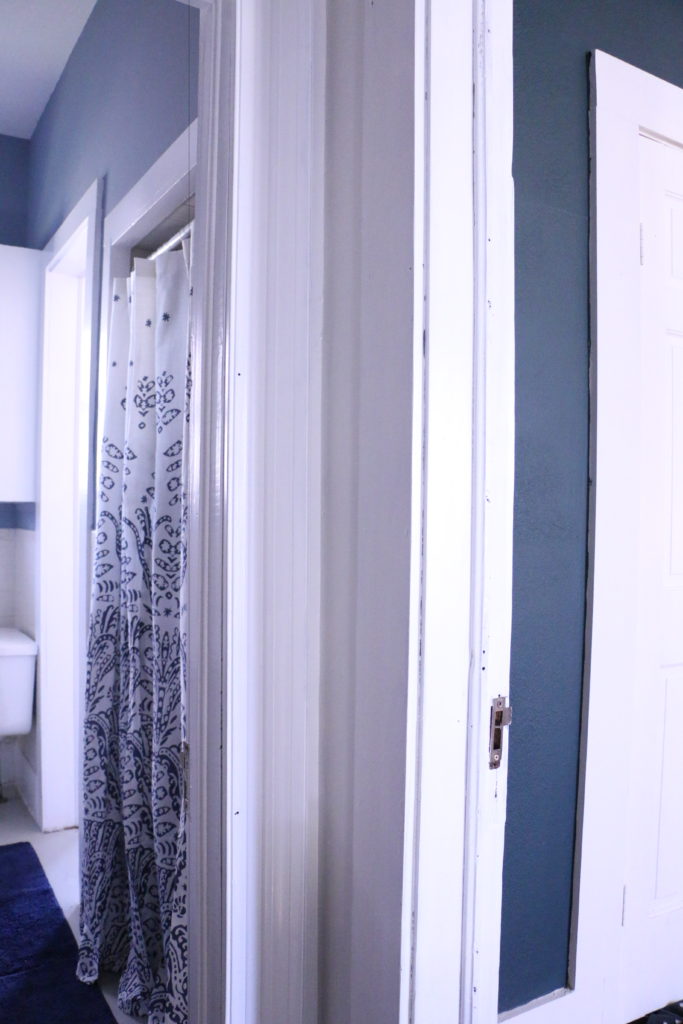
A shower curtain over the shower stall helps disguise that whole lotta ugly.

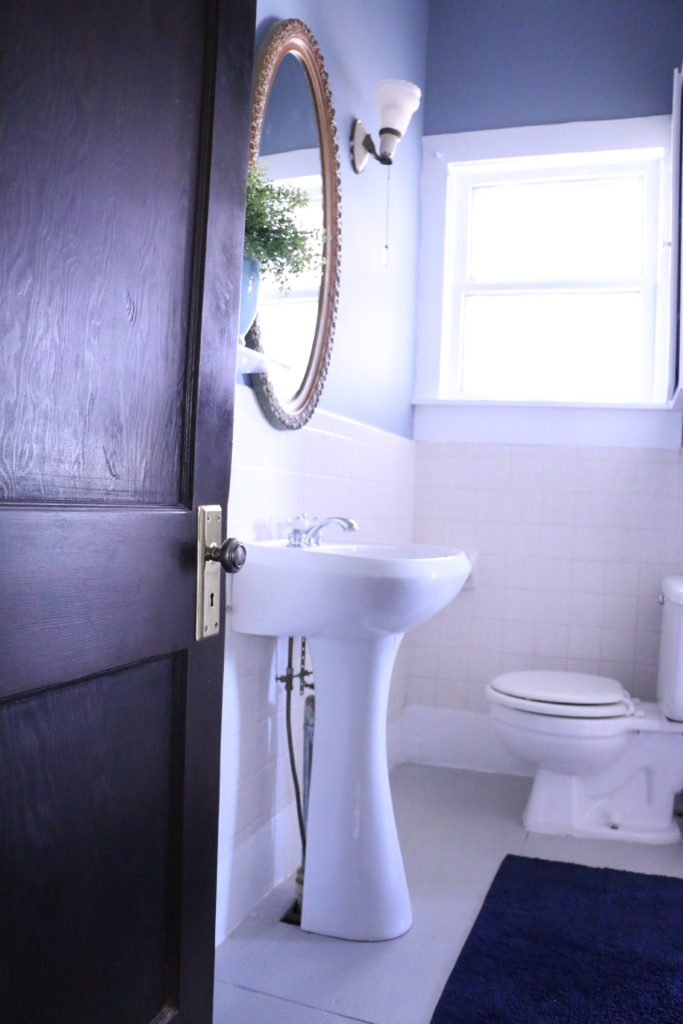
I also painted the plywood subfloor using some paint I had on hand. The floor is painted with Behr Tanglewood.

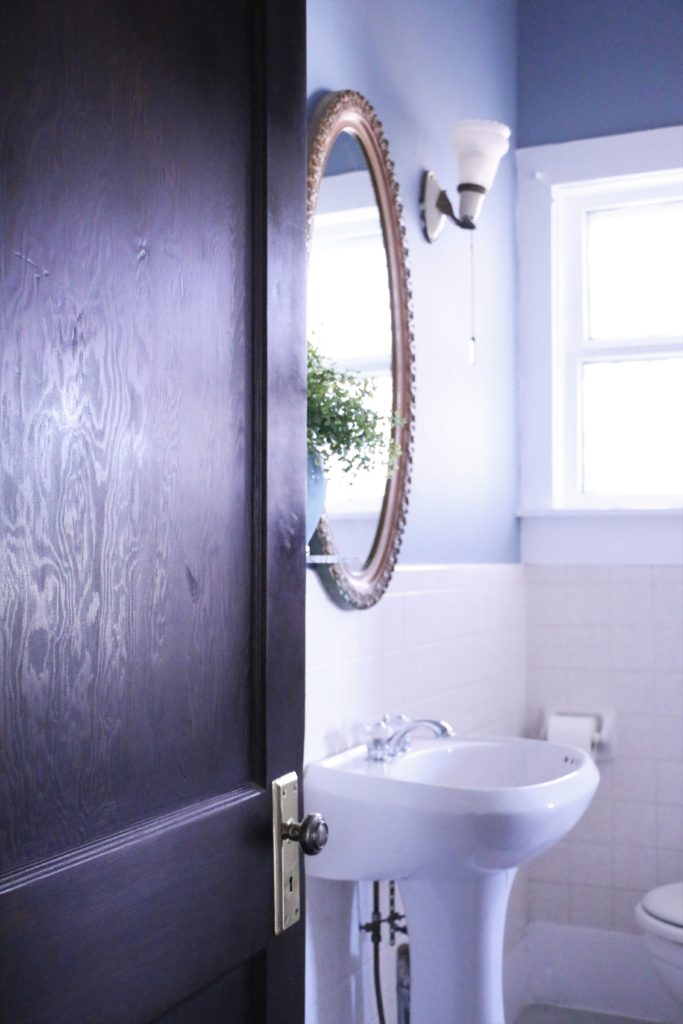
As you can see, I didn’t change any of the fixtures, the only thing I changed was paint. Isn’t that crazy?! Paint is so powerful!

Because this room is directly next to our bedroom that’s painted such a bold color, I was really concerned about how these two colors would look when coming up the stairs and they were both visible. I think they go complement each other nicely. (Bedroom is Behr Thermal.)

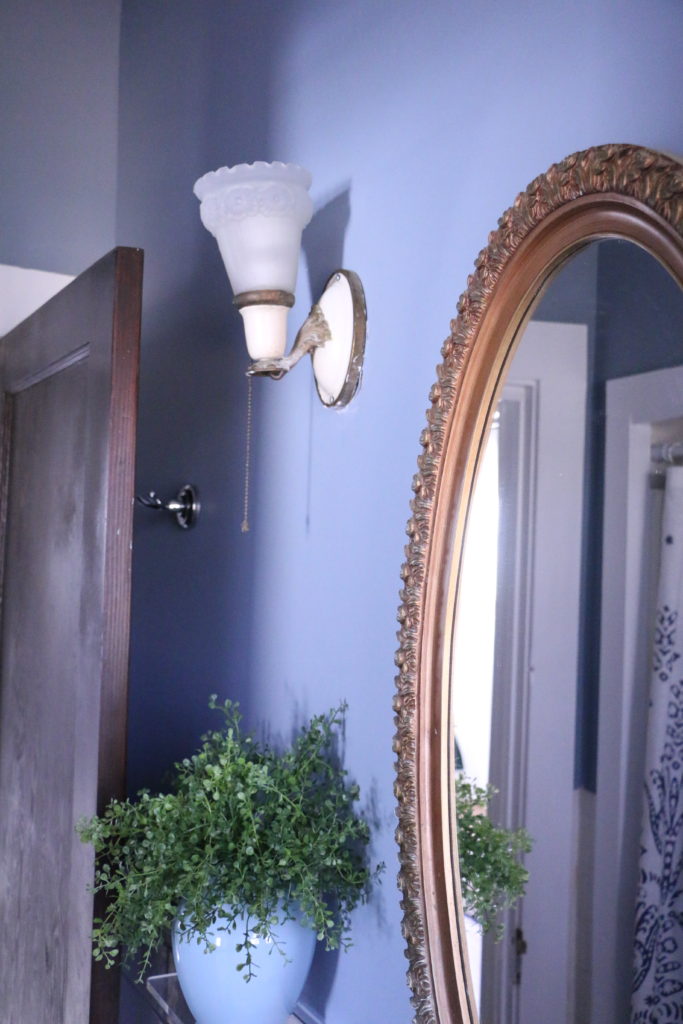
The 1920’s light fixtures stayed, and I think they look so much more elegant now without the dated wallpaper.

All of this to say this: just don’t wait. I would have loathed this bathroom another two to three years until it finally was time to gut it. Instead, I can enjoy the space, and it doesn’t give me the heebee-jeebees every time I go in there! I think there is power in a can of paint, and so much power in doing a “Phase One” project, something that is just enough to tide you over while you’re waiting for the big project.

Before we go, here’s one more before and after from the same angle. I can’t even believe the only difference is paint.

Alright guys, that’s all for today. Have a fabulous day!

DIY Projects

Six Big Impact Projects With One Gallon of Paint

Hello, friends! I thought it would be fun today to show you a few things around the house that are seemingly random but all have one major thing in common.

So, everybody knows about the power of paint in transforming a space, yada yada yada. You hear diy lovers everywhere talk about it. Well, that’s because it’s true. Paint can make something totally blah look totally fabulous.

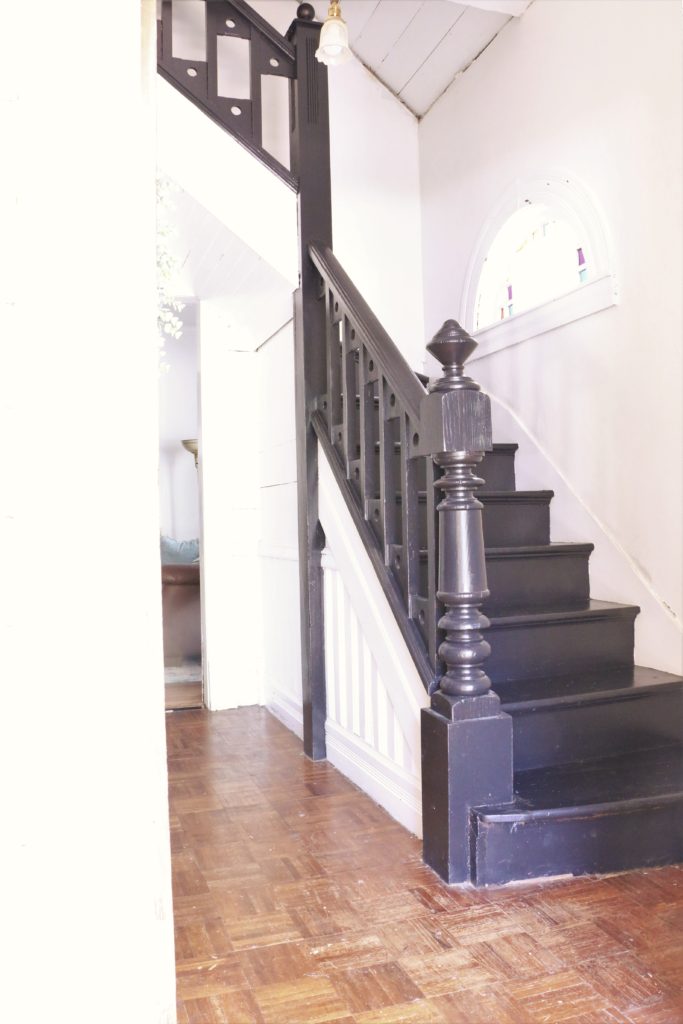
So, let’s back up a little bit. A few weeks after our son was born, I decided to paint the stairs in our house. As one does mere weeks after giving birth. Obviously. So, I went to Home Depot (this is not sponsored by the way, I just only shop there), and picked up a gallon of Behr’s Totally Black in a latex semi-gloss finish. I wasn’t sure how much I would use, or if one gallon would be enough, but I decided to stick with one and if I needed more, I would go get more.

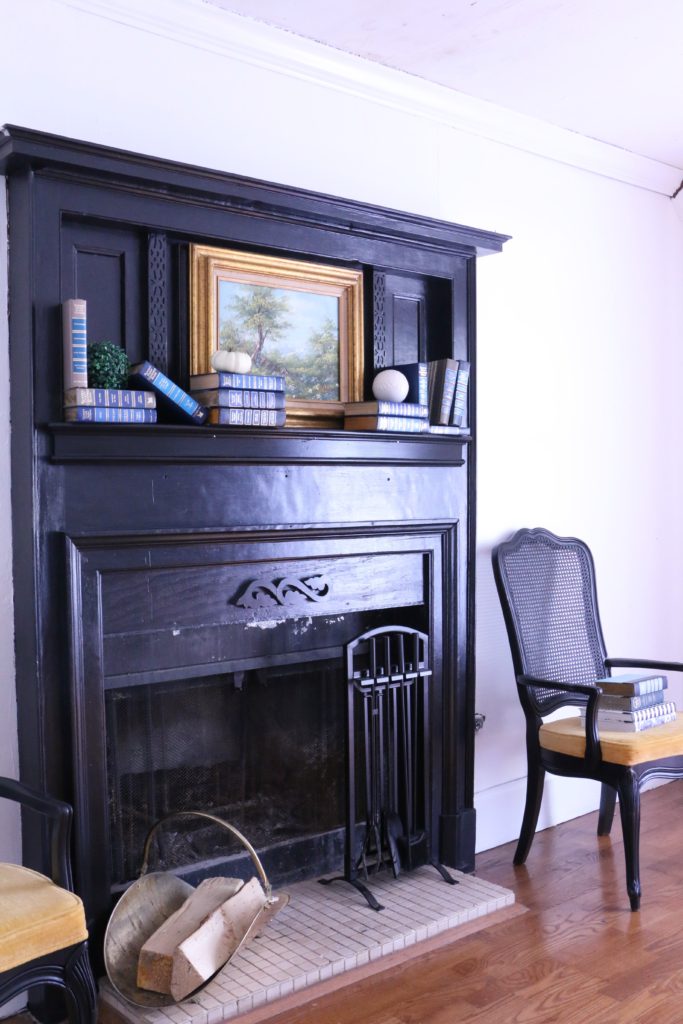
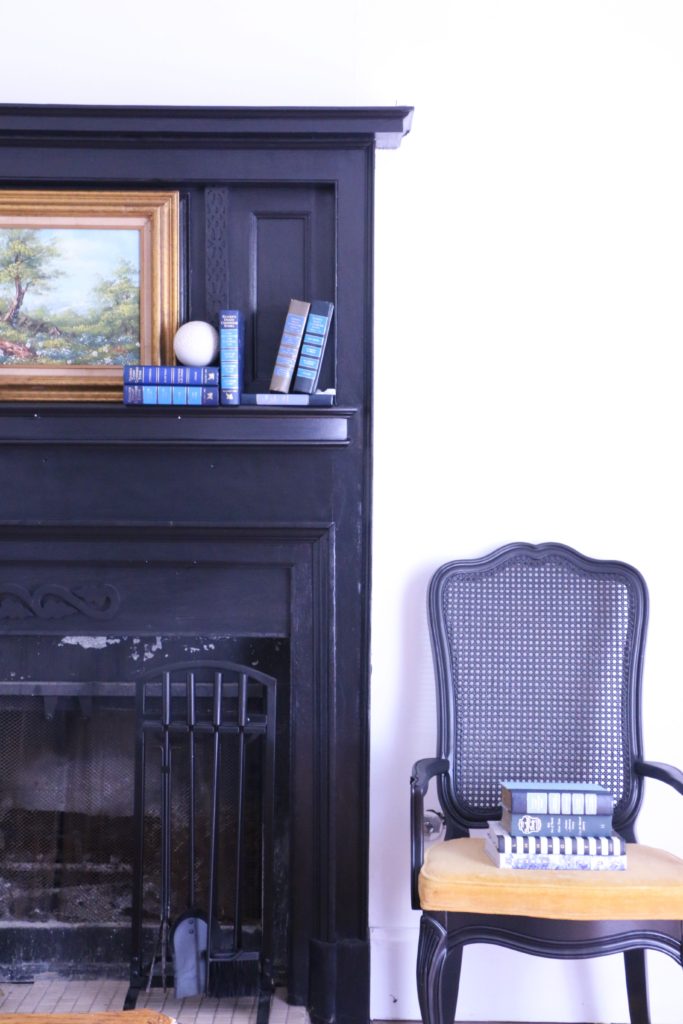
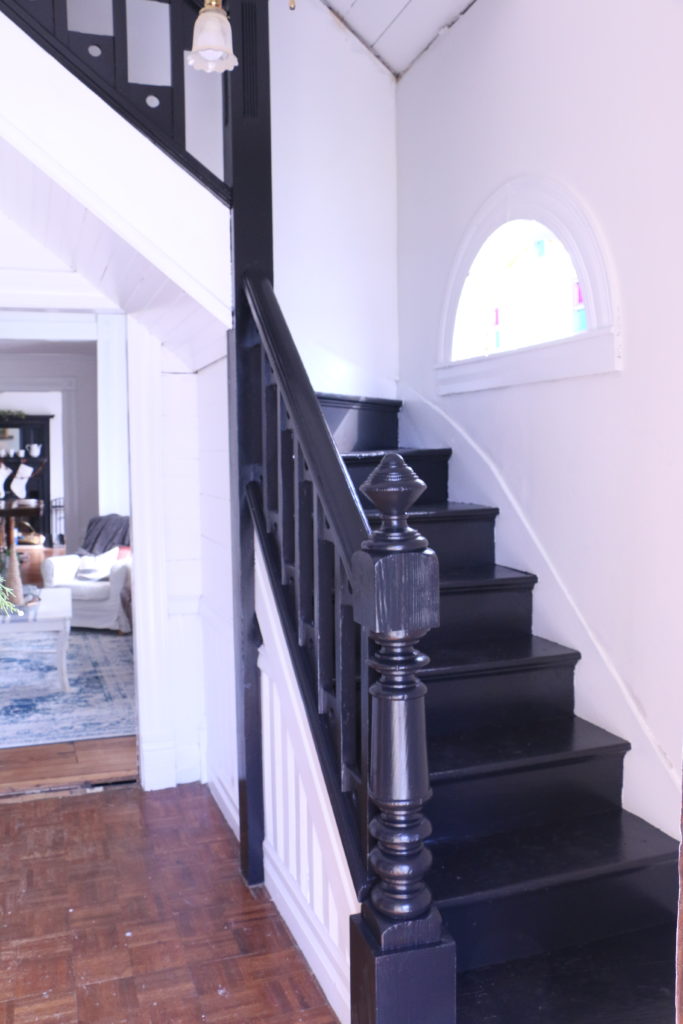
So, the black staircase was born. This is the view from the front door, by the way. I was pleasantly surprised at how well the paint covered the stairs (I did two coats), and how little paint I had actually used. So then, while still on maternity leave, I decided to paint the fireplace. Because, well, I already had some paint I could use, so why not? Hence, the black fireplace joined the party.

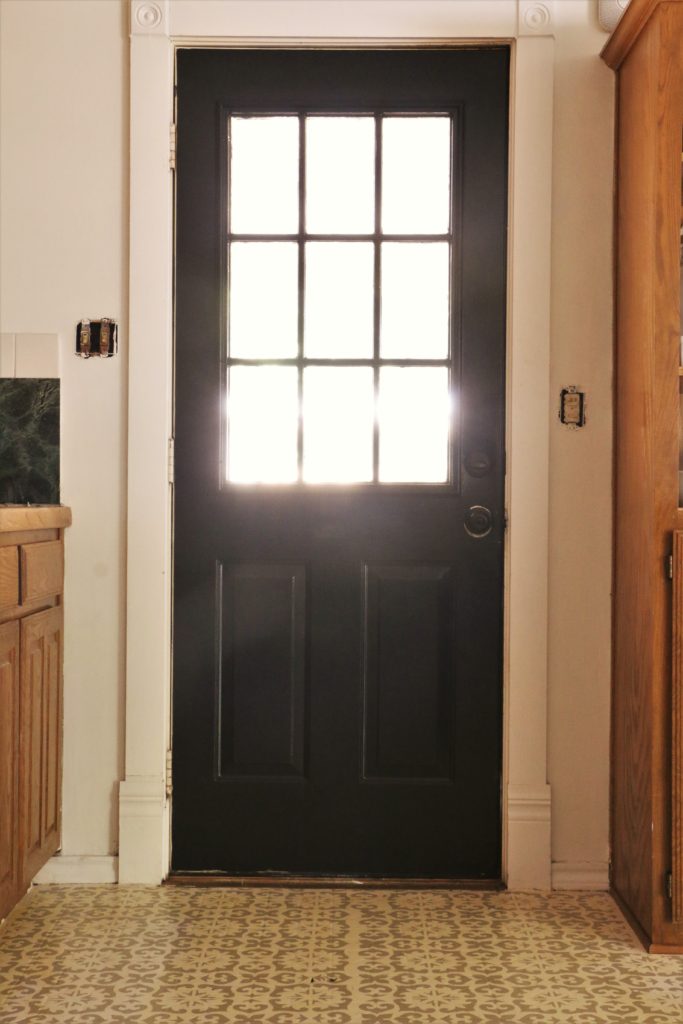
Now, in this picture, you may notice a sneak peek of another project. Hold on, I’ll get to that. Seeing that I still had some leftover paint in the bucket, I decided to go ahead and paint my back door. Now, this one comes with a warning. The back door is in the kitchen which is completely unrenovated and honestly just ugly. The quality of this photo is terrible. I’m sharing just to show you yet another thing I did with this single bucket of paint. So here we go.

The door is awful. It was more awful before. That’s pretty much all I have to say about that. Moving on.

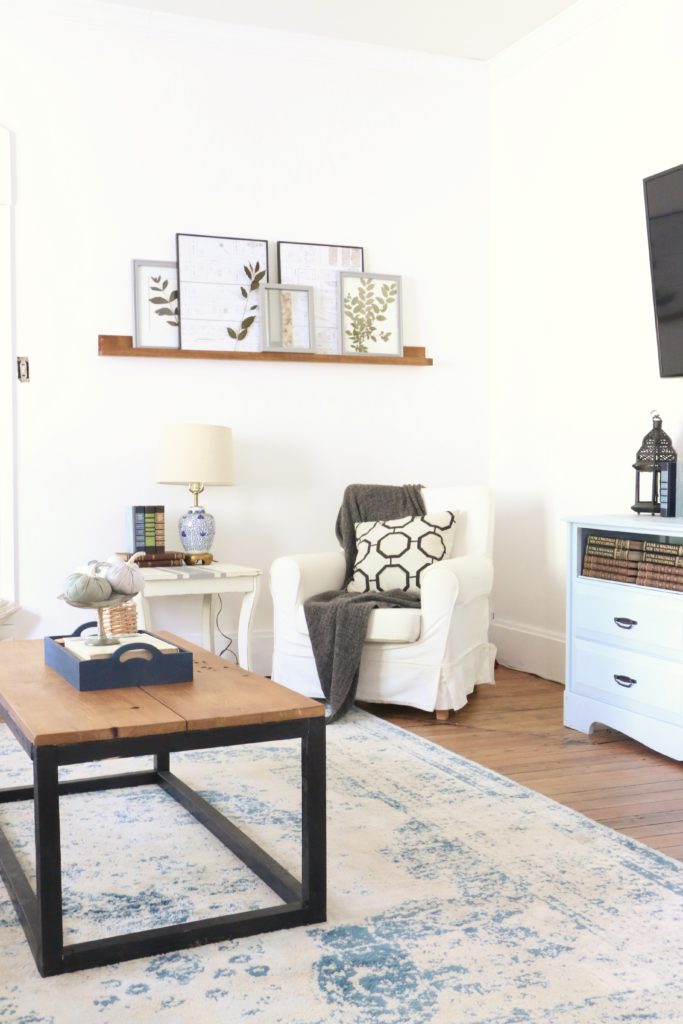
Some months later, the paint can had found a home in the garage awaiting some eventual use. That use came when on a random day in which work was unexpectedly cancelled (I work in a school, and the water had been turned off due to some road construction so school was cancelled). Finding myself with some extra free time, I decided to build a coffee table. A perfectly stable and precise coffee table it is not, but I built it alone and with items I had completely in my garage spending zero dollars. I’m sure you can guess where this is going…I painted the legs to the coffee table with more of the black paint.

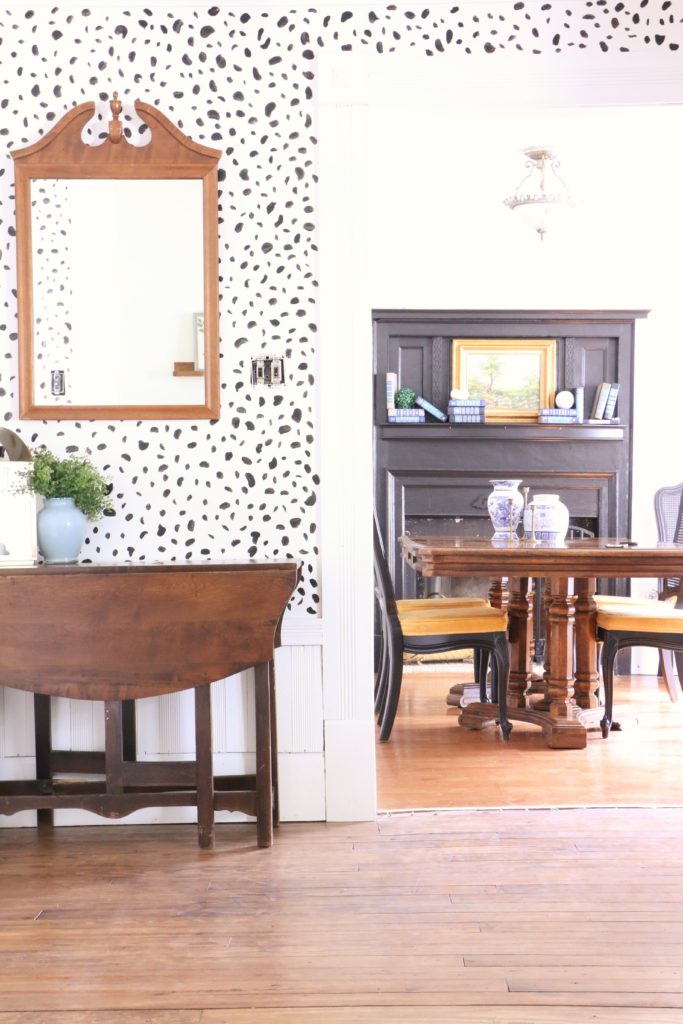
Time goes on. On a whim one day browsing Pinterest, I decide to paint some faux-dalmation wallpaper on a passthrough area between my living room and dining room. Good golly this one was a good one. In a few hours time with the trusty bucket of black paint and a step ladder, I had done this.

The dalmatian wall is my faaaaaaavorite. It adds so much personality to the space and I love it. It was one of the most popular projects I have ever posted about on Instagram as well. And why not? At this point, it wasn’t costing me any more money and wowza it packs a punch.

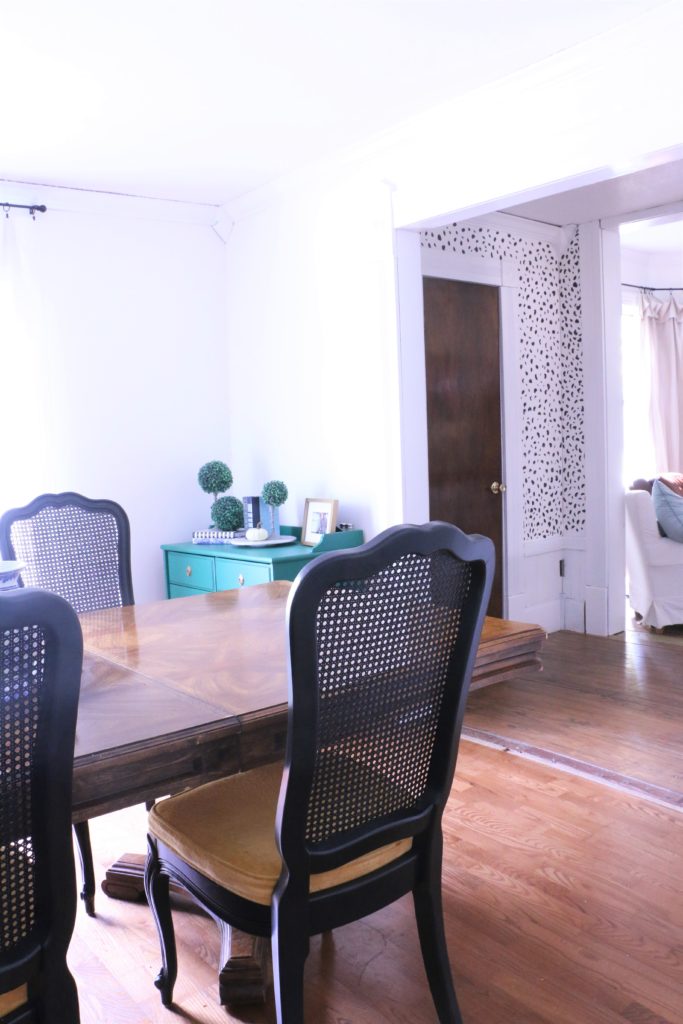
So that brings us around to the final project, the one that you’ve now possibly spotted twice already in these photos. You guessed it. The dining room chairs. By this time, I’ve already completed five other projects with this gallon of paint, but I still have more so why not? I did use a paint sprayer with these chairs, which means I had to add water to my mixture to make it thin enough for my sprayer. So, full disclosure, I stretched a bit here.

This is the most recent project, and they aren’t completely finished yet. I’m looking for the right fabric to recover the chairs, but I haven’t found what I’m looking for at the right price point just yet.

So there you have it. Six things I did with one silly gallon of paint that cost me less than $30. Insane, right? Would you believe I still have some left? Yep. Now, I probably won’t do any new projects with it, as I’d like to have some left just for touch ups. And with all these things, it’s likely I’ll have things to touch up over time.

So, a couple of takeaways here. Number one: paint is freaking awesome. You can cover a lot of ground for a little money. Number two: doing these different projects in different spaces throughout the house makes things feel more cohesive. The fireplace is the same color as the front stairs which makes it feel less random and more like they belong together even though they are in completely different spaces. It helps the house flow visually, I think. All that to say; I hope this inspires you. Get out there and paint something!

That’s all for today, friends. Have a fabulous day!
DIY Projects, House Progress

House Progress – Our Front Stairs

Hi guys! Today I wanted to share a quick update on a section of our house that isn’t finished yet, but looks waaaaayyyyyy better than it did before, and I’m happy to live with it as-is for a while.

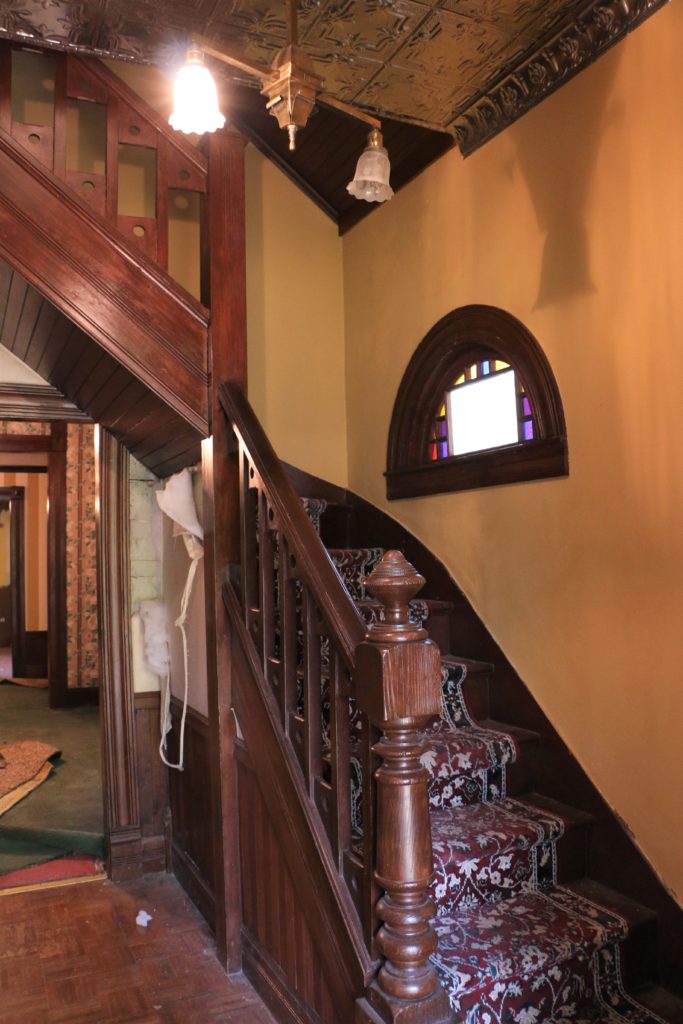
Our front staircase is one of the original features from 1895. It is tight, narrow, and has a very abrupt turn which makes moving furniture upstairs quite tricky. Just as a reminder, this is what it looked like when we moved in:

Looking at that photo is absolutely crazy to me because it looks nothing like this anymore! Within the first few days, we pulled out the carpet, and a few weeks later while we were working daily, we painted the walls. But for a couple months, we hadn’t done anything with the stairs themselves. And then our son was born, and we were a little slow to getting things done, so it took a while before I got around to painting.

I decided to paint the stairs, back in December, I believe, but I never really shared the full details. 

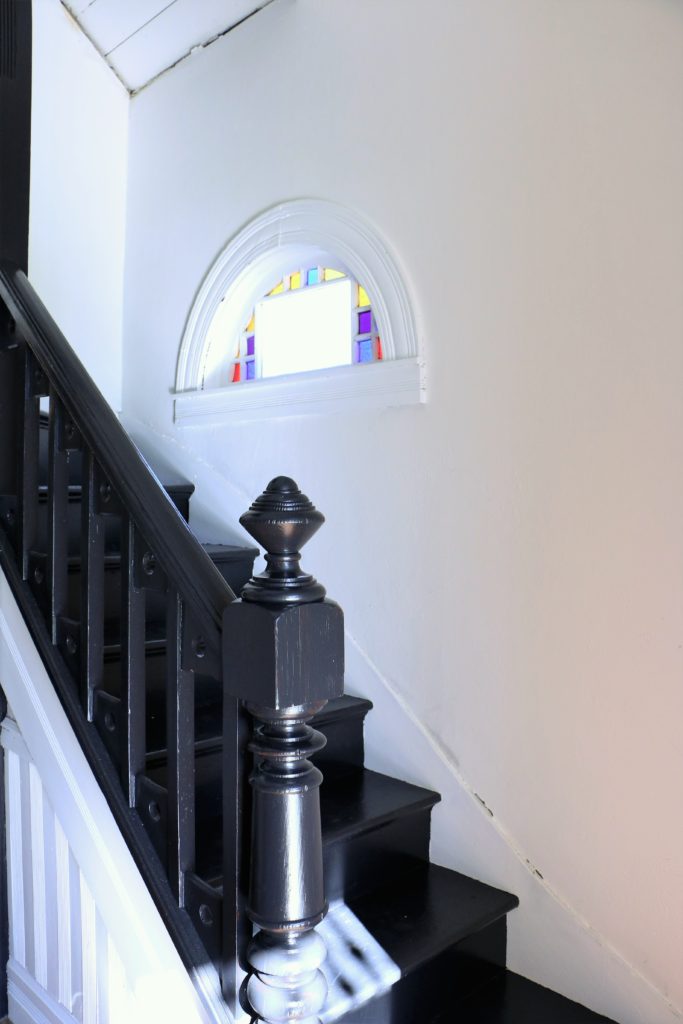
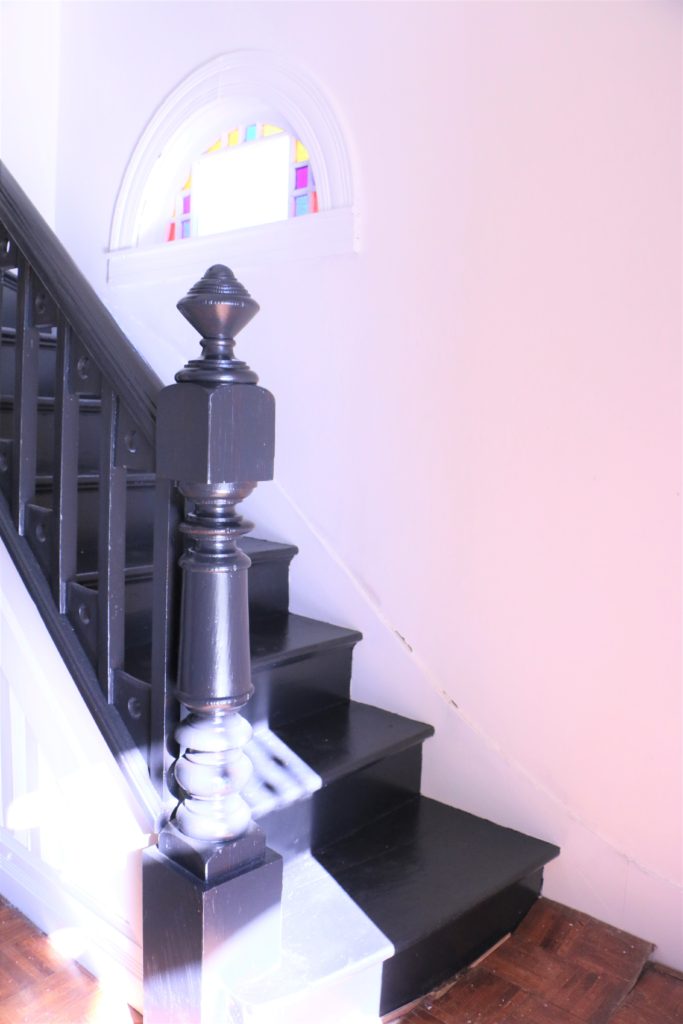
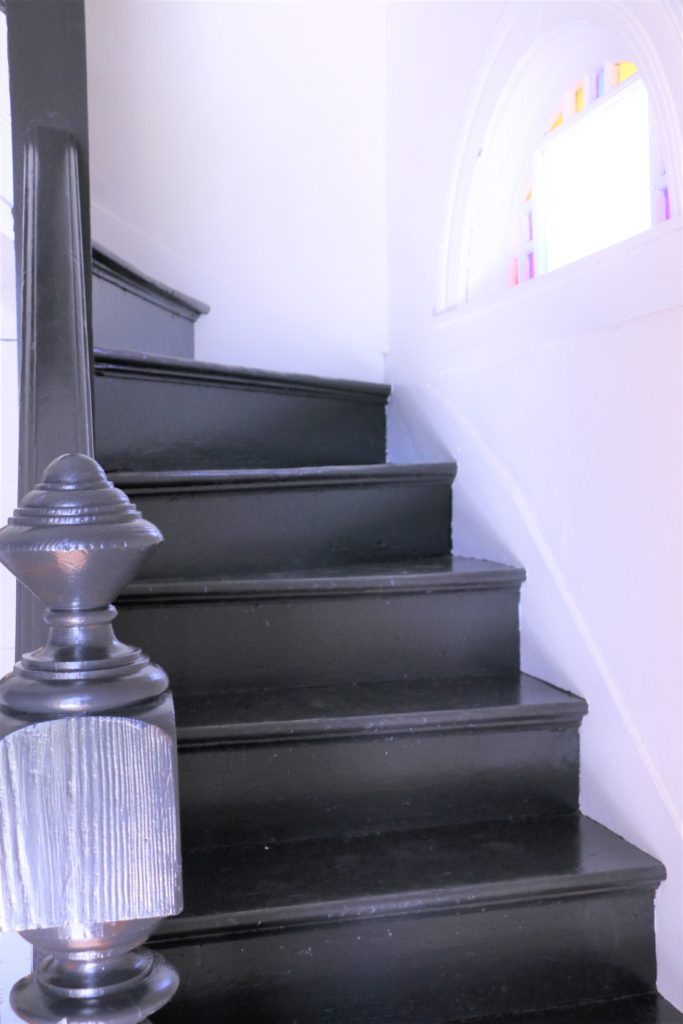
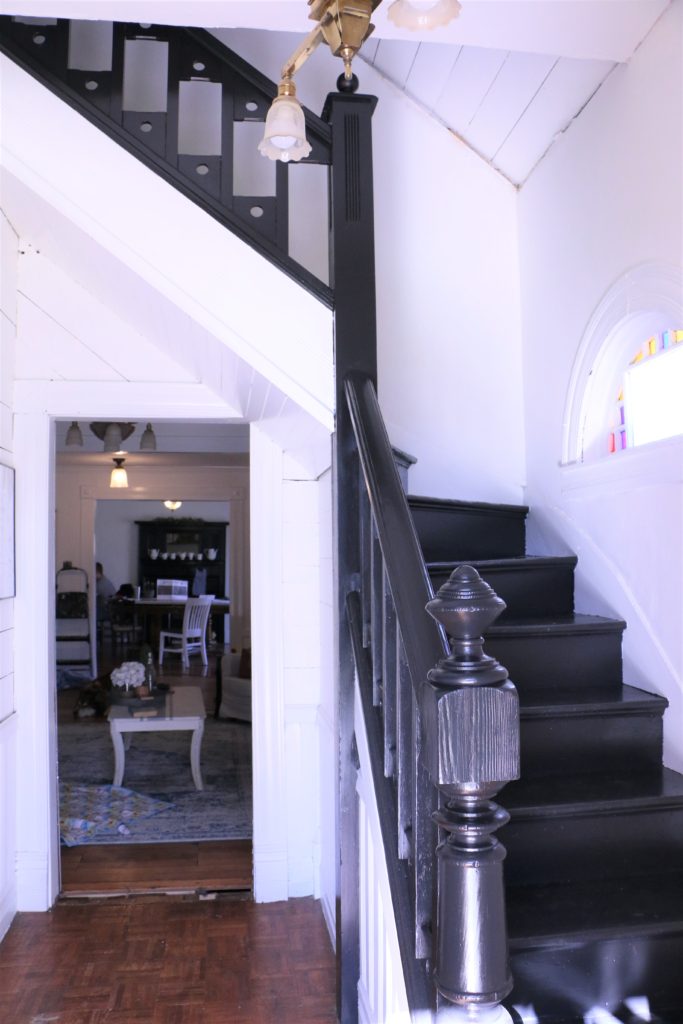
And now they’re black and white and I’m totally in love! They make the space feel so much bigger and brighter, even though it really is a tiny staircase.

Pardon the glaringly bright sun, I was just too excited to wait to take these pictures!

The color is Behr’s Totally Black, with Ultra Pure White (the color you get without any mixing – straight from the can) trim, and Polar Bear on the walls. We painted the staircase with a semigloss finish, which I would not normally recommend on a high traffic area, but we do plan on adding a runner down the stairs for comfort, so they will not be getting much foot traffic at all once the runner is installed.

Here you can see an unedited look (nope, I didn’t clean up for y’all) at the stairway into the rest of the house. So aside from the runner, we do plan on doing a few other things. The light fixture will be changed, of course, but we’re also thinking about a fun statement tile to replace the parquet flooring. For now though, it’s a small makeover to tide us over until we get to the real thing!

So, if you can pardon my photography skills, that’s the latest little update. Projects are going pretty slowly around here, but as soon as we get back at it, I’ll keep y’all updated. 🙂

That’s all for today, friends. Have a fabulous day!
 

DIY Projects, House Progress

Status Update: End of 2018

Hi friends! I’m so glad you’re here! If you’ve been following along on our house progress on Instagram then you probably have seen lots of little projects we’ve been working on as we’ve been doing them. These days, it’s a bit easier for me to do a quick update there than on here, just because life with a newborn is busy! In case you haven’t been following along, here’s the deal with this post. My  Status Updates (Check out the first one here or the second one here) are a series of unedited, real life photos rounding up the entire process of what we’ve accomplished thus far.

At the time of my last update, we had not yet moved into the house. We have since moved, had a baby, and continued working. To say things are a bit crazy would be an understatement. We are definitely still in “fixer upper mode,” when looking at any room in the house, there are at least five undone projects that come to mind. So, bearing all of that in mind, let’s have a look at what our house looks like right now.

The Foyer 

We lived with completely undone stairs for a little while before I went ahead and painted the stairs. This is the view from our front door, and it’s a very tight space. Painting the stairs and the walls made it look a little bit more open though. Still to do in this space: replace the light fixture, add trim along the ceiling going up the stairs, add a runner up the stairs, do something about the floors (we aren’t sure what the plan is…there are no original hardwoods, so we might lay a statement tile. We are still in the very early planning stages on that particular project), and lay a transition piece between this an the living room floor.

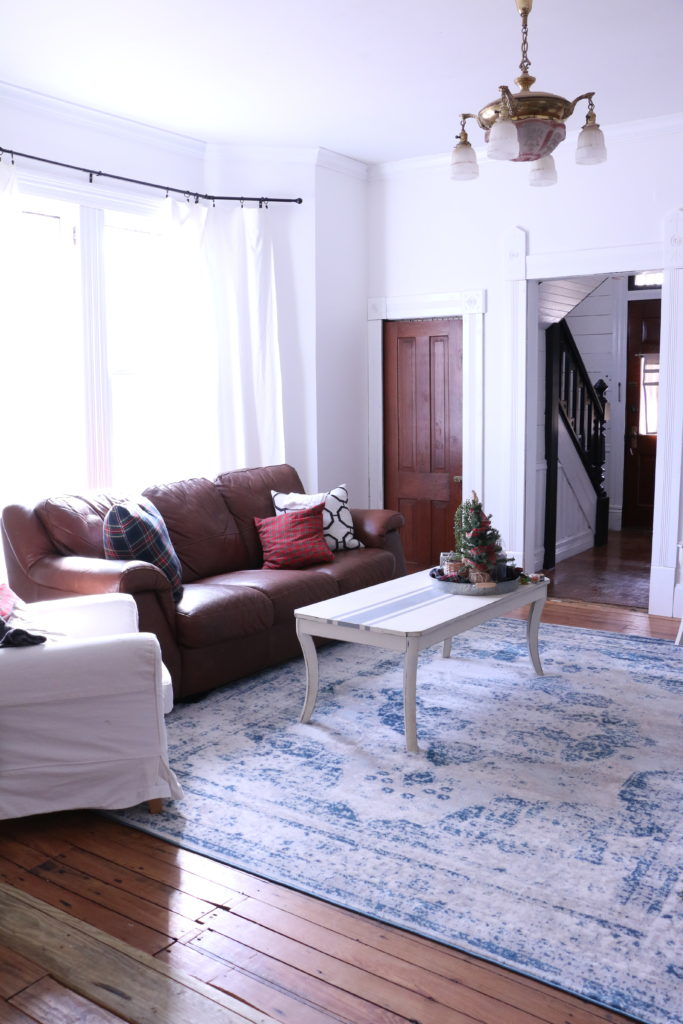
The Living Room

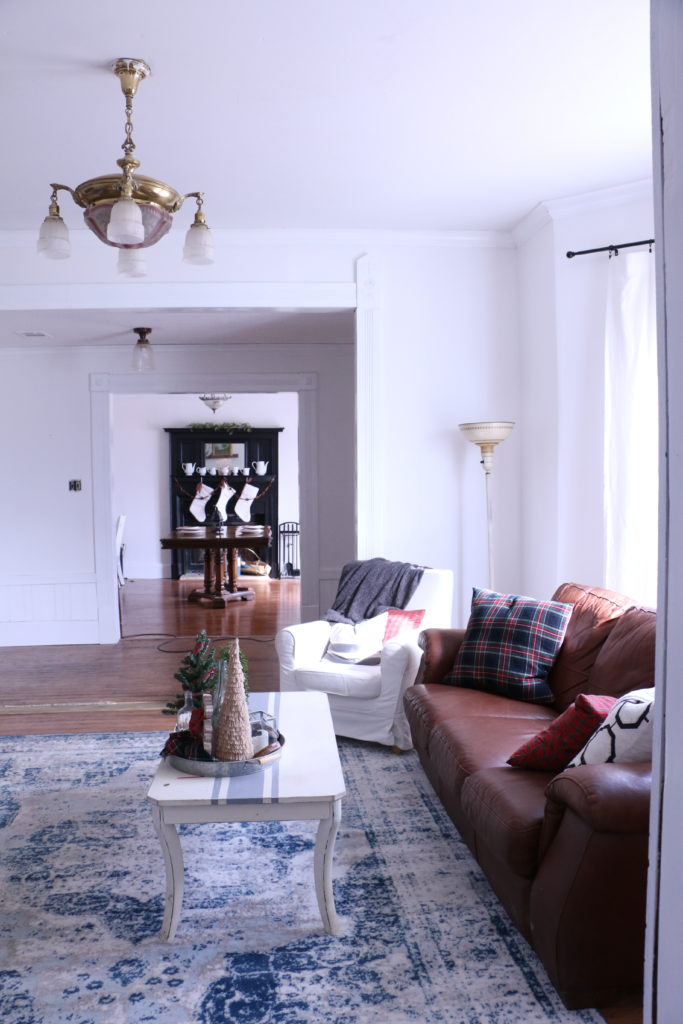
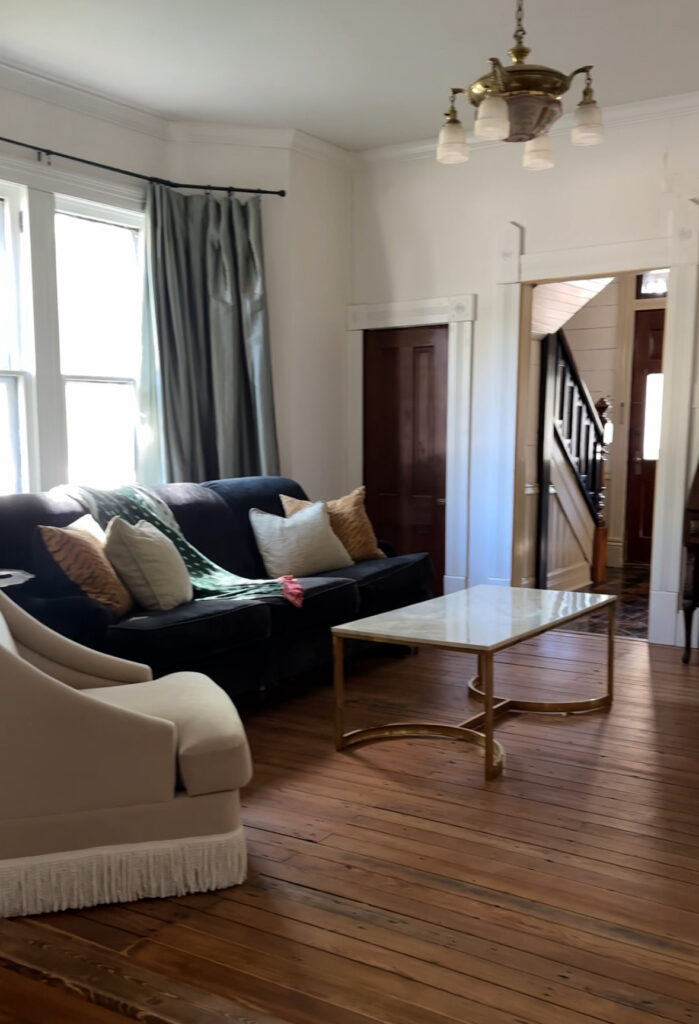
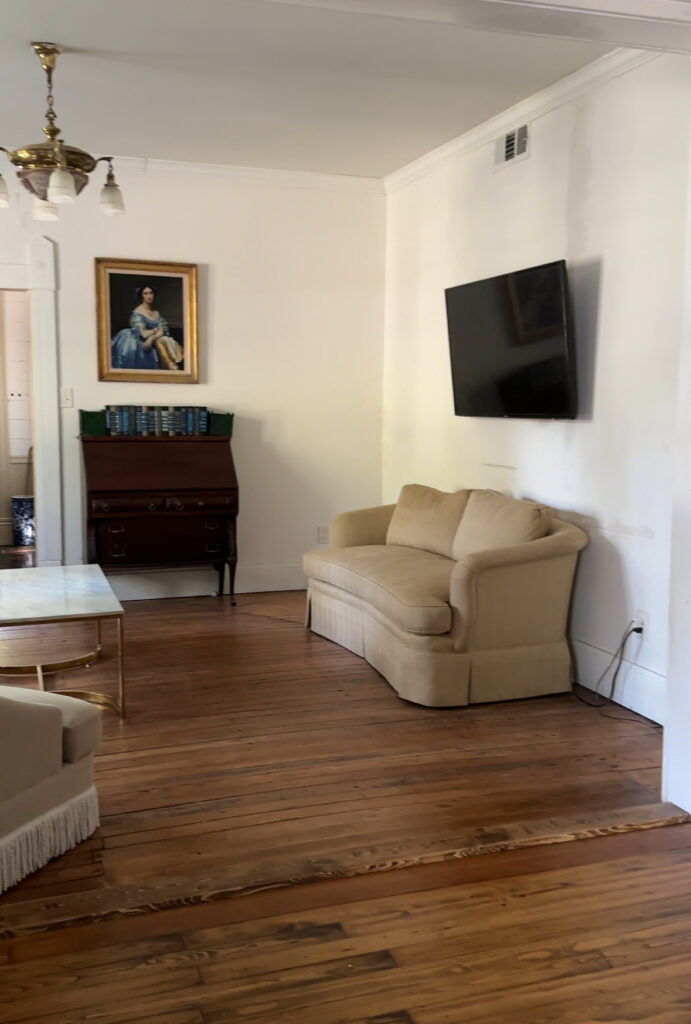
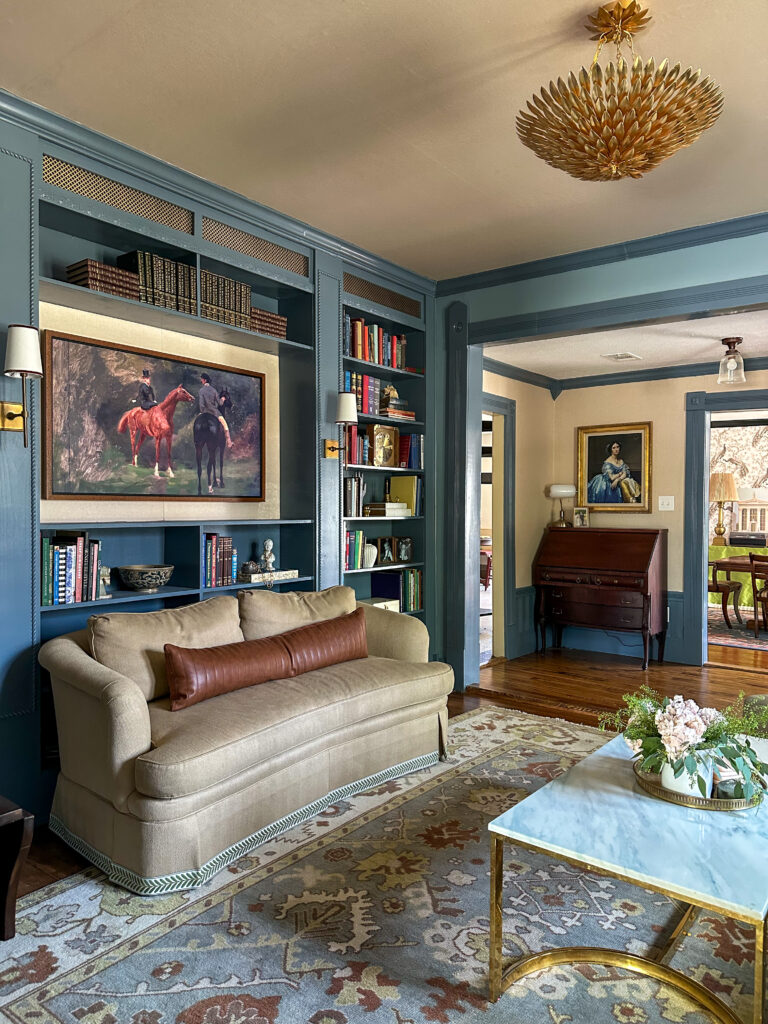
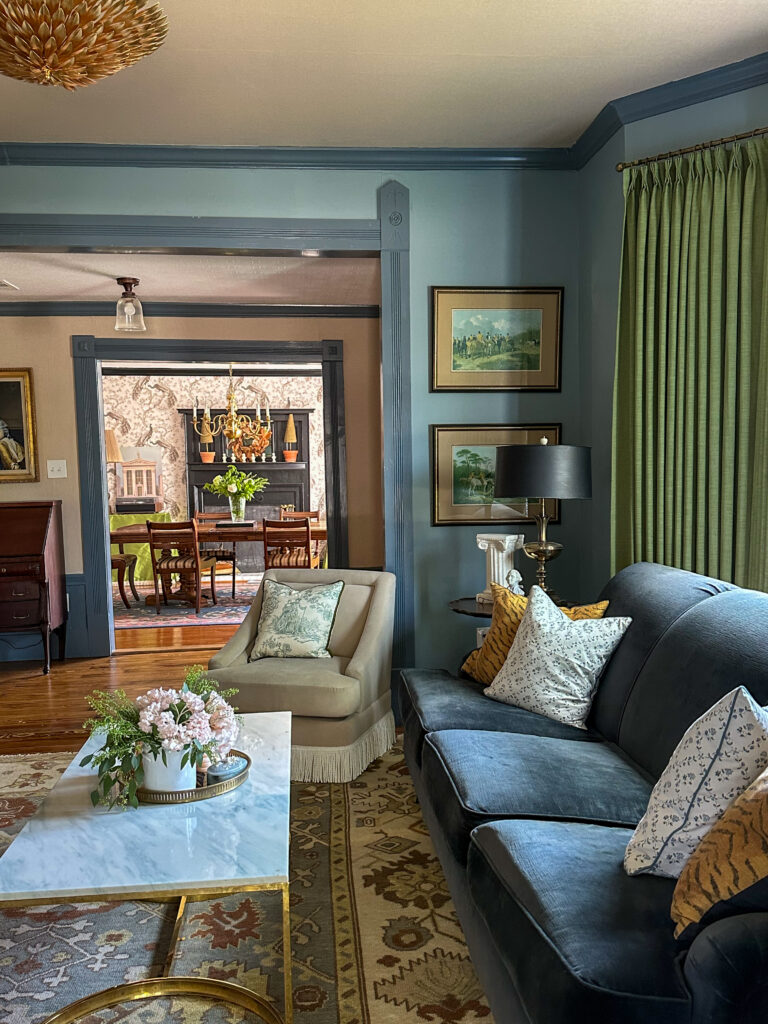
This room is mostly “done” with the exception of the transitions on the floor from one section to the next, and replacing the light fixture (we haven’t done that in any area of the house yet). If you look closely in the first picture, you can see a thin cable running along the floor. It’s something for the internet that needs to be run underneath the house. I also want to replace 99% of the furniture here, but that’s not necessarily considered a project.

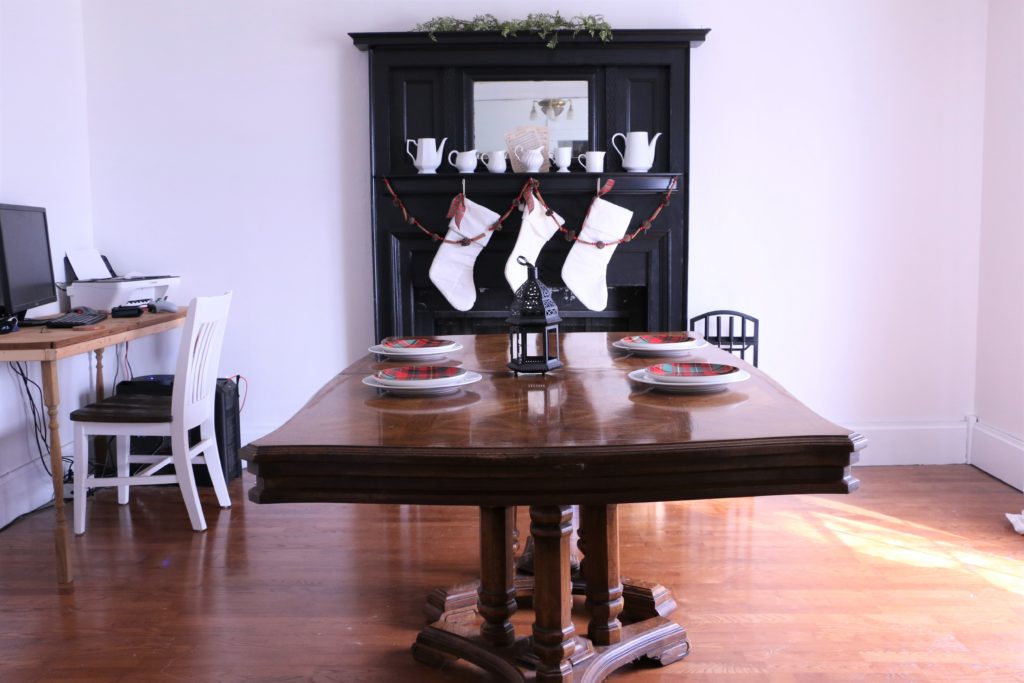
The Dining Room

The dining room is the most embarrassing in its current state. It took me a month to clear the moving boxes from here, we had no table for two months, and Ethan still has a makeshift desk sitting in the corner (the room that will be the office upstairs is completely undone). We don’t have chairs or any other dining room furniture, but it’ll get there. The fireplace has been painted, and everything else is complete, with the exception of caulking along the ceiling trim.

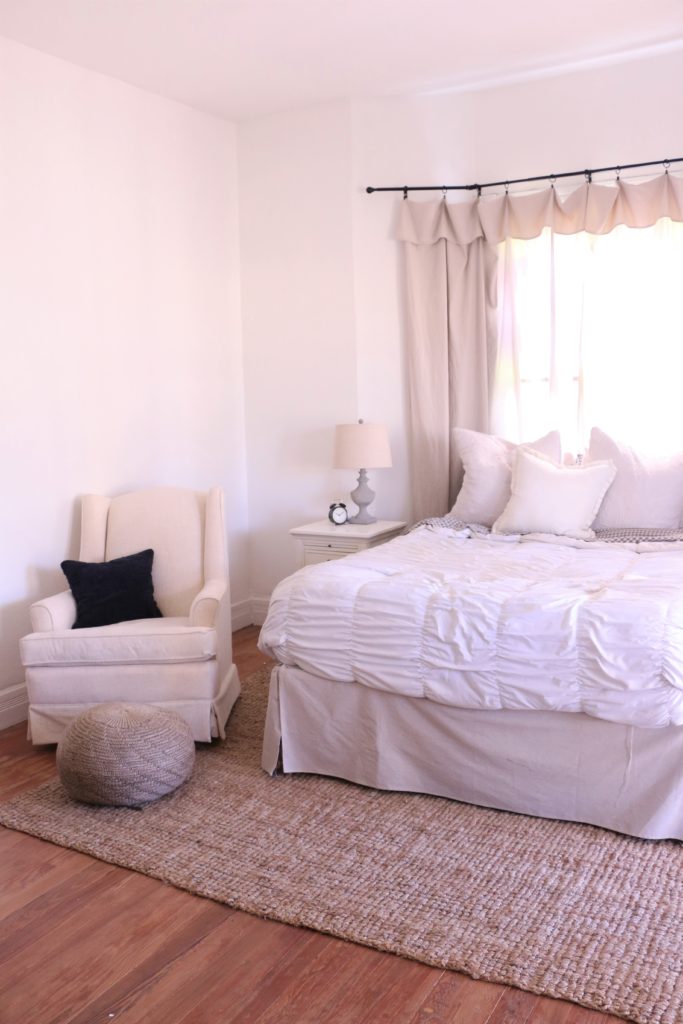
The Bedroom

Our room has a ways to go, but since our son is still sleeping in here in the bassinet (not pictured), everything is temporarily out of place. The rocker will eventually go back into the nursery once he starts sleeping through the night, and once the extra furniture is out of there, I’ll feel more inspired to decorate and finish things in here. We need to add some trim pieces in here, and add a light fixture. This room doesn’t have an overhead fixture at all, so it’ll be a bit more labor intensive than fixtures in the other rooms.

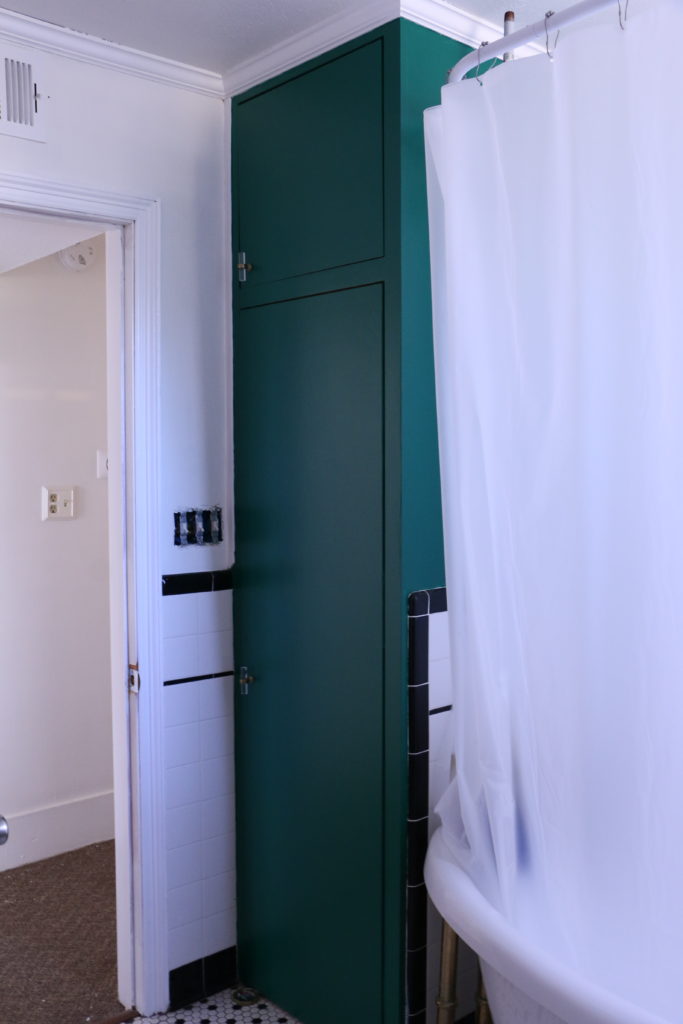
The Bathroom 

The bathroom is small and hard to photograph, but the only thing completed in here is the cabinetry has been painted this emerald green color. As you can see, we need to replace the light switch box, which we will do in the entire house all at once. We replaced the outlets, but we haven’t done the light switches yet.

The Nursery 

I did a whole post about our son’s room, because it’s the only room that’s “done.” It actually still needs a new light fixture and light switch box, but other than that it is done. If you missed that post, you can check out more photos of it here.

We haven’t done anything else on the outside just yet, but we do have some major plans for that yellow house. (Hint – it won’t be yellow forever). We’re at a point now where we have to slowly plan things out. In part, because we spent all the money we had earmarked for house projects when we bought the house, but also because things move at a much slower pace with a newborn around. When I was 8 months pregnant, I was working 12 hour days in the house, and people thought that was crazy. It may have been, but now I can only work in one or two hour increments during naptime. So, in 2019, we’ll be moving a bit slower. Anywho, that’s the update for today. This house has come a looooooong way since our closing date, but she still has a long way to go before she is everything we envision. That’s all for today, friends. Have a fabulous day!
Home Decor, Room Tours

Our Baby Boy’s Nursery Reveal!

Hi, friends! I am so glad you’re here today! I am so excited to share this with you guys… I’ve been planning this post for months (nine months to be exact 🙂 ). I have been pretty ambiguous about nursery planning and baby stuff in general on social media. We didn’t even share the gender on social media until he was born! But now that our baby boy is finally here, I want to share the nursery details with you all!

This was a fun room for me, because it’s the first room I’ve ever designed completely before even starting. Toward the beginning of my pregnancy, we were still house hunting, so I had a mood board of what I was planning, but no idea what the room itself would actually look like! I couldn’t buy anything, because I had no idea how many windows to buy curtains for, how big of a rug to purchase, etc. I had to be incredibly patient, which was hard.

And then we bought the house at the end of July, but there was way more severe work to complete before I could even begin setting up the nursery. We basically purchased everything and set it up completely in one weekend, which was new for us. Every other room in our home has evolved over time, mostly as budget as allowed. This time, I spent months planning ahead of time, and then it all came together at once. Which was a pretty fun experience, in my opinion.

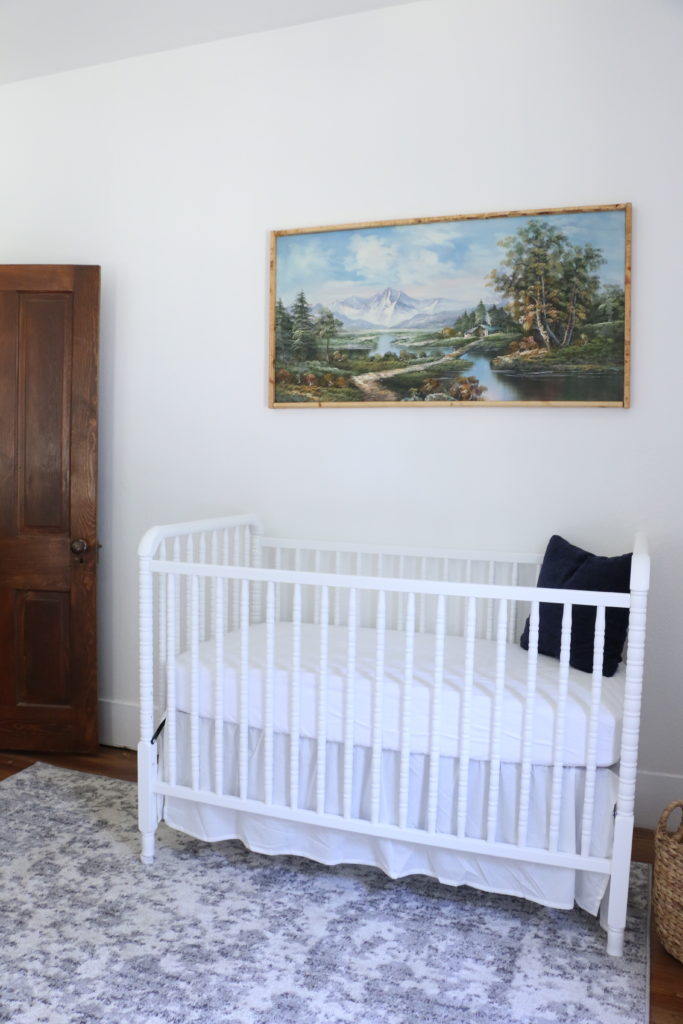
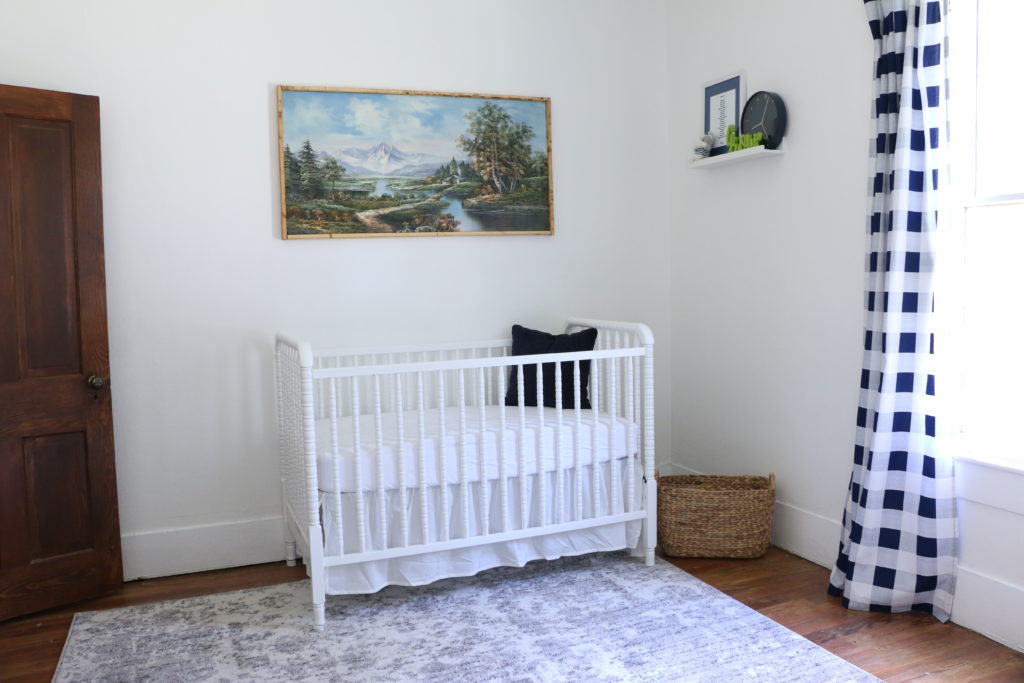
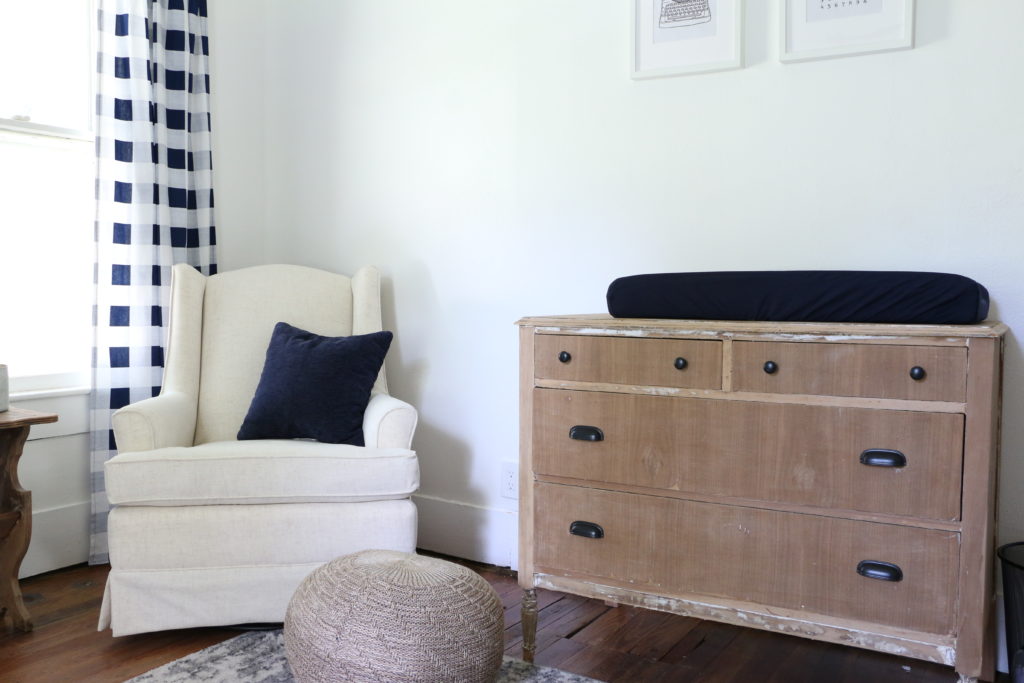
So anyway, I’m sure you want to see the nursery. I knew I wanted to use navy instead of the typical baby blue color, and I didn’t want a “theme.” The walls are the same color as the rest of our house, Polar Bear, by Behr. I wanted everything to have a neutral palette, with just touches of navy here and there.

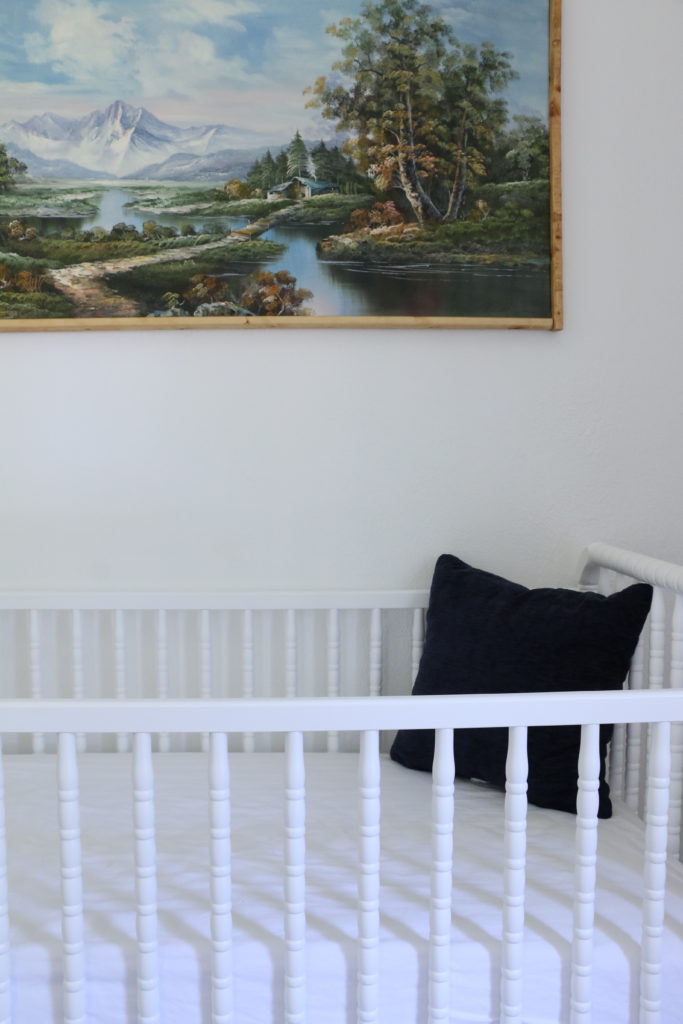
I knew I wanted a white Jenny Lind crib long before I was ever pregnant. I just think it’s super classic, and I’ve always loved the look of them. The bedding is from Target, and the bedskirt is from IKEA. I love the crispness of all the white, I think it’s just timeless. The navy accent pillows are from Target, but don’t worry, it’s only in these photos for contrast. It doesn’t actually stay in there!

The art work was one of those moments the flea market gods are smiling down at you. I knew what I was looking for, and generally when you have something to specific in mind, you can never find it. We were shopping at my favorite flea market in Canton, TX when I spotted it. I usually will walk up to an item with a maximum budget of how much I’m willing to spend before I even inquire about the price. In my head, I knew I would be willing to spend about $50 on the piece, and when I asked the vendor how much she wanted for it, she offhandedly said, “oh, twenty bucks.” I could not get out of there fast enough! I practically grabbed the thing and ran! It had an old gaudy frame on it, which I removed and added a stained 1×2 wooded frame. It took me about fifteen minutes to make the frame, with supplies I had on hand in the garage.

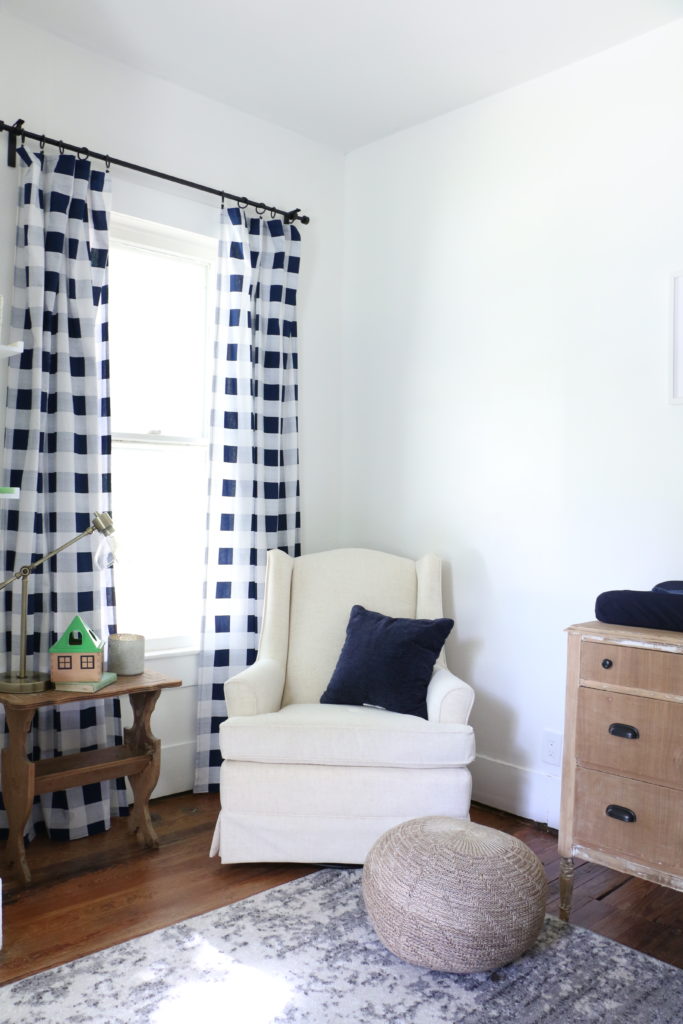
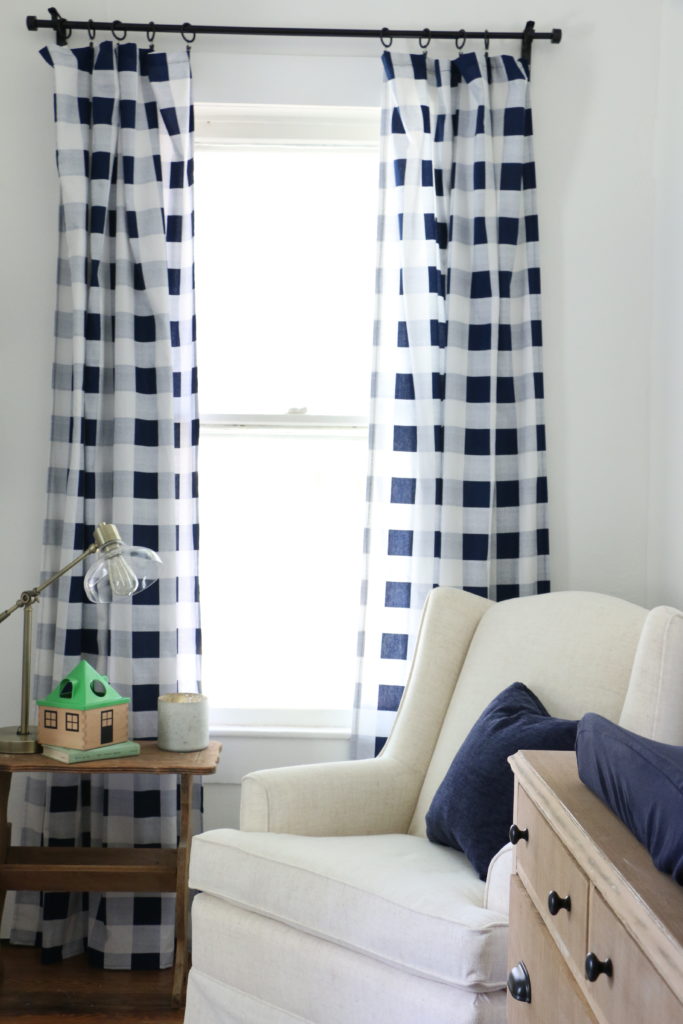
The glider isn’t sold anymore, because it was a line sold at Babies’r’Us (RIP). We were able to get it for 50% off during their going-out-of-business sale.

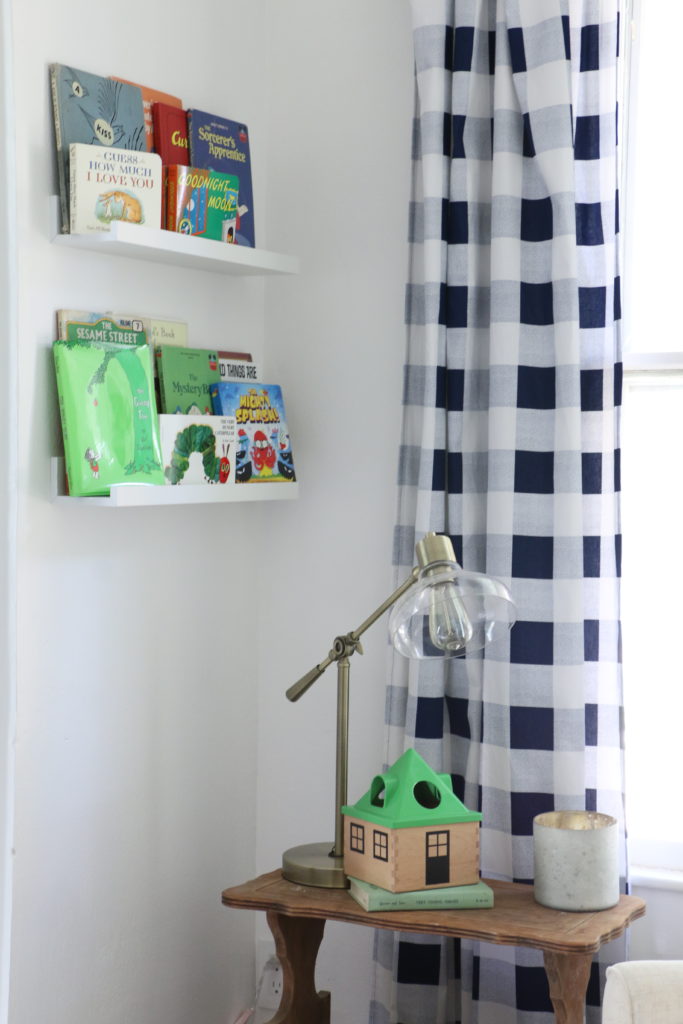
I scored the accent table at the Canton flea market, from my favorite vendor, Canton Bill. He’s a precious elderly man with the best junk and the best prices. I snagged this table for $10, and I didn’t even have to haggle!

The dresser was mine as a child. I’ll be sharing more details about it in a later post, but the hardware is just from IKEA. The ottoman is from IKEA as well.


I made the curtain panels from fabric I found at Hobby Lobby, which is definitely the statement of the room. I always joke and say that my sewing skills are incredibly basic, the only thing I know how to make is curtains. 🙂 I only paid about $60 for the fabric to make four panels, and we have some pretty high ceilings in this 120 year old house!


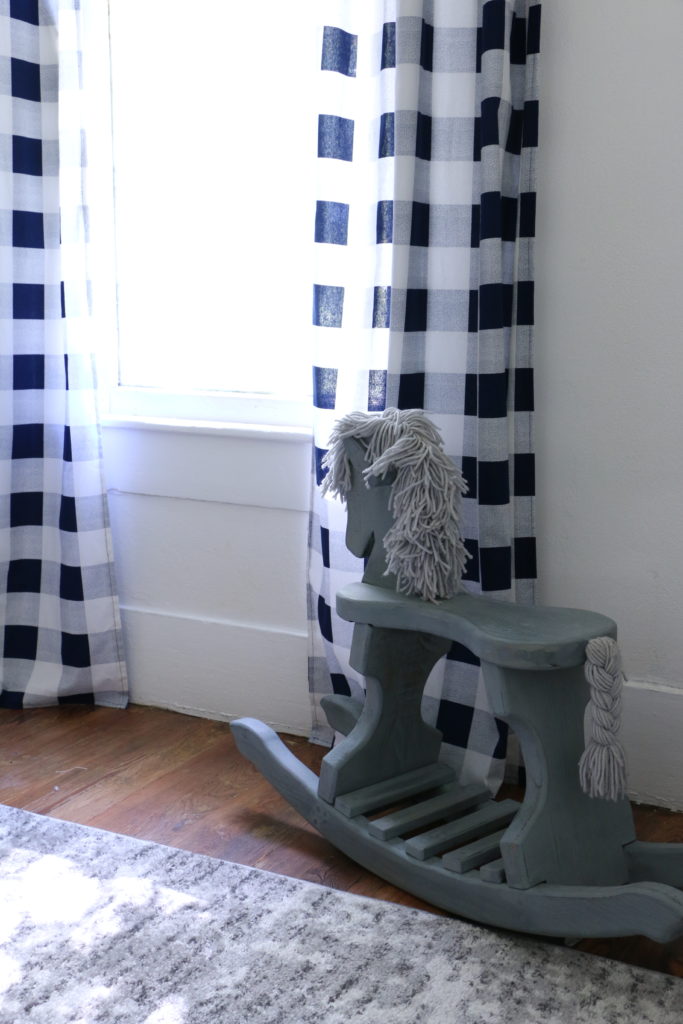
This sweet rocking horse was a garage sale find. I snagged it from our old next door neighbors during a neighborhood wide garage sale. It was wooden with rainbow ribbon and beady eyes. I took everything off, sanded it down, and painted it with Miss Mustard Seed Milk Paint in the color Aviary. The rug is from Rugs USA, which I got on super sale, just how I roll.

Overall, I was going for a classic and timeless nursery, with lots of white, and touches of natural woods and navy gingham. I think nurseries can be so much more than an over simplified “zoo animal” or “nautical” theme. I didn’t want anything overly cartoon-ish, or baby-ish. I know that sounds silly because it is, after all, a baby’s room, but I also wanted a room that felt cohesive with the rest of our house, and somewhere I would enjoy spending time. I love the peaceful and relaxing feel this room has, and it is my favorite room in the house now!

So, what do you think? I’d love to hear your thoughts! That’s all for today, friends. Have a fabulous day!
House Progress

Status Update – One Month In

Hi guys! So glad you’re here! I have been so busy just about every day I haven’t had a chance to sit here and tell you all how things are going at the house. It has been just about a month since we closed on the house, and in that time, school has started back up for me, so my schedule looks something like this: go to school (work), come home and eat a quick dinner, head to the house to work on projects, and then come home late just in time to quickly shower and collapse into bed. On the weekends, Ethan’s family has been helping us, and we are putting in twelve hour work days each weekend. Oh, and I am now what one would consider…. very pregnant. So, things are pretty crazy around here. We originally planned on moving in at the end of August despite the progress we were at, but we extended our lease on our rental for another month, so if all goes according to plan, we’ll be moving at the end of this month. And we’re really hoping things do go according plan, because my due date is looming closer and closer!


So, without further ado, let me show you all the things we’ve been working on! If you didn’t see the before pictures or our first status update, you may want to see those first. And, please remember, these photos are all iPhone photos taken mid-project and therefore not staged at all! There is some serious mess happening here.

So let me show you room by room. These projects are not necessarily in any order of completion, just by room.


Exterior 

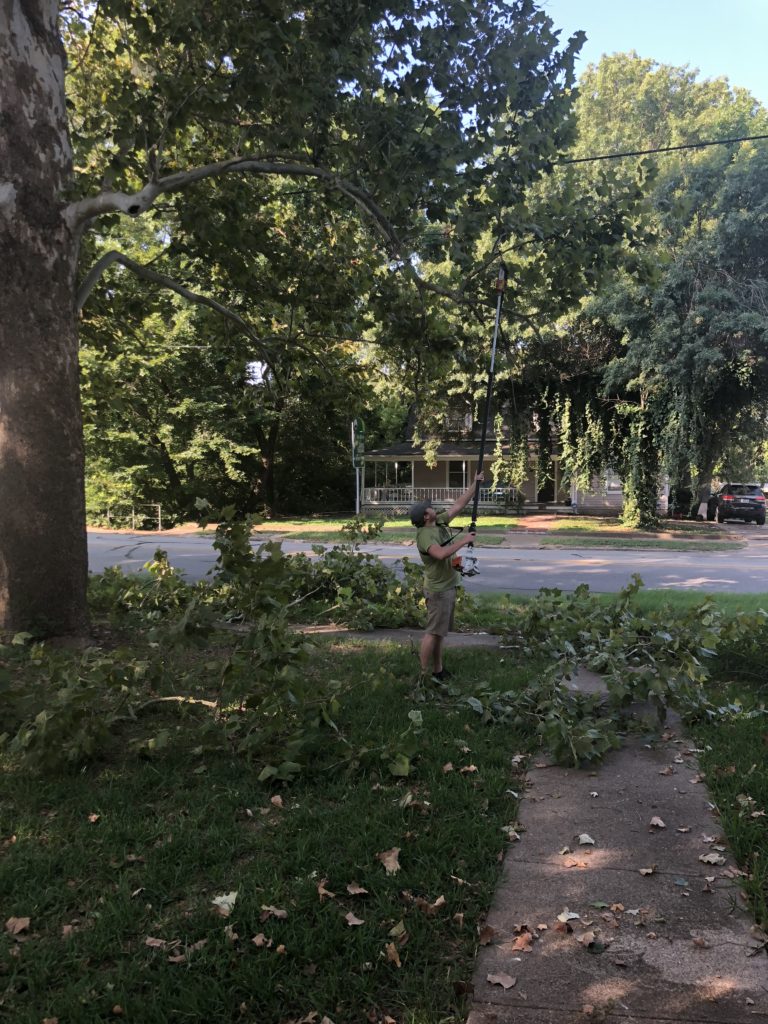
Outside, we have powerwashed the front and side (the other side is covered in paint supplies and power tools and an old water heater so we haven’t powerwashed it yet). Basically powerwashing is my new favorite thing. We also did some major tree trimming, pulling out of weeds, hedge trimming, weed eating, edging, and mowing. The lot is pretty large and has a lot of trees, so this was a lot of work.

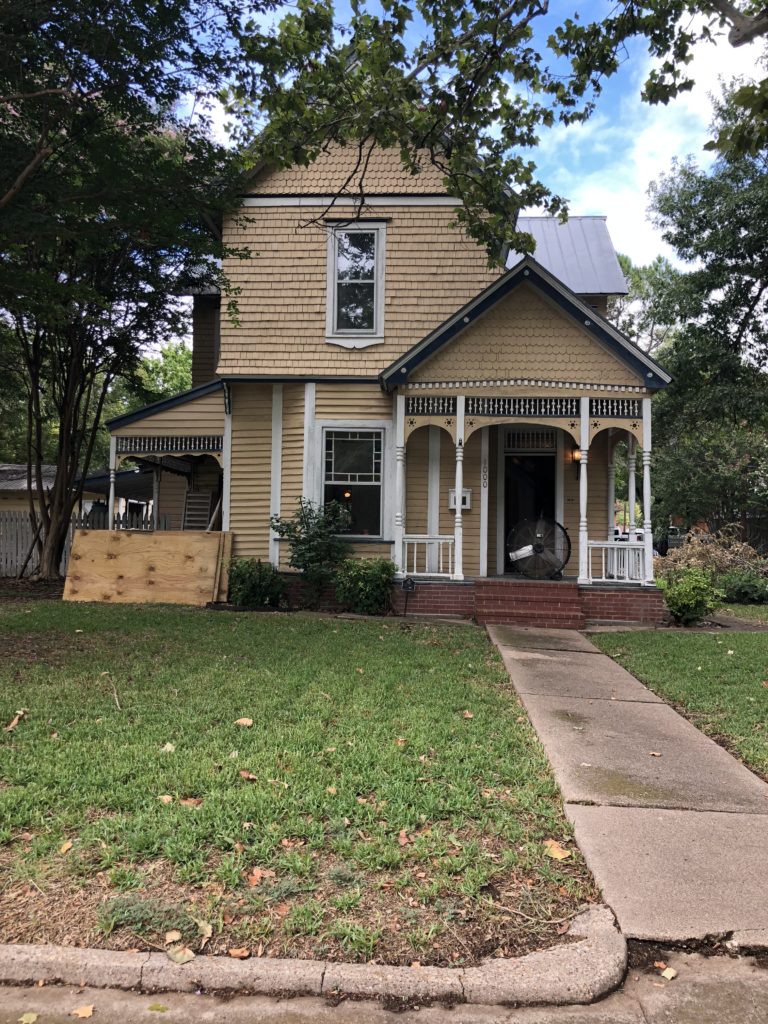
She looks a bit better from the front, now that the grass isn’t a foot tall, and tree branches aren’t blocking the view from the street. 🙂

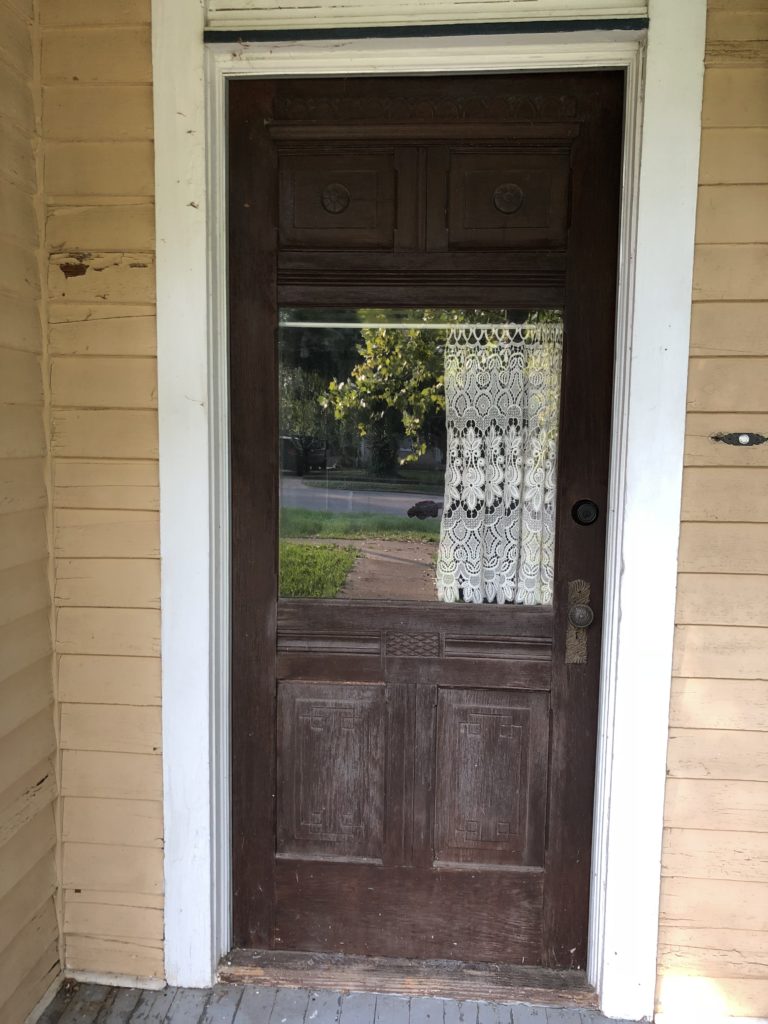
I also took some hemp oil to the front door which was super dry and tired-looking. It was a super quick project (literally 20 minutes) that made a huge difference! Here’s the before:

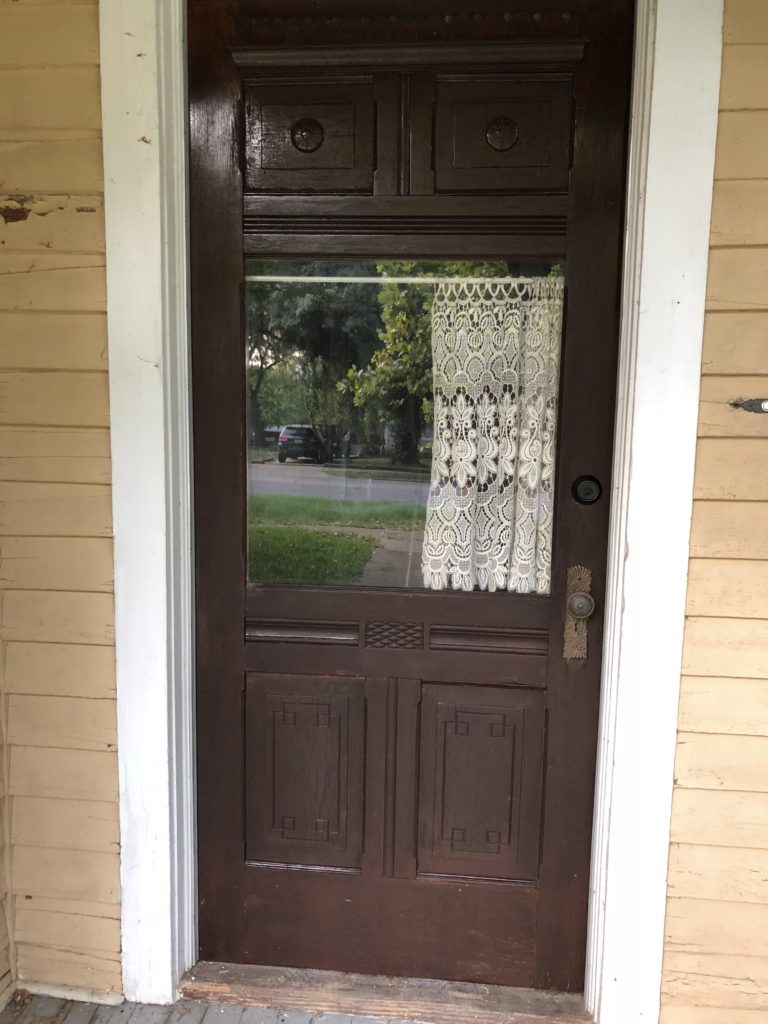
And the after!

Again, no staged professional photos here. 🙂

The Front Bedroom 

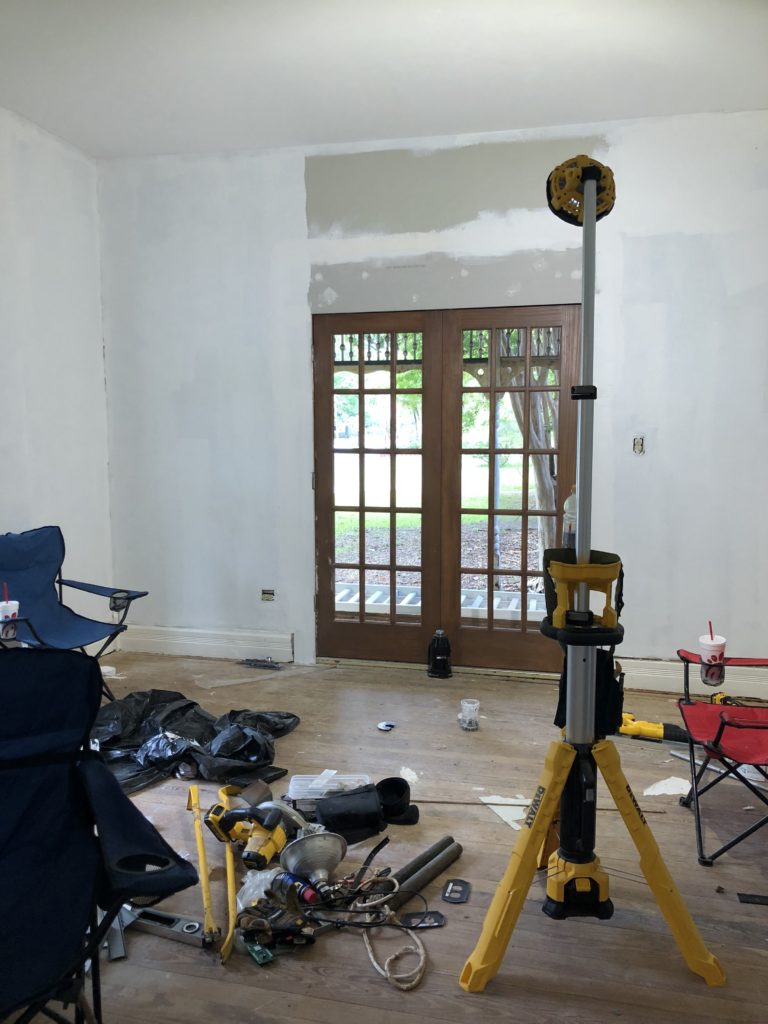
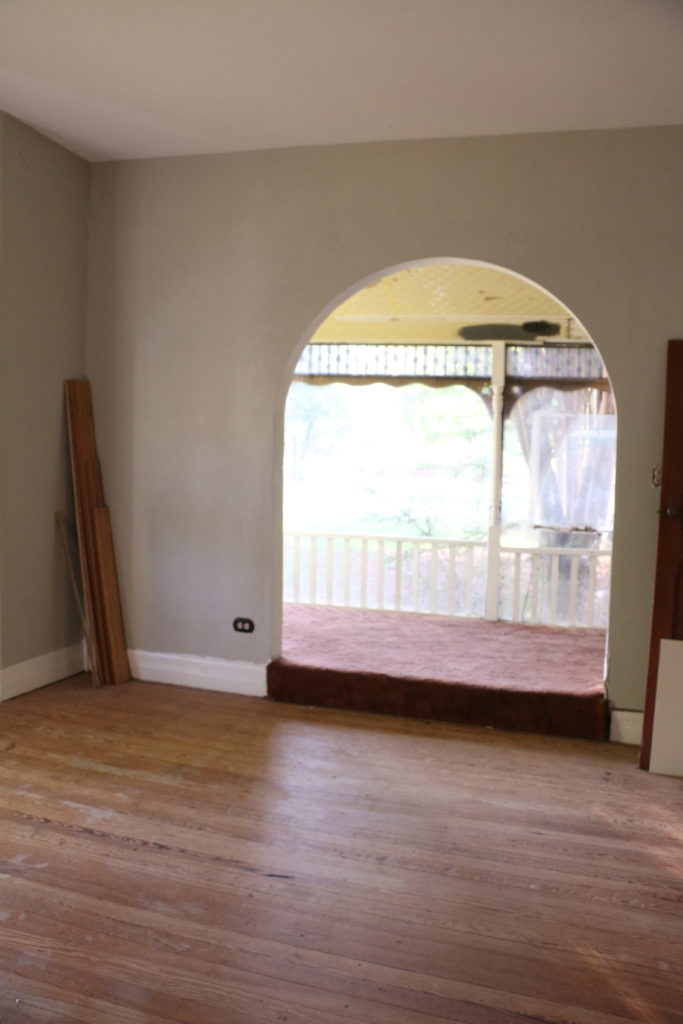
As you know, one of the main projects was closing in the archway off the bedroom onto the weird carpeted porch. We (and by we, I mean Ethan, his dad, and brother) opened the wall, straightened the archway, added french doors. This room has been primed and ready for paint as well.

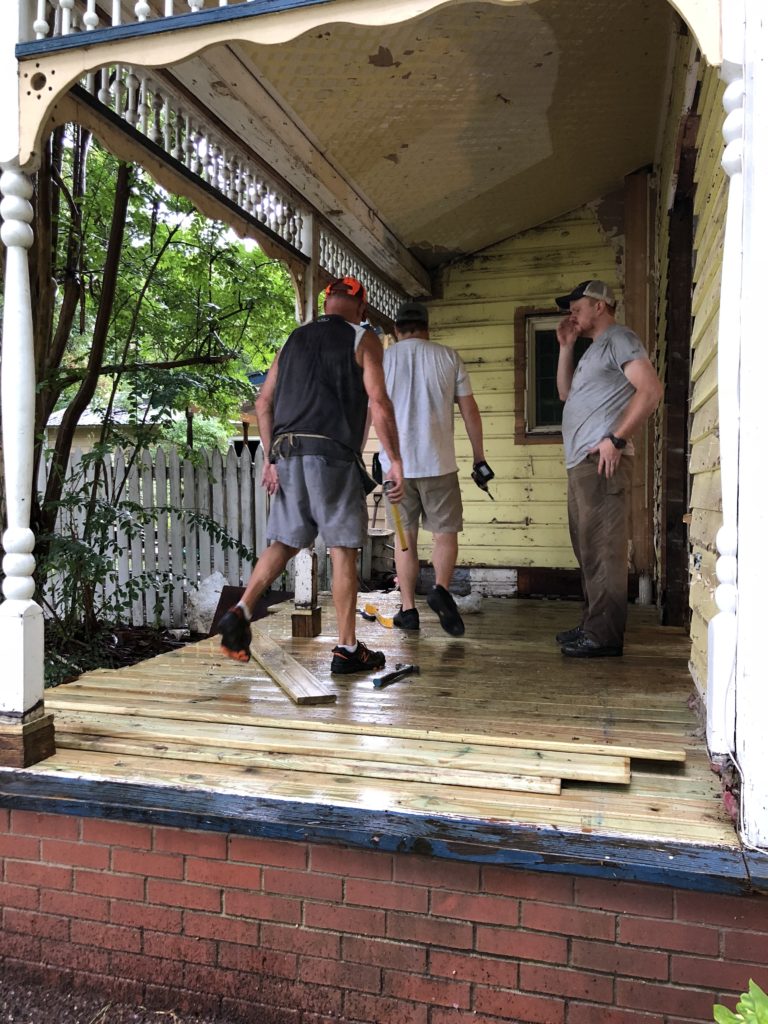
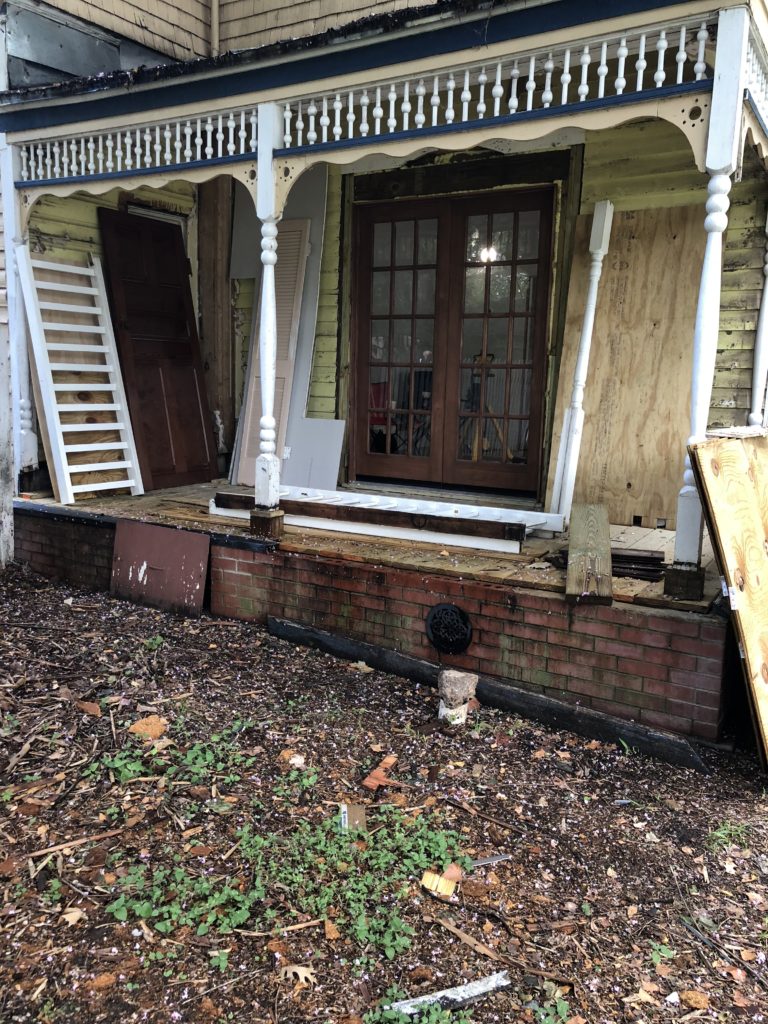
On the outside of the doors, the guys added a completely new porch. The existing sun porch was about six inches higher than the floor in the bedroom, and was just rotten plywood under the carpet. Gross, I know. The tore the entire thing out, put in new support beams on the ground, lowered the floor to the same height at the bedroom floor, and laid new deck boards.

Right now, it’s covered in excess materials from in the house, but you get the idea of what it will look like once it’s all cleaned, painted, the door has hardware, and cute rocking chairs on it.

This is the side of the house, and directly off the master bedroom, so I’m super excited about this spot.

The Living Room 

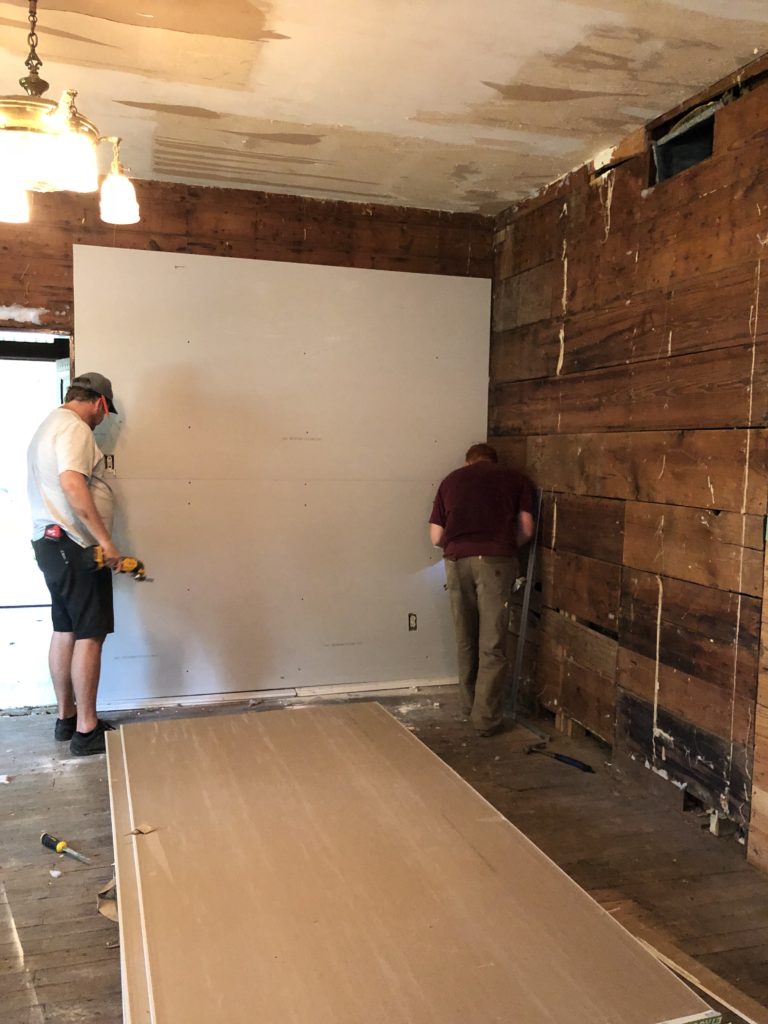
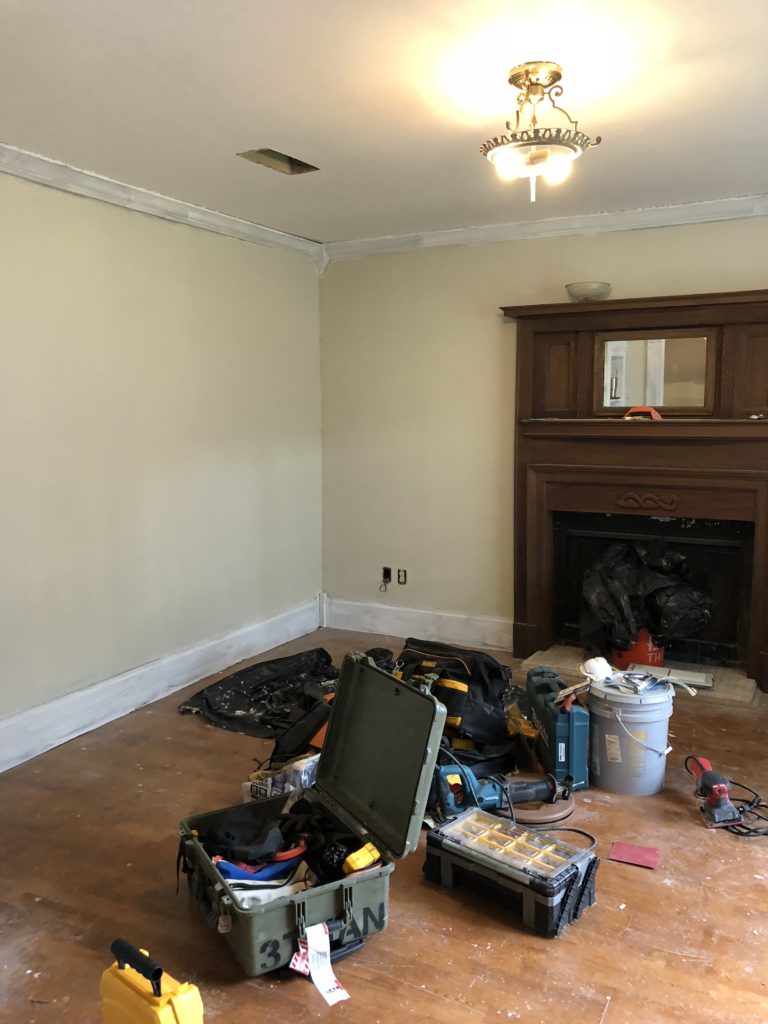
In the living room, the sub floor has been completely removed, the walls have been sheetrocked, and the ceilings have been painstakingly smoothed out after tearing down all the wallpaper.

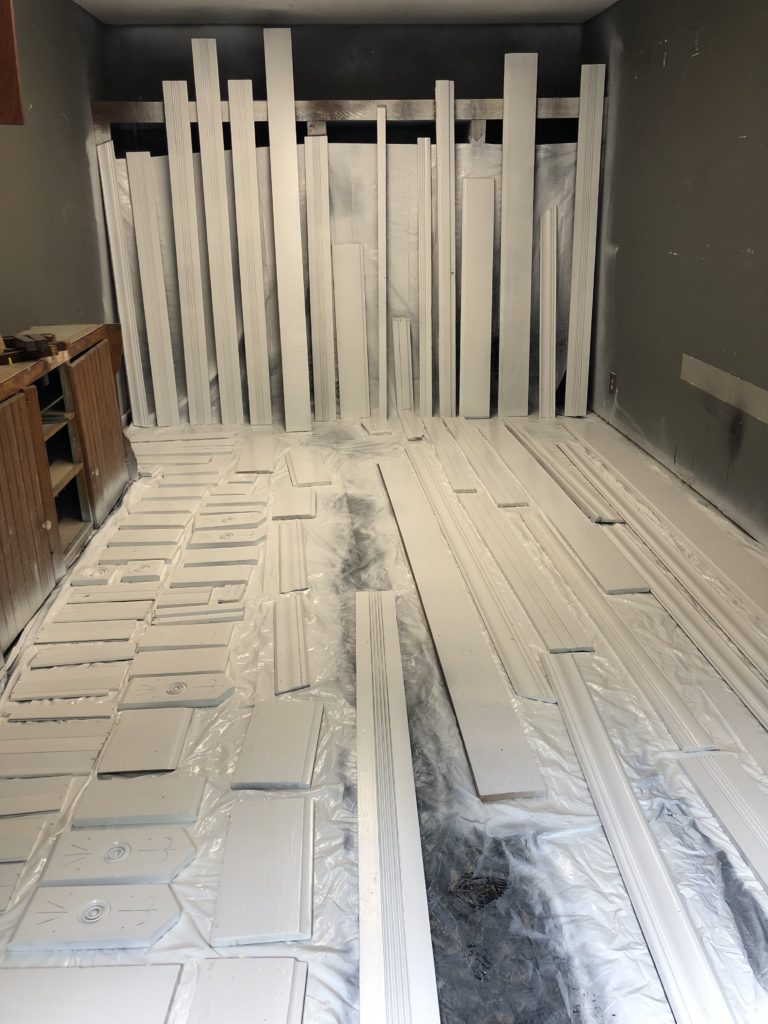
The trim that belongs in this room has been de-nailed (which took forever), powerwashed (it smelled like cats still), primed, and painted in the garage. Once the floors are done and the walls are textured and painted, the trim will all be put back in place.

The Foyer 

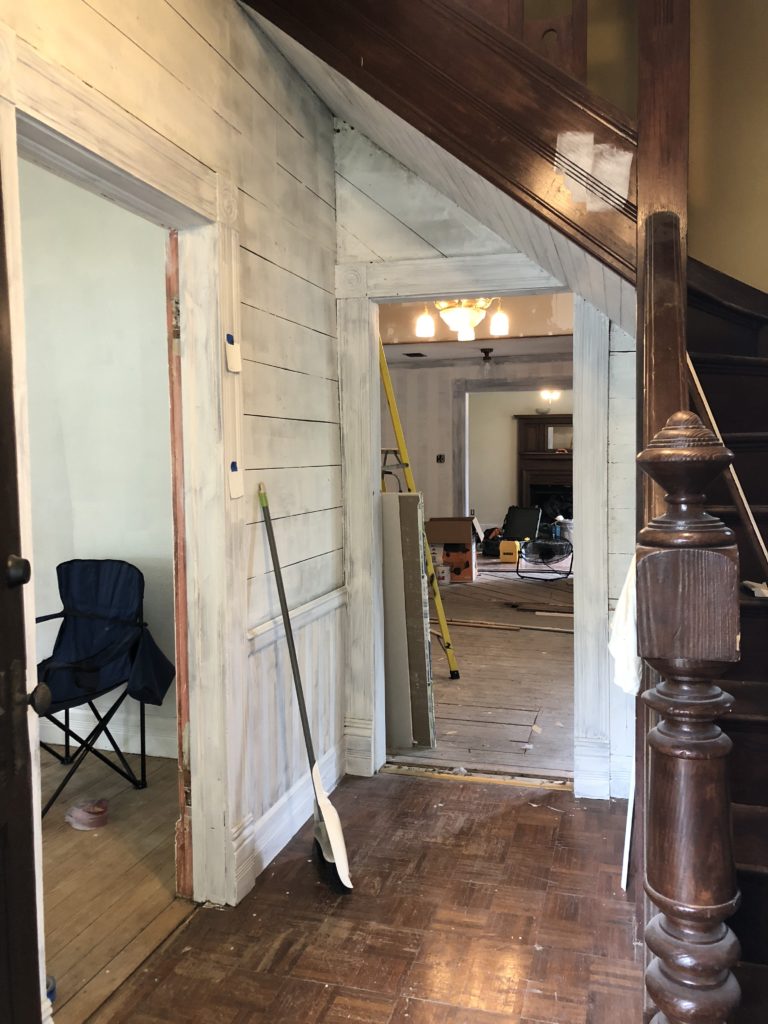
The foyer was upholstered, so we took all of that down, and took what was probably 1,000 staples out of the shiplap. The shiplap has been sanded and primed, ready for paint. This is the only shiplap in the house that we will be leaving exposed. We also primed some of the the trim in this room as well. There is more painting to be done on the stairs (not all of it, don’t worry), but some of the stair treads need to be repaired first.

The Dining Room

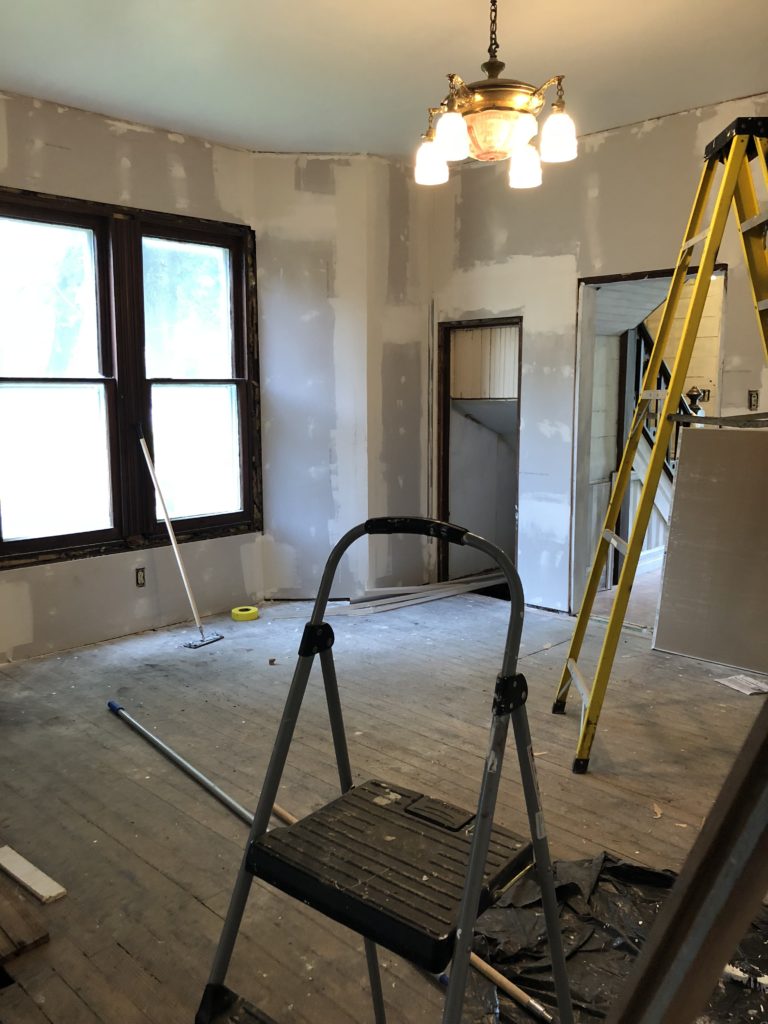
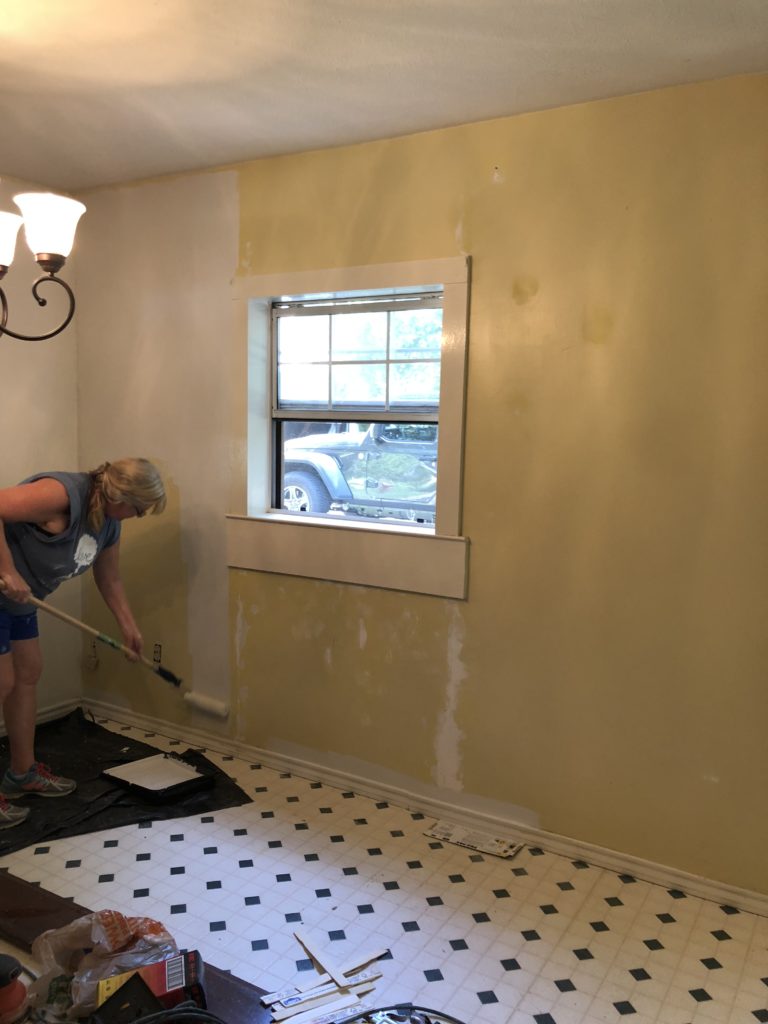
This room has been exhaustingly spackled, the drywall repaired (by my mother-in-law and myself, I might add), textured, and primed. The ceiling has also been smoothed after the insane amount of wallpaper residue that was left. It is ready for paint! 🙂

The Kitchen 

In this room, we’ve primed the walls, ceiling, and trim. There were also some cracks that had to be repaired beforehand.

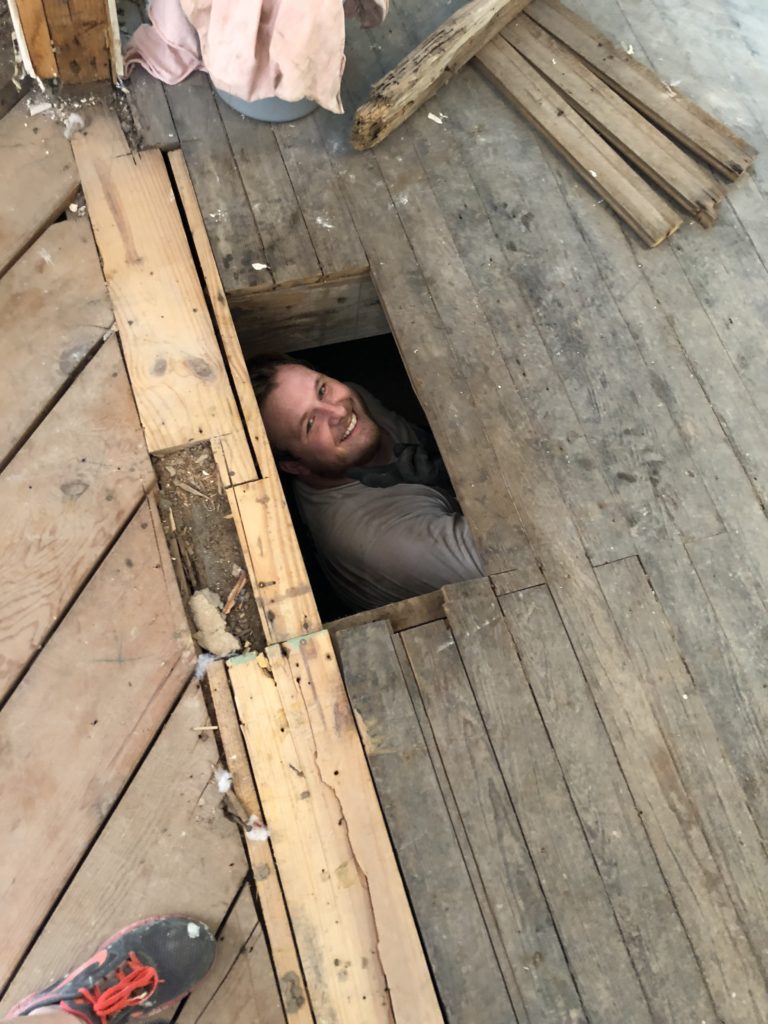
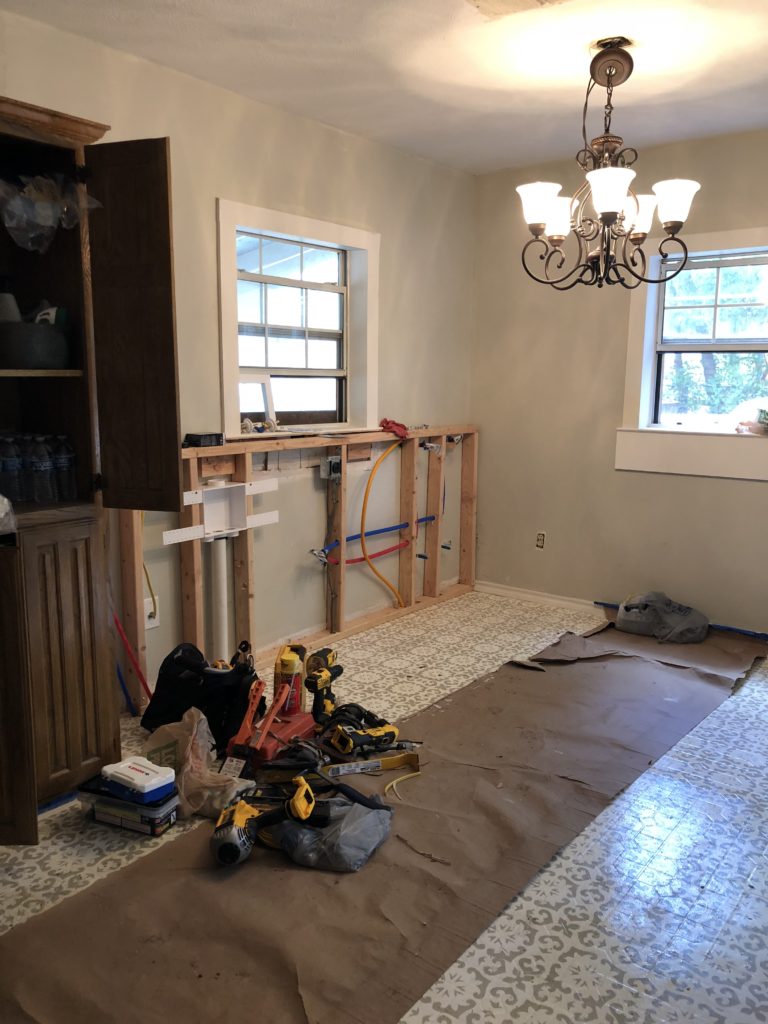
We are also eventually going to build out a portion of this room into a mudroom, so we are relocating all the plumbing (washer, dryer, and hot water heater) into the corner of the kitchen. This has been a huge ordeal for my father-in-law, Ethan, and his brothers. It involves a ton of crawling under the house to move plumbing hoses, and lots of things that I don’t fully understand. We are moving the washroom basically across the entire house, which has been a job. But, it has given me what is my favorite picture of Ethan ever taken.

There are still some finishing touches to be done before we can officially check this off the list, but this is where the eventual laundry room will go.

Also… a sneak peek at another project I’ve worked on! If you follow me on Instagram, you may have watched my stories documenting this project. I’m not ready to talk about it yet….because I’m still a little bitter and it may go down in history as a massive fail. I will keep you guys updated in a separate post on the outcome!

The First Floor Bathroom 

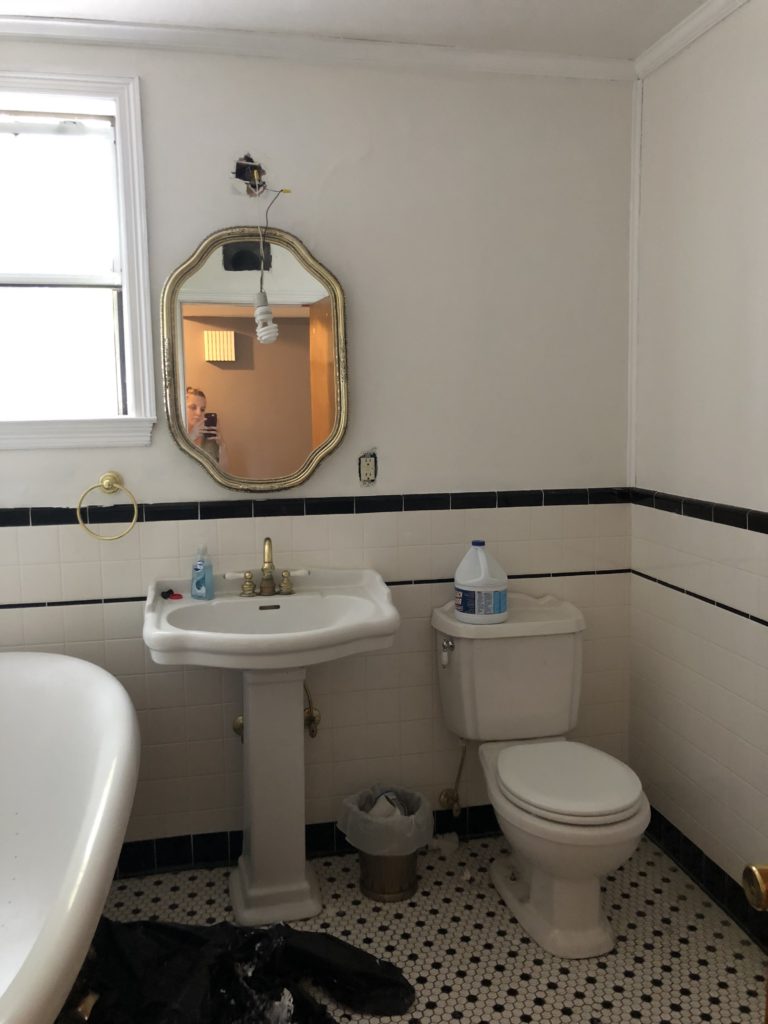
This room may just have a lighbulb dangling from the fixture hookup, but it has been primed and painted! Since it it the smallest room we will be painting, we did some experimenting with the paint color over the primer to test the coverage. So this is the only room that has actual paint! Exciting times, friends, exciting times! (It does need some touch ups, but let’s not talk about that.)


I don’t have a picture, but we’ve also prepped the upstairs nursery by sanding the spikey textured walls, filled in a ton of holes, and primed it for paint. Lots more to do, my friends, but so much has been done. It’s crazy to look at the progress we’ve made so far, but also I’m constantly freaking out about finishing in time. It’s a roller coaster of emotions! Everything takes so much longer than you think it will, and things are constantly coming up that we didn’t anticipate. Still though, this is one of the most exciting times for us. We can’t wait to move in!

I’ll keep you guys posted over the next few weeks about what we’re up to next. That’s all for today, friends. Have a fabulous day!
House Progress, Room Tours

The New House: The Before

Alrighty, friends, I shared the other day that we just bought a house, and we are so so excited about it! If you didn’t read that post, you can check out the entire story here.

Today I wanted to share some of the pictures of the house as it is, and talk about our plans for some things. Be forewarned though – these are rough! The rest of this post is going to be a whole lot of ugly, so scroll through at your own risk.

The Exterior 

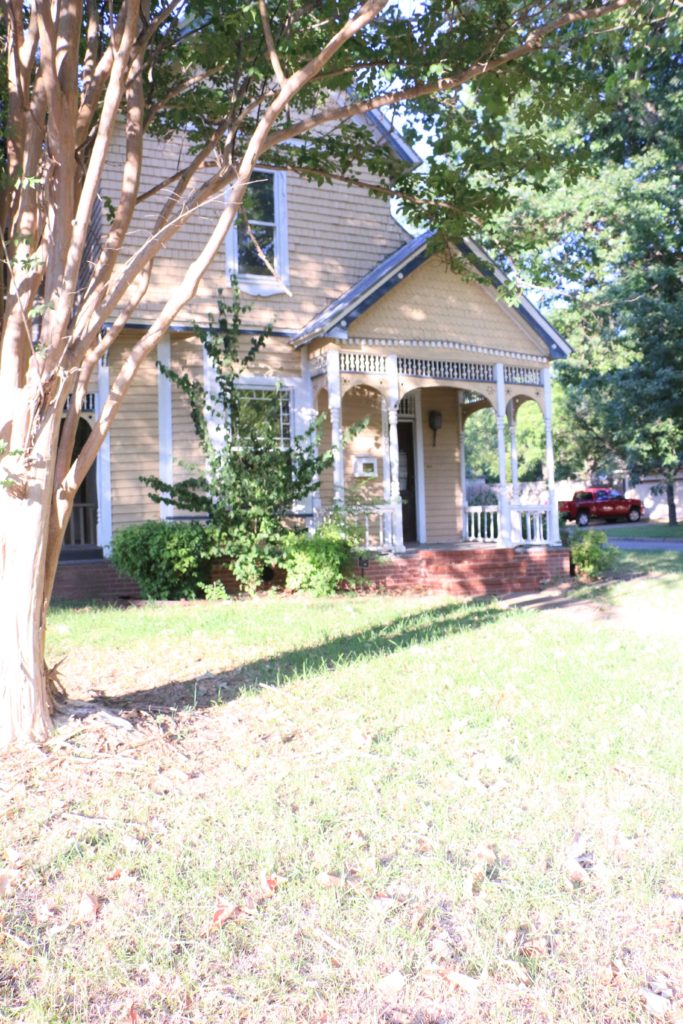
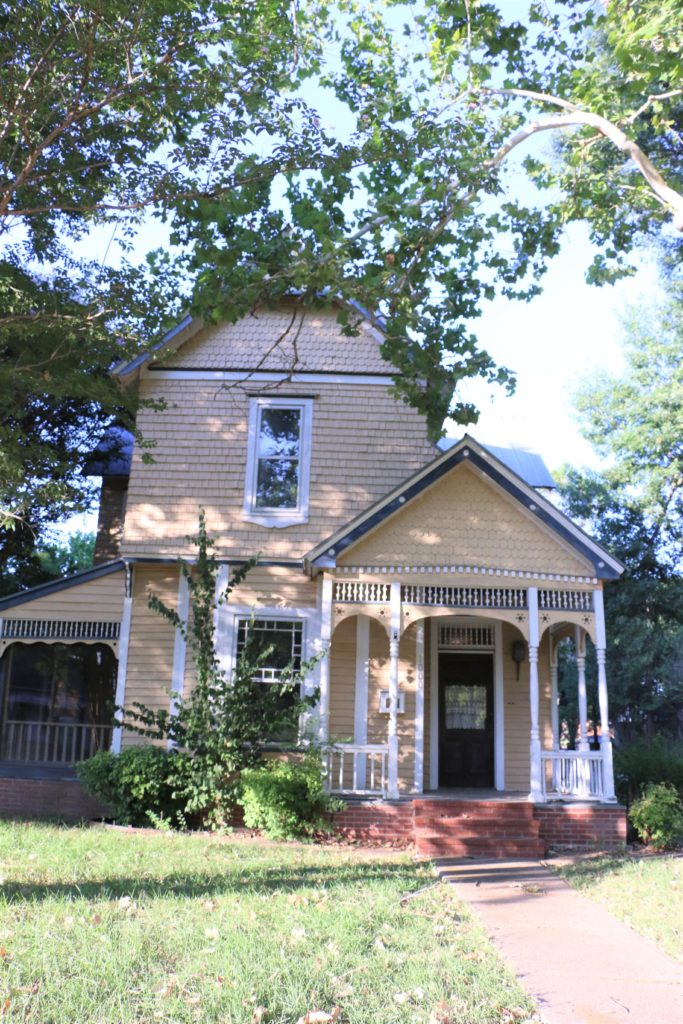
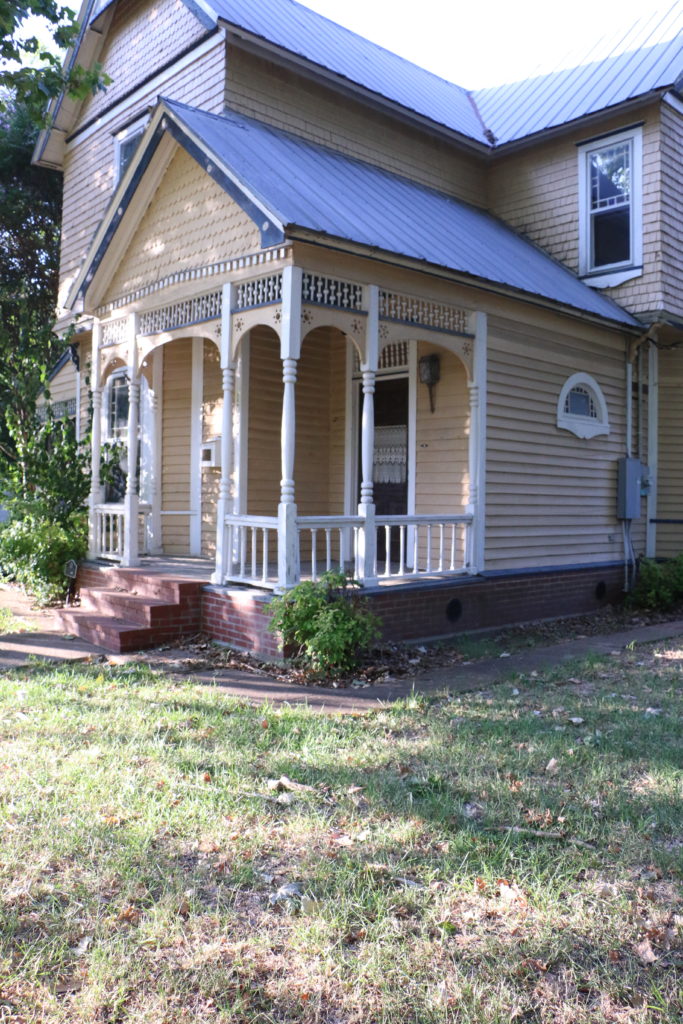
Let’s start with the exterior. It needs a bit of work, I don’t love the color, and the yard is a mess. But, of course it is so charming with all the gingerbread trim, and so it’s not hard to envision what it could look like with some love. It’s a historic home on our city’s register of historic buildings, which means there are some regulations about what we are able to do to the house. The interior is basically fair game, but the exterior facade has to remain the same for the most part. Thankfully, this does not include paint color.


The Foyer 

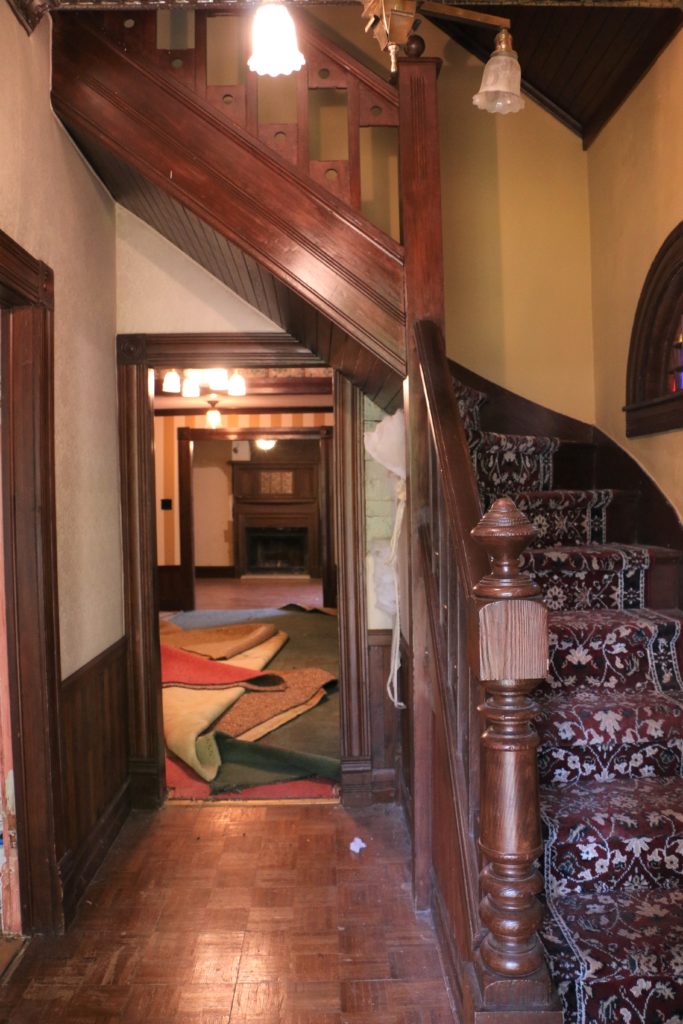
When you walk in the front door, you walk into this small foyer with a stairway to the second floor. It’s teeny tiny, and definitely over a century old because the stairway doesn’t have much headroom, but it does have some gorgeous craftsmanship.

The Master Bedroom

The master is the only bedroom on the first floor, and it is what was once the original parlor of the house. It needs some serious work, as you can see there is an archway that leads out onto a porch here. The porch has a plexiglass cover, but it is definitely not a permanent solution (although I believe it’s been that way for about 30 years). We plan on putting in a functioning door, and walling in the arch. Then we’ll remove the plexiglass on the porch and have a porch off the master bedroom.

The Living Room 

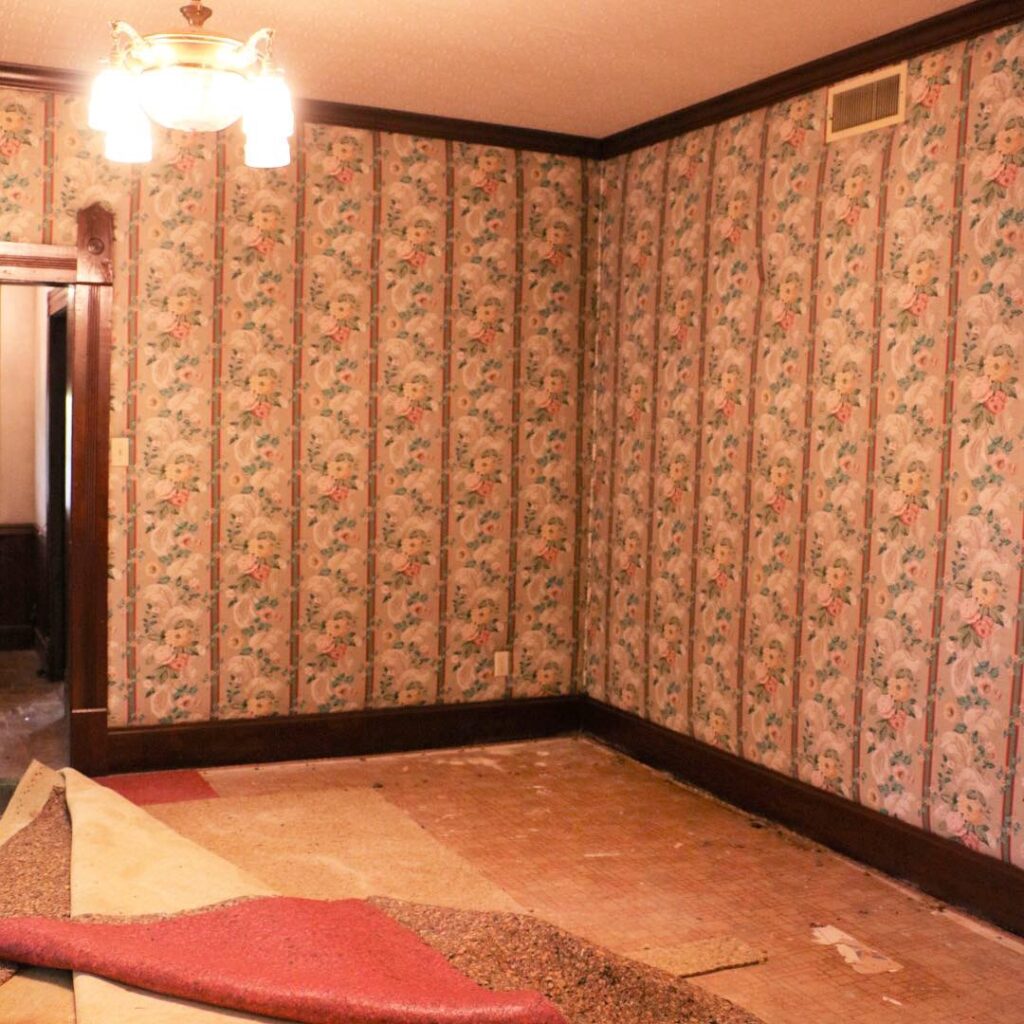
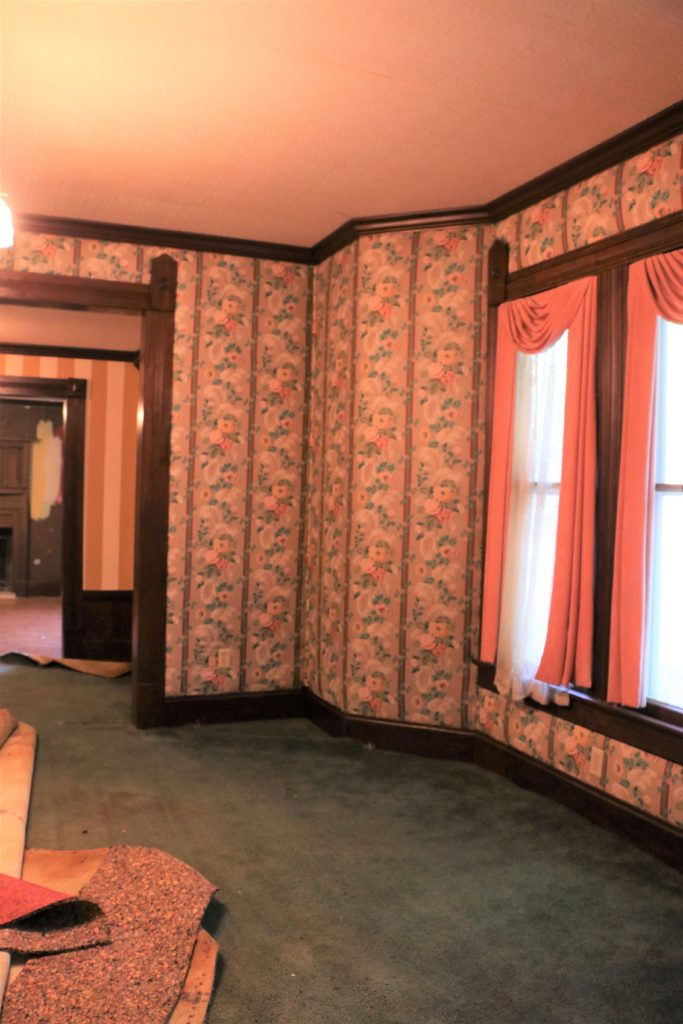
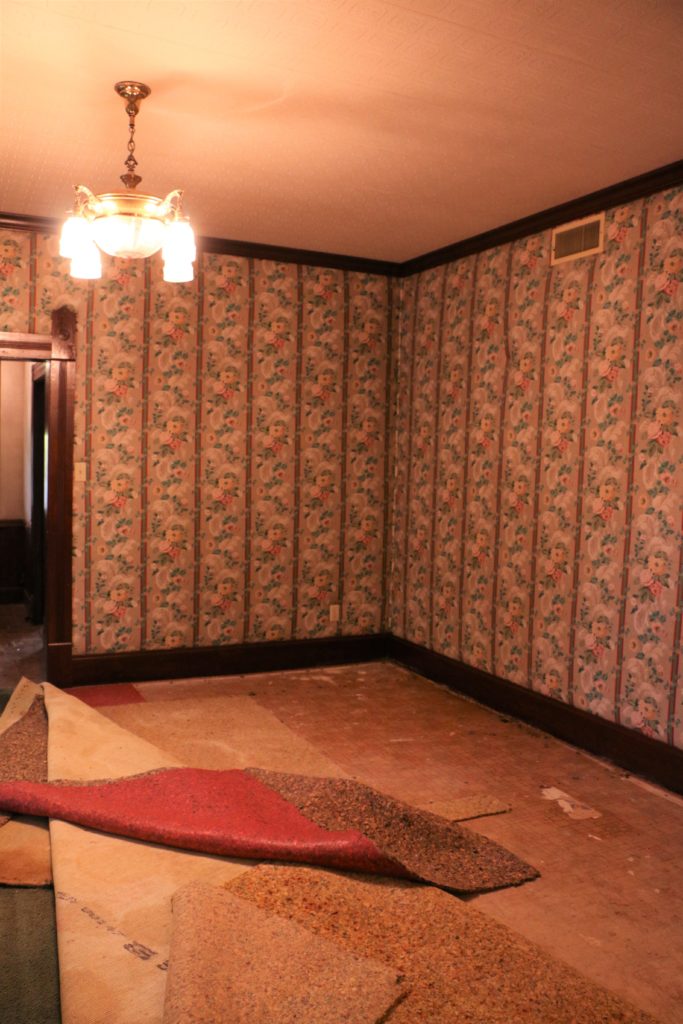
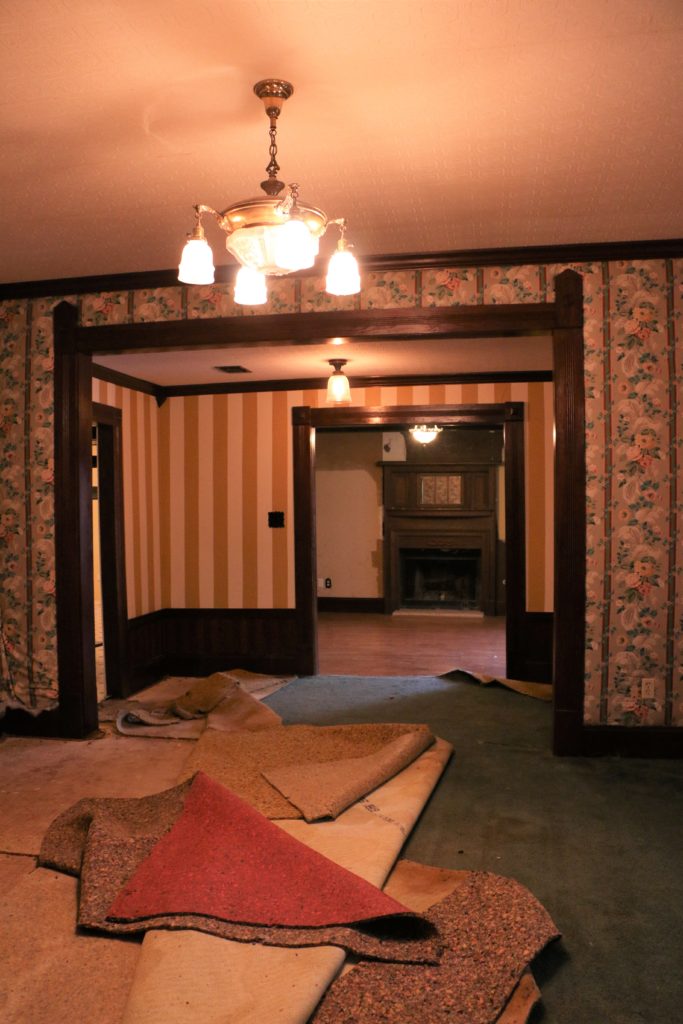
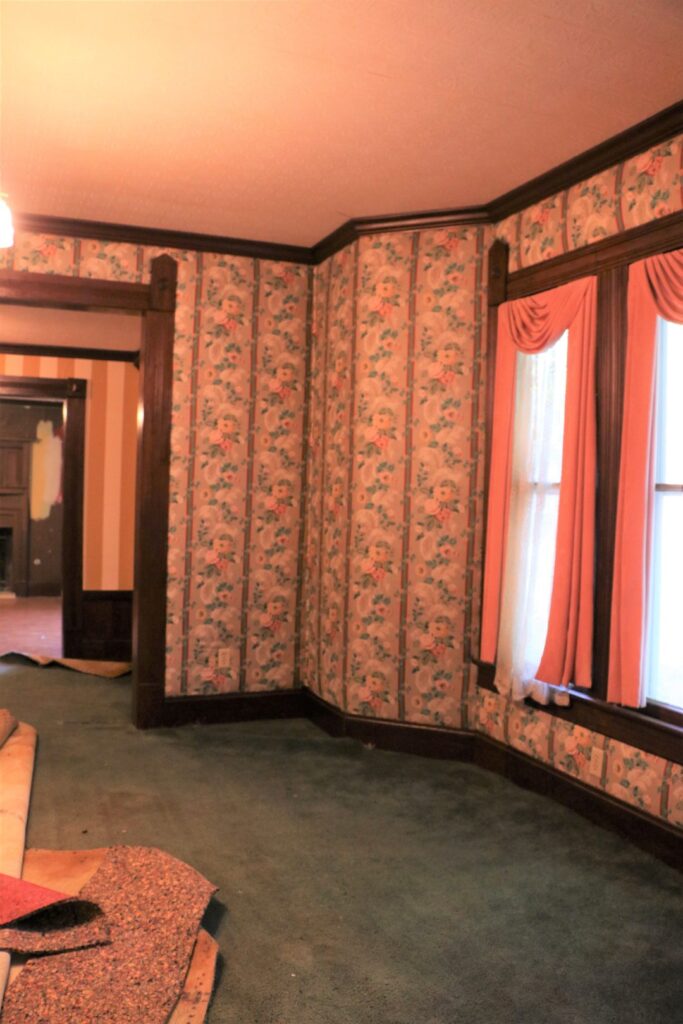
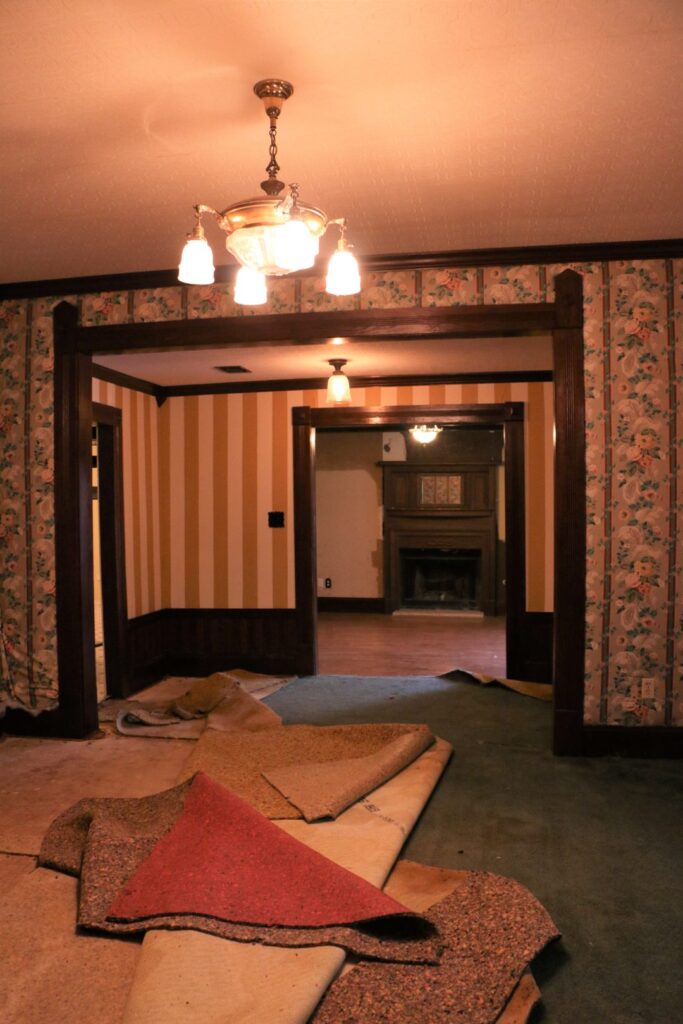
The living room is eerily quiet when you walk in. That’s because it’s one of the few rooms that has carpet, and the walls are upholstered. From my understanding, upholstered walls are period appropriate for the era of the house, but this was a reproduction done in the 80’s or 90’s. Under the carpet is linoleum, and hopefully below that is the same gorgeous hardwood that’s in the master bedroom. Pulling up the linoleum is going to be a pretty serious job though, so we’ll see how that goes.

The Dining Room 

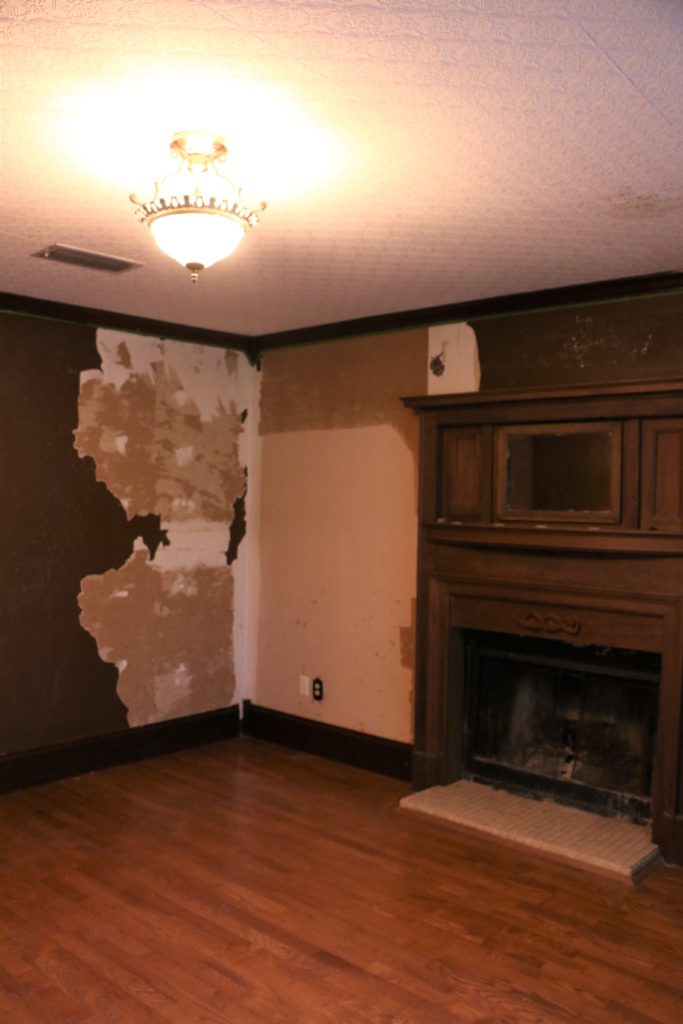
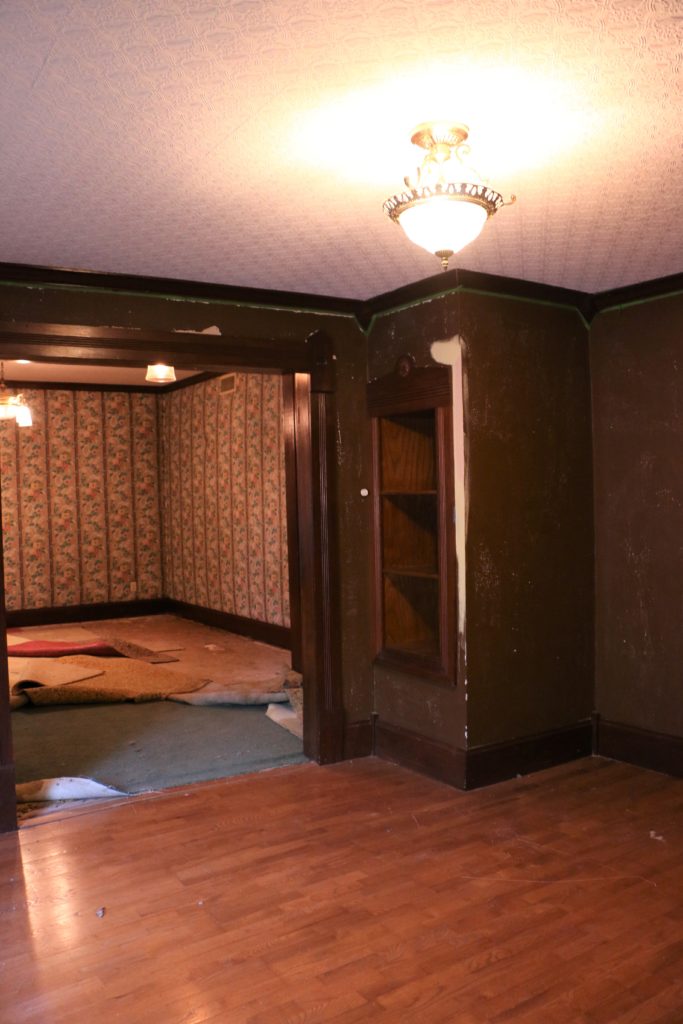
The dining room and kitchen were actually added to the house later on, they are at the far back of the house. I’m not sure when this portion of the house was added, but none of the features are original. The family that lived here from the 1980’s to the mid 2000’s did add the fireplace, and they definitely chose thoughtfully something that would work well with the original portion of the house.

The Kitchen 

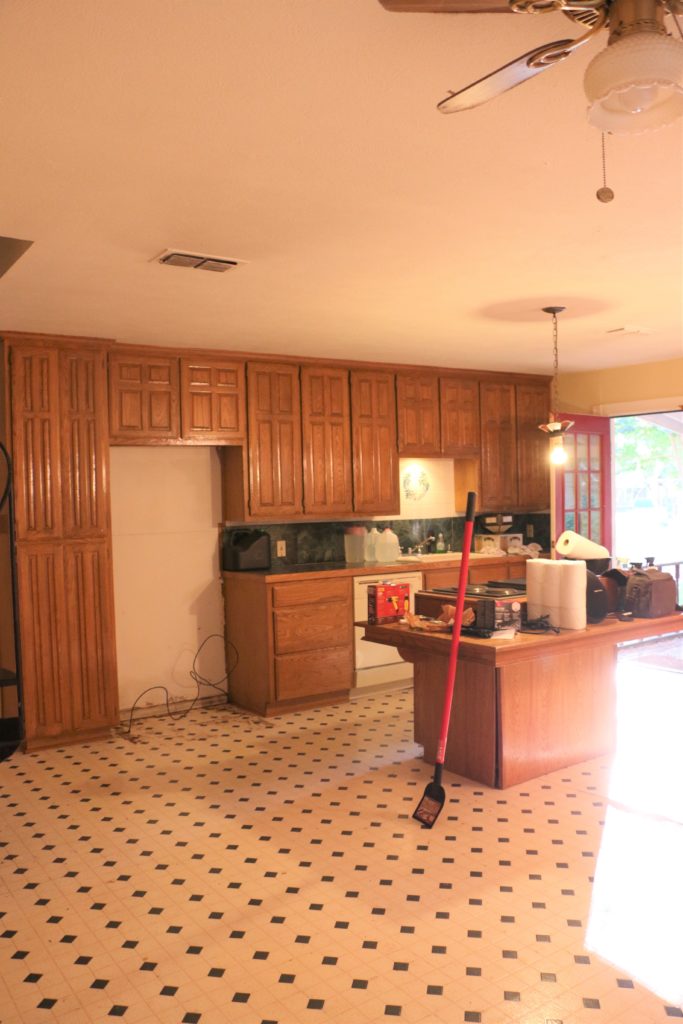
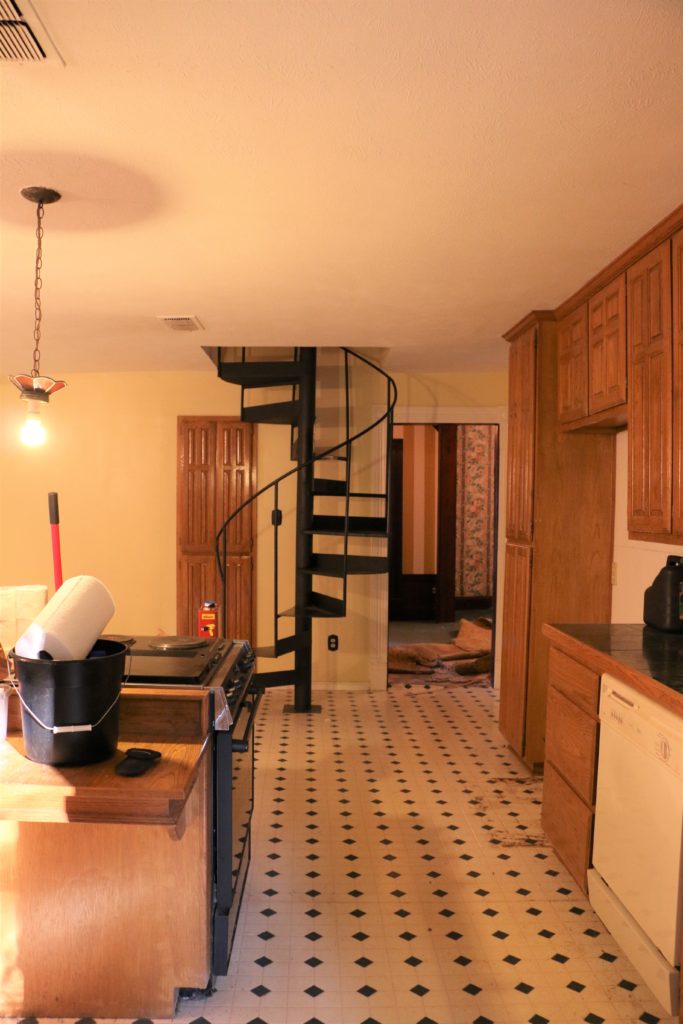
The final room downstairs is the kitchen. Like I said, this is not original to the house, and is a true homage to the 1980’s.  This is where the back door leads, and it is actually a very large kitchen. We aren’t sure exactly how we want to use the space yet, but we plan on doing a “Phase One” cosmetic remodel to the kitchen, before doing a full gut job and reconfiguration of the space. Some thoughts we have may be to build out a laundry room/pantry/mudroom, and to eventually add a traditional stairway here to replace the spiral staircase. Since these things require some serious construction, it’ll probably be a few years before that happens.

The Upstairs Bedrooms 

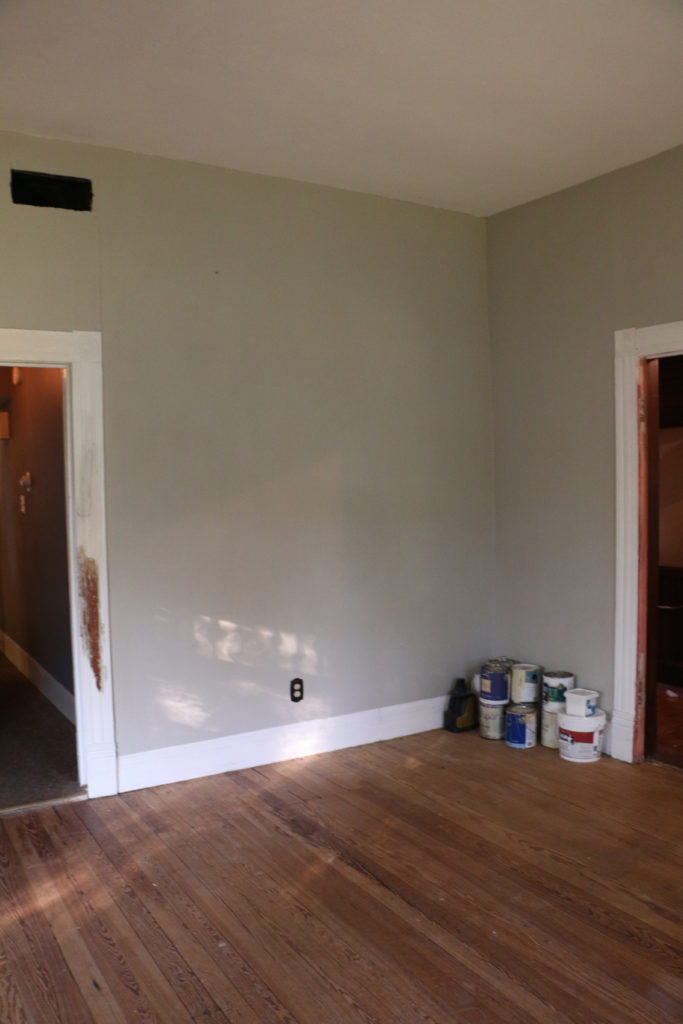
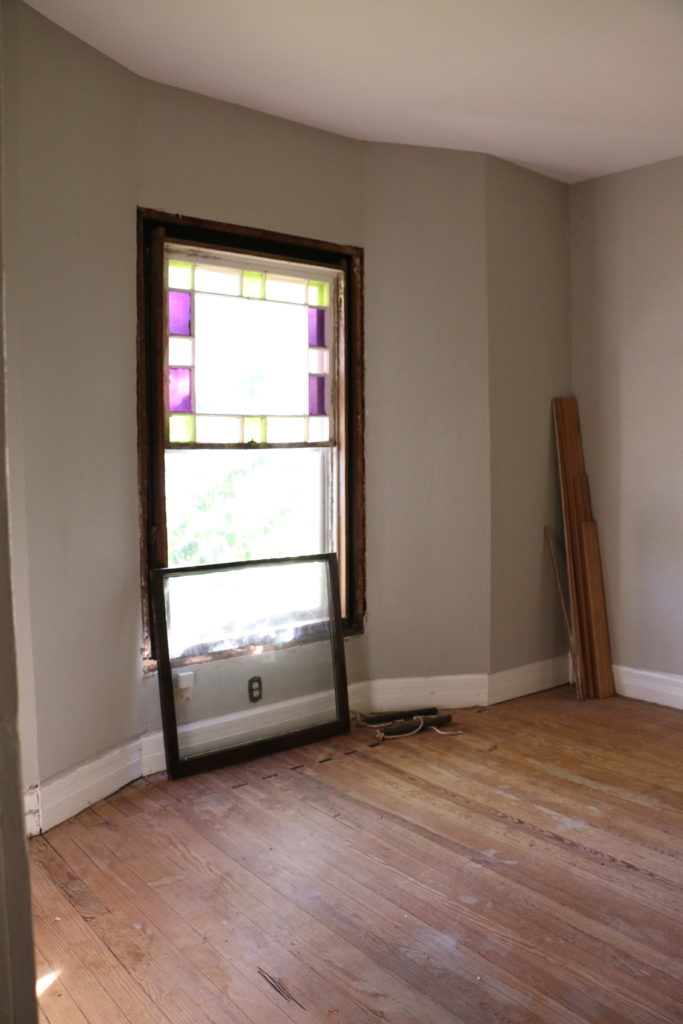
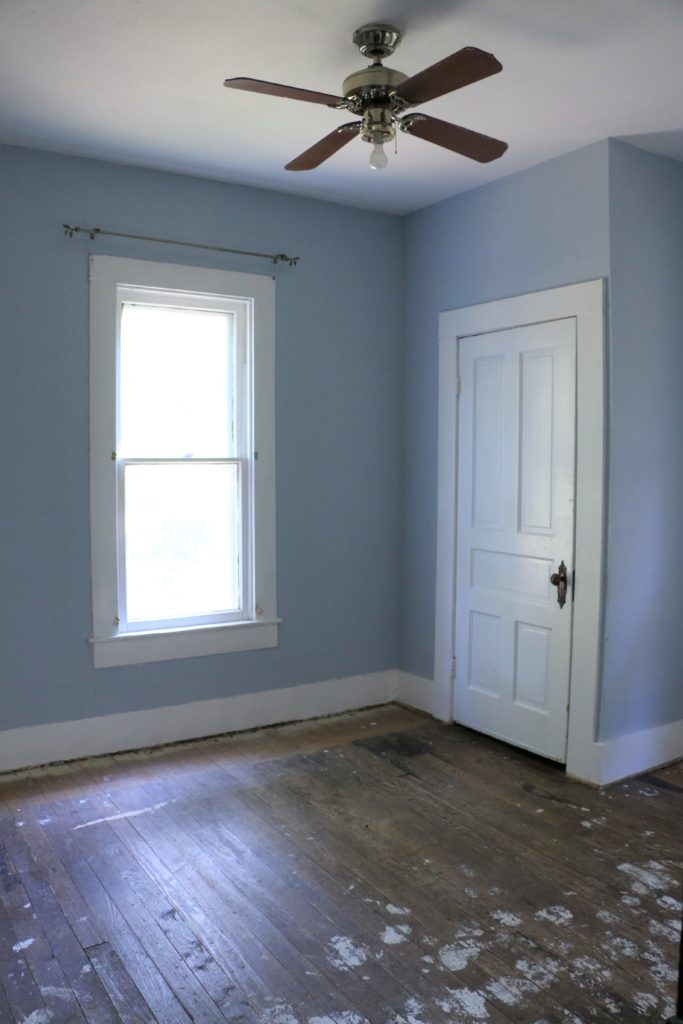
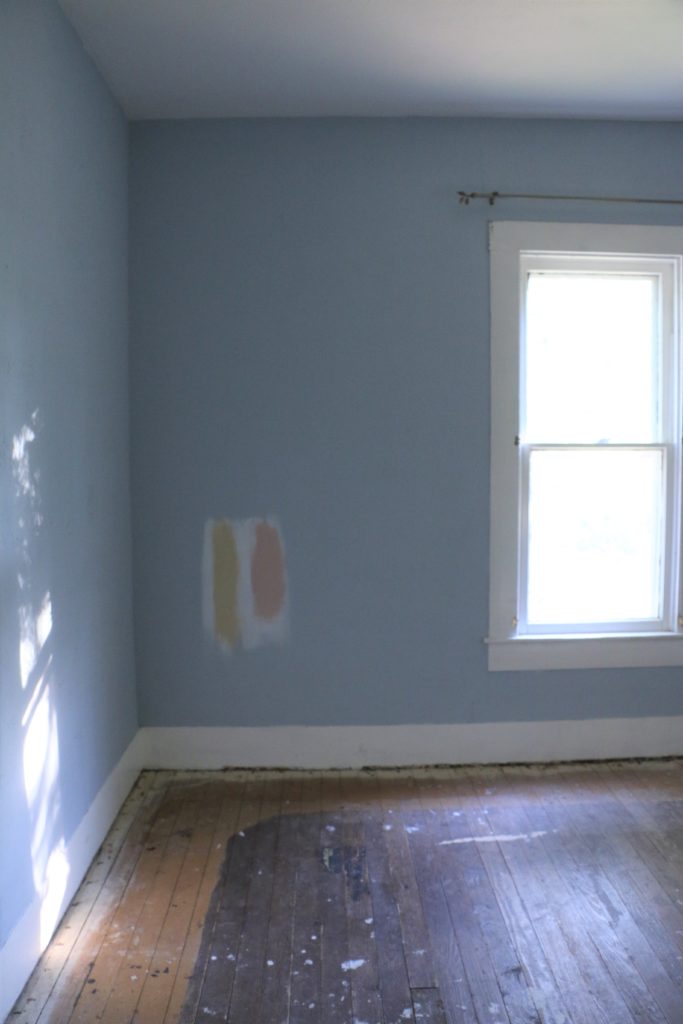
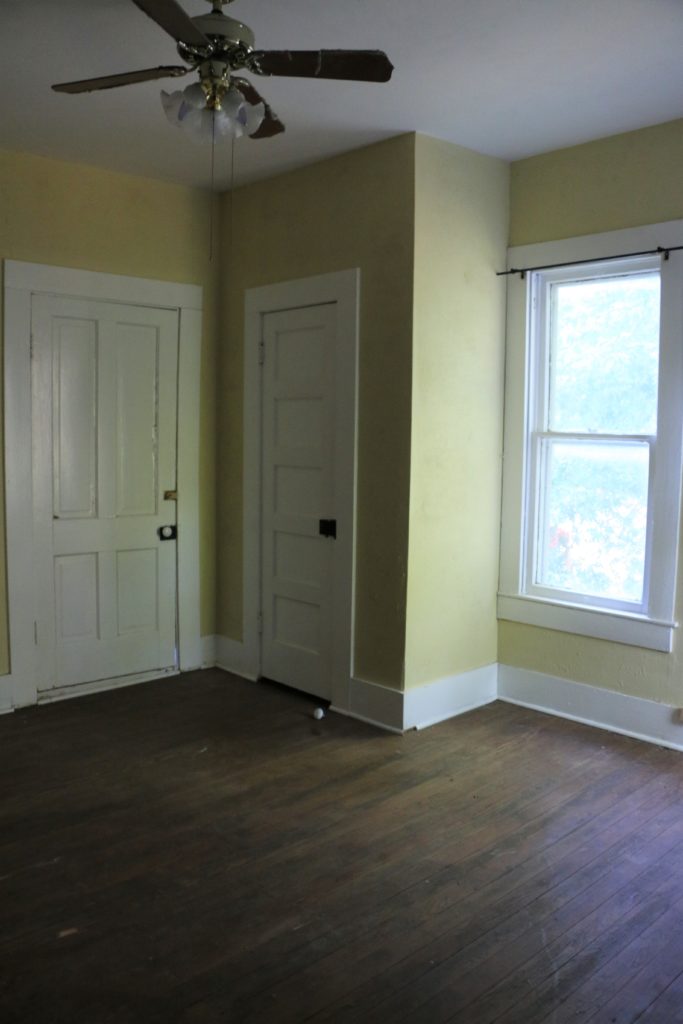
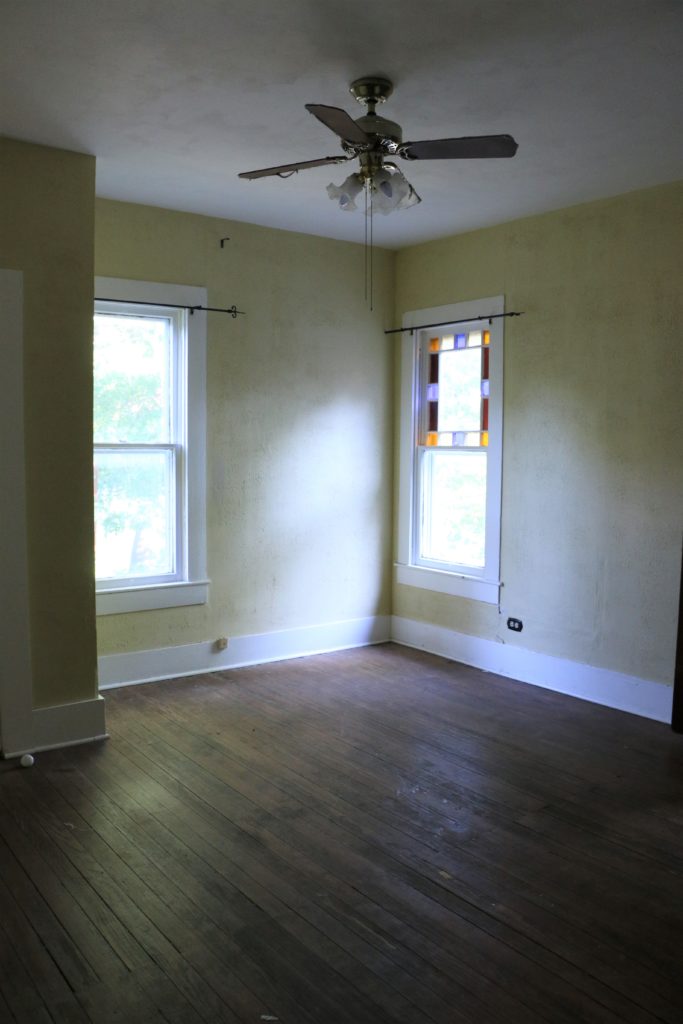
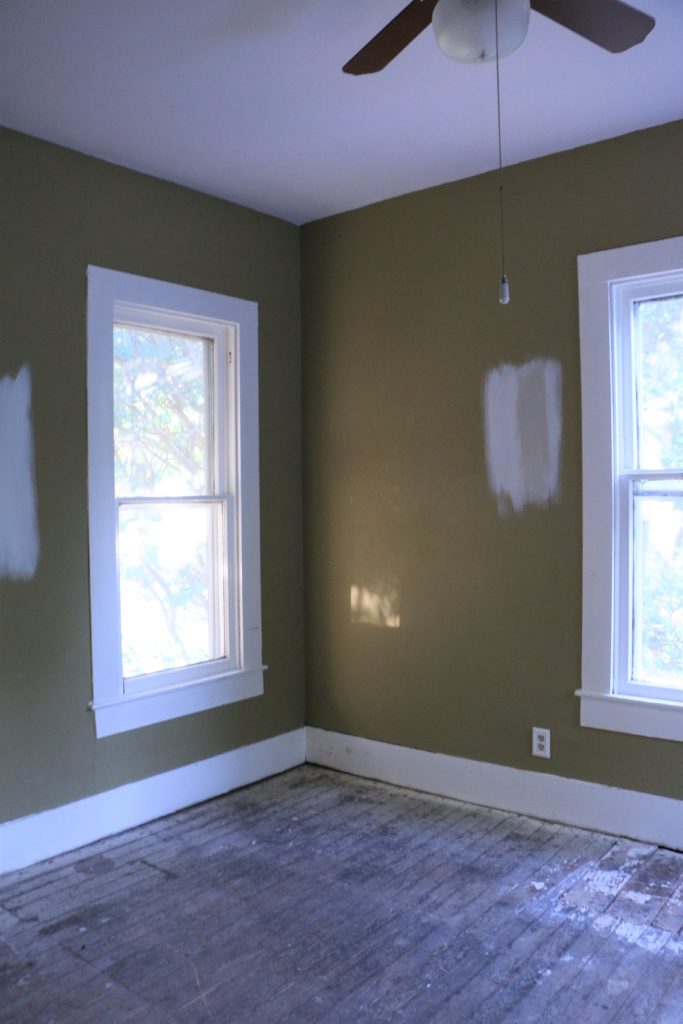
Upstairs, there are three bedrooms and a creepy little carpeted bathroom. The bedrooms all have hardwood, which is original to the home, but in need of some TLC. The layout is a bit wonky, but what old house isn’t? The bedroom that is currently painted blue will be used as the nursery, although it may not be finished before baby gets here. Which is just what my planning personality can handle. 😉 The other two bedrooms will serve as guestroom and office, until we have need of more bedrooms. Thankfully, all the rooms have closets, pretty doors and hardware.

We’ve started doing some of the work already, so these photos are already outdated. We have been waiting for such a long time to start a project like this, it is so incredibly exciting for us. I’m sure it will be stressful and frustrating at times, and things will be dragged out far longer than we anticipate. As of right now, we plan to get as much of the “top priority” work done this month, and move in at the end of the month. We haven’t done much to prepare for baby’s arrival this fall, because we’re going to be moving! God sure has a sense of humor when it comes to timing!  The entire project will take several years, but we are going to do things at the rate of the cash we have to spend, and so we know it’ll take a while. It’s going to be a long lesson in patience, contentment, and hard work to say the least!

Thanks for checking out the before pictures. Make sure you check back as we continue the process! That’s all for today, friends. Have a fabulous day!
 

Home Decor

When “Your Style” Seems to be Changing

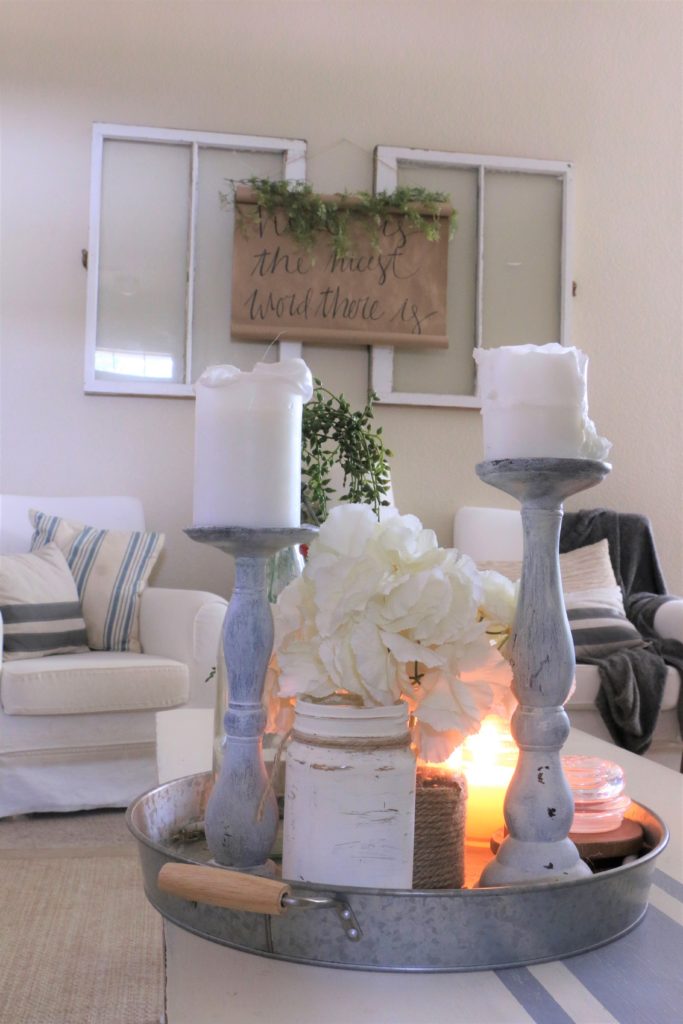
Have you heard from design magazines or HGTV shows about finding “your style” and sticking with it? For the last four years as I’ve been making our two different rental houses home, I’ve been drawn to a farmhouse-y, cottage-like style characterized by lots of chippy, white, antique-y looking things. I’ve sourced all kinds of materials from flea markets, and made things we owned to look older by distressing them.

I started a business refinishing furniture and sourcing antiques and I have done well for my home and others’ homes using all things “farmhouse style.” But guess what? Can I tell you these possibly forbidden words? I’m starting to get sick of it. Whaaaaaaaat? Am I even allowed to say that? Let’s backtrack a little bit.

In my personal style (the clothes I wear and how I present myself), I generally use words like classic, erring on the side of “preppy” using lots of neutrals and blues. I try to stick with only buying pieces that won’t be out of style in five years. But guess what? Would you believe that in high school, for a short time, I was really into duct tape. As in, I made myself all kinds of accessories out of colored duct tape. Belts, purses, wallets, bracelets, you name it. Now, does this fit in with the classic, natural, timeless way I try to present myself? Absolutely not! Because it was a phase and I moved on past that phase.

I think you may be able to see where this is going. I am going to step out on a limb here and say that in our homes, we’re allowed to have phases too. We don’t have to stick to something that we picked five or ten years ago just because that’s what we chose and now we’re stuck with it. So that brings me back to my own home. I have been a lover of the modern farmhouse vibe in all it’s white and gray and chippy paint glory for several years. But I sense myself moving beyond that.

Don’t get me wrong. I love antiques. I love shopping flea markets. I don’t see myself stopping that trend and solely shopping Target from now on. But I feel that I may be moving (or trying to) toward a more timeless, classic and traditional look in my home. Not so shabby chic, but polished. This is going to be a process. I’ve always been on a budget, so there’s not going to be room to re-furnish our entire house just because I don’t like our stuff anymore. No, I’m going to do things as I always have – slowly evolving over time.

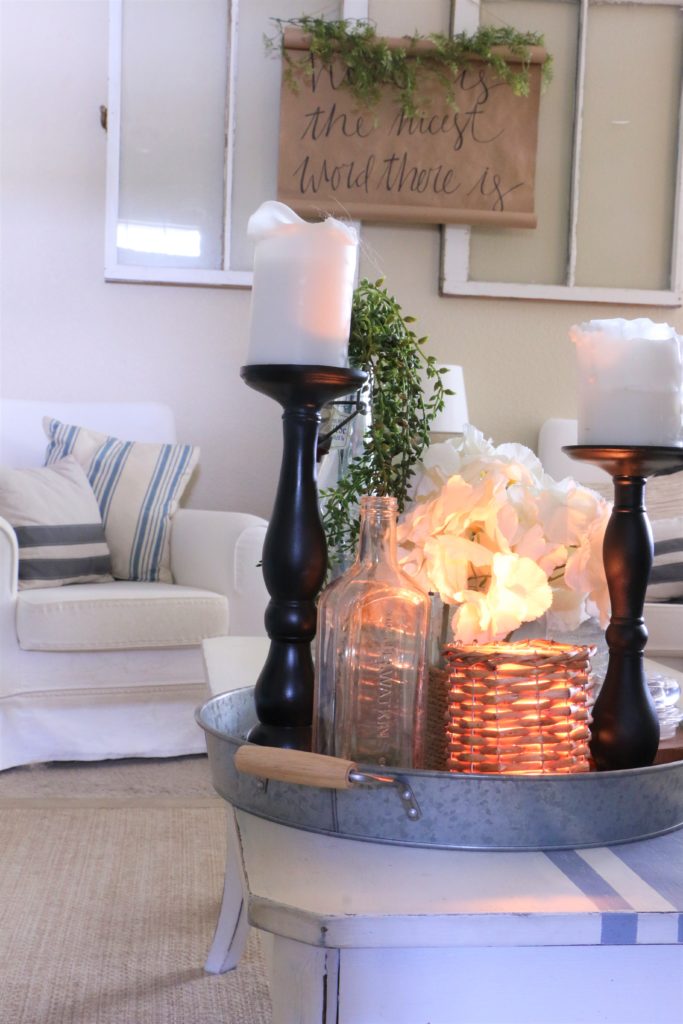
Take this vignette for example. White on white, some galvanized metal, twine, distressing. These are staples in my design choices and have been for a long time. Yesterday, I made some small and simple changes to this vignette. Because one teeny tiny change can make you feel like you’re doing something, even if it’s not an entire house or room.

I took some matte black spray paint I had in the garage and gave these candlesticks a new look. I swapped out the distressed jar for a basket-weave candle holder. I added this antique medicine bottle. But that’s it. Everything else is the same. The flowers, the greenery in the jar in the back. I didn’t change the table (though that’s on my list), the tray, the furniture along the wall.

I took a tiny step in the direction I want to move toward. I don’t know what words you might use to describe the look I have in mind. I have words like “neutral,” “traditional,” and “casual” in my mind. I am loving elements of matte black, natural textures like jute and basket weave, and dark brass. I was looking around my house and realized I don’t have a thing in it that’s black! Good thing I know my way around a can of paint. 🙂

I plan on slowly replacing things like furniture and large decor items on a budget, and you can bet I’ll bring you all along for the ride. I will sell some things like my dining room set to make room for new things (are you local? My dining room set that I refinished (click here for the original posting details) will be for sale soon!). Slowly, over time, I’m going to move on. Because if I can get past the high school duct tape phase, I can get past this modern farmhouse phase too.

That’s it for today, friends! Have a fabulous day!
Personal

Life Update: Where in the World Have I Been?

You guys. Every time I have updated on here in the last year, it has started off with, “So it has been forever since I’ve posted…” and I suppose today is no different! In the last year, I have only posted about five times, and the last time was all the way back in January! I have been slacking to say the least. Things around here have been a little crazy and unpredictable, so I thought I might give a little quick recap of the last year or so.
First, if you follow me on Instagram, you know that we are expecting our first baby this fall. So that alone is enough to have me freaking out. I was feeling pretty sick for a while, and just generally not like myself. I’m feeling much better, and I’ve been able to get back into running and not having to slowly eat pretzels in bed before standing up. 🙂 Now all I can think about is the fact that I am totally and completely unprepared for all of this!
Secondly, because of the baby coming this fall, I won’t be able to do any fall shows. For the last two or so years, I have done several shows per season, while working my full time job. I’ll be taking the fall season off, and after that, I’m not too sure what the future holds. Having a baby will definitely make doing shows a much bigger endeavor, so we will have to see how things go. Meanwhile, I have been selling most of my inventory that I’ve had from my booth, so if you’re local to the North Texas area, shoot me an email or IG message and you can come shop my workshop!

Third, since I’m taking a temporary step back from doing shows, I’ve got my etsy shop back up and running. These hymnal pages have always been my top selling item at my shows and events. I’ve listed them on etsy, because I’ll easily be able to work on them from home, even when I’m home with a newborn. These are my absolute favorite things to decorate with, and they are also my go-to baby and wedding shower gift garnish. If you’d like to check out the shop, click here. 

And, lastly, the thing that has me in the biggest slump is our current living situation. Let me give you the most up to date info. So, we’ve lived in our current rental for just under two years. In fact, our lease ends in just a couple weeks. Since early this year, we have been looking to purchase a home. Our first home! So exciting! Well, it was. And then we found out we were pregnant, and it was even more exciting. We started looking and looking, and well, maybe you need a little backstory. The area we live in is rapidly growing. Which means one thing: the housing market is. out. of. control.

There are so many historic homes in our area, and we would absolutely love to purchase an older home that needs work and slowly bring it back to life. But here’s the thing. Houses sell within a few days. The area is growing faster than homes can be built, and so most homes have multiple offers within a few days, driving up the prices. We’ve lost out on a few houses that we’ve had our hopes set on, because the sellers have chosen other offers.

So, what started as an exciting time has quickly become stressful and disappointing as we loom closer and closer to the end of our lease, and the baby’s due date. I can only plan in theory what the nursery is going to look like because I have literally no idea what the room is going to look like. And I’m a planner. So, it has been incredibly hard not to start working on nursery projects.

Knowing that we’re going to be moving “soonish” but not knowing any type of time frame has put me in a creative slump in our current house. All I’ve been doing is purging, organizing, and throwing things out. I haven’t been doing projects or working on decorating certain areas in new ways because I’ve just been viewing it all as temporary. When we do finally move into our new house, I plan on bringing you all along for the ride! Of course, I’ll still be sharing small decorating DIY projects, but for a while, I’ll be focused on large, full scale projects. I’ll finally be able to do things like paint! I have been waiting SO. LONG.

So, all that to say, who knows what may change before the next time we chat. I’ll try to keep you posted. That’s all for today, friends! Have a fabulous day!