House Progress

Nursery Status: What’s Done, and What’s Next?

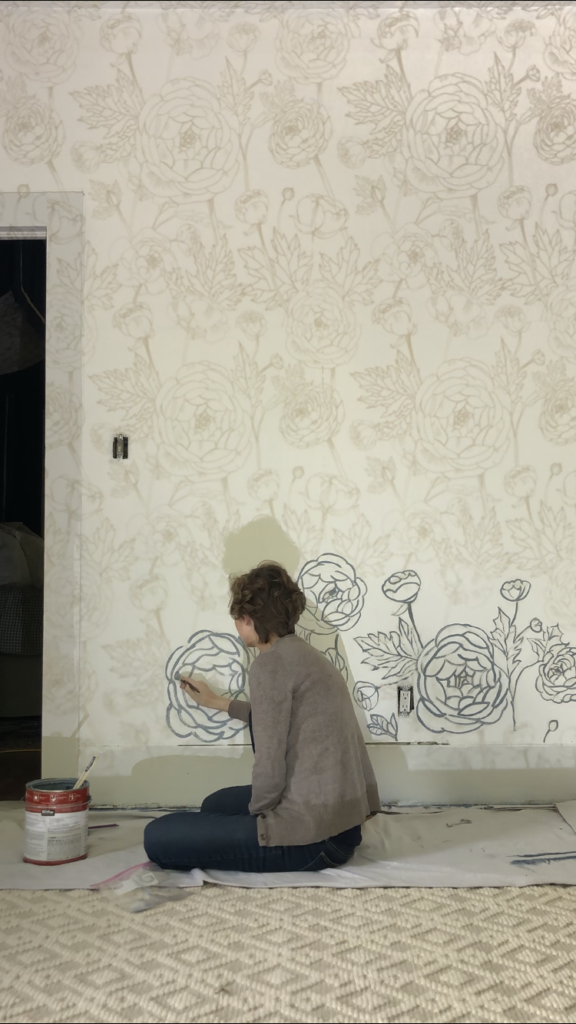
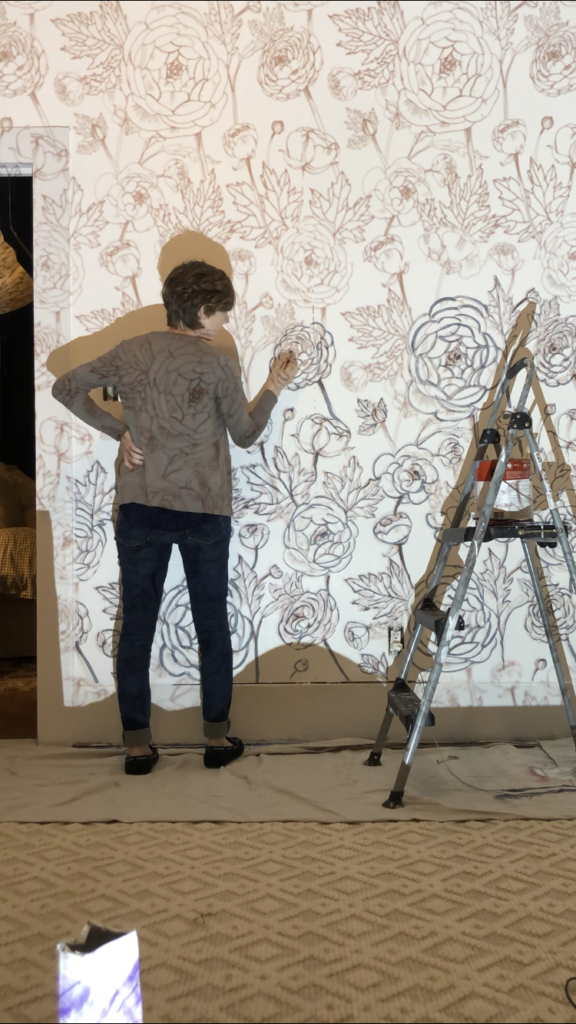
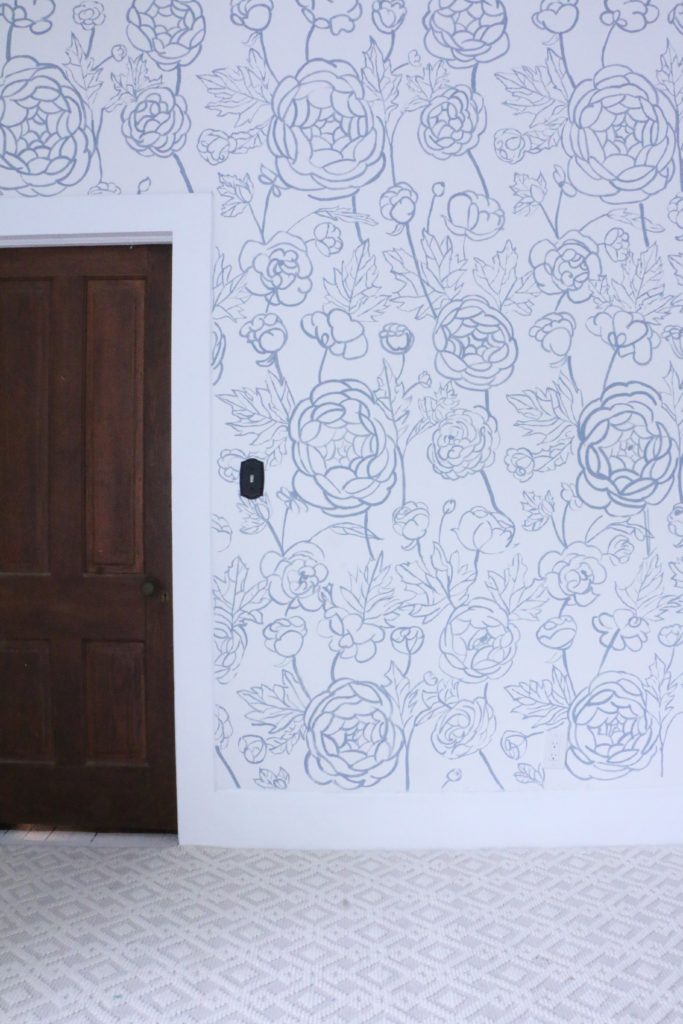
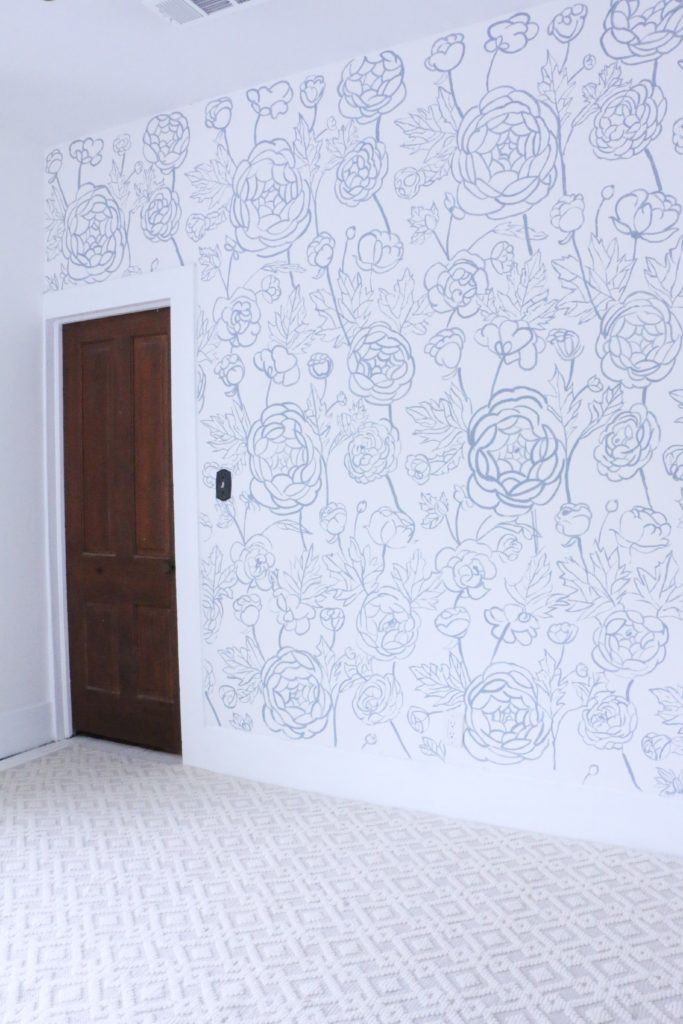
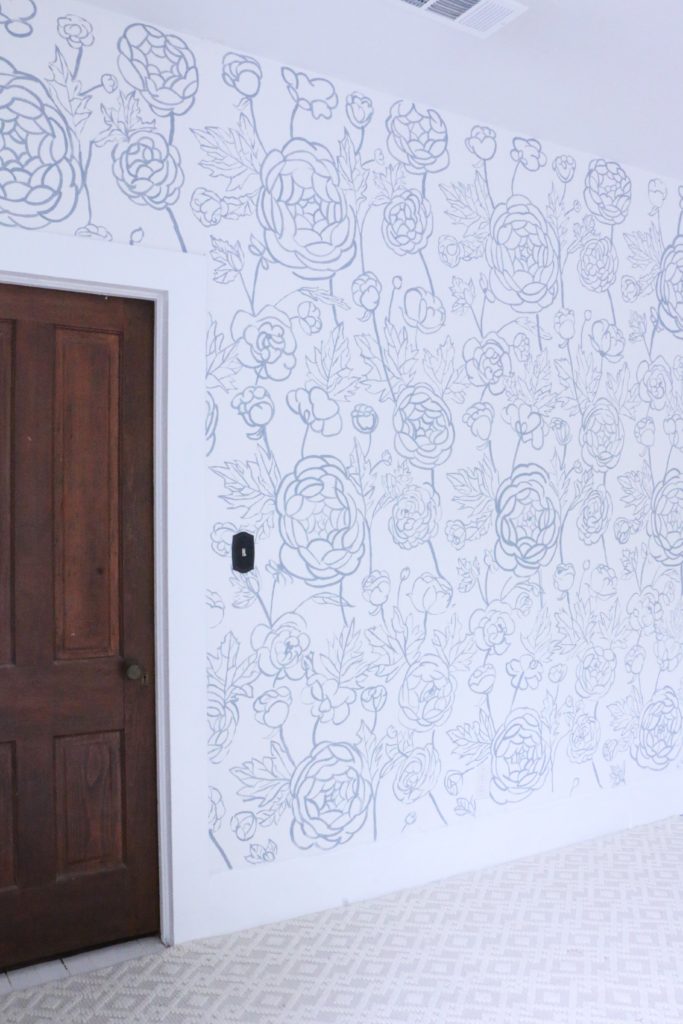
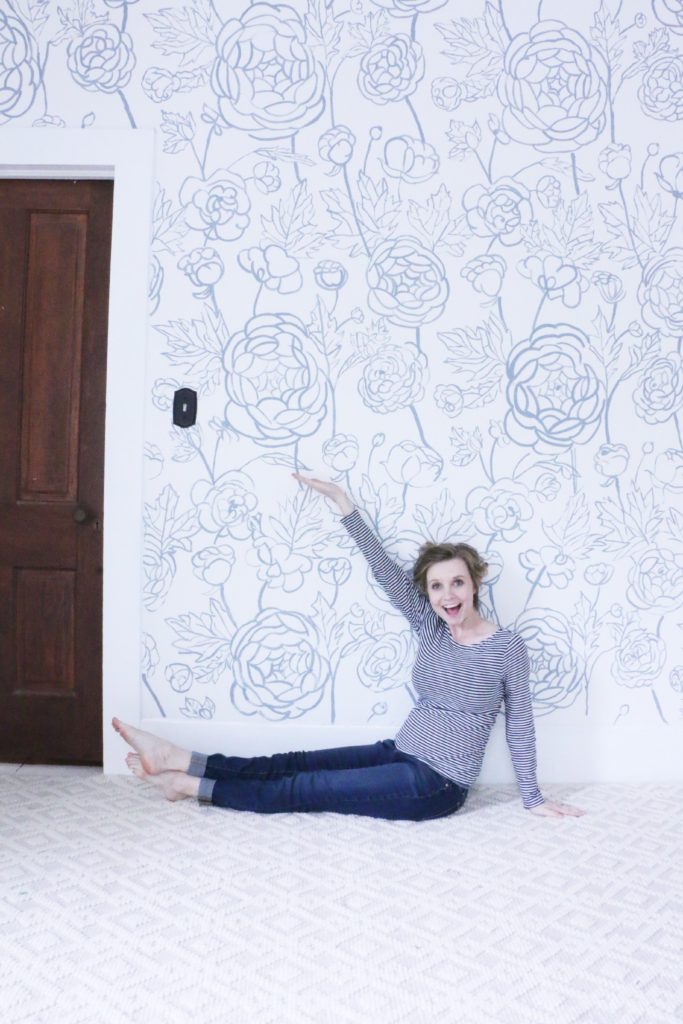
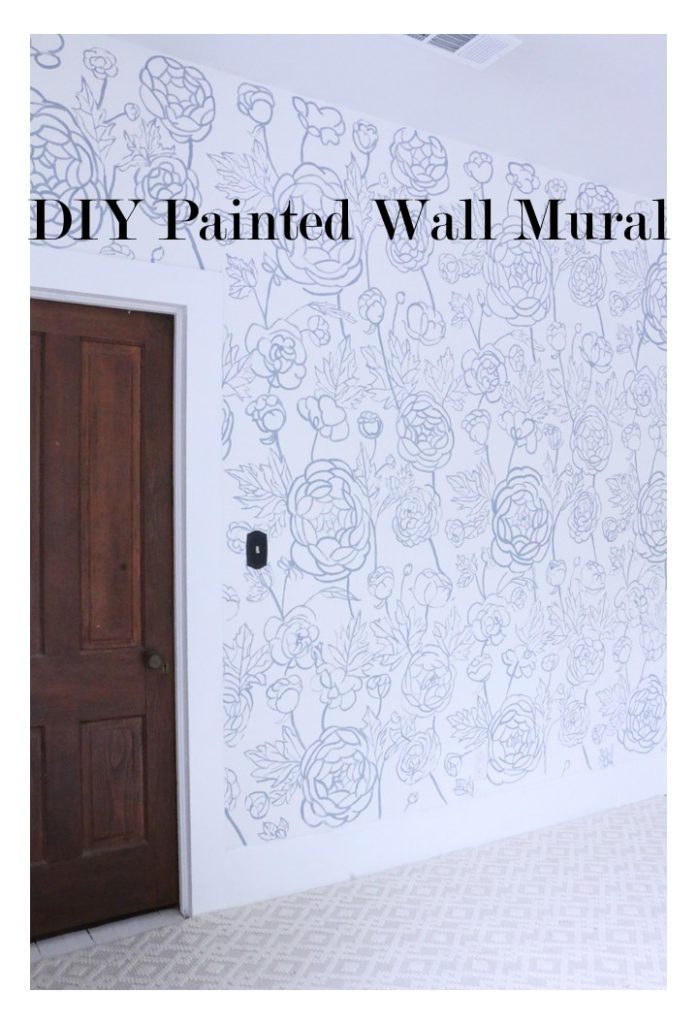
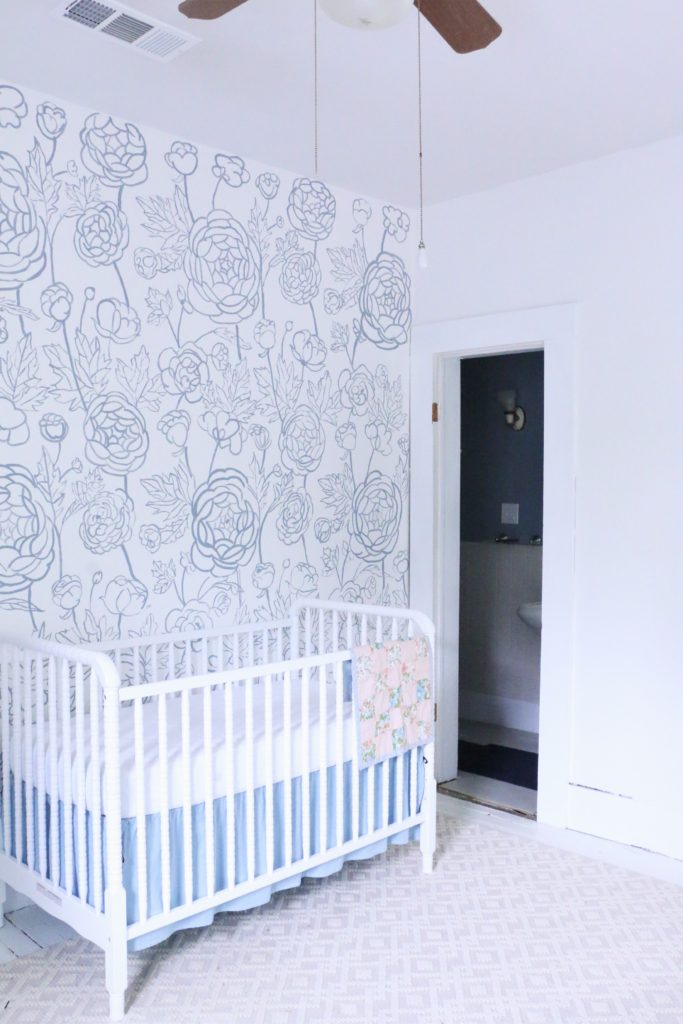
My big project as of late has been the nursery. of course. The big accent wall was a huge undertaking, and will definitely be the focal point of the room. Since then, we’ve done a few things, but still have a lot to do.

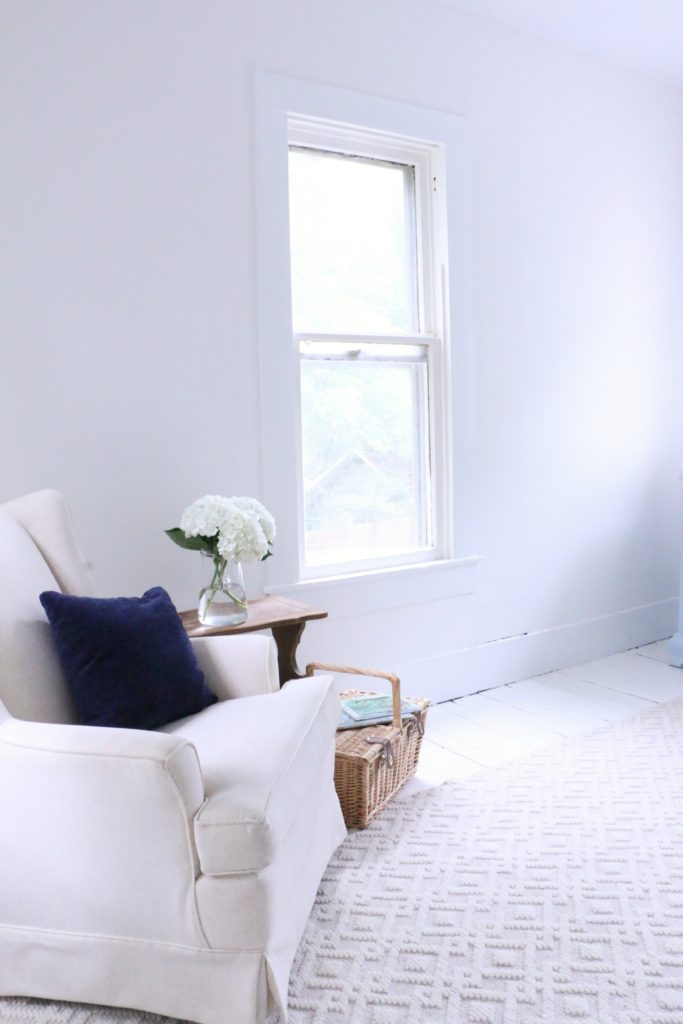
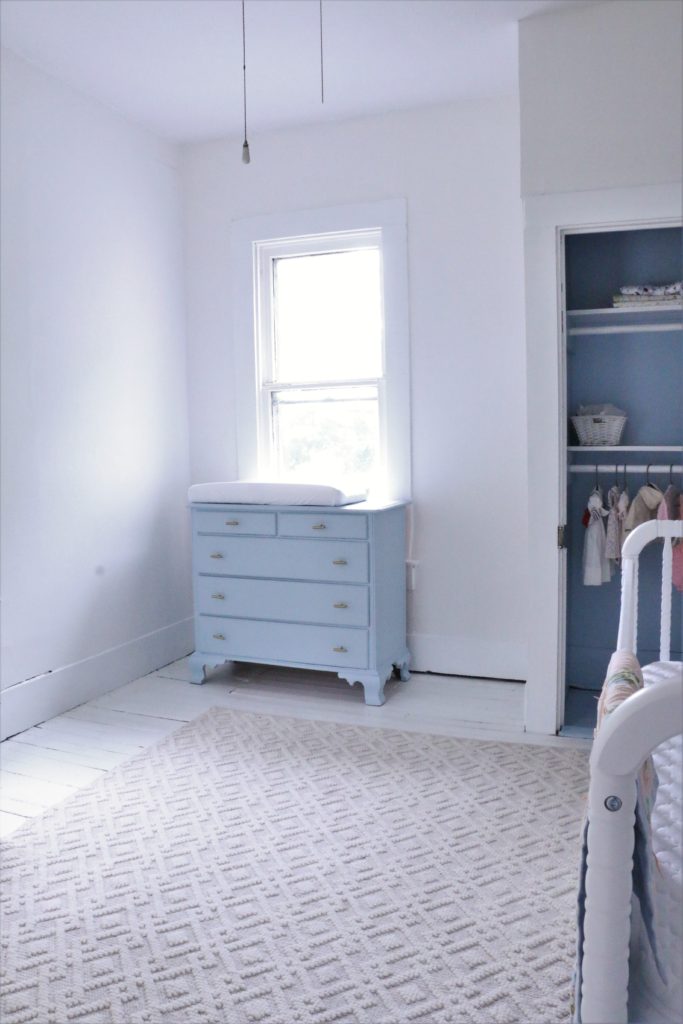
We moved the crib and rocker (ours isn’t sold anymore!) from our son’s room into the new nursery. I used some fabric dye to dye the crib skirt that we already had on hand.

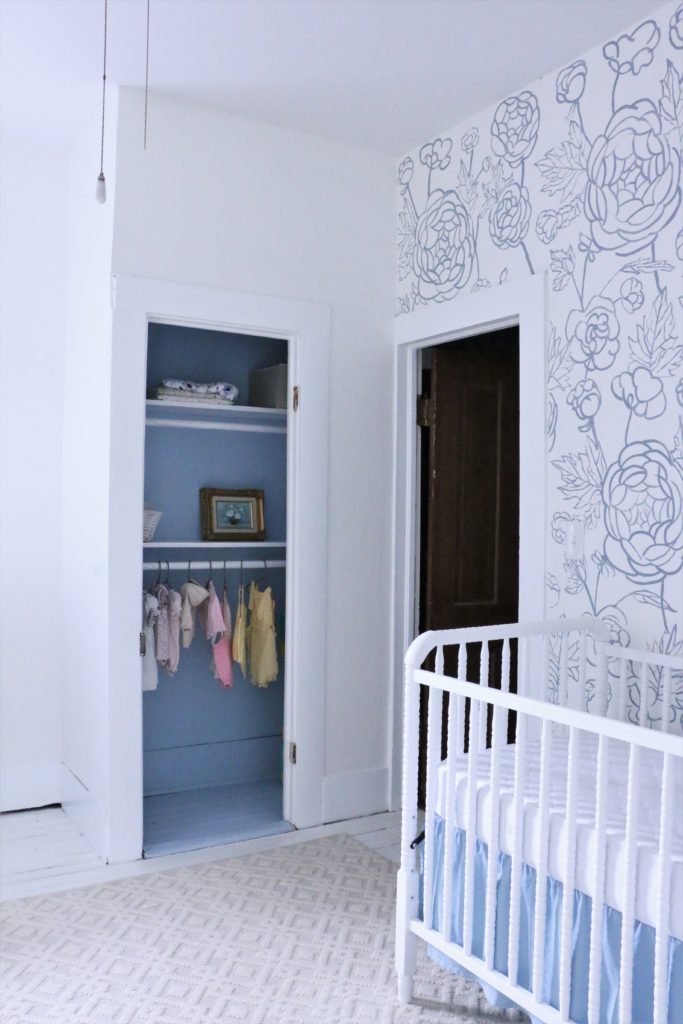
I also painted the dresser that was previously in our room and gave it some fresh knobs from Hobby Lobby. For the dresser, I used a satin finish paint from Home Depot in the color Gentle Sea. This was a quick, slap a coat of paint on kind of project, not the kind where I did a step by step tutorial. I didn’t use very much of the paint that I bought for the dresser, so I ended up painting the inside of the closet with the same paint. It’s a fun little pop of color, and it makes the tiny closet special.

So, I still have a lot to do in this space before it feels “ready.” I have a bunch of projects, things to buy, and a few things I want to make.

Things to Do:

  • Paint the window frames
  • Finish stripping the door to the closet and bathroom
  • Reinstall the closet and bathroom doors
  • Deep clean the windows and floors

Things to Buy:

This is the big one, as I feel like I need to collect a ton of little things to make the room put together. Some things are specifics I have in mind, others are things I’d like to find thrifting (hopefully I can do that soon!).

  • Curtains (I just placed an order for these, but the shipping is going to take a while. I’m not even sure they’ll work, so I may end up returning.)
  • Curtain rods
  • Footstool (I’m loving this one.)
  • Crib sheets I like basic white ones for easy washing.
  • Small art work (I don’t have anything in particular in mind just yet. I’d love to find something vintage.)
  • A frame for the over-the-crib painting. I bought the painting at a flea market sans-frame. I’m hoping to find the right gold frame in the right size for the right price. Not too much to ask for, right? (If you have a 36x24in frame without glass or matting, let me know. I’m scouring FB Marketplace daily.)
  • An accent pillow for the rocker. I put the one from my son’s room in here, I’m not sure if I love it.
  • A lamp (nothing specific in mind, not sure if I’ll go thrifted or new)
  • Tall plant?? (I need something with some height in one particular corner to disguise an awkward wall length. I like the look of olive trees, but we’ll see.)

Things to Make:

  • Shelves for book and art displays

There is still so much to do in here, and with stores being closed and shipping being delayed, it seems like I’ve been unable to get moving in here. Hopefully soon I can get things moving! I have been working feverishly on the door refinishing, and I will share a full tutorial of that process once it’s finished. That’s all for today, friends. Have a fabulous day!

This post may contain affiliate links.

House Progress

Backyard Updates

Backyards are a tricky thing, aren’t they? I don’t have a green thumb, I have a giant dog who ruins grass, and I have never particularly enjoyed being “outdoors.” But, part of being a homeowner and making improvements to your home includes the outdoors as well. My toddler loves to be outside. Now that the weather is nice, he would rather be outside playing with the hose and some trucks than doing anything inside. So, I’ve been spending more time than ever in the backyard lately.

After painting the porches, I had a lot of paint left over. I accidentally overbought. Which turned out to be a blessing in disguise because I had extra paint for projects on a whim. Since spending so much time in the backyard, I’ve been able to dream up more things I wanted to do with the space, and it’s been nice to have supplies on hand. We have this swing and arbor in the backyard that came with the house. It was pretty sad looking, and we thought about taking the swing down and making some kind of grilling station, but the more we sat in it, the more we thought it should stay. I was swinging one day when I realized I had extra white paint from the porch railings, I might as well just paint the thing.

So I did. I used my paint sprayer and sprayed the whole thing.

As for the pea gravel firepit to the right, you may remember my early stages of this from last summer. Well, we bought pea gravel last summer, but it wasn’t enough, so we just sat around with a half pea graveled firepit for a year. I told Ethan I wanted to finish off the firepit for Mother’s Day, so my Mother’s Day present was literally a truckload of pea gravel and a wheelbarrow. Some people get perfume, I got literal rocks.

But we sat out here on Mother’s Day and made s’mores for dinner and it was wonderful. It’s already a much used space. My son is also loving the fresh pea gravel for his shovels and dump trucks.

We (and by we, I totally mean I, with Ethan just along for the ride) also decided to build our son a playhouse. We used all scrapwood we had in the garage and leftover paint from the porches. We don’t have plans for this, but basically it went something like this: I looked at the piles of wood in the garage, drew a picture of what I thought could work, and Ethan built it two days later.

It is definitely a more family friendly backyard now, and we enjoy spending time out here so much now that things are fresher and nicer to look at. 🙂 Now we just have to do something about the dead grass…

My favorite thing about this yard is what it looked like just a year ago. Everything we’ve done in the last two months has been one project leading into another as far as supplies go, and I love the way one thing inspired another.

I wish I had photos of when we first bought the house two summers ago…there was no fence, there were awful metal garden bed edgers that were just full of weeds, there was a broken chimnea in the middle of the yard. It was in rough shape. I’ve heard it said that with outdoor spaces, you just do a little more each year, and soon enough you have a space you can really be proud of. I have so many more plans for next year already. I’m already focusing on learning more about gardening and have big, green plans. Maybe next year! Well, that’s all for today, friends. Have a fabulous day!

DIY Projects

DIY Wall Mural

If you saw my plans for the nursery a few weeks back, you know how much I wanted wallpaper! I did a lot of online searching for removable wallpaper (after all the wallpaper scraping I’ve done, I am not about to put traditional wallpaper paste back up in this house), only to find that I did not want to spend an arm and a leg on wallpaper. Having never been in the market for wallpaper, I did not know how expensive wallpaper could be!

I had a budget in mind, but I did not want to put over half of it toward wallpaper. In my planning post, I talked about attempting to paint something on the wall using a projector. I tried it out, it worked, and this is that post!

So the first thing I did was to find an image that was similar to my inspiration photo for wallpaper. A quick google search found a pattern that I liked, so I then went to make a projectable image. I made sure that the image I chose would be able to repeat itself continuously.

I used a PowerPoint document to work from, and placed my image in a very corner of my screen.

Then I just copied the image and lined them up so that the entire page was covered.

As you can see, it’s just the same image lined up directly next to each other.

Once the image was on the full screen, I put it in present mode on my laptop, connected it to the projector, and projected it onto the wall. I was then able to use a small artist paintbrush to trace from the projector onto the wall.

Pardon the iPhone photos, I am not the greatest with remembering to take progress photos.

Now, I know a lot of people don’t have a projector lying around. I get that. Ethan works in production for live events, so he has access to a lot of equipment that the average person does not have sitting in their house. He was able to borrow this projector from work that I was able to use.

For me, this project was free because I had paint left over, and access to a projector. However, you all know I like to do thinks cheap and easy. But, while I was looking online, I found some projectors that are only around $100. While that seems expensive, it could still end up being muuuuch cheaper than purchasing wallpaper. The wallpaper I had been pricing out was going to be around $400, so even if I bought a projector for this project, it would have still saved me money.

Overall, this took about ten hours of painting, which is definitely not for the faint of heart, but it was a project I spent no money on, and I got the wallpaper look I was going for.

The color is French Colony by Behr, which was leftover from our upstairs bathroom project. It’s hard to capture the whole wall at once because of the size of the room, but the wall is about ten feet wide. Overall, I am super pleased with the way this turned out. And you know my favorite type of project is a free one!

What do you think? Would you try something like this? I’d love to hear your thoughts. Well, that’s all for today, friends. Have a fabulous day!