House Progress, Room Tours

Baby Girl Nursery REVEAL

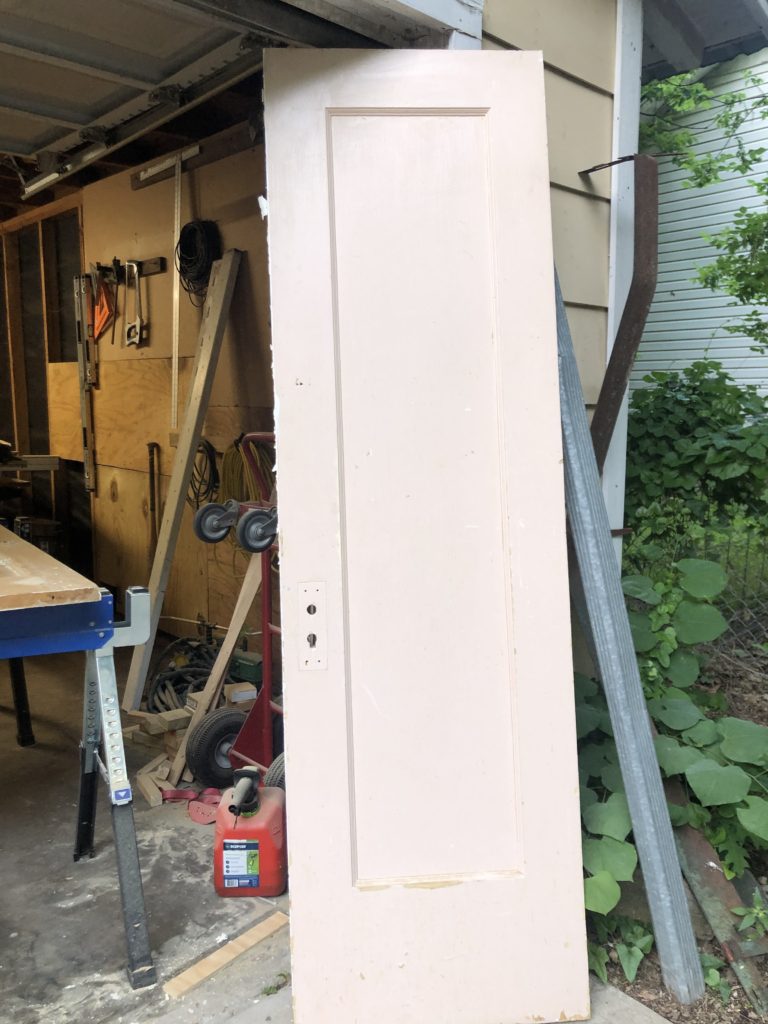
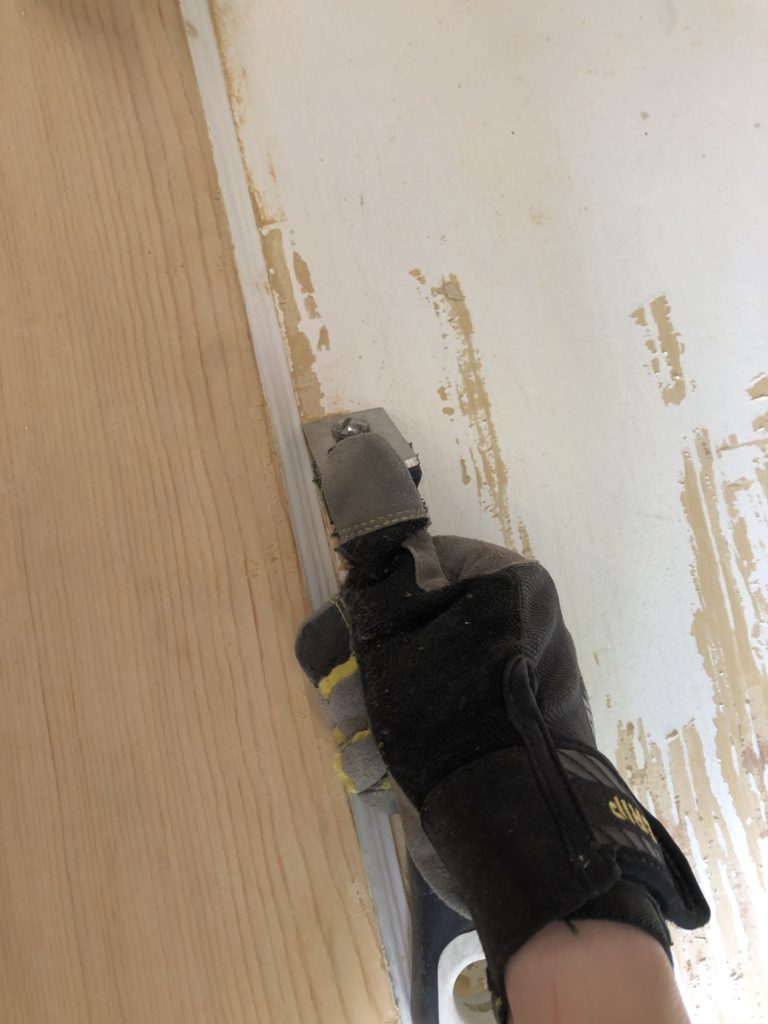
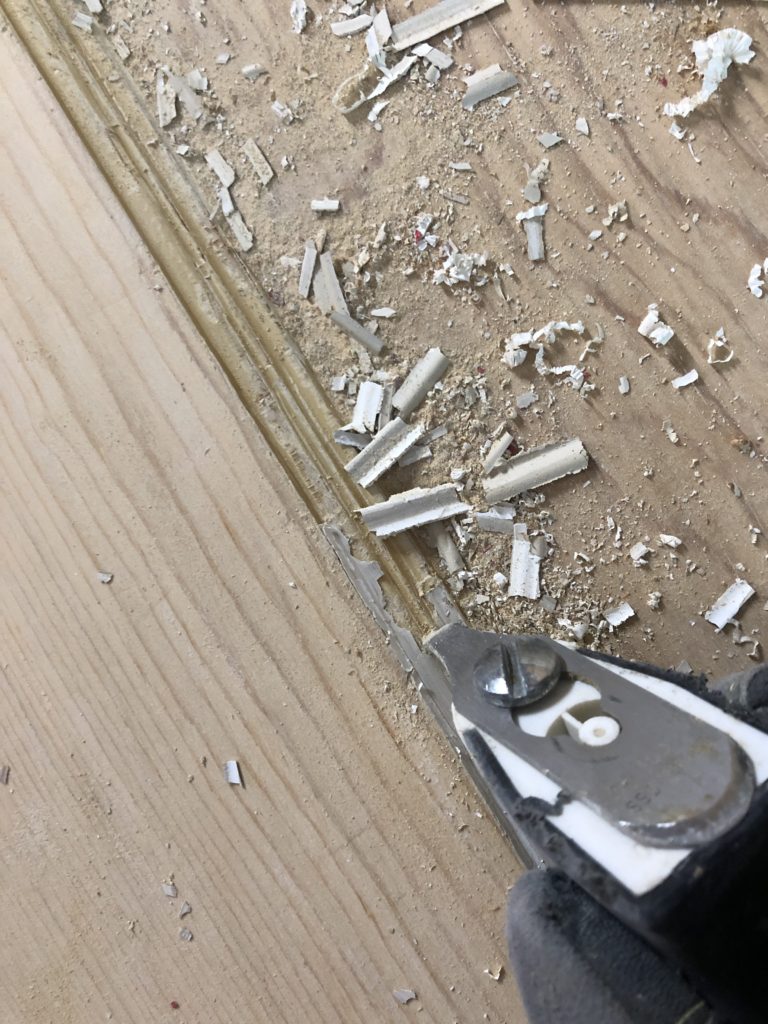
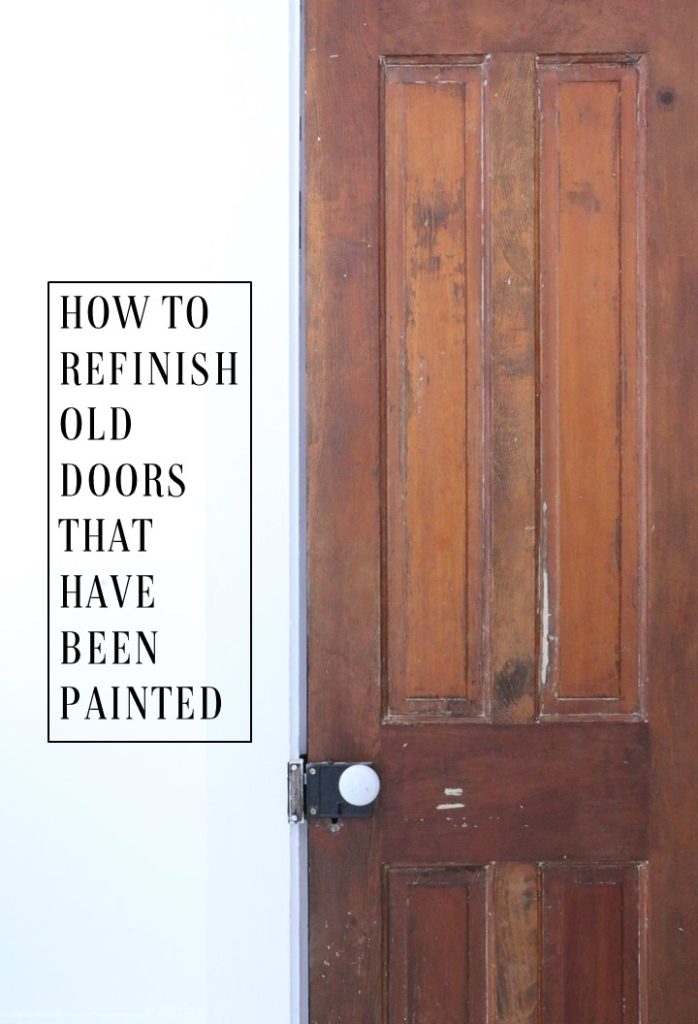
It’s finally finished! The room we’ve been working on for months is done and I can’t wait to share with you all the details. If you haven’t been following along, you may want to catch up with some of the older posts pertaining to the nursery. First, I shared the original moodboard, how I did the DIY wall stencil, how I stripped the painted doors in the room, and the updated list of what projects were still left as of a month ago. Now that all those things are crossed off my to-do list, I’m finally ready to share.

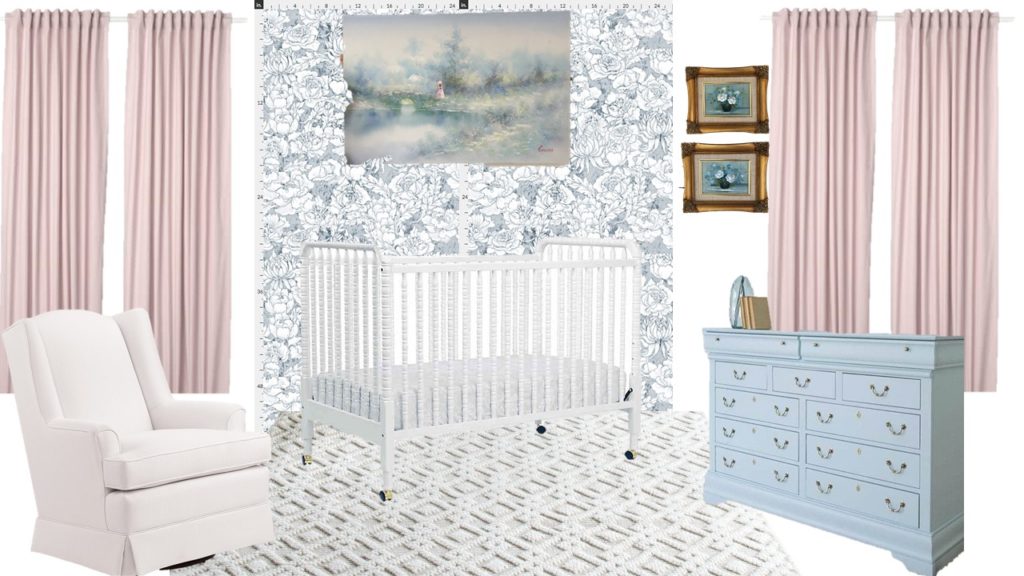
Before we have a look at the photos though, let’s take it wayyyyy back to early April when I was in the planning stages of the room. This was the moodboard I came up with, mostly based on a few things I already had found (art) and furniture I knew I would be reusing from our son’s room (crib and rocker).

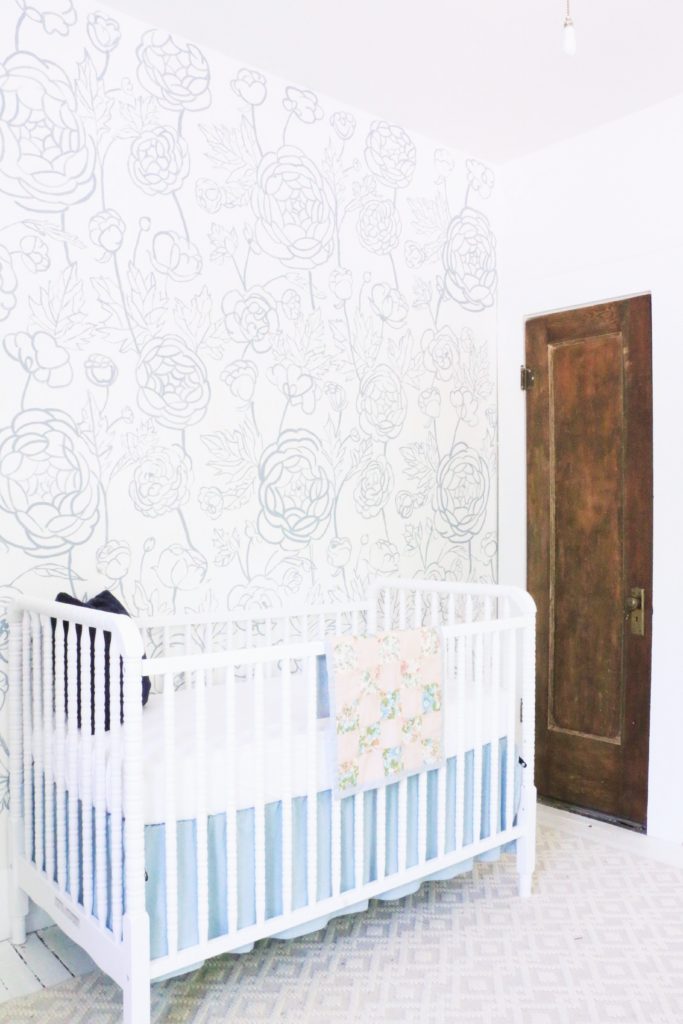
Now the whole thing has come to life and I could not be more excited.

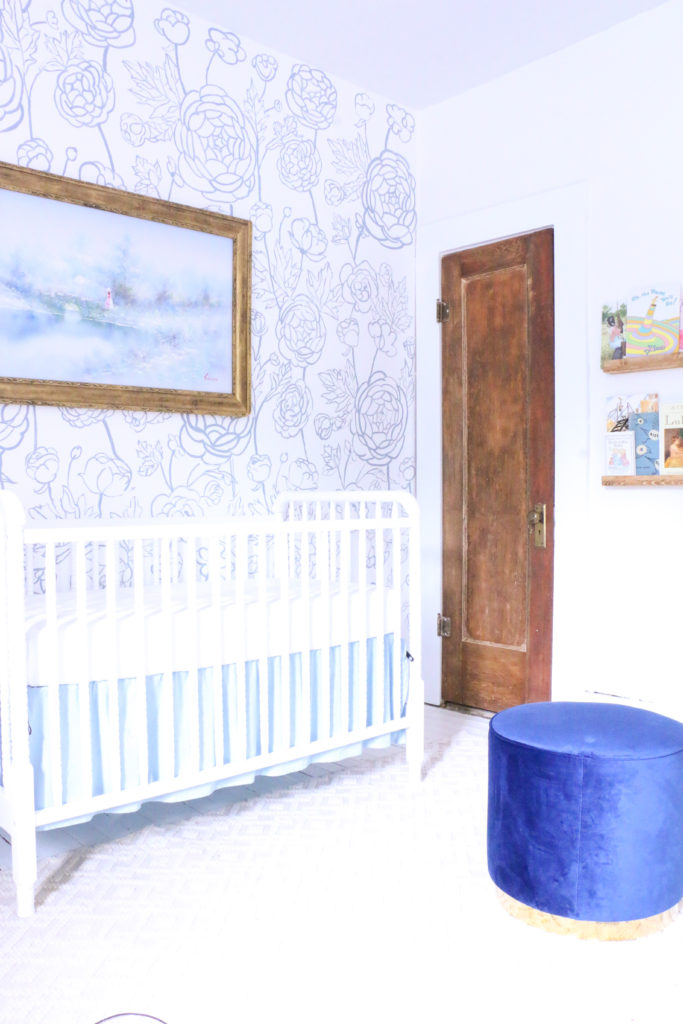
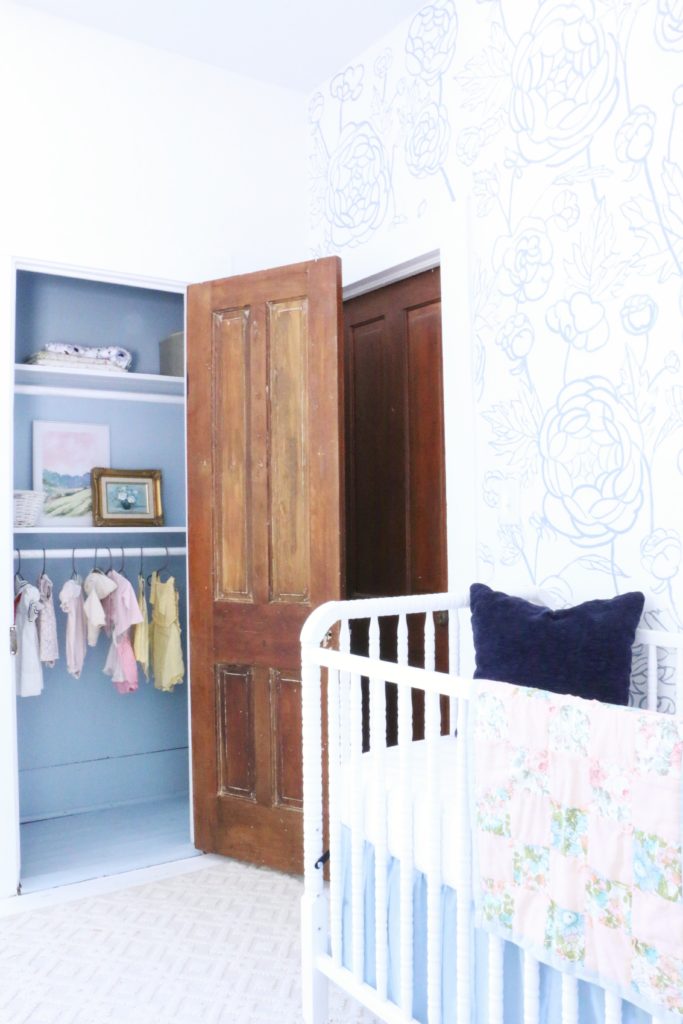
The artwork over the crib was purchased at a flea market before I even knew I was having a girl back in… February? March? I snagged it because it was only ten dollars and I knew if I had a girl it would be perfect for above a crib. Luckily I am actually having a girl, otherwise I would just have this painting with no place to put it. It came without a frame, so it took me a while to track down a frame that fit, but I did eventually. I bought some random ugly artwork just for the frame, threw away the print inside, and used Rub ‘n Buff in the color Gold Leaf on the frame to make it look a little more aged. Here’s what it looked like before:

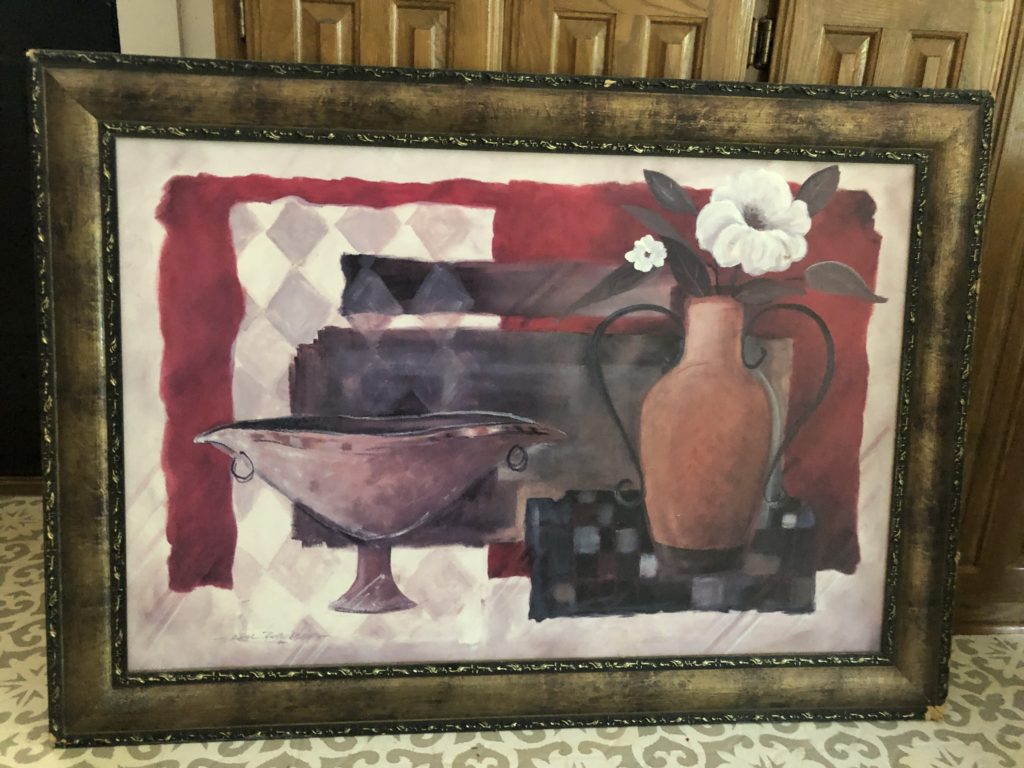
It’s so 2002 chic, am I right? Anyway, our crib is the same one I used in our son’s room, I just dyed the crib skirt with some RIT dye to change it up a bit.

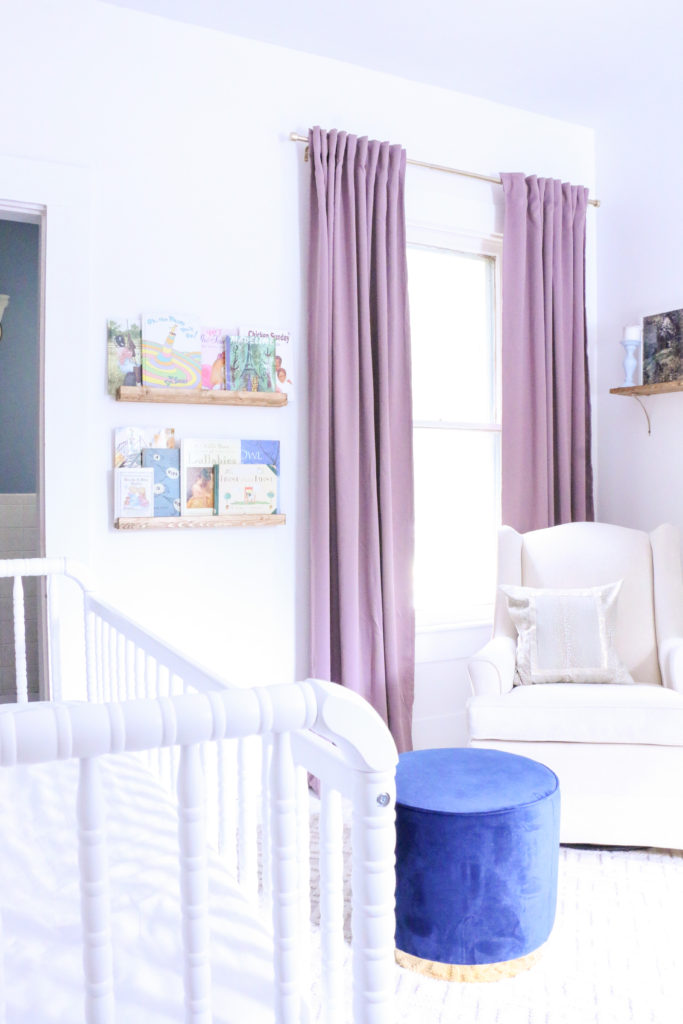
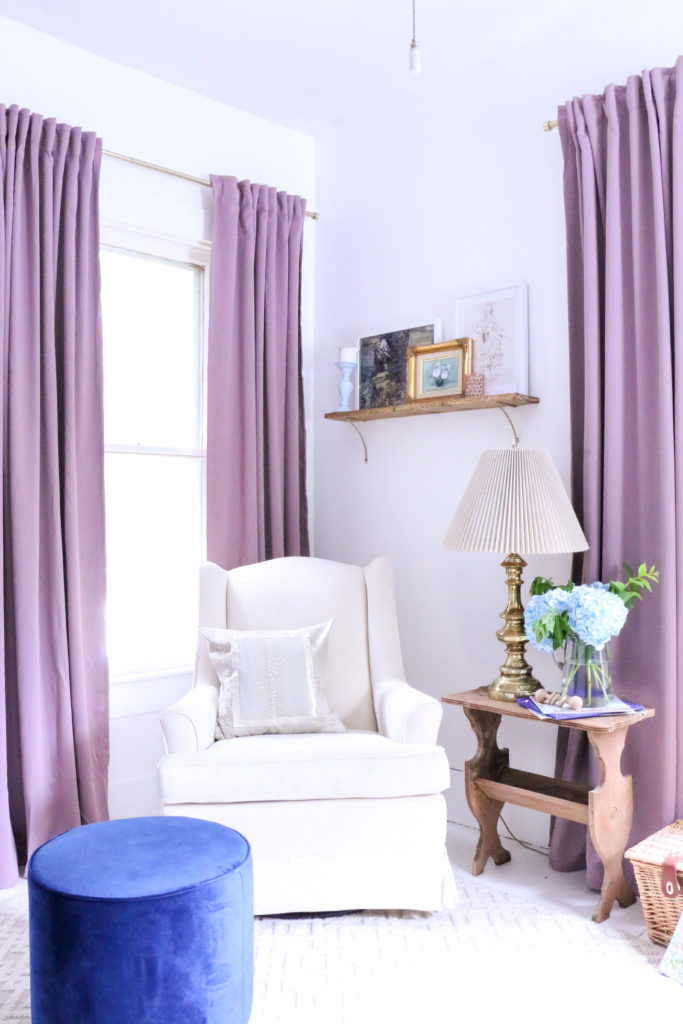
The footstool, curtains, rug, and curtain rods were all new purchases for this room. The rocker was one we already had from our son’s nursery. You can see in these photos some shelves both with artwork and with books. Ethan built the book display shelves with a lip on the front to keep books from falling over. I stained them with my favorite stain color, Varathane Early American.

The pillow was something I whipped up in 30 minutes on a sewing machine on a whim after an unplanned Hobby Lobby trip. I used a pillow I already had and made a new cover for it with $3 worth of fabric. I used some leftover trim from another project.

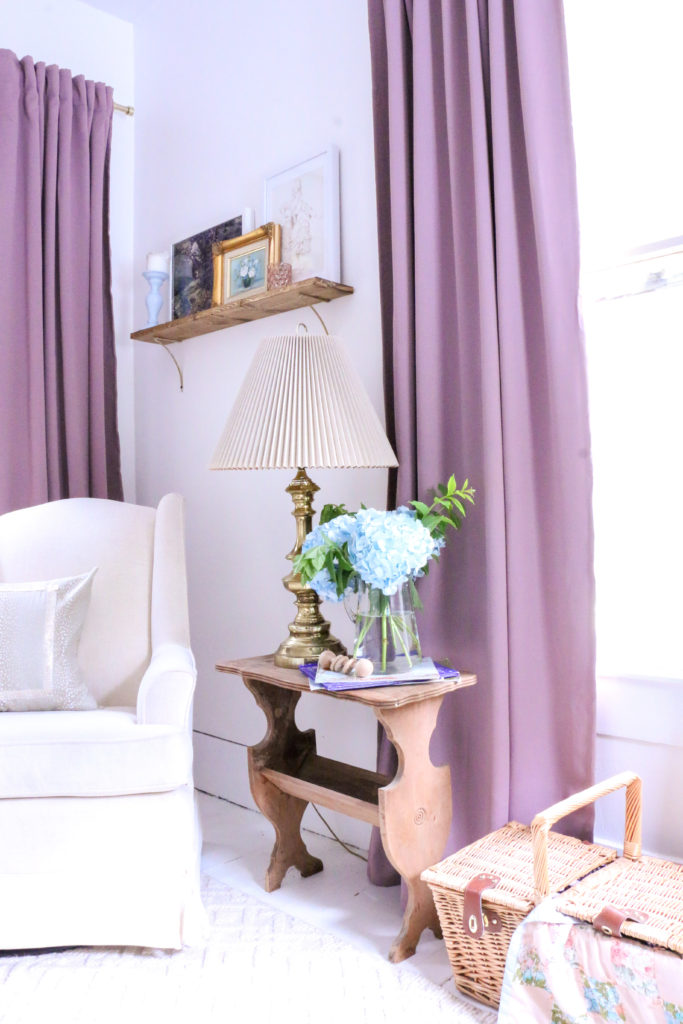
The lamp was a Facebook Marketplace find, the table was a flea market find a few years ago, and the picnic basket was something I’ve had forever (it’s full of baby toys). The little doll quilt sticking out was made for me by my Great Grandmother when I was young.

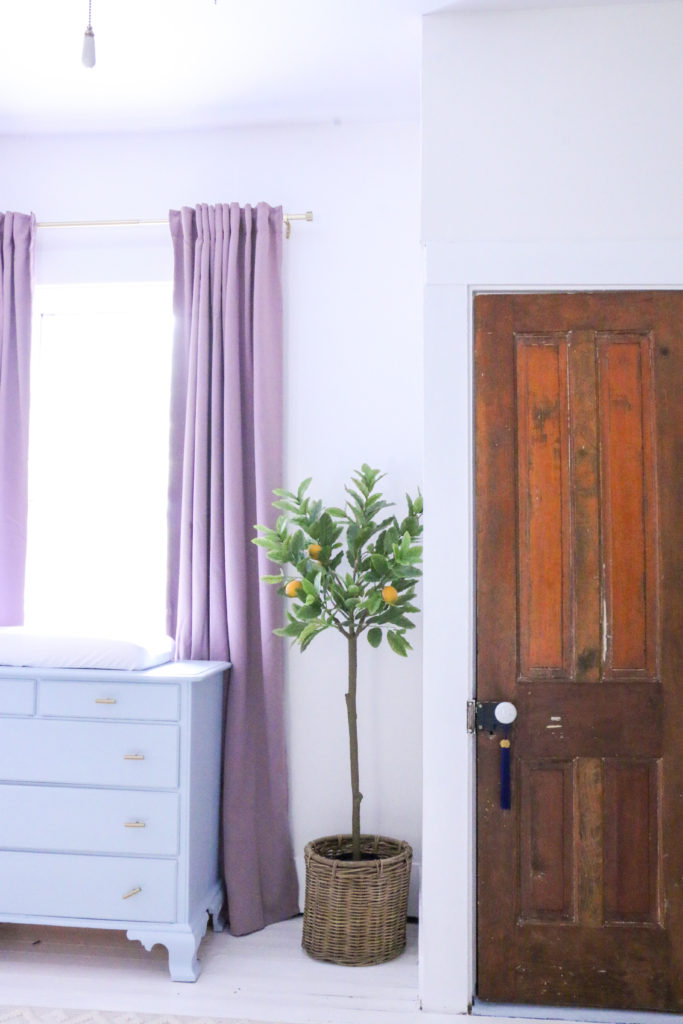
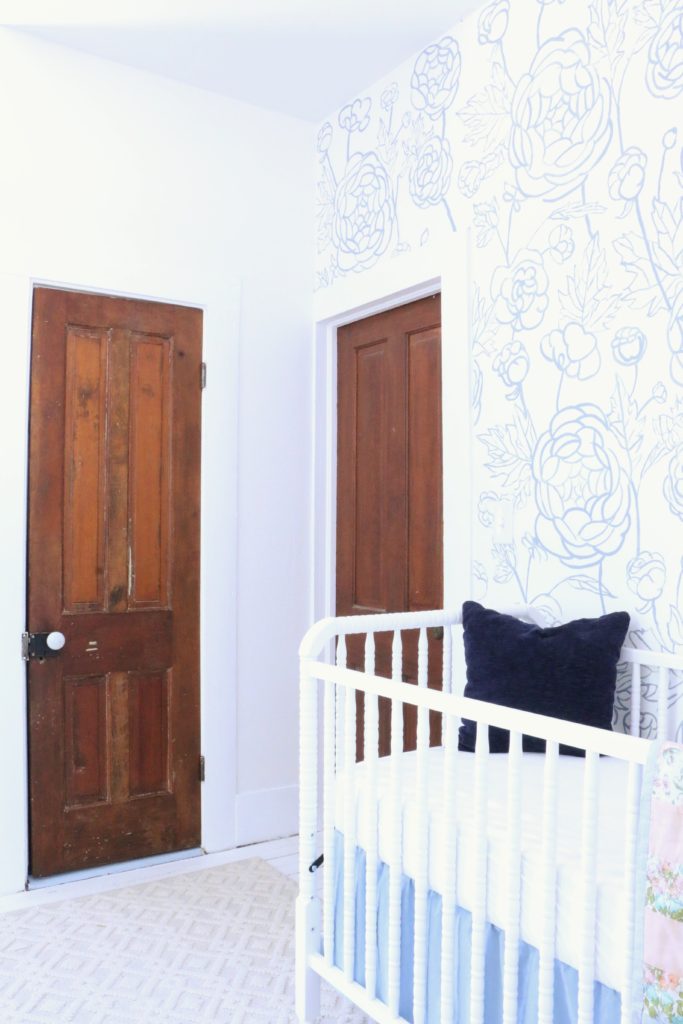
Moving to the other side of the room, the dresser was Ethan’s when he was younger and I repainted it. The basket was a thrift store find, and the tassel on the doorknob was an estate sale find. The tree was found randomly on clearance one day just after I had started browsing Facebook Marketplace for faux trees. It was meant to be!

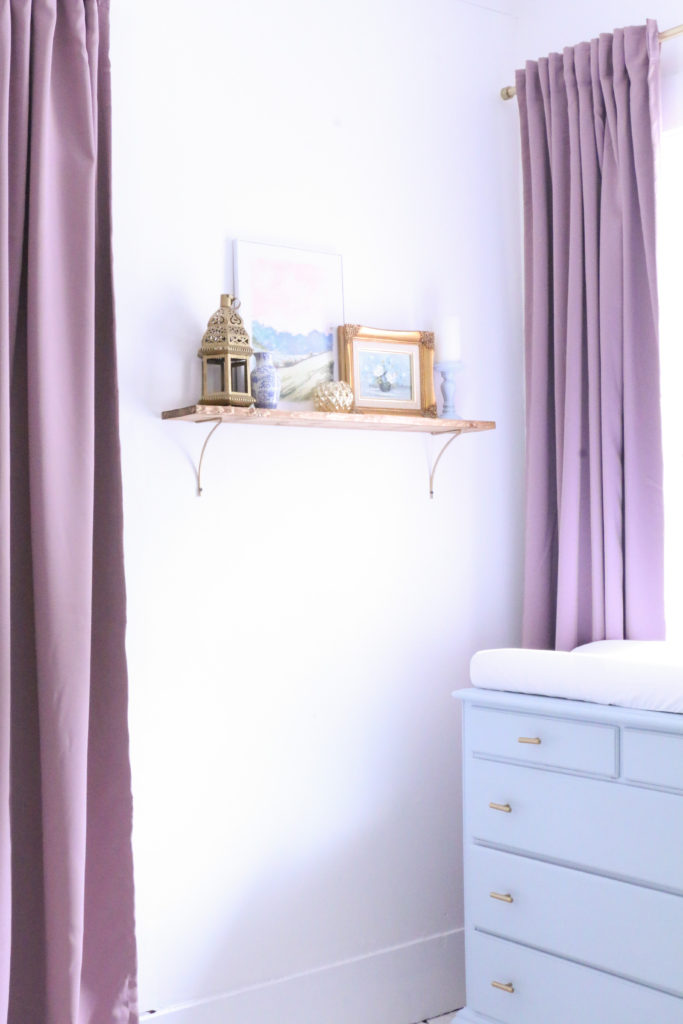
The artwork and decor on both shelves are a combination of thing I had and repainted, or things that were picked up at flea markets and estate sales. The actual art prints are from a source I recently discovered and am currently obsessed with. The Smithsonian Museum has something called Open Access which is an online catalog of millions of photographs, paintings, pictures of sculptures, etc. They’re all free and available to download without copyright infringement, so I like to search for different art prints and have them printed as posters. It’s a super affordable way to get high quality prints that aren’t just the same thing everyone has from the same box store!

The nursery is a such a happy room, and I absolutely love it! Although, it’s now time for it to be filled with the ugly but necessary baby accessories that aren’t pictured in these photos…

I love that just like the rest of our home, this room encompasses a little bit of old, a little bit of new, a whole lot of DIY, and a whooooooole lot of thrifted and secondhand finds. I wouldn’t have it any other way. Now we just need a baby sleeping in the crib!

And, just for fun, let’s throw this waaaaaay back to two years ago when we first bought the house (and let’s be honest, also a year ago because we did nothing in here for a long time).

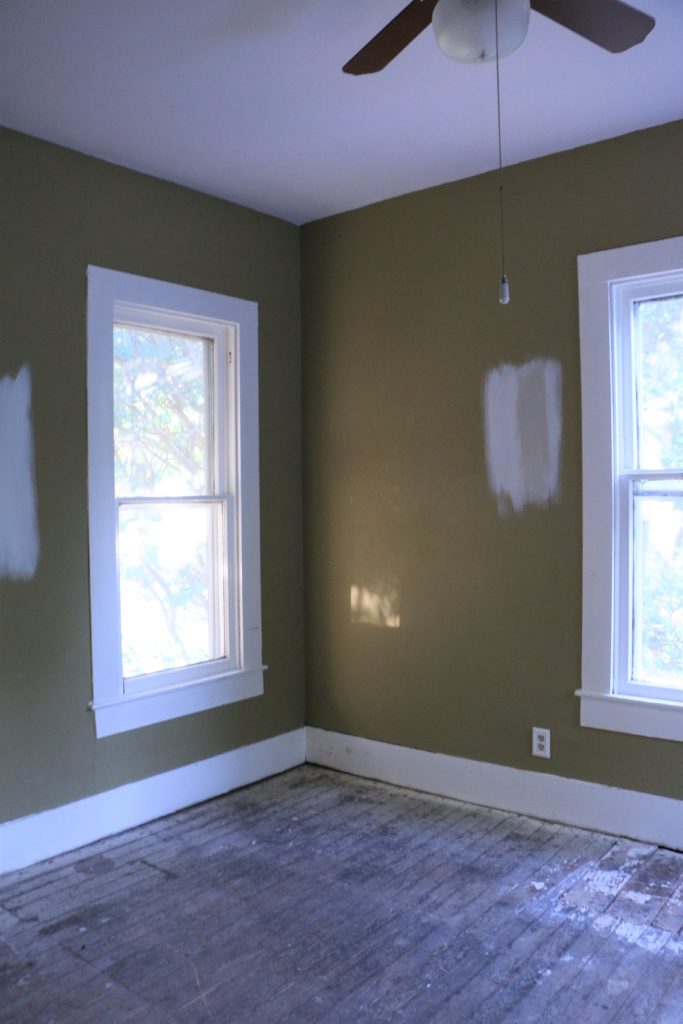
Now that’s crazy, right? So, what do you think? Do you see what I saw with the original moodboard? I am so glad you stopped by to see our baby girl’s nursery! That’s all for today, friends. Have a fabulous day!

*This post may contain affiliate links.

Tutorials

How to Restore Old Doors that Have been Painted

Today’s post has been a long time coming. Because this project is not for the faint of heart. If you live in an old house, chances are, you have old doors. And, if you’re like me, many of those doors have been painted over time and time again. Now, maybe you’re luckier than me and a paintbrush has never touched your wood doors. But about half the doors in our house have been painted. With multiple layers of paint.

We plan on restoring all of them eventually, but hadn’t gotten around to any of it. But, since we’ve been working on the nursery, I figured the best doors to start with would be the two painted doors in there. Now, I’ve stripped a lot of furniture in the last several years, and restored a lot of tables and dressers, but I’d actually never done a door before. So consider this my totally non-professional guide on how to restore doors that have been painted.

Step One

Remove your door from the room that it’s in, and take it somewhere you’ll have room to work. Remove all the hinges and hardware.

Because I’m such a professional blogger I forgot to take a photo of the door while it was still in the room, but here it is outside of my garage before I got started. You can see in the corner of this photo the other door that I was already working one. I did this same process to both doors.

Step Two

If your house was built before 1978, you may have some lead paint. I use these tests to check for lead. Luckily for me, neither of the doors I was working on had lead paint, so that meant I could continue. If your paint tests positive for lead, you may want to consider your options. I would not recommend the following method. If there are multiple layers of paint, the most likely culprit will be the oldest paint, or the bottom layer, so be sure to check that.

Step Three

I found (after some trial and error with paint stripper) that the quickest way to go about removing paint quickly is to scrape it while it’s dry. I tried stripper, which worked, but it seemed to only take off a layer at a time. I found that this set worked well getting off lots of paint at once. The different shaped blades allow you to get into different cracks and crevices along the different surfaces of the door. I didn’t worry about getting 100% of the paint scraped off, but in general I got as much as I could.

Step Four

Sand. Sand like the world is ending. I used my orbital sander, and sanded first with a course 60 grit sandpaper to get the last of the paint off. On the edges of the panels where the orbit sander couldn’t reach, I sanded by hand. Once all the paint was off, I repeated the sanding with a 120 grit sandpaper and a 220 grit sandpaper.

Step Five

I used steel wool and mineral spirits to scrub the door one last time after all the scraping and sanding. Now, keep in mind, these steps took me like two weeks. I work in limited time shifts during naps and after toddler bedtime, so a normal schedule might allow this to get done in a matter of days, but I was averaging two weeks per door.

Step Six

This would be optional based on your wood and your preferences. I had one door in the room that was untouched, and I wanted the three doors I was working on to be all about the same color. So I used the stain we used on our floors throughout the house (Minwax Early American) and it ended up being a pretty close match to the door that was already in the room. I prefer to use a rag to apply (with rubber gloves on!), rather than brushing and wiping the excess. I just apply with the rag and rub it in immediately. If you like the color of your wood after you strip it all down though, you could totally skip this step.

Step Seven

The last thing I did was put a coat of Polyurethane on them. I like to buy the cheap paint brushes to apply the poly, and then just throw them out when I’m done. I ended up doing just one coat of poly (again, trying to match an existing finish!). I let the first side dry for 24 hours, then flipped the door around and did the other side. I let it sit for another 24 hours before moving them back into the room.

Step Eight

Bring your doors back into place, and re-install the hinges and doorknobs. And for goodness sake enjoy the fruit of your labor!

The door on the right is the entrance to the room, and the door on the left is one of the ones that were painted. There are a couple of white spots that you can see which are actually wood filler. They aren’t perfect…they’re 125 year old doors that had six coats of paint on them! But for goodness sake I think they turned out pretty good.

This door on the other side leads to the bathroom, and is the one from the first picture. Let me show you again:

Can you even believe that wood grain was hiding under all those layers of paint?!

This project was a doozy, I’m not gonna lie. It was weeks worth of work, sweating it out in my hot garage in a mask and protective gear. It wasn’t a fun DIY. But, they are back to the way they were intended to be in this house, and I think that’s what matters. And I’m stinking proud of the work that went into these. So, do you have any doors that need refinishing? Are you brave enough to take it on? (I totally think you can!) That’s all for today, friends! Have a fabulous day!

Organization

My Weekly Cleaning Schedule (and a Free Printable!)

I shared a couple of weeks ago over on my Instagram how I have silly names for all the chores I do each day of the week, and several people were interested in it, so I decided to share!

I have always been a pretty “clean and organized person,” but I never really stuck to any sort of routine, I would just do things as needed. But then I had a child and when I went back to work after maternity leave, I was feeling very overwhelmed about keeping up with my house and so I knew it was time to start a real routine. So even though it’s summer, and I’m technically home right now, don’t think that this isn’t for you if you are working outside of the home full time. This is about getting a little bit done each day so that you never have to do a lot at once.

First, there are a couple things I do every single day (or weekday). A load of clothes is one of them. I know that may seem counter-productive to some, but trust me on this. I never spend more than 5-10 minutes folding and putting away laundry. I start a load as soon as I’m dressed in the morning, flip it over, and fold it while I’m waiting for my son to fall asleep after I put him down for his nap. During the school year, I start it on my way to work, Ethan flips it on his way to work, and when I get home, I quickly fold and put away. Because it’s only one day’s worth of clothes, it’s never overwhelming. (Also, our washer has an auto sensing fill, so it’s not using excessive water. We haven’t noticed any difference in our water billing since I used to only do clothes once a week or so.)

I also vacuum every day. I realize most people don’t need this, I just have a hairy dog and a crumb monster child, so it works for me. If you don’t need a daily vacuum, just consider that a quick kitchen floor sweep. I usually do this in the evenings after my son goes to bed.

The last thing I do every day is dishes. We actually don’t have a dishwasher (pre-renovated kitchen problems), so I wash by hand at the end of the day, let them dry on the counter overnight, and put them away first thing in the morning. I know this sounds like a lot. I promise it’s not.

Then each day of the week, I do one chore or task that needs to be done on a regular basis but not every day. I came up with names because I’m nerdy like that, but it helps me remember! On Mondays I mop, hence Mop Monday. I mop all the hard surface floors in my house. on Toilet Tuesday I clean my bathrooms (we have two). On Wash Wednesday in addition to my load of clothes, I also run a separate load of sheets, and one of towels. On Third Thursday, I rotate through different things that don’t need to get done every week, but should still be getting done somewhat regularly. One week I’ll dust my flat surfaces and shelves, the next week I’ll do windows (again, dog and toddler), and the week after that I’ll do my kitchen. I’ll throw away anything in the pantry or fridge that needs to go, as well as clean the outside of my appliances. On Free Friday I just catch up on anything that I may have missed through the week. Inevitably there will be something that didn’t get done, so I give myself a buffer. And on the weekends, I don’t do anything but the dishes and vacumming. I keep the weekend open for bigger projects around the house.

And that’s it! I spend about 30 minutes each day keeping up with my house, and it keeps me on track so I don’t wake up one day to a bathroom that hasn’t been cleaned in a month. I never have to worry about doing a huge cleaning day, or spending all my weekend working on housework. Although our house is in a perpetual state of disarray because of projects going on at any given time, the general cleanliness is usually up to par.

If you’re reading this in the days that it was first written, join me on Instagram, as I’ll be walking through each day on my stories. You can do it with me! You can either screenshot the photo above if you are wanting to save it on your phone, or if you’re a paper kind of person, you can click the link below to download and print your own copy. Check it off each day as you go! I can’t wait to get cleaning together!

Click here to download the printable cleaning schedule!

Well, that’s all for today, friends. Have a fabulous day!