Browsing Category

House Progress

Furniture Makeover, House Progress

Plans for the Playroom/Office + A Furniture Makeover

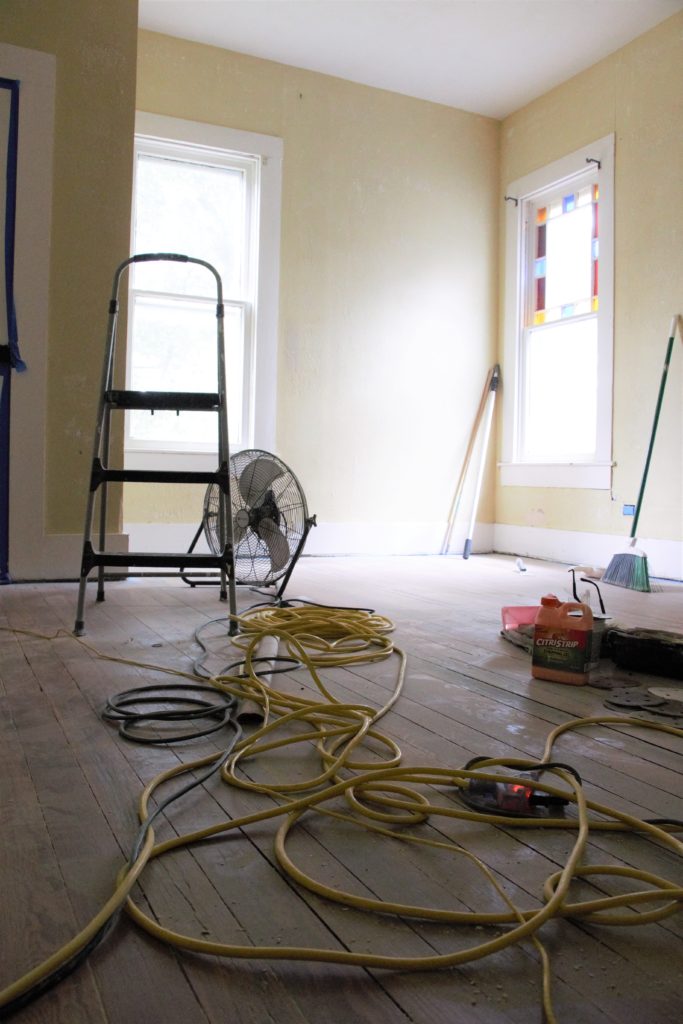
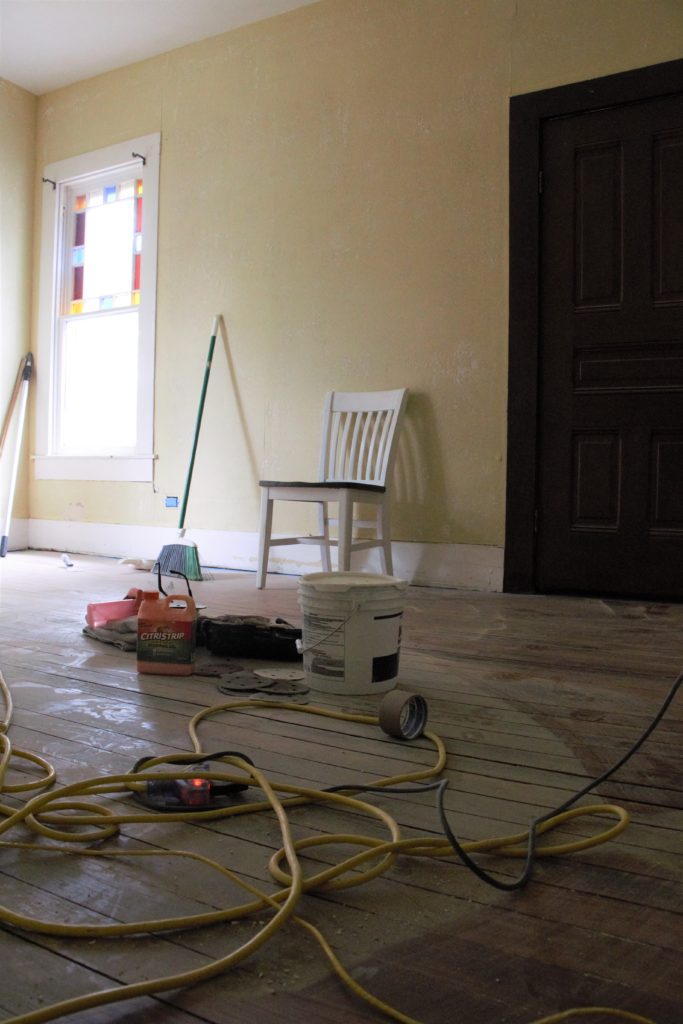
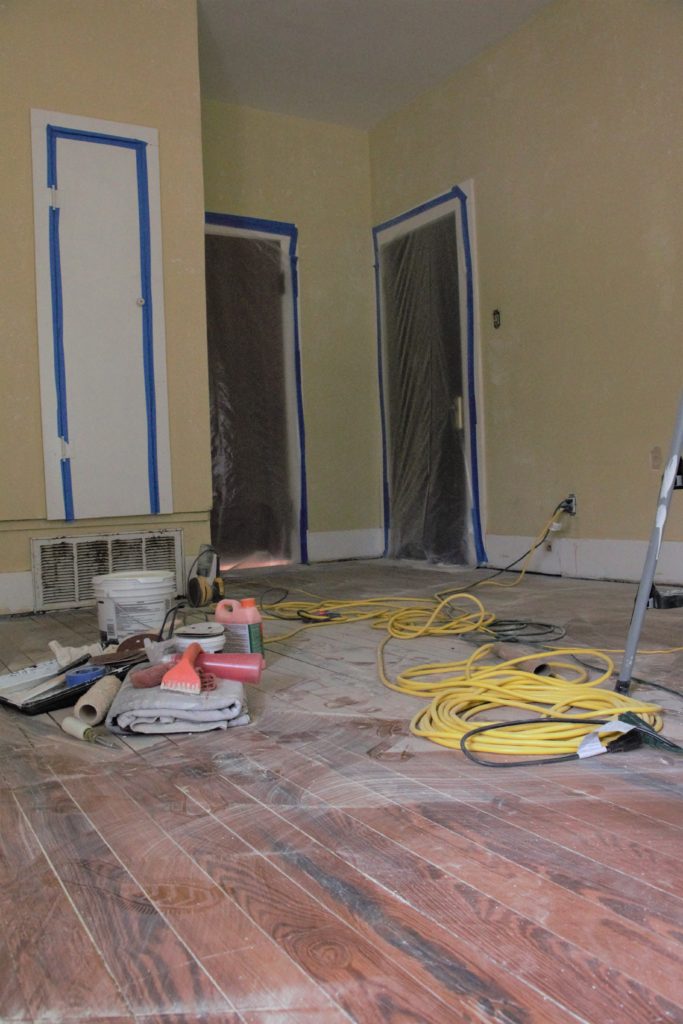
About five months ago, we moved our bedroom upstairs with the intention of turning the downstairs room into a playroom/office. It’s been pretty slow going. Drywall removal, wallpaper removal, and nail-in-shiplap removal has taken some time, and it’s not really fun work that keeps you motivated to do more.

But with our impending nursery project coming up, and the general house re-shuffling that comes with preparing for a new baby, I feel inclined to get moving on this playroom. I bought a set of chairs for five dollars a while back from a thrift store, and I knew they would be perfect in our playroom when we eventually got around to finishing it. The chairs didn’t come with a table though, so I searched Facebook Marketplace until I found one for ten dollars. So for my total price, I was at fifteen dollars. I knew however, that it was going to need a lot of work so I just stuck them in my garage and ignored them for a while.

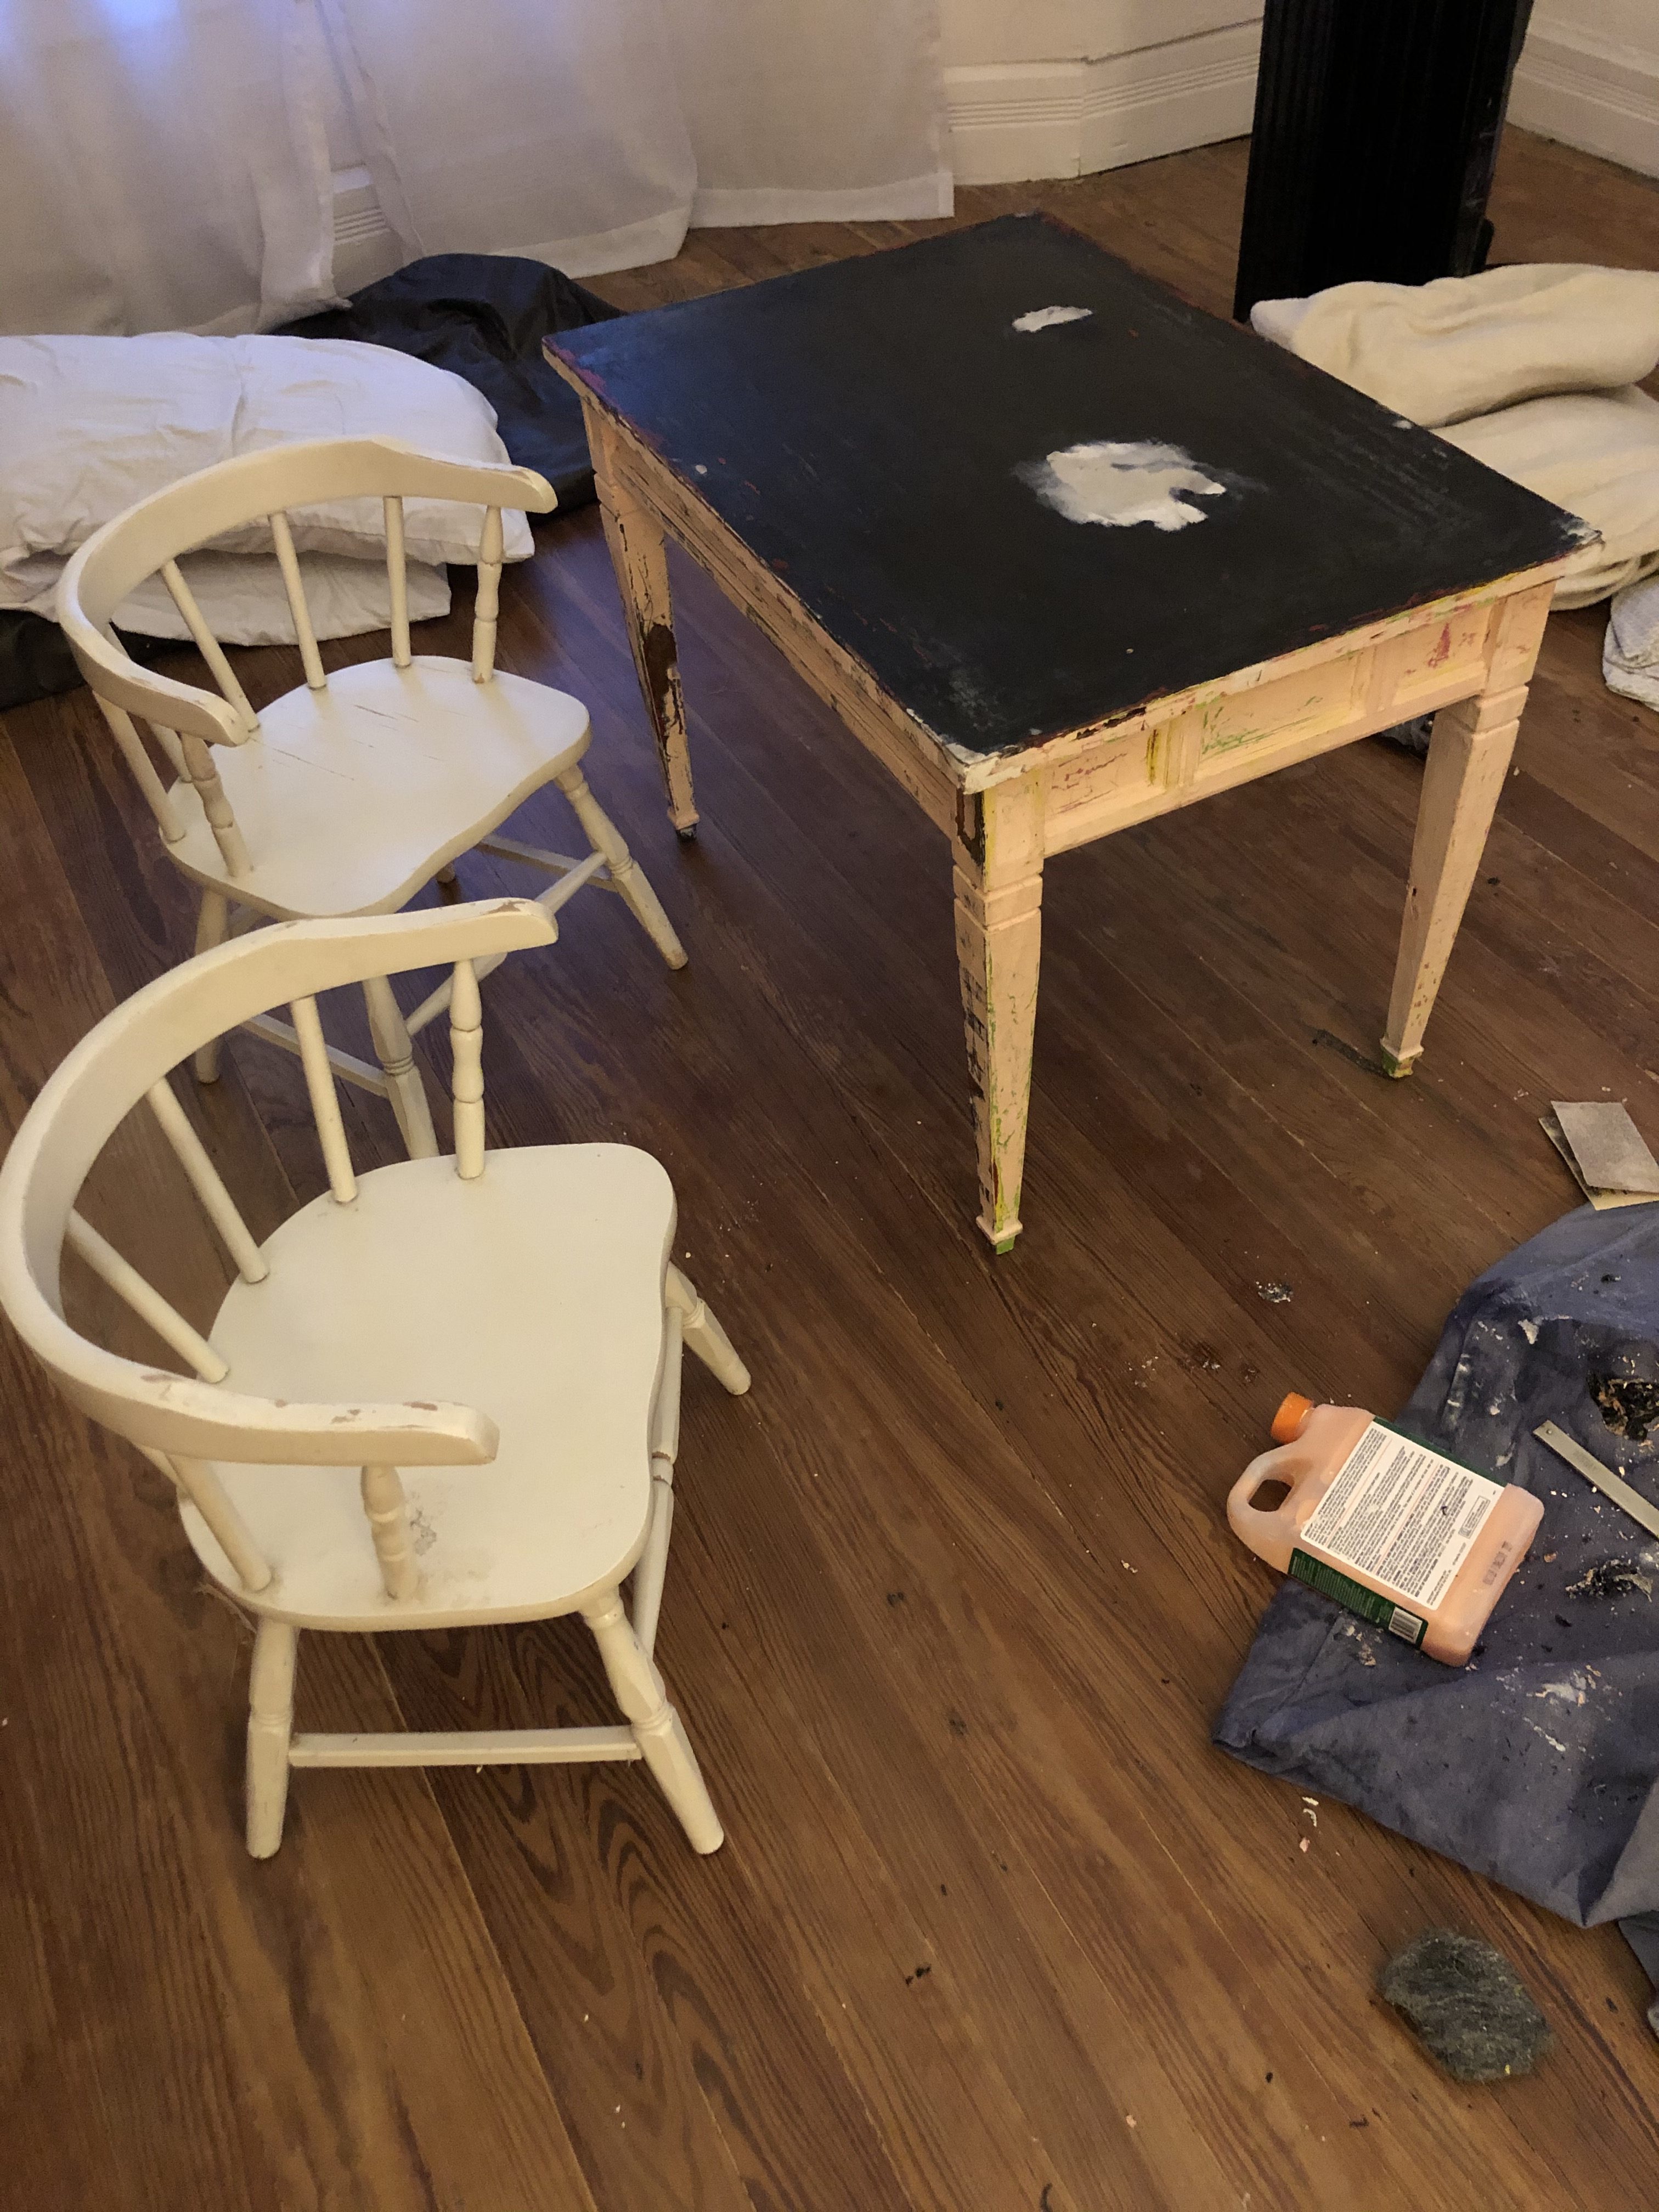
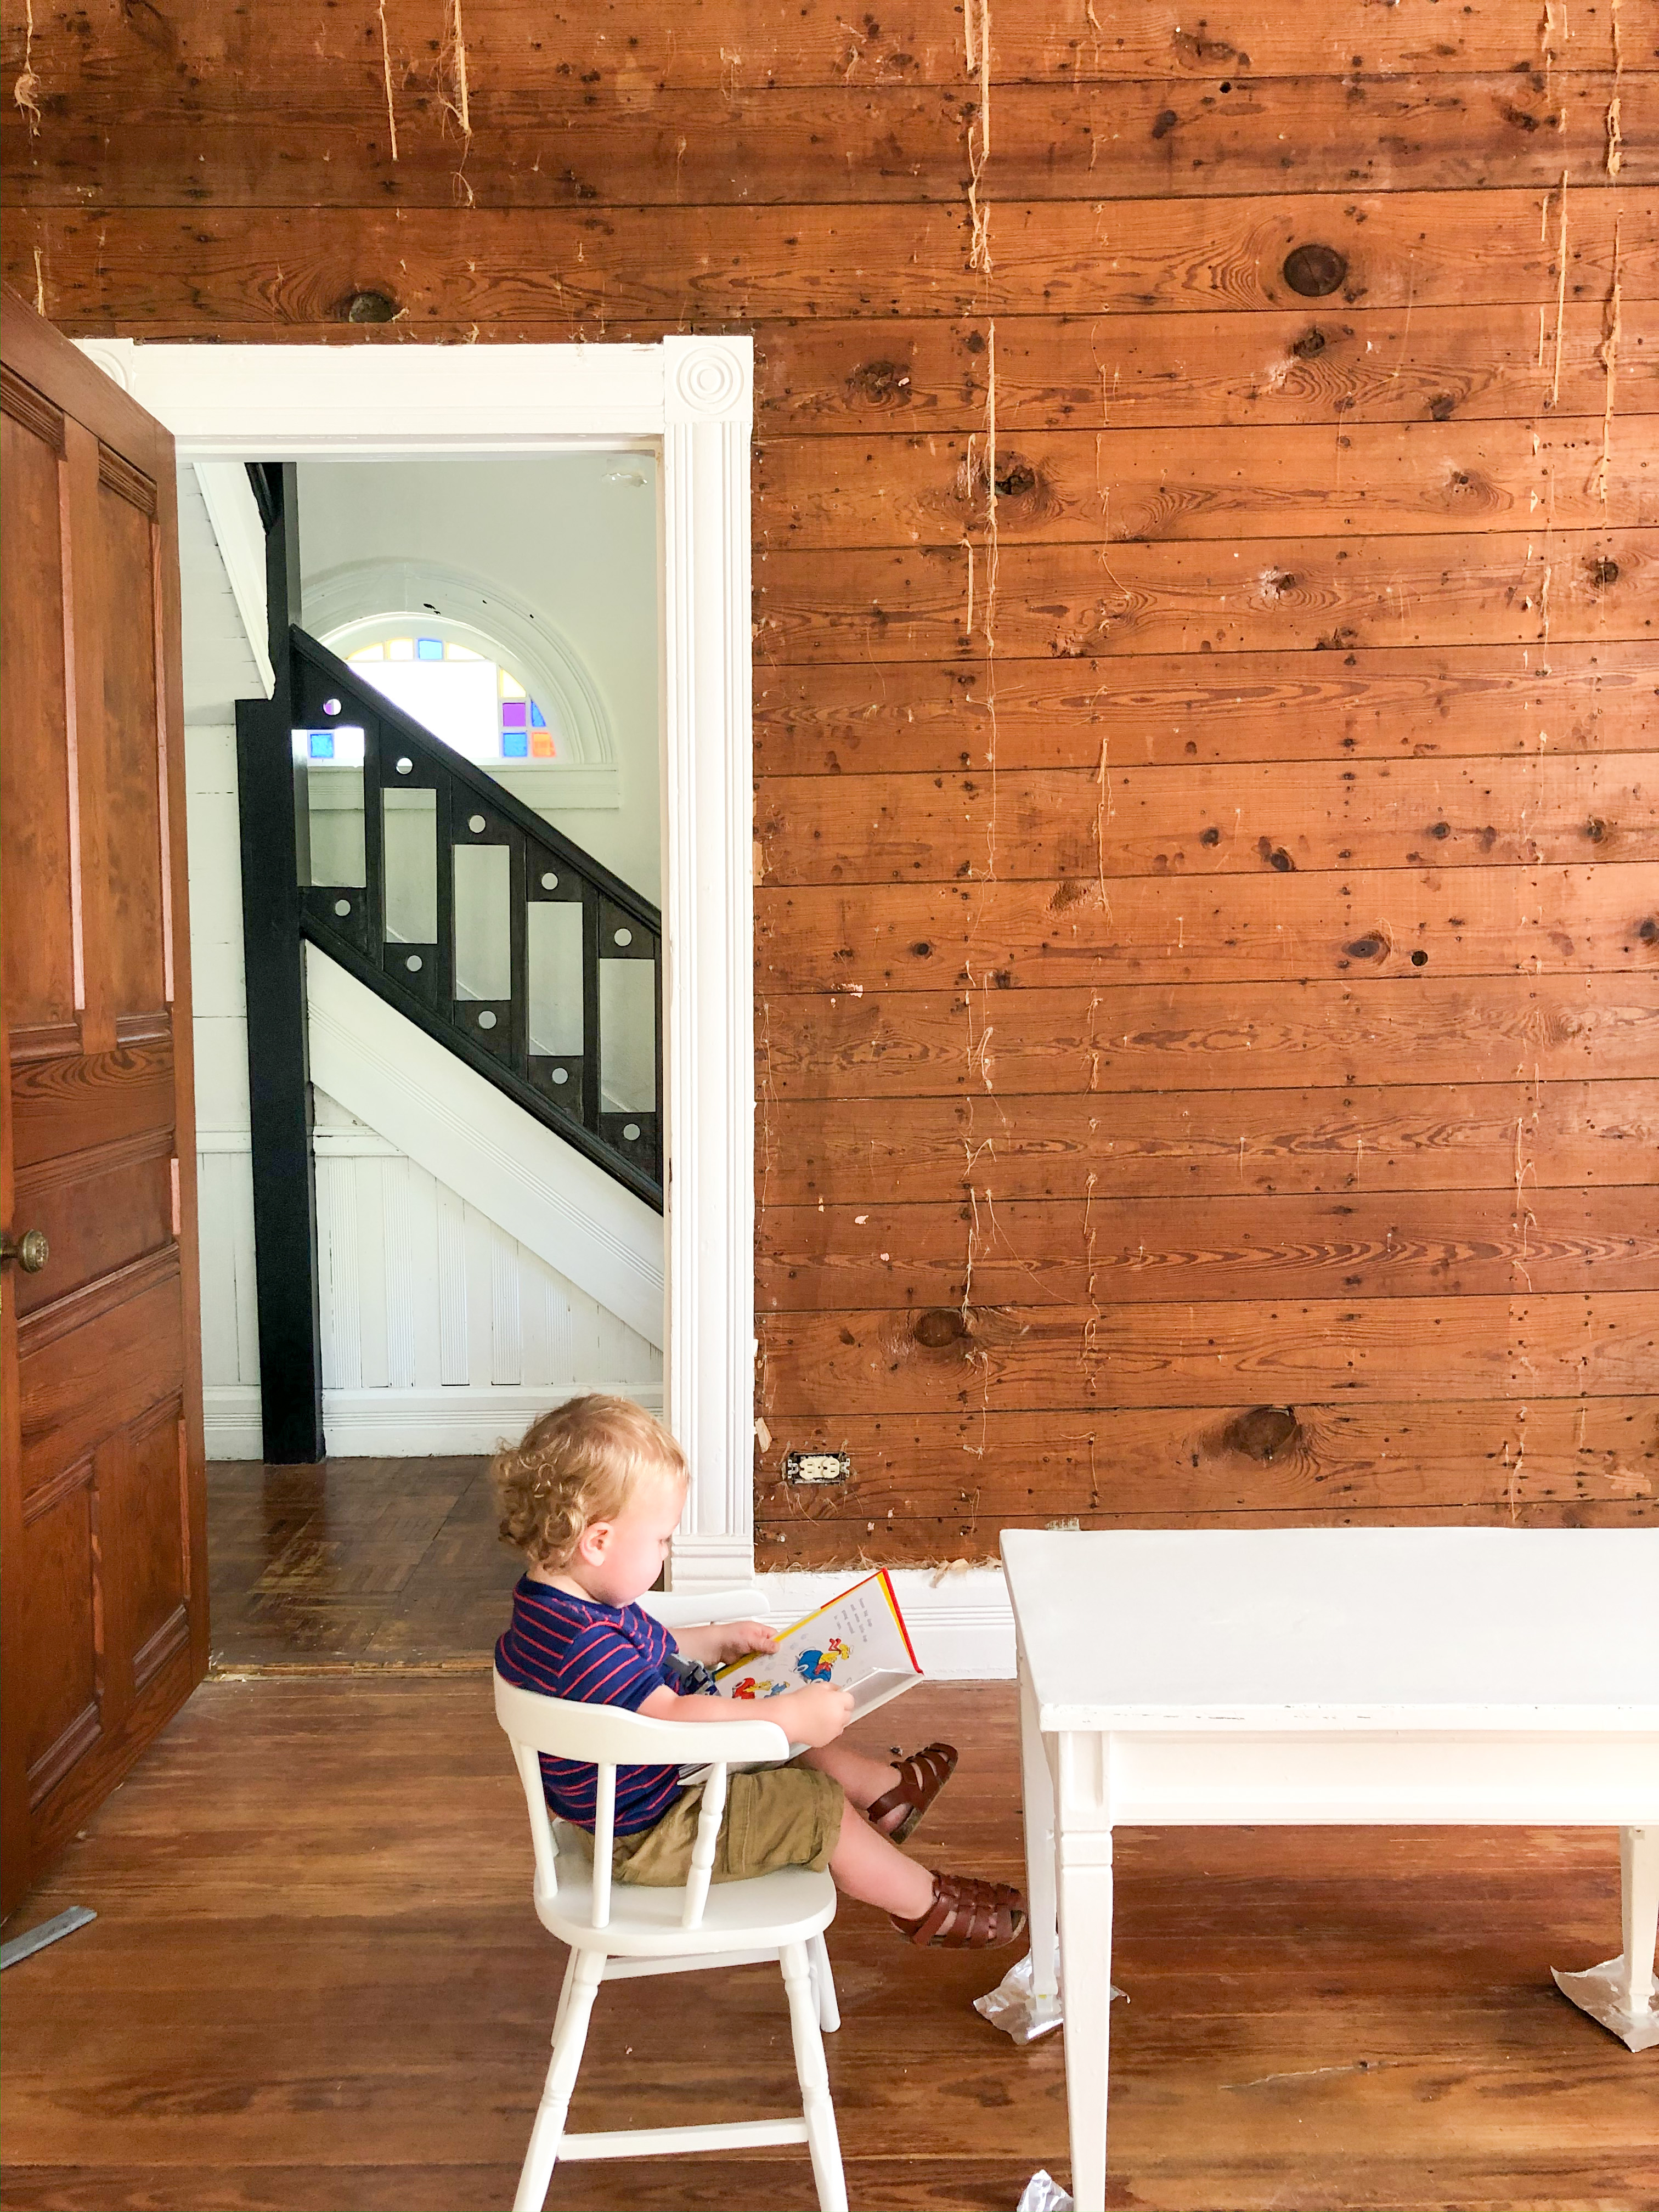
Because of our current social distancing situation, I wanted to paint the table and chairs without going to the store to purchase anything. Luckily for me, I have a hoard of supplies in my garage, so I found a leftover sample we had used to test colors and got to work. The table was in the roughest shape. It needed to be sanded, stripped a bit, wood filled, glued back together, and clamped overnight. The painting was actually the easy part!

It’s not 100% done yet, but someone is already enjoying it!

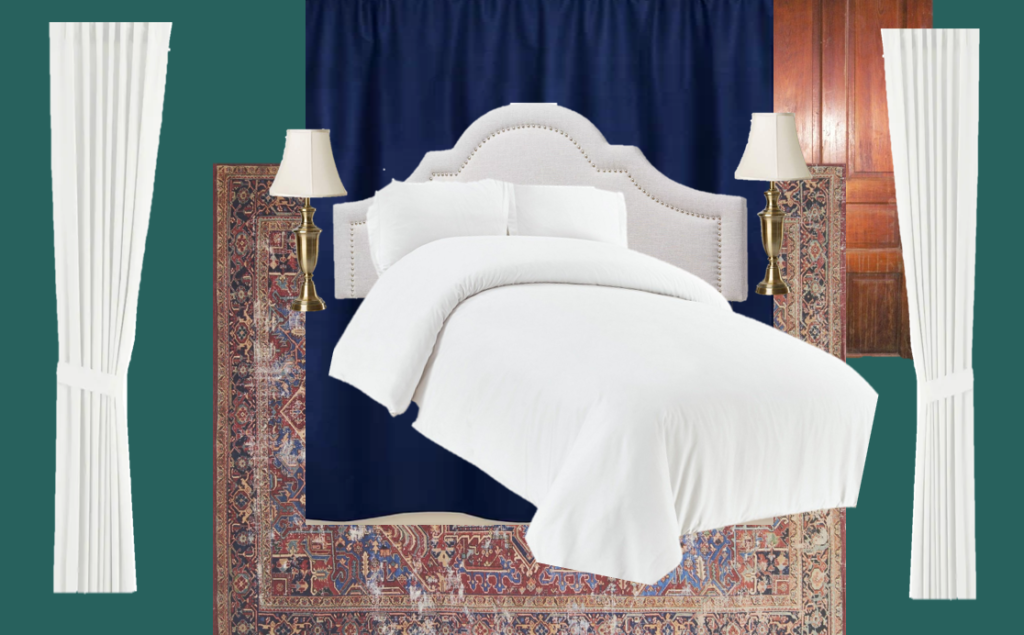
So now that the table is almost done, I figured it would be time to work on a mood board for the space. I always find it helpful to visualize everything together in a space when I’m planning a room. I used everything I already had that I knew would go in the space, and then worked from there. So here’s what I came up with:

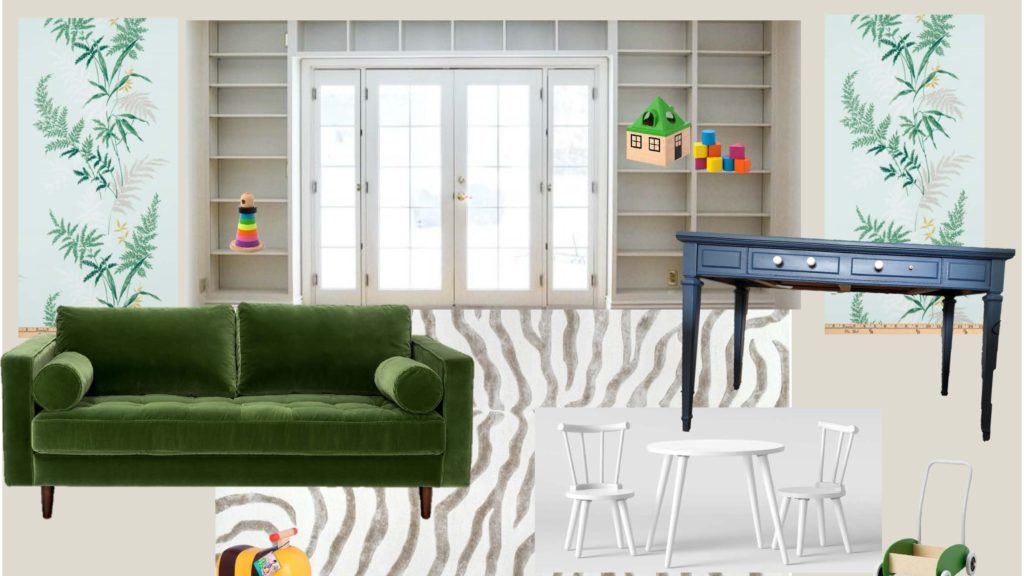
Obviously my table and chairs are a second hand DIY version, but I wanted to visualize what it might look like, so I included something similar. Here are a few similar options that I love: option 1, option 2, or option 3.

Our couch is the Sven Sofa from Article in the Grass Green color. It’s currently in our living room while we work on the playroom, and it’s the perfect sofa for littles. The long bench cushion comes off, and our son loves taking it down and climbing all over it.

As far as wall colors, I’m not 100% certain on what I want in the space, but I think I want to go in a beige direction. Gasp! The color on the background is Benjamin Moore Athena, but it’s just an example for now. Once we can safely leave our house again, I’ll get around to testing some actual colors.

I think the beige wall color will look really good with this rug, which I totally have my eye on. I think it’ll be just the right amount of fun for a playroom, but also the right amount of sophistication for an office.

The desk is a picture of our current desk, as we plan on putting our desktop computer in the playroom as well. It’s painted in Behr’s America’s Cup Navy. I need some new hardware, as you can see. 🙂

Other ideas for the room include built in shelves around the french doors for toy storage, and large framed fabric panels to tie the blue and green furniture together. Although I have some ideas in my mind, I just included some inspiration photos, not necessarily the exact thing I will end up going with. If you’re wondering, the fabric is here, and the built in photo I used for inspiration comes from this blog.

And just for good measure, I included some photos of actual toys that we have. You know, to make it more realistic. Most of our son’s toys come from IKEA, because they have the cutest toys.

So that’s the plan! I’m not exactly sure when we will get to finish this because of social isolation and all, but we definitely are going to get started on getting the last of the wallpaper residue off the walls. Baby steps. What projects are you planning during this time?

That’s all for today, friends. Have a fabulous day!

*This post may contain affiliate links.

House Progress

The Power of Paint (A Phase One Bathroom Makeover)

Hi there! Thanks so much for stopping by today! Boy oh boy, do I have a before and after for you today! First, let’s get the backstory. We bought our home from a realtor who had purchased the house at auction following a foreclosure. That realtor listed it for sale, but went back and forth about whether he wanted to flip it himself. When we bought it, there were a few random half hearted attempts at restoration work. One random door frame stripped of paint, carpeting partially pulled up, wallpaper torn off in just a small section of a room. That was the case in the room I’m going to show you guys today.

So the upstairs of our house has three bedrooms and a full bathroom. When we did our first big amount of work in the months before we moved in, the only room we touched upstairs was the first bedroom for our son, leaving the bathroom and two bedrooms untouched. The house was built in 1895 with no indoor plumbing, and therefore no bathrooms. I’m not sure at what point it was added, but at sometime, a bathroom was poorly shoved into what would have once been a spacious hallway between the three upstairs bedrooms. This leaves us a bit perplexed as to what to even do with the bathroom, because the floorplan of the second story is a bit wonky. I’d love to someday see that turned back into a hallway, but alas, we need more than the outhouse that was originally here. Knowing that this bathroom was going to involve some structural changes, and that our needs in the house/bedrooms may change as we have more kids etc., the upstairs bathroom was literally at the bottom of the priority list. Out of sight, out of mind.

Until, that is, we moved the master bedroom upstairs. Then all of a sudden this upstairs bathroom was a little more on the forefront of my mind. I lovingly nicknamed this room “the dungeon bathroom,” because I was so scared to use it. Everything was fully functional, but the carpet (yep, this thing had carpet) that had been in there had been waterlogged and soaked through the subfloor. My brother actually pulled up the carpet and old subfloor and laid down new plywood. And that’s the extent of work we had done in the dungeon bathroom. But now our bedroom was right next to it, and it was a pain to go all the way down the creaky stairs right outside of our son’s room in the event that I needed to go to the restroom in the middle of the night. So I knew I needed to do something. But again, of all the “big projects” we have planned for the next couple years, this one is quite literally the last one on the list. So I decided to give it a little cosmetic facelift, a Phase One makeover to tide us over until we would eventually remodel this bathroom. So, without further ado, here is the dungeon bathroom.

For days, I worked during naptime and after my son went to bed to scrape wallpaper. Most of the wall had two layers of paper, but in some areas, I found four different papers laid on top of each other. It was grueling. I used a handheld steamer and a wallpaper scraper and would work in tiny six inch square sections. It took a long time, and my arms arched.

As I scraped the wallpaper, I found that some of the drywall had been damaged, and had simply been disguised by the paper. That meant we had to do some patch work on the walls. I had to sand it all down to get the gunky wallpaper paste completely gone. All of this was before I ever started painting!

I originally planned on only using products that I had on hand to do this bathroom, but I ended up purchasing the wall color because I didn’t have as much paint in the garage as I thought I did. The color is Behr French Colony, and I think it’s a lovely blue-grey.

A shower curtain over the shower stall helps disguise that whole lotta ugly.

I also painted the plywood subfloor using some paint I had on hand. The floor is painted with Behr Tanglewood.

As you can see, I didn’t change any of the fixtures, the only thing I changed was paint. Isn’t that crazy?! Paint is so powerful!

Because this room is directly next to our bedroom that’s painted such a bold color, I was really concerned about how these two colors would look when coming up the stairs and they were both visible. I think they go complement each other nicely. (Bedroom is Behr Thermal.)

The 1920’s light fixtures stayed, and I think they look so much more elegant now without the dated wallpaper.

All of this to say this: just don’t wait. I would have loathed this bathroom another two to three years until it finally was time to gut it. Instead, I can enjoy the space, and it doesn’t give me the heebee-jeebees every time I go in there! I think there is power in a can of paint, and so much power in doing a “Phase One” project, something that is just enough to tide you over while you’re waiting for the big project.

Before we go, here’s one more before and after from the same angle. I can’t even believe the only difference is paint.

Alright guys, that’s all for today. Have a fabulous day!

House Progress

We’re Moving the Master Upstairs… What??

YEP. You read that right. And if it seems totally random, that’s because it is. So I figured I owed it to you guys to walk you through my thought process and plans before I take you along for the ride.

So, flash back to about two weeks ago. We were driving home from being out of town for several days, and we were going to be arriving very late. While we were gone, it had gotten cold for the first time in the season, so we were anticipating walking in to a cold house because the furnace had not yet been turned on for the season. Our house is two floors, and has two separate thermostats and HVAC systems (one for each floor). Our son’s room is upstairs, directly above our current room. And for whatever reason, although he has been sleeping in his own room since he was about two months, I started to freak out and panic that having a separate system upstairs was terrifying because something could happen upstairs and we would have no idea downstairs because the HVAC systems are completely independent from each other. So, in the car that night, I started talking to Ethan about the possibility of moving our room upstairs (we have two additional rooms up there we aren’t really using), the pros and cons of the situation, and the timeline of when it could happen if we decided to do it.

We got home that night, and had pretty much decided we were going to move our room up there, it was just a matter of getting some work done. The room we are talking about is one of the untouched spaces in our house, which have been completely neglected since purchasing.

So, this week we started working! It’s been slow going because we have a one year old and can basically only work during naptime or at night. Not to mention the fact that whoever lived in this home before had some weird love affair with wall texturing compound, and sprayed? dabbed? rolled? (I don’t even know how this could have been installed) the spikiest, sharpest wall texture known to mankind. So we have the absolute pleasure of sanding and scraping every surface of the room before we can do anything else.

So, y’all want to see some before pictures?

Keep in mind, this isn’t going to be a glamorous before and after renovation. This room has six doors. SIX! Plus a half door to house the HVAC unit. Because of all the doors, there’s no logical space to put the bed. Also, this is going to be a very much phase one renovation. Meaning, we have larger plans down the line, but it’ll take a bit to get there.

So, let’s walk through the pros of using this room. Obviously, safety. Biggest benefit hands down. Also, with our current master being in the front of the house downstairs, our “Christmas Tree Window” is where our bed is. I’m most excited that if we can get our room situated upstairs, we will have a tree visible from the street outside. Another benefit will be the proximity to the third bedroom (the one we will use as a nursery for our next child someday). The new nursery will open right into the master, which will be super helpful for those first months. (Phase Two renovation will eventually separate those rooms with a hallway and an additional staircase, but that will come later on.) Right now, we don’t have a closet in our room. Our room was the original parlor to the house, but was turned into a bedroom when the addition was made in the 1950’s. We have been using the downstairs coat closet as our main closet for a year. Which has been fine, but I can almost guarantee that a neighbor at some point has seen me run pantless through the living room to the hall closet to get dressed in the morning. The upstairs room has two closets!!!

The cons: need I say again..SIX DOORS. It’s an awkward layout for sure. It has a door the a lower level roof for goodness sake. I have some design plans to work with it for now, so we’ll see how that turns out. Also…the dungeon bathroom. It has graced my Instagram stories mayyyybe twice. Our upstairs bathroom is a scary place. And it’s low on the list of priorities. To be honest, I’m pretty scared to use it. So I’ll be using the bathroom downstairs still. Which I’m sure will be annoying in the night. Or on those cold mornings getting ready for work.

So, at the risk of getting too wordy already, let’s talk about the plan for the space. Y’all want to see my super sophisticated moodboard that I literally made on my lunch break? Well, you’re in luck:

When we bought the house, we bought ten gallons of the same white paint color and just went to town with it in every room. We don’t have any more of that paint, so I will have to buy more regardless. I’m really inspired by dark, saturated blues and greens right now, so I’m thinking something like this. None of the things in this photo are exact things I plan on purchasing (except the headboard, which is what we already have), but are more or less ideas for the space. I will likely thrift a lot of items, or try to source some on FB Marketplace. I plan on stripping some of the painted over doors, with a bright, crisp, white trim. Moody and dark, with brass accents. And don’t even get me started on a timeline, because who knows when it will be finished. But, I do plan on priming it and moving us up there this weekend. Everything else can be done after we are sleeping in the room.

So anyway, that’s the plan. I’ll keep you along for the ride! That’s all for today friends. Have a fabulous day!