Browsing Category

DIY Projects

DIY Projects, Home Decor

DIY Bed Canopy

Hi guys! Glad you’re here! I wanted to share with you a project that was a big undertaking in our master bedroom. If you remember a couple of months ago, we were working on getting one of the upstairs rooms livable to move our master upstairs. You can read all about that here . Over the last weeks, I kept some of the progress live on Instagram, when we revealed the paint color, and the new rug.

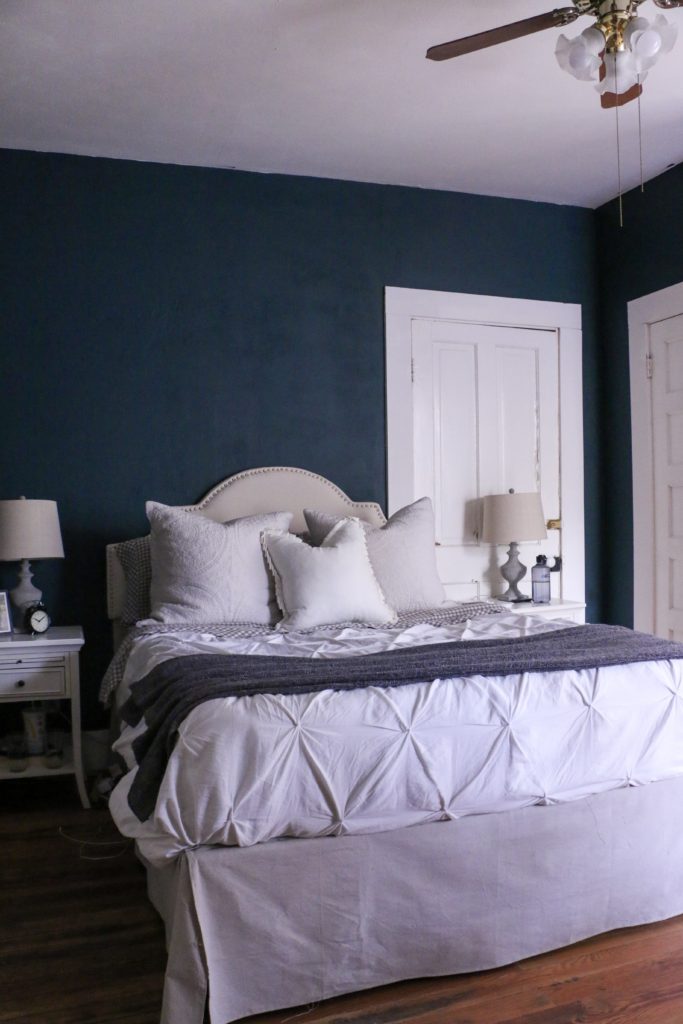
If you remember, this room has six doors in it, leading to various places, meaning that there was no good spot to put a bed. We ended up putting the bed in front of a door, and I started coming up with some ideas on how to cover that door or make it less obvious. I thought about painting the door and door trim the same color as the wall, or putting a privacy screen behind the bed, or even making some kind of false wall contraption that would rest behind the headboard. Then I stumbled upon this on Pinterest from Design Sponge, and I knew this was what I was going to do.

She had a great tutorial that I used, but because I was trying to cover a door behind the wall, I needed it to be wider than the bed itself. It ended up being a 10 foot width that I needed to cover, by 15 foot length. Trying to find fabric of that size was a nightmare. I first tried a large dropcloth and dying it the color I wanted, but that ended up being a massive fail because the fabric was so large and it didn’t fit in my bathtub where I was trying to dye it.

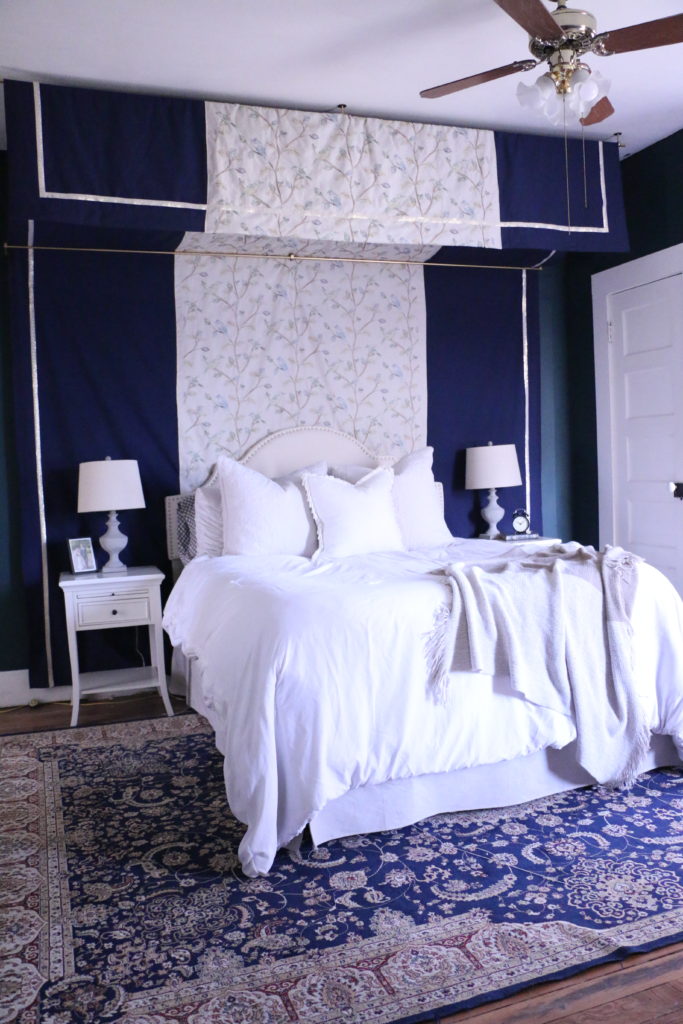
So I ended up buying a bolt of 60″ wide fabric (ten whole yards), cutting it in half, and sewing the two pieces together so that I had one 10x15ft piece of material. The only problem was that now there was a seam down the middle of where it would be hanging on the wall, so I decided to add an accent material up the center of the canopy to cover the seam.

The accent fabric was a nightmare. I ordered from one place, only for it to be out of stock. I ordered the same fabric from another location, only for that one to be out of stock. I finally just walked in to Hobby Lobby and found this fabric. It’s no longer listed on their website, so I think it might be discontinued, but I liked that it had blues and greens in it, and would probably work well in the room.

I used my accent fabric just in the middle of the canopy, and then hung it up. One rod is mounted on the wall, and the other from the ceiling. Hanging was also a nightmare, because this canopy was super heavy, and these are tall ceilings. I used a dab of hot glue once we had it in place to prevent it from shifting.

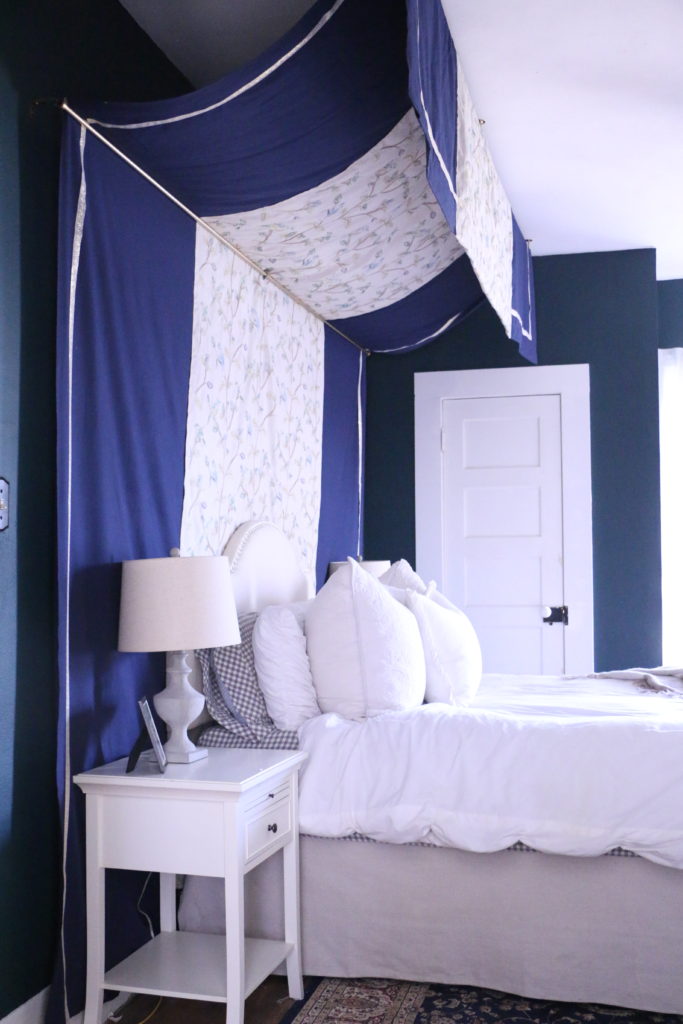
I also used hot glue (because hot glue can do all things) to add the greek key ribbon trim. Before the ribbon was added, I wasn’t too sure about it overall, but I do think the trim polished the whole thing off and made it look more finished.

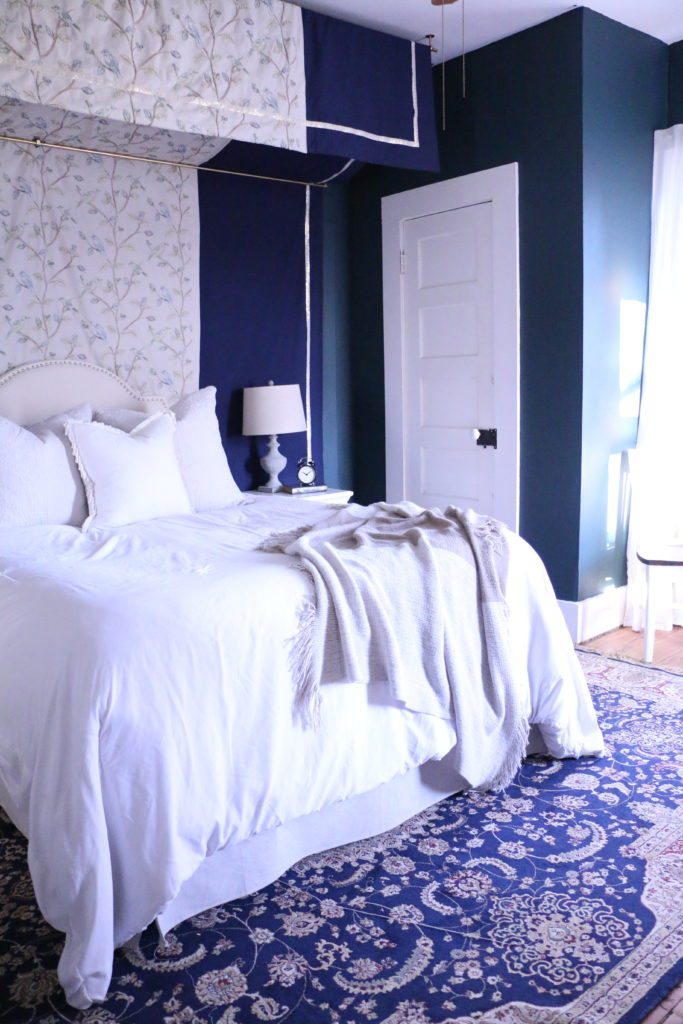
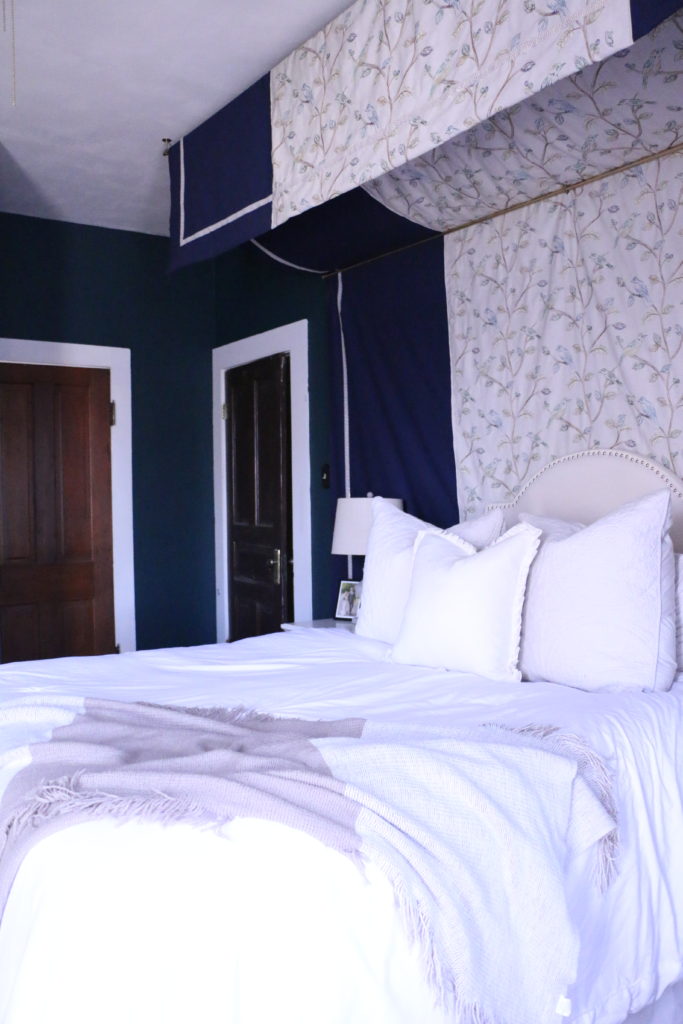
The goal here was to cover that unsightly and unused door, and I think that this definitely fits the bill. And the best part is that the door is still totally accessible so the next time we need to move furniture upstairs, we can open the door! I’m really loving the way this project turned out, and it’s true what they say: necessity really is the mother of invention. What do you think?

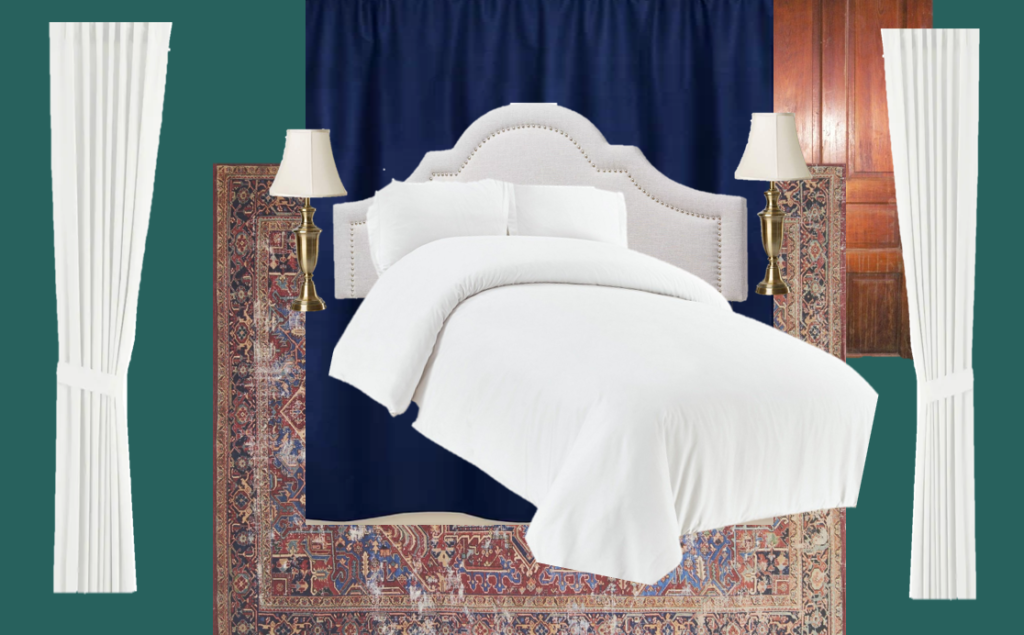
And just for fun…take a look at the original mood board for the space! It’s so fun to see it coming together!

The rest of this room is evolving slowly, and I have some continued plans for the space, but all in due time. That’s all for today, friends, have a fabulous day!

DIY Projects

Six Big Impact Projects With One Gallon of Paint

Hello, friends! I thought it would be fun today to show you a few things around the house that are seemingly random but all have one major thing in common.

So, everybody knows about the power of paint in transforming a space, yada yada yada. You hear diy lovers everywhere talk about it. Well, that’s because it’s true. Paint can make something totally blah look totally fabulous.

So, let’s back up a little bit. A few weeks after our son was born, I decided to paint the stairs in our house. As one does mere weeks after giving birth. Obviously. So, I went to Home Depot (this is not sponsored by the way, I just only shop there), and picked up a gallon of Behr’s Totally Black in a latex semi-gloss finish. I wasn’t sure how much I would use, or if one gallon would be enough, but I decided to stick with one and if I needed more, I would go get more.

So, the black staircase was born. This is the view from the front door, by the way. I was pleasantly surprised at how well the paint covered the stairs (I did two coats), and how little paint I had actually used. So then, while still on maternity leave, I decided to paint the fireplace. Because, well, I already had some paint I could use, so why not? Hence, the black fireplace joined the party.

Now, in this picture, you may notice a sneak peek of another project. Hold on, I’ll get to that. Seeing that I still had some leftover paint in the bucket, I decided to go ahead and paint my back door. Now, this one comes with a warning. The back door is in the kitchen which is completely unrenovated and honestly just ugly. The quality of this photo is terrible. I’m sharing just to show you yet another thing I did with this single bucket of paint. So here we go.

The door is awful. It was more awful before. That’s pretty much all I have to say about that. Moving on.

Some months later, the paint can had found a home in the garage awaiting some eventual use. That use came when on a random day in which work was unexpectedly cancelled (I work in a school, and the water had been turned off due to some road construction so school was cancelled). Finding myself with some extra free time, I decided to build a coffee table. A perfectly stable and precise coffee table it is not, but I built it alone and with items I had completely in my garage spending zero dollars. I’m sure you can guess where this is going…I painted the legs to the coffee table with more of the black paint.

Time goes on. On a whim one day browsing Pinterest, I decide to paint some faux-dalmation wallpaper on a passthrough area between my living room and dining room. Good golly this one was a good one. In a few hours time with the trusty bucket of black paint and a step ladder, I had done this.

The dalmatian wall is my faaaaaaavorite. It adds so much personality to the space and I love it. It was one of the most popular projects I have ever posted about on Instagram as well. And why not? At this point, it wasn’t costing me any more money and wowza it packs a punch.

So that brings us around to the final project, the one that you’ve now possibly spotted twice already in these photos. You guessed it. The dining room chairs. By this time, I’ve already completed five other projects with this gallon of paint, but I still have more so why not? I did use a paint sprayer with these chairs, which means I had to add water to my mixture to make it thin enough for my sprayer. So, full disclosure, I stretched a bit here.

This is the most recent project, and they aren’t completely finished yet. I’m looking for the right fabric to recover the chairs, but I haven’t found what I’m looking for at the right price point just yet.

So there you have it. Six things I did with one silly gallon of paint that cost me less than $30. Insane, right? Would you believe I still have some left? Yep. Now, I probably won’t do any new projects with it, as I’d like to have some left just for touch ups. And with all these things, it’s likely I’ll have things to touch up over time.

So, a couple of takeaways here. Number one: paint is freaking awesome. You can cover a lot of ground for a little money. Number two: doing these different projects in different spaces throughout the house makes things feel more cohesive. The fireplace is the same color as the front stairs which makes it feel less random and more like they belong together even though they are in completely different spaces. It helps the house flow visually, I think. All that to say; I hope this inspires you. Get out there and paint something!

That’s all for today, friends. Have a fabulous day!

DIY Projects, Furniture Makeover, House Progress

Plans for the Backyard + An Outdoor Chair Makeover

Hi friends! I wanted to share with y’all what we’ve been working on this week, even though we aren’t finished. Just about everything is a work in progress around here, but I figured I’d share some of the progress and our plans in real time.

So, on Monday morning I happened to stumble upon a neighbor’s trash pile with a stack of outdoor Adirondack chairs. I don’t normally go garbage picker, but if the shoe fits… I grabbed the chairs, brought them home, and then started dreaming about what our backyard could look like with a little bit of work.

So, these chairs were in great condition, but….the brown was just not gonna work. Thankfully there was an easy solution to that. With a quick couple of coats of outdoor spray paint, they were looking better already. I used Krylon outdoor spray paint in a high gloss finish.

You wouldn’t think such a subtle change would make all that much of a difference, but it makes them look brand new! But then I had these great chairs, and all of a sudden, I was inspired to start some projects in the backyard. So….we started digging. But first, let me show you what our yard looked like before.

Yikes, right? This space had some old rosebushes in them before we moved in, but they were terrible and awkwardly located, so we tore them out a while back. Then my brother built this in-ground fire pit while he was staying with us for a few weeks using some rocks from around our property. But other than that, it was just looking super sad.

So I thought, man, wouldn’t it be great to have an area covered in pea gravel surrounding the firepit, to put these chairs on and round out the space? So, Ethan and I got to work. We rounded up some bricks from behind the garage and under the porch (old house problems or old house perks?) and dug a trench perimeter for the area we were thinking about.

We buried the bricks halfway into the ground, just kind of winging it, and then we started digging. And digging, and digging, and digging. We wanted an area about two inches below the surface. Which, two inches doesn’t seem like a lot, but when it’s a large surface area, it freaking suuuuucks. Ethan did most of the work, but I did enough to make my body hate me, don’t worry.

And that leads us to where we are now. We’ve finished digging, and the next step is laying down a barrier and then pea gravel!

As for the swing, I think we’re going to take it down, build a solid cover on top, and then put our grill there. I’d like to paint it as well, but I’m not sure what color. I want to do something that goes along with what the house will be eventually, which is white with black trim. But we aren’t sure what exact white, and what exact black, so I don’t want to do something that will eventually clash with the house. So I’m currently undecided.

It’s not finished, but I can see the end result in my head and I can’t wait!

So, in the spirit of celebrating progress instead of just completed projects, that’s where we are. Aching backs, and spruced up old chairs. And if you think that I’m not going to enjoy some summer s’mores just because we aren’t done yet, you’d be wrong. 🙂

That’s all for today, friends. Have a fabulous day!