All Posts By

Fawn Rumfield

Home Decor, Organization

How to Make Your Guest Room Guest Ready

Hey y’all! Don’t mind me over here just eating Hershey’s Kisses and listening to Johnny Cash records because #summer. Seriously someday I’m going to have responsibilities in the summertime like children, or a job that doesn’t have the summer off, but for now I’m going to soak up my precious freedom to do nothing!

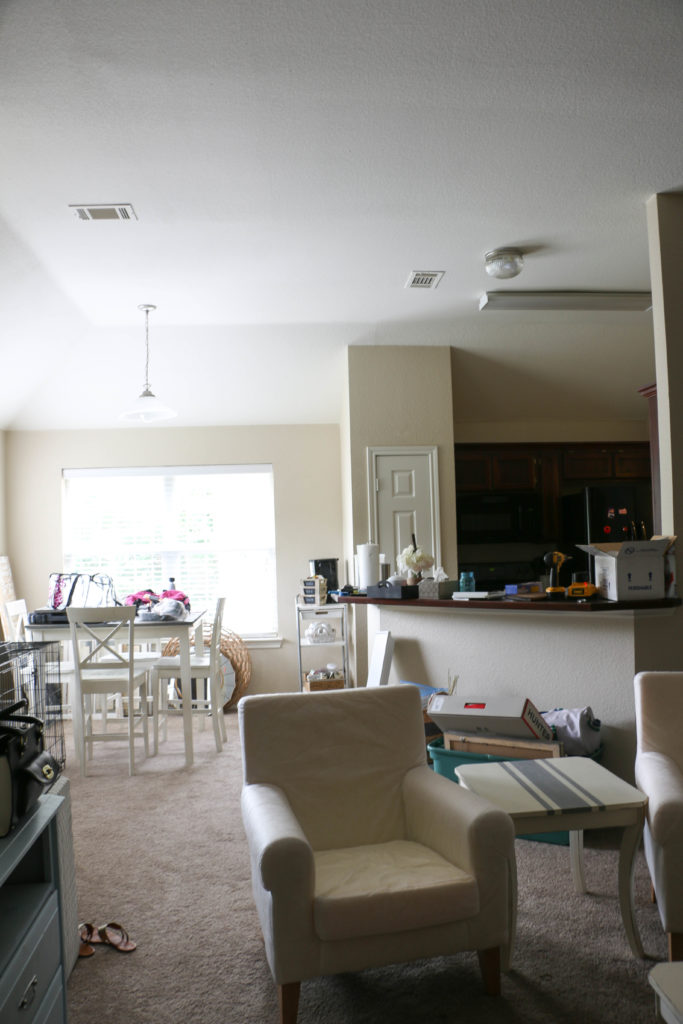
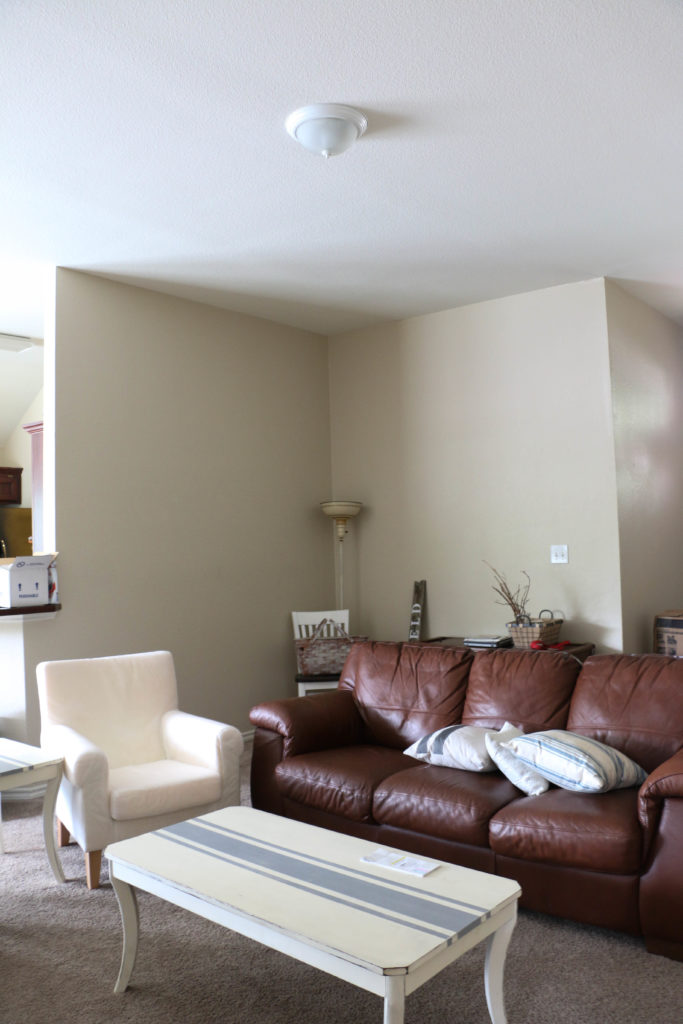
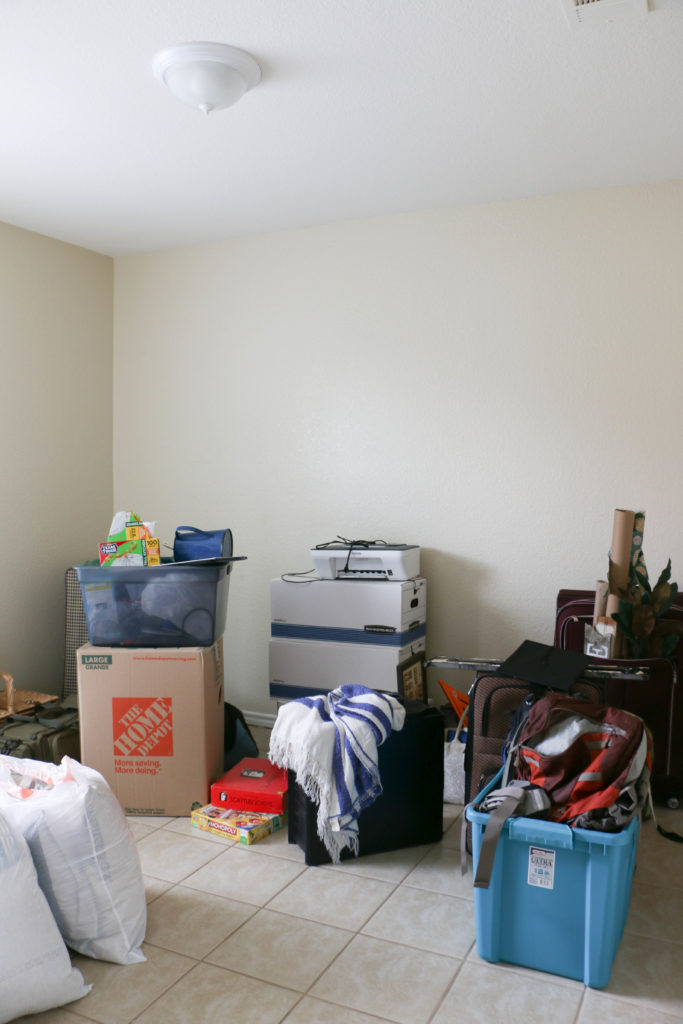
This weekend my mom and my sister are flying in from New York to spend a week with us, and I’m super excited! I’ve been getting the guest room cleaned out because let’s be honest here: it’s the most neglected room in the house and we all know it. Our guestroom is super weird. We live in an old southern house, and apparently back in the day it was custom to have two front doors to a house. One for the family to enter, and one for guests to enter. The guest entry would lead into a nicer parlor than the family entrance. All that to say, we have two front doors to our weird little rental, and one of them leads directly into the guest room. It’s sealed, but it’s still weirdly there. It’s also the biggest room in our house, bigger even than our bedroom. Anyway, it’s usually filled with loads of furniture and drop cloths and paint until we have overnight guests and I’m forced to clean it out. Like now.

So that’s what I’ve been doing the past few days, and so I thought it might be a good idea to share some tips on how to make that poor neglected room a little more comfortable for visiting guests. So here’s a few things you might want to consider next time you have people staying.

guestroom

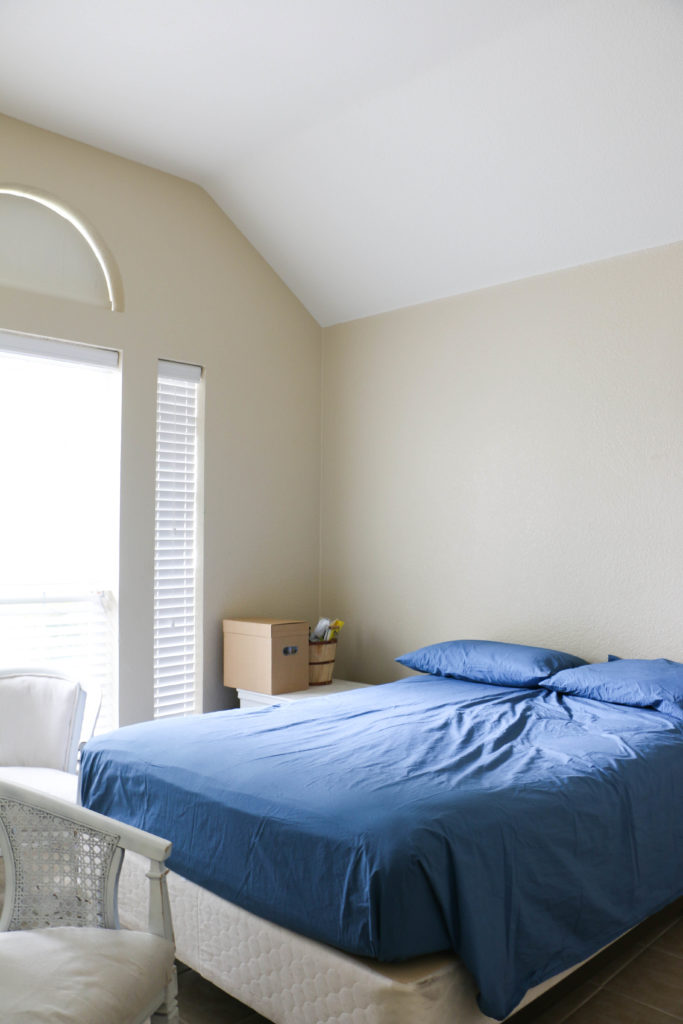
One. The most obvious thing: clean the room. Make sure the sheets are freshly washed, the floors are cleaned and the dust bunnies aren’t too big. Unless you intentionally use it for storage, check under the bed and in the closets. Make sure there’s no trash or random items that don’t belong.

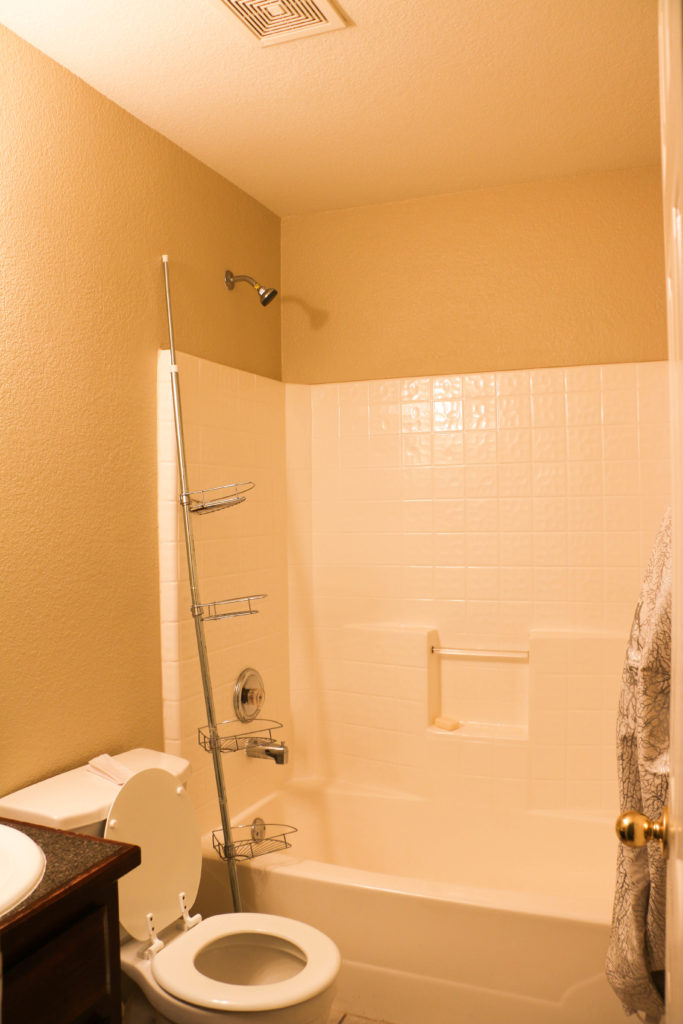
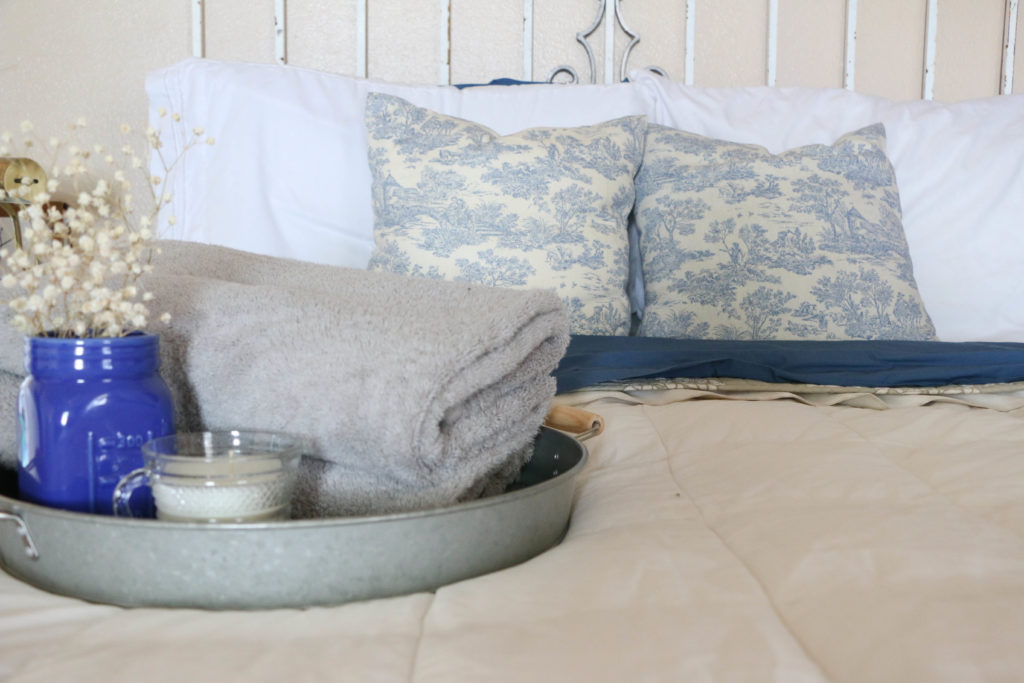
Two. Lay out towels for your guests in the guest room, even if you don’t have an attached guest bath. I try to think about how I feel when I stay overnight at other people’s house, and sometimes you don’t know where fresh towels are, or which ones you’re supposed to use. Make this easier for your guests by simply placing a few on the bed, or on the bathroom counter if your guest bath is attached.

guestroom2

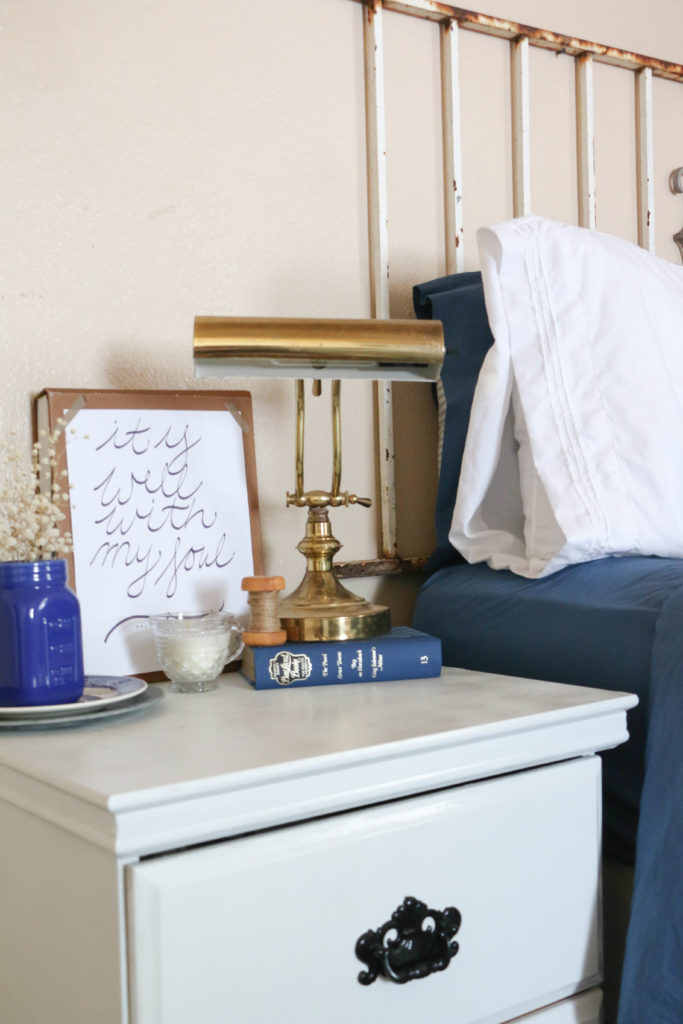
Three. Post the wifi password somewhere. I have seen some really cute printables online that are for posting the wifi password. You can make your own, write it on a chalkboard, or find one online and print and frame it yourself. This way your guests don’t have to ask, and it’s just another thing you can do to make them feel at home.

Four. Do something about the smell. No, I’m not saying my house smells, nor yours. But have you ever noticed that every house you go into has a slightly different scent? Not even a bad one, just individual to the people that live there. It’s more noticeable the first time you walk into someone’s home, but if it’s your own home, you probably don’t even notice. Place a yummy scented candle or fresh flowers in the room to give it a pleasant smell. I’ll be burning one of my own homemade vanilla candles when my mom and sister arrive, but any candle or flower will do. If you’re really feeling festive, do both!

guestroom1

Five. Keep extra blankets and a fan available. Everyone has different sleep preferences when it comes to temperature, so have you’re guests covered either way. Make sure they’re comfortable whether it’s hot or cold at night.

Six. And this is just above and beyond. (And mom, if you’re reading this, don’t be expecting this one, since, you know, you’re my mom, not the president.) Have a tray of bottled water or drinks, and a bowl of candies. Bonus point if you have some local goodies for out of towners. Nothing better for your guests than to have something to drink or snack on at night without having to tiptoe through an unfamiliar house in the dark looking for the kitchen.

Well, that’s about it. I’ve got to get back to doing some laundry, and vacuuming out the guest room. What do you do to make your guests comfortable? I’d love to hear about it! That’s all for today friends, have a fabulous day!

DIY Projects, Tutorials

DIY Pallet Flag

Now that summer is officially here, it’s almost time for one of my favorite holidays… the Fourth of July! I’ve always loved this holiday, and I don’t even really know why. The fact that it’s in the summertime probably helps! 🙂

The past few weeks I haven’t been super productive, but this past weekend we went away to celebrate our anniversary, and some time on the beach has done me some good! I came back feeling pretty refreshed, and inspired to create something new.

As I mentioned in my last post, this summer we are saving all our pennies for a big goal, so we don’t have a ton of room in our budget for extra fun stuff. Which is totally fine. Because I am super excited about the possibility of something new. Anyway, I was wanting to add something new to our front porch for the holiday, but I wanted to spend zero dollars. Mission accomplished. palletflag2

I found this old pallet in the trash pile while I was driving down the road… #noshame. I had Ethan drive by in the truck and pick it up. I’ve had it for about a month with no purpose, sitting in the garage. Until yesterday I decided to make a quick project out of it. See, there are perks to hoarding junk in your garage. Totally justifiable.

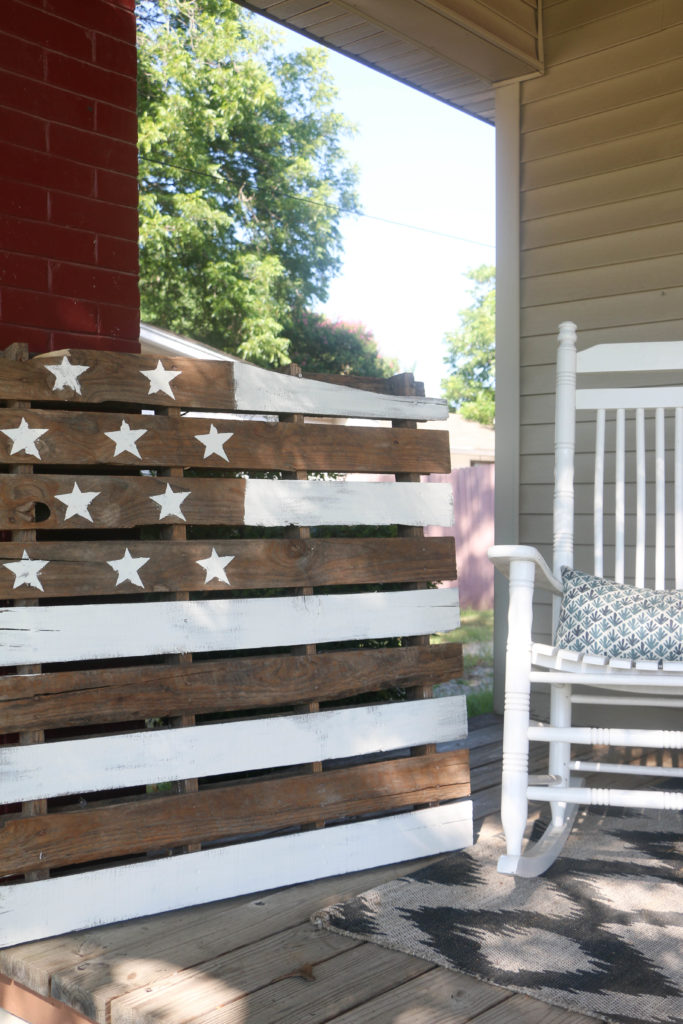
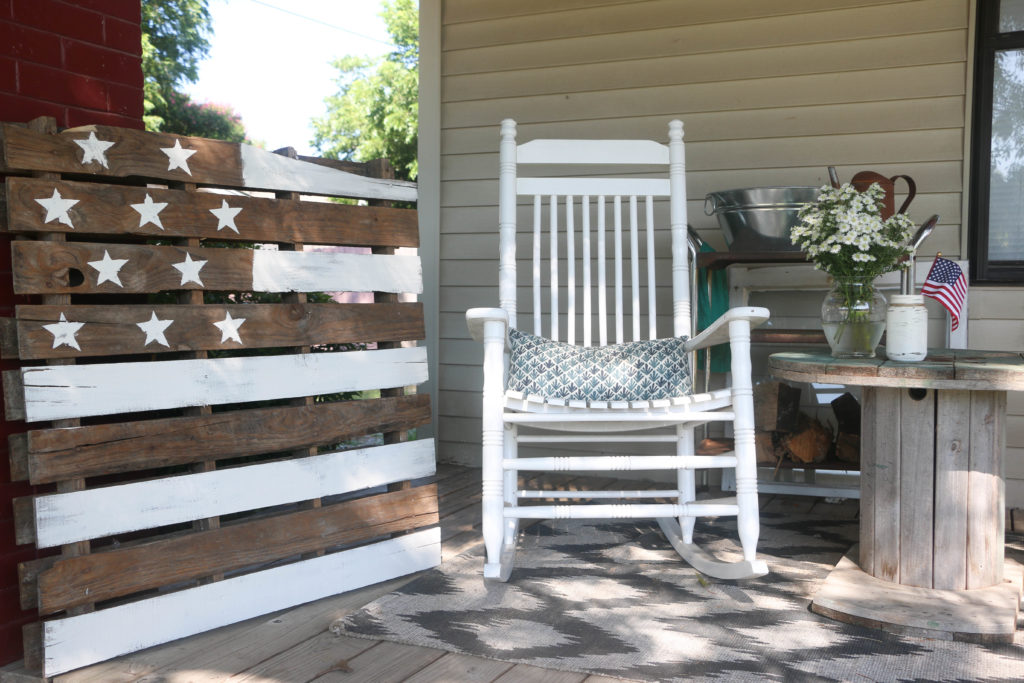
I didn’t have any red paint on hand (because red is pretty nonexistent around my house), so I decided to make this pallet flag a neutral one. This isn’t my original idea, I’ve seen it all over Pinterest. But this neutral one is my own version.

It took me about fifteen minutes to do the whole thing. I just free handed the stripes, and for the stars, I made my own little stencil. To make the stencil, I just drew a star on a piece of paper, and cut it out. I then used the paper to place my stars where I wanted them. Easy peasy.

palletflag1

Now my little porch area is Fourth of July ready! This little rental that we’ve lived in for the past two years of our marriage has been both a blessing and a curse. The list of things we dislike about this rental is more than a mile long, and the list of things we like are pretty slim. Actually, the positives can be narrowed down to two things: the rent is cheap and there’s a front porch. I am not kidding when I say that’s about it. But this little porch area really is my favorite spot, and I have loved adding more fun touches to this spot.

Now I’m feeling pretty productive for a Monday morning, but I have much more to do. I just wanted to pop in and show you this little DIY! This (like all my projects) is an easy one, and I hope it inspires you to create something today!

Well, I’m off to cross more things off my to-do list. That’s it for today, friends. Have a fabulous day!

Personal

Six Ways to Work More Creatively

I have now been on summer break for about a month. I had some serious plans of working on a ton of projects, blogging a bunch, and being generally productive. I laugh in the face of my plans. Because, let’s be honest. I have done absolutely nothing thus far this summer. Unless you count Netflix binges, in which case, I have been super productive.

I’ve been struggling this past month or so, because I haven’t been able to work creatively on just about anything. I’ve felt pretty unsuccessful because I haven’t done anything new, and the longer it has gone, the more of a creative rut I feel myself slip into. I realize this sounds pretty dramatic. All I mean is that I have been unable to create or make things. We are working toward a pretty big financial goal, and so for the the past few months we have been intentionally super tight. Which is fine, because we’re really excited about future possibilities, but there hasn’t really been any extra cash for house/decor projects.

So I thought it might be a good idea to share with you guys some ways (simple ones) that I have found helpful to get some creative juices flowing.

lemon water

One.

Go for a walk. If you are like me, and it’s a bajillion degrees during the day, you might want to do this in the evening. But a simple walk around the neighborhood can do a body good. I love to walk and look at homes around the neighborhood, admire people’s gardens, and wave at the older woman who lives down the street. It just feels good.

Two.

Clean things up around the house, and move things around. The classic “shop your home” strategy to make new vignettes by moving things from your home and moving them around. I love doing this because it’s free, but also because it forces me to get up and think outside the box.

Three.

Go outside and water the plants. Or grass if you don’t have any plants. I kid you not, there have been a few days this summer when the only thing I have done in the day is go out to the front yard and water my hydrangeas. (The bush is growing, but the flowers are all dead. I’m not sure what that means, but hopefully it’ll bloom next year.) Standing there with the hose makes me feel like I’m doing something.

Four.

Pick some flowers. Pull some branches from a tree. Whatever. Get some alive thing, and put it in a vase. I feel better with fresh flowers around. It helps me think, and it doesn’t hurt that it looks pretty too.

Five.

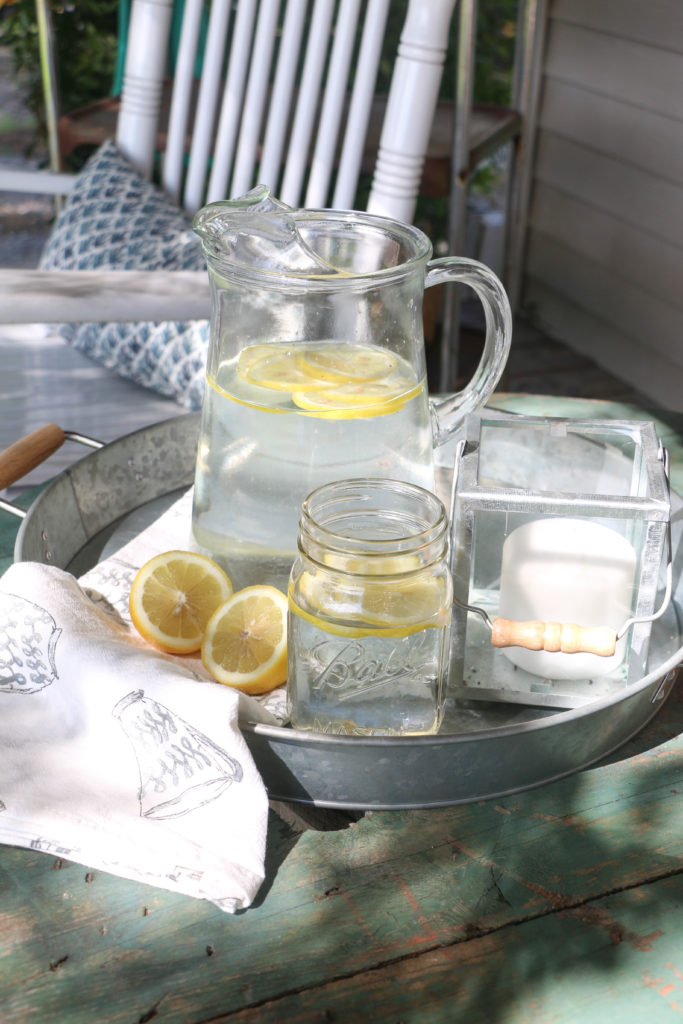
Slice up some lemons and put them in a glass of water. I think I’m a little overly obsessed with lemons right now (blame summer), but for me, there is something soothing about slicing lemons. Put in a glass of water, combined with a long sit on the porch, and it’s just perfection.

Six.

And this is the one I’m still telling myself. Turn off the dang TV and do something else. Anything else. I have wasted so much time this summer sitting on the couch watching mindless shows. Now there’s nothing wrong a little R’n’R, but I just feel so unproductive when I’m not doing something. So this is definitely a goal of mine for now.

So I’m feeling a little bit more creative and ready to get to work! Have you ever felt like you’re in a creative rut? What did you do to get through it? I’d love to hear about it! Well, that’s all for today, friends! Have a fabulous day!
Recipes

Homemade Strawberry Pie

Hey y’all! It’s June and you may not know what that means, but in my world, that means it’s strawberry season! I don’t know about you, but I love me some strawberries. I love them because they’re so sweet they’re not even like fruit, they’re more like candy. Which is exactly why they are incredible.

When I was growing up, every June we would go strawberry picking at a local farm. Now, we were not farm people at all, we could best be described as extreme suburbia. When strawberry season came around though (in New York where I grew up it was usually the last week of June), we would head out the the farm to do some picking. My mom and my siblings and I would fill up basket after basket, eating yummy berries as we made our way through the rows. After we loaded our trunk with berries, we would head home where we would make strawberry jam for the rest of the year, pies, shortcakes, and of course some just to eat. Those were some good times.

The last time I picked strawberries myself was two years ago when, two days before our wedding, Ethan and I picked fresh berries for the chocolate covered strawberries served at our wedding. I haven’t been picking lately, which is fine because I don’t have a need for a ton of berries. When they’re in season though, they’re super cheap at the grocery store and so I stock up and get baking.

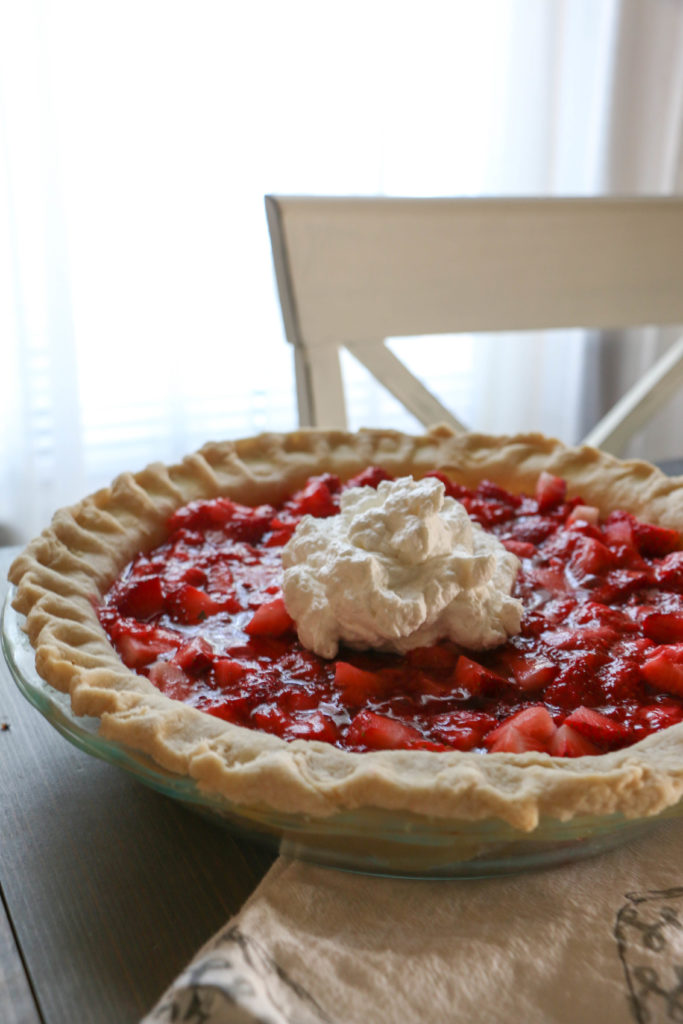
Today I want to share with you guys my homemade strawberry pie recipe. This is the first (and pretty much only) recipe that I have tweaked and changed myself to truly be able to call it mine. Now, I’m sure there is someone else out there in the world who has the same recipe as me, and that’s totally fine. I can honestly say though that this is my own recipe from my own baking experience. And I make everything from scratch. The crust, the filling, and the whipped cream. I know that some people can get overwhelmed by making their own crust. But let me tell you a secret… it is SO EASY. And it’s way tastier than store-bought crust. I promise if you make your own crust, you’ll be wondering why you didn’t do it sooner.

Strawberry Pie3

The first thing you’ll want to prepare is the crust. You will need:

2 cups flour

2/3 cup shortening

1/3 cup cold water

So, you add your shortening and flour info a mixing bowl. Mix it around with a fork until the shortening is in small, pea-sized bits. Then slowly add your water, a little at a time. Pour some water in the bowl (about a tablespoon or so), and mix into the flour mixture. Continue to add water until a dough forms. Toward the end, you will use your hands to form a dough ball. Then. on a floured surface, flatten the dough with your hands. With a rolling pin, roll it until it is about 16 inches across. You will want this to be as circular as possible. Once it is rolled out, fold the dough in half, and then half again. It should basically look like a fraction (1/4) of a circle. Lift the folded pie dough into a pie plate, and unfold. The folding is just a trick to transfer it from countertop to pie plate. Use your fingers to mold the crust into the dish. I usually use the back of a spoon to create a pattern around the edge of the crust. Poke holes in the crust with a fork. Now you’re ready to bake! Place the empty crust in the oven at 450 for 5 minutes.

Strawberry Pie 2

Once the crust is done and cooled, you’ll get started on the filling. Here’s what you will need:

8 cup strawberries

1/2 cup water

1 packet of strawberry gelatin

1 tbsp cornstarch

2/3 cup sugar

First, you’ll take six cups of strawberries, and set them aside. Cut off the greenery, and cut the berries into quarters. Some people like to put whole berries in their pie, I prefer smaller pieces. That’s totally a personal preference though. Place these strawberries into the pie crust.

With the remaining two cups of strawberries, cut them (this time you will want them to be in pretty small pieces) and place them in a bowl. Using a berry masher, mash the berries until they are as pulpy as possible. It should basically look like juice with some small chunks mixed in. Transfer these into a pot.

On medium heat, add your water to the strawberries. After you add the water, you will add the sugar, gelatin, and cornstarch. Continue mixing until the sauce thickens and begins to boil. Once it is boiling, take it off the heat, and pour over the fresh strawberries in the pie plate. You will want to make sure the sauce is poured evenly around the pie.

Strawberry Pie 4

Once the dish cools a bit, place it in the fridge for three hours. Just before serving, you’ll want to make the whipped cream, which in my opinion, is the best part! You will need:

1 cup heavy whipping cream

approximately 1 tbsp sugar

approximately 1 tsp vanilla

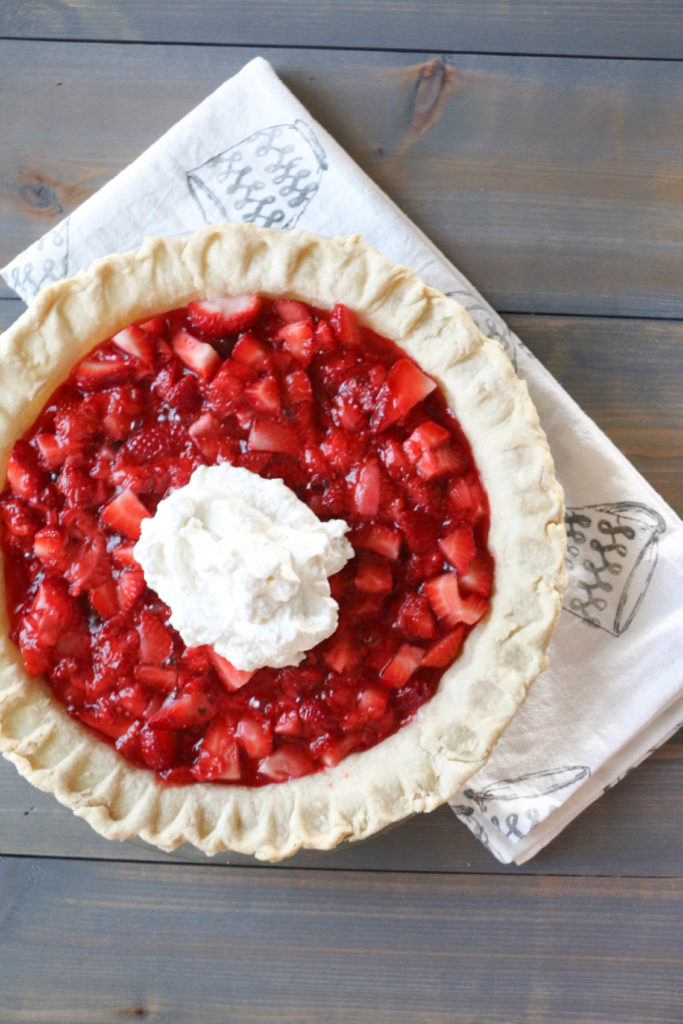
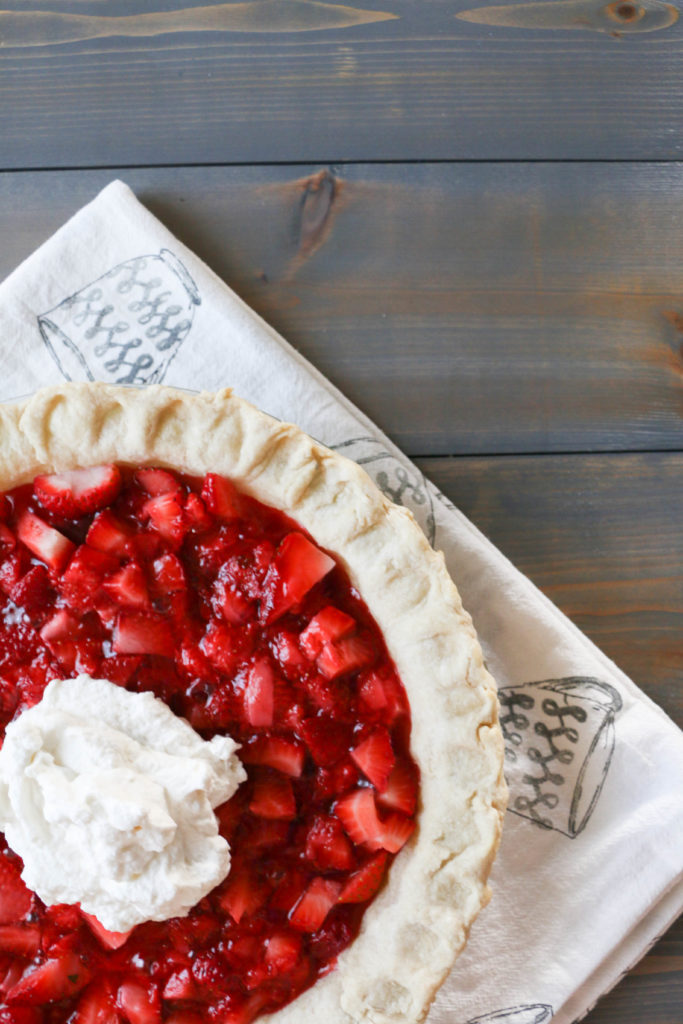
I say approximately because I don’t actually measure these, I just kind of pour them into the mixing bowl. I leave them in the Kitchenaid for about five minutes, or until the cream starts to thicken. You can add more sugar or vanilla, depending on your taste preferences. It’s totally easy and totally up to you!  Scoop a little on your pie, and enjoy!

Strawberry Pie1

And that’s pretty much it! The most time consuming part is cutting all the strawberries, but overall, it takes me about 40 minutes to prepare. Guys, I seriously love this pie. I’ve experimented with a few different factors, and this is what I’ve found to be the best! I cannot recommend this one enough, especially now that strawberries are in season and super fresh. Well, I’m off to enjoy some pie! Have a fabulous day, friends!

Strawberry Pie

DIY Projects

How I Fake Calligraphy

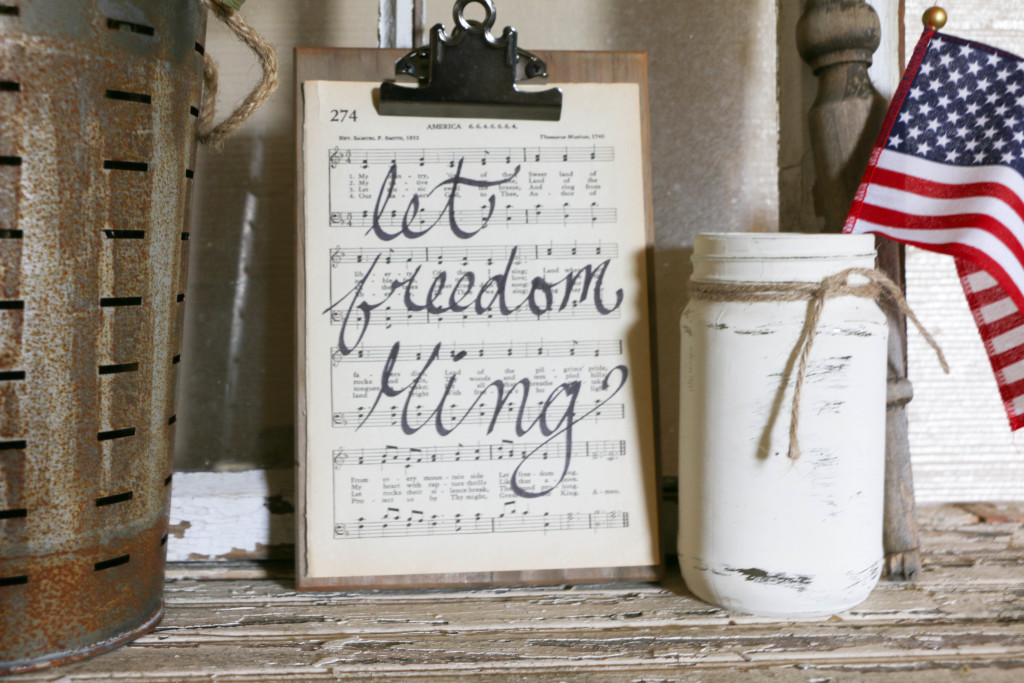
Hey guys! Hope you’re having a great day! I just got in from mowing the lawn (yuck). It’s hot and sticky outside, and I’m pretty sure my outdoor quotient has been met for the day. Now that Memorial Day has passed, summer is here, and that means BBQ and fireflies and porch sitting and bringing a little red white and blue into the home.  Yesterday I took out a few patriotic decor items out of the closet, and I put a few things together. I made a little hand-lettered print, and I realized it’s totally something I should share!

Now, a little background. It seems like everyone is on this hand-lettered kick in decorating, and I’m all about it. I have seen some really beautiful calligraphy around, and I just don’t have that sort of talent. I’ve never taken a class or anything, I really would not consider myself someone who actually knows something about the matter. I do, however, love creating little prints for our house. It’s basically free art, and there’s no way I’m not getting on that train!

So here’s how I, someone who is totally not an expert, create simple hand-lettered pieces from my home. I bought a multi-pack of pens from Hobby Lobby. I don’t see them listed online, but it was a three pack of square tip pens in various sizes. Are they good? They work for me, and that’s good enough.

Calligraphy1

You may still be able to find this pen in the store, and with their 40% off coupon, it only cost me a few dollars.

calligraphy2

This pen has a square tip, which is pretty much the secret to creating pretty writing.

calligraphy3

When I’m writing something, I use a normal cursive font, the same that I would write with using a normal pen. The trick to using these calligraphy pens is holding them at about a 45 degree angle. It took me a little while to get used to holding the pens correctly without moving them.

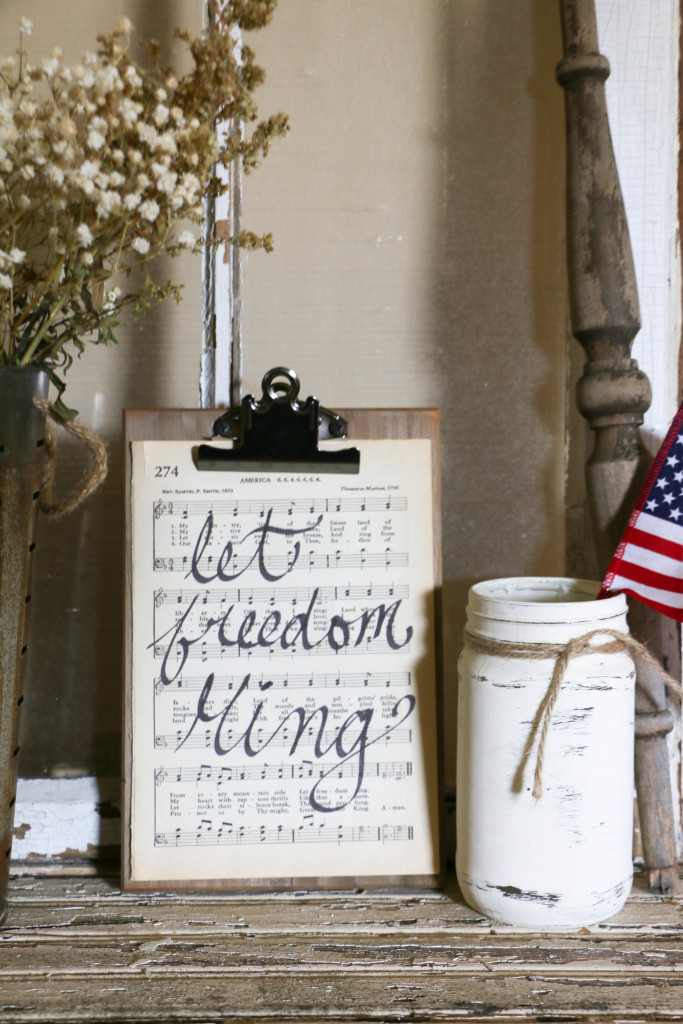
For this little print, I used a page from my old hymnal, the page with My Country Tis of Thee on it. Perfect for the upcoming Fourth of July holiday. I printed a line from the song, and this is what I came up with:

calligraphy4 calligraphy5

Easy. (I think that might be my motto around here: do I do anything that’s not easy.) I have little prints around the house, and I love it because it’s so cheap and quick. And on the hymnal, I love it even more. It adds such a nostalgic touch for me. And the mini clipboard is from Hobby Lobby. I got it recently, and it’s perfect for switching out seasonal prints.

Have you ever tried hand-lettering? I promise, it’s much easier than it seems! Well, that’s all for today, friends. Have a fabulous day!

DIY Projects, Home Decor

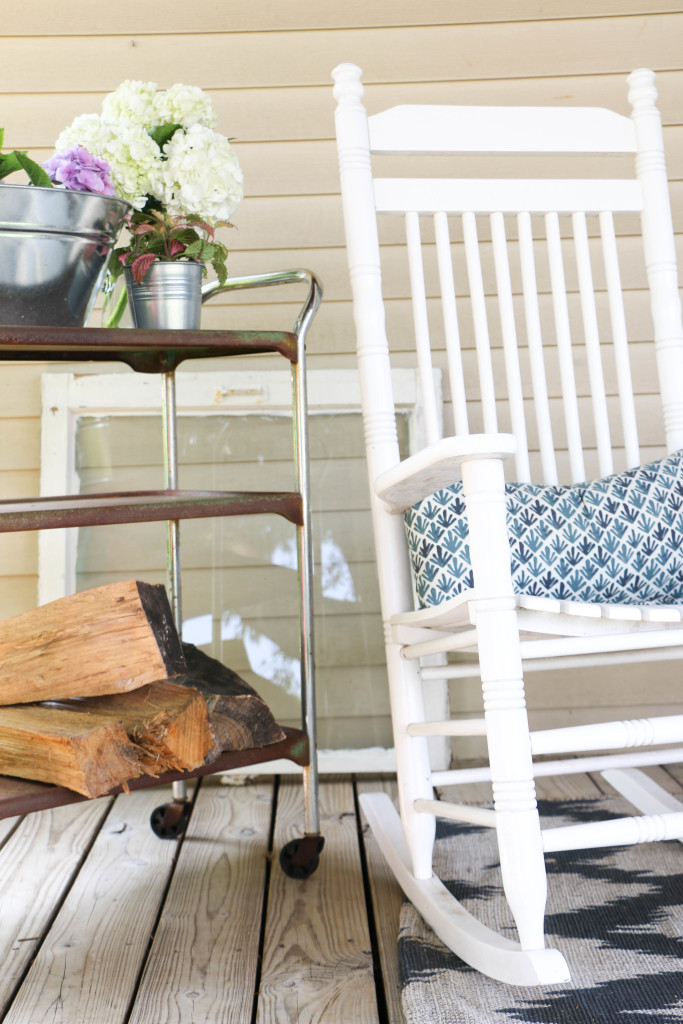
Rusty Porch Bar Cart

Good Morning, friends! Today is my first official day of summer break, and as I’m typing this, I’m lounging around in my pajamas. I’m ready to have a nice refreshing break from work this summer!

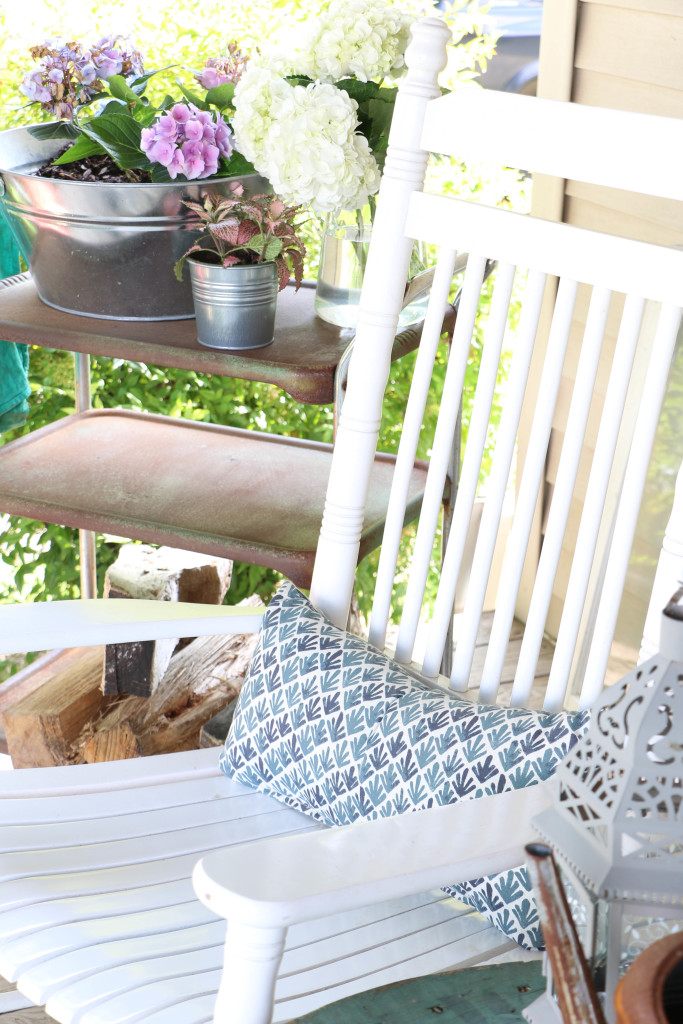
Now that summer is officially here, I have lots of plans which include porch sitting, painting things, lounging, and not much else. 🙂 I’ve been working on making our porch a little bit more enjoyable this season, and I wanted to share a new addition to the front porch. A month or so ago, I added our cable spool table to the porch, and it has been wonderful! I knew that I wanted to add more, so when my father-in-law sent me a picture of a rusty old bar cart asking if I wanted it, I jumped at the chance.

Porch Barcart  7

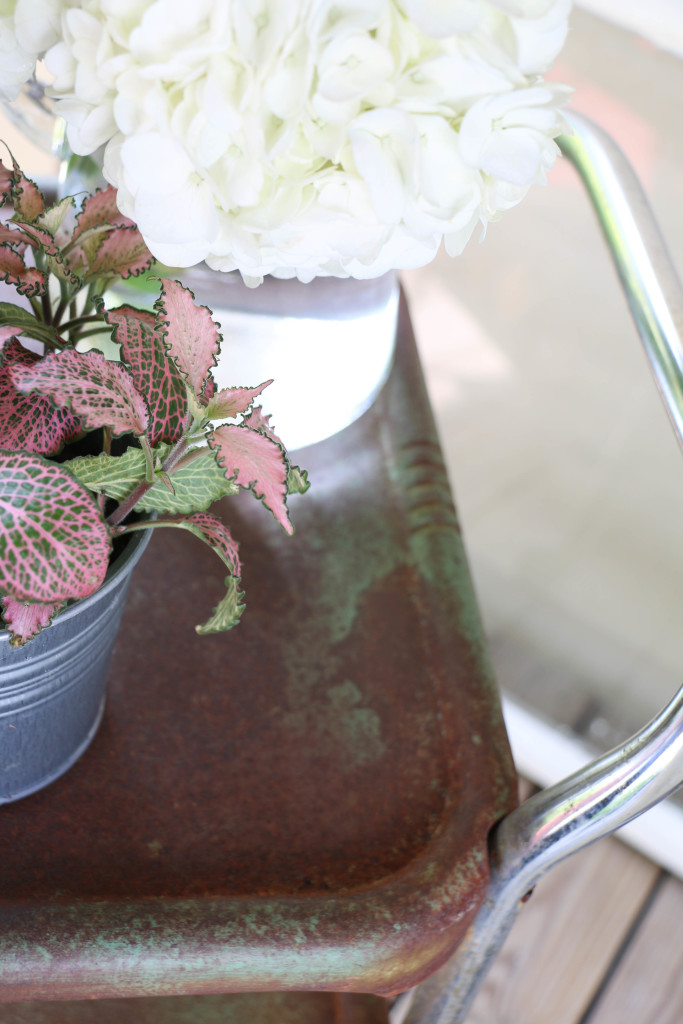
I’ve been desperately trying to keep a few plants alive (not very well, I might add), and I knew an old bar cart would be the perfect thing to house my little plants. The problem was that it was so rusty, I couldn’t even tell what color it was originally. I wanted it to be rusted, but I wanted to see if there was a way to scrub some of the rust off so that some of the original paint was exposed.

I didn’t really want to buy anything to remove the rust with, knowing I would only use it for this project (assuming it even worked) and would then be destined to cluttering the back of my cleaning supply closet. So, I figured I’d do my own thing. Recently, I shared my DIY all-purpose household cleaner, and I’m happy to report that it truly does work for all purposes. You can check out the full article in the link above, but it’s what I used to expose some of the original paint on this little cart.

I generously sprayed the cart completely. I let it sit for about an hour, spraying a bit more at that time (the Texas heat didn’t quite allow for a soak, as it just dried it up). After about two hours of the solution on the cart, I began scrubbing with the same brush we generally use to clean the grill. As I would scrub a certain spot, I would hose it down. If it needed more scrubbing, I would spray a little more solution on it, and immediately continue scrubbing.

Porch Barcart 6

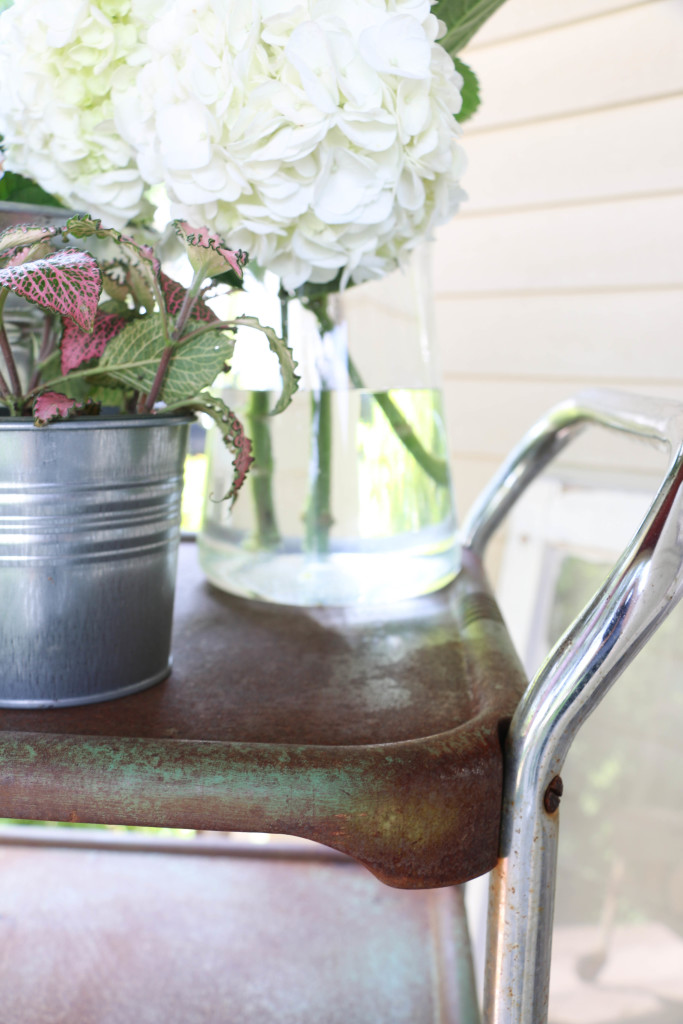
Eventually I began to see little spots of green paint emerge from behind the scrub brush. I’m not going to lie and say this was super easy; it took quite a bit of elbow grease. I did intentionally stop at this point, since I wanted the cart to keep a bit of it’s rusty charm. If you have a bit more muscle than I do, you could certainly scrub off more rust than I was able to.

Porch Barcart 5

Porch Barcart 2

Porch Barcart 8

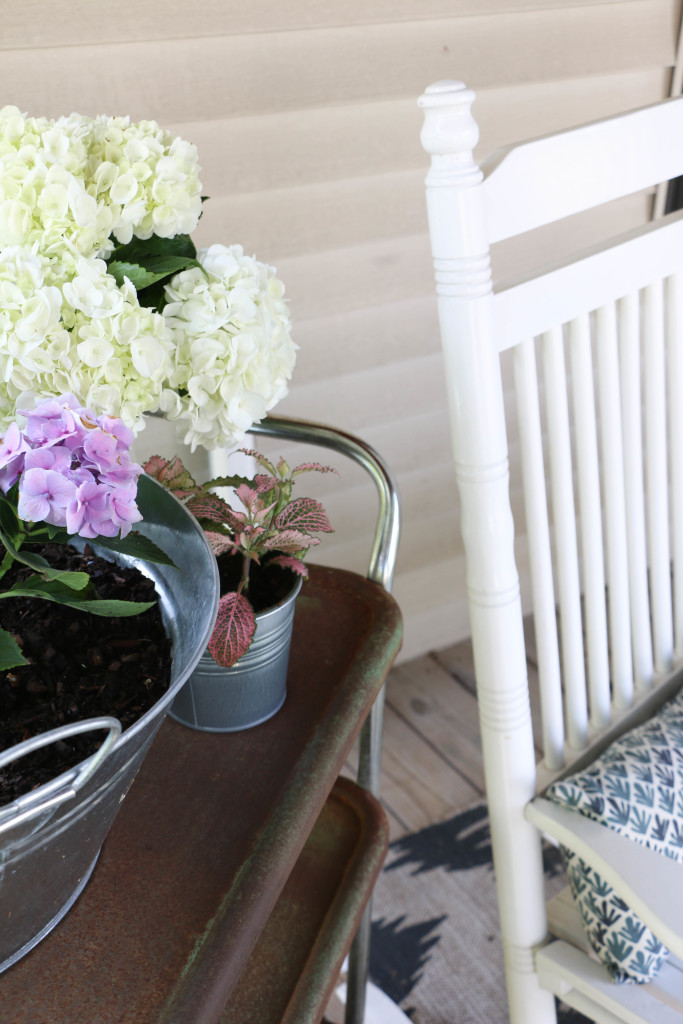
This little cart makes the porch just a little bit more cozy! And I’m absolutely thrilled with how it turned out, with it’s rusty, chippy goodness. I think once I get up from this couch, I’ll make my way out there to enjoy this little spot. Do you have something old and rusty? I’d be willing to bet you can clean it up a bit with some elbow grease and some items you have around the house!

Well, that’s all for today, friends! Have a fabulous day!
Personal

Twenty Four Things

Hey y’all! I hope you’re having a great day! Today is my twenty fourth birthday, and although I normally don’t like to advertise that it’s my birthday (it may be my introverted side that doesn’t like to call attention to myself), I thought it might be a good time to share a few things you might not know about me! I love when bloggers share more personal things about themselves on their platforms, and so I’d like to share twenty four things you may not know about me (on my twenty fourth birthday)!

One. I am really short. I’m only 5’2, and Ethan is a foot taller than me, making me feel even shorter. I’m always the shortest person in the group picture…sigh.

Two. I love watching documentaries. I know that they’re usually made to persuade an audience, but I don’t even care. I’m persuaded.

Three. We are working our way through Dave Ramsey’s financial baby steps. Au revoir, student loans, you’re getting out of here! (Seriously though, trying to pay off students loans as quickly as possible has caused so many of our lifestyle choices. I love talking about it, but hate to be too pushy. 😉 )

Four. Most of my wardrobe has some form of blue in it. What can I say? I guess it’s my color.

Five. Interior design/home decor is something I never knew I was interested in until I was an adult. Oops.

Six. Chocolate is most definitely a food group. I consume more candy regularly than a six year old on Halloween.

Seven. Coffee is not my thing. No matter what, I just can’t get on that train. I like about one flavor of tea, and that’s about it in the cafe drink selection. Don’t invite me to a coffee house. I’ll be like a fish out of water.

Eight. I teach first grade, and sometimes my teacher voice comes out a little too embarrassingly in non-school settings.

Nine. I am completely introverted. ISFJ for life! I’m a total homebody, and enjoy spending time at home.

Ten. I am what I’d call a yo-yo runner. Meaning I do it for a while and then lose interest. Then I quit. Then a month or two later I have to start all over again. Several years ago, I did complete several lengthy races, but I’m afraid those days are long over!

Eleven. I’m the biggest Julie Andrews fan. I have seen The Sound of Music only about nine million times. I’m obsessed with her.

Twelve. I can’t wait to buy a house. I’ve got house fever real bad. But, patience is a virtue, my friends. Eventually, we’d like to purchase a historic home in our neighborhood and restore it, but for now it’s just a dream.

Thirteen. I love to bake. But cooking dinner is a chore. This might just be due to the fact that I love sweets, but I do love to bake! My mom is a really great baker, and I’m slowly improving on my skills. I hate thinking about coming home after a long day at work though and cooking. I have to be in a certain mood to bake, but when it hits, it hits!

Fourteen. Flea markets are my jam. I’m always on the lookout for something I won’t be able to find anywhere else. Recently I’ve been trying to collect vintage Better Homes and Gardens cookbooks. You know, the classic red and white gingham pattern? So far I have about five or six different editions, and I hope to have all of them someday. It’s the cookbook I grew up on, and it has the perfect chocolate chip cookie recipe.

Fifteen. I hope to someday travel to France. It’s been a dream of mine since I started taking French classes. Seven years of useless French class that led me to living in Texas. Reeeeal helpful. Ha!

Sixteen. I drink everything without ice. The perfect drink temperature is room temperature. My perfect drink order is a Coke, no ice, with a straw.

Seventeen. I have a serious lead foot. Thankfully we have speed limits of 75 here in Texas, but it’s still not fast enough for this girl. It’s a serious problem for this girl.

Eighteen. Hair and makeup is not really my thing. I always tell myself I’ll get better at it when I’m older, but I guess that’s probably not true. I try, but good grief, some of y’all are like real makeup artists and I’m just trying to figure out which eyeshadow won’t make me look twelve.

Nineteen. My favorite restaurant to eat at is Cracker Barrel. I love their store and their food. We even have their rocking chairs on our front porch.

Twenty. When I was a kid, I was given free reign over decorating my bedroom. Which led to a lot of bright colors. Now, I’d be happy to rock some plain ol’ white.

Twenty One. I really want to get into canning vegetables and fruit. Maybe someday!

Twenty Two. I have an iPhone, but otherwise, I’m PC for life.

Twenty Three. We are about to celebrate our second anniversary. Our wedding was basically one big huge DIY project for me, and piqued my interest in decorating and design.

Twenty Four. The 4th of July will always be my favorite holiday. We’re pretty patriotic people, so it doesn’t get much better than that.

Thanks for sticking around and reading through all of my silly ramblings. I appreciate the time you take out of your day to visit my little blog. That’s all for today, friends. Have a fabulous day!

Organization

DIY Household Cleaner

Hi friends! Long time no chat! I’ve seriously been so busy lately I haven’t had a spare moment to update here and I feel terrible! I’m so glad I could finally carve out a little time to stop by and say hello! School (which is work for me, since I’m a teacher) is moving full steam ahead into the end of the school year and I’m struggling to keep up. Thankfully in just two weeks I’ll actually have some free time!

Well, I’ll be short and sweet today, but I wanted to share with you a little homemaking tip for you fellow budget conscious friends. If there’s one thing I hate spending my money on, it’s cleaning products. They can be so expensive, and it seems like you need a different product for everything! I don’t know about you, but I’d rather spend my money on pretty things for the house than boring cleaning supplies. A while back, I shared my DIY laundry soap, which has saved me tons of money over the past few years. If you didn’t catch that post, you can read all about it here.

Recent’y I’ve started making an all purpose cleaner, something that takes the place of many of the bottles that I previously had under my sink. So here’s the super easy all purpose cleaner that I make for my home.

diycleaner1

I use about 1.5 cups of vinegar and put it in a jar, and then add one small lemon, thinly sliced. I place the lemons in the vinegar, and leave the jar to sit for a few weeks. This will allow the lemons to fully soak into the vinegar. I don’t really know much about chemistry (I barely passed that class in high school), but I know both lemons and vinegar have some super strong stuff in them, so working together makes them doubly great I  suppose? Who knows. I just made that up.

After two weeks, I pour the liquid into a spray bottle, and that’s about it! My spray bottle has a pretty narrow neck, so I don’t bother trying to squeeze the lemon slices into it. I just throw them away.  My spray bottle was something I picked up for a dollar or so in the cleaning section at Walmart. Lemon and vinegar are both pretty inexpensive, so this is something that comes out to be much more budget friendly than typical cleaners.

I use this spray for just about anything. Countertops, stove top, sinks, shower walls, and even the inside of the fridge and microwave. The lemons take away the strong smell of the vinegar, and it smells more like citrus than like vinegar. I absolutely love using this method because it saves me a couple dollars, and I do enjoy making the things I use in my home. It’s also chemical free, which I know is a big deal for a lot of people. Safe for expectant mamas, and easy to make!

I told you I’d be short and sweet today, but once my summer vacation has started, I’ll be around much more frequently. I hope you enjoyed this little post, and that you’ll give it a try. I would definitely recommend this one, I can’t stress enough how easy it is! Well, that’s all for today, friends! Have a fabulous day!
diycleaner

DIY Projects, Home Decor

Cable Spool Porch Table

Hi guys! Thanks for stopping by! I’m so glad you did! It means so much to me that you would take a moment of your day to stop by my little corner of the internet. Anyway, enough of the sappy stuff. Is it getting warmer where you are? I hope so! Here in Texas we’re reaching some pretty high temperatures which have me itching for two things: summer break and outdoor life!

We have about six weeks left of school, but who’s counting!? 😉 We have a large front porch on our house, which is one of the only positive things about our sad little rental. I mean, for real you guys. Over summer break, I like to spend as much time on the porch as possible! Give me some magazines, some lemonade, and I’m good to go for hours!

Recently, I’ve been looking for a cable spool, but I really haven’t wanted to spend a lot on it. I know that the cable spool as an outdoor table is totally not my original idea, but stick with me. I know everyone and their next door neighbor is doing this, but I still wanted to share. The table we had on our front porch previously was a small glass top one, maybe only 18 inches across. It wasn’t really large enough to place a lot of stuff on it, which is why I was looking for a cable spool to use as a table.

For the past few months I’ve been looking, but I’ve only been able to find them for about $60, which was more than I wanted to spend on a piece like this. So imagine my delight when I found one on the side of the road for free?! Ethan was driving, and I totally made him do a real quick turn around to scoop that bad boy up. It was actually a little scary looking because there was some additional wood attached to the top, and several pieces of wire wrapped around various parts on the spool. I just cut off the wire and pried off the pieces of wood that were nailed to the top. Ain’t no thing.

So, without further ado, here’s what our front porch looks like now:

cable spool table 3

You might notice that the bottom piece it not a full circle. I actually found it this way, and was a little disappointed at first until I realized how much better this actually is. Since we have rocking chairs, the narrow bottom actually allows the chairs to fully rock while still being close to the tabletop.

cable spool table 5

There’s so much more room on the surface than there was on the old table, I’m loving it! I can just imagine some plates out here, maybe a little pie….I don’t know where pie came from. I’m just really ready for summer, okay?!

cable spool table 9

cable spool table 8 cable spool table1

If you have your own cable spool, I would reccomend cutting the bottom to be more narrow.

cable spool table 6

cable spool table 4

I case you were wondering, the rug is from Hobby Lobby, the chairs are from Cracker Barrel, the pillows are from Target, and the serving tray is from Walmart. This little outdoor area is fresh and cheery, and I cannot wait to get out here and enjoy myself. Especially since I’m so close to endless lounging during my carefree summer break. Ahhhh, summer. Alright, I’ll stop now y’all, I promise.

So what do you think of the cable spool as an outdoor table? Is this a trend you’re willing to go along with? I will say that even Ethan loves it! I am sensing some meals eaten out here together, and I cannot be more excited about that! That’s all for today, friends. Have a fabulous day!

Personal

My eShakti Spring Dress

Hi you guys! Happy Friday! I am sooooo glad the weekend is almost here! Today I wanted to share with you something that I don’t typically share, but something that I’m still really excited about, and I hope you are too!

Have you heard about eShakti.com? It’s an online women’s clothing company that has some pretty cool perks. I just recently heard of them, and I love what I have seen so far, and so I wanted to share with you guys in hopes that you’ll love it as much as I do! Everything is totally customizable, which is a total plus for me. There are times when I am shopping and I’ll find something I love, only to say something along the lines of, “I wish this was longer,” or “I wish the neckline was different.” I work in a school, and so there are some restrictions on what I can wear to work. I still need to dress professionally, so I’m always looking for pieces I can wear both at work and out.

When I looked through the website, I was super pleased with all the options. They offer everything from wedding dresses to sun dresses and plenty in between. The prices are also super affordable, which is great! I wanted to order some thing I could wear to work, but I ordered this dress, which typically comes sleeveless. Since I can’t wear sleeveless tops to work, I was able to customize the sleeve to a capsleeve! How awesome is that? I was also able to enter my height (I’m pretty short, so dresses are often an awkward below the knee length on me), and what I wanted the dress length to be.

Less than a week after ordering, a package arrived on my doorstep and I was absolutely in love with the dress! Here’s what the dress looks like:

springdress5

I love the nautical feel that it has. I will definitely be wearing this to some upcoming outdoor weddings this summer. The length is perfect, and it’s something I can wear to work. It’s a win-win in my book!

springdress3

My clothing style is pretty simple, with a little bit of preppy inspiration. I wear a lot a navy blues, but I’ve just come to accept that about myself and not worry about constantly adding more to my closet. I guess it’s my go to color. This dress just feels so preppy and it’s perfectly light for summer.

springdress1

There is a side zipper, which you can see in this picture. I adore the neckline. This is the type of dress that doesn’t need much else with it for accessories, and I love that about it.

springdress2

springdress4

But guess what you guys?! I have some good news for you too! If you are looking for some great, customizeable fashion, you can order at eShakti.com using the code “rumfieldhomestead” and get 10% off when you shop before 05/05/2016! How seriously awesome is that?! I am in love with this dress, and I had an great experience with the company (and I totally wouldn’t lie to you guys!). I would recommend this site to anyone, and I do hope you love it as much as I do! If you’d like to see more of this awesome company, you can find them on Pinterest, Facebook, or Instagram.

That’s all for today friends, have a fabulous day!
This post is sponsored by eShakti.com as a part of their #realfashionforrealpeople campaign, but all opinions are my own.