All Posts By

Fawn Rumfield

Furniture Makeover

Spring One Room Challenge Week Six: How to Remove Veneer from Wood Furniture

Week One | Week Two | Week Three | Week Four | Week Five

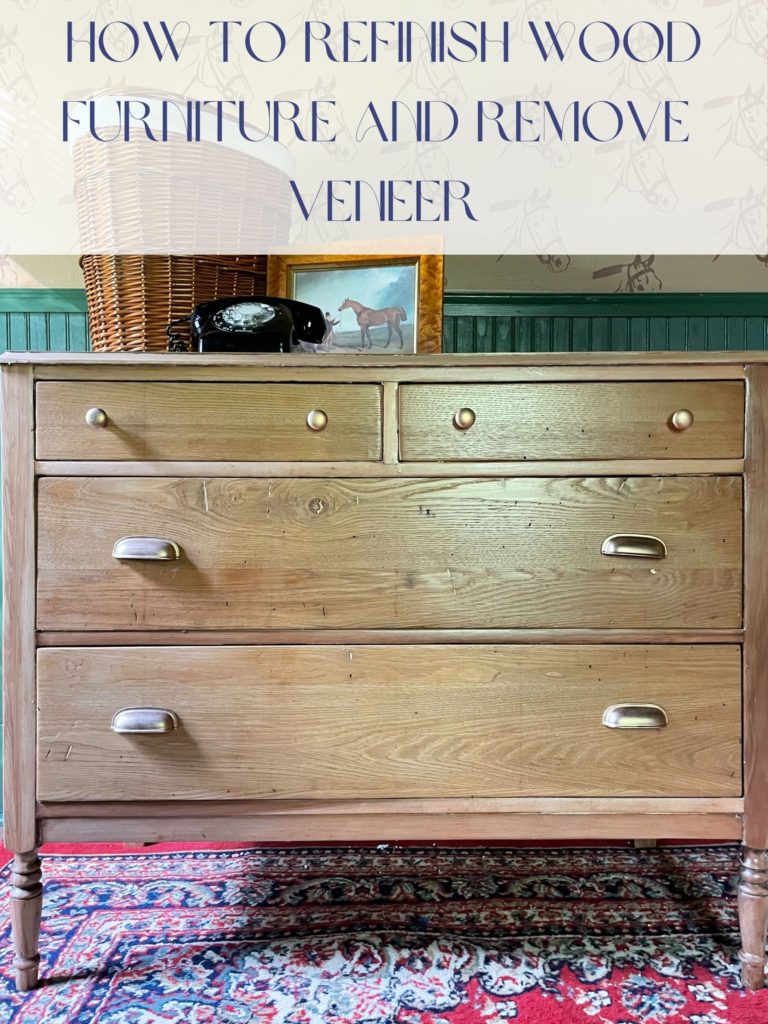
Week Six already?! We are in the home stretch now and truly have the hardest work completely behind us now. This week I turned my attention to refinishing a dresser that was already in the room. You may remember it from the before photos.

This dresser was mine as a kid, and my mom’s before that. It’s been painted a countless number of times throughout my life, and the blue was just its most recent iteration. Several years ago, I attempted to strip it, but it was covered in a midcentury veneer style that I just didn’t love, and so I painted it again. I know a little more about furniture restoration and antiques than I did several years ago, so this time I decided the time was right to remove the veneer and see what was underneath.

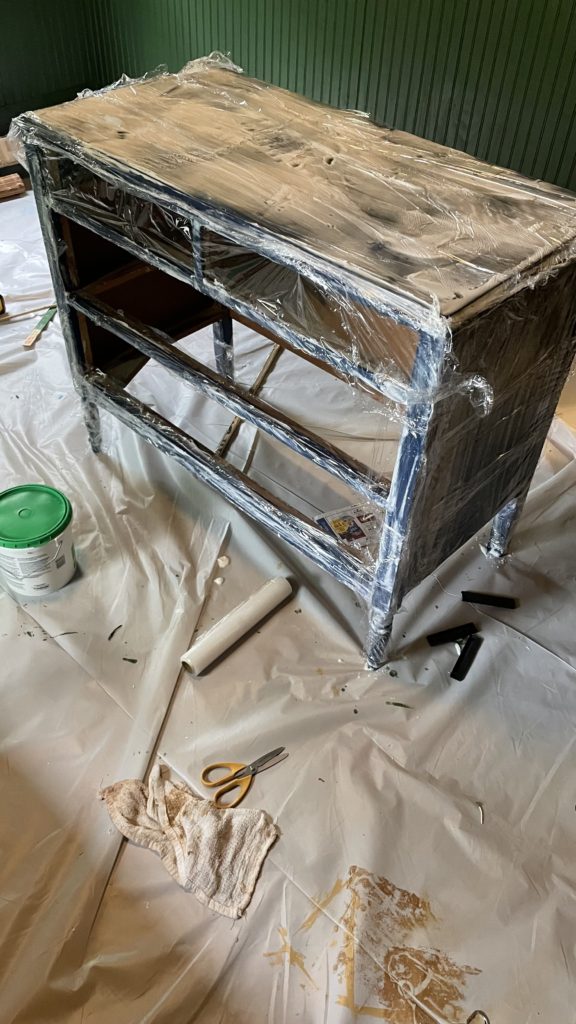
I started out with a layer of SmartStrip. It’s a nontoxic paint stripper that cuts through multiple layers. I’ve only used it once before, but it’s what I had on hand, and it’s relatively safe for indoor use since there’s almost no odor, so I figured it was my best bet. I wrapped in plastic wrap and let it sit overnight.

Now, I expected it to take off the paint, but what I didn’t expect was for it to begin lifting the veneer as well. After about 24 hours, some of the veneer had begun to bubble. Which was a pleasant surprise for me, because my goal was to remove the veneer anyway. However, if you have a piece that has veneer you’d like to keep, SmartStrip is going to be too strong.

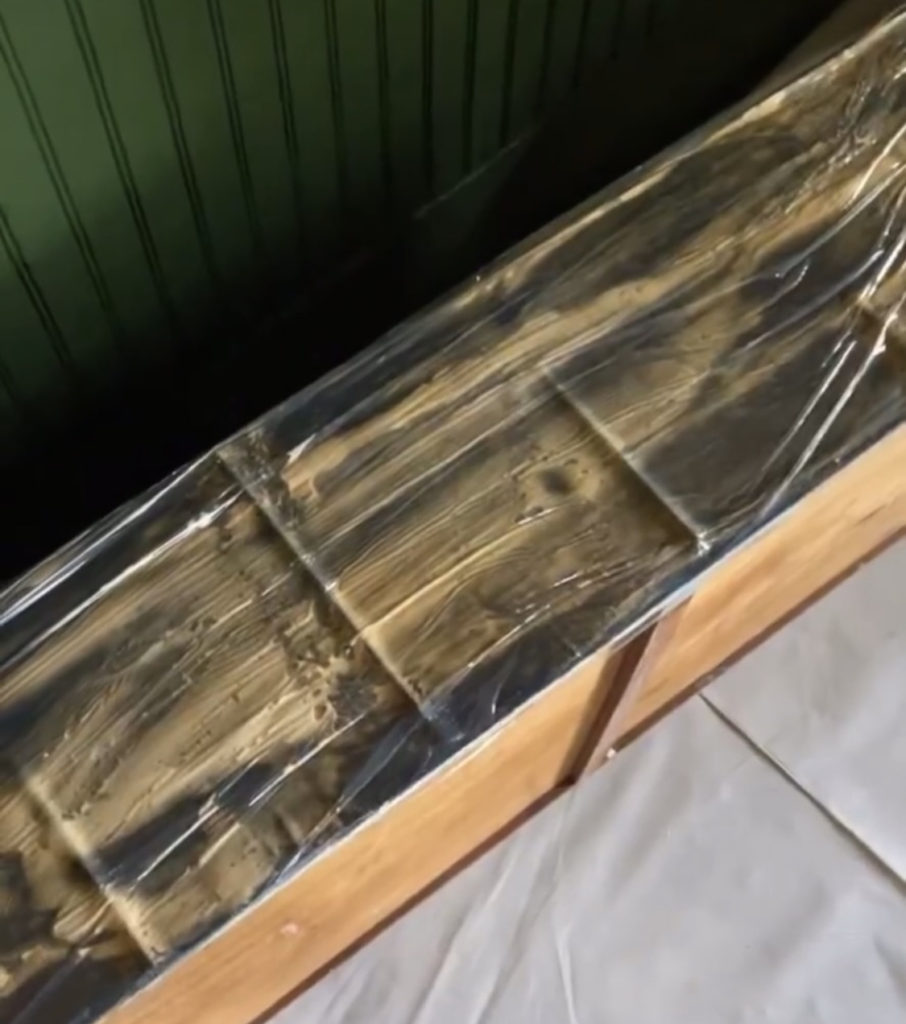
One coat of SmartStrip was enough to remove about 80% of the veneer! I saved myself a step of removing the paint first and then the veneer which is what I assumed I would have to do, but there was still some that needed another method to remove.

I used some old hand towels (they should be thicker than rags, but they will be ruined, so you want to use ones you don’t care about), and got them damp with the hottest water I could handle. I laid the damp towels over the veneer, and then set my iron on top of it.

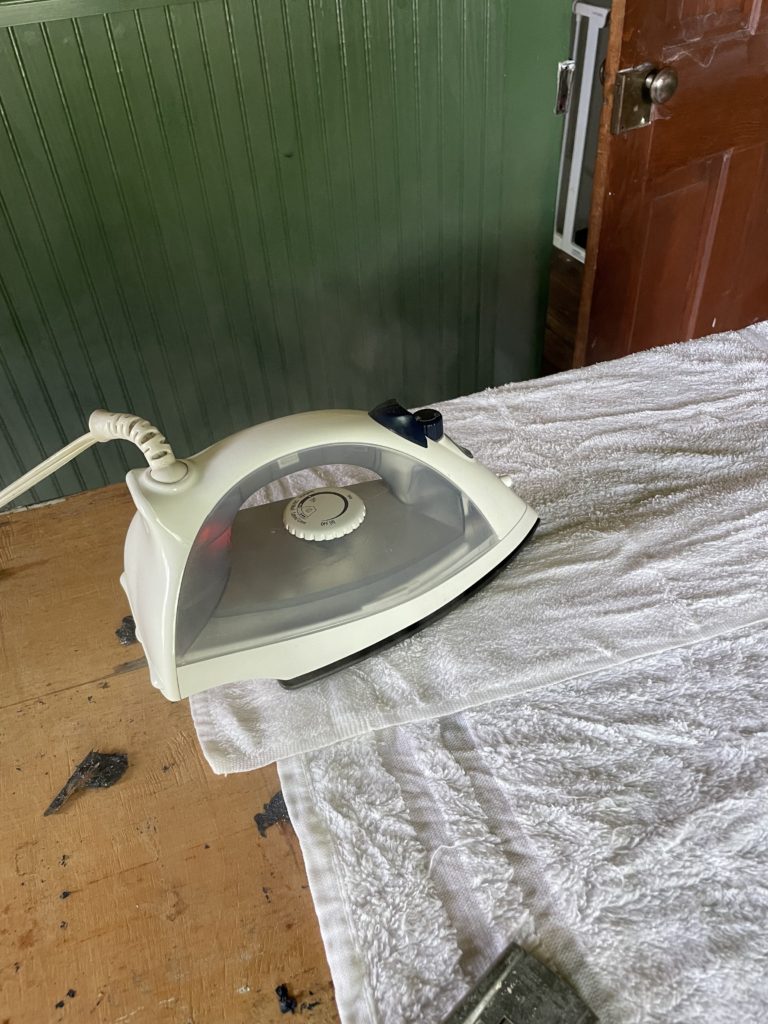
It creates a ton of steam, which loosens the glue so that the veneer can be removed fairly easily with a putty knife.

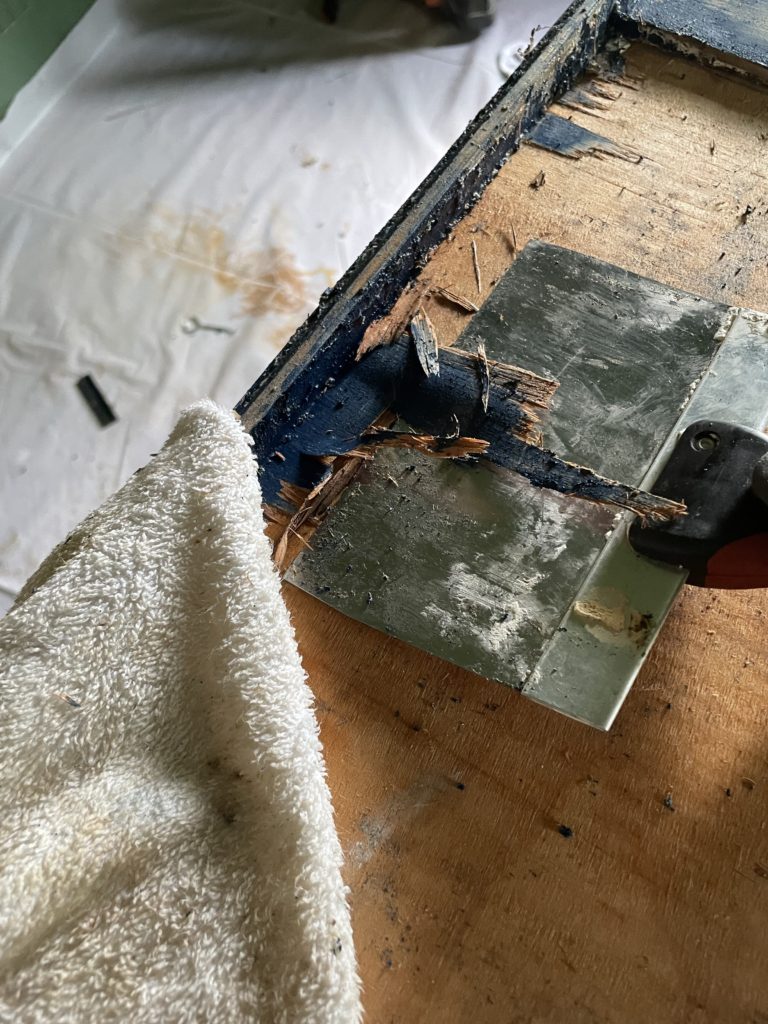
I actually found this to be easier physically than scraping with the SmartStrip, but it was more time consuming.

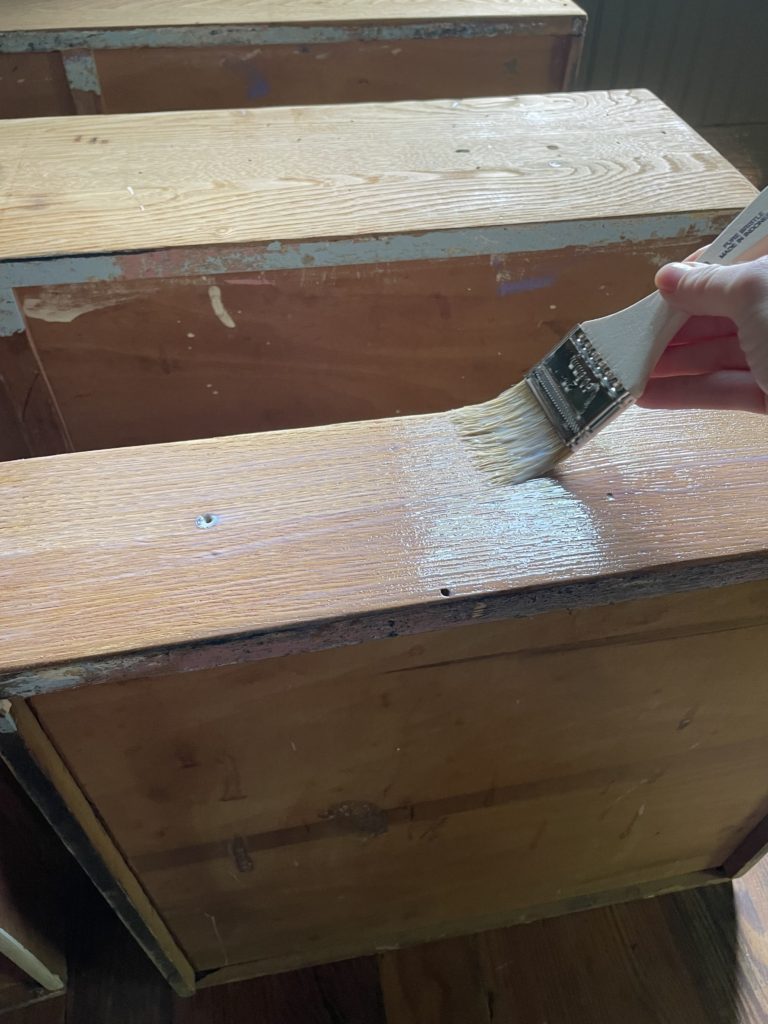
Once I had all the veneer scraped off, I had to sand myself into oblivion. I sanded with an 80 grit, a 120 grit, and finally a 220 grit to make sure everything was super smooth. I then coated with a coat of polyurethane (water based because I was working on it indoors and didn’t want to deal with the odors). I did two coats of polyurethane, with a light sand with 220 grit sandpaper in between.

You can see in the photo above that I didn’t strip the paint from the bottom of the drawers, which if you look closely, you can see all the different color lives its lived. The purple was the color it was in my own baby nursery!

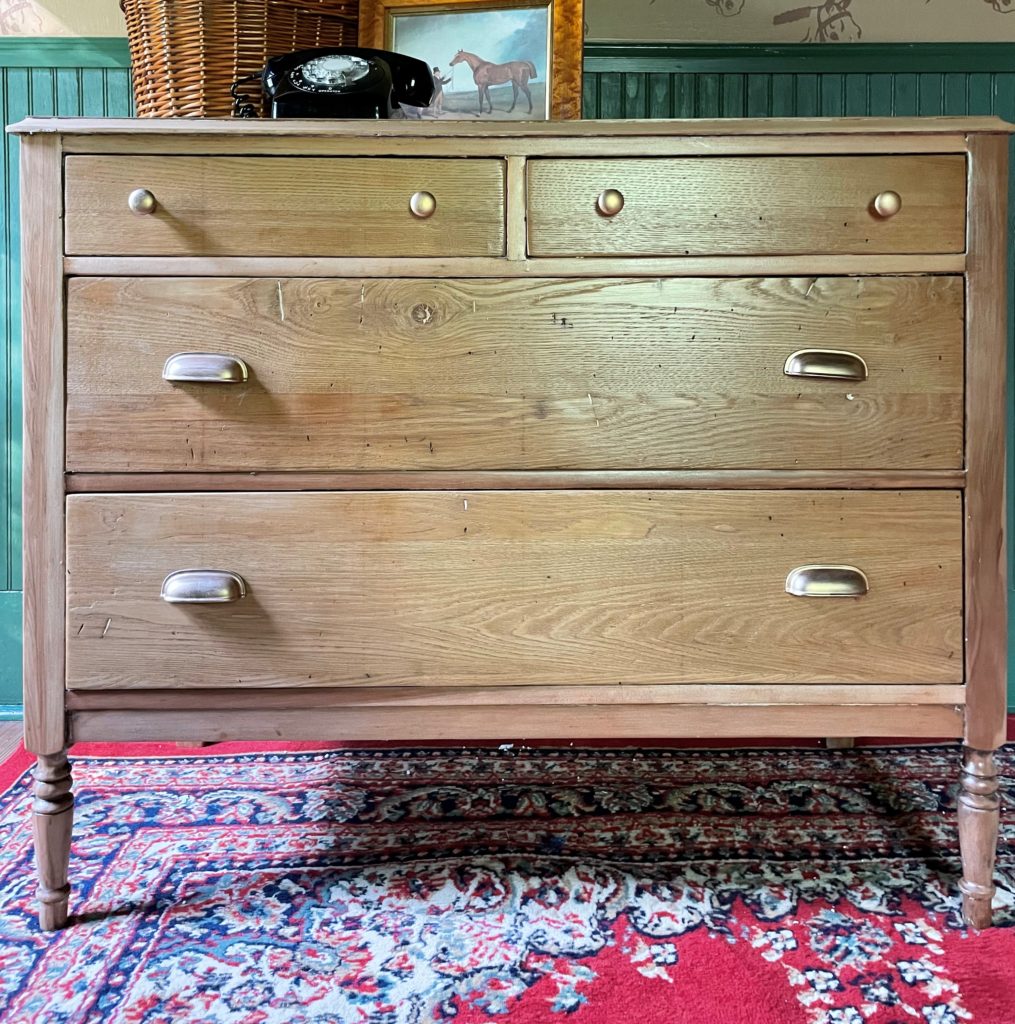
And now, it looks like the antique heirloom piece that it is! The pine looks so lovely in its natural state, and I am so glad I decided to leave it this color and not stain it. The hardware is the same hardware that was previously on it, but sporting a fresh coat of Rub N Buff in Antique Gold.

You’ll have to pardon the photo angle, I’m strategically hiding a few elements in the room I’m not ready to share yet. So you’ll have to check back for the full reveal in just two weeks to see how the dresser looks in its new home!

Be sure to check out the other participants’ weekly updates, and stay tuned, because the reveal will be here before you know it! That’s all for today, friends! Have a fabulous day!

House Progress

Spring One Room Challenge Week Five: Paint Diaries

Week One | Week Two | Week Three | Week Four

Another week, another post from the depths of paint despair. I always start off optimistic about a paint job, and then end up becoming slowly disenchanted with the work as time goes on. As I mentioned before, the paint in this room is pretty involved, and from the outset, I budgeted myself two weeks just to paint. As of the time of this writing, it’s been exactly two weeks since I put the first coat of paint on a surface, and I probably have one more day of painting before I’m officially done.

I have shown you guys the green paint that is the majority of the room, but I haven’t talked about here what my plans were for the upper portion of the wall. I am doing a faux wallpaper look (more on that later I promise!) using just paint. I’ve done it with a few different methods in the past, and so I’m lovingly referring to this “wallpaper” as Fake Wallpaper3.0. While I’m not ready to show you what the wallpaper is, I want to share what color I painted the wall as a base for Fake Wallpaper3.0. I’m going for a moody, English country style, and so I chose Windswept Leaves by Behr to help darken the space. It’s not transferring super well in the photo I snapped today, it’s a lovely camel shade and less of a gold, but I think it’ll serve as the perfect backdrop for what I’m hoping to achieve with the faux wallpaper.

Does it not bring some drama to the situation? I’m excited to show you what’s coming next, but I’ll have to leave you in some suspense! Be sure to check out the other ORC guests this week as they reveal their progress too. That’s all for today, have a fabulous day!

House Progress

Spring One Room Challenge Week Four: What Sheen of Paint Should I Use For…?

Week One | Week Two | Week Three

It’s week four of the One Room Challenge and I didn’t officially cross off one single item off the list. I’ve been working on trim painting all week (with a break over the weekend) because there is so much trim. I’m knee deep in paint, and honestly there’s no end in sight. The paint in this room is so much more detailed than just slapping a coat of paint on the wall and calling it a day. There will end up being three different colors (you’ve only seen one so far!) and three different sheens (you’ve seen two so far).

I figured this might be a good opportunity to chat about the three main sheens of paint I use throughout my home and for what purposes. Of course, rules are meant to be broken, but this is a general guiding principle and what I’ve found works best in my own house.

Flat Finish:

Honestly this is good for one thing and one thing only. Ceilings. You can see even in the terrible quality iphone photo above that the paint on the ceiling absorbs the light. It’s dark, but it won’t reflect light, which I guess is helpful for sleeping? I don’t know guys, I’m not an expert. It’s been said that flat paint can’t get wet, and that might be an outdated assumption as paint technology has improved over the years, but I’m still not taking any chances. I’ll leave it to the ceilings.

Semi-Gloss Finish

I use semi-gloss on all of my trim, painted doors and cabinets, and walls in my bathroom. (That last bit might be contentious in some circles, so don’t quote me on this, this is just what I find works for my house.) You can see in this picture that even though the ceiling and the trim are the same color, they reflect light completely differently. Semi-gloss is also much more wipeable, making it a good contender for trim. Have you cleaned the trim next to your doorknobs lately? That gets gross so quickly. Or maybe that’s just my house with toddler granola bar fingers running around. But I digress.

Eggshell Finish

Lastly, I use eggshell finish on almost all of my walls. It falls in between flat and semi-gloss, as it’s somewhat wipeable but it’s also a little more forgiving that flat. I’ll be painting the walls with eggshell finish, although I haven’t started yet, so there’s no visible example of it in this photo. But trust, eggshell is the way to go on *most* interior walls.

Like I said, rules are made to be broken, but this has worked for me. When I rolled up to Home Depot to get my paint order with very specific color and sheen requests, I know the employee was side eyeing me, but what can I say, I’ve painted a lot of rooms!

I probably have about two more weeks of painting ahead of me, as I have some more to finish on the trim (looking at you, windows), and then I’ve got the walls as well, but I can’t wait to see all of it come together. It’s getting so good! Be sure to head over to the One Room Challenge’s Blog page so you can see what everyone else has been up to this week. That’s it for today, have a fabulous day!