WOW WOW WOW I cannot believe it’s finally time to reveal the completed kitchen space with you all! It has been a long nine months since we first became aware of the water leak in our kitchen and began making a plan to renovate (more on that here).
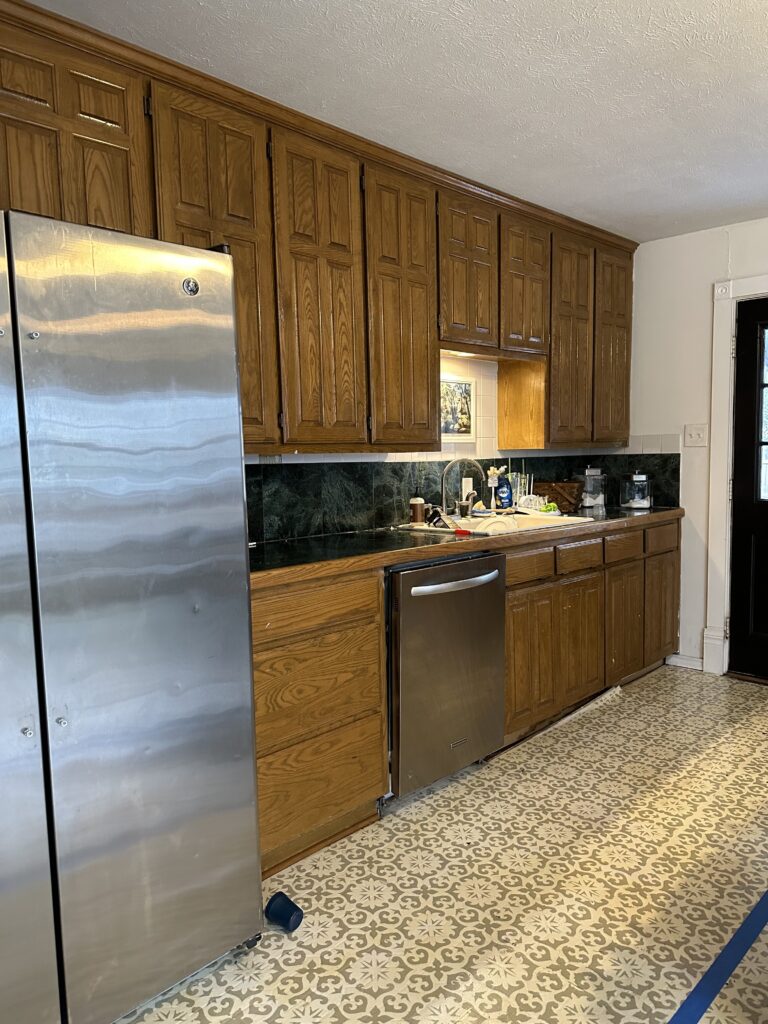
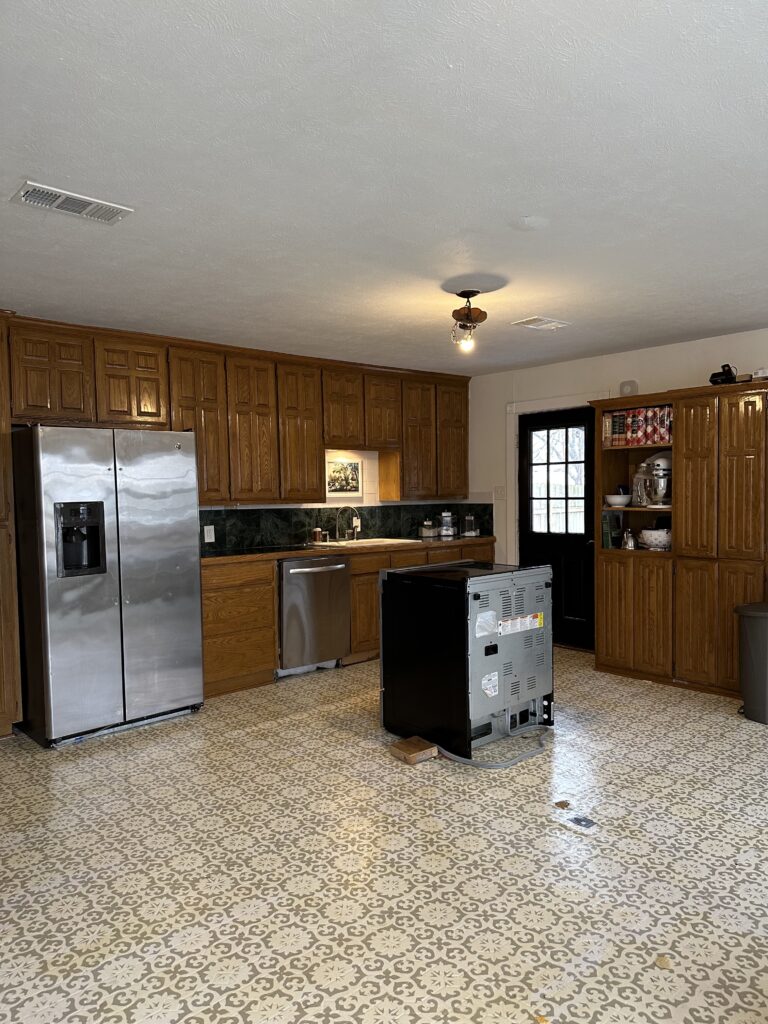
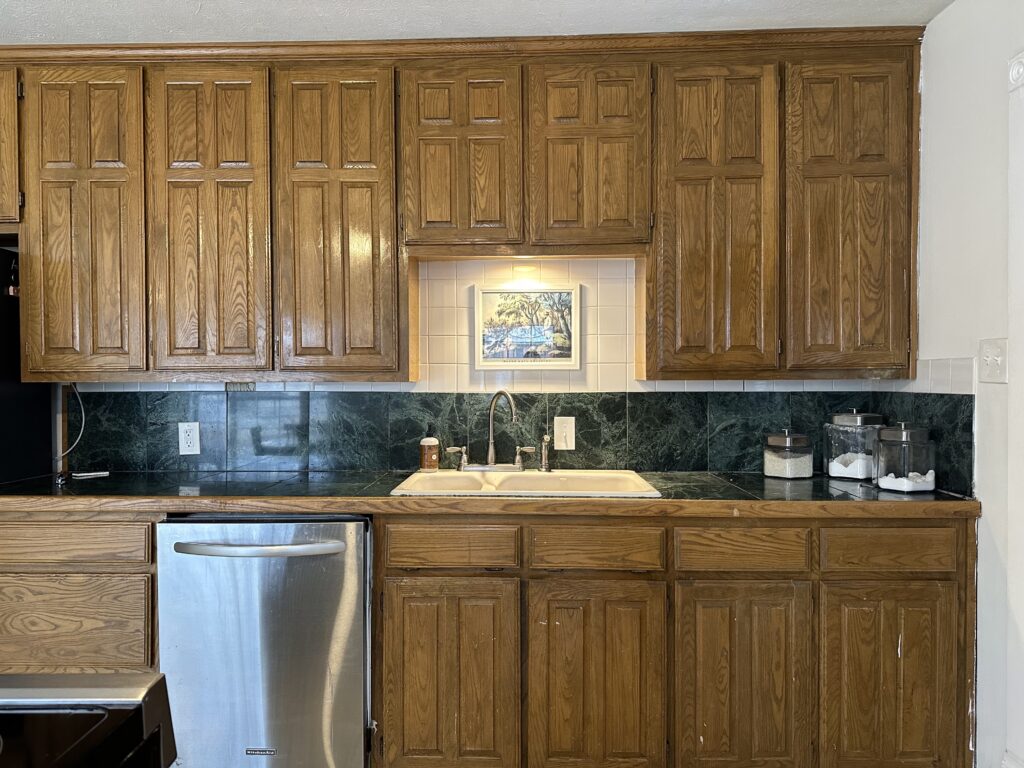
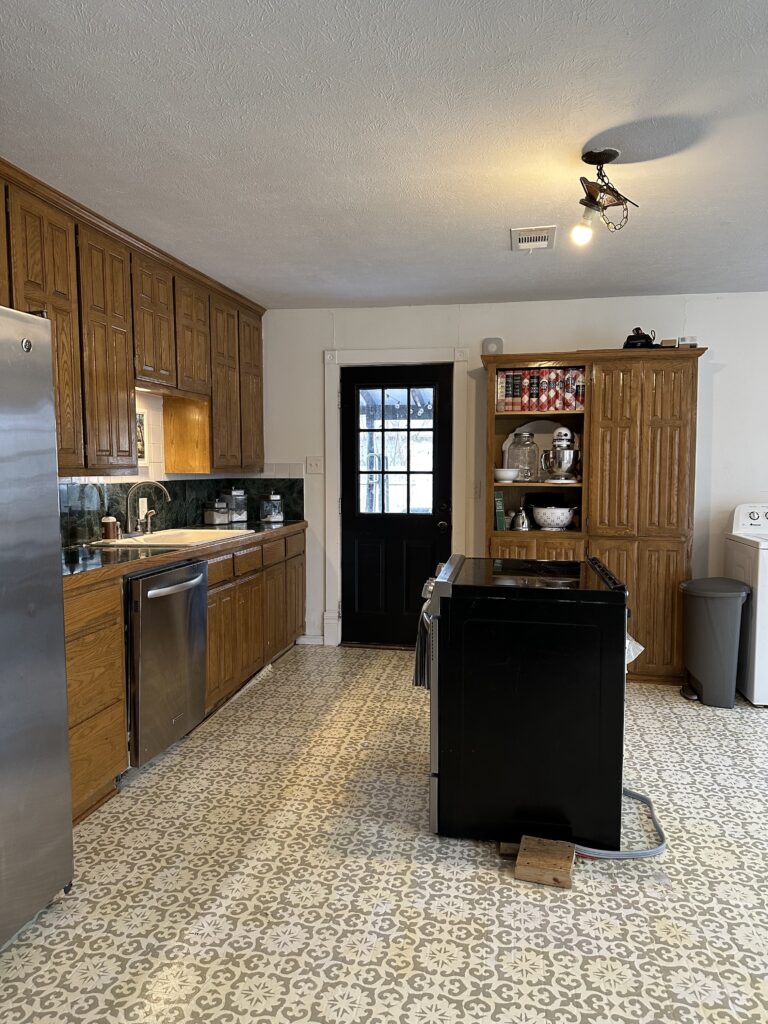
First, a quick walk down memory lane. These photos are so bizarre to me, after four years of living with this kitchen, it’s an unrecognizable room to me now.
This was the original plan, I always find it helpful to put my ideas in one place so that I can get a visual of how everything is working together. Now that it’s done, it’s interesting to see how this compares to the reality!
I pulled inspiration from historic kitchens like The Elms in Newport, and Biltmore House in Asheville. I knew I wanted to nod to the history of our home c.1895, but obviously couldn’t take that too literally. I made tile selections based on what tile houses had at that time period, and salvaged antique light fixtures. I wanted it to be not a true “restoration,” but a historic-ish rehabilitation.
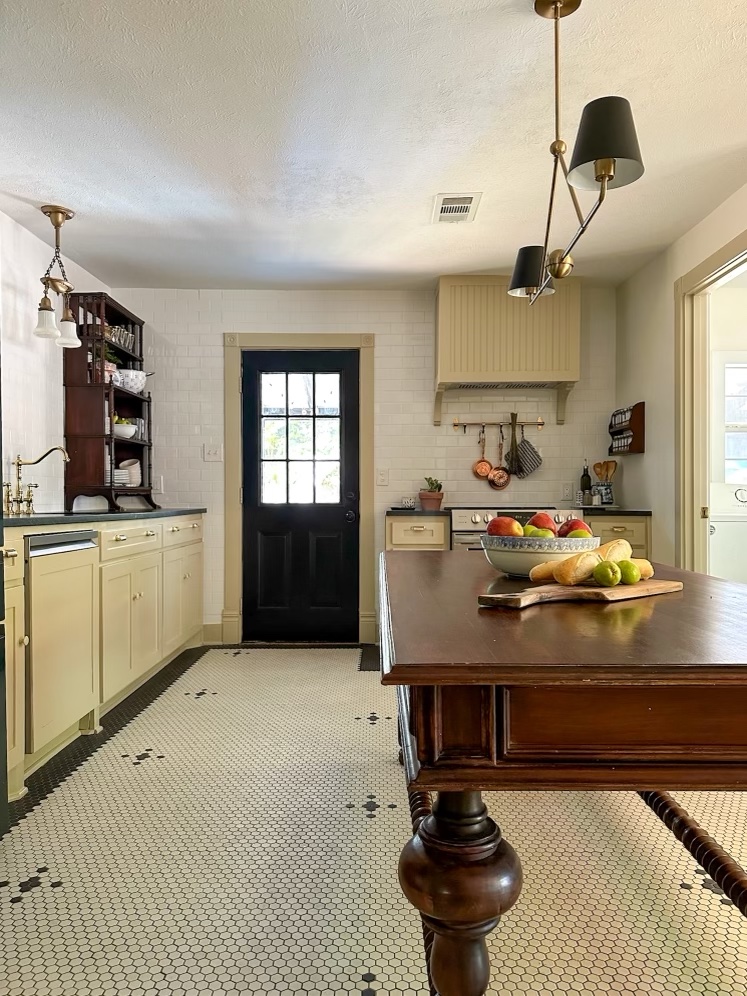
We worked with a contractor who we loved, and was willing to go above and beyond with some of our asks. The biggest thing was the flooring. I studied historic floor patterns, and fell in love with this particular pattern that of course doesn’t come pre-made. I also noted many Victorian-era homes the tile had a contrasting border that went around the room. We chose a one inch hexagon tile that came in 1x2ft sheets. We ordered in two separate colors, and the tile crew did an incredible job laying the black border, and then filling in the rest of the floor with white tile. I then carefully measured and counted where exactly I wanted each black tile motif and marked it with a pencil. The crew was so gracious to carefully remove each one inch tile that needed to be replaced and switch it with the correct color. It was a huge ask, and the whole thing took over a week, but I am so pleased with the result.
For reference, this is the same angle before!
I thoughtfully decided to remove all of our upper cabinets so that we could run the tile all the way up to the ceiling. Traditional white subway tile is always a classic, no matter what trends come and go. With the addition of a bookshelf to store our daily dishes, one shelf made from a board from our home’s interior, and a large hutch with baskets, I have more storage now than I did previously with the row of cabinets up top.
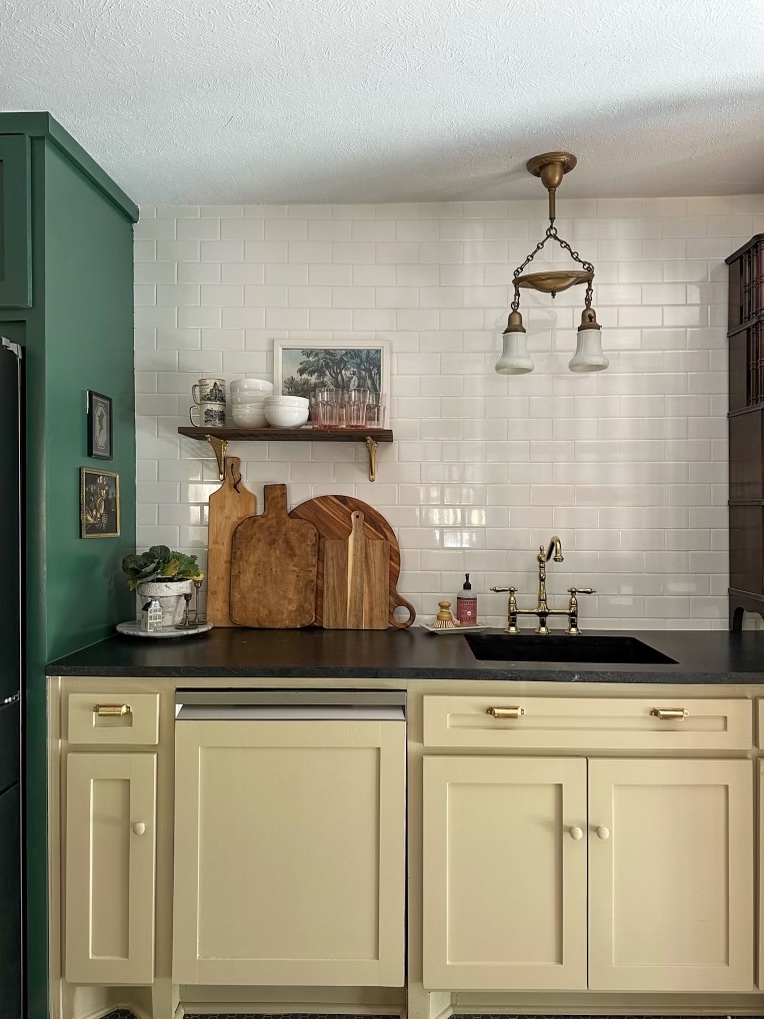
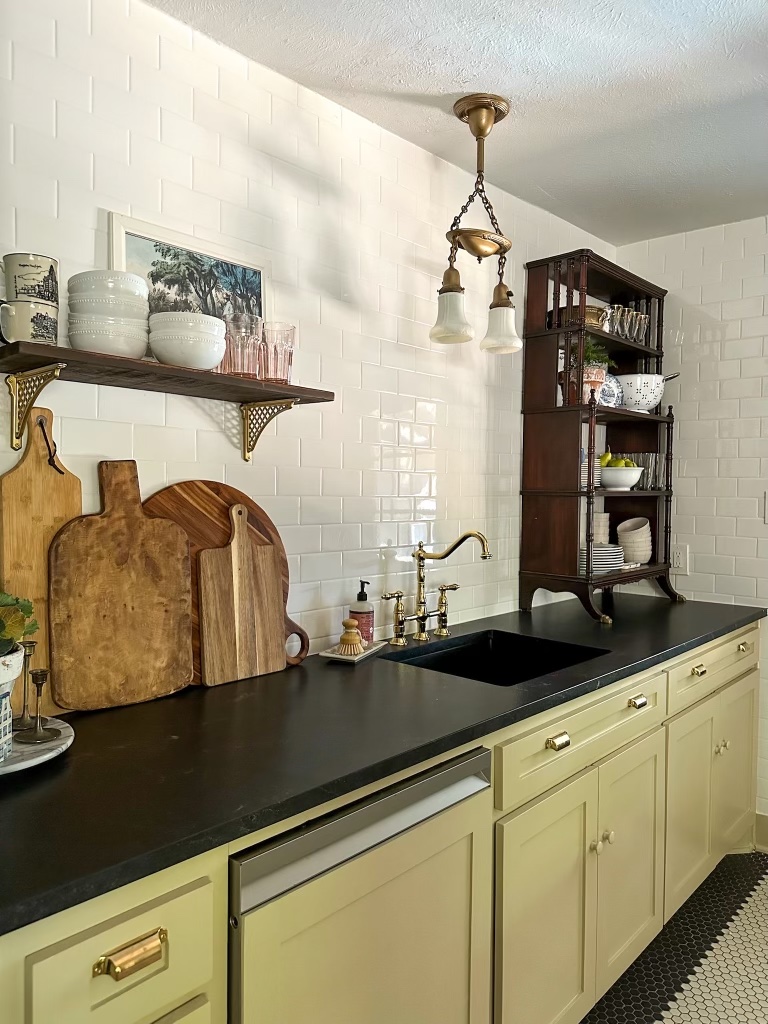
I originally intended to use an antique sink, and I coulnd’t find one that met the specifics I needed, so I ended up ordering a simple black undermount sink, which I love. I think it makes the counter top (Negresco Granite, by the way, the poor man’s soapstone) longer since it doesn’t break it up visually, and it allows the gorgeous faucet to shine. A win-win!
Although we technically lost square footage by closing in the laundry, it feels more spacious. With the closing in of the laundry room, I knew we would lose some light because we would be closing in two windows, so I wanted a door that would let some light pass through. I found a french door on my local buy nothing group, and it needed some work to make it shine, I stripped the paint and stained it to make it look and feel older. Lace curtains on the inside obstruct the view of the washer and dryer while still lighting the stove area. With the walled in laundry room, it also gave us a little alcove for a breakfast nook.
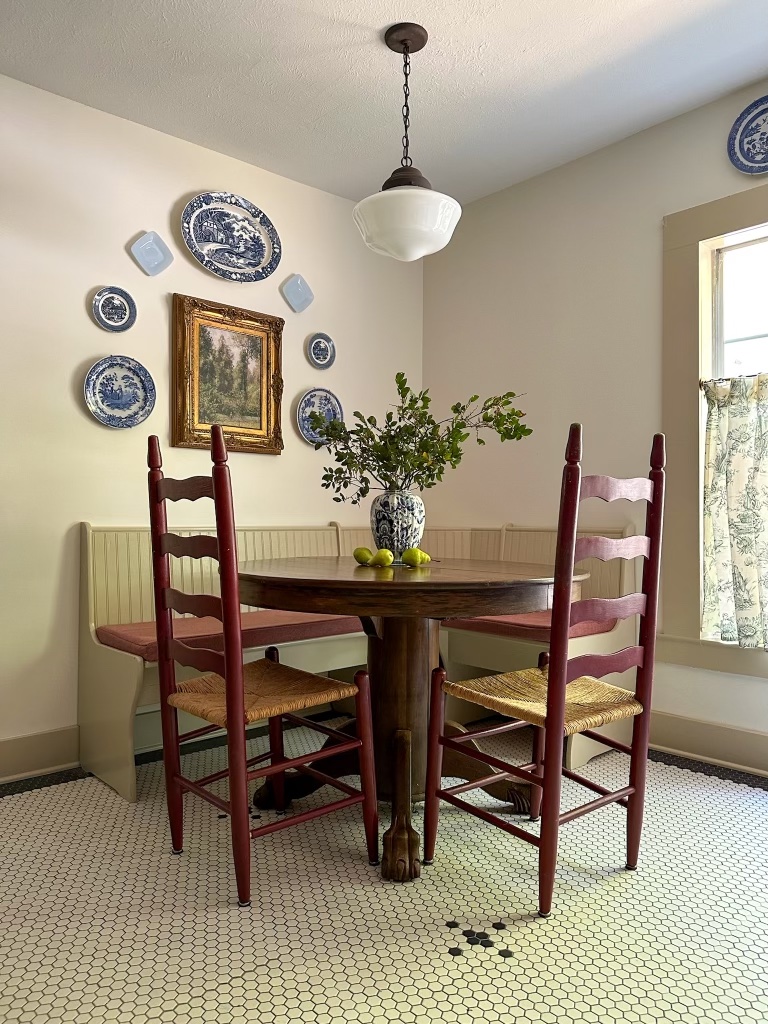
I found the bench and the chairs on Facebook Marketplace, and the table for sale on the side of the road in my neighborhood. It’s a high quality antique I bought for $20! I sewed some cushion covers myself, which I do not recommend if you want to keep your sanity, but was helpful in saving several hundred dollars.
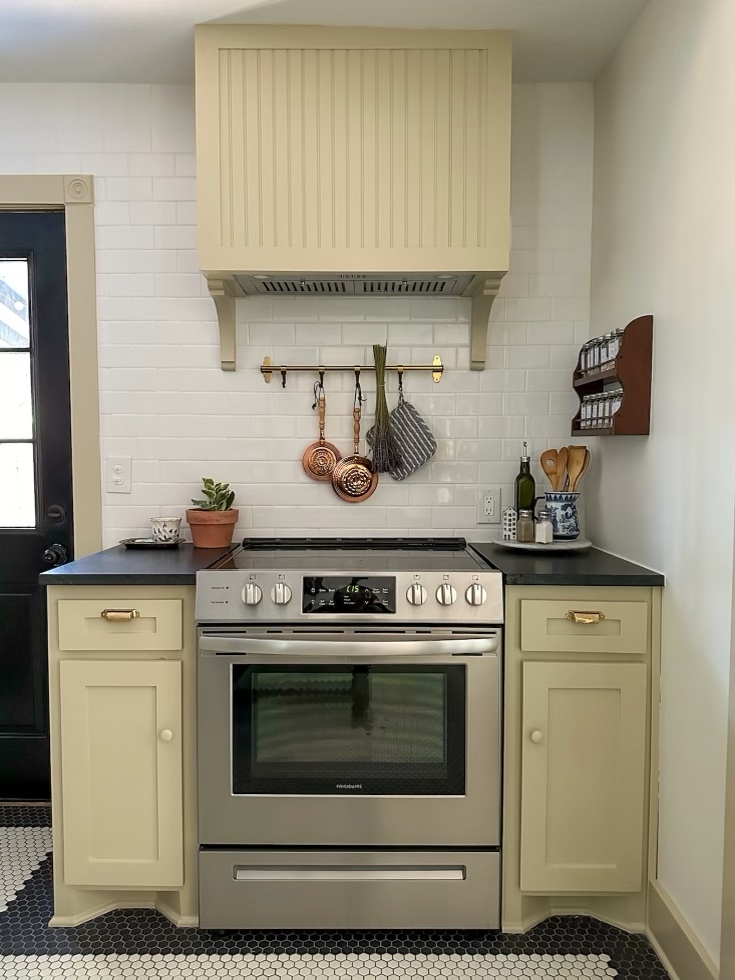
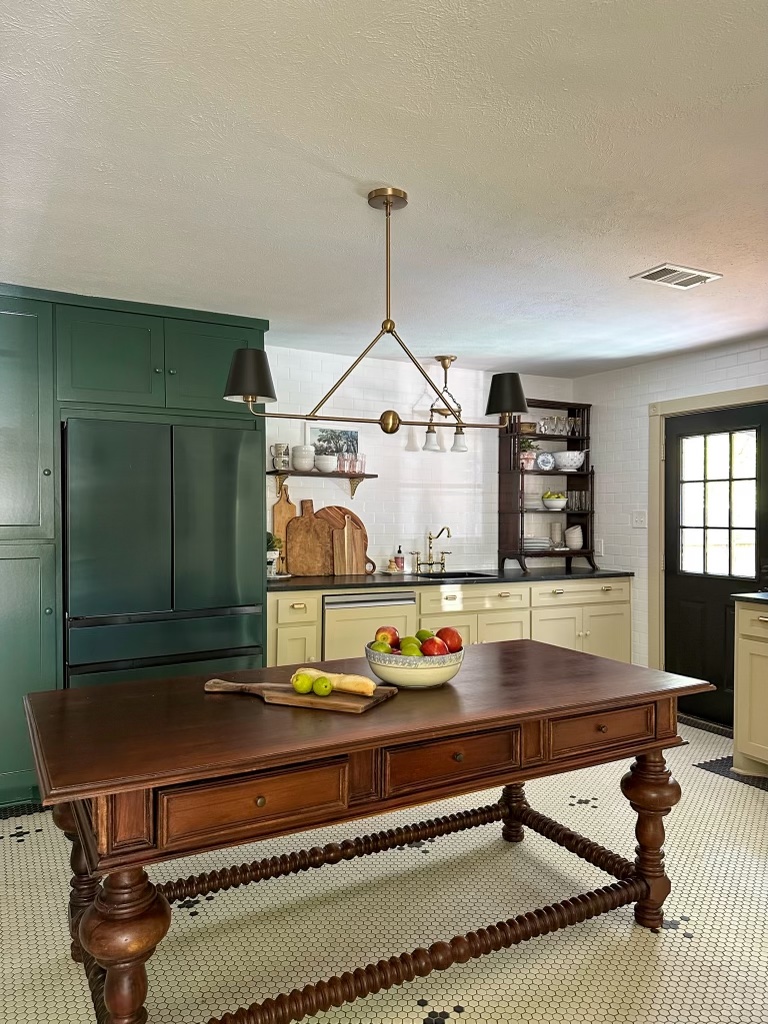
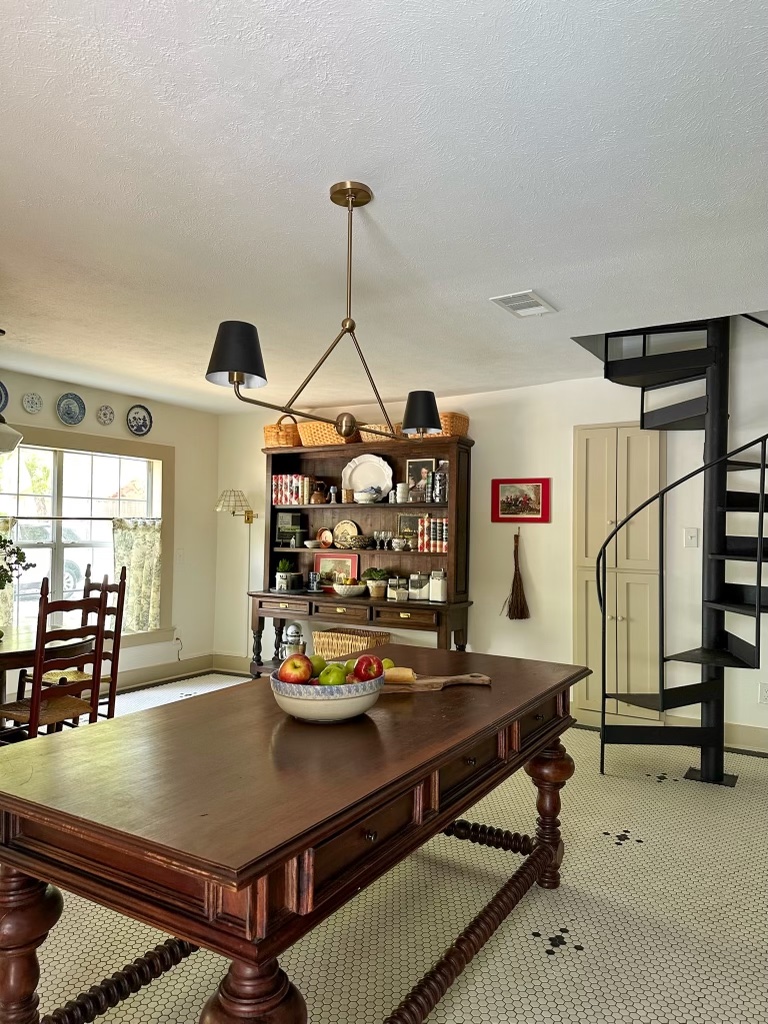
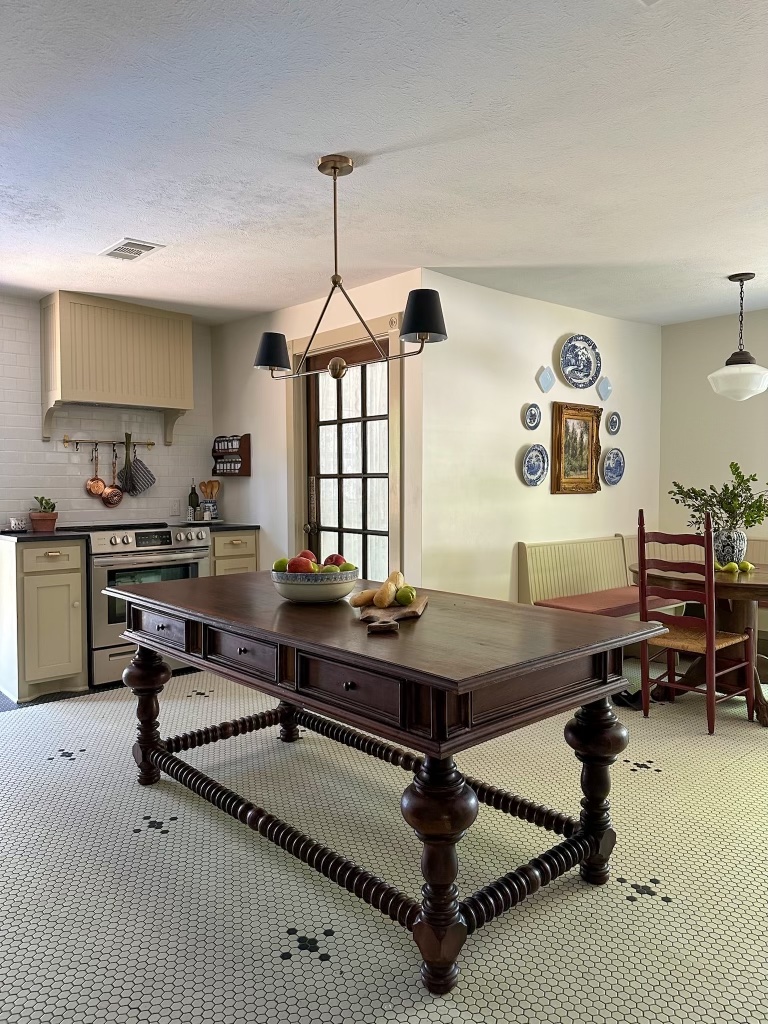
The only thing that was moved in the layout aside from building a wall around the laundry room was the stove. It works really well here, so I am happy with the decision to move it. Plus, it allows for our antique worktable in the center of the room. We purchased it at an antique store, and it is quite literally the most expensive piece of furniture I’ve ever purchased, but it was absolutely worth it. It helps bring a feeling of antiquity to the space.
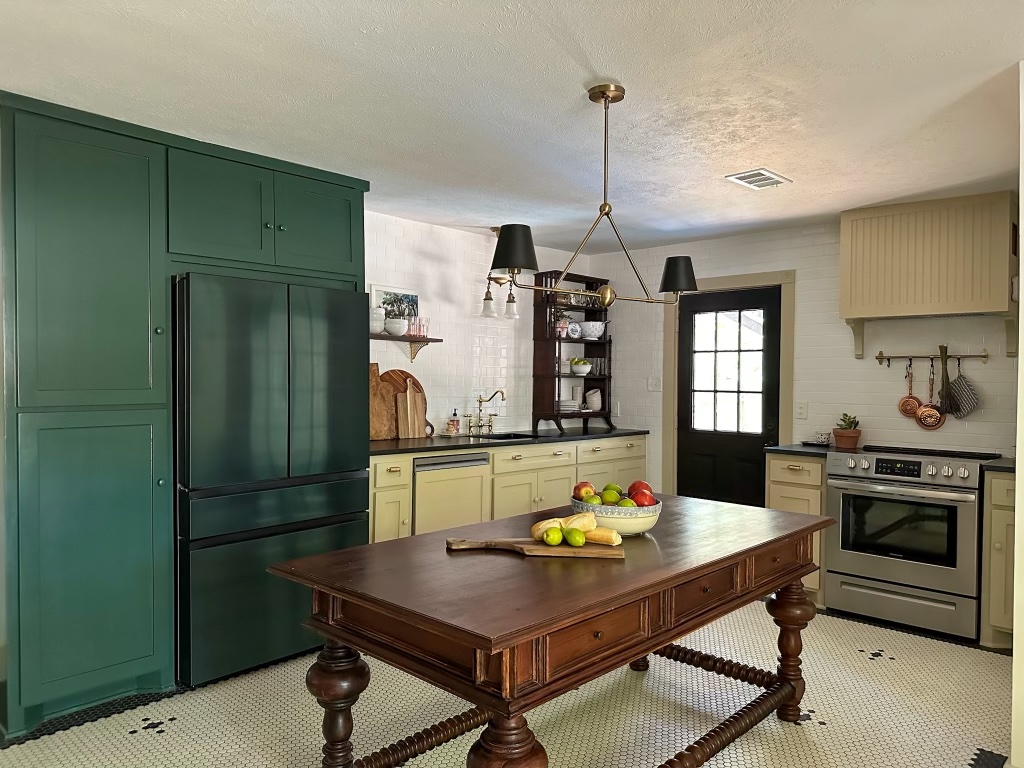
We painted the pantry fridge cabinetry Sherwin Williams Billiard Green, to match the fridge. Which, by the way we love. It comes in several different colorways, and you can switch out the front panels to match your style. We also bought a dishwasher from the same line, but Ethan made the panel for it himself. We’ve had the fridge six months now and really like it (how’s that for an adult-sounding sentence?)
The paint color and all the trim and cabinets is Clare Turbinado, and the walls are Clare Timeless. I was super impressed with the coverage and love the colors! Of course I looked to historic house museum kitchens for color inspiration. Drawer pulls are these from House of Antique Hardware in unlaquered brass. They are already starting to get a slight patina as we’ve been using them, and they’re a nice solid quality. For the knobs I used simple wooden knobs and painted them to match. I also placed them about 1/3 of the way down the cabinet rather than in the corner, which I’ve seen in more English kitchen design.
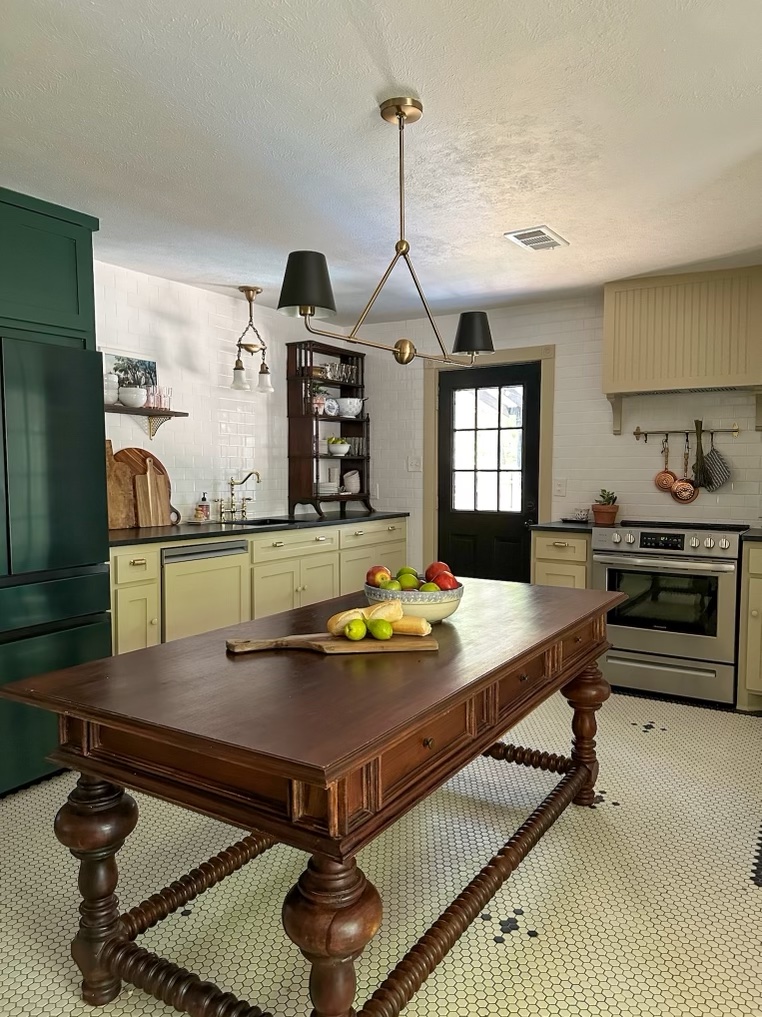
I had grand plans of building my own replica of a light fixture for the island, and I eventually just ordered this one, and have no regrets. All the other light fixtures are antique or thrifted.
I really had this vision of an upstairs/downstairs vibe. Historically, “downstairs” would refer to workrooms, or servant’s living and working quarters in grand manors. Usually much simpler in their design than the upstairs public rooms. If you watch tv shows like Downton Abbey or The Gilded Age, you’ll notice this. I wanted to give a nod to the time period when kitchens were not the entertaining center that they are today but more the workhorse of the home, while mixing it with some glam that would have been reserved for the upper rooms. Hence upstairs/downstairs. It’s the mix of simple ladderback rush chairs with brass faucets.
This being the first kitchen I’ve ever done a single thing to, I learned a LOT. Made some compromises and didn’t get everything I wished I could have added (hello very normal budget), but I’m very proud of what we created. We are so so happy with it, and so so happy to be completely finished. It’s far and away the nicest room we have in our house now, which just means we have a lot more work to do.
That’s all for today, friends. Have a fabulous day!