All Posts By

Fawn Rumfield

DIY Projects

How to Paint Porch Floors

You guys. I can’t even begin to tell you how excited about this project I am. Or how excited I am to be done with it. I decided to make it a priority over my spring break to get our porch floors repainted. I had the week off from work (little did I know at the time that I would not be returning to work in person for who knows how long, but that’s another story…), and so I had some time to devote to getting some paint on our multiple porches.

So we actually have three porches on this house (or technically two decks and one porch but whatever), but two different types. Our front porch is a traditional tongue in groove type wooden porch floor with no gaps and was already painted. It was badly chipping as it had probably been 40+ years since its last coat of paint. The back and side porches are more what you would consider a deck, They are 2x6inch (I think) boards with a small gap in between them. Ours had never been painted since it was installed in 1989. Are you ready for this before picture. Please don’t judge me. This house is a choose your battles kind of project y’all, because not everything can get done at once.

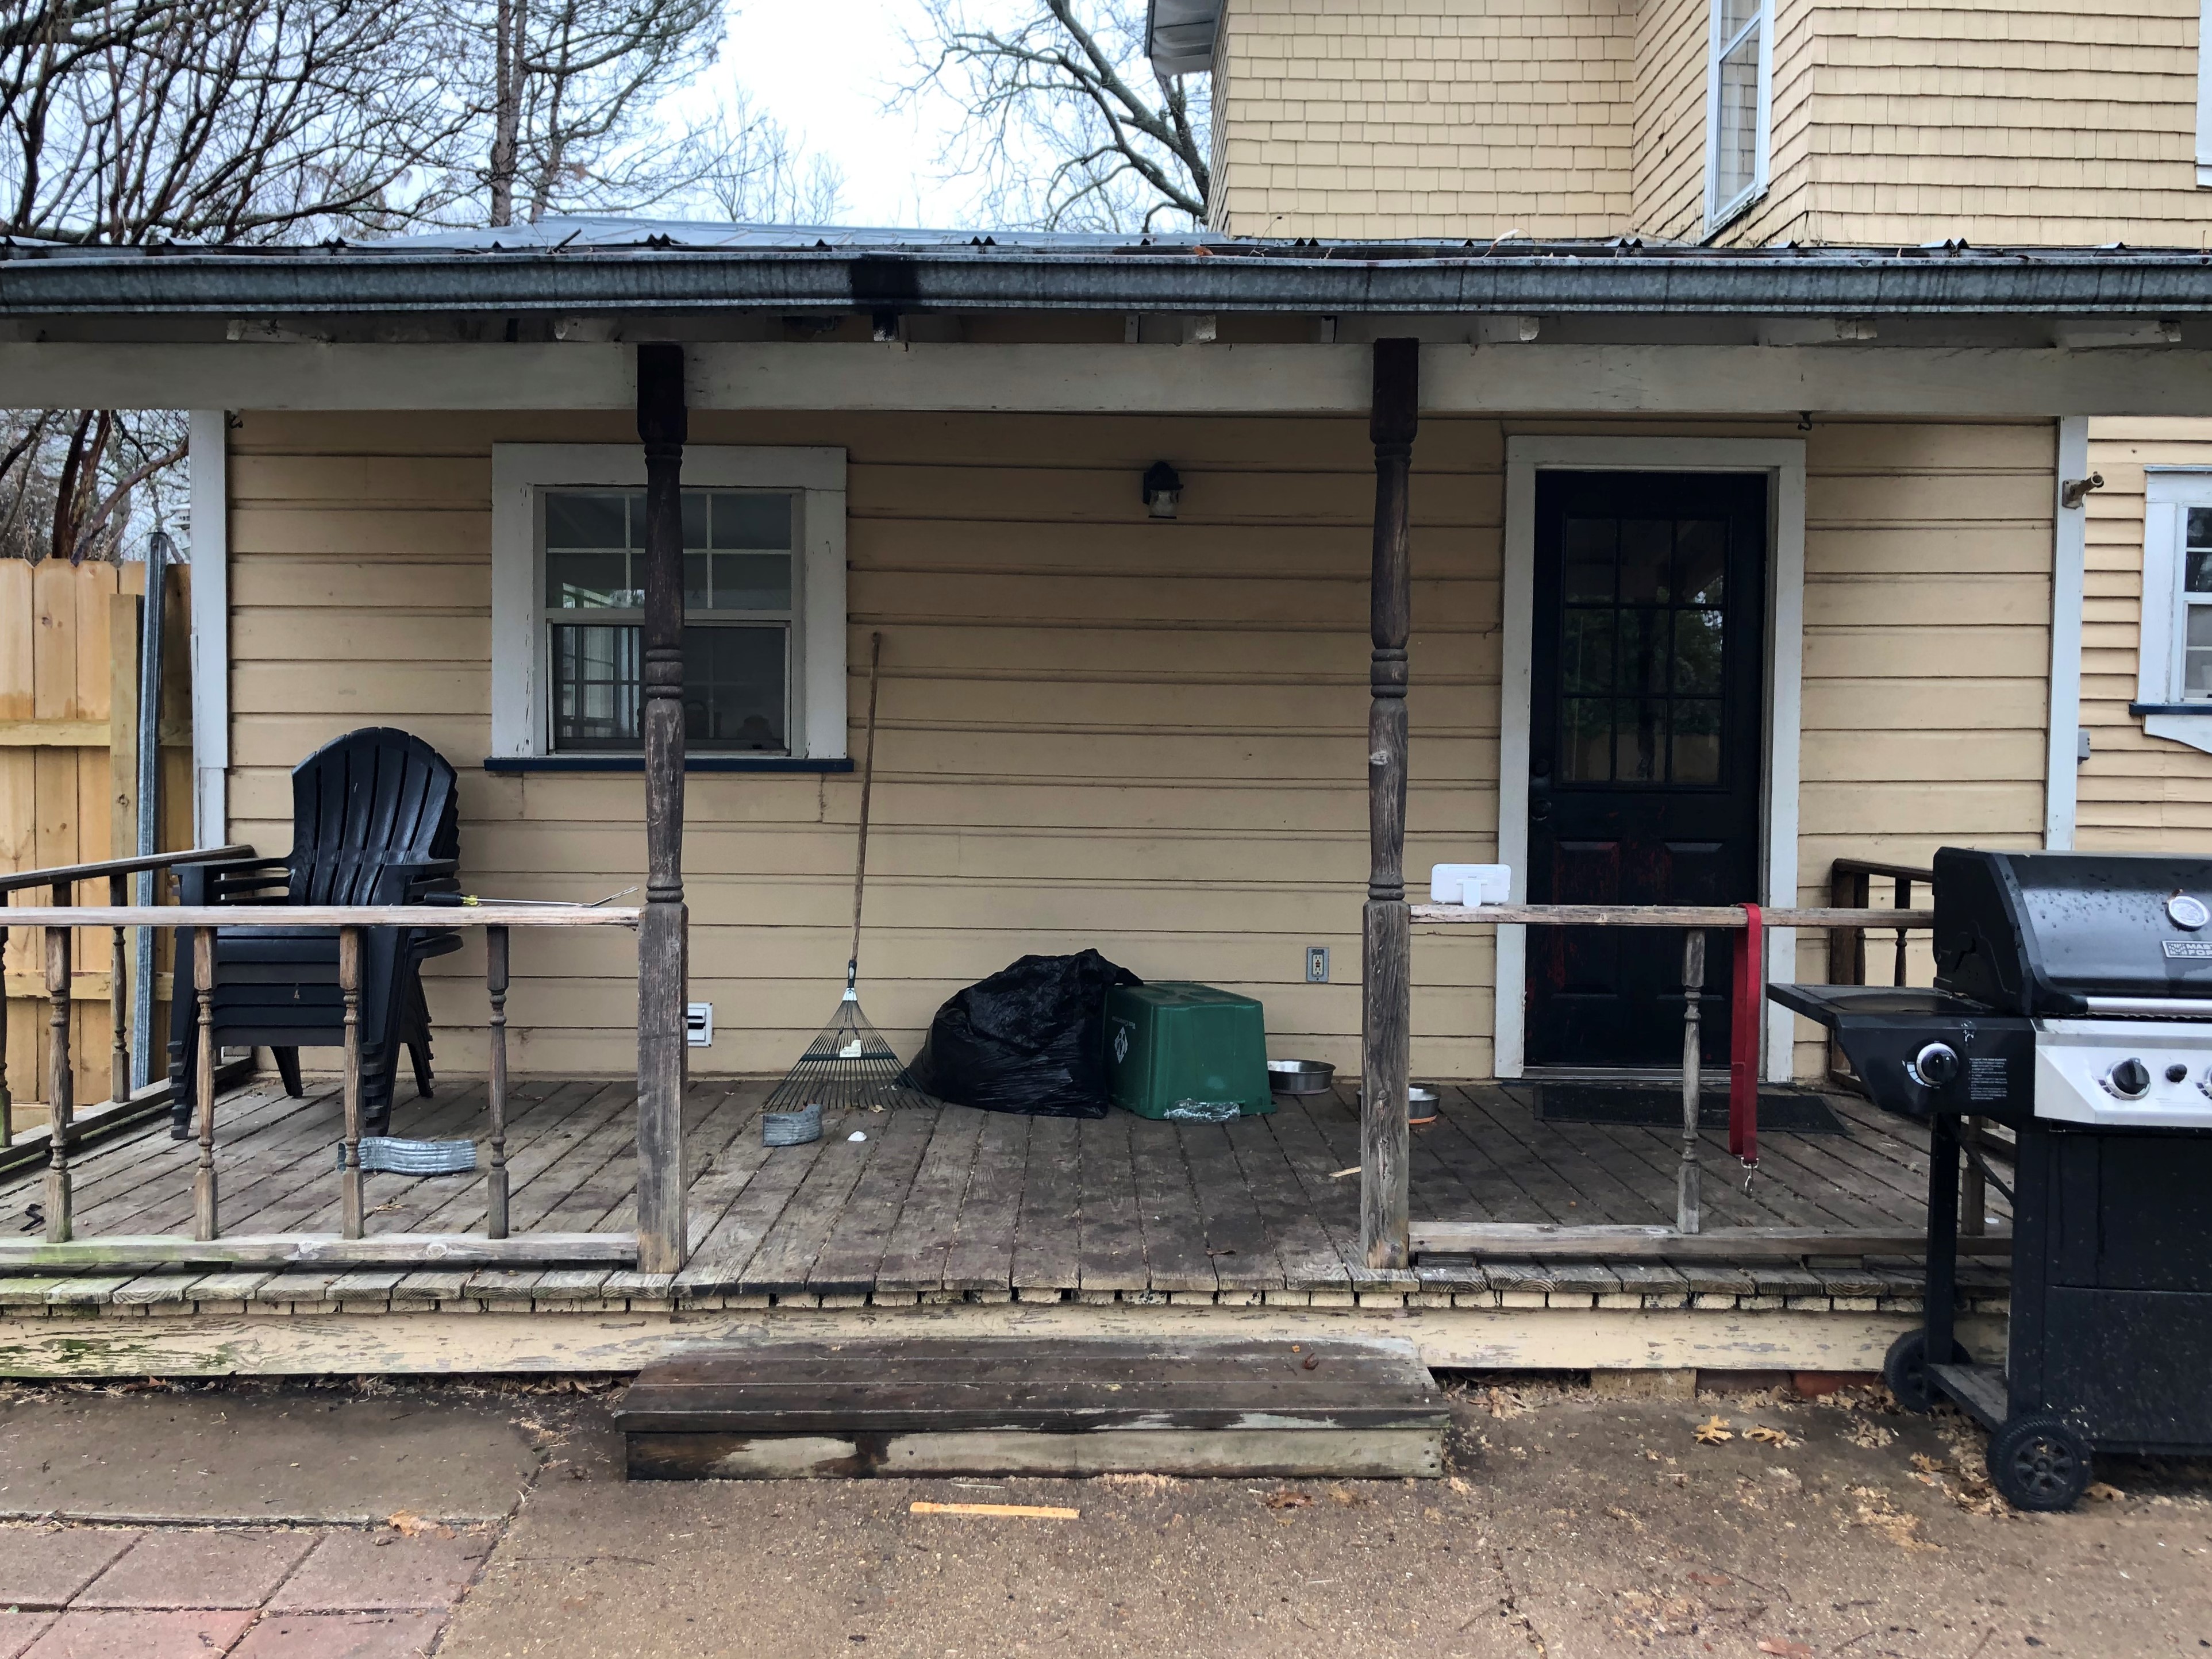
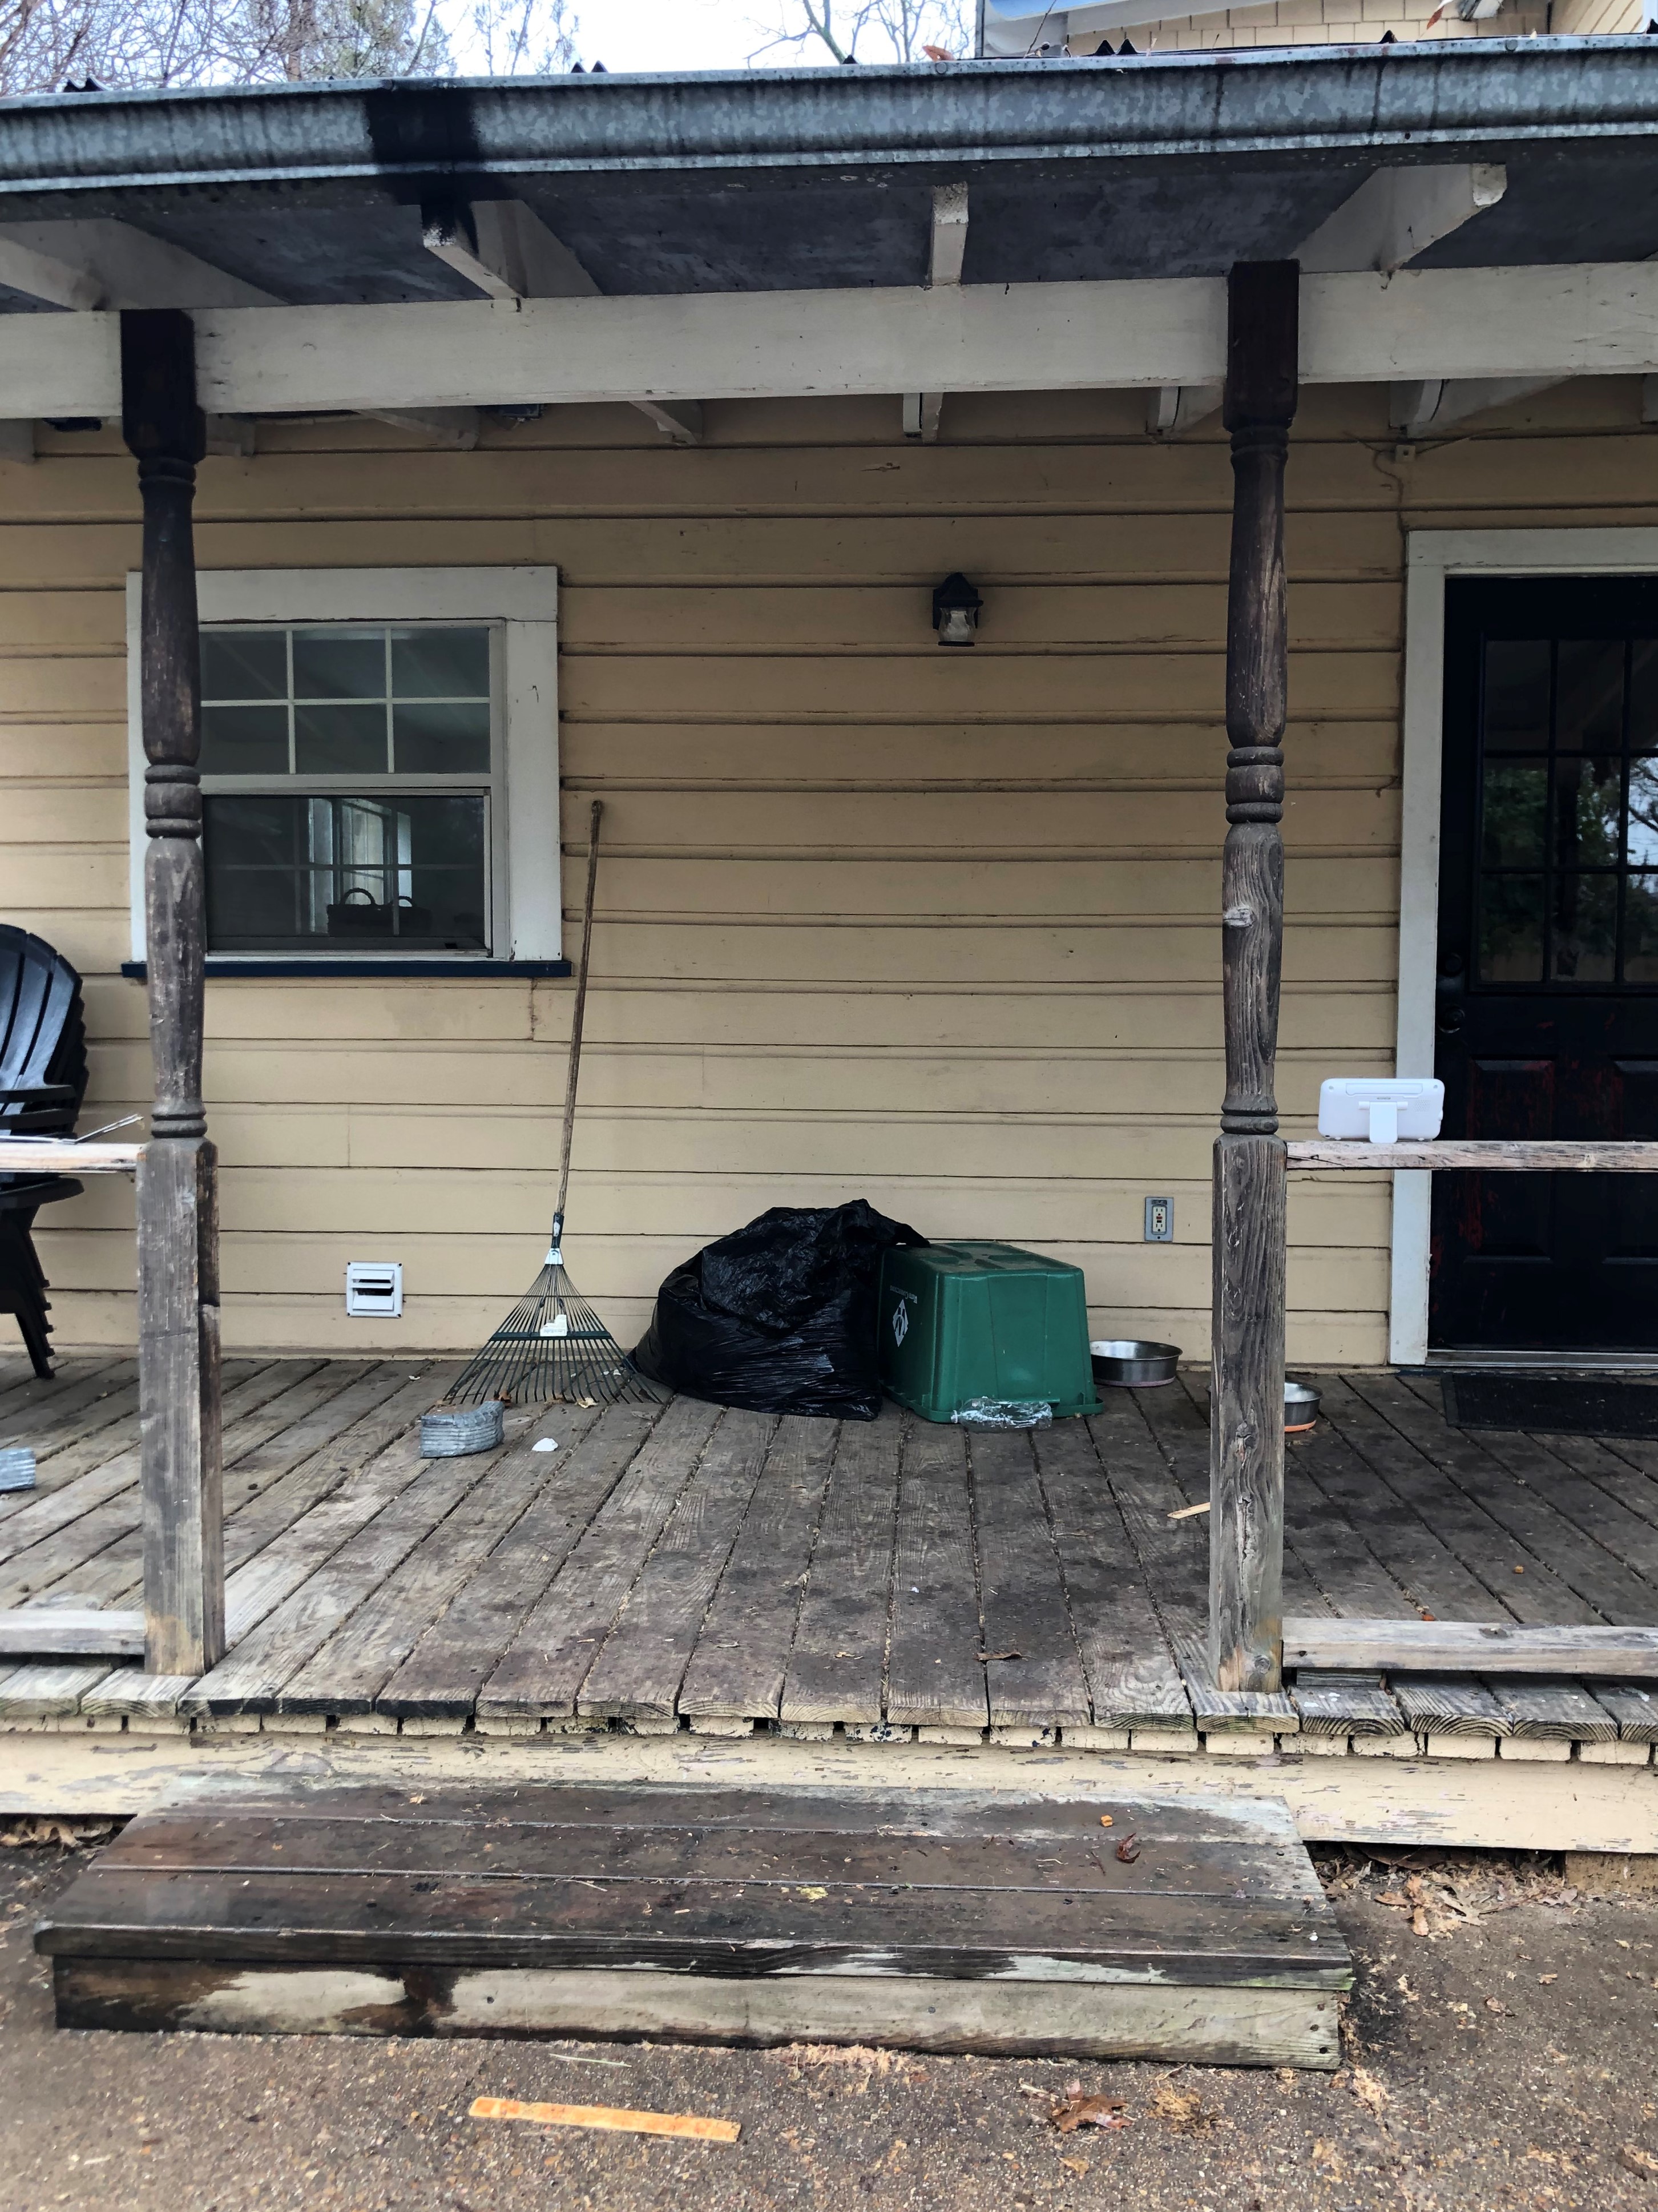
This picture was taken one month ago. Like, I’m embarrassed. Here’s one more for good measure.

The process for both the front and back porches was pretty much the same, with a few minor variations. Because the back porch had never been painted, we just had to clean it, using a power washer. In the front, the paint was chipping, so I scraped by hand what I could, and then power washed the rest. The power washing definitely got more of the paint chippiness off.

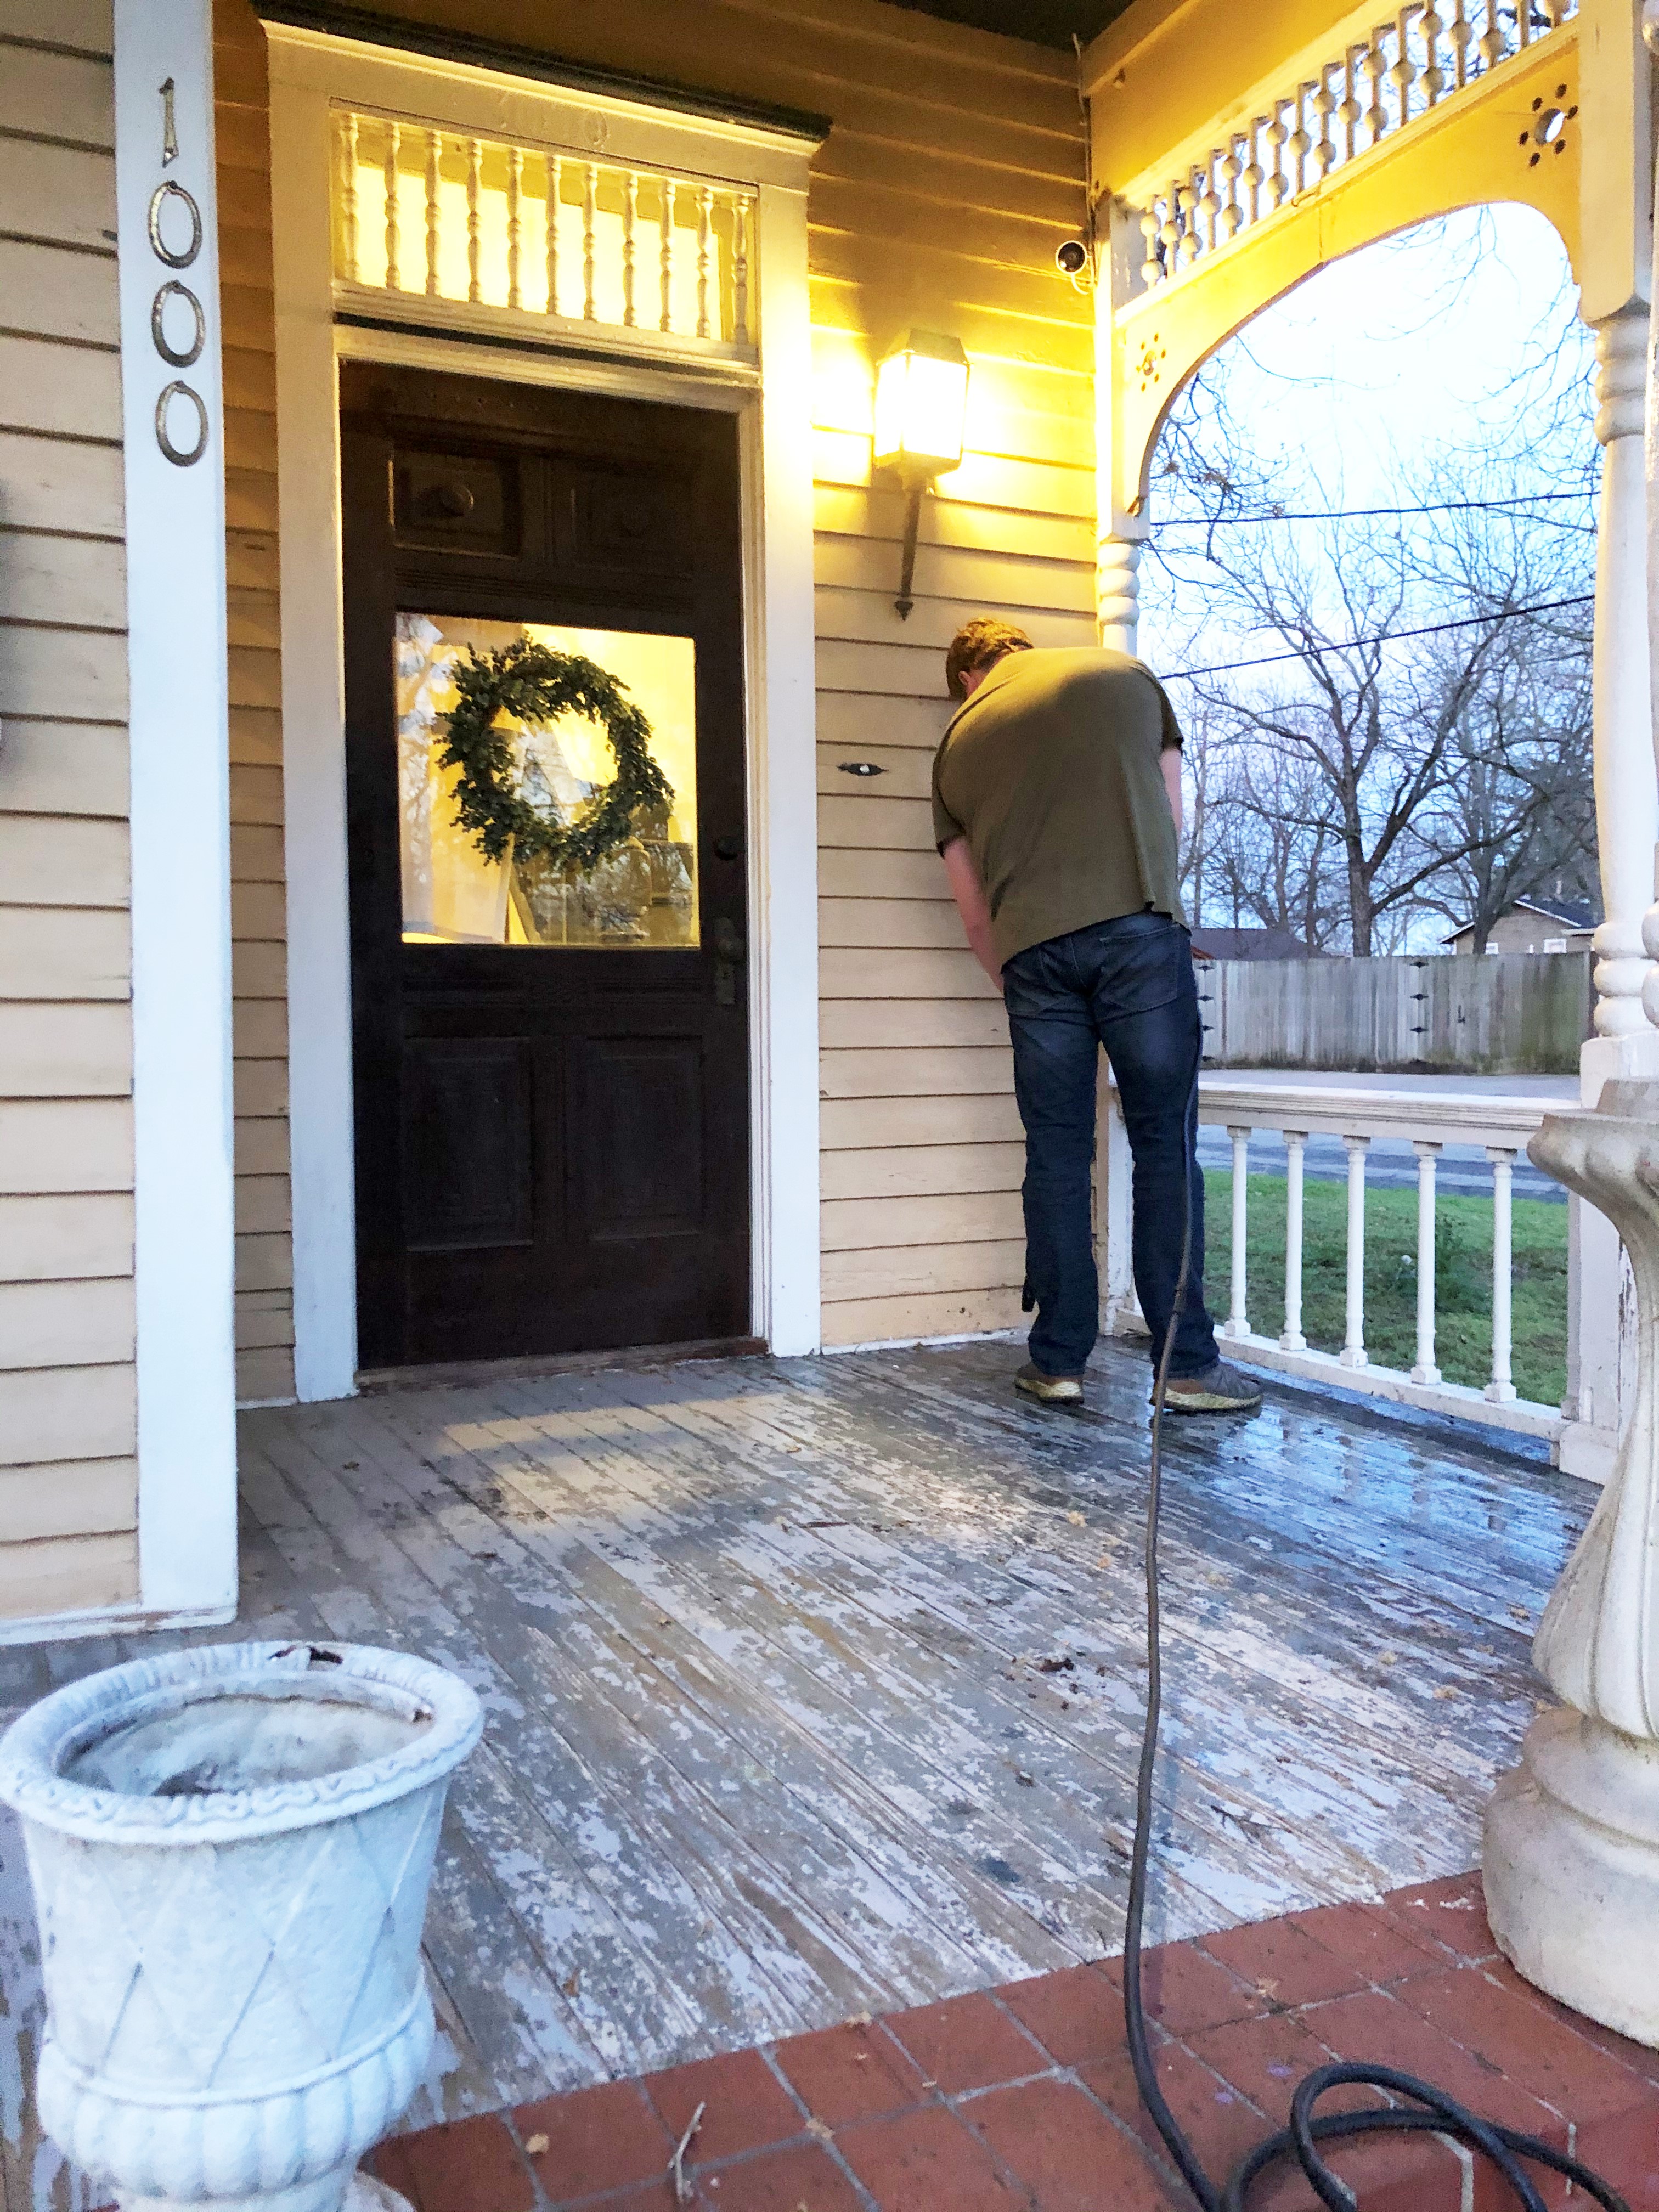
You can see here just how bad it was. There was multiple colors showing through from different layers over time. So once we got everything scraped, washed, and ready to go, it was time to paint.

I used porch and patio floor paint mixed in the color Teton Blue by Behr. I bought a five gallon bucket, but only used about two gallons. Which is fine, because I have plenty for touch ups in the future. The first thing I did was roll using a regular paint roller with an extension brush. If you’ve never painted floors this way, honestly, it’s the easiest thing. Just standing, no strain on the back or arms. Honestly, it’s great.

In the front, since there were no grooves between boards, this was super easy. I was careful not to get too close to the house with the roller, but it was a very quick process. Once I completed the rolling, I had to cut in with a paint brush. On the front porch, this was just along the edges next to the house. On the back porch, I had to get my brush individually between each board. This was the most time consuming part.

I eventually coated everything twice, with some interruptions from the rain. When I was done painting, I let it cure for a few days before sealing it. I wanted to use something to seal the porches because it’s such a high traffic area that’s prone to dirt. For that, I used Thompson’s Waterseal and brushed it on completely. I did not use a roller for that. Because of the consistency of the mixture, I found it annoying to use the roller. It took forever to dry. Forever. That is likely in part due to the amount of rain we were battling along the way with this month long affair.

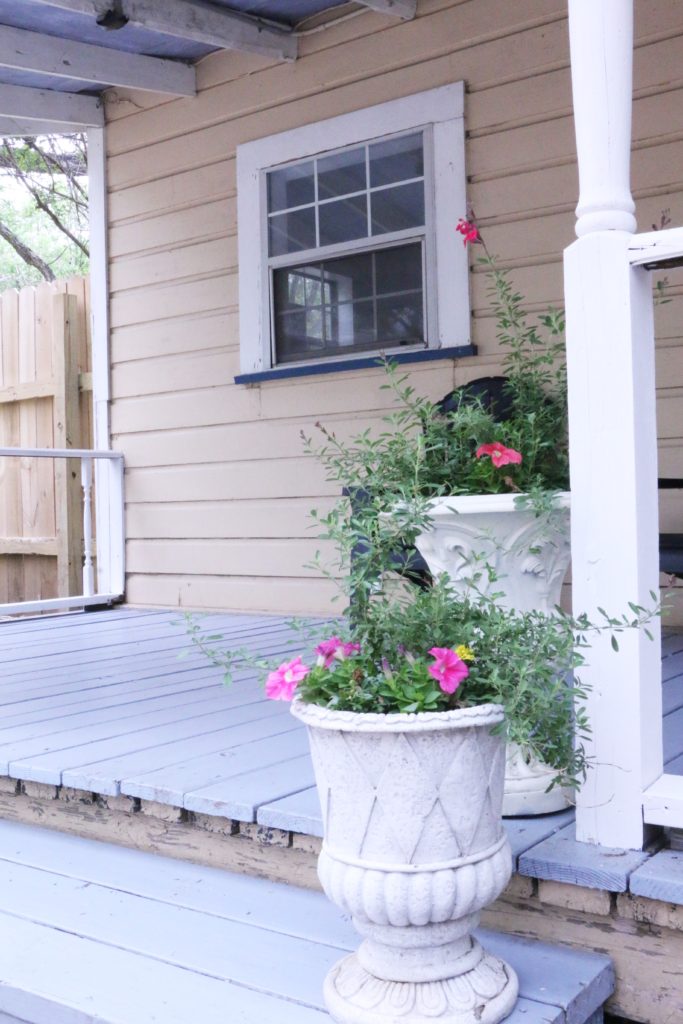
Lastly, for the back porch railings, I painted those white, using exterior flat paint. I got the color Cameo White. Those I just brushed on, it took forever, was honestly the most time consuming part of the whole thing.

Alright, are y’all ready for the after photos? I’m assuming that’s what you’re actually here for. Let’s look at the front porch first.

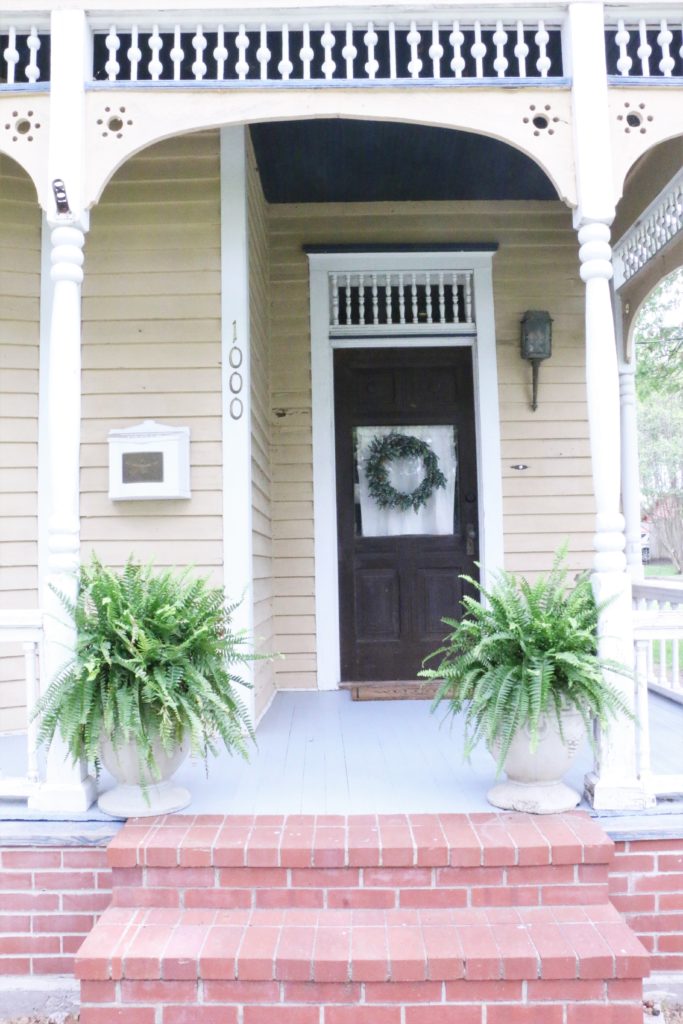
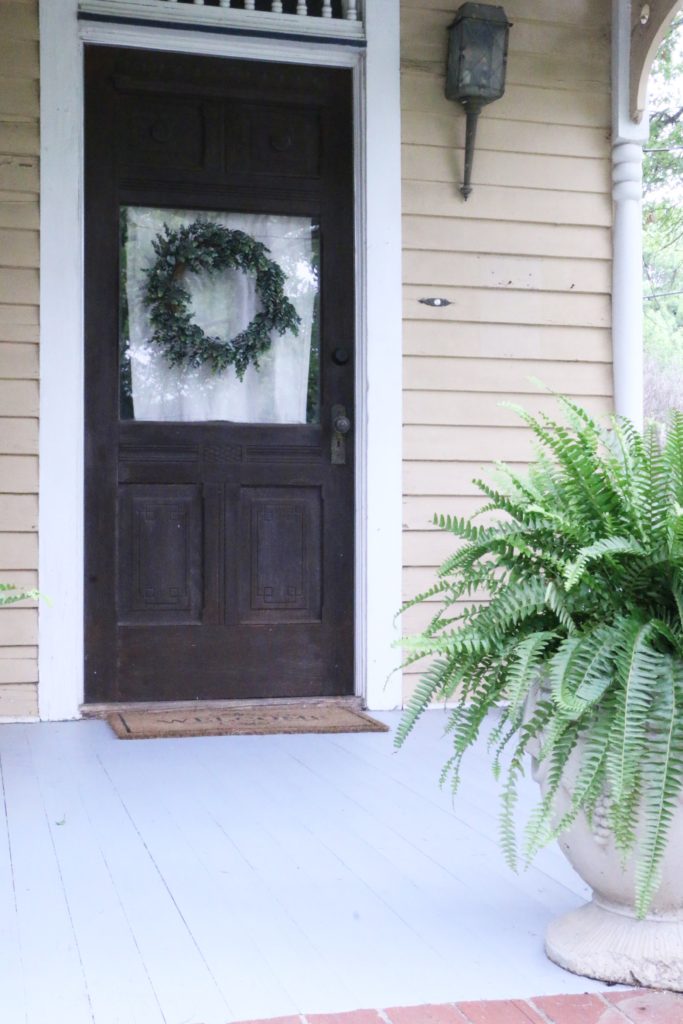
This isn’t all that dramatic, it’s just fresher and cleaner looking.

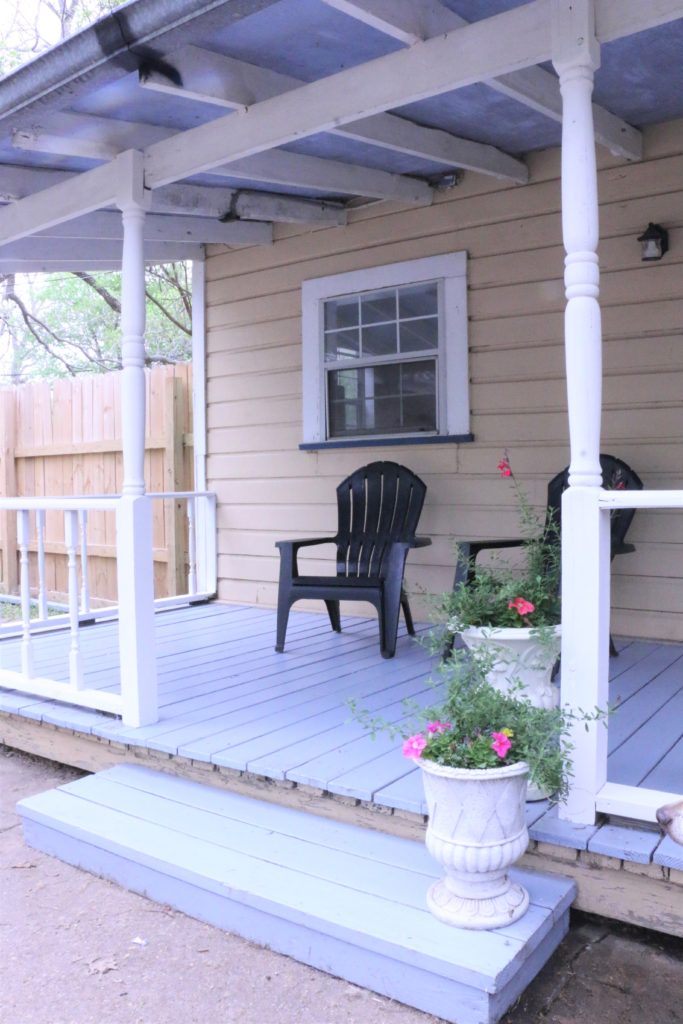
But the back. Y’all. Let me just show you one more time the before.

And now…

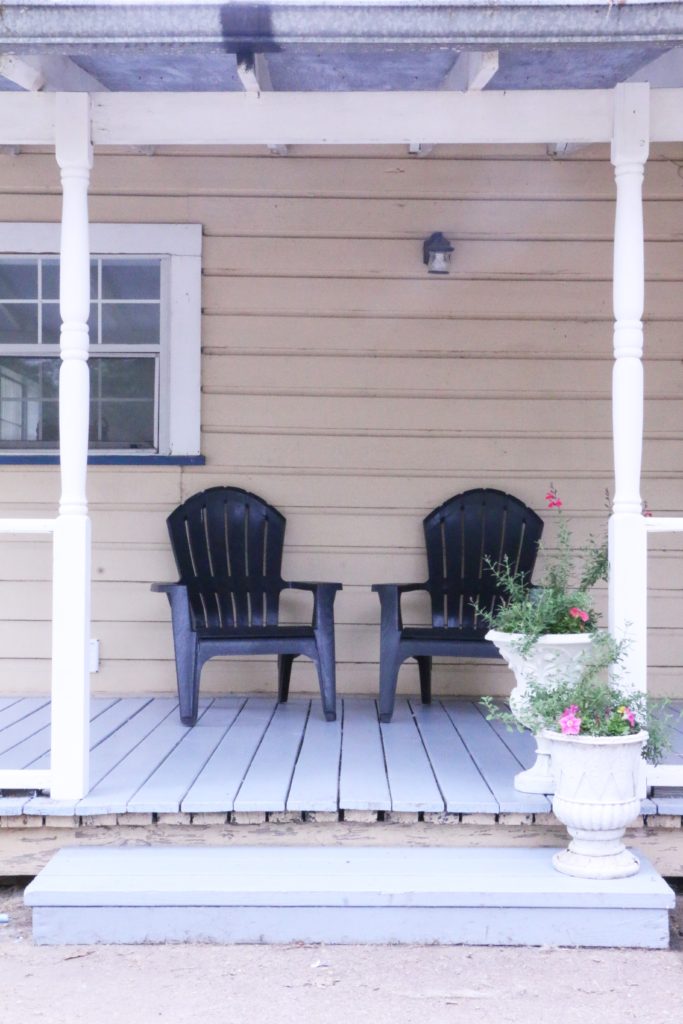
I cannot get over how much of a change this makes.

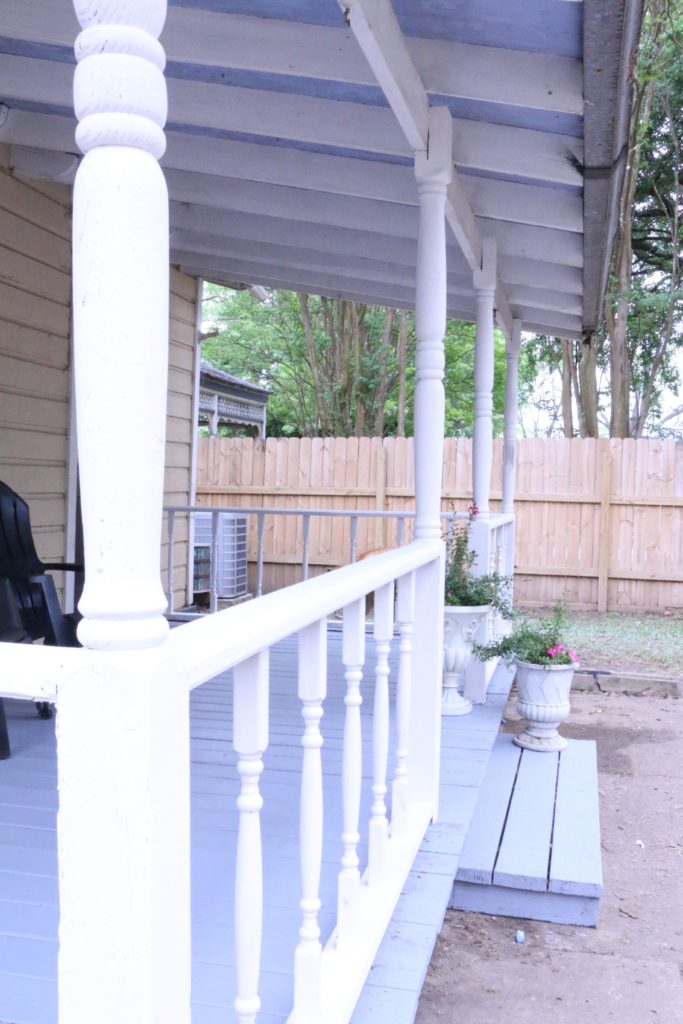
This project cost about $200 for all of the supplies, but I could have gotten away with much less paint. I used a total of about two gallons for an estimated 500 square feet of space. Just as I do with all my projects, I kind of just dive right in without really knowing what I’m doing, but this one wasn’t as intimidating as I made it out to be.

So, what do you think? Can you even believe this is the same porch? I hope this gets you feeling motivated to tackle your own project, whether it’s a porch floor or something else. It probably won’t be as bad as you think! Well, that’s all for today, friends! Have a fabulous day!

House Progress

Plans for a Baby Girl Nursery

Hello! I am so glad you stopped by! Today I am sharing something that I’ve been planning for a while, and I absolutely can’t wait to get started. We’ve known we were having a baby girl for a couple of weeks now, but with Social Distancing, we haven’t been able to get out and do much yet as far as planning and buying things for the nursery goes. Lucky for me, I have a garage full of supplies, so I have some things I can be doing while I’m unable to go to the hardware store.

First, I want to show you the mood board I put together for the space, then talk you through the plans.

As you know, my favorite color is blue and I can’t stand the thought of not having blue in a room in my house, so I wanted the focal points of the room to be blue. I’m planning on painting the dresser that’s currently in our bedroom a light blue (we’ll be buying a new dresser for us), and the artwork I’ve picked up from flea markets is also in the blue family.

Thankfully, since this is our second child, we already have most of the big stuff. We will be reusing the rocker (no longer sold) and crib from our son’s room. Having a second child is SO much easier. 🙂

I’ve already ordered the rug pictured, and if you follow @rumfieldhomestead on Instagram, you’ve likely already seen it rolled out in the space. I’m not completely decided on curtains yet, I have these IKEA ones as a possibility. I don’t like to buy things from IKEA without seeing them in person first, and since I can’t go there right now with all the Shelter in Place ordinances right now, I’ll have to wait and see. I do want something of a dusty pink color though. Not too in your face baby pink, but something to tie in some of the colors from the large painting I have.

And then lastly, the walls. I knew right away that I wanted some blue floral wallpaper in this room, and I fell in love with this one from a small Etsy shop. I quickly realized I did not want to blow the majority of my nursery budget on wallpaper, so I came up with a plan that miiiiiight be a massive fail. Here’s what I’m thinking:

I am going to try to use a projector to project a floral design on the wall, and then trace and paint myself. I’m not super great at free hand drawing (and by not super great I mean actually terrible), so I don’t trust myself to draw my own pattern. I’m not entirely sure the projecting and tracing thing is going to work, so you’ll have to stay tuned. But, if it does work, I will save myself a lot of money on wallpaper! I’ll also be able to get started right away, because I have the perfect shade of paint already in my garage.

Things are a little weird with everything that’s going on, but I’m excited to be working on this project! That’s all for today, friends. Have a fabulous day!

Furniture Makeover, House Progress

Plans for the Playroom/Office + A Furniture Makeover

About five months ago, we moved our bedroom upstairs with the intention of turning the downstairs room into a playroom/office. It’s been pretty slow going. Drywall removal, wallpaper removal, and nail-in-shiplap removal has taken some time, and it’s not really fun work that keeps you motivated to do more.

But with our impending nursery project coming up, and the general house re-shuffling that comes with preparing for a new baby, I feel inclined to get moving on this playroom. I bought a set of chairs for five dollars a while back from a thrift store, and I knew they would be perfect in our playroom when we eventually got around to finishing it. The chairs didn’t come with a table though, so I searched Facebook Marketplace until I found one for ten dollars. So for my total price, I was at fifteen dollars. I knew however, that it was going to need a lot of work so I just stuck them in my garage and ignored them for a while.

Because of our current social distancing situation, I wanted to paint the table and chairs without going to the store to purchase anything. Luckily for me, I have a hoard of supplies in my garage, so I found a leftover sample we had used to test colors and got to work. The table was in the roughest shape. It needed to be sanded, stripped a bit, wood filled, glued back together, and clamped overnight. The painting was actually the easy part!

It’s not 100% done yet, but someone is already enjoying it!

So now that the table is almost done, I figured it would be time to work on a mood board for the space. I always find it helpful to visualize everything together in a space when I’m planning a room. I used everything I already had that I knew would go in the space, and then worked from there. So here’s what I came up with:

Obviously my table and chairs are a second hand DIY version, but I wanted to visualize what it might look like, so I included something similar. Here are a few similar options that I love: option 1, option 2, or option 3.

Our couch is the Sven Sofa from Article in the Grass Green color. It’s currently in our living room while we work on the playroom, and it’s the perfect sofa for littles. The long bench cushion comes off, and our son loves taking it down and climbing all over it.

As far as wall colors, I’m not 100% certain on what I want in the space, but I think I want to go in a beige direction. Gasp! The color on the background is Benjamin Moore Athena, but it’s just an example for now. Once we can safely leave our house again, I’ll get around to testing some actual colors.

I think the beige wall color will look really good with this rug, which I totally have my eye on. I think it’ll be just the right amount of fun for a playroom, but also the right amount of sophistication for an office.

The desk is a picture of our current desk, as we plan on putting our desktop computer in the playroom as well. It’s painted in Behr’s America’s Cup Navy. I need some new hardware, as you can see. 🙂

Other ideas for the room include built in shelves around the french doors for toy storage, and large framed fabric panels to tie the blue and green furniture together. Although I have some ideas in my mind, I just included some inspiration photos, not necessarily the exact thing I will end up going with. If you’re wondering, the fabric is here, and the built in photo I used for inspiration comes from this blog.

And just for good measure, I included some photos of actual toys that we have. You know, to make it more realistic. Most of our son’s toys come from IKEA, because they have the cutest toys.

So that’s the plan! I’m not exactly sure when we will get to finish this because of social isolation and all, but we definitely are going to get started on getting the last of the wallpaper residue off the walls. Baby steps. What projects are you planning during this time?

That’s all for today, friends. Have a fabulous day!

*This post may contain affiliate links.