All Posts By

Fawn Rumfield

DIY Projects, Furniture Makeover, Home Decor, Tutorials

Cane Chair Makeover…again

Have you ever done a project and just hated the results? You work hard on something, and when it’s finished, it’s just not what you thought it would be? This is what I’m sharing today. About two years ago I bought a pair of cane chairs from a thrift store for $20. I was so excited to work on them. Like, SO excited. Unfortunately, I don’t have the original picture anymore, but they were dark wood, with a gross blue fabric. I knew I wanted to make them over, but I had no idea how.

I picked some fabric out for the chairs with no thought to how it might lay on the chair. I learned a lot from this first makeover, but they just weren’t doing it for me. Here’s how they looked after makeover number one (and don’t judge me):

chairbefore1

First of all, if you look close enough, you can see that the back legs aren’t even painted. How did I miss that?! I don’t know. I also don’t know how I lived with this for so long. Ugh.

chairbefore2

This is a wider shot of the chairs. They are convenient, really. Ethan puts his shoes on here, and they are pretty comfortable. I like to sit here and read on occasion as well. Sidenote, our dresser is my husband’s childhood dresser (a family heirloom), deemed untouchable by the paintbrush. Anyway, looking at these chairs just makes me cringe. I’ve wanted to do something about them for so long, but the amount of work I did the first time around was torturous, and I couldn’t imagine going through that again. So I put it off for a while, thinking that since I had done it, I’d have to live with it.

But that’s just not true. I did these chairs before I got married, before I was making a home, and WAY before I started figuring out what my style was. There’s no rule out there saying you have to live with your DIY mistakes. So, I decided to take the plunge. This time, with a few ground rules. I had to do this the easiest way possible. Because last time was awful.

So let’s go through it, step by step.

chairmakeover1

I didn’t want to go through the hassle of all the buttons, so I stuffed them with stuffing. A little hot glue on top of the button, and some stuffing. Easy peasy.

chairmakeover2

I bought a $4 drop cloth and placed the seat bottom face down on the fabric.

chairmakeover3

Then I carefully pulled the corners over and stapled the dropcloth material to the bottom. The key here is to pull as tight as you can, and keep everything as neat as possible.

The seat bottom took probably a total of ten minutes, but the top section was a bit more involved.

chairmakeover4

I cut a piece of material the size of the chair back and stapled starting at the top. I found that the best way to keep it tight and even is to start at the top, then staple the bottom, and finish with the sides.

chairmakeover5

I then wrapped the chair back in quilting batting. I did this to make it a bit more comfy, and to conceal the buttons.

chairmakeover6

I then wrapped the seat back in the material, and hotglued the extra material to the backside.

chairmakeover7

I then put the seat back up against the frame, and stapled as closely to the top as possible. This is tricky, and my staple gun was not kind to my hands.

chairmakeover8

I then covered the staples with trim. I make the trim by wrapping the existing trim in the material and hotgluing it. Hot glue for the win.

The new chairs are still not perfect, but they’re much simpler, and I can live with them now. This was only my second time with reupholstery (on the same set of chairs). I still don’t have it down, but I definitely appreciate these chairs a bit more now.

chairafter2

Overall, they just look cleaner, smoother, and more natural.

chairafter

The neutral look will allow them to be moved anywhere around our home and work.

chairafter3

So the moral of this story is: if you don’t like something, change it! And if you still don’t like it, change it again! I can’t say that these are perfect, but they’re working SO MUCH BETTER than before.

Have you ever done something you hated? What did you do? I’d love to hear about it! That’s all for today, friends. Have a fabulous day!

Wedding

Our Wedding…One Year Later

As of this upcoming Sunday, Ethan and I will have been married for one year. One whole entire year! I feel like our wedding day was just yesterday, and yet I feel like I’ve been married five years. Cliché, I know. In light of the anniversary of our wedding, I thought I would share some wedding photos and share a few things I’ve learned this past year.

We got married in Western New York, where I’m from, even though we were both living in Texas by that time. We had our wedding at a local heritage museum, or as I like to call it, an “outside old buildings museum.” Either way, it was the perfect way to blend a church wedding with an outdoor wedding. We had the ceremony directly in front of a 19th century chapel, and the reception on the main lawns and gazebo of the museum. Things were far from perfect that day, but it’s in the past. It’s funny how at the end of the day, those little details I was freaking out about didn’t matter at all.

ceremony

firstkiss

aisleflowers

I wanted all the details to be laid back and “pretty.” I wanted everything to feel fresh and simple.

cardtable

I loved these little window frames we used to hold childhood photos of Ethan and me. And I just love looking at baby Ethan pictures.

centerpiece

Our centerpieces were simple; a collection of books, mason jars, candles, and Baby’s Breath.

weddingcake

The gorgeous cake. It was delicious as it is beautiful. A woman from the church I grew up in made it, and I cannot tell you how much I adored this cake. It was everything I ever wanted!

sweethearttable

Our reception was directly in front of the chapel. We had lights strung above the dance floor, and night fell at a perfect time.

bridemaids

My bridesmaids each picked out their own dresses. I absolutely loved the cohesive look.

brideandgroom

So here I am, (almost) a year later still trying to figure out what it means to be married. Because sometimes I’m still convinced that the past year has gone by without me even realizing it. Have I really been married for a whole year? That’s crazy! There have a few things though that I’ve learned, despite how fast this year has flown by.

God has blessed us immeasurably.

We both had real grown up jobs before the wedding (I hadn’t officially started yet, but I’d been hired as a teacher starting about a month after we were married). We had a place to live, furniture in our house, food on our table, and a newly-purchased bed to sleep on. Sure, there have been late nights when all we could ask ourselves was what the heck are we going to do?  Of course there have been those moments. When I measure those moments against all the victories we’ve faced in our marriage, I cannot deny that God has been there for us through and through. We haven’t had to struggle overmuch, and for that I am grateful.

Marriage is work.

Duh. As if anyone assumed otherwise. What I mean is that we’ve learned best by supporting each other, by being there for each other. At the end of the day, I listen (and I mean actually listen) to Ethan as he tells me about his day, and I know he’ll do the same for me. When Ethan has to work late (and I’m frustrated enough because I don’t get to see him all day), I have to remind myself that bringing him a hot meal at work will show him that I love him. Even if I really don’t feel like cooking, my husband is working hard to provide for us, and cooking some food and driving it to him is hardly a big deal. In my (way super limited) experience, love is actively doing something to serve my husband, knowing it means something to him.

I am not a perfect wife.

Another duh. While engaged, I had envisioned myself working hard each day, coming home to cook a full three course meal (which would be served at the table the moment Ethan returned from work), with dessert in the oven, all with an immaculate home. Big surprise! I was wrong! There are times that the clean clothes are on the bedroom floor for way longer than I’d like to admit, waiting to be put away. Sometimes I go to bed with dirty dishes in the sink. And, gasp! There are days the bed goes unmade. I’m learning that I really don’t have to have it all together. I’m pretty sure nobody does anyway.

I have to pray. All the time. Seriously.

I thank God for my husband daily. I ask to God show me ways to demonstrate my love to my husband. How can I be a wife of noble character? How can I bring honor to my husband? I can support Ethan in prayer. I pray that his dreams come to fruition, and that I may have the wisdom to support him. I pray for our future, for guidance in situations that have yet to arise. I pray that Ethan will be able to lead me and our future children in the direction of Christ. I pray that we continue to serve Him in whatever He may ask us to do. Without prayer, I think marriage would be a bit more frustrating, and quite meaningless. I’m thankful for a God who has given us the gift of marriage, because that’s what it is, really. A sweet, precious, heavenly gift.

So overall, there may be a couple of things I’ve learned. I’m just glad I can keep on learning how this marriage thing works as we go.  Thanks for letting me get a little personal today. I appreciate y’all. That’s all for today. Have a fabulous day, friends.

DIY Projects, Furniture Makeover

Coffee Table Makeover

Hello all! Happy Monday from me to you! I hope you’re having a fantastic morning. Are you drinking your coffee as you’re reading this? I hope so!

Summer is in full swing for me here. I’m a teacher, and even though my summer break started a few weeks back, I spent the first bit of that away from home visiting different family members. I didn’t feel like my summer break had fully begun until this last week. I don’t have any kiddos to keep me busy (that is definitely not a complaint), so my days range between mindlessly watching Netflix for an embarrassing number of hours and finding odd projects around the house to keep me busy.

This week these old tables we have in our living room became the object of choice (I swear, nothing is safe from the paintbrush in this house. Except for the walls, because, landlords). These two tables were my husband, Ethan’s from his bachelor days. Who knows how old they are or where in the world they came from. Classic newlyweds, amiright?

tablebefore2

I painted the bases white when we first got married, and that was good for a while. But you can see how scratched and janky (I can use that word right?) they are. They weren’t looking so hot.

tablebefore1

So obviously I had to do something about it (which if you’re reading this and you still haven’t figured out that I am about to paint this table, then I’m sorry I ruined the surprise for you).

The first thing I did was put a fresh coat of Annie Sloan Old White over both tables. I’ve written previously more details about using this paint, which you can find here.

paintedtable

Don’t mind this background of this picture. It’s our totally-unfinished-not-fully-furnished-guestroom/paint studio. We all have that one room we don’t want anyone to see. Except you just saw mine. Don’t judge me, please keep reading.

painterstape

I wanted to go for a “farmhouse style” look, so I wanted to paint a grainsack stripe on each of the tables. I spaced a four inch wide line in the center, and a one inch wide line on either side.

paintingduring

I then painted in the areas I had taped off. The color is Pencil Sketch by Behr. I bought a sample jar of it at Home Depot in a flat finish and had plenty left over. The paintbrush is the 2″ Wooster Shortcut. This is the first time using this brush and I can tell you that I absolutely loved it! It’s inexpensive and easy to use.

distressing

After painting my stripes, I got around to distressing lightly the edges of my table. I also sanded down over the gray stripes so that a bit of the white would show through. I wanted to give the stripes a bit of a worn look.

After distressing, removing tape, adding a finishing wax, and making a huge mess, my tables were done!

tableafter1

tableafter4

tableafter2

tableafter3

They make the room so much brighter, which I absolutely love. I also am really digging the rustic vibe they have. The best part about this project is that I had everything on hand except for the $3 paint sample I bought. That’s what I call a thrifty project! My favorite kind! That’s all for today. Have a fabulous day, friends!

CoffeeTableMakeover

Home Decor

My Go-To Styling Accessories

Happy Monday y’all! If you’ve been reading for a bit, you know that my husband and I don’t own our home. Which is a good thing, because our home is U-G-L-Y not cute. We’re still newlyweds, paying our dues in a rental before buying our first home. Because we’re renters, I can’t rely on changing the wall color or ripping out the carpet (through I’d love to). When I’m decorating, I have to be intentional about what I bring in the room. In the last year that we’ve lived in this house, I’ve realized that the accessories I bring in are the most important. The “shell” of the room (flooring, wall color, lighting fixtures) are unchangeable for us, so the accessories matter.

Today I want to share with you the four things I use most often to create vignettes in my home. The staple pieces, if you will. These are my favorite things to decorate with, and can be seen everywhere in my home. If you’re a renter like me (or even if you’re not), these are some things you can use to cozy things up without making any major changes.

IMG_1529

1. Books

I use books everywhere! They are great for adding height to smaller items, for making different levels. Styling accessories takes a bit of practice (which I’m still learning), but stacked books can add another dimension to whatever it is that you’re displaying.  I absolutely love old versions of Reader’s Digest Condensed Books. They come in a variety of colors, and the patterns are beautiful. I find them at thrift stores and garage sales usually for $1 each or less. With something so inexpensive, you really can’t go wring!

IMG_1536

2. Candles

I love to use candles not only for decor, but for practical purposes as well. They provide a soft light, warmth, and a certain coziness to a space. I usually will have one scented candle burning at a time, along with other white unscented candles. I buy candles from IKEA. They are sold in sets, usually a few dollars for several candles.

IMG_1540

3. Trays

Trays are great because they are like an anchor for pieces you want to display. They work especially well for areas like coffee tables, where the space is versatile. I like to have pieces on my coffee table, but it can be a pan to move things constantly. Having your accessories displayed on a tray makes moving things easy! This is especially helpful if you have little ones around (or so I’m told).

IMG_1525

4. Flowers

My favorite thing of all! I always have them around somewhere! Whether you’re using faux or fresh (I use both, though I’m partial to fresh), flowers can make a huge impact. Each week when I’m doing my grocery shopping, I stop by the floral section and pick up an inexpensive bunch or two. Fresh flowers add a nice scent (obviously), and an element of thoughtfulness to a room.

So there you have it, friends. These are the things that I use in my home to add dimension. If I’m in a pinch, these are my go-to pieces. I use them all most frequently when I’m styling (or restyling, then restyling again) a room. I hope you’ve found this helpful! Do you use these in your home too? I’d love to hear about it! That’s all for today, friends. Have a fabulous day!

DIY Projects, Tutorials

My Experience with Annie Sloan Chalk Paint

Hello everyone! I hope you’ve had a marvelous weekend, I know I have! I am in New York visiting some family, but I wanted to take a few minutes and make sure I wasn’t neglecting the old blog. 🙂

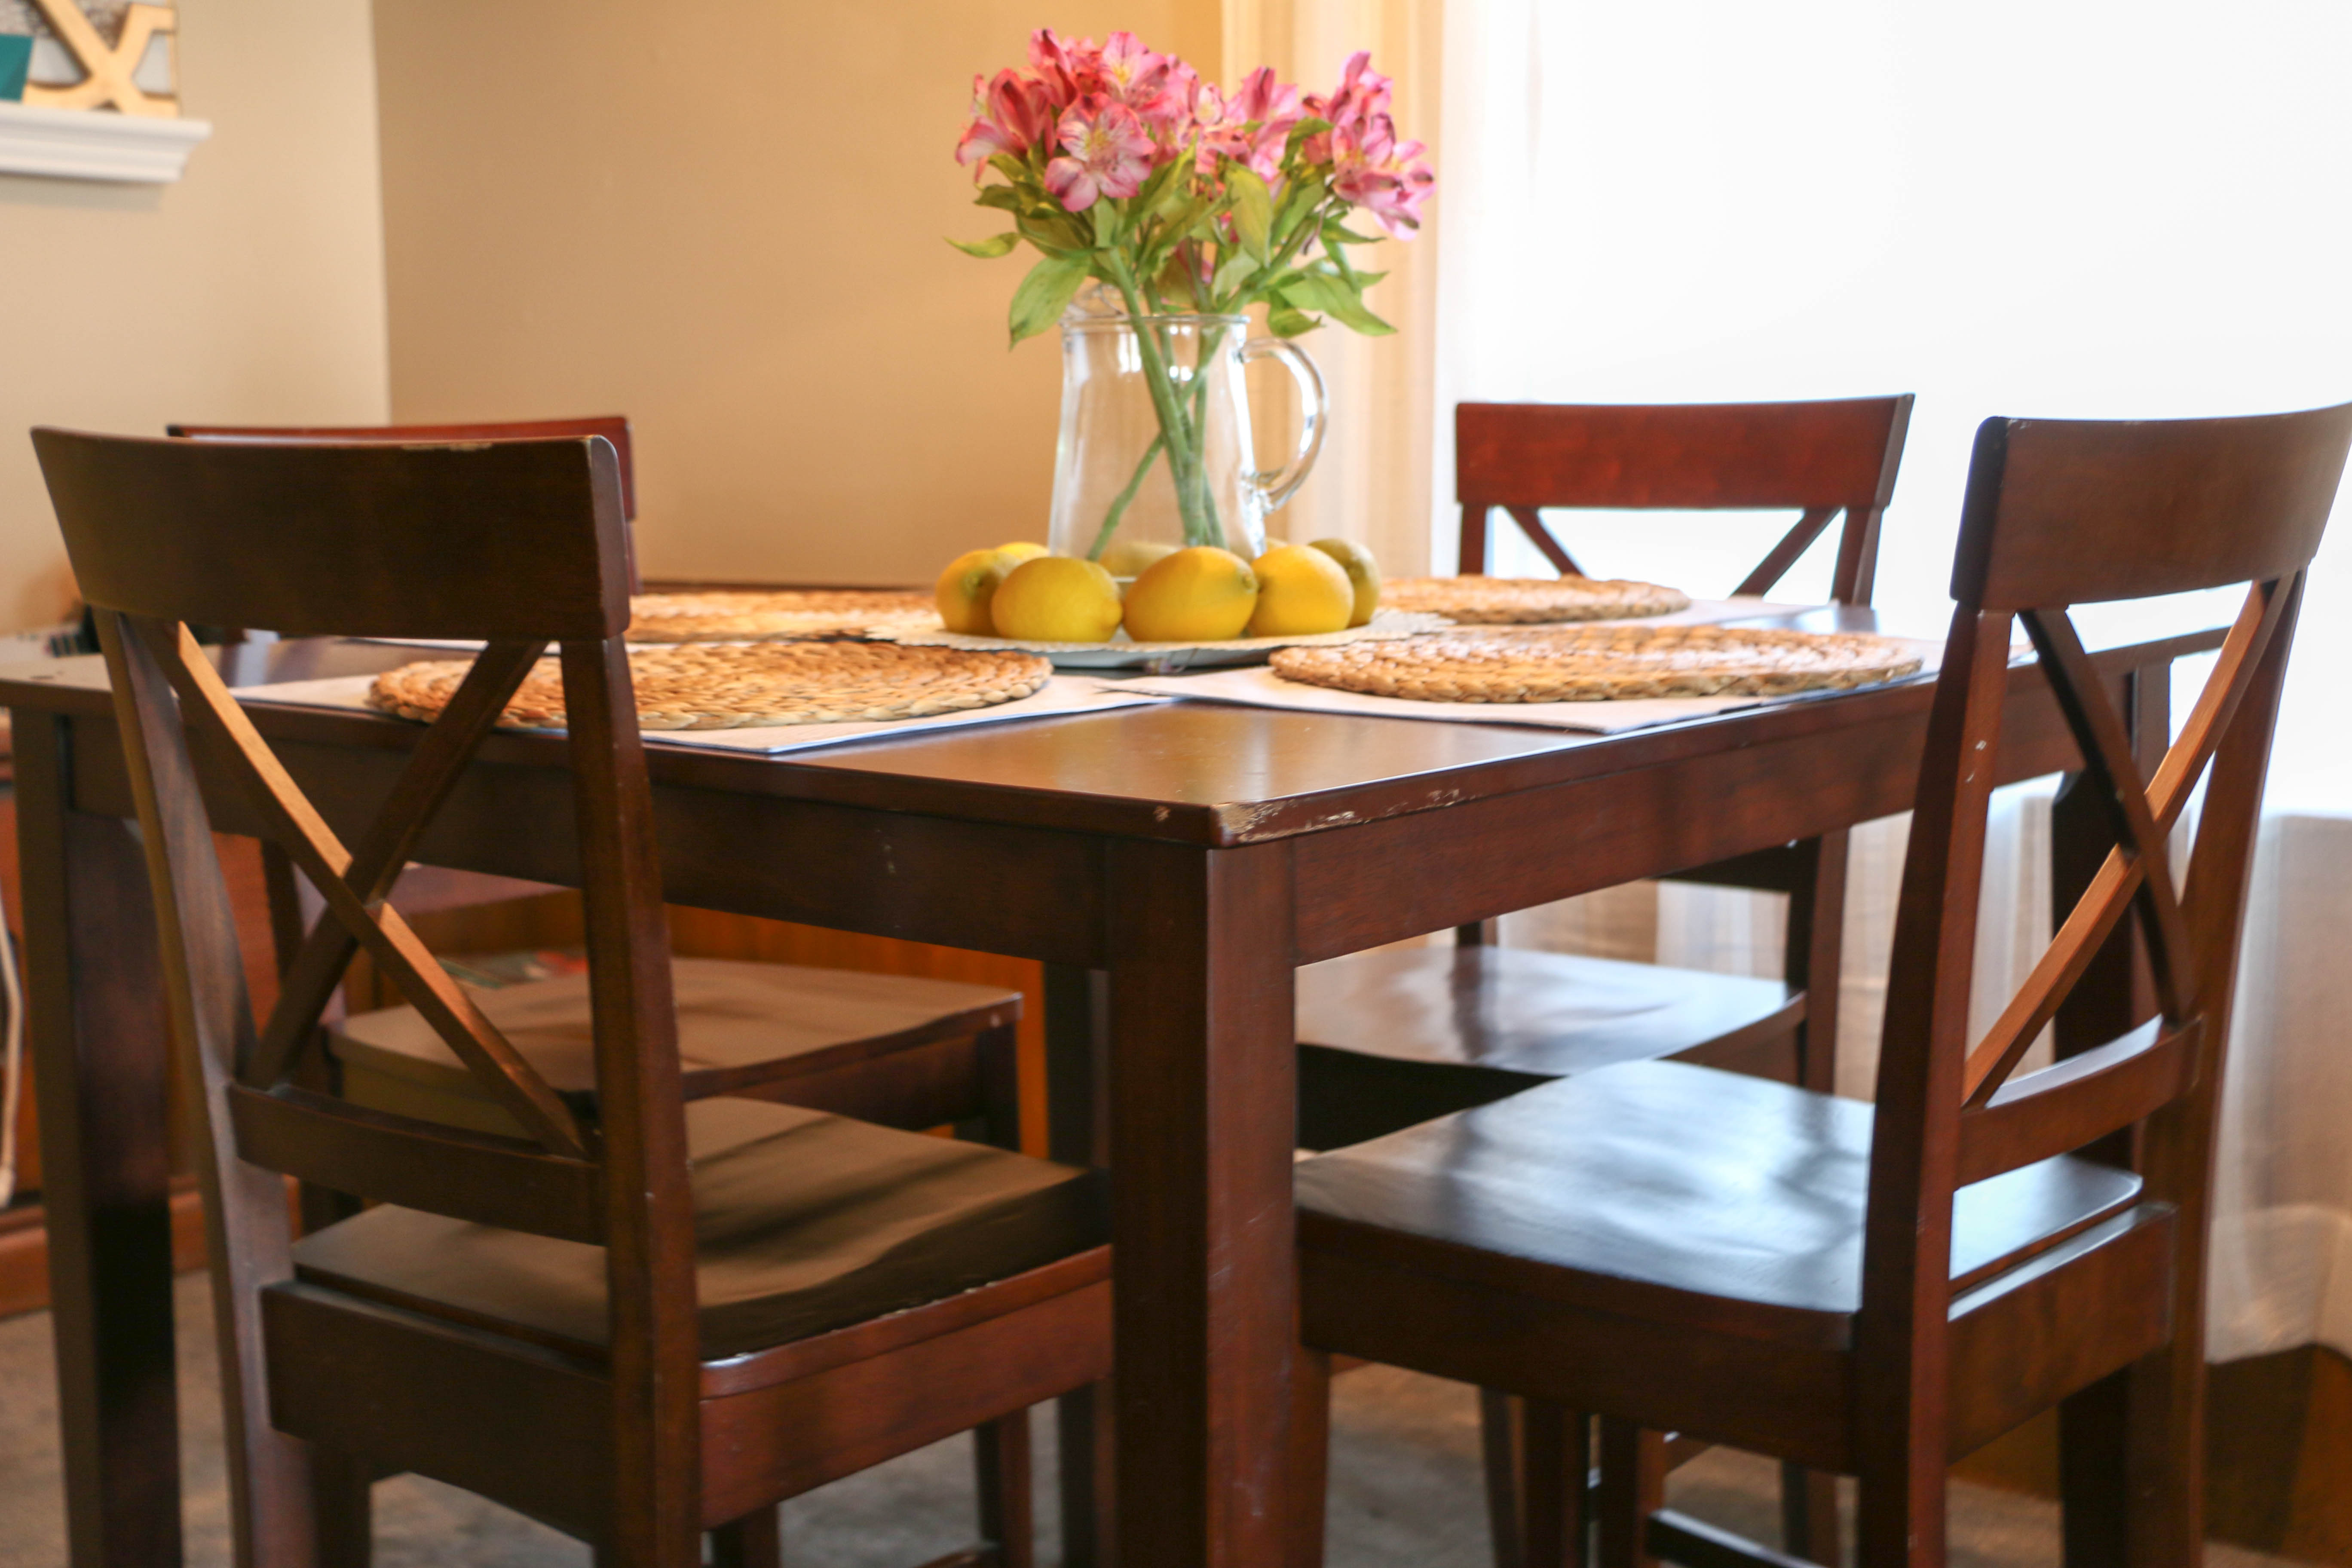
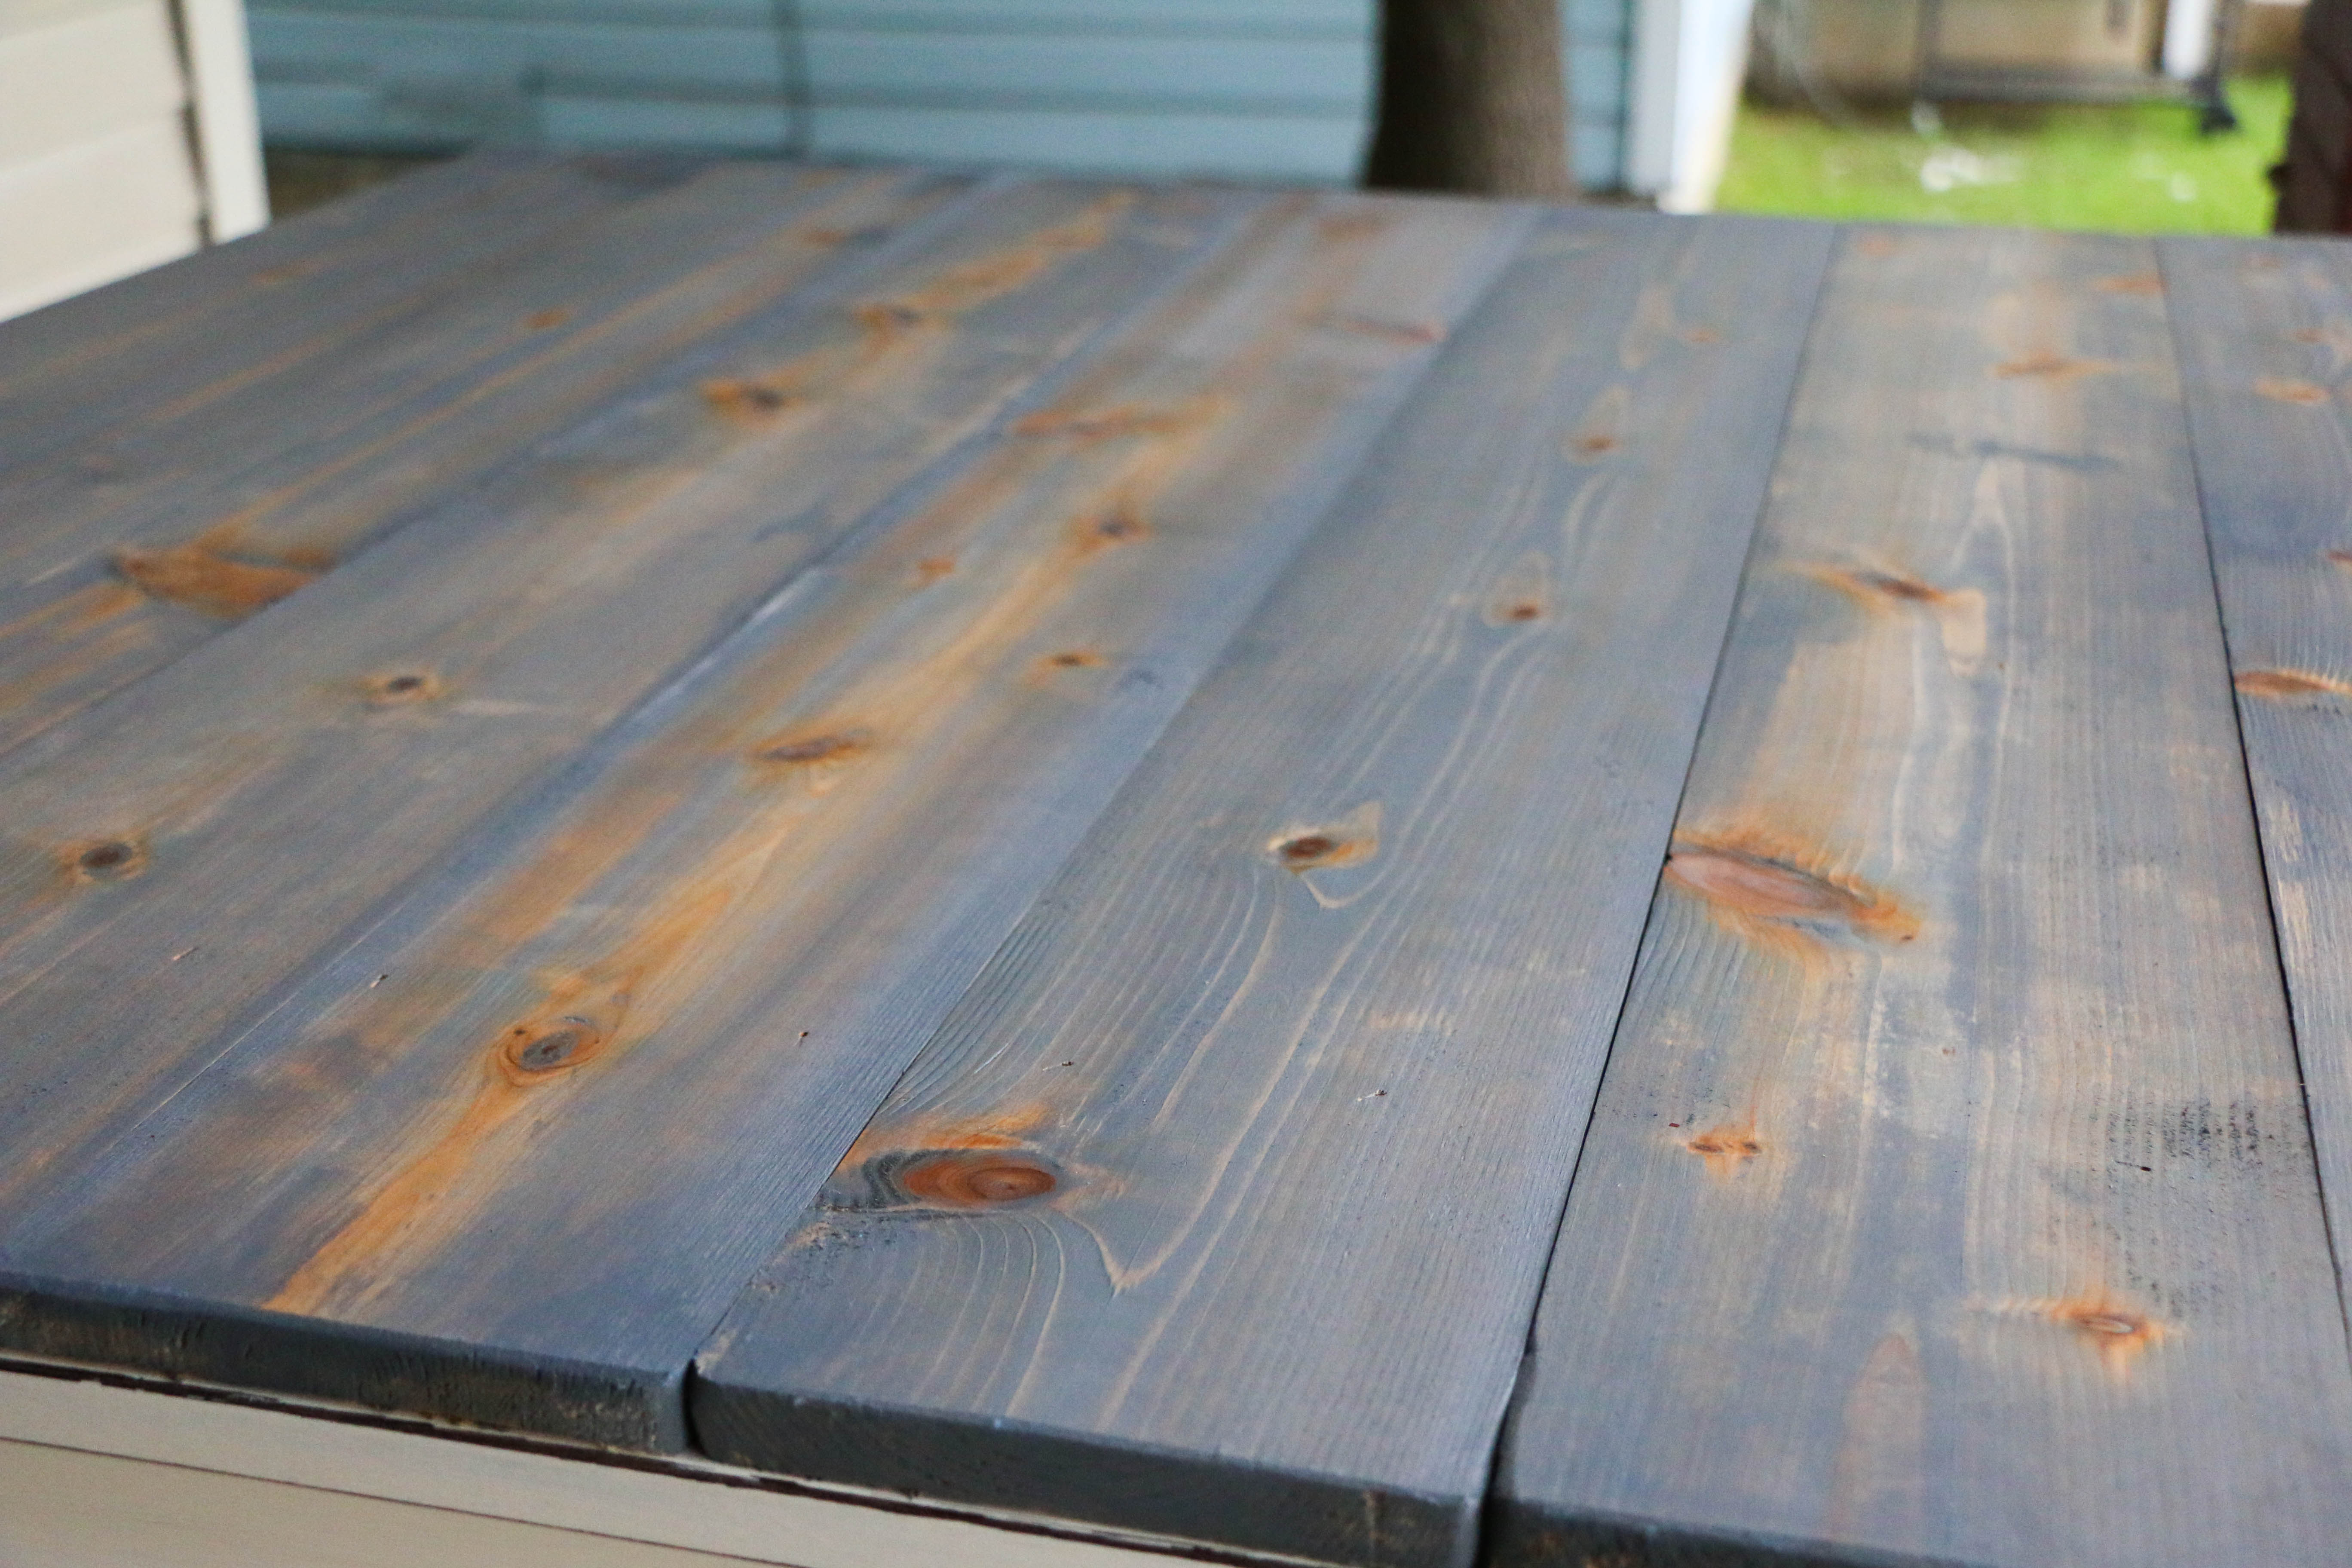
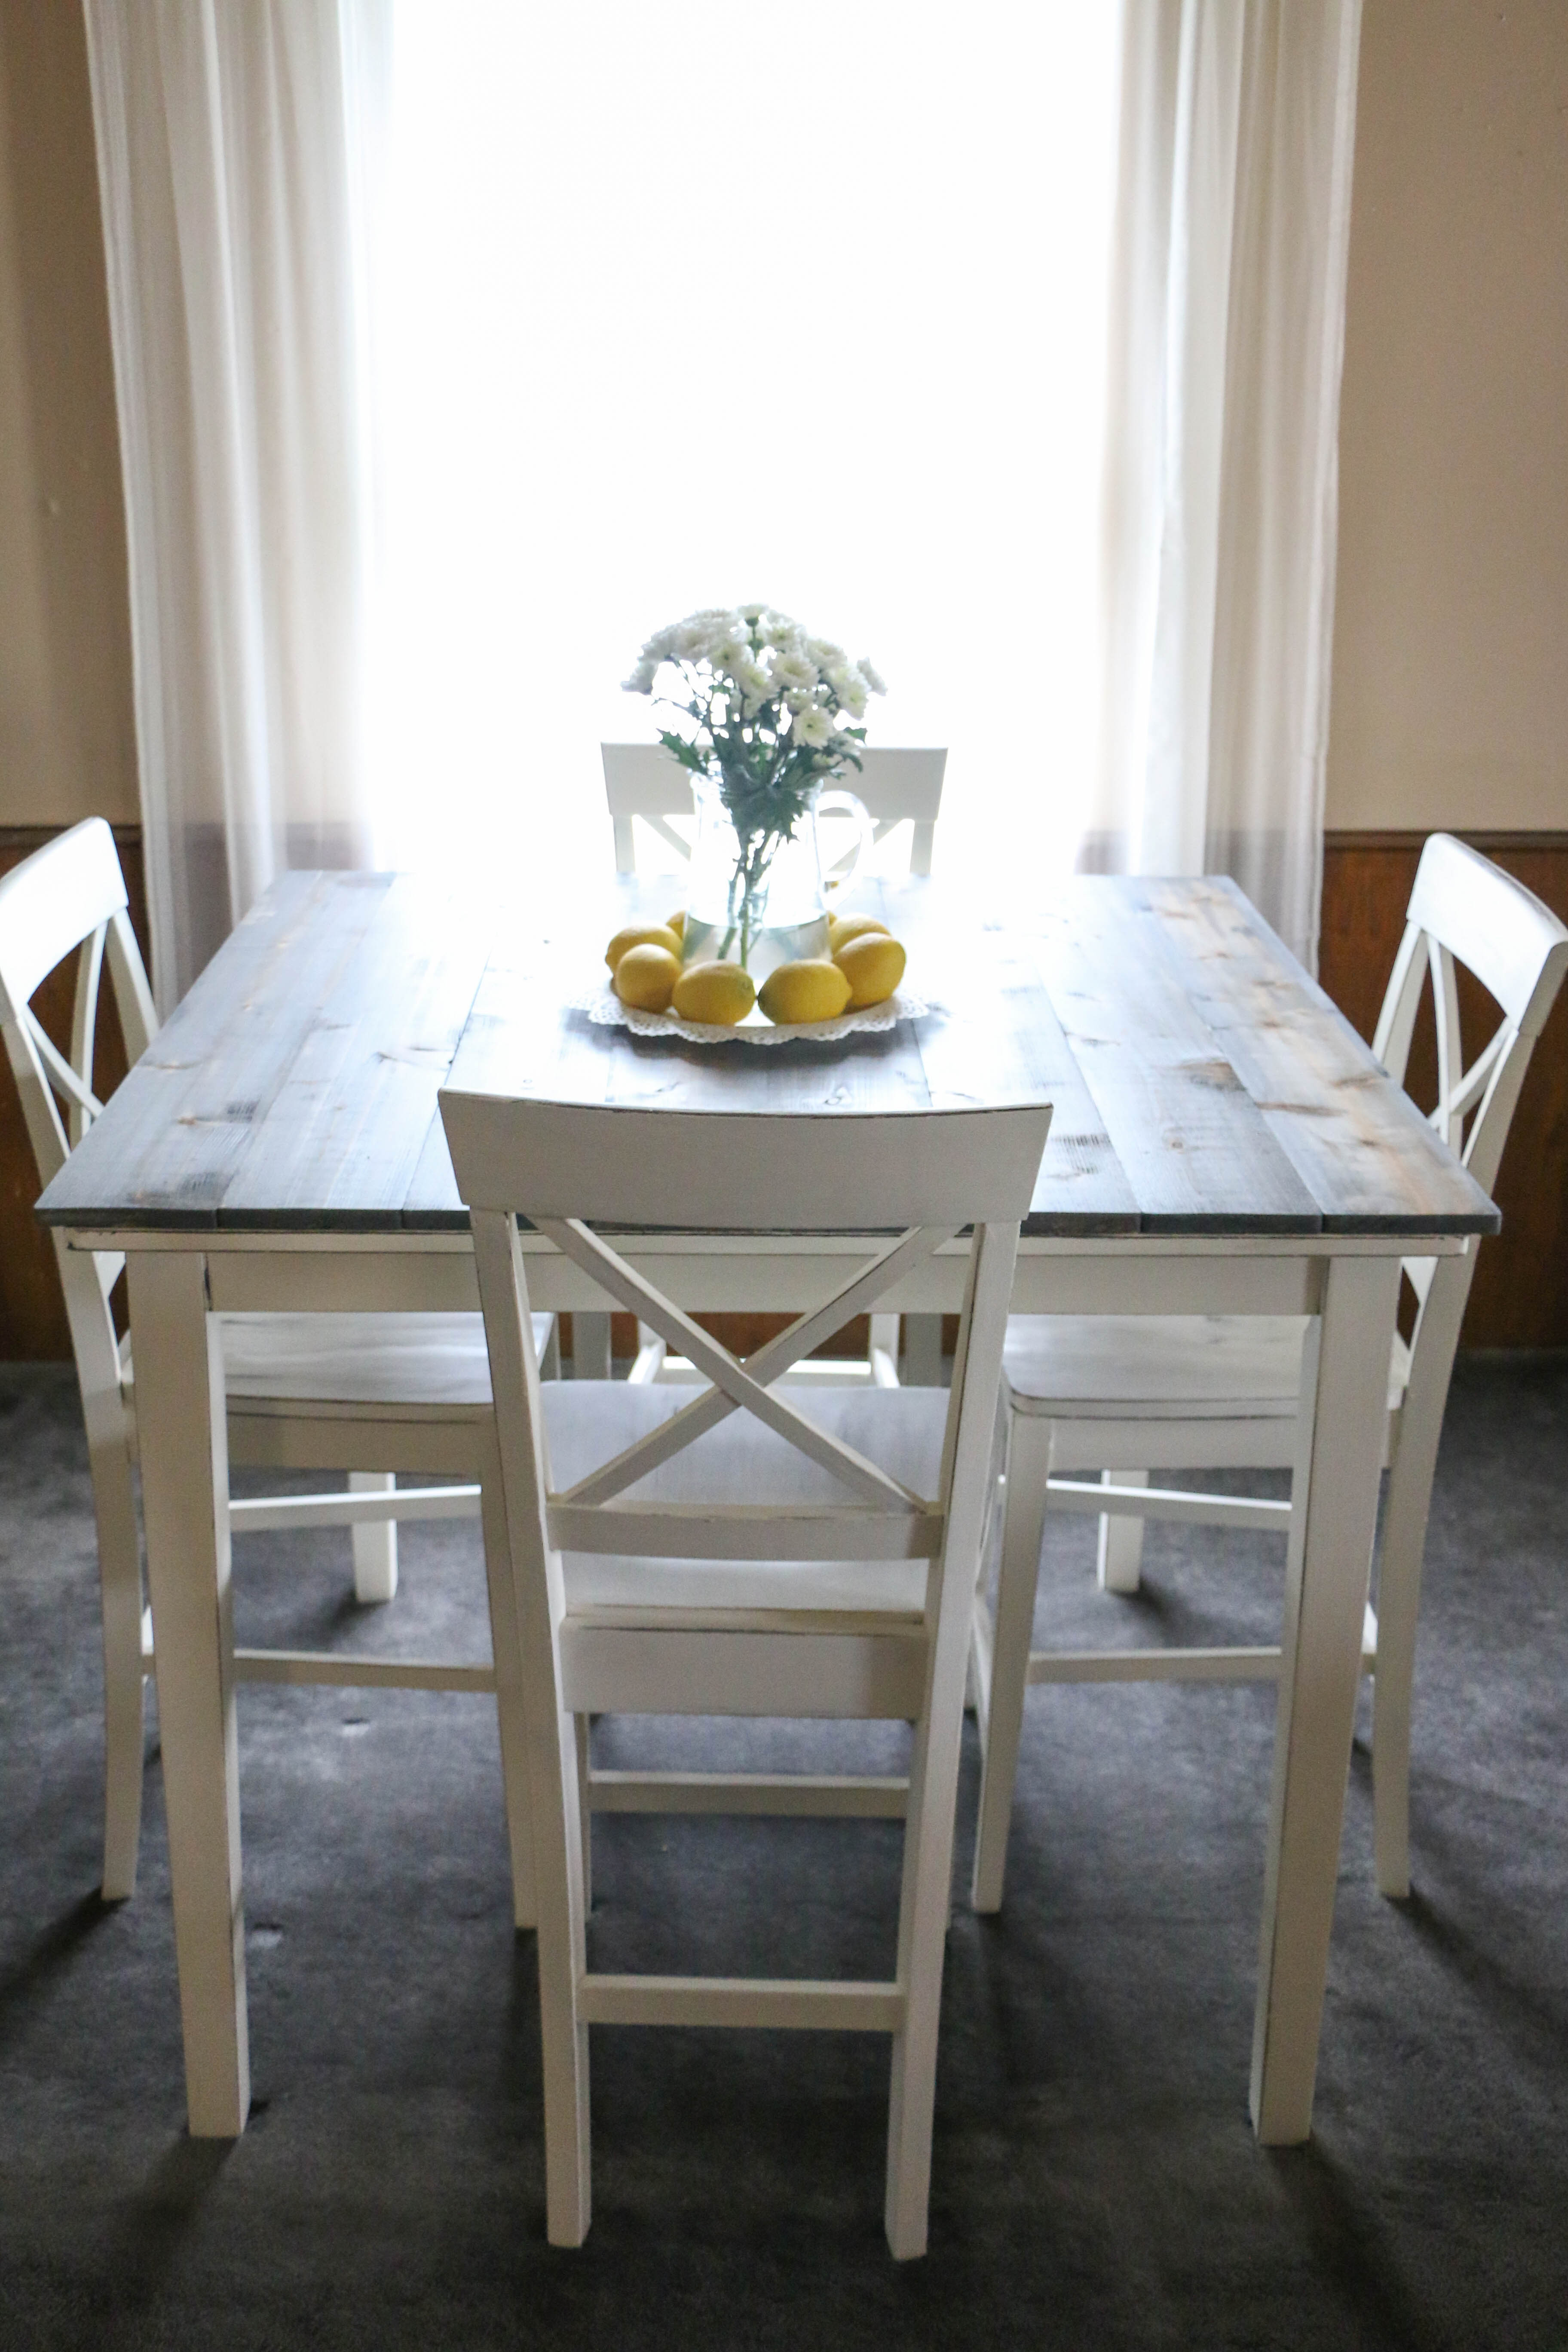
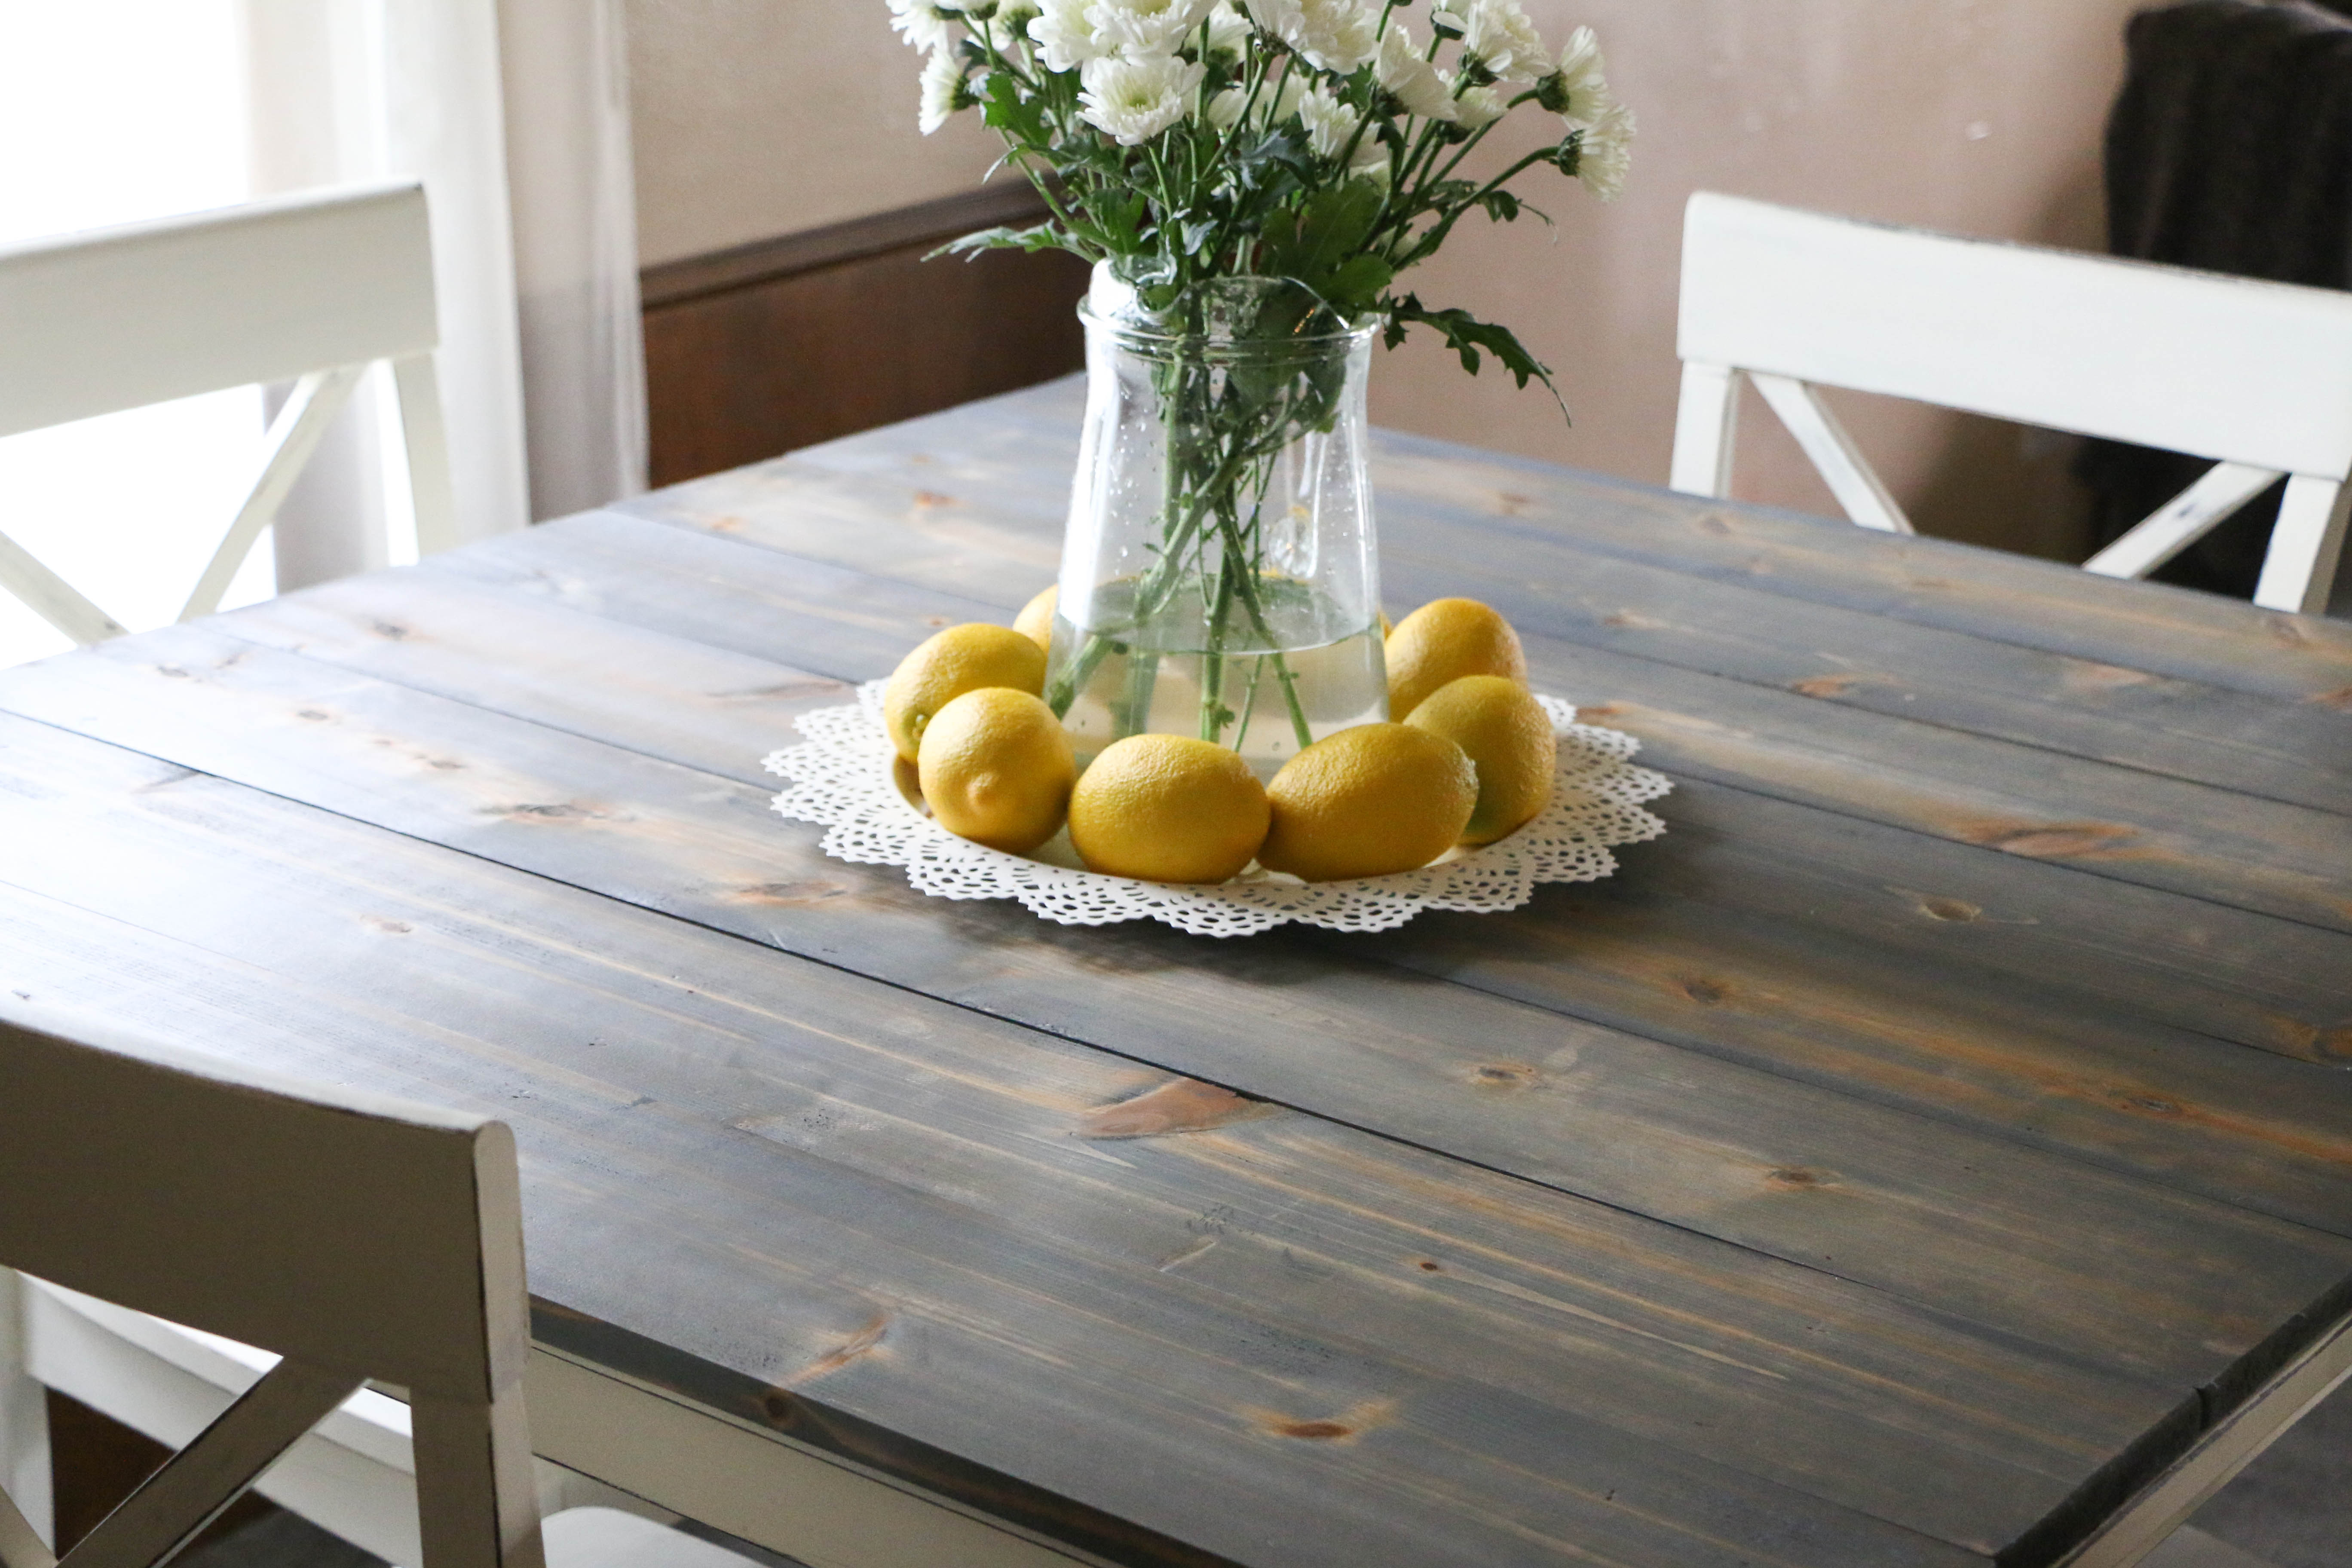
So last week I blogged about my new dining room table. If you haven’t checked that out, go ahead and do so. It’s cool, I’ll wait. I want you to have a frame of reference when reading this post. Okay, you read it? Cool, let’s continue.

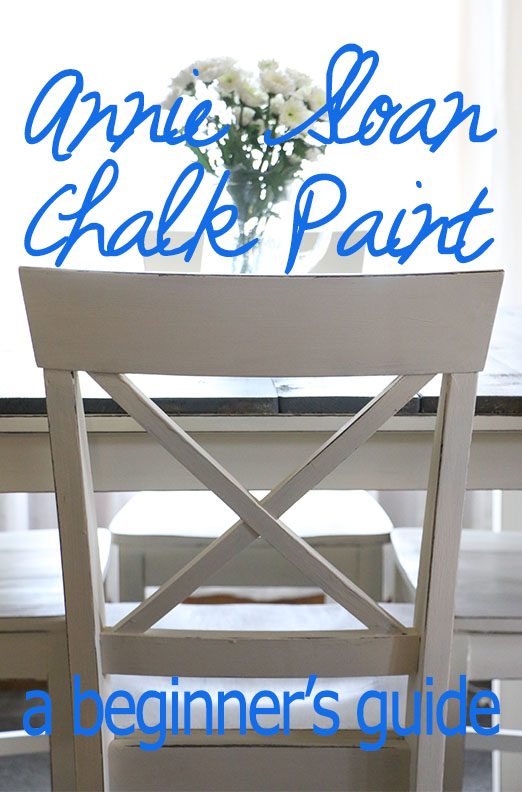
I painted the table and chairs using Annie Sloan Chalk Paint. If you haven’t heard of this paint before, you are really missing out. Seriously, this stuff is awesome! It’s called chalk paint not because it creates a chalkboard finish, but because of its matte look. It has a “chalky” feel to it when the paint dries. There is no sanding or prep work required with this paint (can I get an amen?!), and it will adhere to most any surface. Did I mention it has no VOCs? Pretty cool stuff.

Annie Sloan is a company based in Britain, so while you can order online, there are only limited stockists in the United States. You can click here to find a stockist near you. I got mine from Nest, a cute little store in Mansfield, TX. It is suggested that you take a workshop to learn about the paint before tackling any big projects, but being the rebel that I am (mostly I’m just cheap), I opted to just try it for myself. I did do some internet research, and Lauren over at The Thinking Closet has a great tutorial on this topic as well. I referenced her post several times during my project.

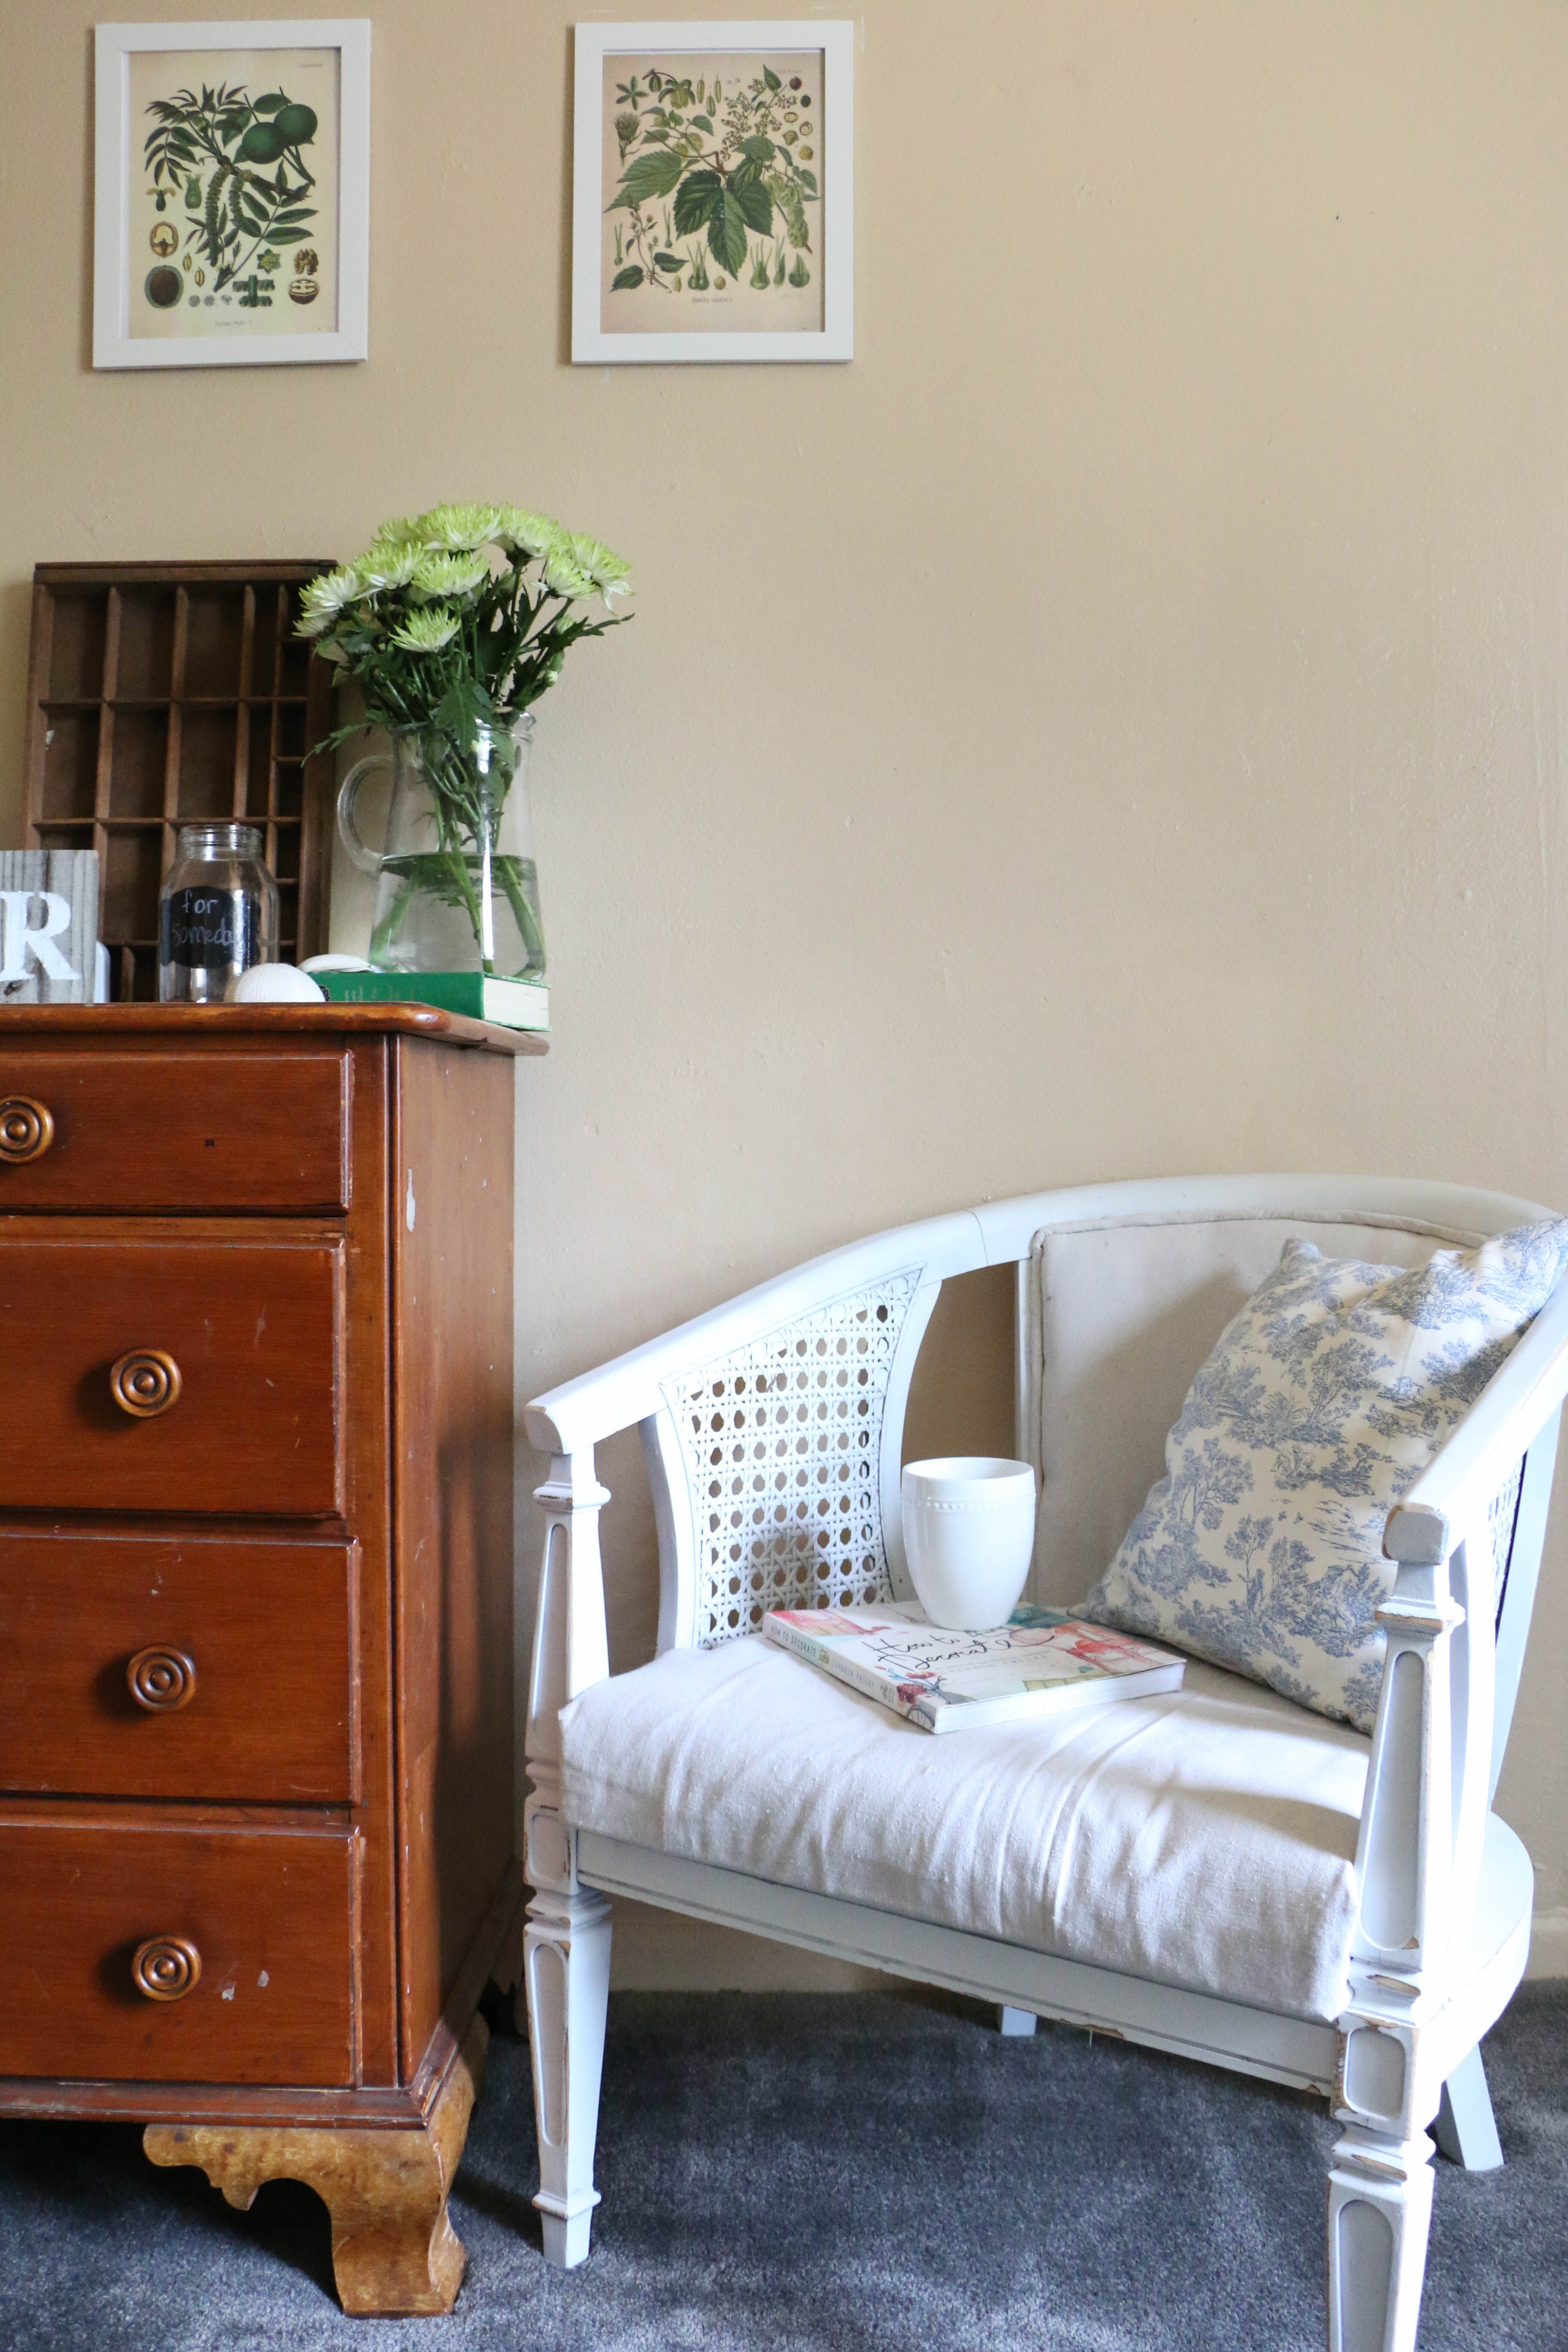
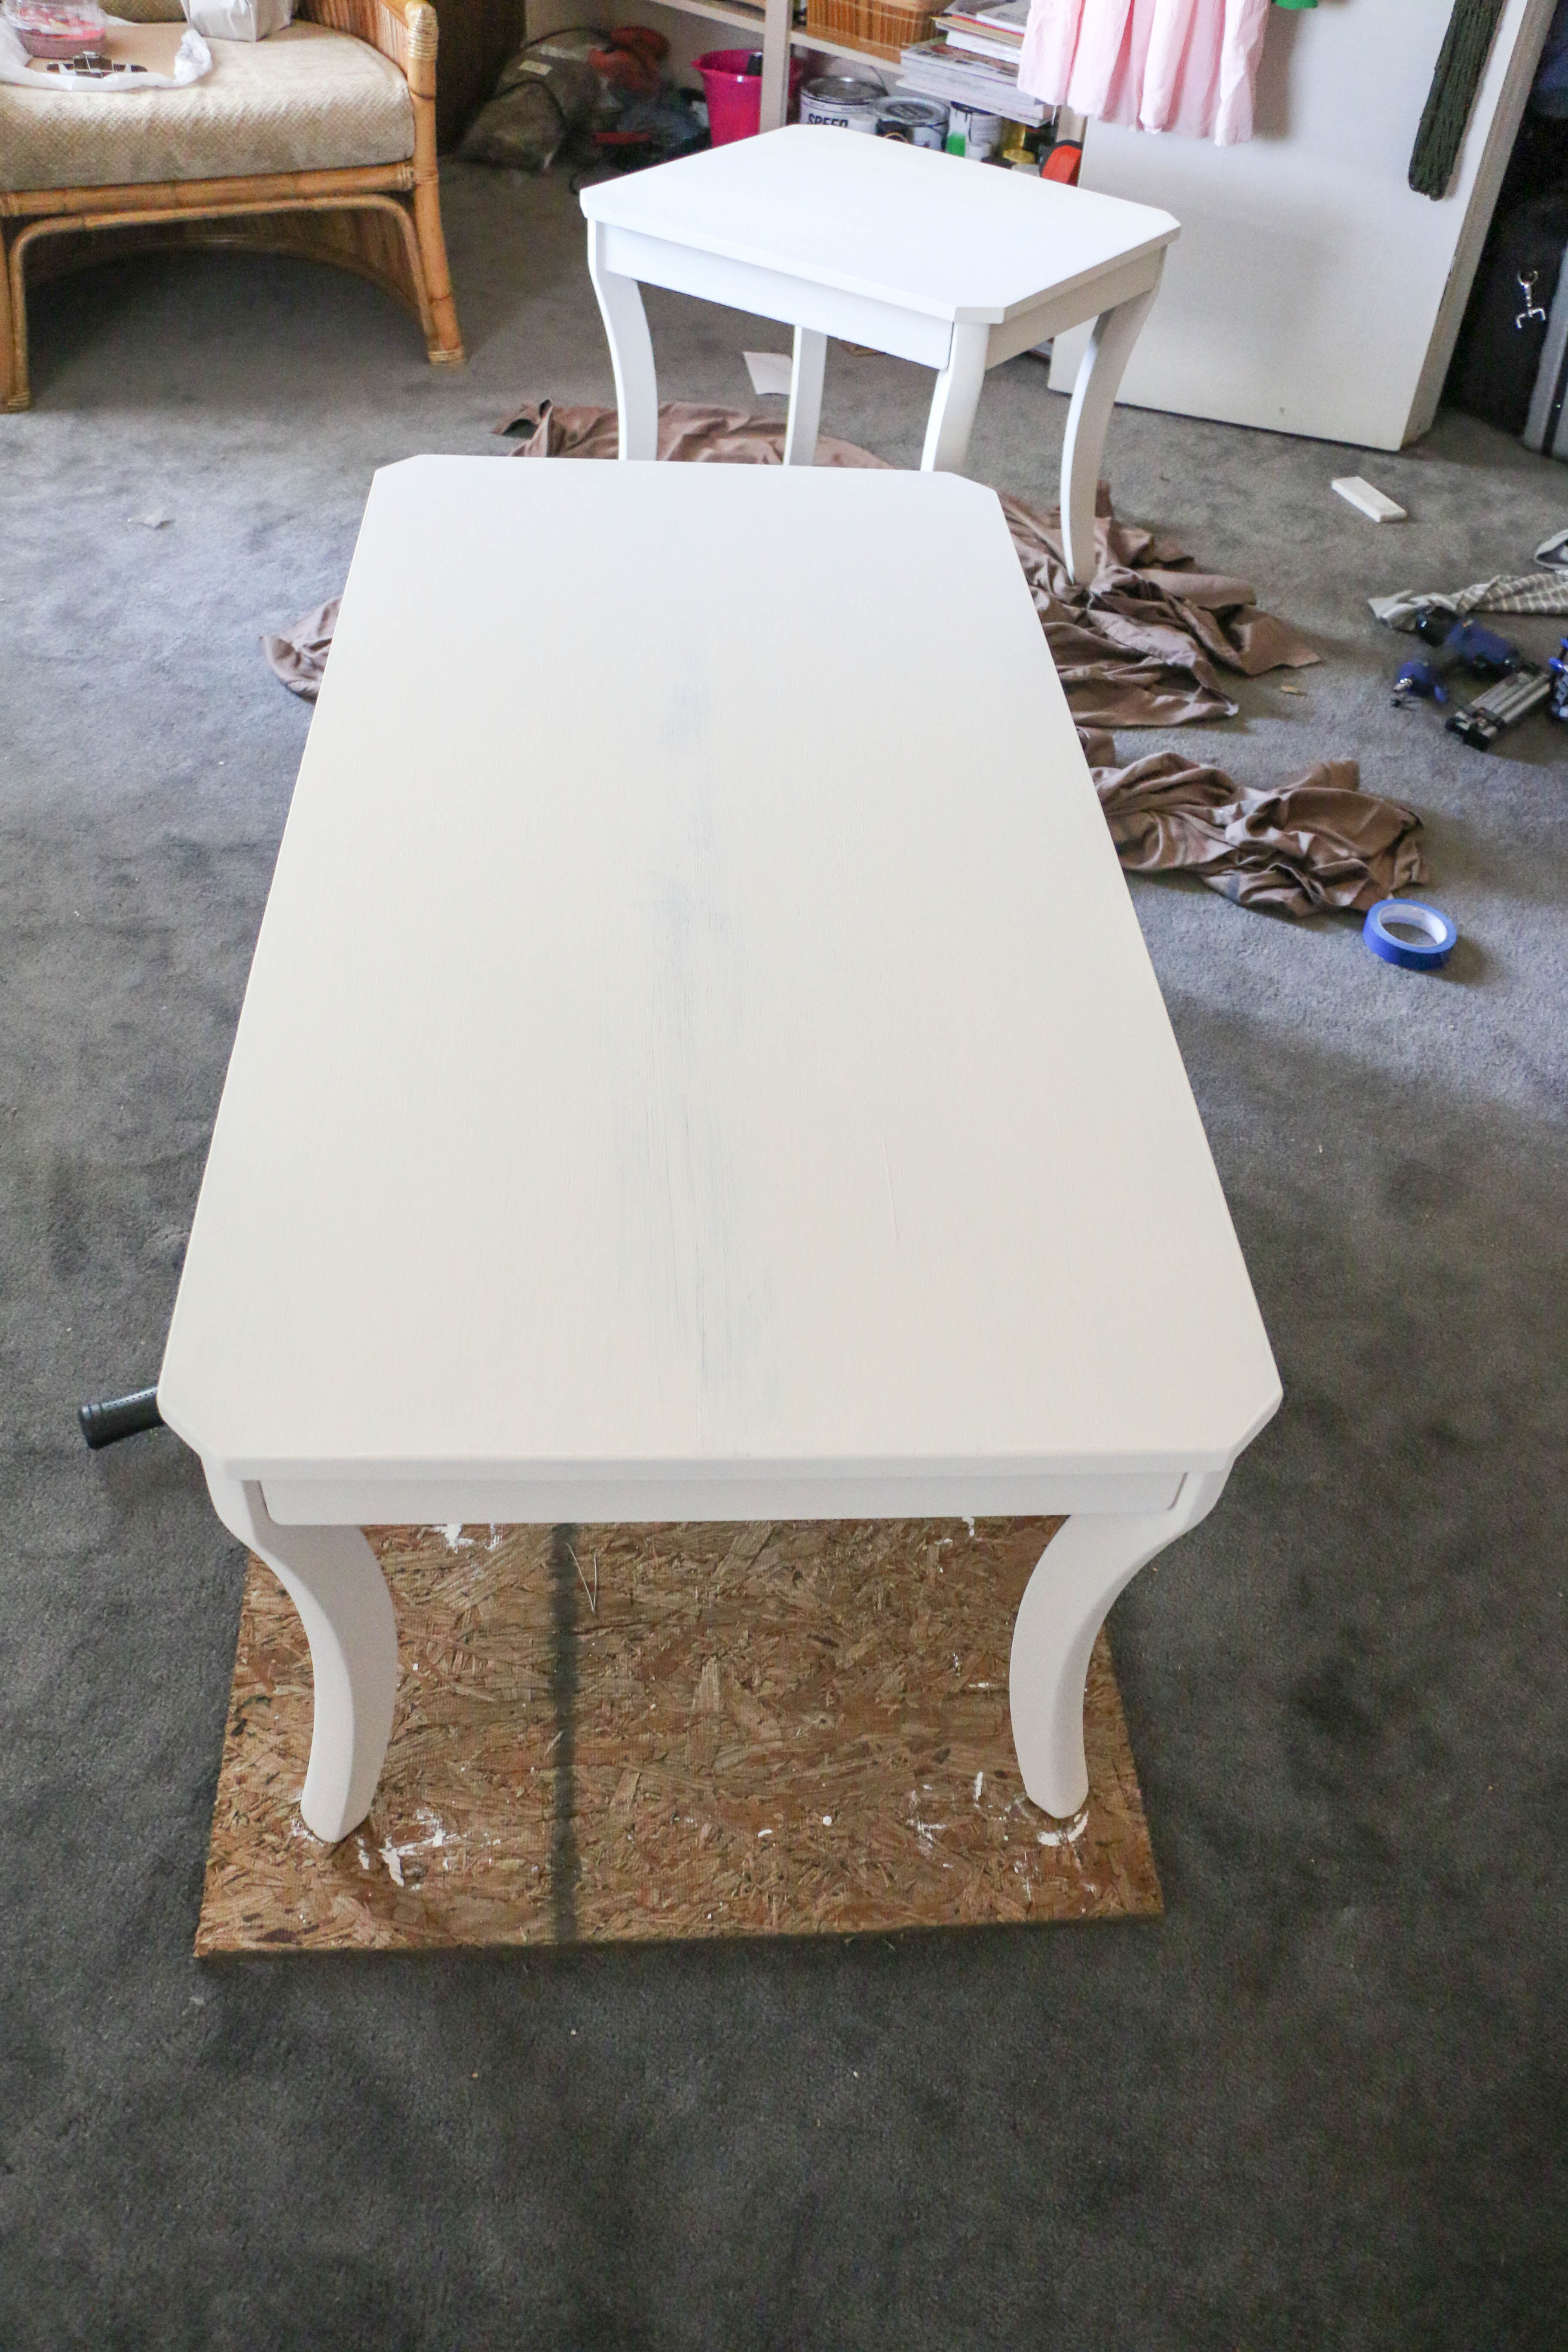
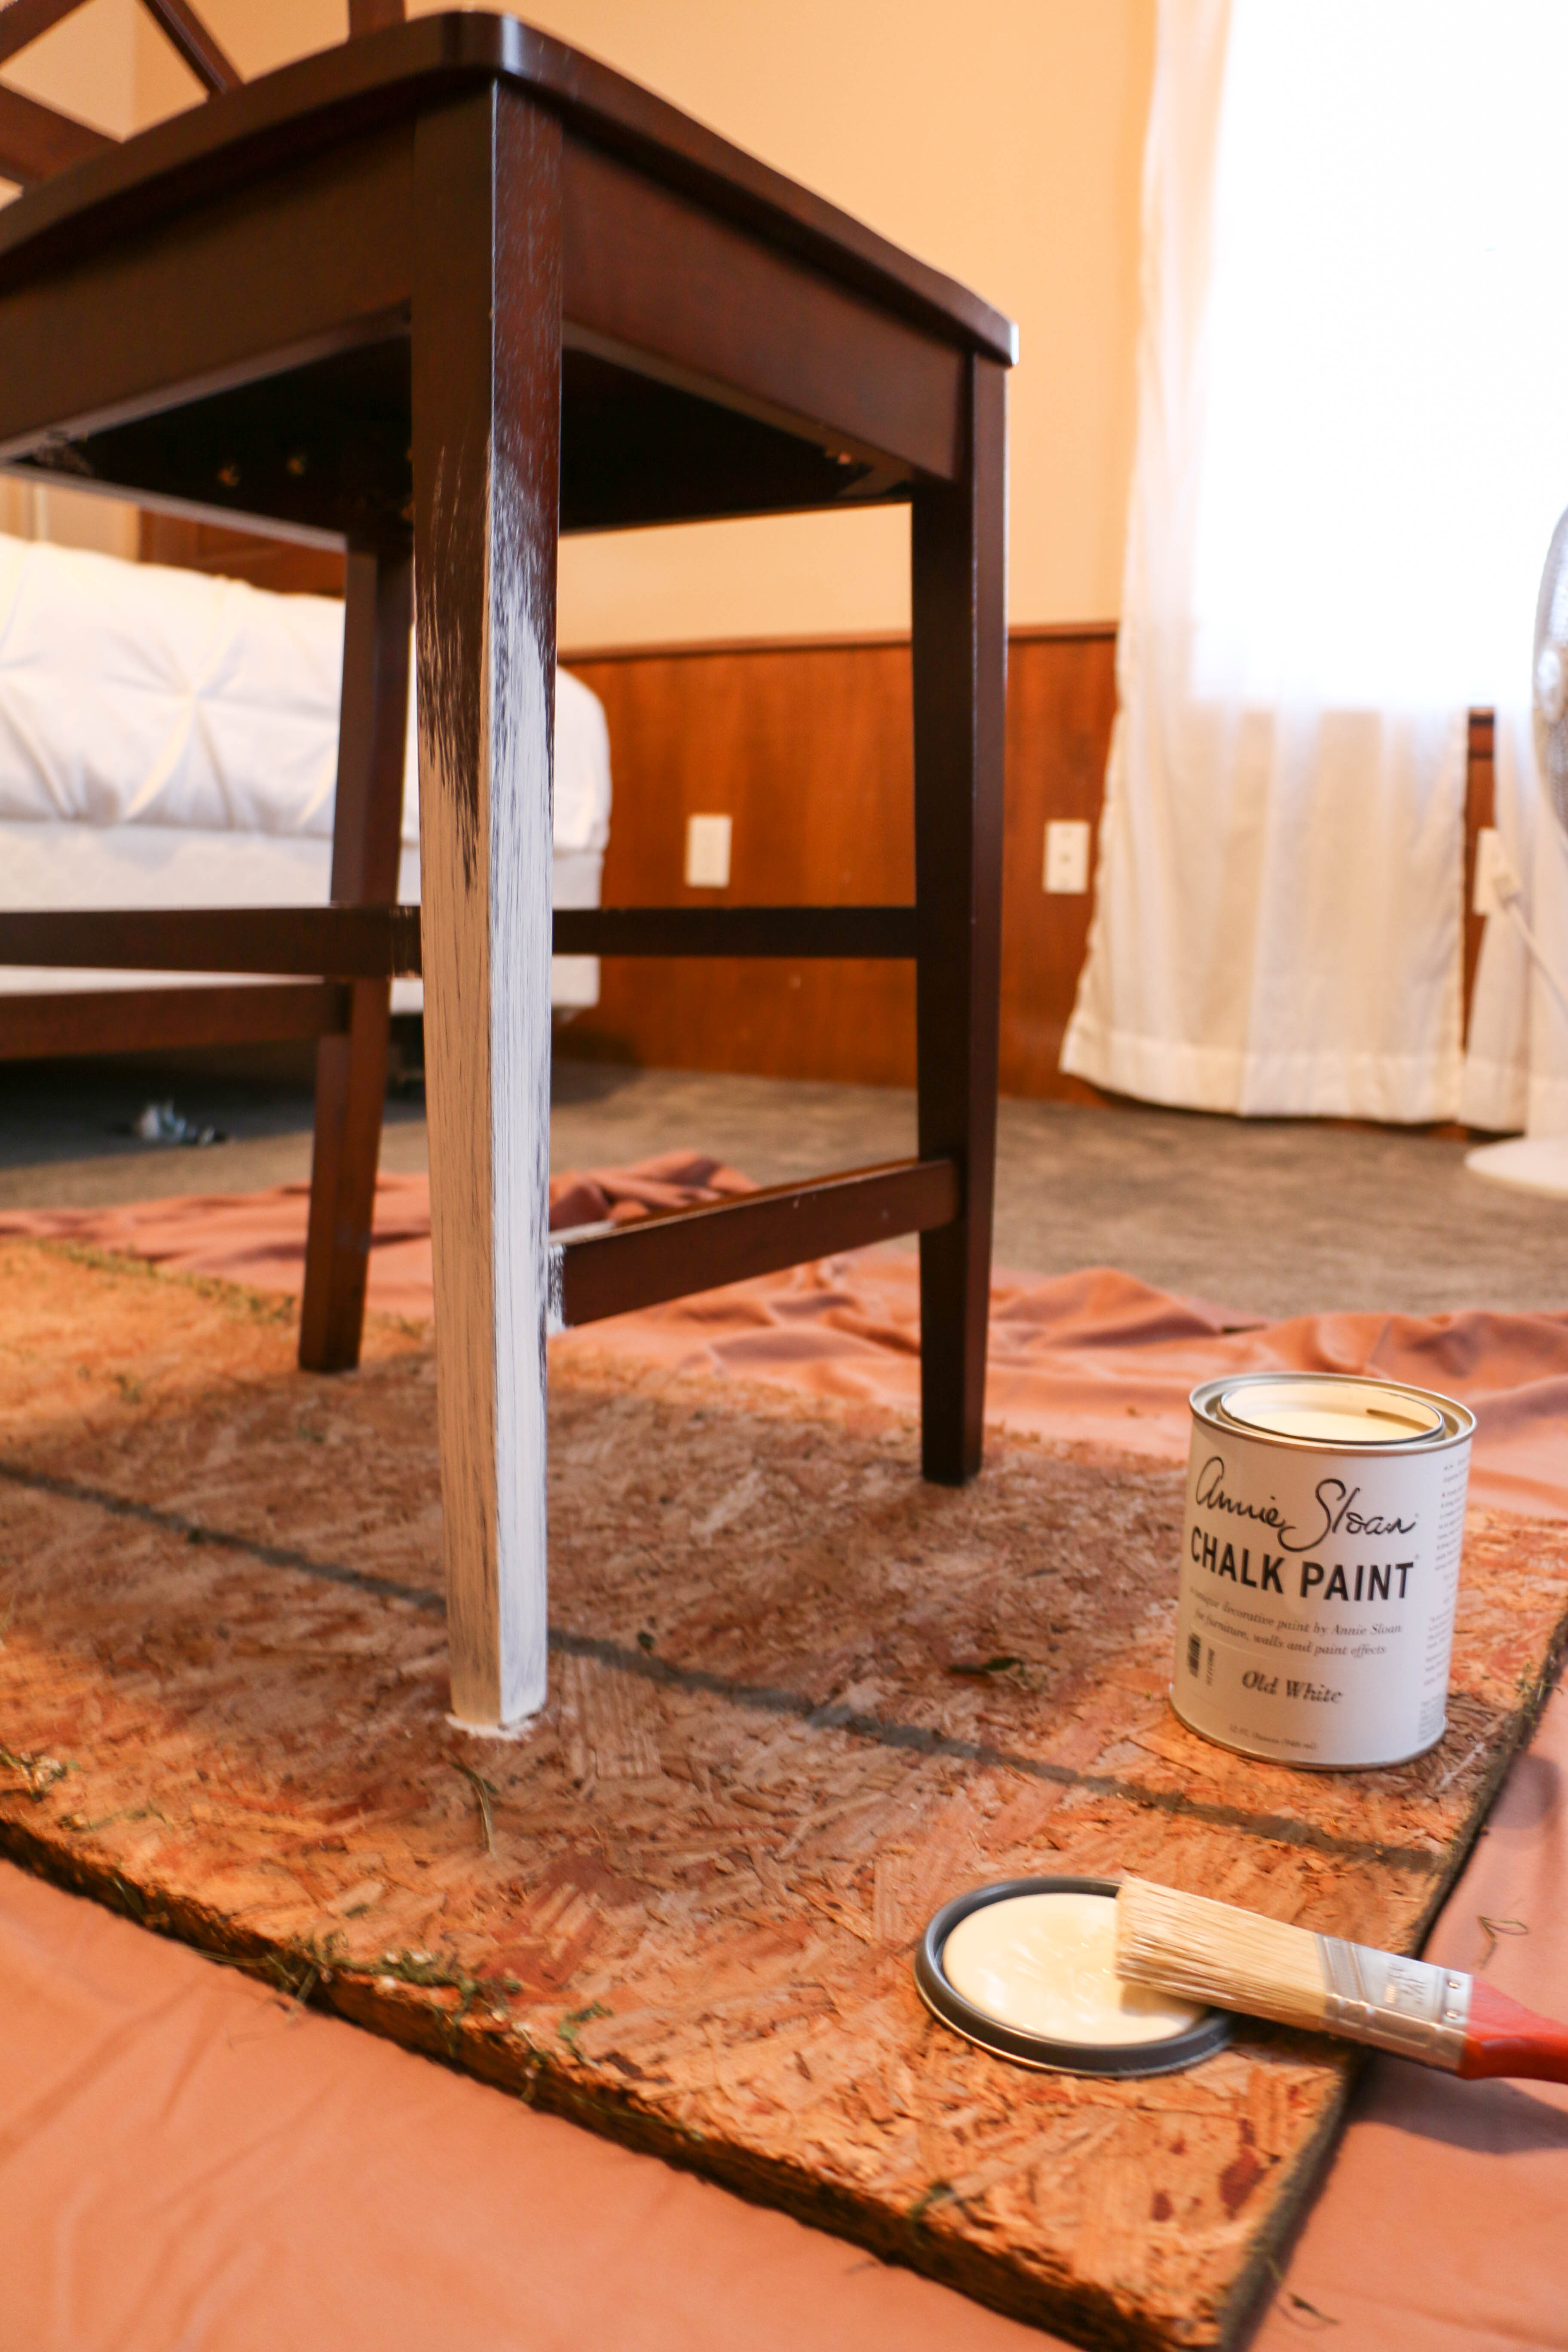
So let’s get down to it, shall we? First off, I chose my color, Old White.

IMG_1426

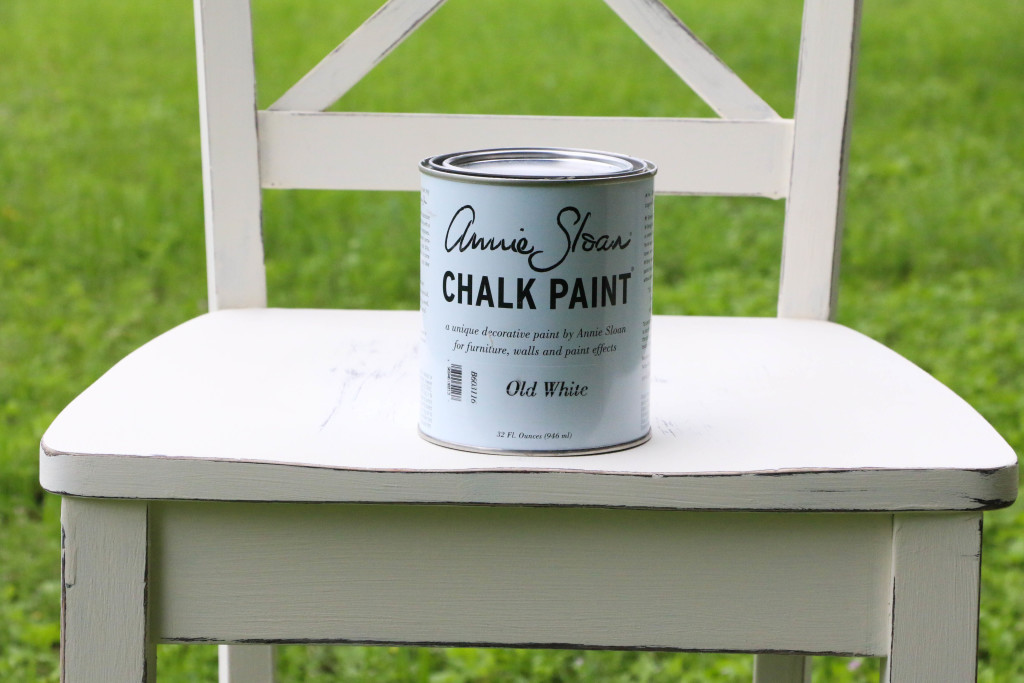
This color is a not-quite-cream-not-quite-pure-white color that’s perfect for my space, so I went with it. The actual application of the paint is easy-peasy. I’m assuming you know how to dip a paintbrush in a can and slap it on something. I won’t insult your intelligence.

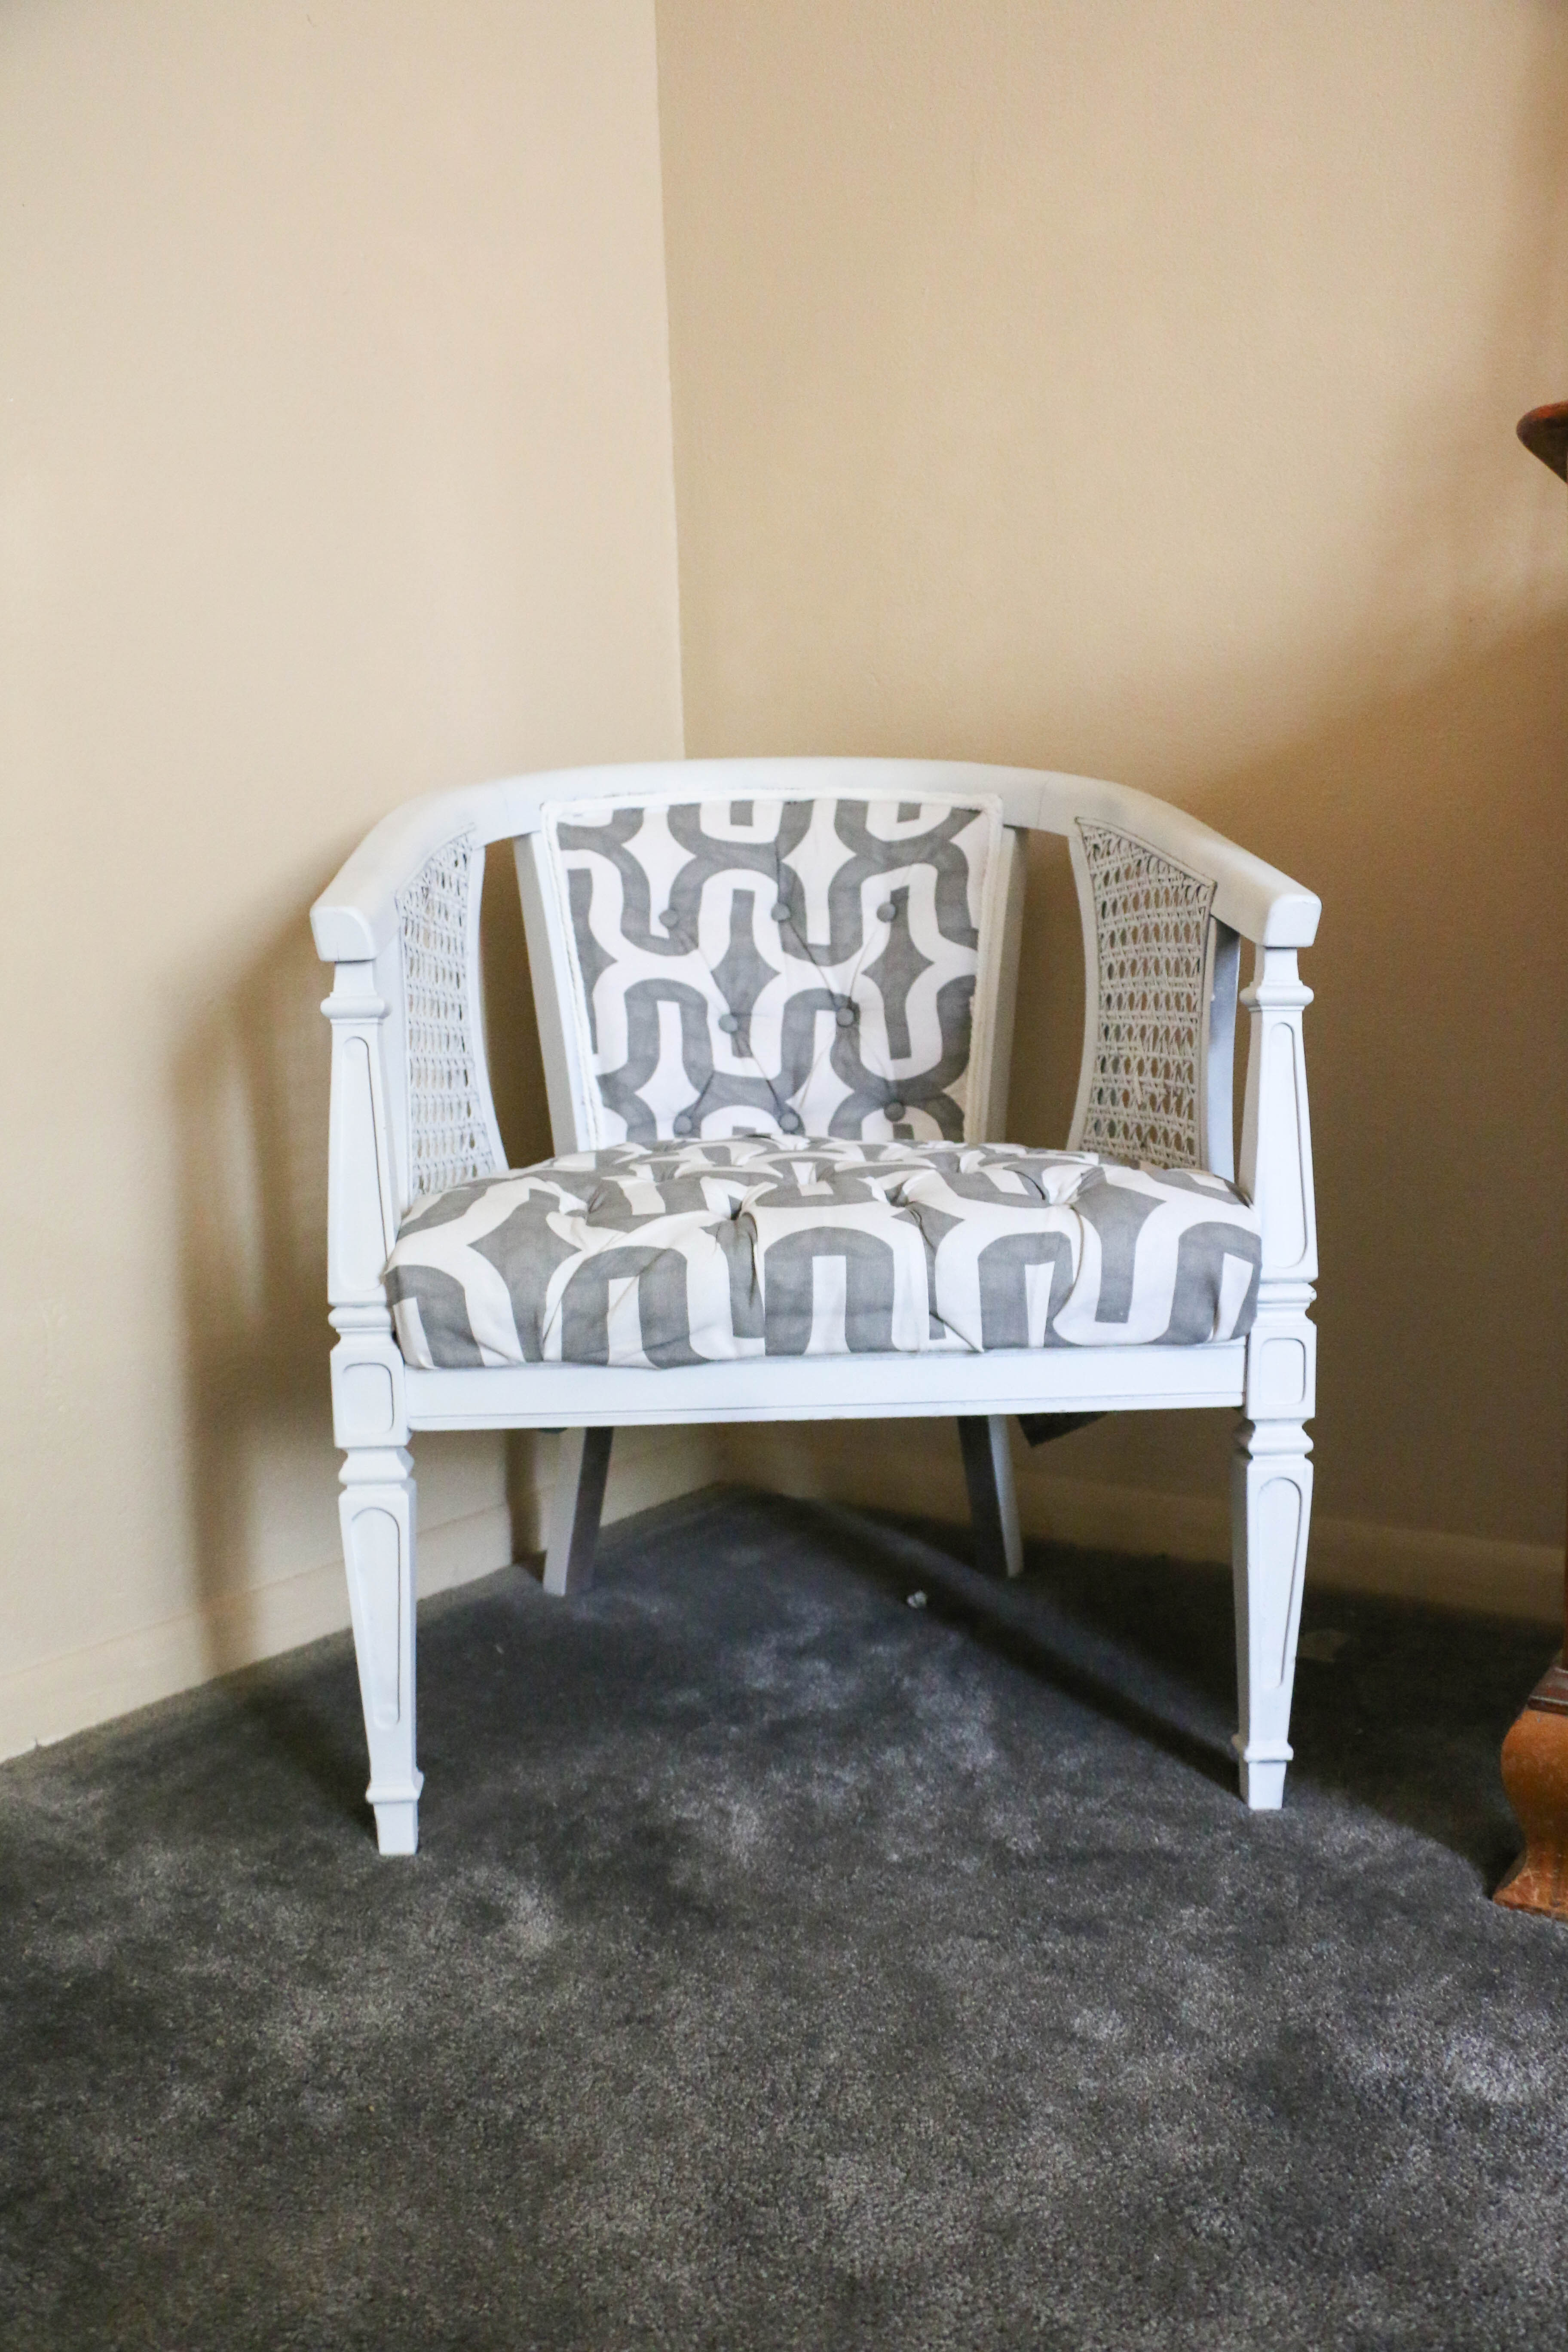
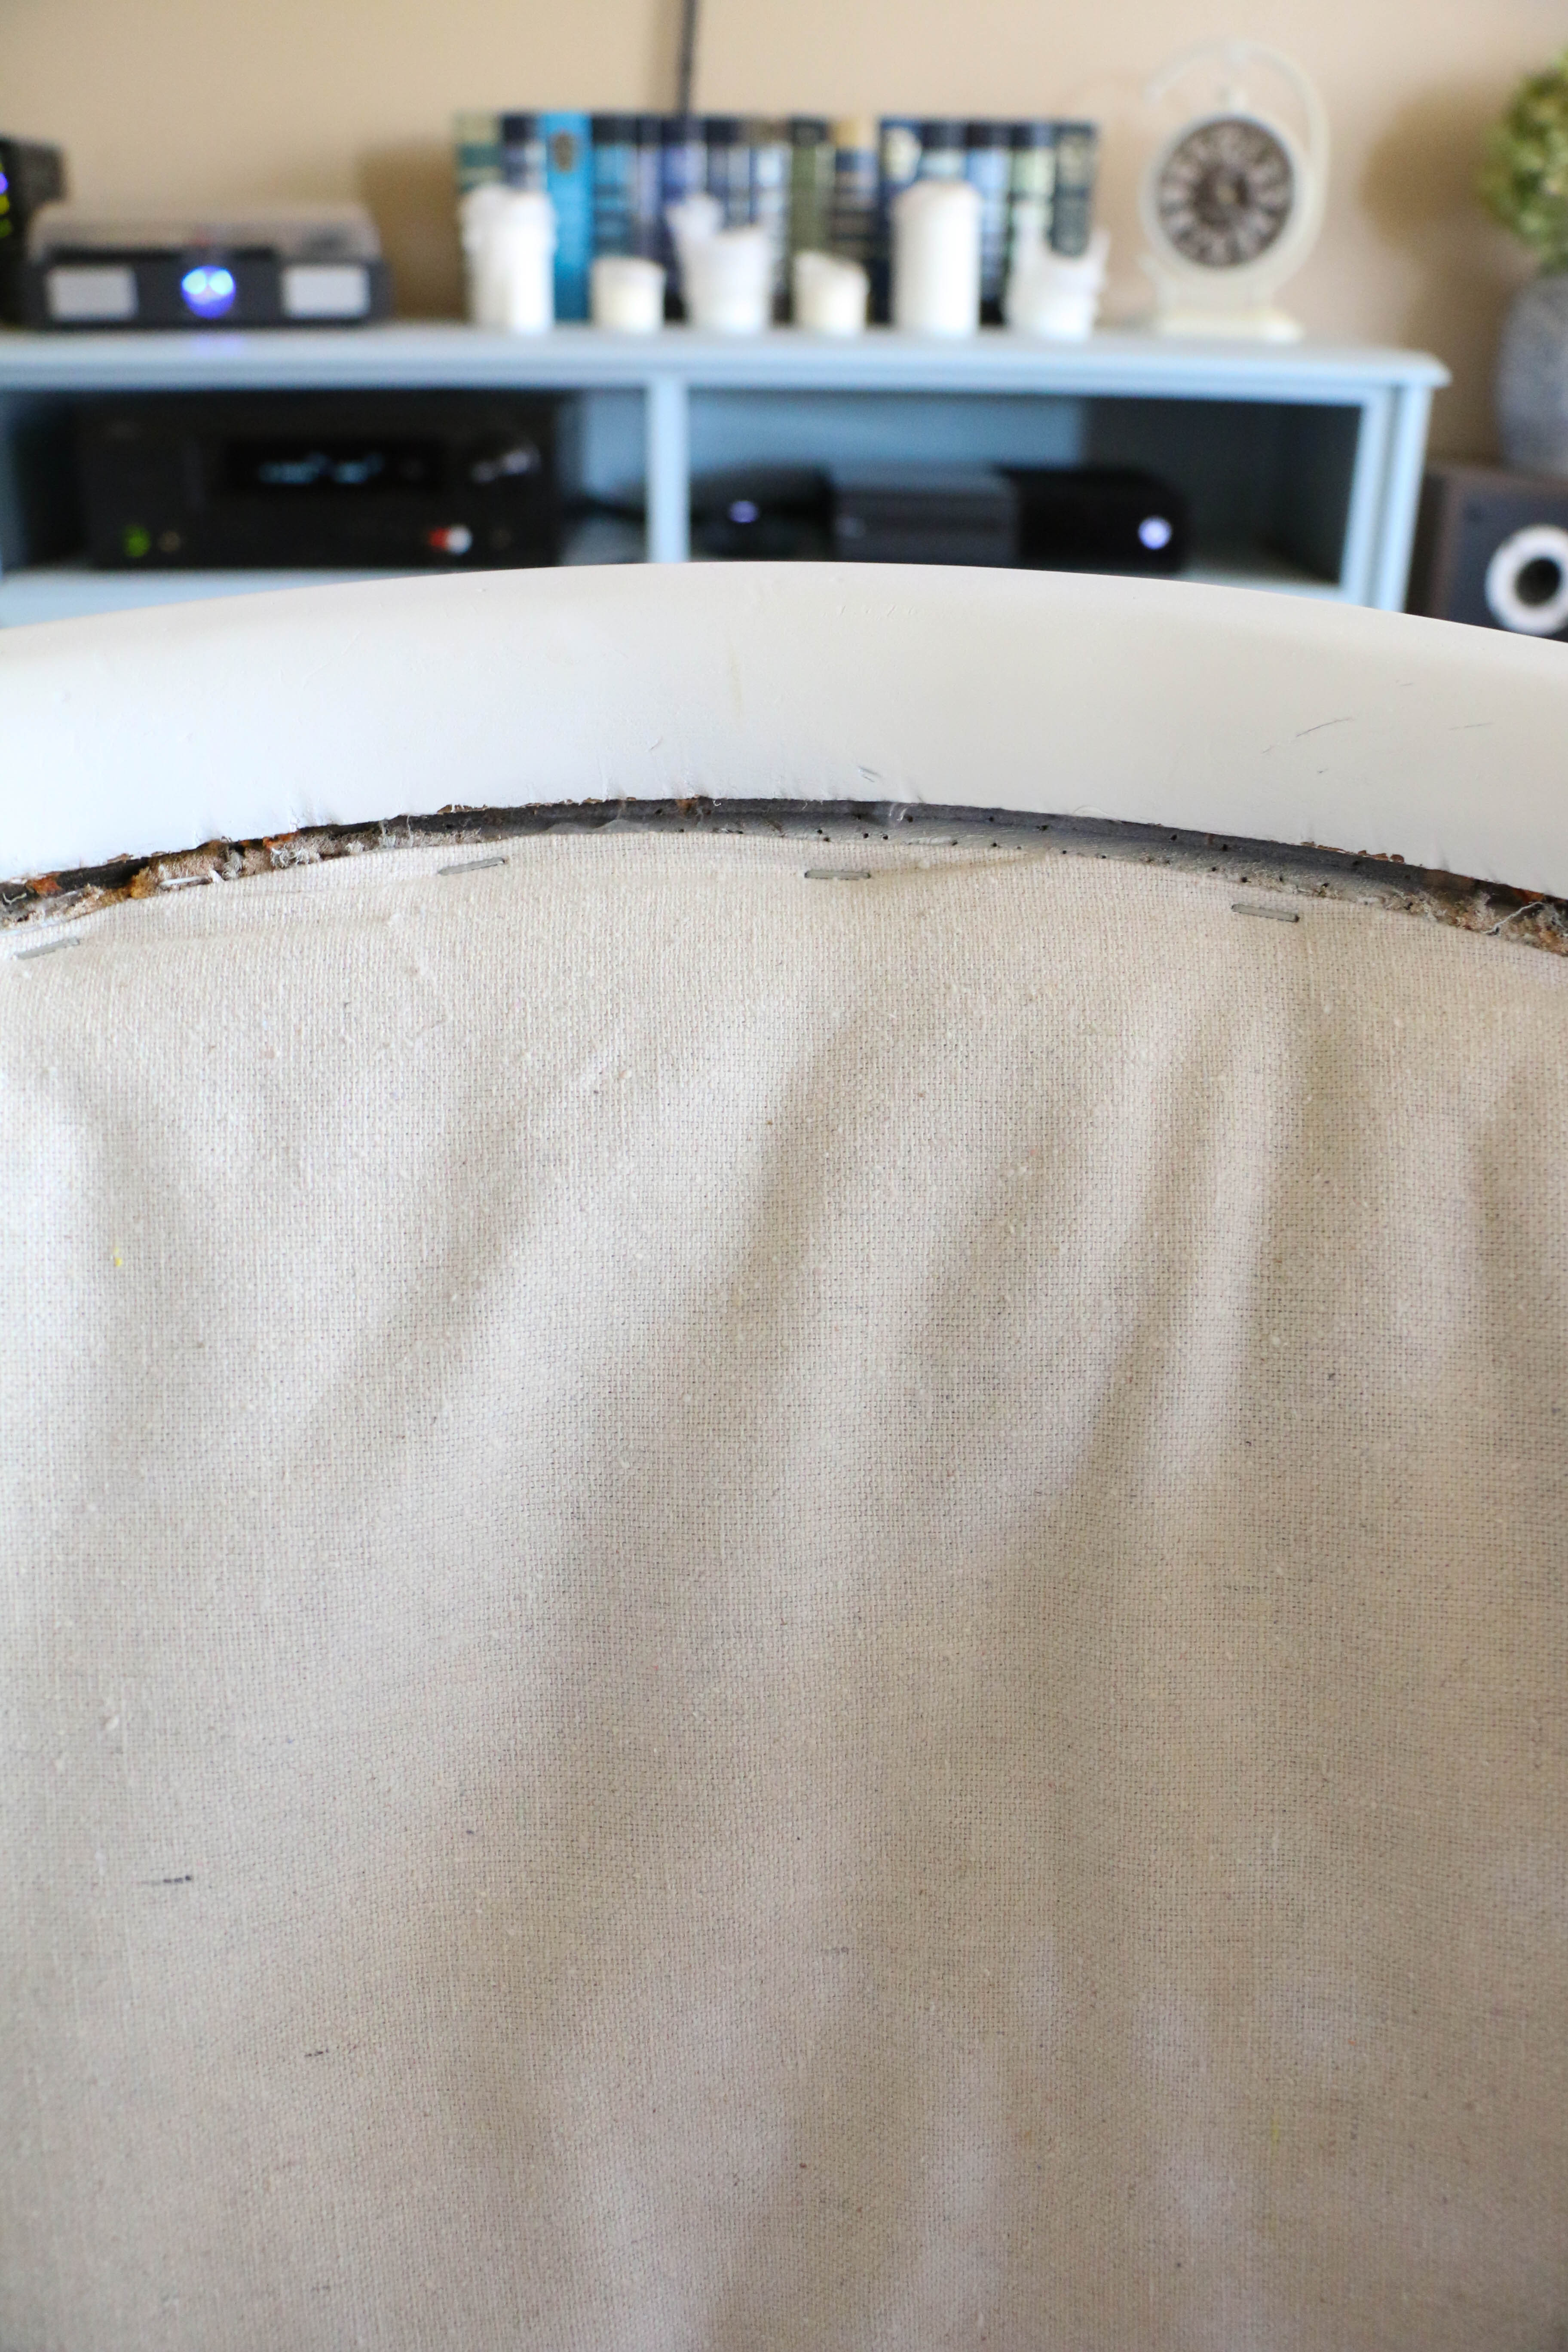
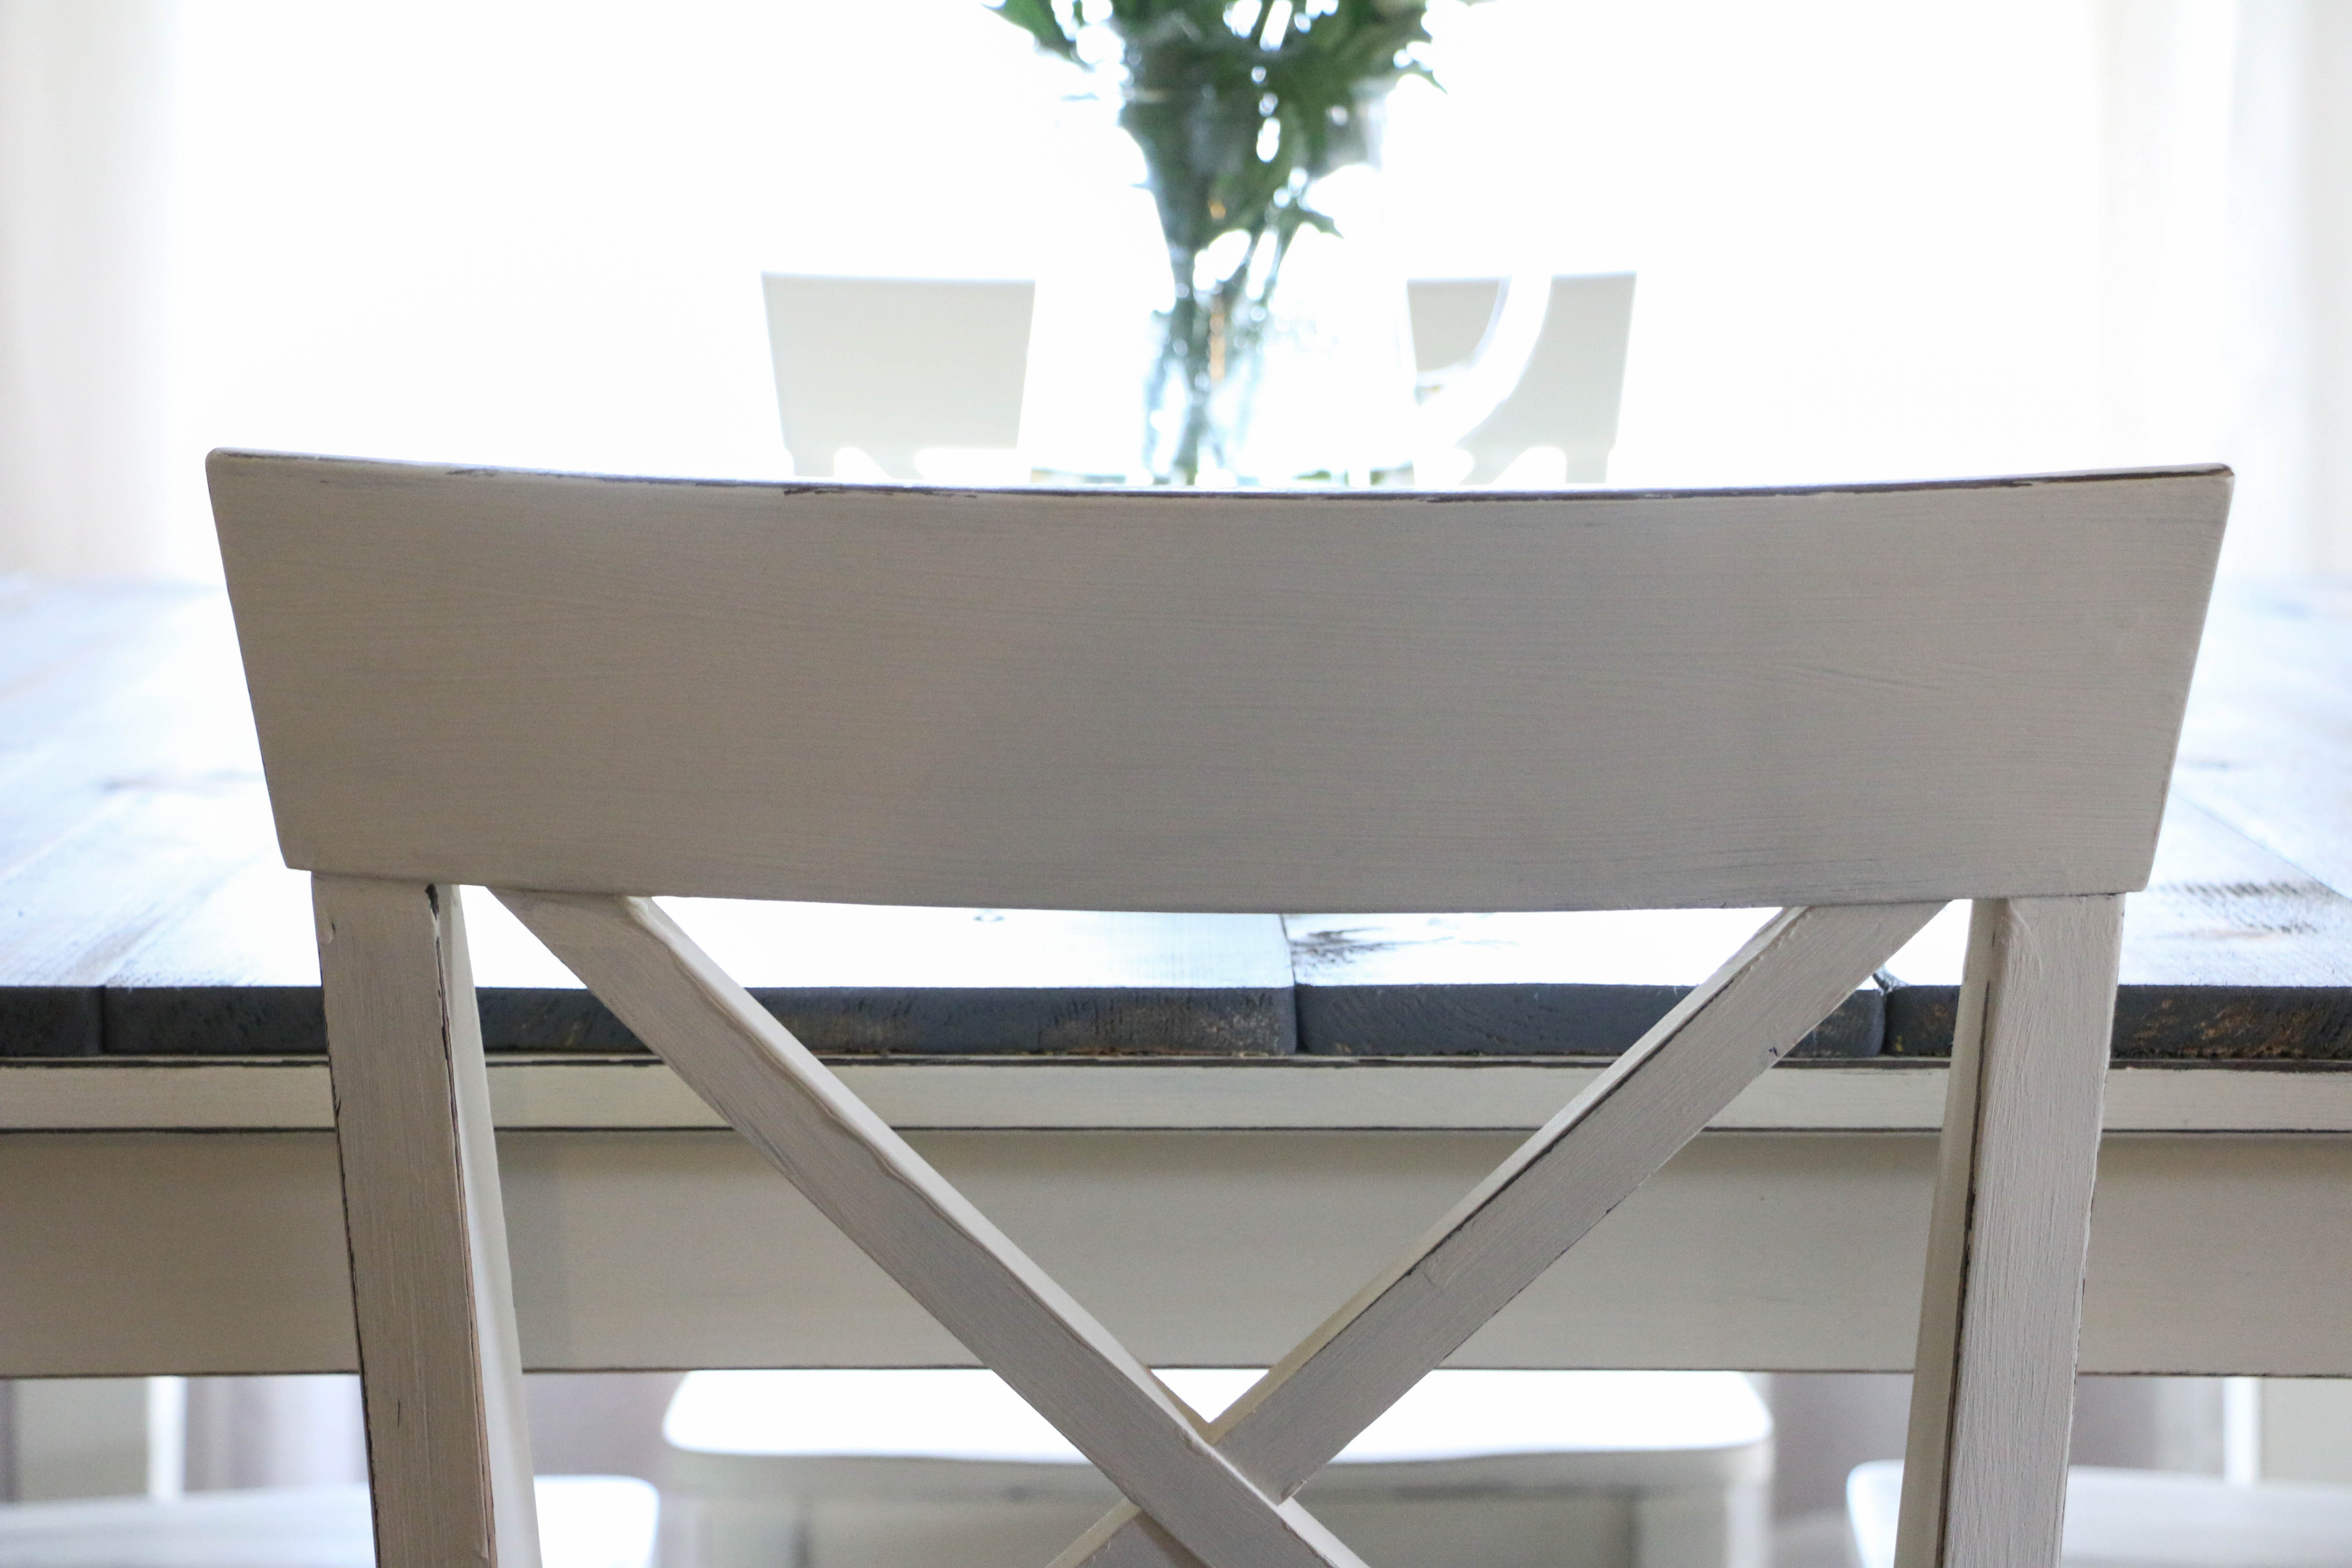
While the can states that one coat will be sufficient, I found this not to be true. Pardon the HORRIBLE lighting, but you can see here with just one coat, there were still visible areas. Now, these chairs are not solid wood, so that may be why it took more paint, I’m not sure.

IMG_1333

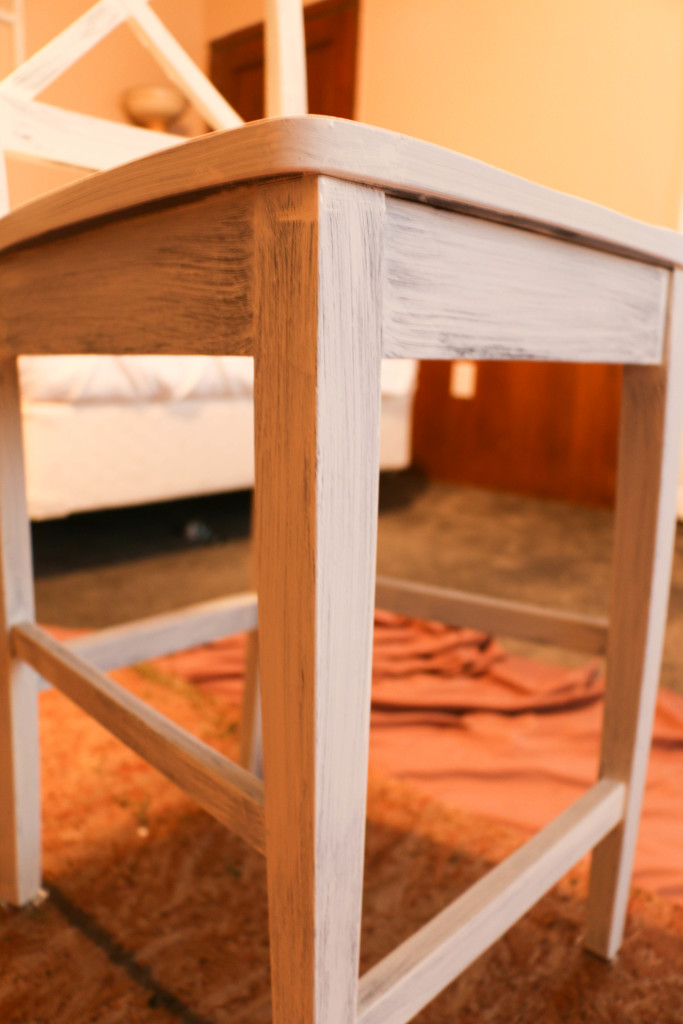
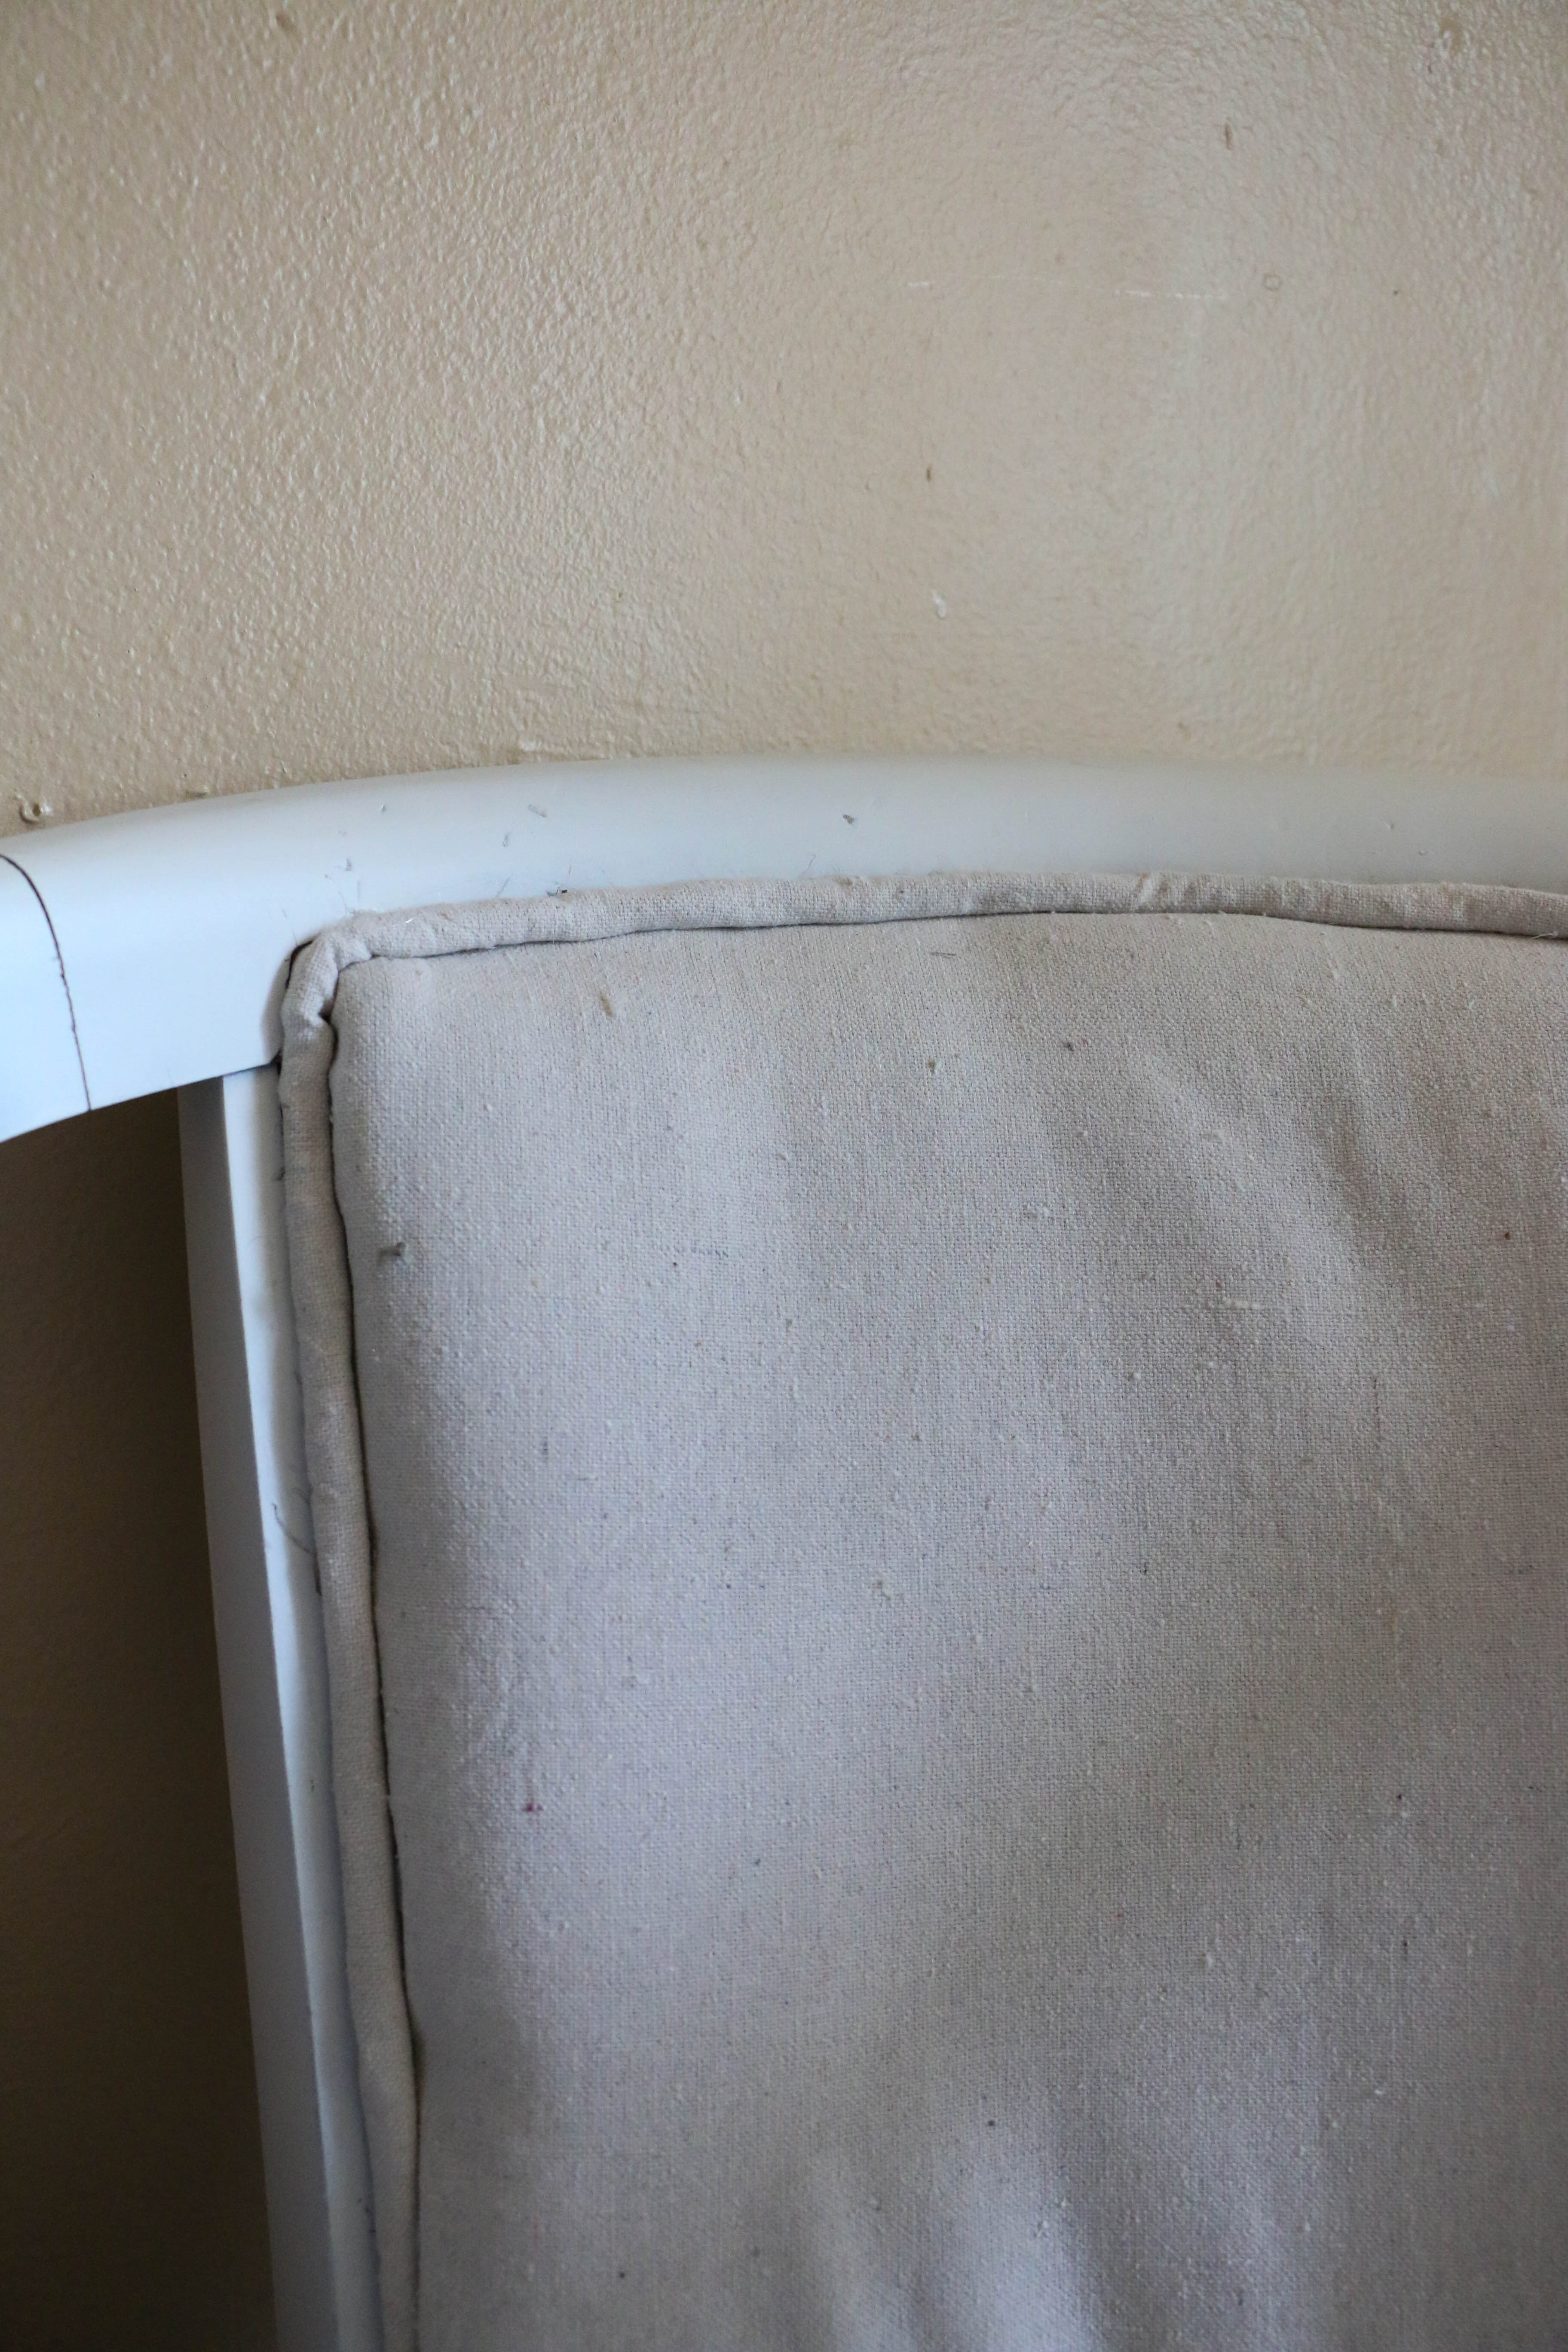
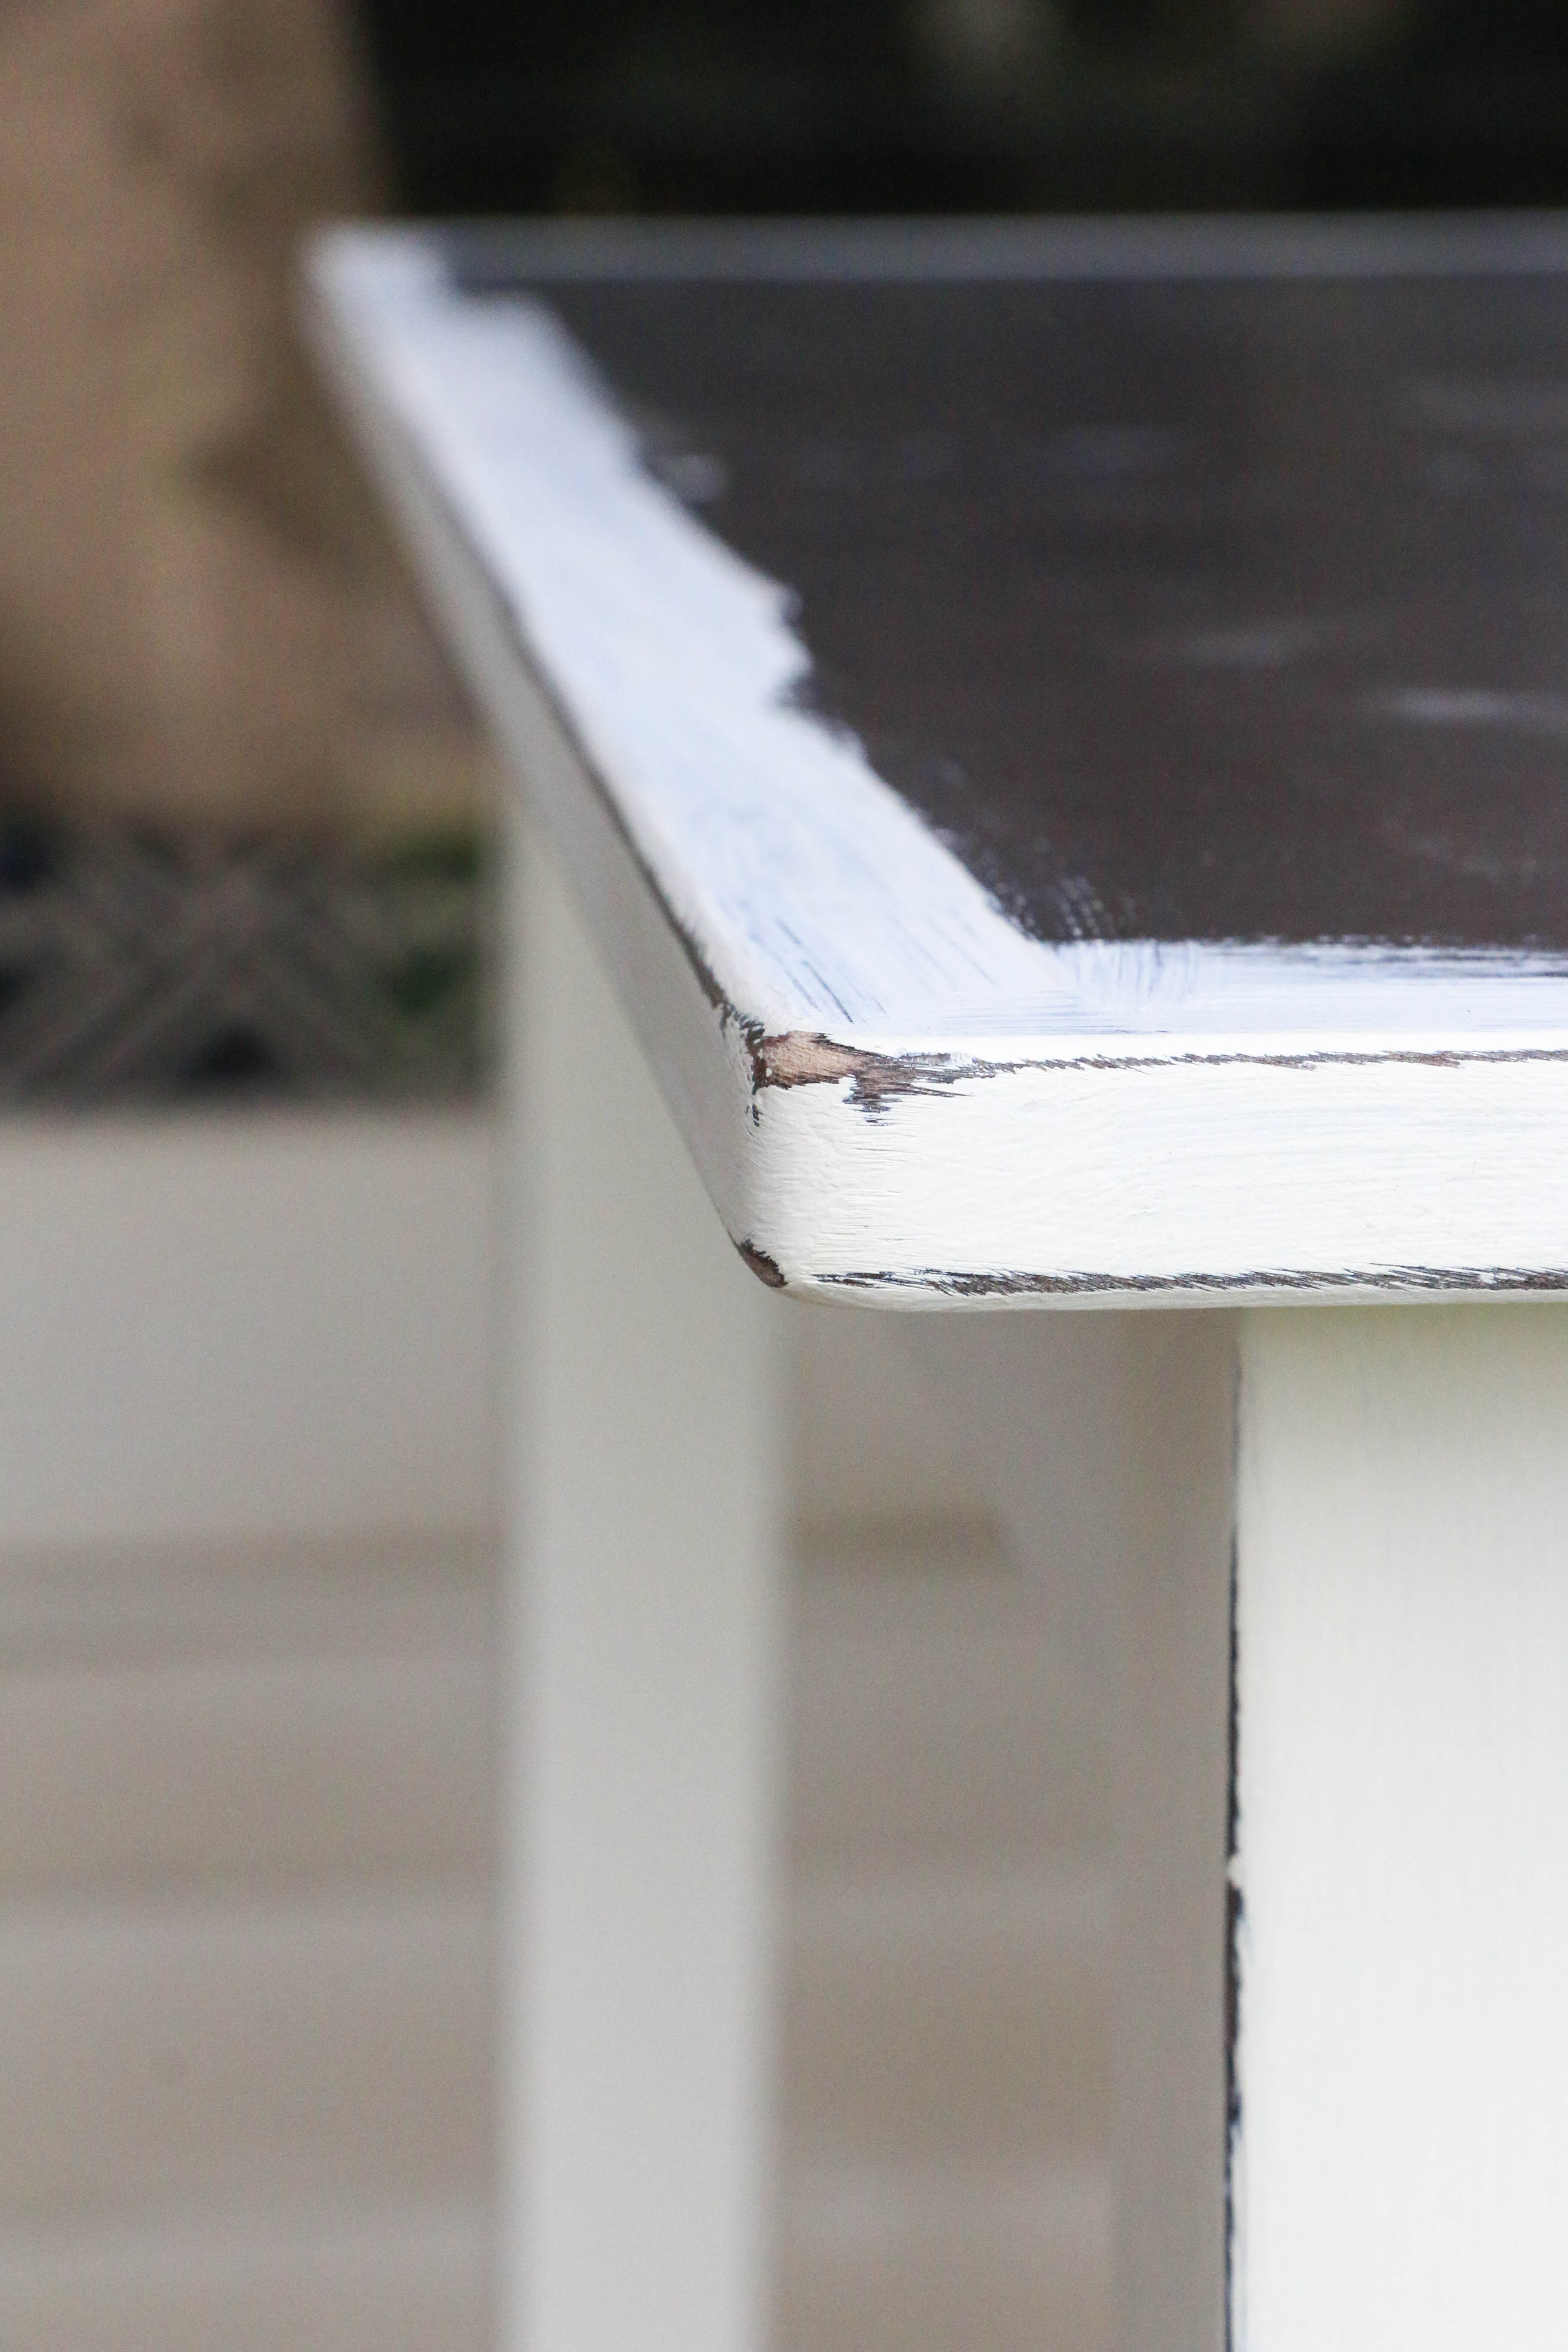
Overall, I did two complete coats, with a third coat over some small areas. If you look closely in this picture, you can see the defining line between one coat and two coats of paint.

IMG_1356

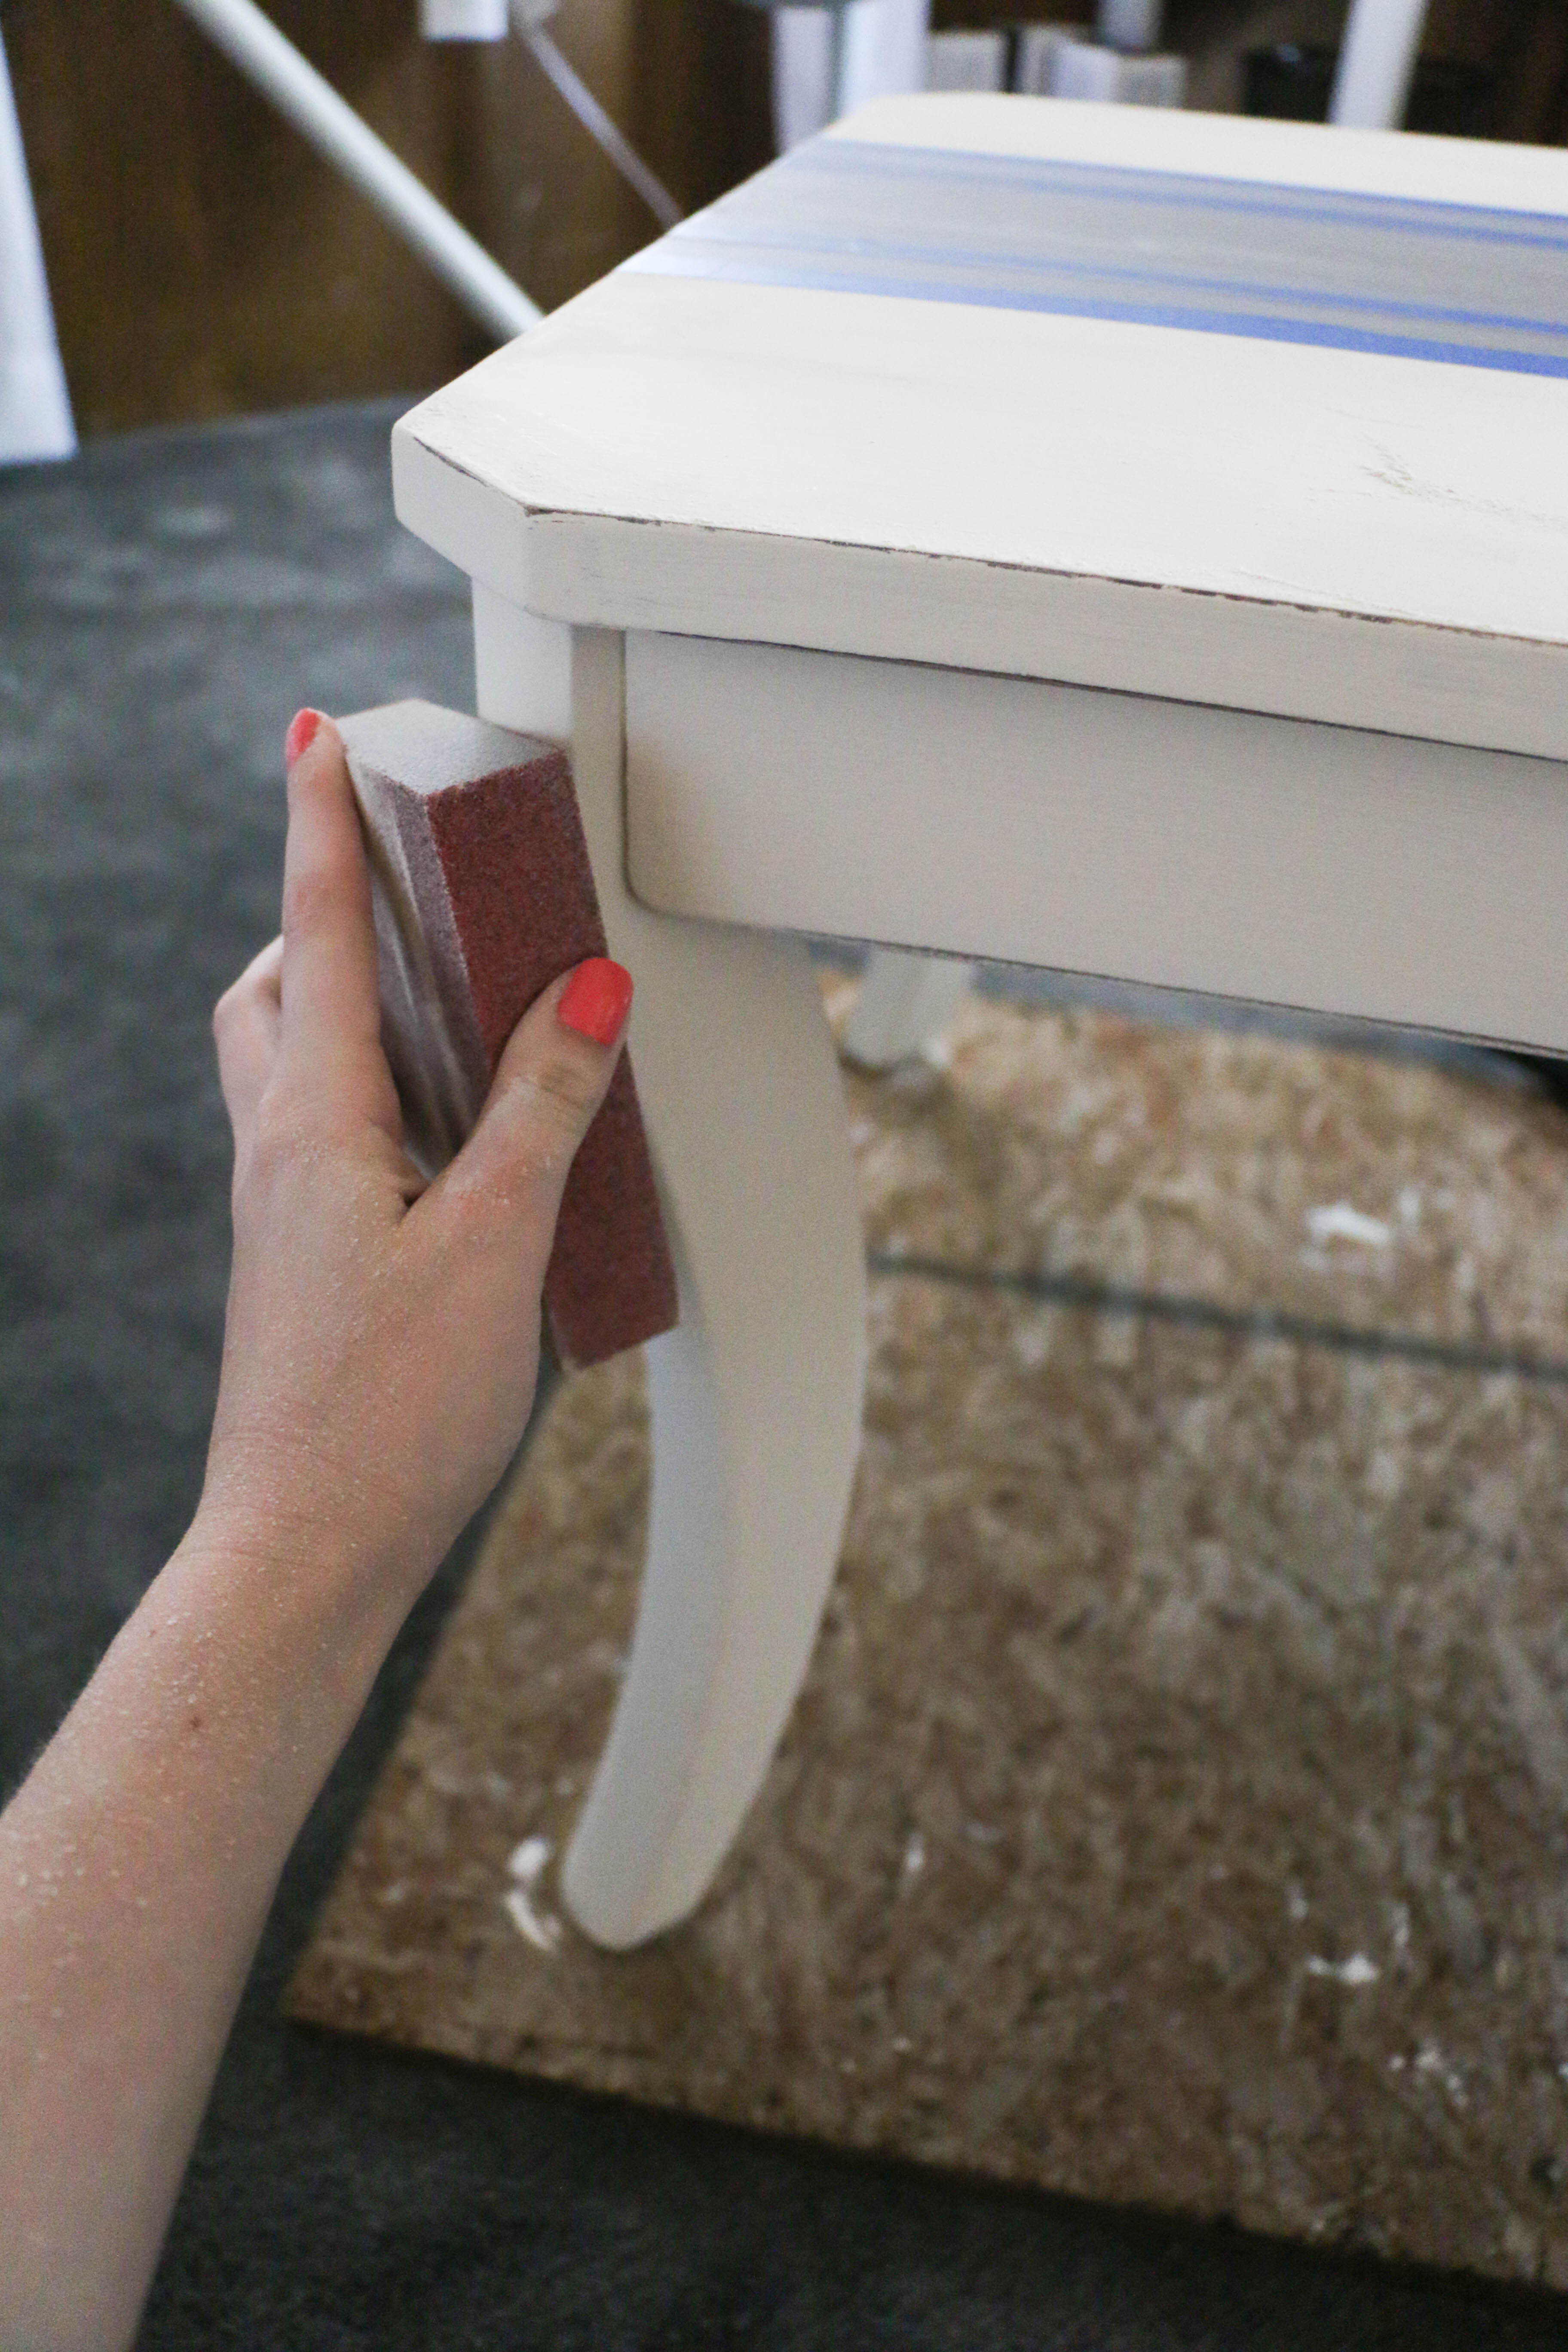
This paint dries quickly and is very easy to distress, if that’s the look you’re going for. If so, you would simply sand down the edges you want distressed and be done with it.

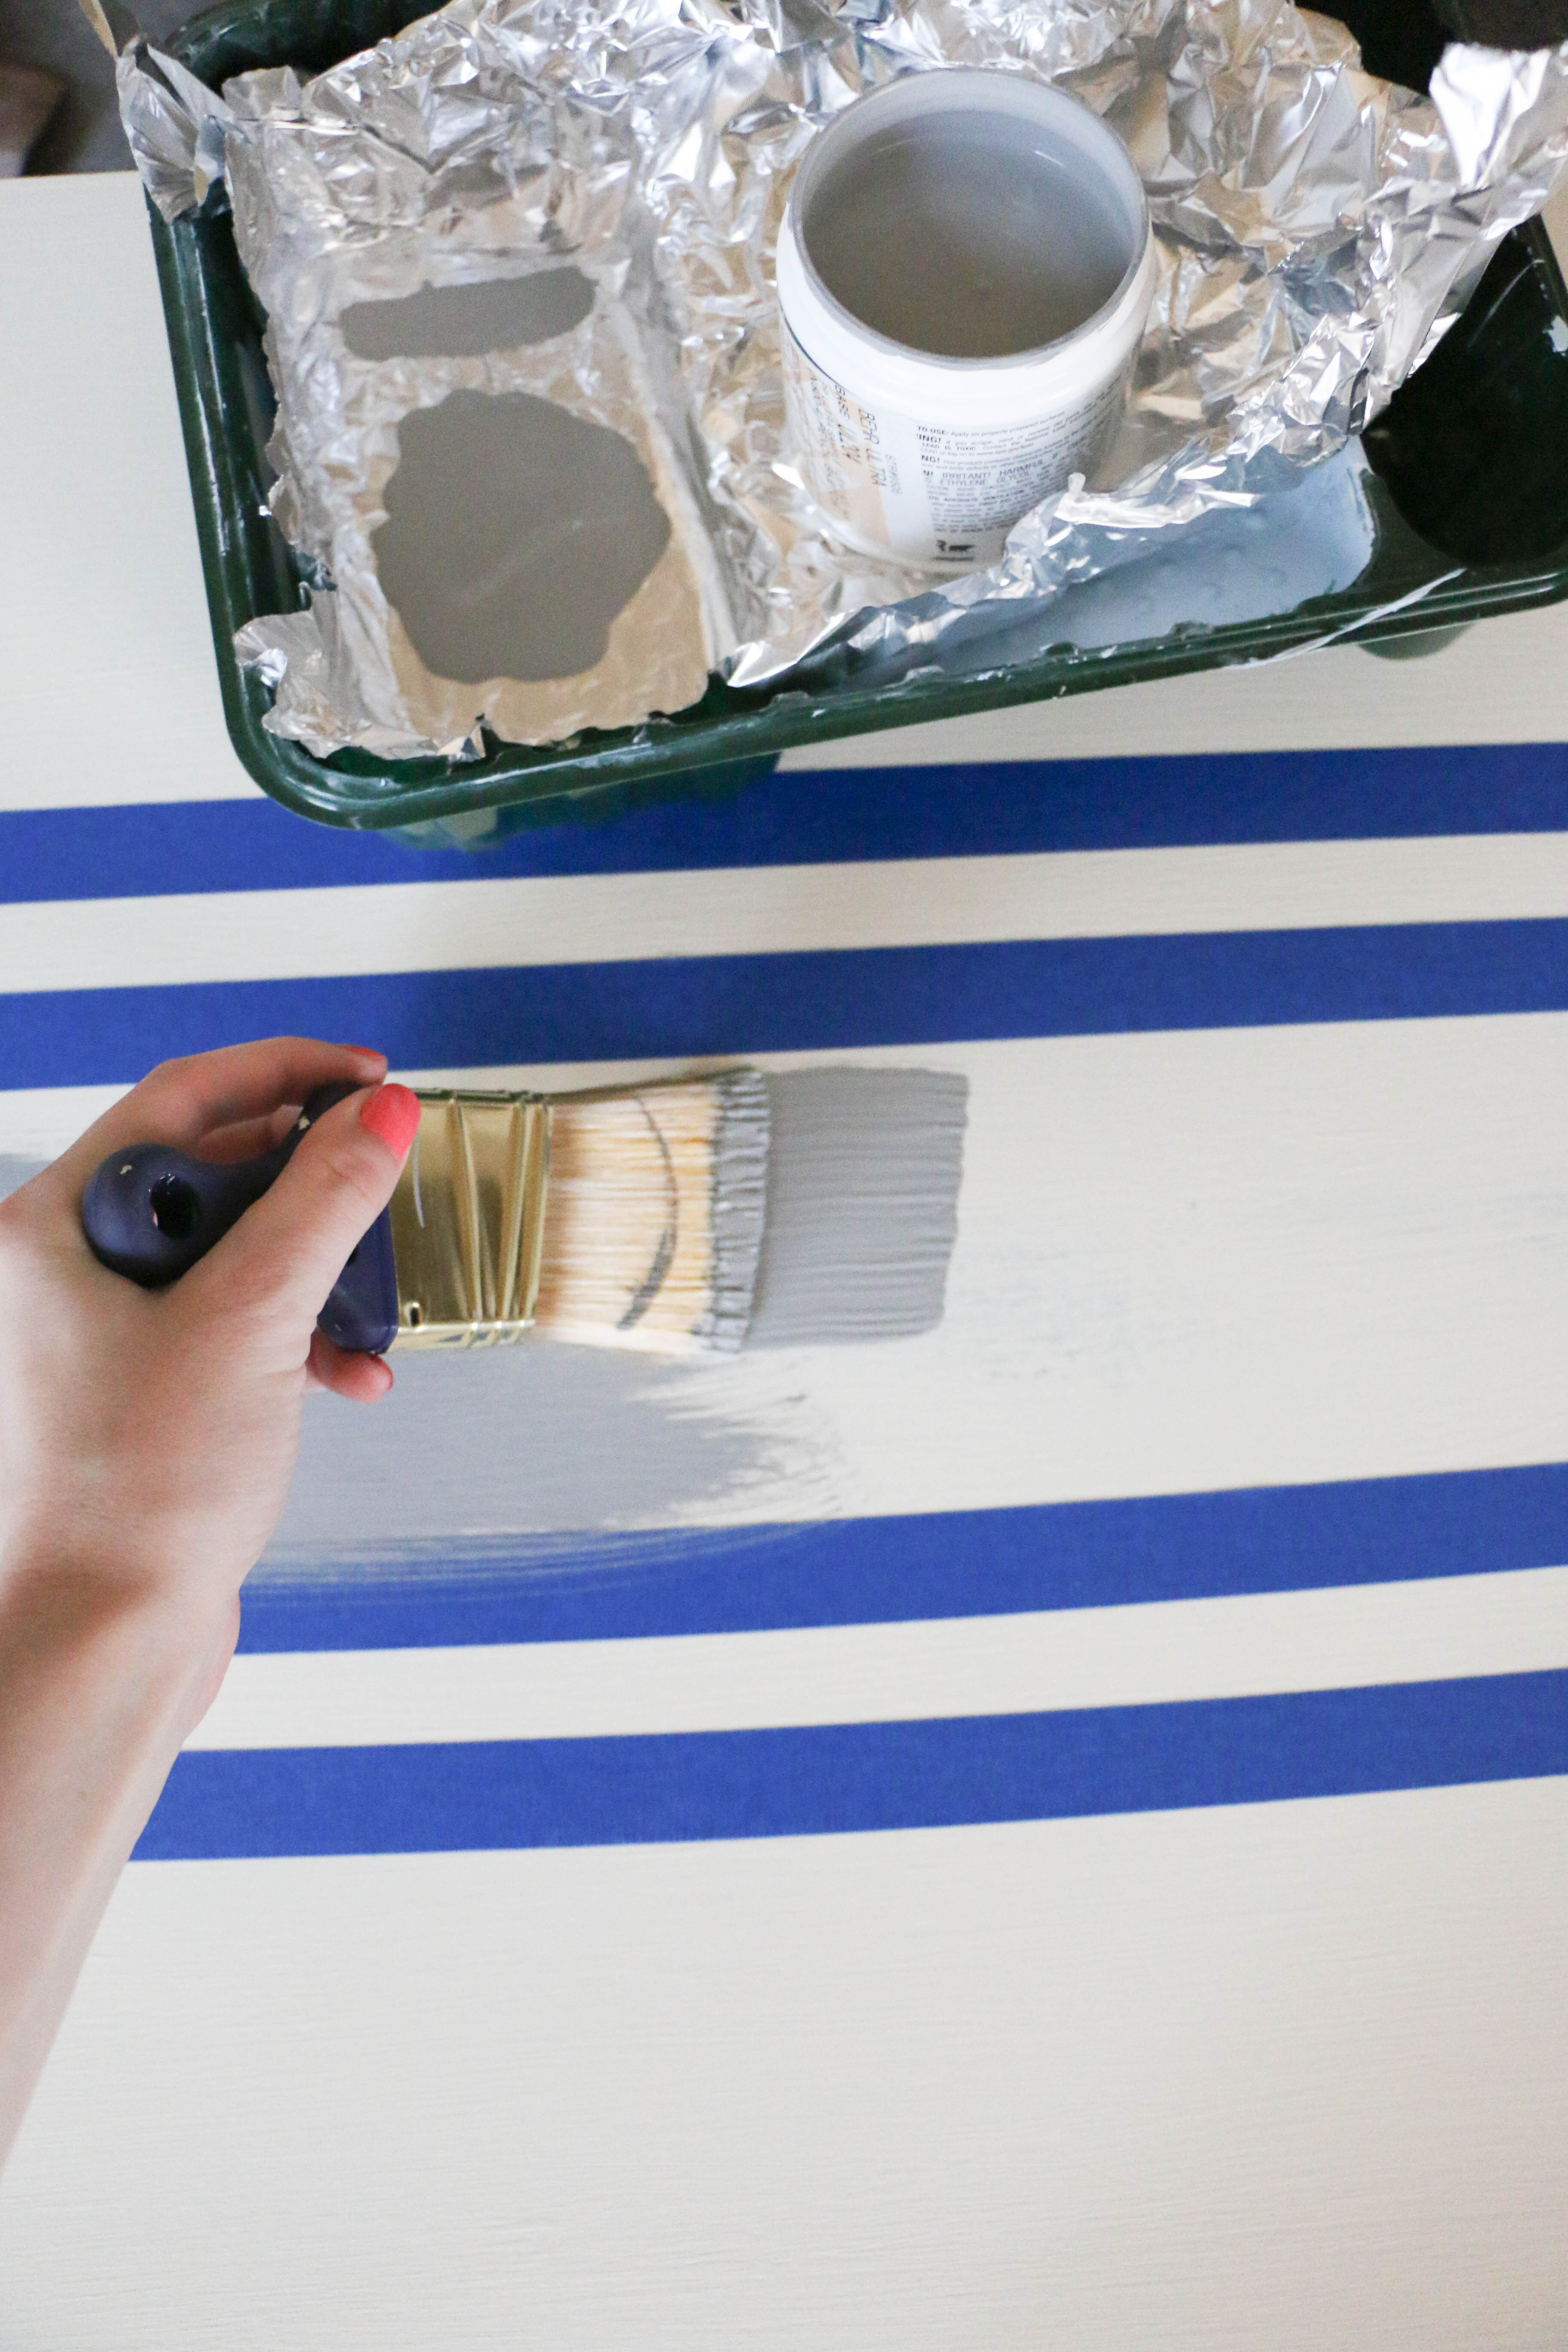
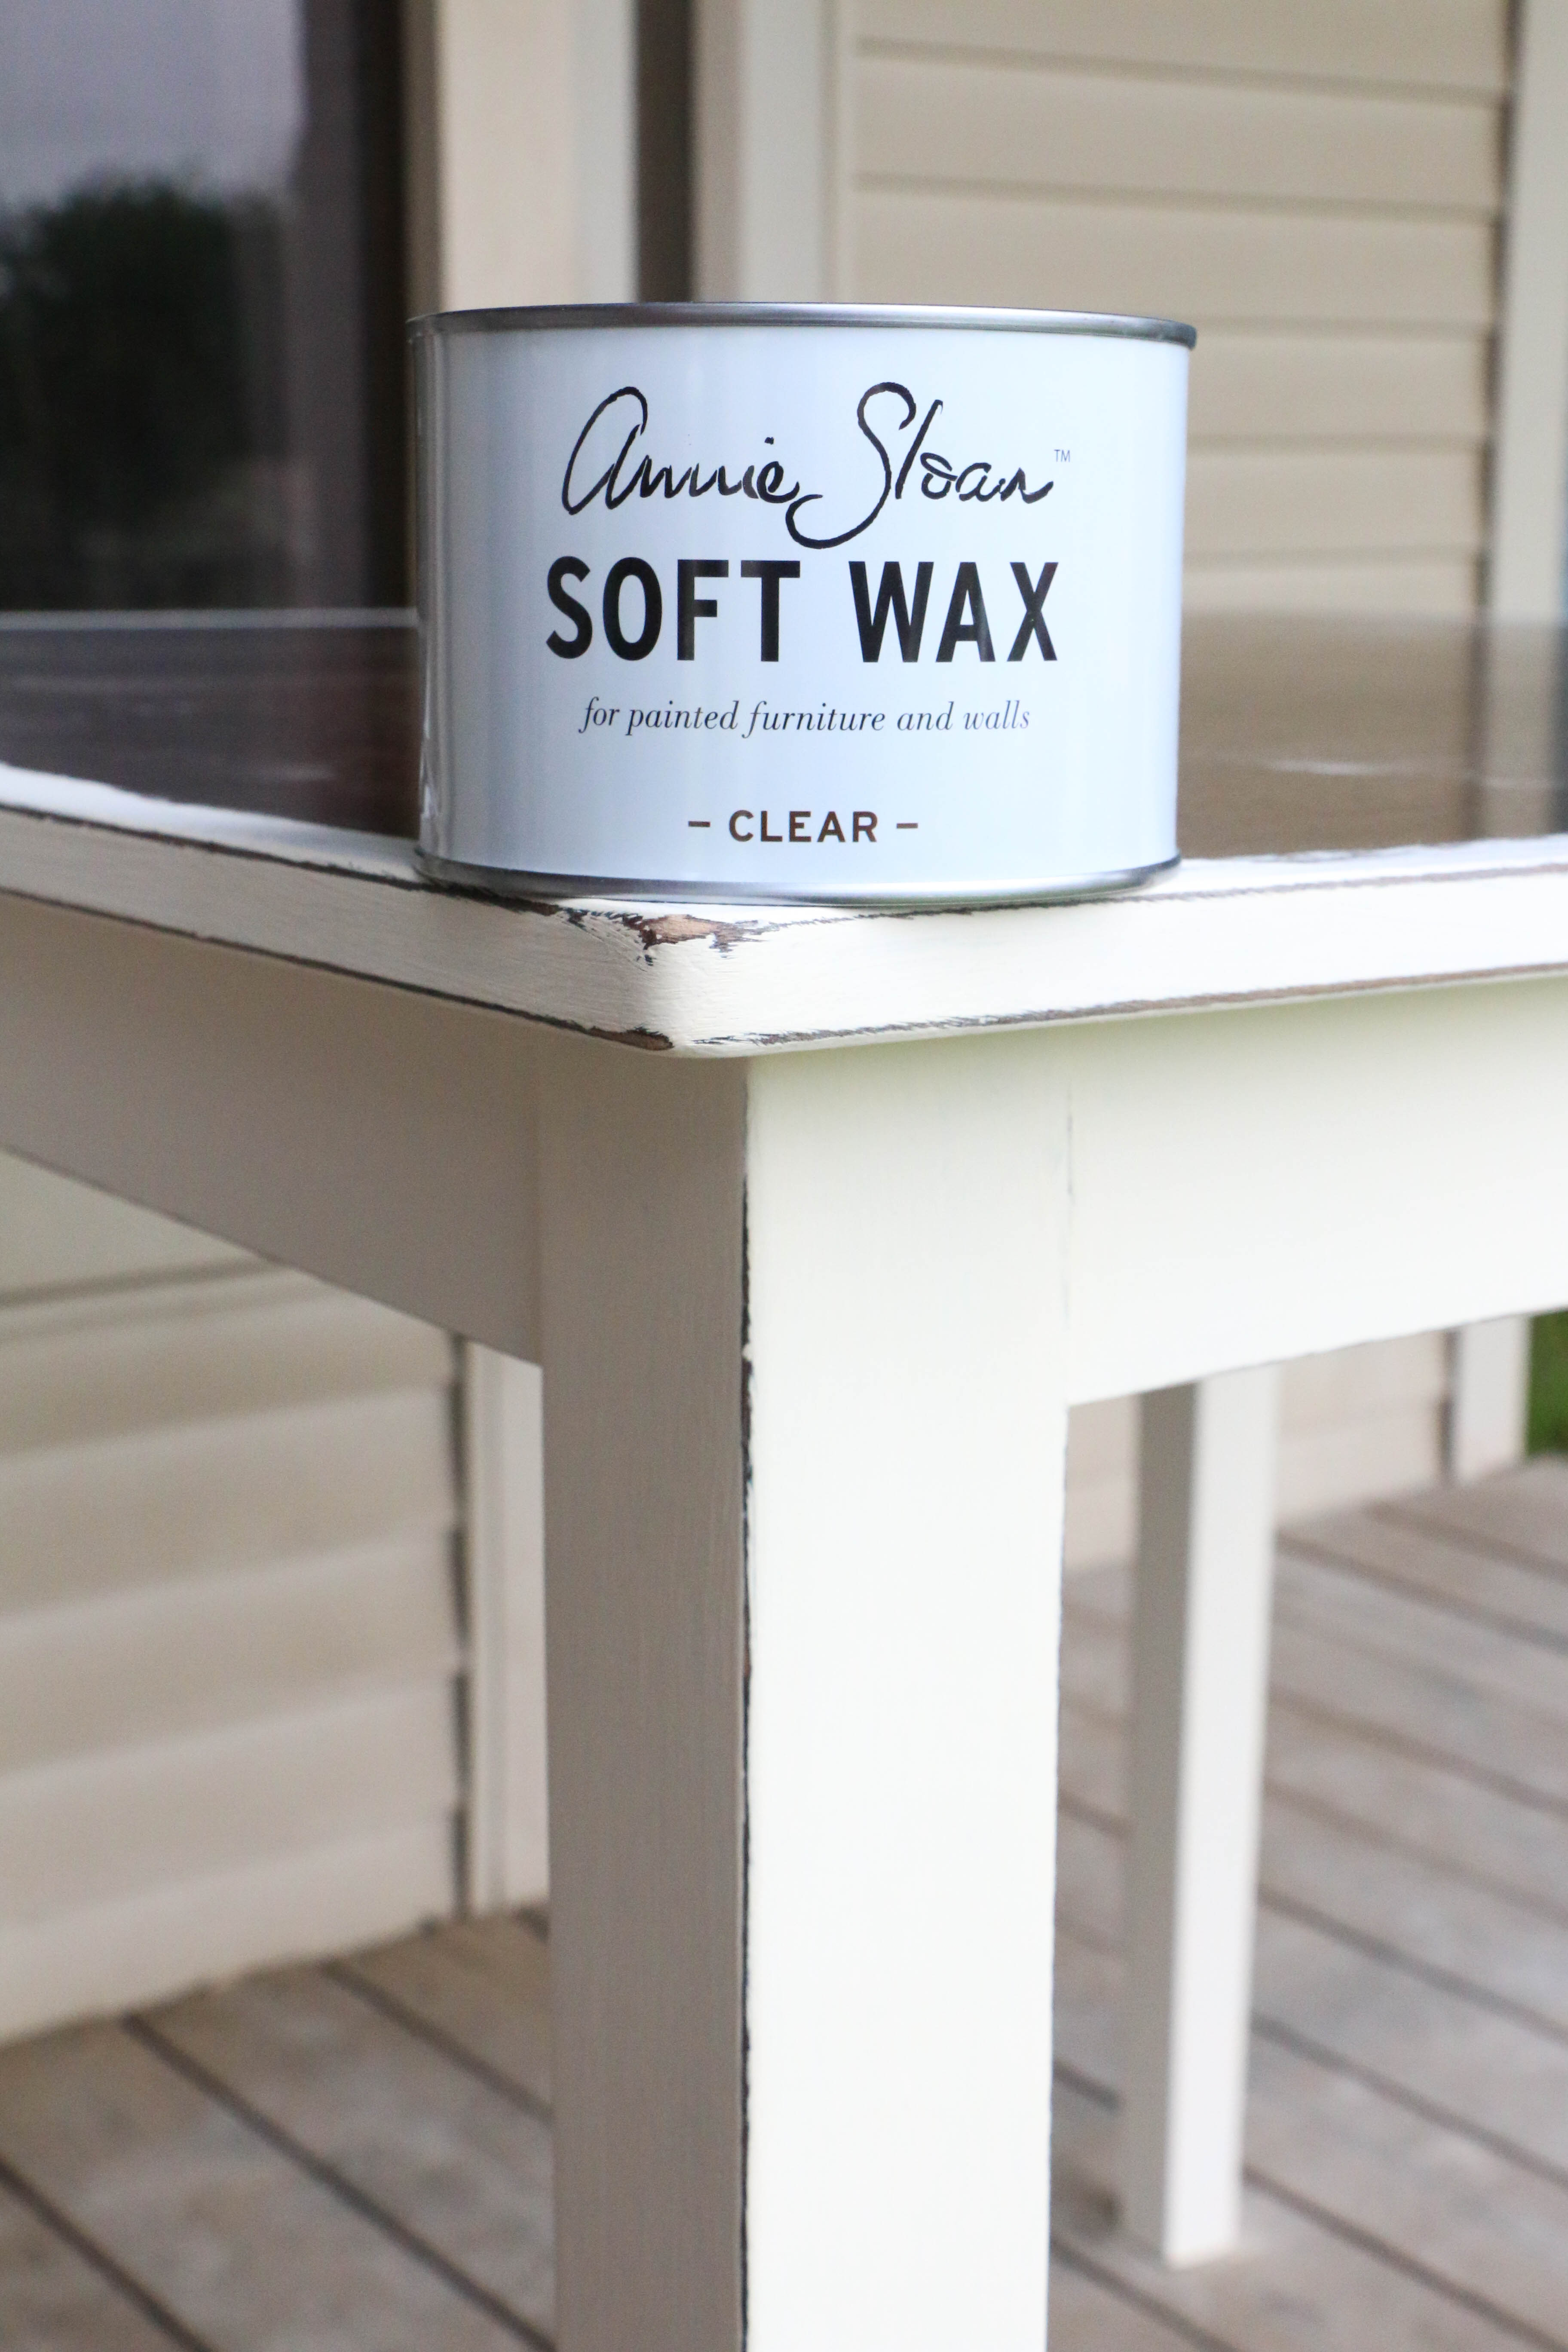
After your paint is fully dry and distressed, it’s time for the wax. I applied the wax the next day. This is the part that is unique to this type of paint, and the main reason a workshop is suggested. I however, did not attend a workshop and didn’t have any problems.

IMG_1386

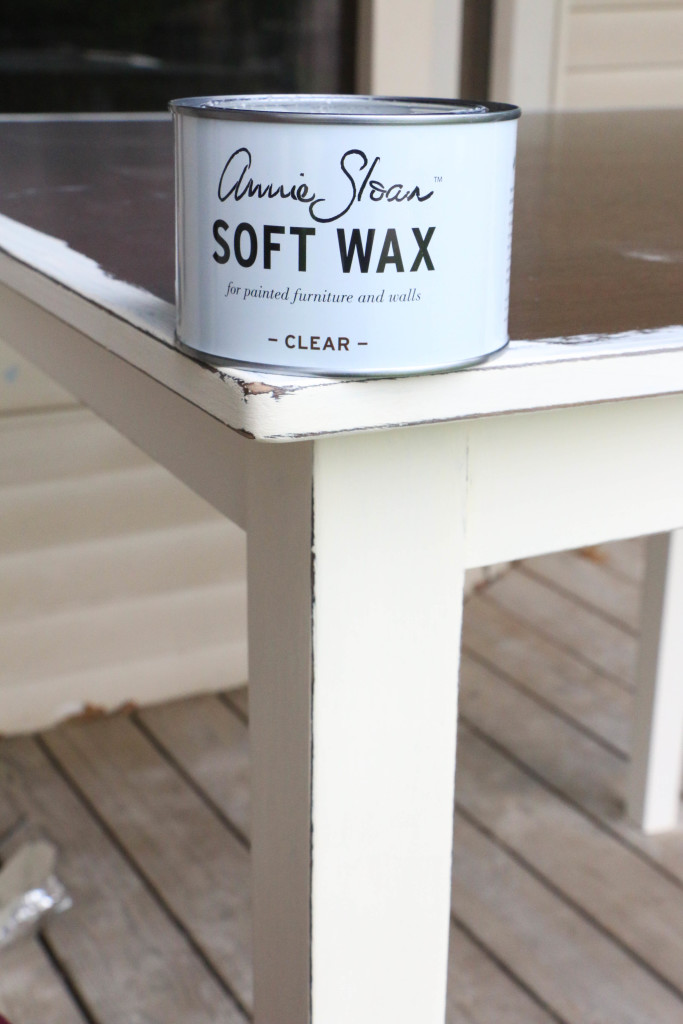
There are suggested brushes for applying the wax. I used a regular old cheap brush from Home Depot. You will want to make sure the paintbrush you use will be solely for wax. You won’t want to mix your brushes used for paint with your brushes used for wax.

You will want to apply a small amount of wax to your brush, brush it onto your piece, and then immediately rub the wax into the piece using a dry cloth. This allows the piece to have the wax fully worked in. It also removes any excess wax. THIS IS SO IMPORTANT. If you have too much wax, it will leave a tacky residue on your finished project and that’s just no good.

It didn’t take me long to completely abandon the paint brush (this is not the professional way to do this, but it worked for me). I would dip the cloth into the wax, and apply directly from the cloth.

IMG_1412

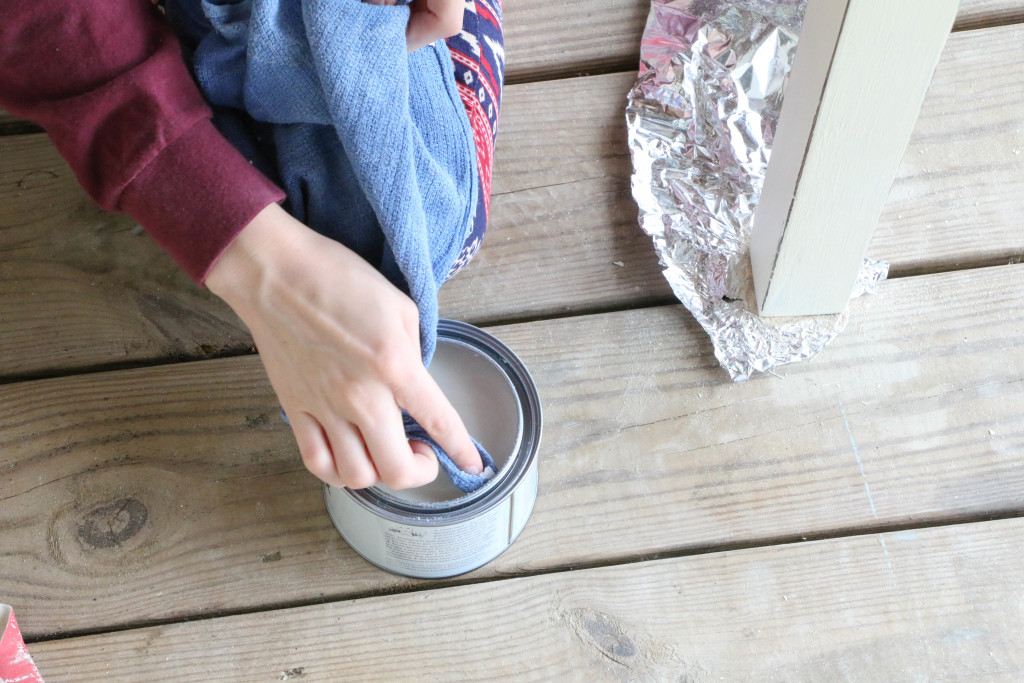
In my opinion, this was much easier than using a brush, since I applied and worked in the wax in one cohesive step. It also eliminated brush strokes in the wax.

Wax During

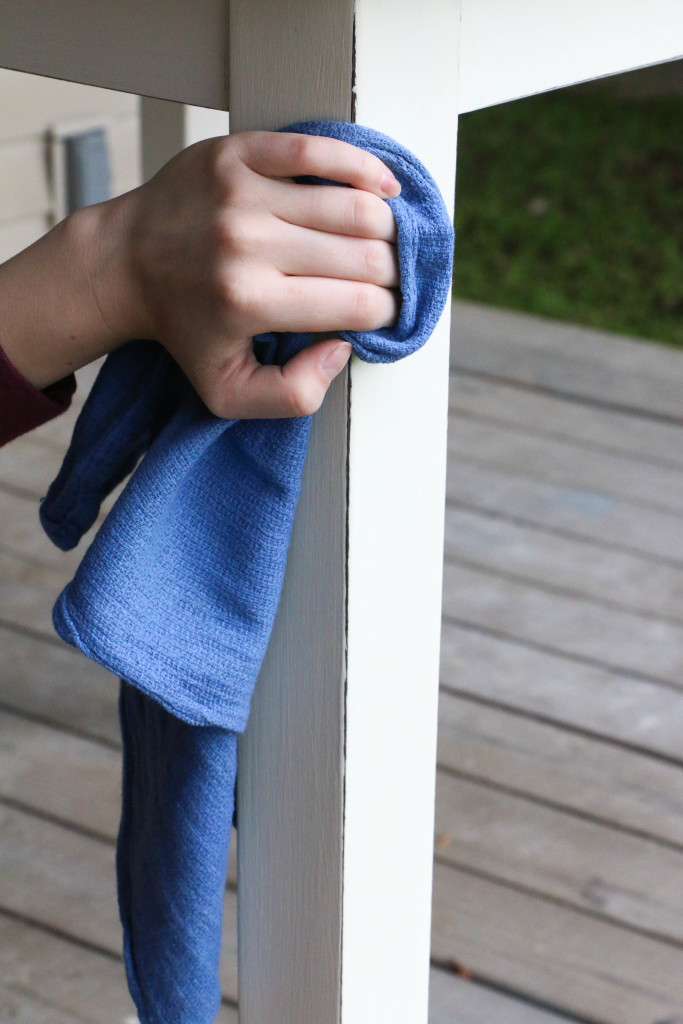
By the time I was done, my cloth was pretty oily, so I took a clena cloth and wiped down the entire surface once more. I did not have any issues with tacky wax after drying. I waited another day after applying the wax to place my furniture back in my dining room.

IMG_1514

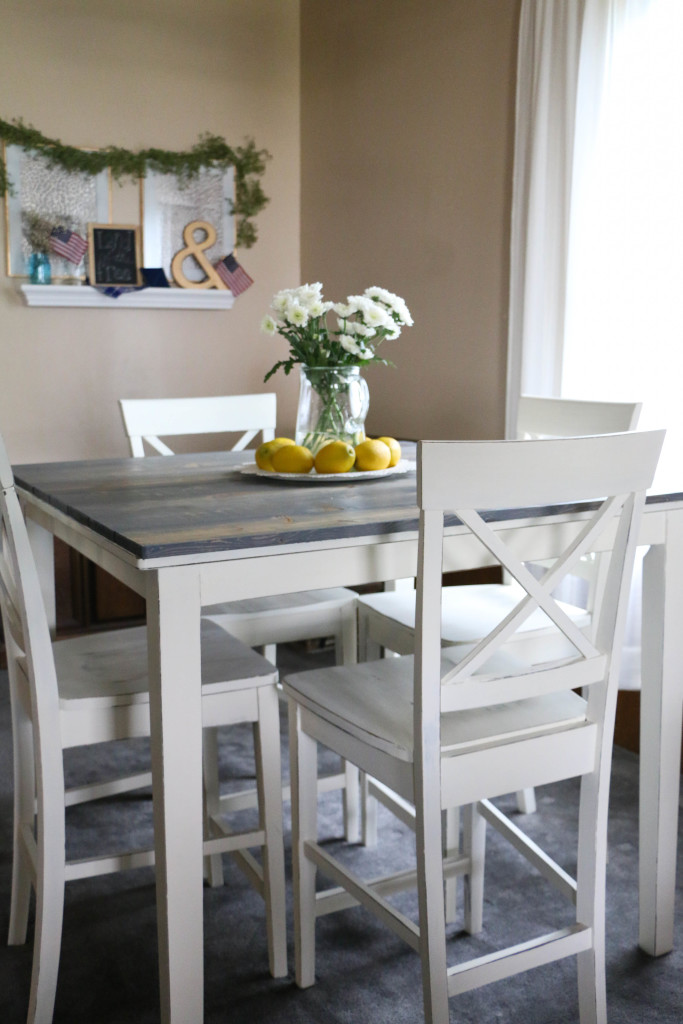
I am totally a novice with this product, but I’d say I had a pretty easy experience with great results. I would definitely recommend doing a little research, but if you’ve been hesitant to try it, DON’T BE! I had a really good experience with it, and I know you can too!

Annie paint text

That’s all for today! If you have any questions, please let me know, and I’ll try to answer them as best I can. Have a fabulous day, friends!

DIY Projects, Furniture Makeover

Dining Room Table Makeover

Hey Y’all! Today I’m sharing what is hands down my favorite project to date. This is definitely the biggest impact project I have done, and I am IN LOVE with the result.

So, cue the before picture:

TableBefore

This dining set has seen better days. I believe it’s from Target, but I’m honestly not even sure. My husband bought it for $50 long before we were married from a couple who was moving. It had been their newlywed table, and we inherited it as our newlywed table. It’s not awful, but it’s a dark, basic, “starter” table in all its MDF glory. Clearly not my favorite thing. You can see why I needed to update this baby.

I got my first supply of Annie Sloan Chalk Paint for my birthday, and I decided to give it a try.

Chair during

This labor of love took several days, but it was so worth it. As you can see, I started with a coat of Annie Sloan’s Old White. What’s shown here is the very first coat. I ended up doing two full coats and a third coat just in certain areas.

Chair After

This is the end result of my hard work. I wanted to go for a bit of a distressed look (not too much), so I lightly sanded around the natural edges of the chairs and tables.

 Chair Close Up

table close up

That messy porch workshop of mine. Sorry, y’all. In the photo of the table, you can see that I painted about an inch onto the tabletop. I didn’t paint the whole thing, because I felt like that would just be a waste. I didn’t want any unpainted parts to show through when I added the top though, so I just painted around the edges.

wax

Next comes the wax. Chalk paint needs an application of wax after the paint is dry. It’s a tricky process, but I seemed to manage. I think I’m going to do a separate post on my experience using this paint. Anyway, once the wax was applied, it was time to work on the tabletop.

Sanded Boards

First thing I did was sand the sharp edges of each board. We used 8 1×6 cedar planks cut to 42 inches (the width of our table). I wanted a rustic look, but not a give-you-splinters-while-you’re-eating-dinner look.

Stained Boards

Then I stained each of the boards. I have learned by now that gloves are a must while staining. Just…don’t go to school with stain all over your hands and knees. Your students will not appreciate it.

This is the stain I used:

IMG_1395

As you can see in the above photo, the color on the can isn’t quite how it turned out, but that’s alright. Up until this point, this project had been completely mine. I did have to enlist my husband to help with the next step, though.

We lined the tabletop with the newly stained boards, and nailed them in place.

nailed boards

Can I also just say that nail guns are really awesome? Okay, that’s all.

Poly

I added a coat of Polyurethane to the top to protect the finish. The poly brought out the wood grain even more and made the top look SO GOOD.

poly2

This photo shows how much the poly enhanced the wood grain. Hello, beautiful. After this, we waited for it to dry so we could move it back into the dining room. Never mind the fact that the dining room had been awkwardly empty for a week at this point.

Here she is, my new table! She doesn’t look quite so newlywed basic anymore!

after5

We decided to leave about an inch of overhang on either side to create just a little bit more surface area.

after4

We can’t do anything about the dark carpet or paneling, or wall color, so this table makes a big impact. It lightens up the space so much!

after3

after1

Remember how dark it was before? The before/after pictures were taken at the same time of day! I am loving this table now, and definitely won’t be parting with it for a LONG time.

Like I mentioned earlier, I’m going to do a more in depth post on my experience with Annie Sloan Chalk Paint, so stay tuned for that! That’s all for today. Have a fabulous day, friends!

table before after

DIY Projects

Shutter Styling

Hey y’all! Thanks for stopping by! Today I’m sharing a super quick update we made in our master bedroom. A quick and easy thing that I am loving!

Last weekend, my husband and I traveled to Canton, TX to visit First Monday Trade Days. It’s just over an hour from where we live, and it’s one of the largest and oldest flea markets in the United States. This place is seriously AMAZING. If you live in the area (or even if you don’t) I would definitely recommend checking it out. We saw antiques, collectibles, handmade items, junk, and everything in between. Definitely one of the coolest places if you’re looking for unique items. PLUS it’s free admission, so you really can’t go wrong.

While we were there, I picked up some old window shutters. The seller was very confused about why I only wanted one pair, and even when I tried to explain that I wouldn’t be using them on the outside of a window, he was still confused. Sir, if you’re reading this, I’m sorry! I paid $15 for this beauty:

shuttersbefore

Ignore the water spigot. And the weeds in my yard. Whatevs. Anyway, super dirty and gross, I know. I hosed them down and had the intention of sanding and repainting them. Keyword being intention.

After days of sanding this thing, I was over it. I mean OVER IT. My sander couldn’t reach in all the slats, and I’m pretty sure my hand is still shaking from using it. Now before you judge me, this is not my first go-around using a power sander, just my first go-around sanding shutters. Sanding flat surfaces > sanding EIGHT MILLION nooks and crannies.

So I left them half sanded and left some of the primer exposed. I’m a half quitter. But I’m kind of glad I’m a half quitter because I love the way they are, even without a fresh coat of paint.

IMG_1318

We hung them on either side of our bed, just above our nightstands.

shutters1

I love the rustic feel they bring to the room now.

shutters3

shutter4

shutter2

The woven basket piece is from Target, and the headboard was a DIY project.

nightstand1

And this little print was one I whipped up quickly just to fill space on my nightstand. Whatever works. Overall, I think the shutters add a much needed texture to the room, and I love the warm tone of the wood and the coziness it brings.

I think decorating with shutters might quickly become an addiction. I need more, more, MORE! I’m also thinking a full room tour of this room might be in order soon, so we’ll have to see about that (I have a few more projects up my sleeve first). What about you? Have you used shutters in your home? I’d love to hear about it!

That’s all for today. Have a fabulous day, friends!

DIY Projects

DIY Antique Metal

Hello friends! Today I’m sharing my experience with making new metal look like antique metal. If you’ve been to Target recently, you know that they have some AMAZING metal goodies in their One Spot. Last week, I bought a cute little olive bucket for $3. Awesome, right? The only problem was that it was all shiny and new (totally doesn’t match the rustic vibe I’m going for on the front porch). Anyway, I brought it home thinking it would definitely be worth an attempted DIY, even if it wasn’t successful.

So here’s what we’re working with. I have this olive bucket (I couldn’t find it on their website, but it came from the Target One Spot), and I also decided to try it with this watering can I’ve had for a while from Ikea.

Aged Metal Before

This is definitely an OUTDOOR project, so take your items outside, and gather your supplies. My front porch is a never ending project workspace, and I’m constantly wondering what my neighbors are thinking of me. There’s that weird girl painting someone else’s trash. There she is, sanding something again. Can she possibly paint anything else? What on earth is she doing now?

There are some supplies that are necessary for this DIY, and some are optional. Here’s what I used:

Aged Metal Supplies

-bleach

-vinegar

-bucket

-rubber gloves

-steel scouring pads (optional)

-sander (optional)

So first things first, I removed the twine handles from the olive bucket. Then I sanded these bad boys down. I’m not sure this was totally necessary, but I like using my sander, and I figured it wouldn’t hurt. If you don’t have one, I think it’ll still work, so you’re good.

IMG_1163

Next comes the reason why this really needs to be an outdoor project. I filled my bucket with vinegar and bleach. I didn’t measure exactly, but I think I used about 1.5 gallons of vinegar and 1 gallon of bleach. This smells AWFUL. I didn’t wear one of those mask thingies (totally correct name), but I probably should have. It seriously is one of the nastiest things.

I submerged my metal in the bucket. With my rubber gloves on, I used the scouring pad to scrub the metal while in the bucket. It sat in the sun, and I would scrub every 15 minutes or so.

Aged Metal2

As you can tell in the above picture, the bleach/vinegar concoction turned orange. This is because I left the scouring pad in the bleach when I wasn’t using it. This rusted the pads and changed the color. It was totally unintentional, but it made the metal come out with a more orange, rusted look, which I really like. Overall, these sat in the bucket for about an hour each, scrubbed every fifteen minutes. As you can see, my bucket wasn’t quite big enough, so I had to flip the metal over about halfway through.

When I was done, I pulled the metal out of the bucket and hosed them down. When they were finally dry, I put them back on my front porch. I am IN LOVE with how these tuned out. This was a total experiment and I had very little idea what I was doing, so I’m super pleased.

Aged Metal 3

Aged Metal7

I placed a smaller vase inside to hold flowers because there are holes in this, and well obviously that can’t work.

The lines that appear around the top and bottom are due to not having the whole thing submerged at once, but I’m really okay with it. More character.

Aged Metal 6

I keep hearing Taylor Swift lyrics in my head: Did you have to ruin what was shiny, now it’s all rusted?

To answer your question Taylor, yes. I kinda did.

If you can get over the smell, this is a really easy project to try. It’s messy (but not messy enough to stain my shirt!), but in my opinion, totally worth it! I’m obsessing over these! Now I need to rust all the metal things!!

Aged Metal1

Let me know if you try this one! I’d love to hear about it!

That’s it for today. Have a fabulous day, friends!

DIY Projects

DIY Pillow Covers

Hey y’all! Today I’m sharing my super secret cheapest possible pillow covers. Except it’s totally not a secret since I’m about to tell you all about it. Whatever. By this time, everyone on the planet knows what a huge impact throw pillows can have on changing the feel of a space. But if you’re like me, you can’t bring yourself to pay $30+ dollars for one pillow. I’m the kind of girl who walks into a Target with three dollars in her pocket fully intending to find the best possible deal. (Don’t lie, you’ve been there too.)

Back to what I was originally talking about. I’ve discovered the secret to time travel the cheapest throw pillows! A few weeks ago, I went into a World Market for the first time, and it suddenly hit me! I could make pillow covers from napkins! Now, before you stop reading this, I’m not talking about paper napkins covered in pizza grease (why pizza grease? I don’t know.). World Market has a great selection of cloth napkins that are perfect for making pillow covers. On my trip there, I picked up these cloth napkins. Under $8 for four! I was in cheap girl heaven!

Okay, so here’s the deal. This is not a sewing tutorial. My sewing skills are basic at best, so I’m not going to explain in that great of detail how to sew these. These napkins are 20×20 inches, so they are perfect for and 18×18 size pillow or smaller. After bringing my napkins home, I ironed them, and got them pinned and ready to go.

pillowsewing

Again, I’m not going full out with the sewing tutorial here. The napkins are already cut in perfect squares, so I just sewed in some straight lines. Easy enough. Here’s how they look afterward:

throwpillows1

I really love the way that these turned out, and it was SO EASY. I made two covers for four dollars each. You really can’t beat that price.

throwpillows2

I chose this pattern because it plays well with the neutral tones in our living room (and because the only color I add in decorating is blue). But there are so many choices at World Market, the possibilities are endless!

Throw Pillows

Seriously guys, this is so easy, and so cheap! You should definitely try this one!

That’s it for today. Have a fabulous day, friends!

DIY Projects

Vintage Window Styling

Hello there! Thanks for stopping by and taking the time out of your day to read my very first blog post! The purpose of this blog is to document my journey of making our hideous  challenging rental place a home. I figured there’s no better way to start off than just diving right in!


It's been a fun day hitting up all the local antique stores. This aqua window frame is coming home with me! Can't wait to figure out what to do with it!

A few weeks back, I found a cute vintage window frame at an antique store.  I had just the spot in mind at the house, so it came home with me.

I love the color it was when I bought it, but it just wasn’t going to work with the colors I already have going on in my house, so it had to go. I sanded it all down, leaving it looking like this:

IMG_1065


I knew I was going to want it to look a little unfinished, so I didn’t worry about sanding too professionally. (But let’s be honest, I probably couldn’t sand like a professional even if I tried.) In this picture you can see my little indoor workspace trick: I use old wrapping paper as a dropcloth. Super easy, and super disposable. Anyway, I then painted the whole thing white, not worrying about looking too uniform. When it was dry, I lightly sanded the edges to give it a bit of a distressed look.

IMG_1083

I knew it needed a home above the bed in our guestroom.

WindowFrame1

Here’s a closeup of the frame. I used some ribbon I had from a previous project to hang these cute miniature wreaths from the top. I got three of those wreaths at a thrift store for a dollar, by the way.

WindowFrame3

I really love the way this little project turned out. It was quick and easy! Now if only I could figure out what to do about the headboard situation in this room. Another project for another day, I guess.

That’s it for today. Have a fabulous day, friends!