All Posts By

Fawn Rumfield

Personal

Reflecting on 2015

Can you believe 2015 is at its end? I know everyone says that every year, but I do think its important to reflect on the year and thank God for His blessings and grow from the trials. 2015 has been, for me, a year of learning new routines. This year I started this blog, and through that I really believe God has placed new dreams in my heart. We’ve made our house a home this year, and I’ve worked to be intentional about what our home looks like and feels like. We’ve been able to travel to new places together this year, and try new things (like my first time being a vendor at a craft market!). This year has been our first full calendar year of marriage, and in this year we’ve continued to chip away toward our goal of becoming debt free. We aren’t finished, but we’re moving. We’re getting there. Paying off debt is a life of sacrifice, saying no to things, and saying yes to contentment. Did I mention it’s also really hard?  We’re doing it though, and we’re proud of our progress.

Lest you think this year has been perfect, I can assure you it hasn’t been. We’ve faced disappointments, mulled over really tough decisions, emotionally prepared ourselves for a big move only to have it fall through at the last moment. I’ve felt frustrated with the slow rate we’ve been able to pay off debt, I’ve struggled to find contentment in our home, and I’ve felt unfulfilled creatively. I’m so thankful to have had Ethan by my side every step of this year. We’ve walked together, cried together, prayed together, and hoped together. This year has had highs and lows, and I know next year will be no different in having imperfections. However, I’m looking forward to a fresh start and the things that 2016 will bring.

This year, I want to work on all of these things. I want to paint more, make more, and fall in love with the place we call home. I want to blog more, pay off more debt, be more intentional with my time and my goals for the future.

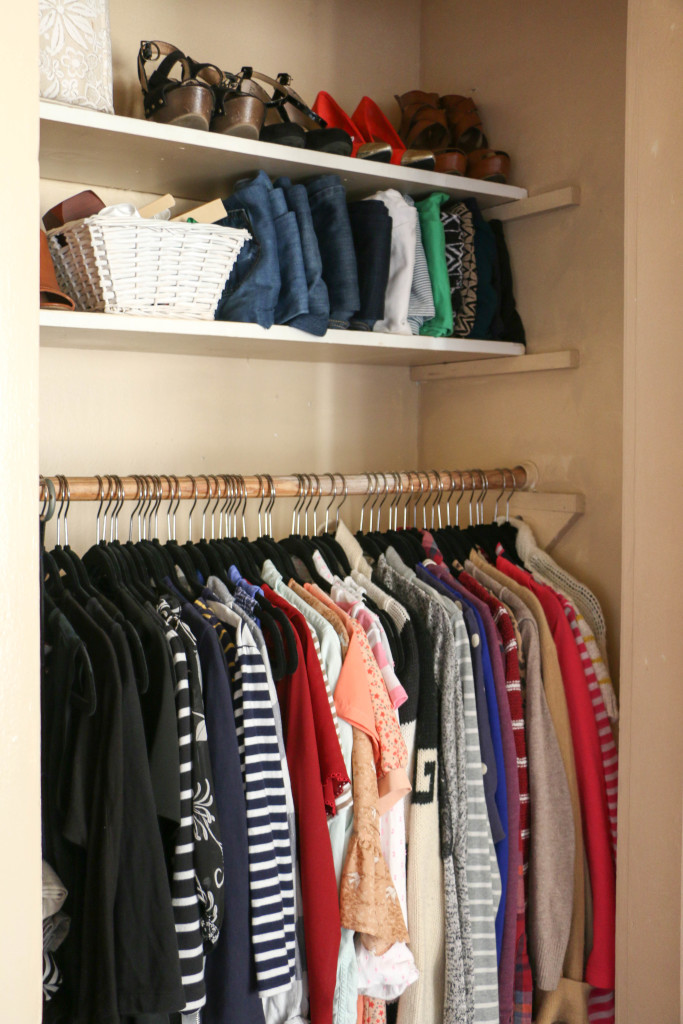
When it comes to our house, I have big plans. I want to get rid of the excess, and purge all the unnecessary items. My husband might not be prepared for it yet, but I’m deeming this year the year of the garbage bag. By that, I mean, I’m bagging up as much as I can and getting it out! I want to spend time organizing, clearing out, and enjoying space. Because (as embarrassed as I am to tell you this), we actually have a room in our house called “the back room.” It’s an unused bedroom off the master that houses my closet, a plethora of guitars, amps, laundry hampers, an ironing board, and senseless piles of workout clothes and gym bags. I think most people probably have some sort of space like this in their home, but I’m telling you, ours is bad. We haven’t touched it since we got married, and this year I want to abolish the mess.

I’ve been meaning to read The Life Changing Magic of Tidying Up, and I’ll be doing that soon and getting a move on things. I am looking forward to the calmness and freedom that cutting back will bring. I’m not about to get crazy and move into a tiny house or anything, but I am looking forward to being serious about a change in our lifestyle. Those are my thoughts on the New Year. What are yours? I’d love to hear about what your plans are for 2016! That’s all for today, friends! Have a fabulous day!
DIY Projects, Holidays

The Importance of Wrapping

When I was a kid, Christmas Eve was a big deal. Our family tradition was that everyone would sleep in the living room on Christmas Eve night, so that on Christmas morning, we would wake up right next to the tree. I remember how much I loved this tradition. I remember the year I pretended to still be sleeping as my parents rolled our new bikes into the living room from the garage. I also remember sitting in my nightgown on my sleeping bag opening my first “grown-up” tape recorder (and by grown up, I mean that it was a normal tape recorder, and not a Fisher-Price one). I spent hours in my room with that tape recorder making my own “radio show,” where I would be the DJ, playing my favorite songs, talking about my favorite things, and interviewing very interesting people (my brother and sister). I wonder if I still have those tapes somewhere.

We all have childhood memories associated with “the best gift we ever received.” Now please don’t hear me say that giving and receiving gifts is the most important thing about the holiday, because we all know it’s not. However, as we do give and receive gifts, we form emotional memories of years past. The feeling you have as a child of tearing open the package is a beautiful feeling. To me, giving gifts is a way of showing you love and appreciate someone.

So why in the world would we not do our best to make our gifts as presentable and beautiful as we can? Again, I am not implying that gifts must be perfect, or that pretty wrapping makes a gift any more meaningful. For me, it is simply another creative outlet. So here are a few of my tips for pretty (and inexpensive) gift wrapping.

giftwrapping3

giftwrapping8

giftwrapping1

giftwrapping5

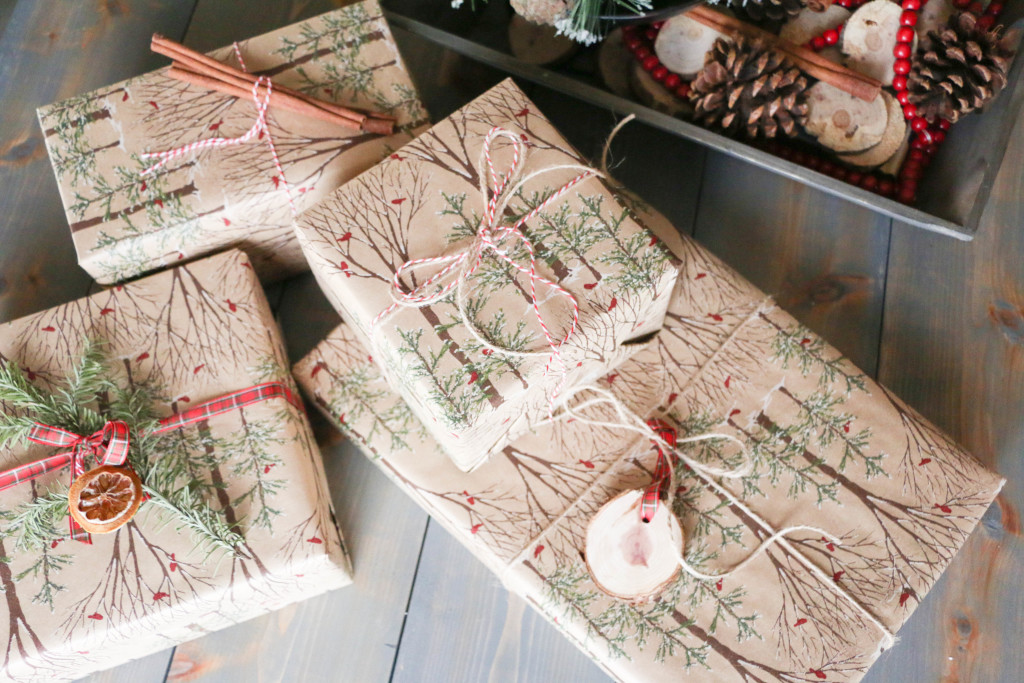
This paper came from Hobby Lobby last year or the year before, and everything else I had on hand.

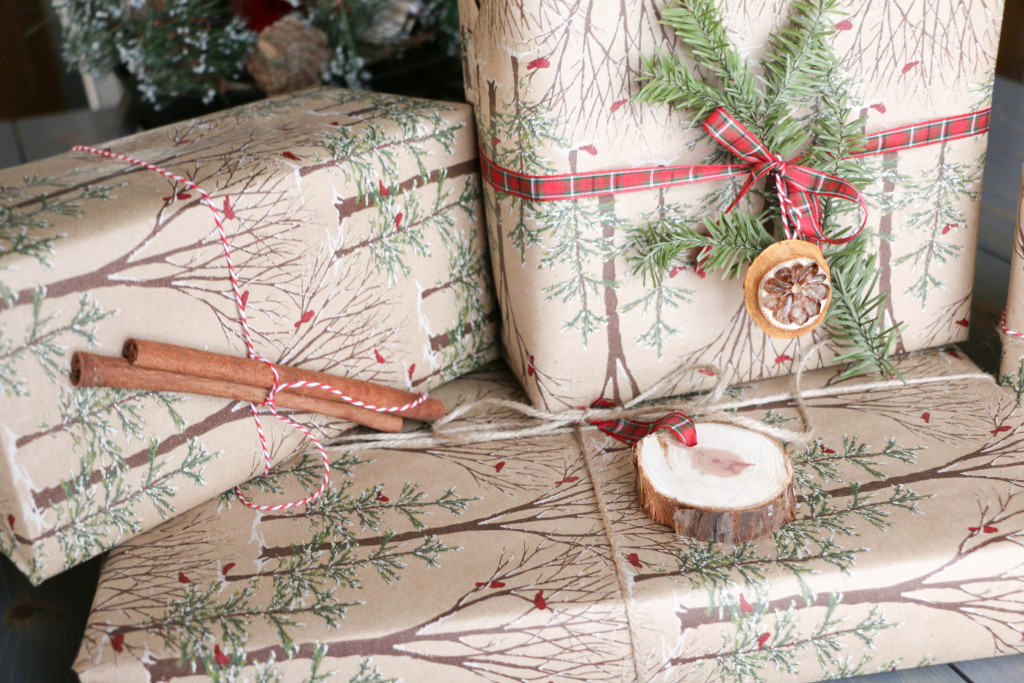
Gift wrapping has three important factors: the paper, the ribbon, and some type of embellishment.

Let’s talk paper. I never pay full price for wrapping paper. I re-use the same paper from previous years most of the time. I also pick up a roll or two the day after Christmas when everything is marked down 50-70% off normal retail prices. If you’re without holiday paper, have no fear! One of my favorite things to use is plain brown craft paper because it works for all occasions. Baby shower? Check. Christmas? Check. Birthday? Check. Wedding gift? Check. You get the point. You can also use black and white newspaper (I have seen some GORGEOUS wrapping using newspaper), wrap your gift in a scarf (both pretty and reusable!), or in a real pinch, use any themed paper on its opposite side so that it simply shows white.

Next up is ribbon. The options are unlimited! I do occasionally use normal cloth ribbon, but my favorite things to wrap a gift in is regular twine, or colored baker’s twine. My suggestion is to look around your house and see what you can find. Thinly sliced strips of a coordinating wrapping paper can work as ribbon as well. A thin scarf can work here as well. Don’t go out and buy something new every time you have a gift to purchase. Look around your house and I’m sure you can come up with some thing to wrap your gift in. There’s a reason Julie Andrews mentions “brown paper packages tied up with string” as one of her favorite things…the string is an important detail!

Lastly, let’s talk about embellishments. I think a gift looks perfectly topped off with anywhere from one to three finishings. The amount, of course, depends on what it is that you’re using. I like to use a lot of natural things, such as small pinecones, sticks, dried citrus slices (see my tutorial for that here), cinnamon sticks, leaves, pine clippings, wood slices. The possibilities are endless. I also often add a name tag of some kind, just so that I don’t forget who the gift is for after I finish wrapping it. For kids, you can add a tiny toy as embellishment, or a pretty piece of candy. This is the step that brings it all together, so it’s an important thing to add. The good news is that you can add just about anything you want here, so you can certainly find something you have at home or go out into your yard and find something just as easily.

How do you wrap your gifts? What’s your go-to accessory for finishing your wrapping? I’d love to hear about it! Be sure to follow me on Instagram @rumfieldhomestead for the latest updates on what I’m doing! That’s all for today, friends! Have a fabulous day!
Holidays, Home Decor

My Christmas Decorating Secret

Christmas prep is in full swing over here! I’ve been super busy with the semester winding down at school, and the buzz of Christmas is alive and well in first grade. Thankfully there’s just ONE WEEK left of school before it’s officially Christmas vacation! Our home is fully decked out for Christmas, and I am *almost* done with my Christmas shopping. There are always those last minute things to get accomplished, but I can’t deny that I love the hustle and bustle of the holiday season.

Today I want to share with you all what I’m deeming THE BEST KEPT SECRET OF CHRISTMAS (y’all know I’m dramatic). Seriously though, if you’re cheap like me, you’ll want to keep reading.

I was too impatient this year to wait around for the real Christmas trees to come out, and so we caved and bought an artificial tree in early November. I don’t regret that at all, however, we missed the homey scent that comes with a real tree. Ever the optimist, I came up with a plan to get the best of both worlds: get an artificial tree early in the season, and still have the homey smell of a real tree. I was inspired by some friends who used tree clippings from their yard to make garland for their staircase. Now, I have neither a staircase nor the proper tree (nor the money to spend for that matter). But that has yet to stop me!

Here’s what I did. THIS IS THE SECRET, SO READ CLOSELY. Did you know (I didn’t) that Home Depot has their own tree selection (0kay this part I knew, but the rest I didn’t)? Each time someone purchases a tree, they trim the bottom/excess and put the clippings in a large bin. Here’s the cool part: the clippings are FREE for anyone to take. I said they’re FREE!!! How awesome is that?!

We simply asked the kind gentleman at the cutting counter for the clippings, and he directed us to the free bin. I may be the only person on the planet who didn’t know this, I don’t know. But if there’s someone out there who is like me, you might be excited to find this information out. I broke the boughs down when we got home and placed them in various places around the house.

treeclippings

treeclippings2

treeclippings3

treeclippings4

treeclippings5

treeclippings6

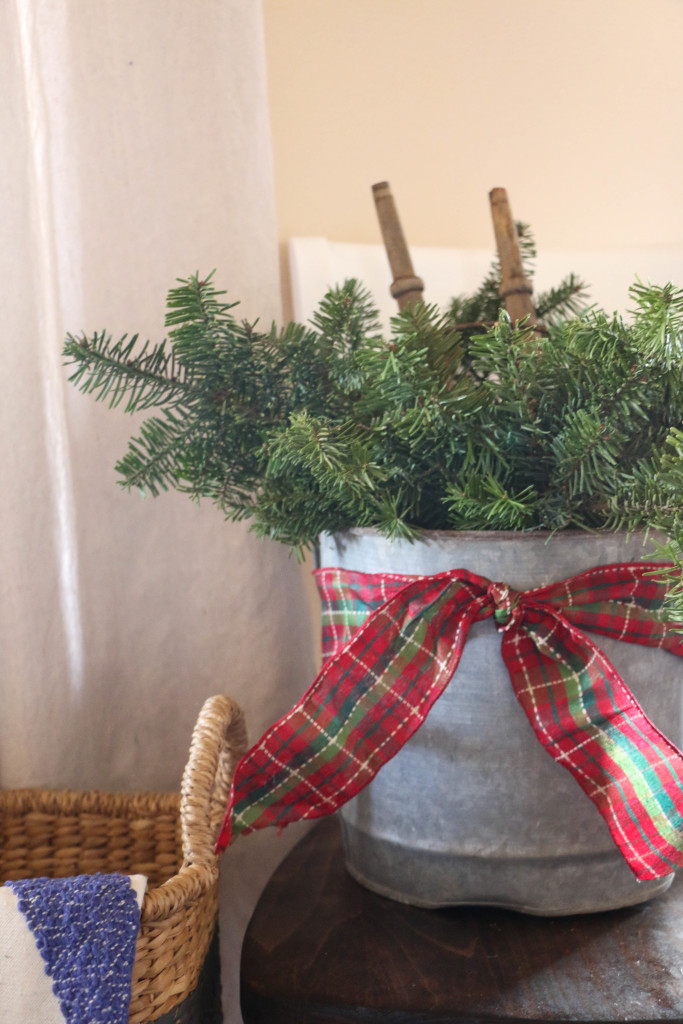
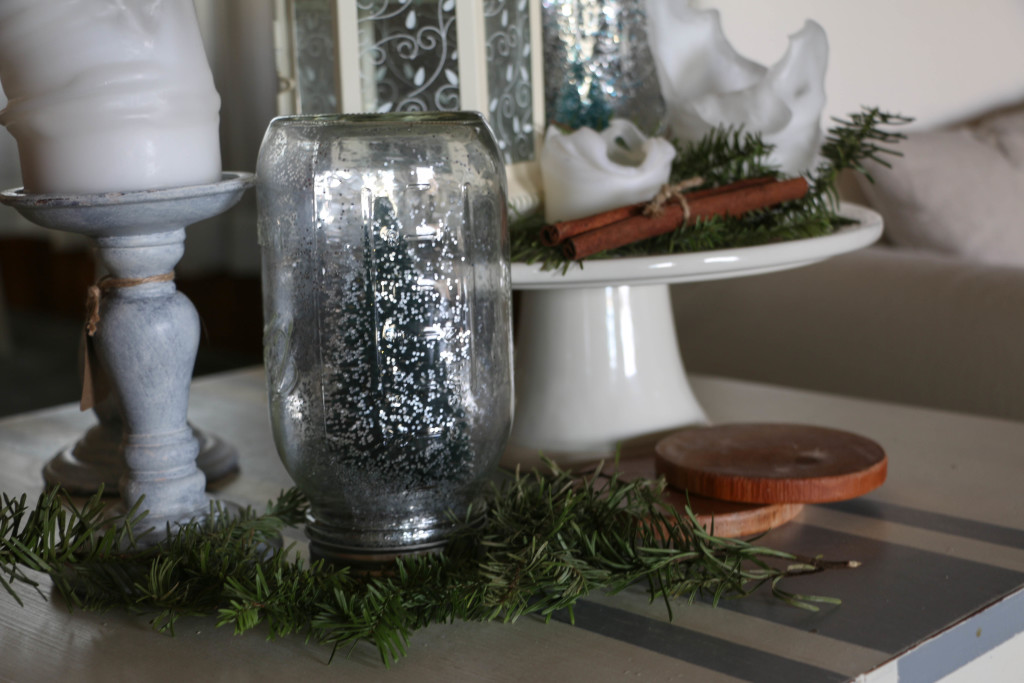
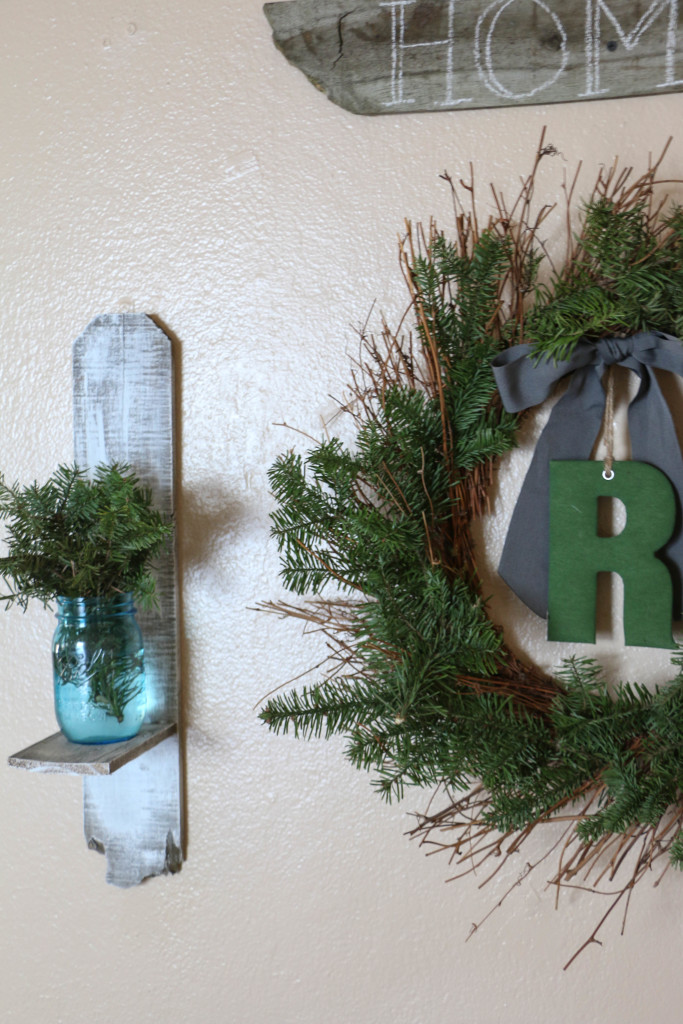
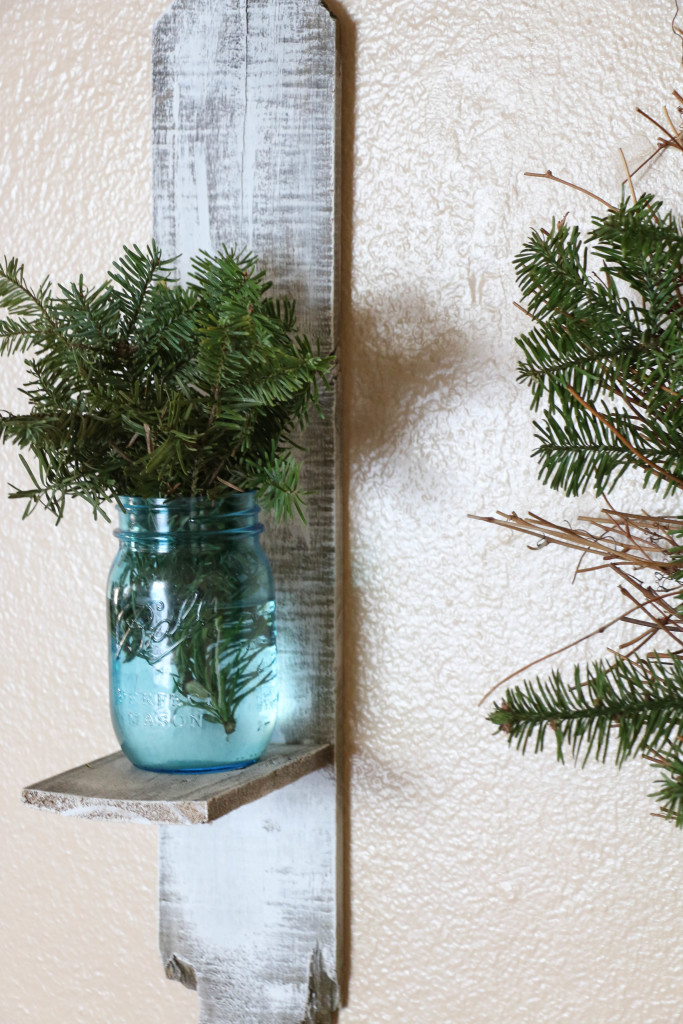
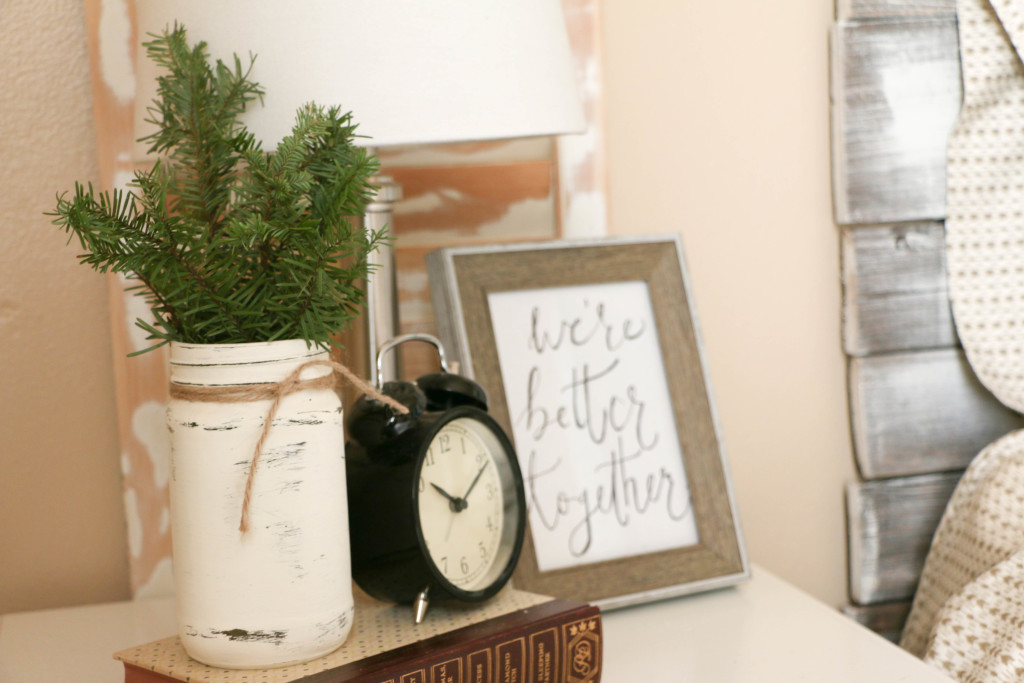
I spread them out all around my home in jars, vases, wreaths, and mixed in with my decor. It smells amazing! We’ve had our tree up for weeks, but now it smells like Christmas in our home too! I think my favorite look is in the first picture, the cuttings in a big bucket. Having these clippings around makes the house not only feel homey, but it also adds to the rustic/primitive look I was going for this year.

I got mine from Home Depot just because that was the closest thing to us locally, but I’ll bet you could ask just about anywhere trees are sold and you’d be able to take some some clippings free of charge. I’m a pretty budget conscious gal, but this is big even for me! The clippings make an impact in several rooms in our house and it cost me nothing at all!

Have you done this before? Did you already know about The Best Kept Secret Of Christmas? I’d love to hear about it in the comments below or if you plan on trying it this year. That’s all for today. Have a fabulous day, friends!

Holidays, Tutorials

DIY Citrus Slice Ornament

HAPPY DECEMBER Y’ALL!!!! Okay, I’ll admit I’m excited. It’s officially the Christmas season now that it’s December. I can post all the photos of my tree and Christmas decor without shame! It’s a wonderful world, friends.

Today I wanted to show y’all the last of my DIY ornament ideas. My Christmas decor this year is super rustic and primitive, and so this last DIY was the one that I really think brought the whole look together. If you haven’t seen the other two ornament DIYs, you can check them out here and here. I remember seeing photos of dried fruit as Christmas decor years ago, but I never really thought anything of it until this year. I needed something with a pop of color, and so it was time to test out this project!

citrus slices

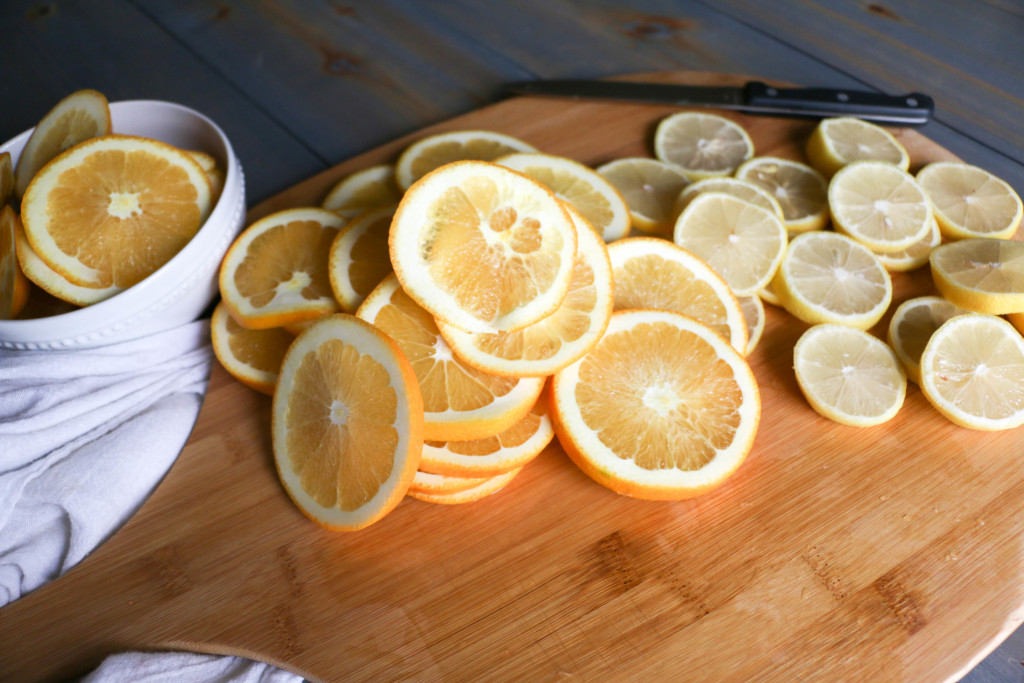
The first thing I did was slice several oranges and lemons. I think I did four of each. I wasn’t sure which I would prefer, so I did both. I cut the ends off and simmered them on the stove using this recipe so they wouldn’t go to waste. citrus slices2

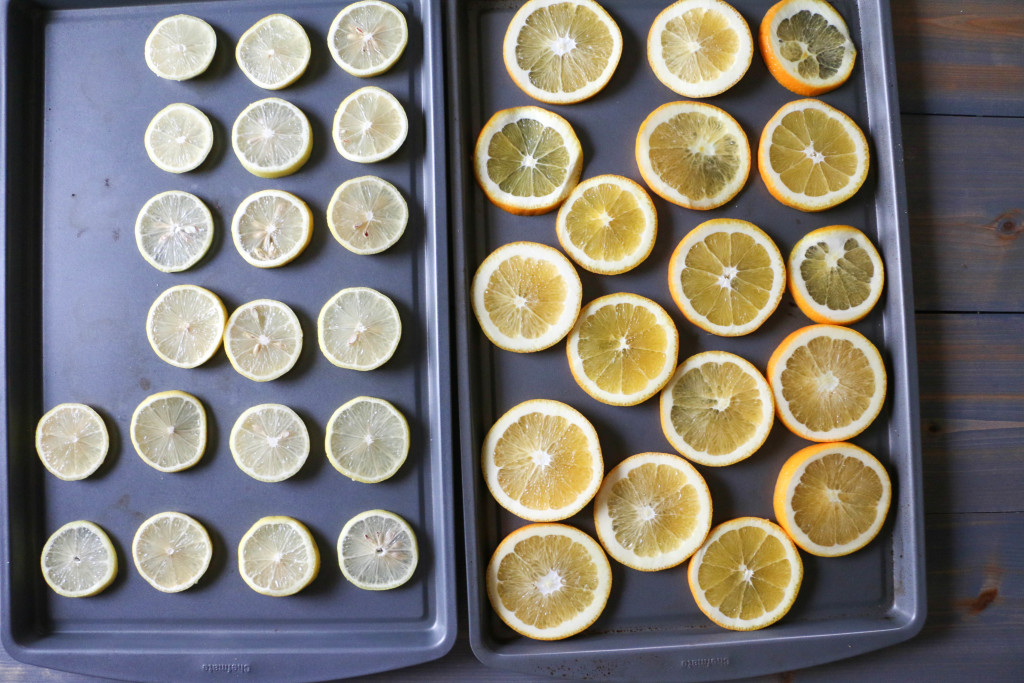
I separated the oranges and lemons on my (badly stained) cookie sheets so that if they cooked at different rates it would be easier to remove them from the oven. I placed them on the lowest setting on my oven (I think it was about 150 degrees) and put the slices in. In total, I cooked them for about five hours. Every hour or so, I would turn the slices over so that they would dry evenly. I really don’t know if this necessary, but I’m a little paranoid. The good thing about the temperature being so low is that I could turn the slices over with my bare hand. In general, the lemons cooked a bit faster than the oranges did, because they were thinner I think.

citrus oranment1

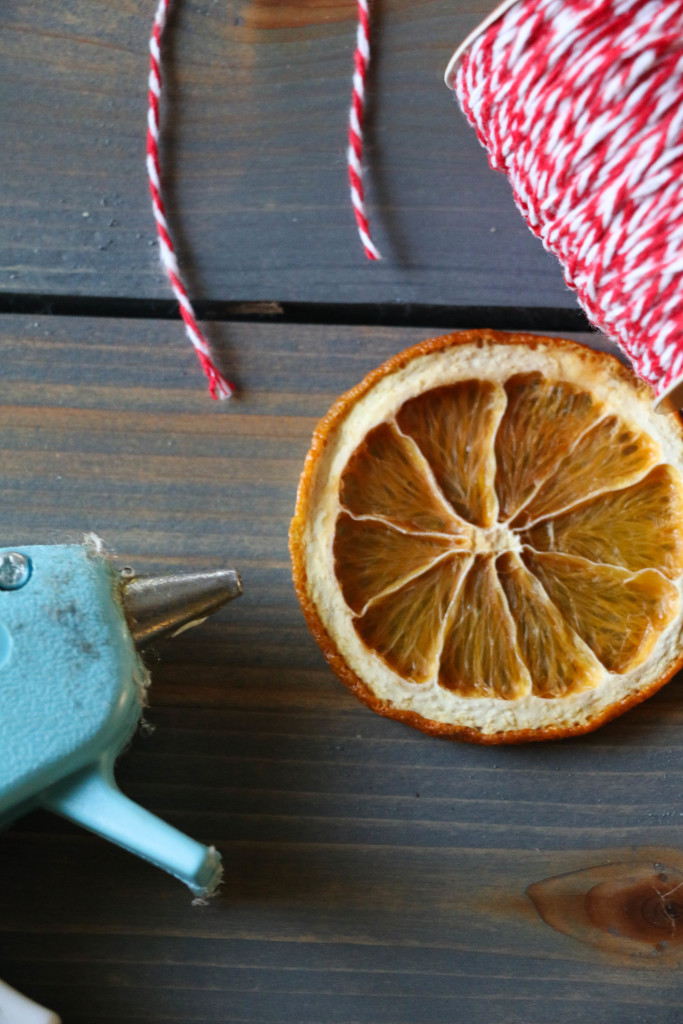
After they were fully dehydrated came the fun part! I cut little pieces of red baker’s twine, the same twine I used previously on our pinecone ornaments, and hot glued it to the back to make a loop. Easy.

citrusornament3

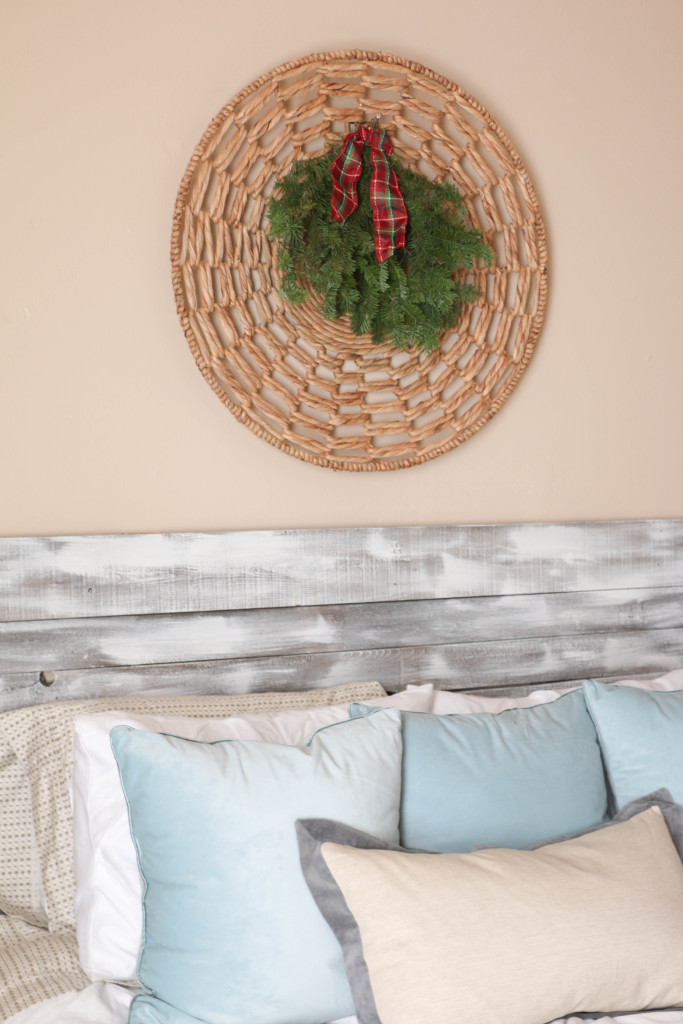
When they were finished, they looked like this, and I am so excited about how they turned out. They have just the look I was hoping for. As it turned out, I ended up liking the orange slices better than the lemon slices because the oranges had a thicker rind (is that the right word? I don’t even know.). I did these a few weeks ago, and they’ve lasted just fine, which was an initial concern of mine.  I love the way the tree lights shine through the fruit. It feels super cozy! I also placed some of these slices on the wreath I have on the front door, and I love how it feels there too! I’m deeming this year “the year of the fruit” when it comes to decorating.

I’d love to hear what you think, and if you’ve tried this out. That’s it for today. Have a fabulous day, friends!

DIY Projects, Tutorials

Salvaged Wood Headboard DIY

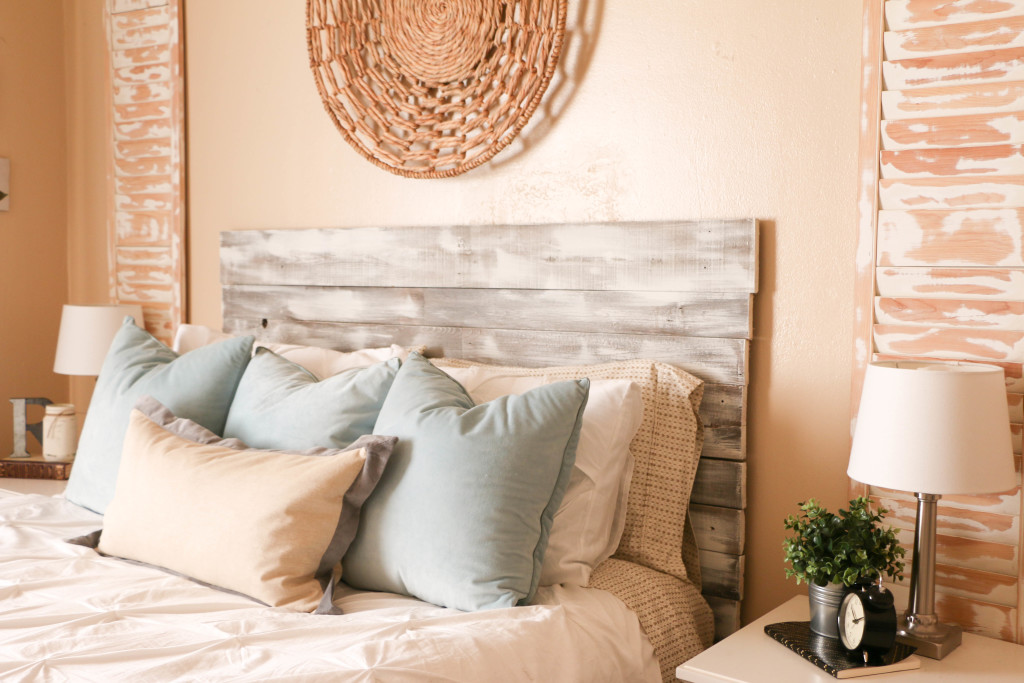
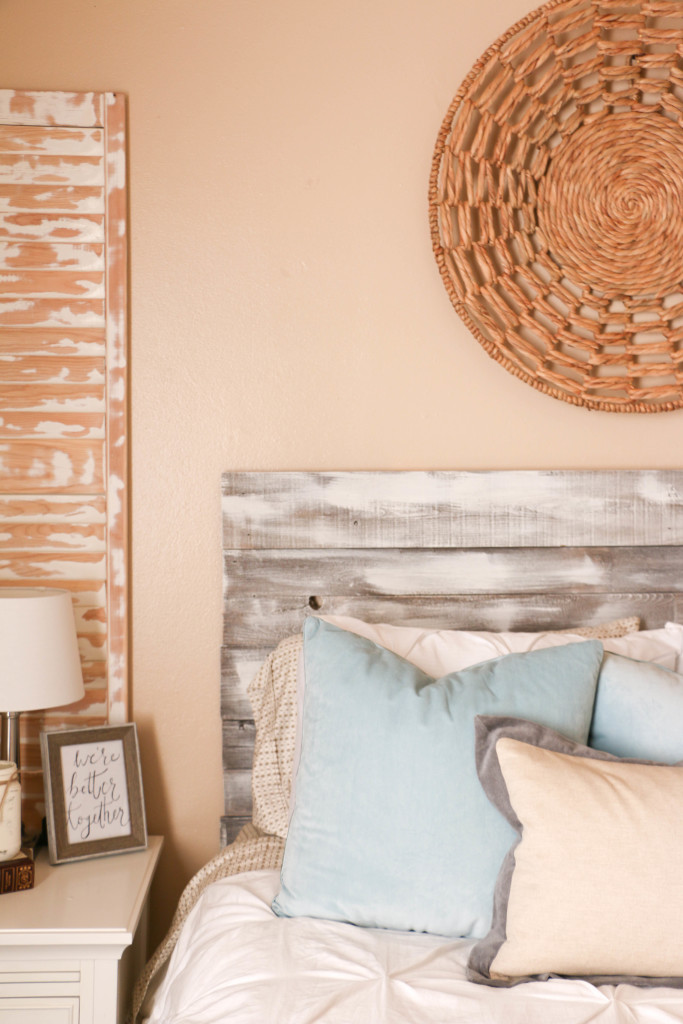
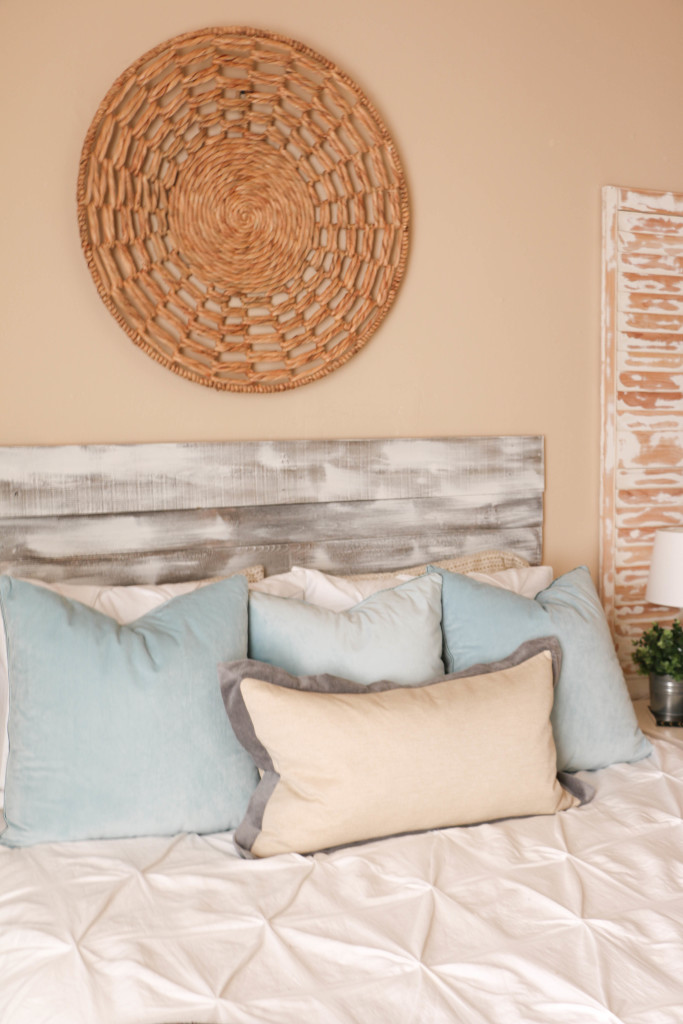
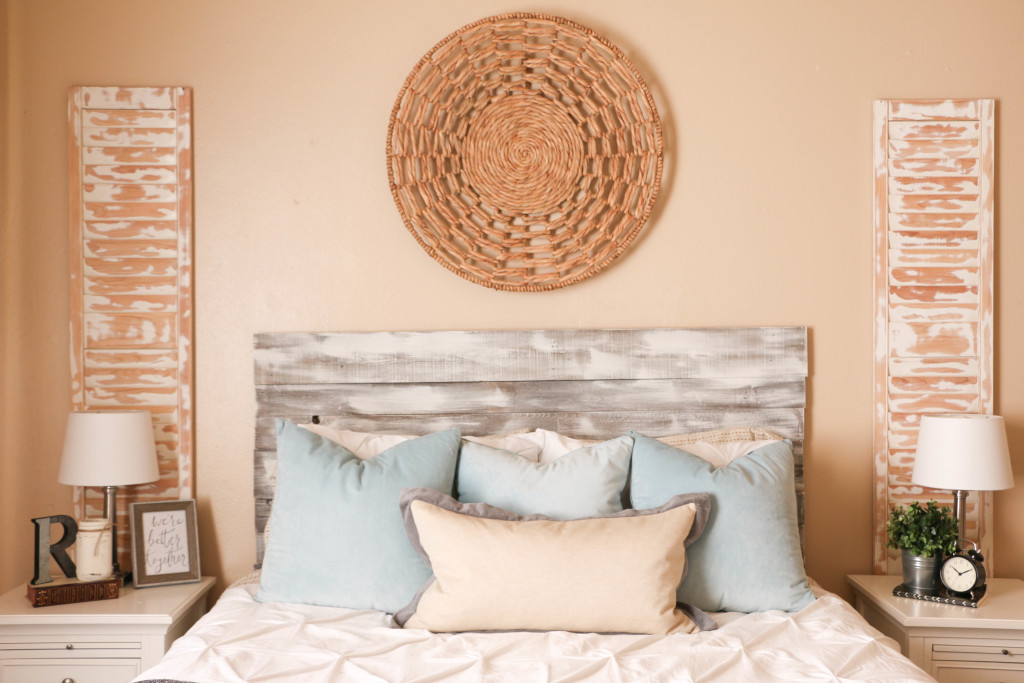
It’s been a few weeks since we updated our bedroom and I am still living in a fairy-dream world because of it. I showed you guys the full result a week or so ago, and you guys have been so sweet about how it turned out. If you didn’t get a chance to check that post out, you can read all about it here. Today what I wanted to do was show you guys with a little more detail the headboard that I made for this space.

When I bought all the new pillows for the bed, I knew something was still missing. Our old headboard was a pre-blog DIY that was imperfect but served us well for the time that it did. I made it back when I was still unsure about the style direction I was heading in with our house, so it just didn’t quite work. And let’s be honest. I still don’t think I know the style I’m headed toward. Live and learn.

I wanted to make something, but I didn’t want to spend any money. Yes, you read that correctly. I wanted to spend zero dollars. Story of my life, right? I knew that I could only justify to Ethan building a new headboard if I could do it for free since I had just built one a year prior. Now that I think about it, I think Ethan has learned not to question my unreasonable antics. The other stipulation for this project was that I had to do it completely by myself. Normally our DIY projects are a team effort (and by that I mean Ethan does the work and I make it pretty). This time, before I knew what I was thinking, I told him that I was going to make this project for free, and I was going to do it completely on my own. Cue “On My Own” from Les Mis as I head to the garage to work on this project.

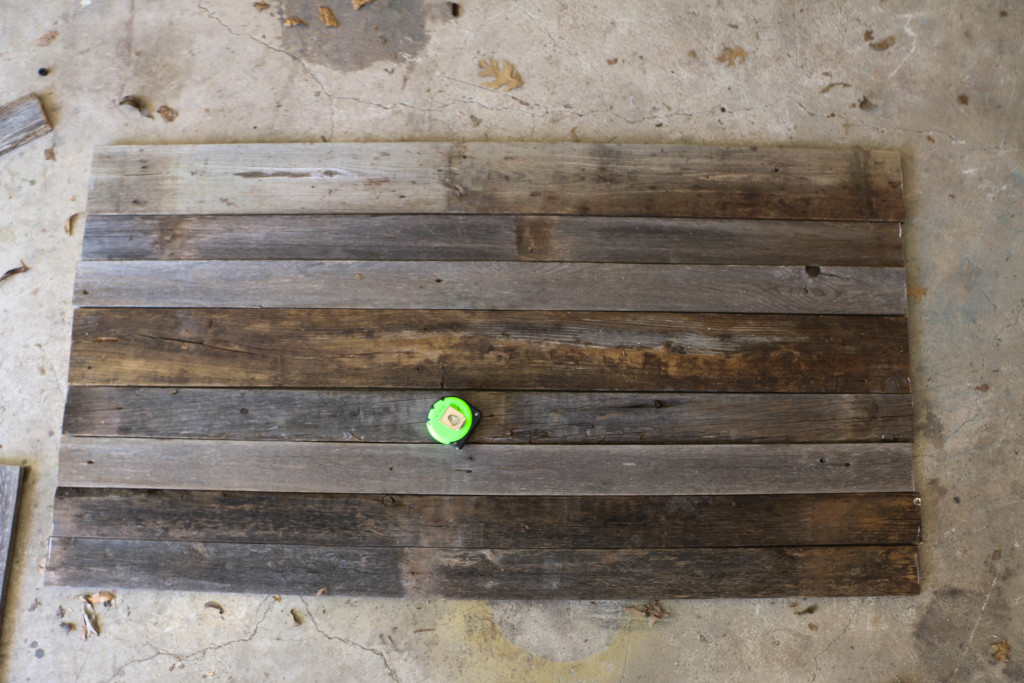
So here’s how it went down. A few months back, our neighbors were replacing a portion of their wood fence. I hoarded rescued some of the pieces and they have been sitting in my garage, safe from harm. I headed to my stash and chose the best looking pieces for the job. I (and when I say I, I do mean me myself and I. All by my lonesome) cut the pieces using a circular saw to 60″. We have a queen size bed, so that was the size we needed. If you were to do something similar, be sure to measure the size of your bed. I did wash these with warm water and soap, and lightly sanded them, just to make sure they were clean. And not going to give me splinters. Because those things are important, I guess.

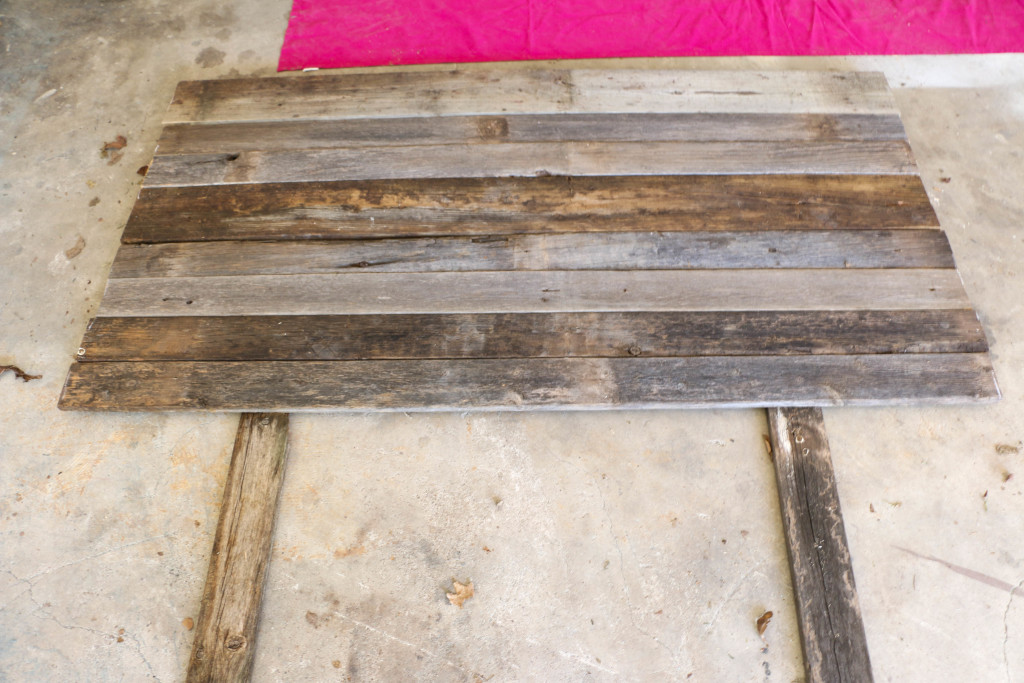
So I laid out all the pieces on the garage floor to make sure I liked to order of them, since all the pieces were slightly different.

headboarddiy1

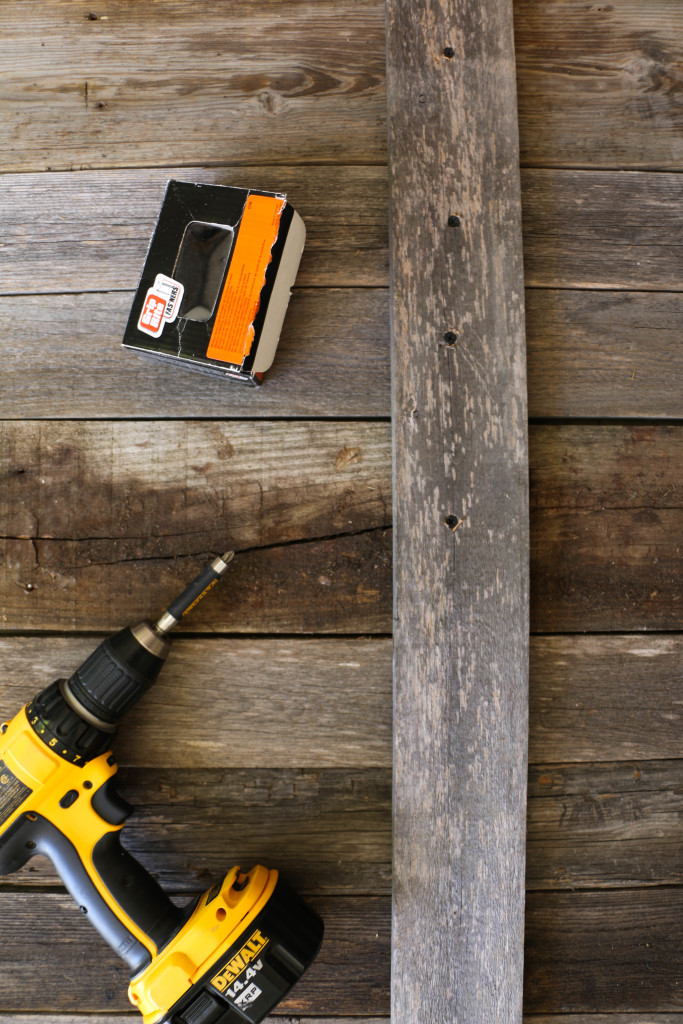
Then I used two cross pieces to screw onto the backside of my headboard. These pieces were vertical, and were 54″ tall. Our old headboard was a bit taller than this, but I always thought it looked kind of weird, so I was very mindful of how tall this one was going to be. I don’t know if there are official rules about how tall a headboard should be, but I think y’all all know that I make up my rules as I go when it comes to home decor. I wish I could show you the pictures of me screwing this together just to show off my brute strength, but alas, I did this one on my own. And I don’t have enough hands to photograph myself building a headboard. You’ll just have to trust me in the fact that I did make this.

headboarddiy2

After I screwed the back pieces together, I turned it around to paint it. It looked like this:

headboarddiy3

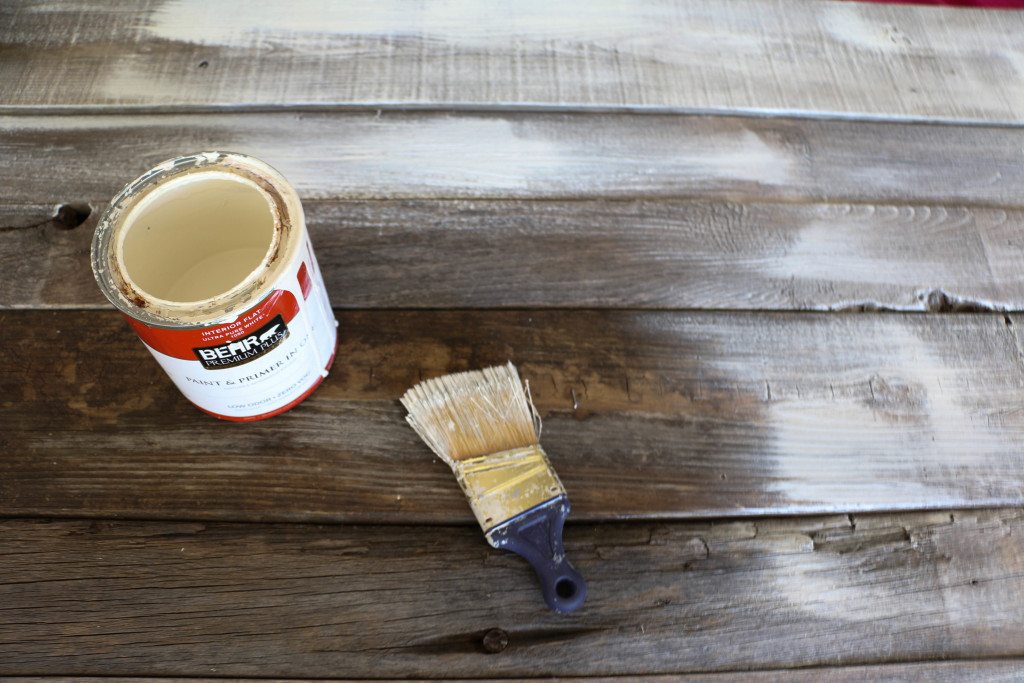
Technically, it didn’t need to be painted, I did like the way it looked like this, I just love lighter colors, so it didn’t really stand a chance. I used my dry-brushing technique, which you can read about here. It took about ten minutes total to paint. Have I mentioned that’s my favorite way to paint things?

headboarddiy4

The color is Mourning Dove by Behr, and I use that for tons of projects around the house.

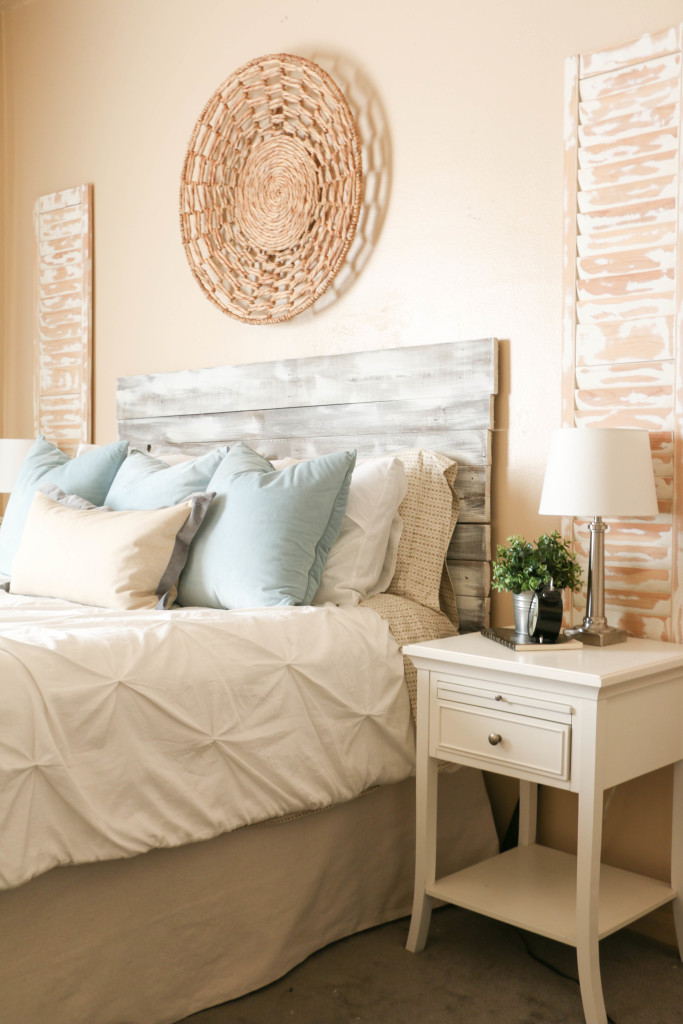
After I let it dry (which didn’t take long with the amount of paint I used), Ethan helped me carry it into the house to put it behind the bed. So I guess he did help. BUT OTHER THAN THAT I did this one on my own, and I am so proud of myself. Picture me pridefully kissing my biceps.

diyheadboard9

 You can see more after photos in the original reveal post. I cannot tell you guys how much this little project changed the feel of our bedroom. And it was 100% free! This cheap-loving girl is jumping up and down with excitement over this one! I promise you, I am super wimpy, and I did this in an afternoon, so I know you can too!

All the sources for the items you see here are in my original reveal post, which you’re welcome to check out! I’d love to hear what you think about this project in the comments below, or you can find more on my Instagram. That’s all for today, friends! Have a fabulous day!
rusticheadboard

Holidays, Tutorials

DIY Wood Slice Ornament

Hey y’all! Thanks for stopping by! Can you believe Thanksgiving is just around the corner? I’m SO READY for the turkey and mashed potatoes!  Seriously, that’s all I eat on Thanksgiving. I’m a really picky eater, I know. Don’t shun me, but I don’t even like pumpkin pie (even my mom’s). But I am all about turkey and mashed potatoes. This year I’ll be flying up to New York to spend the holiday with my family. It’ll be a super short trip, but I’m excited nonetheless.

Now, my family doesn’t have a tradition of setting up the tree the day after Thanksgiving, but I know that many people do. Growing up, we didn’t set it up until about a week before Christmas. Ethan and I have had our tree up for about two weeks now, so I guess you can say I’ve strayed as far from that tradition as possible. All that to say, I know a lot of y’all put out Christmas decorations Thanksgiving weekend, so I wanted to share another homemade ornament idea I’ve come up with for my home.

If you haven’t checked out my first post on pinecone ornaments, you can read all about that here. I wanted to keep with the primitive, rustic theme I had going on, so I added these wood slices and I am in love with how they turned out. Seriously y’all, this is the easiest DIY yet.

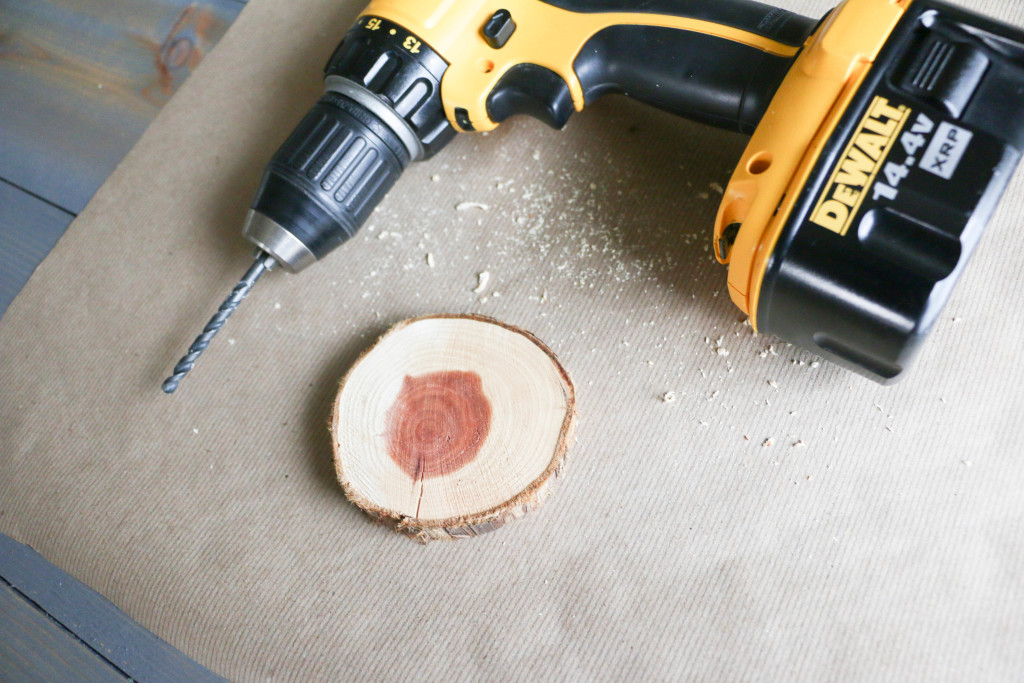
I bought some pre-sliced wood at a flea market for a steal. You could just as easily get a thin log and slice it yourself though. My slices were probably about a half an inch thick. First thing I did was drill a small hole near the top of the slice. The trick is to not drill too close to the top so as not to split it. I accidentally broke a few of them, but I had about twenty to start with, so I was okay with losing a few.

wood ornament1

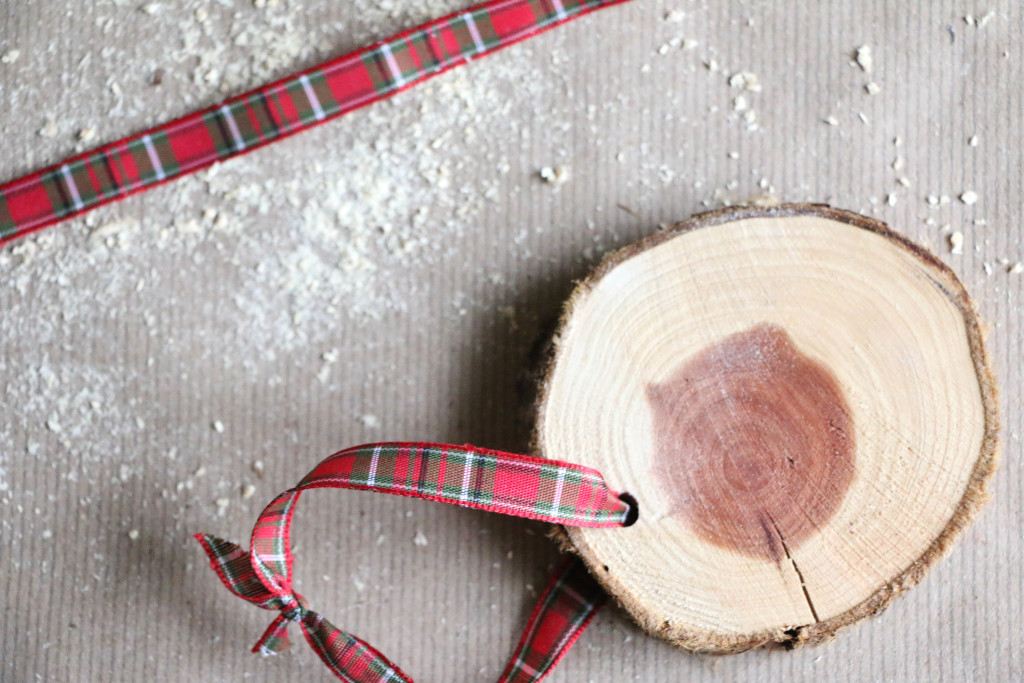
After I drilled the holes, I strung some ribbon I had through the hole. I found this ribbon at Michael’s on sale. I was originally looking for a cream-based red gingham ribbon, but I found this one and it stuck out to me. I really like the way the plaid has an old-fashioned vibe. So this is the one that ended up in my cart.

wood ornament2

I thought about hand lettering something on each of the slices to complete the look, but ultimately decided against it. The reason why is simply because I thought I might reuse them in the future for something else, and I wanted them to be bare just in case. Also, I figured (since I’m so darn fickle) I might not like them as much next year if they were written on, so didn’t want to do anything I would regret.

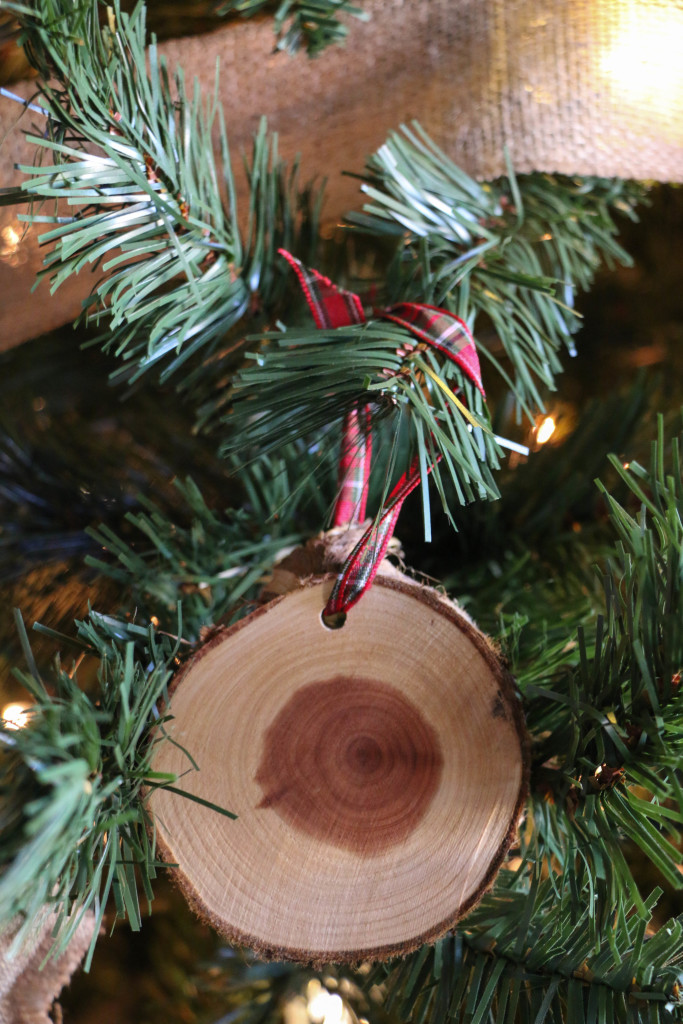
So here they are in all their bare wood slice glory:

wood ornament3

The easiest project you ever did see.

Will you be setting up your tree next weekend? If so, why don’t you give this easy project a try? I’d love to see how you use this simple idea in your home.

Have a Happy Thanksgiving friends! And a Happy Decorating! That’s all for today. Have a fabulous day, friends!

<a href=”http://www.bloglovin.com/blog/13855015/?claim=9a8yvxbhj62″>Follow my blog with Bloglovin</a>

Home Decor

Quick and Easy Bedroom Update

Hi you guys! Thanks for stopping by! I am so excited about today. It’s the last week before Thanksgiving Break (I know y’all will hate me for saying this, but I get the whole week of Thanksgiving off!). I cannot even tell you how excited I am to have next week off. And we all know what comes quickly approaching after Thanksgiving, right… Not that any of that has anything to do with what I’m talking about today. But this teacher’s got a one track mind. What can I say?

So a while back (like several months back), Ethan and I were talking about some changes we wanted to make with bedding in our bedroom. We’ve only been married a little over a year, and the bedding I picked out on our registry wasn’t quite working out. I still have no idea what I’m doing when it comes to decorating, but I’d like to think I’ve learned a few things at least about what doesn’t work in our home. Maybe I’m completely wrong. Who knows?!

shutter21

Okay, so this is what our bedroom looked like beforehand. This quilt was just a light quilt that we used this summer, but this is the best photo I could find (why didn’t I take a better photo for you guys before I redid the bedding? I don’t know.) So the bedding you’ll see today is our permanent bedding that we’ve had. There are a couple of problems we ran into with this arrangement.

First, those pillows in the back are too long for the bed. Like, they’re falling off. What was I thinking?

Second, the gray patterned pillows are the ones we actually sleep on, and I don’t like that they’re in the front. I know that’s probably like the first thing you would learn in a design book. But let’s be real, I haven’t read a lot of design books. Because, in case you hadn’t noticed, I still have no idea what I’m doing.

Lastly, (and I can’t even believe I’m typing this) the light gray patterned sheets don’t hide sweat stains very well aren’t very aesthetically pleasing. In case you forgot, I am married. Which means a man sleeps in my bed. So while I’m all for solid white sheets, I do have a husband to consider.

So we decided we needed to change some things up. We were anticipating an extra bit of money, so we waited until then to purchase anything. Which ended up being several months. But what are ya gonna do? Most couples probably spend their money on more important things when extra money comes in, but lucky for me, I have a husband who agrees to let me spend our money on what’s really important. Like throw pillows. He’s kinda the best. Okay, so here’s what I came up with:

diyheadboard9

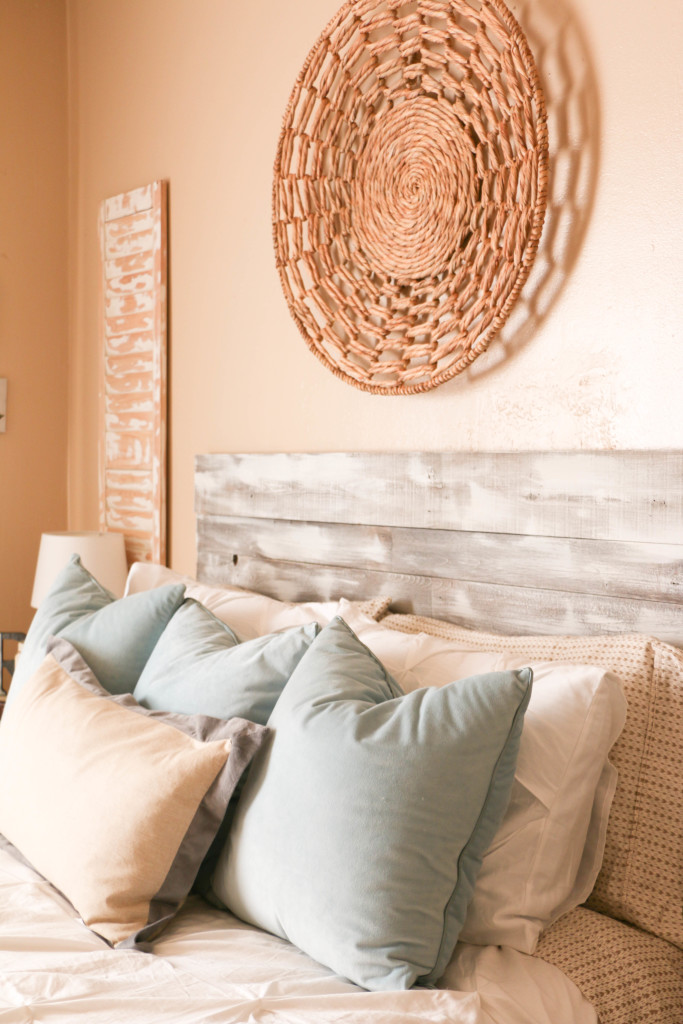
So what I actually purchased were the sheets and the throw pillows. I am liking this arrangement SO MUCH better.

diyheadboard8

So the sheets are these from Target. I wanted to get something neutralish, but would still be dark enough that everyday wear wouldn’t be too evident. I’m a total white lover when it comes to pretty much all things home, but in this case I made an exception.

The white shams came with the bedding but we had never used them before. I was happy to pull them down from the closet and put them on some NORMAL sized pillows. Not ones that are literally falling off the side of the bed.

diyheadboard6

The blue throw pillows have a super soft velvet-like finish that I got from Pier1 imports. I was surprised to find out at the register that they were also on clearance. So hello, happy shopper here! They come in a wide variety of colors, and they’re super comfy!

diyheadboard10

The long throw pillow in the front is my favorite of all! I found it at HomeGoods. Funny story about it. I knew I wanted something of this shape for this spot, but I couldn’t find just the right thing. So we were at HomeGoods one weekend, and Ethan found this same pillow with yellow trim. Which of course would have been perfect if it hadn’t been yellow. I told Ethan, “I wish we could find the exact same thing, just with gray trim instead!” But they had no such thing.

So what do you know, the next day we were at a DIFFERENT HomeGoods (don’t question how often we go there, okay?), and I found this one! It was like the pillow heavens opened up and smiled down on me that day (it was also five dollars cheaper than the original yellow one I found).

diyheadboard11

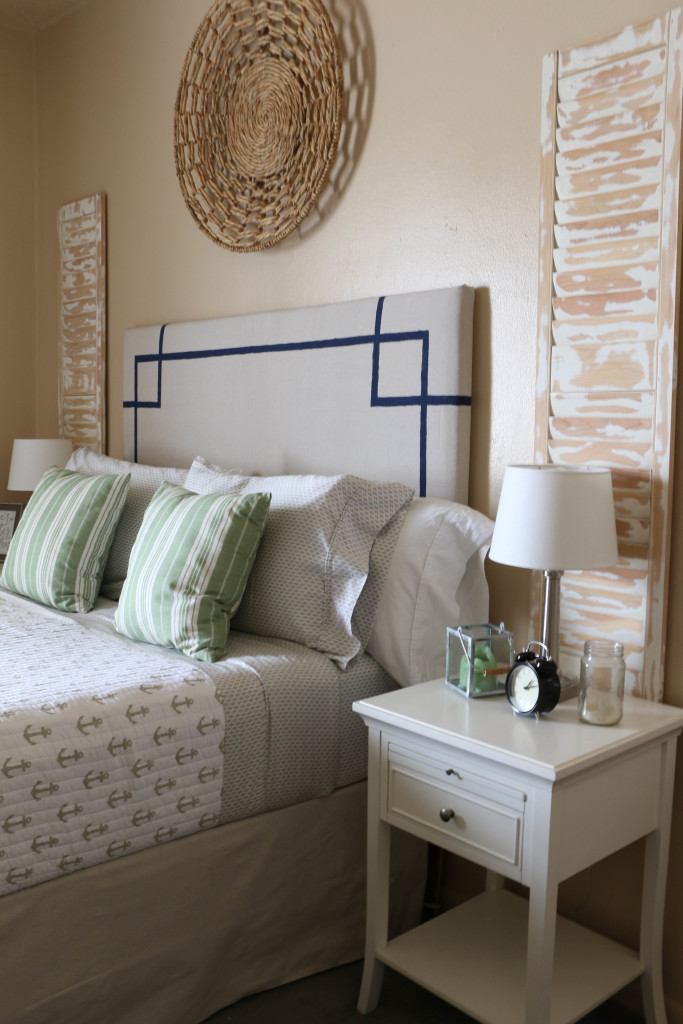
I think the sheets and pillows went a long way here, but in case you didn’t notice from the first photo…I impulsively changed the headboard too! I made it by myself for completely free, because I didn’t think the old headboard worked well with the new bedding. Plus, I’m fickle and I just changed my mind too quickly. I’m going to do a full separate tutorial on the headboard, but I do think it’s the thing that brings the bedding together.

diyheadboard7

Stay tuned for that tutorial! I’m so happy with how this mini bedroom refresh turned out. I brought in so few new pieces, and the result is something I really love. I hope this inspires you to change things up at home, even if it’s just moving pillows around! 🙂

That’s it for today friends, have a fabulous day!
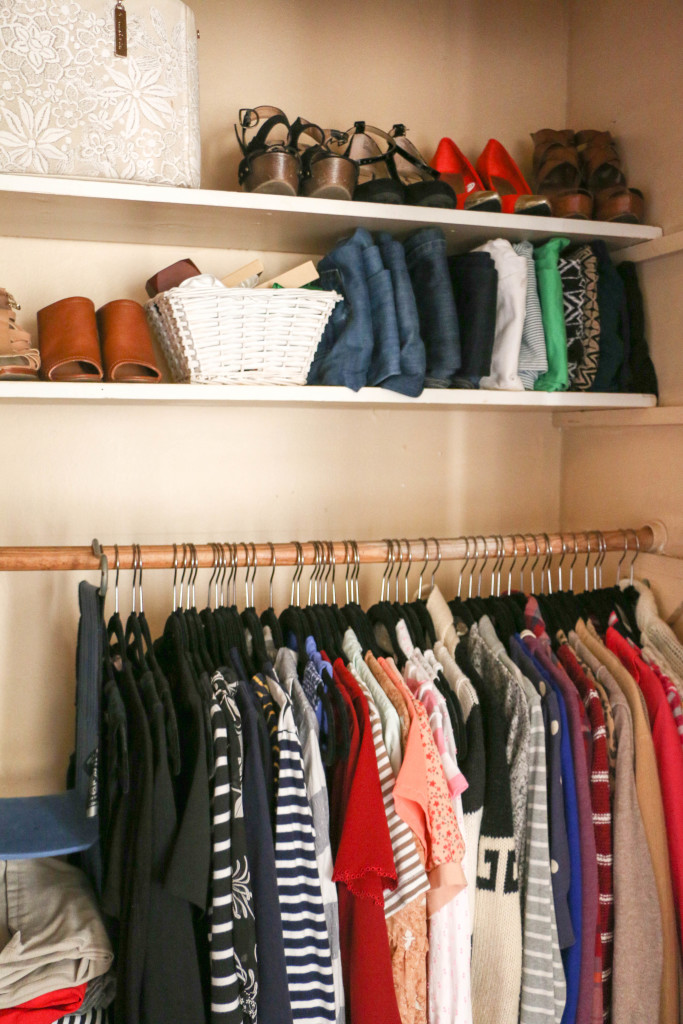
Holidays, Tutorials

DIY Pinecone Ornaments

I know it’s still early….but I have begun decorating for Christmas at our house! Last year, we got a real Christmas tree, which I loved having. They smell so good, and they’re so nostalgic I think. The only downside to them is that they don’t come out until early December because they don’t last very long. Which I suppose I can’t be upset about, but I was so impatient this year that we went out and got an artificial tree. I had too many decorating ideas that I couldn’t wait to get started.

So, now that our tree is up, I wanted to share with you a few of the quick projects I did for our tree. If you know me at all, I’m all about finding the cheapest way to do things, and so I created a few different types of ornaments on a shoestring budget. For our tree this year (and all of the decor, really) I wanted to go with a very natural, rustic-y, theme. I had a hard time putting into words exactly what I was going for, even to Ethan. I just kept saying to him, “I want it to look like how the pioneers would decorate a tree if they had one.”

As if that even makes sense.

Anyway, today I’m sharing how I turned regular pinecones  into ornaments for our tree. This is so simple, it’s even kid friendly!

pineconepaint

I painted the edges of several pinecones using some paint I had on hand. The color is Mourning Dove by BEHR. I’ve used it for a lot of projects, and it’s one of my favorite off-white colors. I didn’t worry about painting too neatly, I just kind of quickly brushed on the edges of the pinecones. I wanted to make it look like snow, because, you know, that makes total sense in Texas.

pineconeglue

When that was done, I put a dot of hot glue into the top of the pinecone. I tried to tuck it down inside so that hot glue wasn’t too visible once they were hung on the tree. pineconeornament

I added about a four inch piece of red baker’s twine in a loop to the hot glue. I bought the twine from the Target dollar spot. Can we just give a quick shout out for the Target dollar spot?! I swear, that place is like magic. Anyway, I chose red so it would have a little Christmas-y pop. And when it was done, it looked something like this:

pineconeornament2

This is by no means an original idea, I’m sure it’s been around for ages, but it’s something I whipped up super fast, and I wanted to share with y’all. I don’t have kids, but this could easily be done with little ones…it’s THAT easy. Plus (in my personal opinion), super cute. I’ll be sharing a two other ornament ideas soon, so stay tuned!

I hope you give this one a try! I know I’ll be enjoying them this season.  Well, that’s all for today friends, have a fabulous day!

DIY Pinecone

Home Decor

Sugar Mold Thanksgiving Styling

Can you believe it’s November already? This year is flying by, and I definitely have Christmas on my mind. (Christmas in first grade is a lot of fun, I have to admit). But before we get to Christmas, I have to at least give a little nod to Thanksgiving! I wanted to show you guys a cool piece I found recently and how I am styling it for Thanksgiving.
About a month ago, Ethan and I were shopping at Canton, our favorite place to go. I’ve shared about it before, but it’s a giant flea market in Canton, Texas. It’s one of the country’s oldest remaining flea markets, and it has a range of all sorts of things. Anyway, we were there and I totally had blinders on because I was looking for one specific thing. I don’t know about you, but I can talk myself out of almost any purchase. So I had my money that day, and because I was walking around looking for one particular thing, I didn’t buy anything for several hours. After maybe four hours or so, I realized I wasn’t going to find what I was looking for, and so I went into SHOPZILLA mode. That’s not a thing. I just made that up. What I mean is that after I gave up on that one thing, it was like my eyes were opened to so many more possibilities around me.

One of the things that I picked up that day was this sugar mold. sugar mold 1

I paid fifteen dollars for it, although I had no idea how I was going to use it. I usually don’t buy things unless I have a plan for them, but this one time I broke my own rule. At the time that I purchased it, I didn’t really know what it was either. I know I had seen pictures of similar things on Instagram, but I didn’t know what the official name was or the history behind the pieces.

When I got it home, I didn’t know what to do with it, so I put it in the guest bathroom (arguably the least used room in our house) so i didn’t have to look at it. I was a little overwhelmed with how to use it, so I ignored it. Anyone else do that? No, you probably don’t, because that’s not normal. Anyway, while it was collecting dust in the guest bathroom, I did a little research on it.

Sugar molds started in medieval times and were used throughout the 19th century. Granulated sugar wasn’t really a thing until the 19th century so sugar was poured into these cone shaped molds to be sold. I never knew that, so when I was reading this, I found it super interesting! I’m a history nerd anyway, so random historical facts are totally my jam. The actual wooden mold has deep cone shaped grooves in the center (mine has six), which made it slightly difficult to style for me. While the origins of my piece are unknown to me, it’s becoming one of my favorite things. I’m sure it’s not an authentic antique, but I love it anyway.

When I finally pulled it out and decided to make it pretty, I was kicking myself for not doing it sooner! The little imperfections in the wood have so much character, and the piece is one of the more unique things in our home right now.

sugar mold 4 sugar mold 6 sugar mold 2 sugar mold 5

I used a bit of straw to fill in some of the depth of the molds, and then some fall vase filler. I got the filler items from Hobby Lobby (40% off of course). This little fall look was a quick and easy look to achieve, even though I was dreading it for almost a month! Just in time for Thanksgiving, and then I’ll be transitioning this piece into Christmas with some more festive holiday decor!

Do you have a sugar mold? I would love to hear about how you styled it…because it ha me stumped for a while! That’s it for today friends, I hope y’all have a fabulous day.

DIY Projects, Tutorials

Dry Brushing – The Easiest Painting Experience

Hey y’all! I hope you’re doing well! It’s been dark and rainy here, so the weather is perfect for Halloween tomorrow! (Let’s not talk about the fact that I am going to be running  walking a 5k on Halloween morning. Why do I do these things to myself?!) Hopefully the rain won’t deter Trick-or-Treaters though because Ethan and  I love sitting on the front porch passing out candy.

Anyway, before the rain set in, I completed a quick little project that is quickly becoming my favorite way to do things! I wanted to share this painting trick with you that really does save time, materials, and requires minimal experience (I always say that, but this time I mean it). Have you ever heard of dry brushing? It’s new to me, but I’m already obsessed with it, and I want to dry brush everything in sight! Here are the steps:

picnic basket before - Copy

First, you need to choose your victim (or in this little basket’s case, its lucky day because this thing about to get a serious makeover). I chose this basket because well, just look at it, and you can tell it needs a little help. It’s a vintage picnic basket that I found while junkin this summer, and although it has some damage, I think it just adds some character. What I don’t like about it is the orangey color it has. Plus the top has a weird uncleanable dusty look. But for six bucks, you can’t ask much.

You can also see the brush and paint I used in this picture. These little brushes are available at Home Depot, and they are awesome! The handle is rubber and so it’s really comfortable to handle while painting.

dry brush 2 - Copy

Dry brushing is a technique that uses a very minimal amount of paint and a dry brush (cleverly named technique, don’t you think?). When I do this, I find the stiffest brush I can find and  I don’t dip the brush in the can. Instead, I just use the lid and dab a small amount on the brush. I try to keep the paint limited to the top part of the bristles and not the sides. Does that make sense? (I also apologize for the lack of clarity on some of these photos, I haven’t yet mastered the photography-while-painting technique).

dry brush 3 - Copy

I then blot the top of the brush on my dropcloth to take off any excess paint. You can see in the above photo just how little paint there is on the brush. If you don’t use dropcloths, a paper towel will do. Before you put the brush on your object, it should look something like this:

dry brush 4 - Copy

The trick is not to use too much paint. You can always add more, but once you have too much, it’s hard to get the desired effect.

dry brush - Copy

When you’re ready to paint, you’ll want to use a short, side-to-side stroke. You’ll want to move quickly and paint lightly, as you don’t want too much coverage in one area. The look really lends itself more to a vintage, weathered look. Once you have too much coverage in one area, it becomes hard to fix it, so move fast! The awesome thing about it is that it uses practically no paint (I covered this basket just with what was on the lid of the can), and it dries super fast because it’s such a thin layer of paint.

picnic basket after - Copy

Here is the finished product! I think this project took maybe thirty minutes (including dry time). It saves so much time, and also money because it’s such an effective use of materials. What more can you ask for than quick and cheap?

picnic basket2

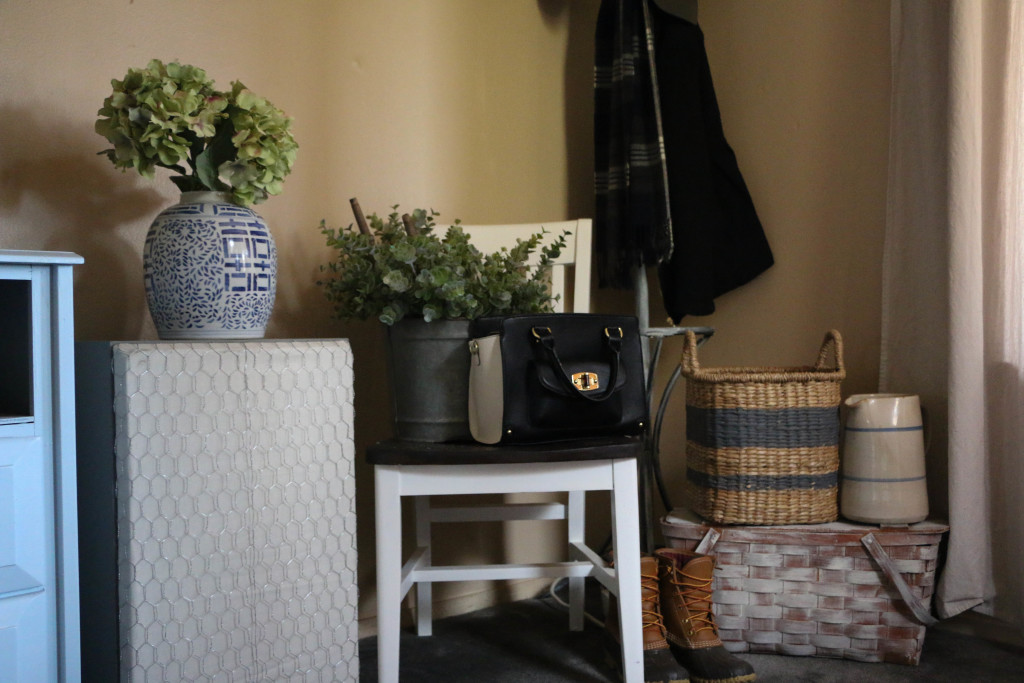
I placed this basket in the corner of my living room where I keep the coatrack and store blankets. This basket is pretty roomy, so it’s a good place to store odds and ends. I also really like how the white lightens up this space. The orange look definitely wasn’t doing itself any favors. She looks so much better now, don’t you think?

picnic basket1

What do you think of this technique? Have you tried it before? I promise it really is easy – I’m not lying! I am thinking about dry brushing everything now…nothing is safe! Let me know what you think, and if you plan to try it!

I hope y’all have a great weekend and that you have some fun Halloween activities planned (hopefully not completing a 5k like myself)! That’s it for today friends, have a fabulous day!