Browsing Tag

Table Makeover

DIY Projects, Room Tours

DIY $15 Office Makeover

Hello friends! If you are here today because you clicked on a link that said I spent fifteen dollars on a room makeover and you’re wondering what in the world this is about, welcome. If you’re wondering how in the world that is possible, hold on. I’m about to tell you. But first, let’s rewind.

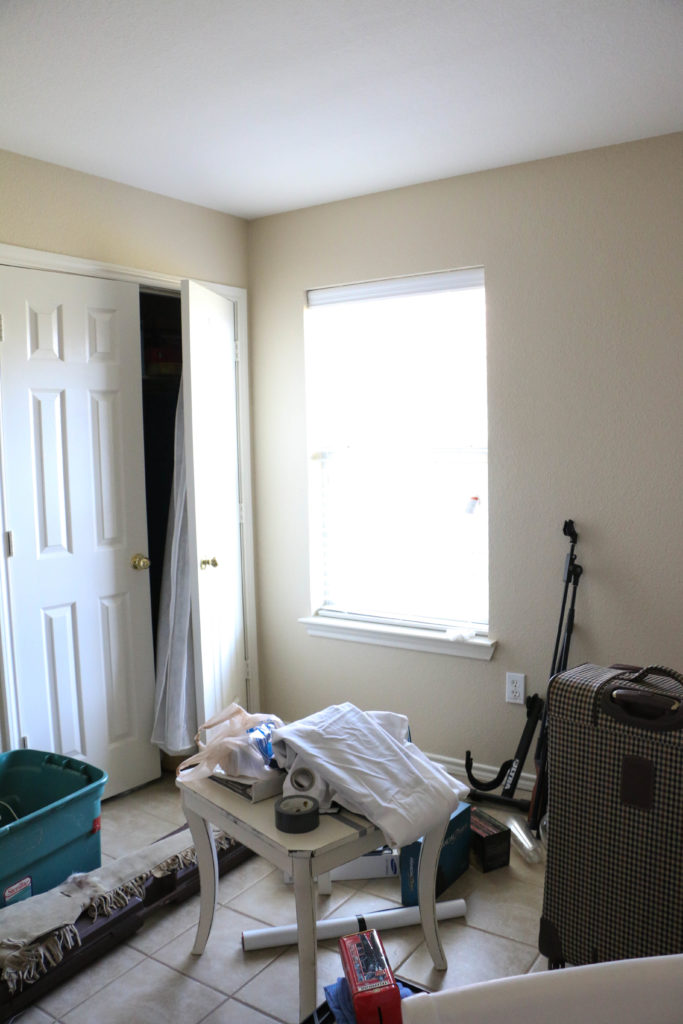
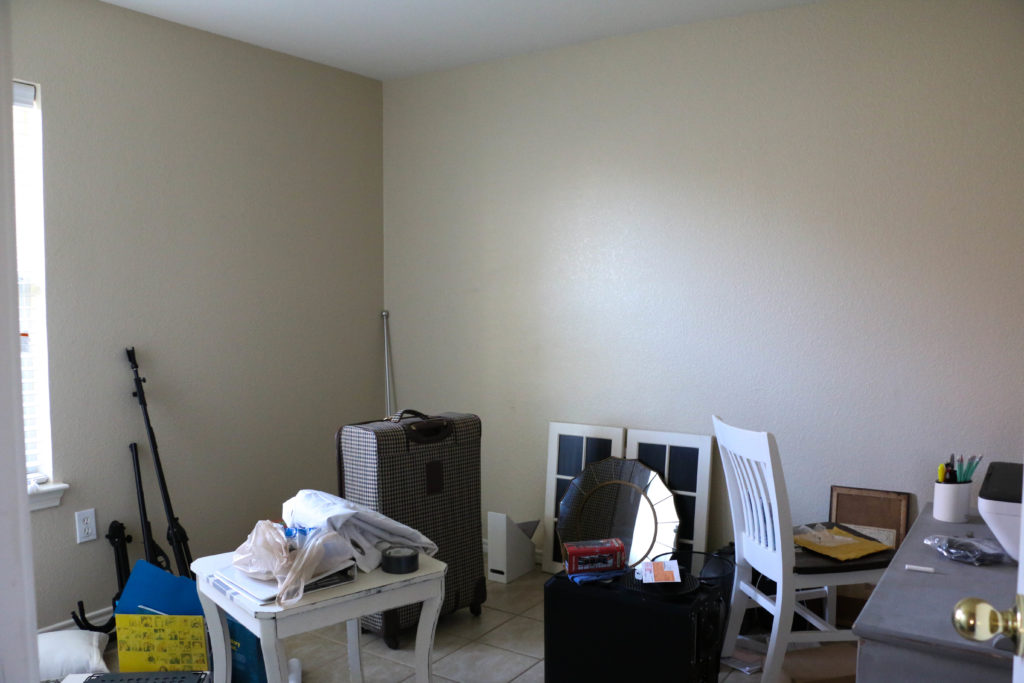
We moved into this rental house in July. And in July we had fabulous plans of quickly making each of the additional bedrooms into a purposeful, functional space. The guestroom quickly became usable (albeit with mismatched hand-me-downs from other rooms), but then there was this third room. It was like the junk drawer of rooms. No organization, no purpose. It housed all the things I hadn’t used in the months since moving in. You know, all the super important things. I’m going to show you some before pictures, but before I can do that, you have to promise that you’re actually going to scroll to the bottom and see what it looks like now. Don’t judge me based on my ugly junk drawer room and then leave. Promise? Okay cool. Here’s some pictures of what the room looked like four months after moving in:

office-before-1 office-before-2

Now, don’t stare too long because you might get sucked into a vortex of clutter. You get the point. Moving on.

So my plan was to make this room into something usable pretty. The only problem being that I didn’t really want to spend any money on this room. So, I did what I always do and put my super cheap creative thinking hat on and got to work.

I shopped the house for items that I could re-use in this room. I dug things out of the garage from our previous house that we weren’t using and brought everything together. I slowly started piecing things together until a room started to form. The only problem was that I didn’t have a desk. Can’t really have an office without a desk, huh?

I had some scrap wood in the garage, enough to make part of a desk, but my rudimentary woodworking skills didn’t know how to fashion legs for a desk on my own. So I went to the architectural salvage shop in town and told the gentleman what I was looking for. Thankfully he makes all kinds of repurposed furniture and so he was super helpful.

He showed me an old child’s bedframe with decorative posts on the ends. He told me that he could cut the posts off for me in the shop, and they would work perfectly as legs to a table. The best part is that he would charge me fifteen dollars for the four legs. (Now is the title of this blog post coming together?)

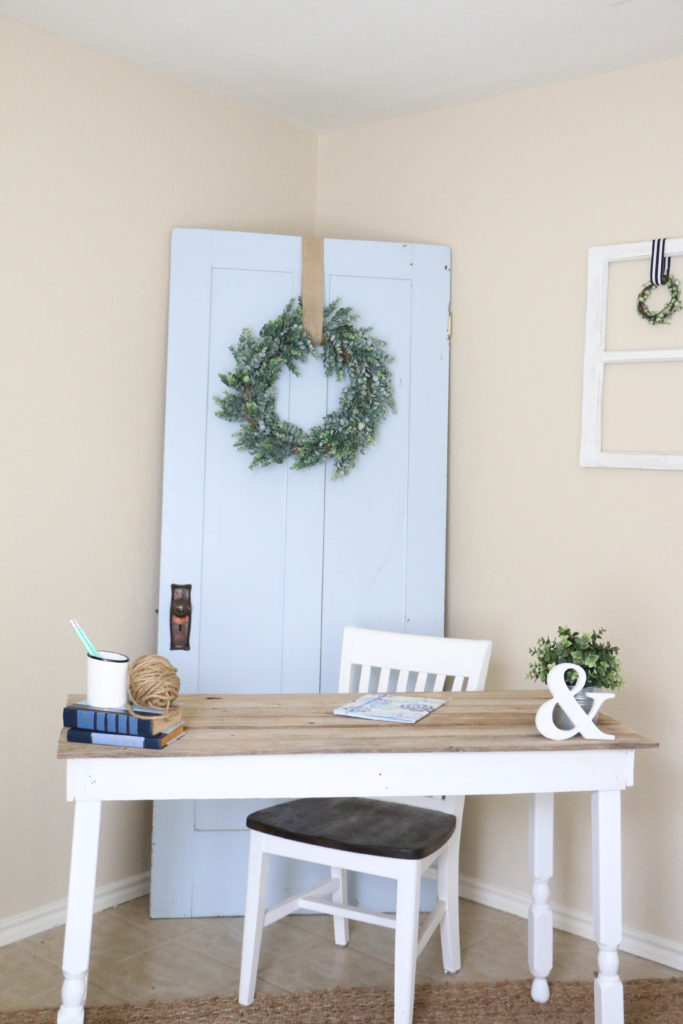
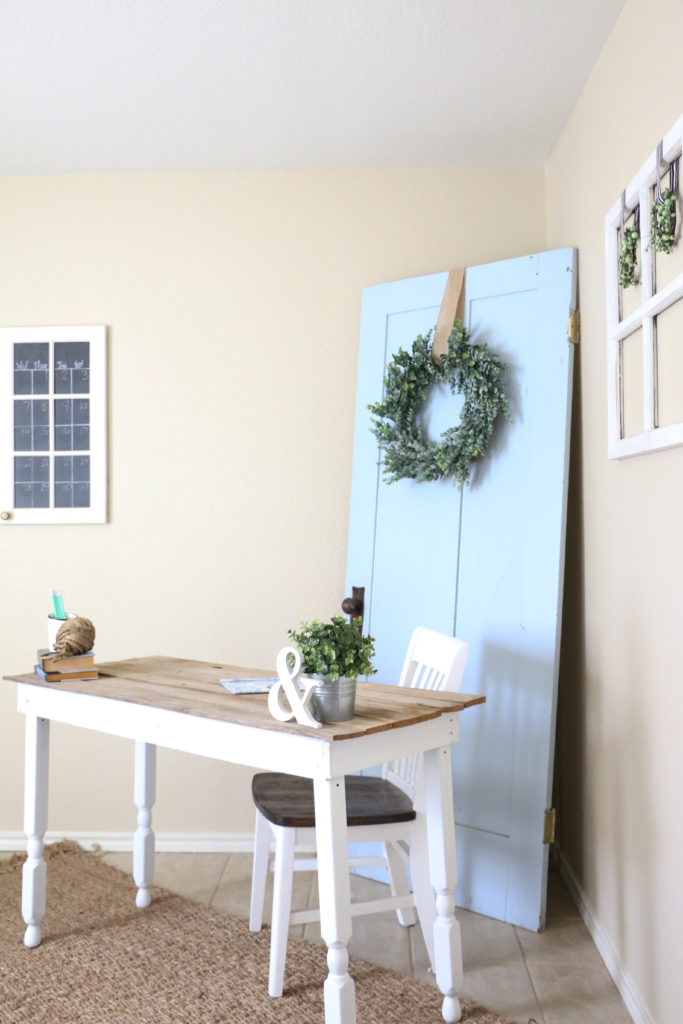
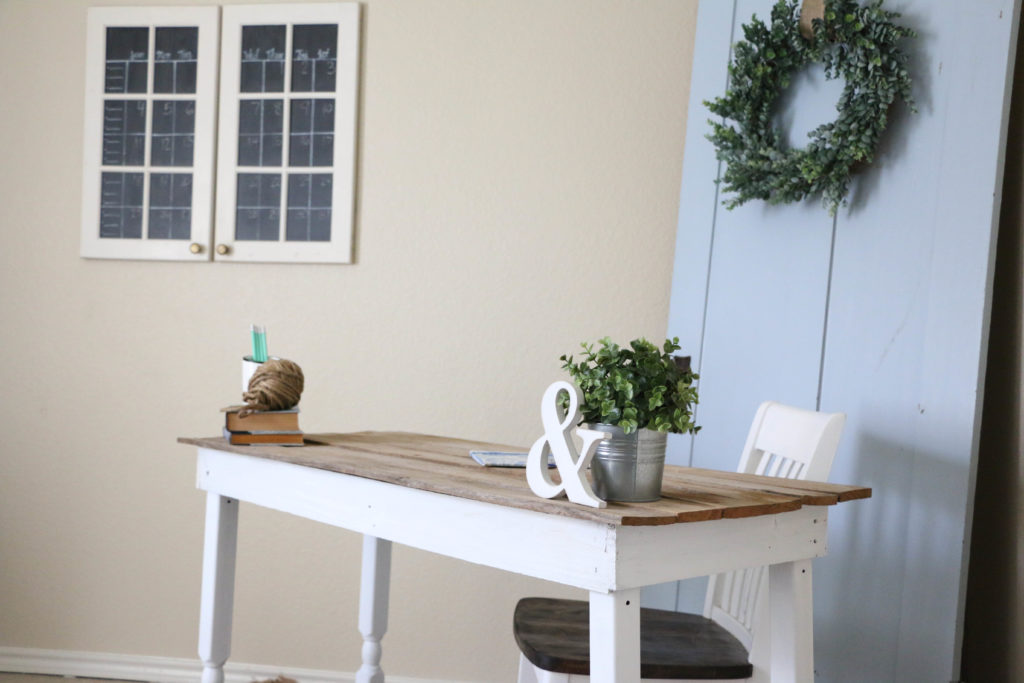
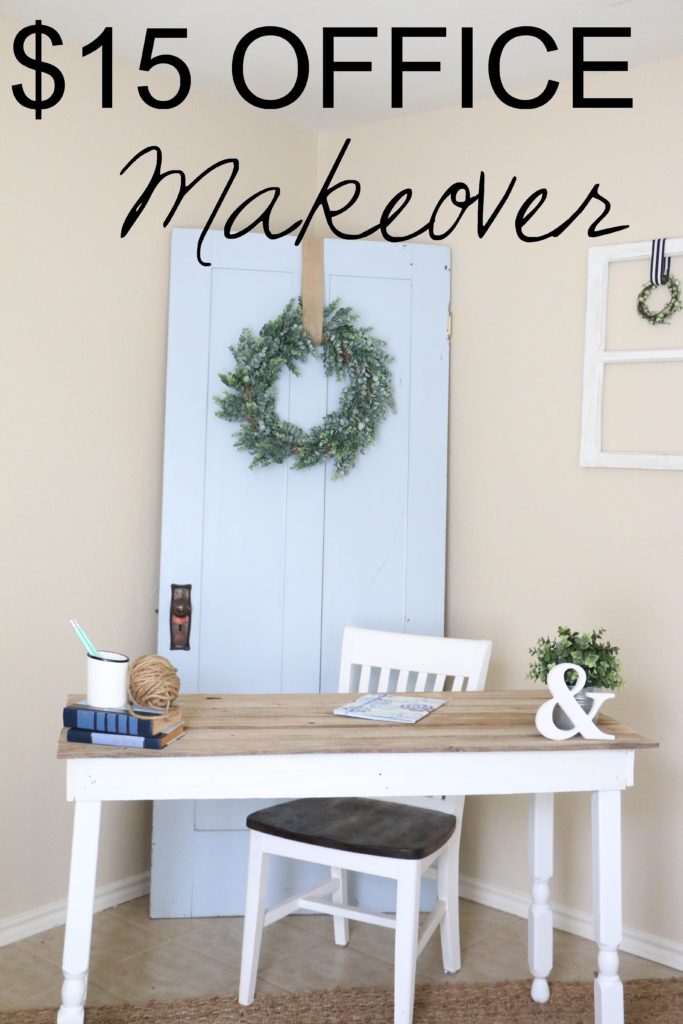
So on my very own, with no help from Ethan (my choice, not his) I built this desk for the office for a grand total of fifteen dollars.

diy-office-2

I added a little frame and then the top, which was all made from scrap wood we found on the side of the road. Can you picture the legs as part of a bed frame? I turned them upside down and painted them white.

Literally every other thing in this room was something I already owned. Which is why this room isn’t quite the office of my dreams, but it’s something that’ll do for now.

diy-office-5

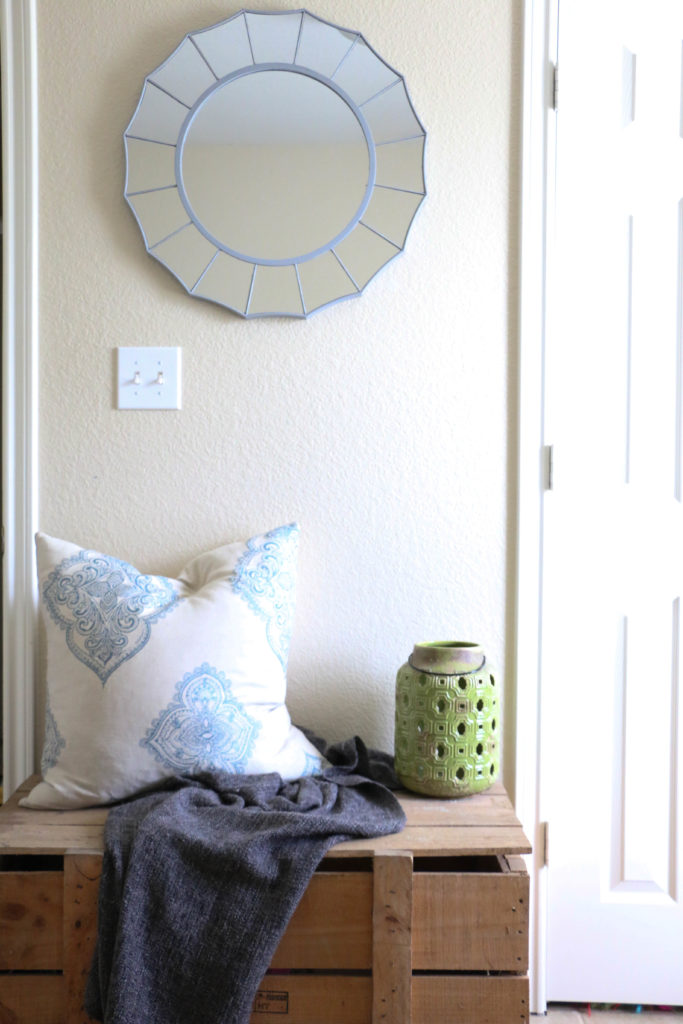
This crate was something I found at a yard sale this summer and it had been sitting in my garage for a while. It houses our record collection, and offers a place to sit or drop a bag by the door to the room.

diy-office-4

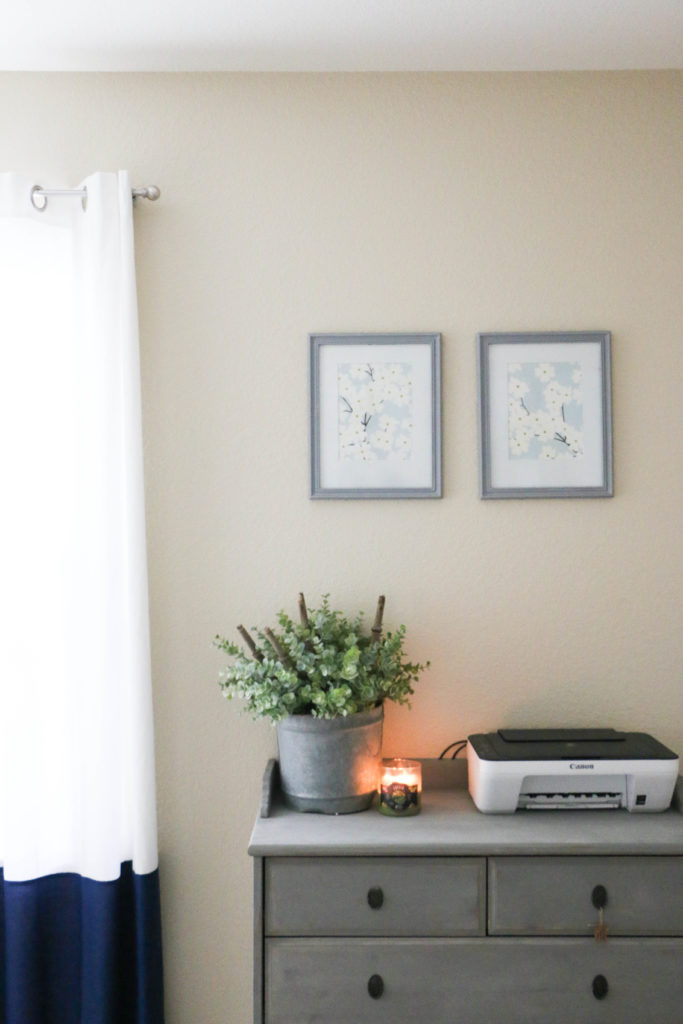
The dresser was a piece I made to sell (see the tag still on it?), but I decided to keep it rather that taking it to my next show. We needed a place for storage, and it’s a perfect spot to put the printer.

diy-office-1

In the top left of this photo you can see my calendar that I made from some old cupboard doors. We used them originally as decor at our wedding, and they’ve been useless since then. I used a chalkboard marker to add dates to it, and now we have a functional calendar that doubles as wall art. Plus it was free, so I’d call that a win.

diy-office-3

I placed this old door behind the desk as a focal point to the room, another thing I found at a yard sale this summer. It was an original door to a church in our town built in the 1890’s. I love that I know where exactly it came from.

Literally everything in this room had been sitting in a closet or in my garage until I brought it in here and cleaned out the space. I just love the fact that it’s possible to make do with what you have and still have a pretty home.

I could have spent hundreds of dollars in here, buying all kinds of things to fit here, but at the end of the day, I’d rather stretch myself creatively and do it on a budget anyway. I ended up making that desk on my own. It’s pretty rickety, but I’m super proud of it because I did it by myself. I wouldn’t have the same feeling if I had bought a desk from Target or wherever. My wallet wouldn’t be as happy either!

Well, that’s all for today, friends. I hope you’re inspired by my little office. Maybe it’ll inspire you to shop your house instead of buying something new. Have a fabulous day, friends!

office-makeover

DIY Projects, Furniture Makeover

Annie Sloan: One Year Later

Hey y’all! Phew. The past few weeks have been CA-RAZY. With moving into the new house two weeks ago, and setting up my classroom, and Ethan being in and out of town for work, things have been hectic to say the least. Today is the first day we’ve had internet at our house. Like, we had to go to McDonald’s to pay bills last week. So that was a low point.

Things are starting to feel a tiny bit more settled now finally, and I can’t wait to share with you guys more of the house! Today I want to talk about something I think a lot of people have had questions about. How well does chalk paint hold up? Since I’ve been setting everything up at the new house, I’ve been inspecting and reworking all the things we had in our previous home.

About a year ago, I gave our living room coffee and end table a little makeover. I used Annie Sloan chalk paint, which I’ve used for several other projects throughout our home. I love this paint, and I’ve talked about great it is, but I’ve never had much experience with the paint over a long period of time. Now, our coffee table is the hub of the living room. We’re pretty casual, so this table gets a lot of wear from putting our feet up on the table. We also eat off this table and write on it. It’s basically a work horse.

coffeetable4

I’m not being paid by anyone to tell you this, but I have to say, after about a year or so, the top of this table needed a second coat.

coffeetable2

The edges of the table top started to wear down (and not from the distressing I intentionally added), and it was starting to look a little more shabby than I was wanting.

coffeetable

In about twenty minutes, I just slapped on a quick top coat of the paint in the Old White color. I didn’t even tape off where I had painted the gray stripes. Just a quick and painless coat of paint, and wax a few hours later.

With this specific project, it doesn’t bother me that I had to do a second coat. With something bigger and more time consuming, it might be a little bit more annoying. Now, there may be people who are better at applying the wax than I am, which could protect the paint better. I’m a novice at this stuff, but that’s my experience. This will in no way prevent me from continuing to use chalk paint in the future. I love the stuff! But, with something bigger, I might look into another solution in the future. We’ll see.

Have you ever had issues with this in the past? If so, I’d love to hear about how you solved them! I know that this has been a quick and simple post, but I wanted to pop in and share what I’ve been up to! Well, that’s all for today friends! Have a fabulous day!

anniesloan

DIY Projects, Home Decor

Cable Spool Porch Table

Hi guys! Thanks for stopping by! I’m so glad you did! It means so much to me that you would take a moment of your day to stop by my little corner of the internet. Anyway, enough of the sappy stuff. Is it getting warmer where you are? I hope so! Here in Texas we’re reaching some pretty high temperatures which have me itching for two things: summer break and outdoor life!

We have about six weeks left of school, but who’s counting!? 😉 We have a large front porch on our house, which is one of the only positive things about our sad little rental. I mean, for real you guys. Over summer break, I like to spend as much time on the porch as possible! Give me some magazines, some lemonade, and I’m good to go for hours!

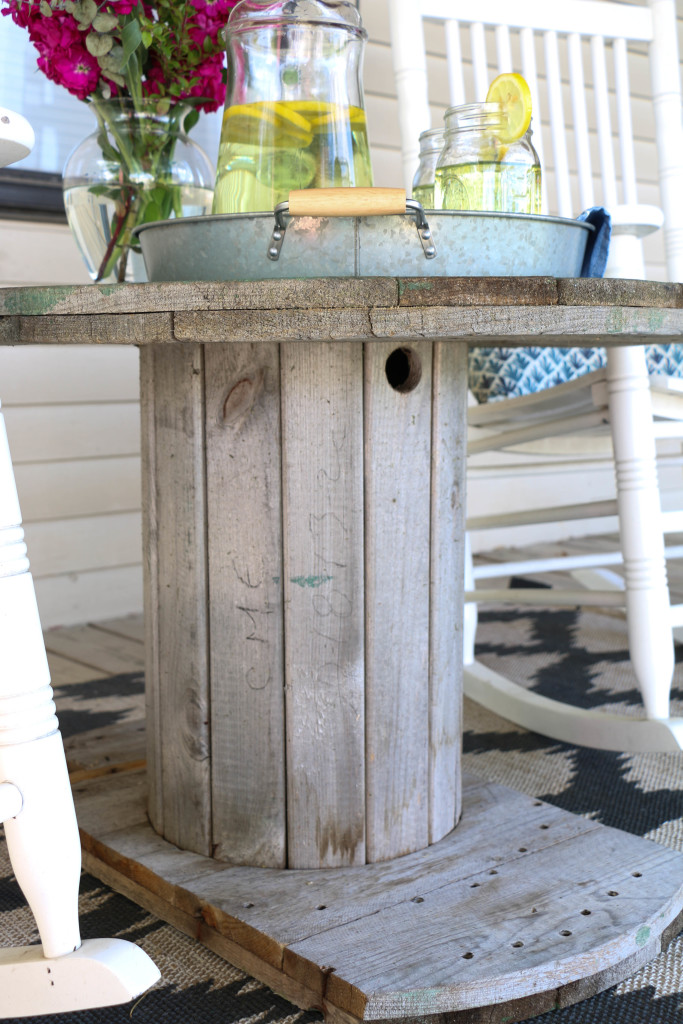
Recently, I’ve been looking for a cable spool, but I really haven’t wanted to spend a lot on it. I know that the cable spool as an outdoor table is totally not my original idea, but stick with me. I know everyone and their next door neighbor is doing this, but I still wanted to share. The table we had on our front porch previously was a small glass top one, maybe only 18 inches across. It wasn’t really large enough to place a lot of stuff on it, which is why I was looking for a cable spool to use as a table.

For the past few months I’ve been looking, but I’ve only been able to find them for about $60, which was more than I wanted to spend on a piece like this. So imagine my delight when I found one on the side of the road for free?! Ethan was driving, and I totally made him do a real quick turn around to scoop that bad boy up. It was actually a little scary looking because there was some additional wood attached to the top, and several pieces of wire wrapped around various parts on the spool. I just cut off the wire and pried off the pieces of wood that were nailed to the top. Ain’t no thing.

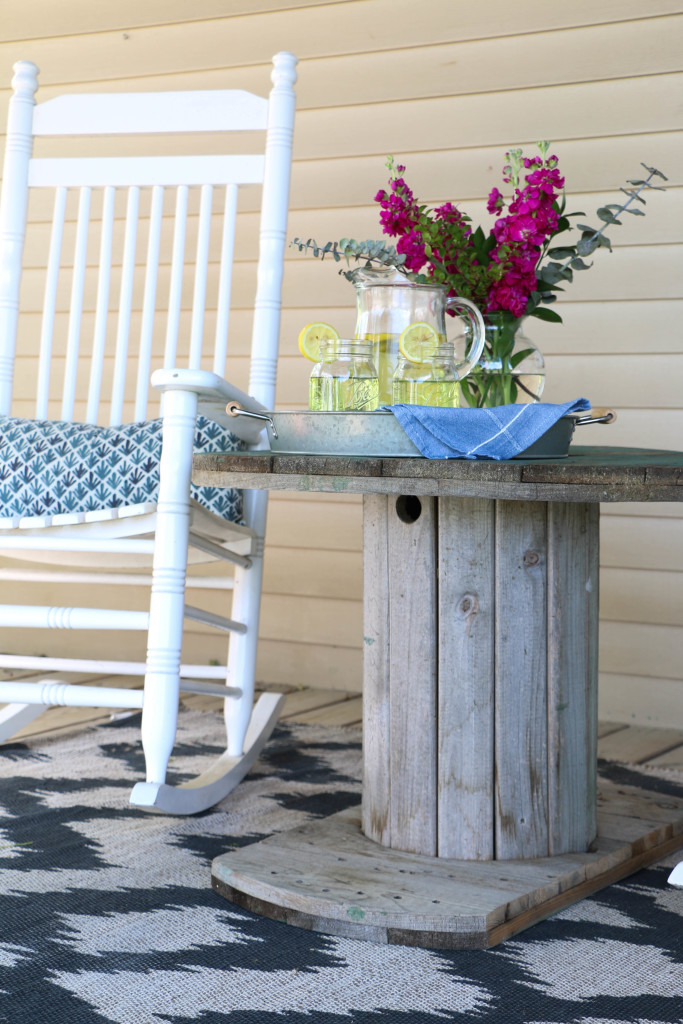
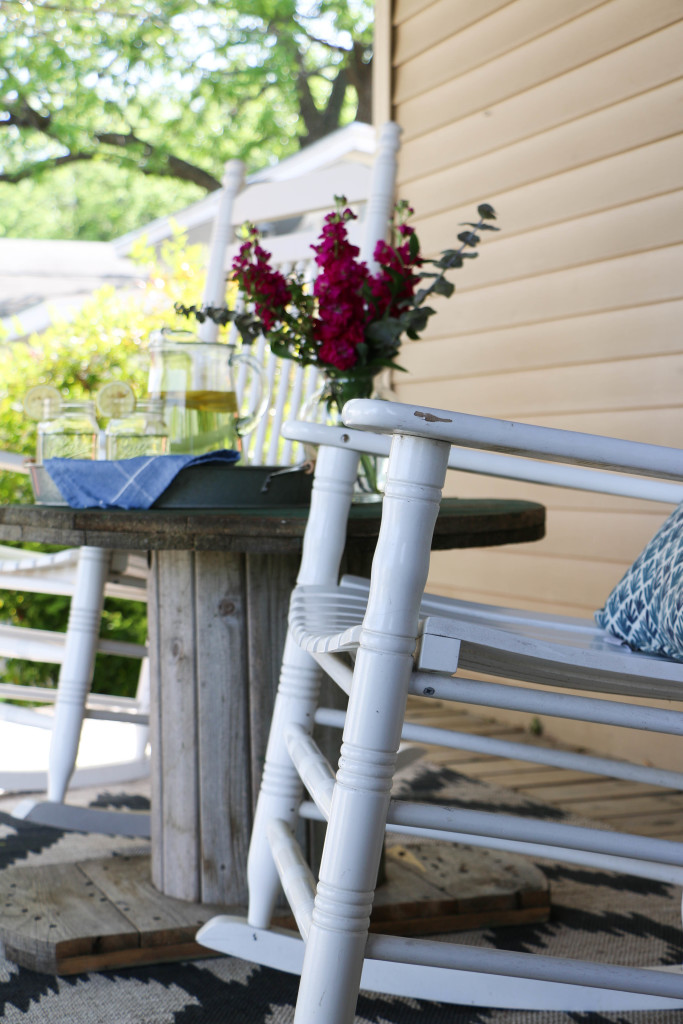
So, without further ado, here’s what our front porch looks like now:

cable spool table 3

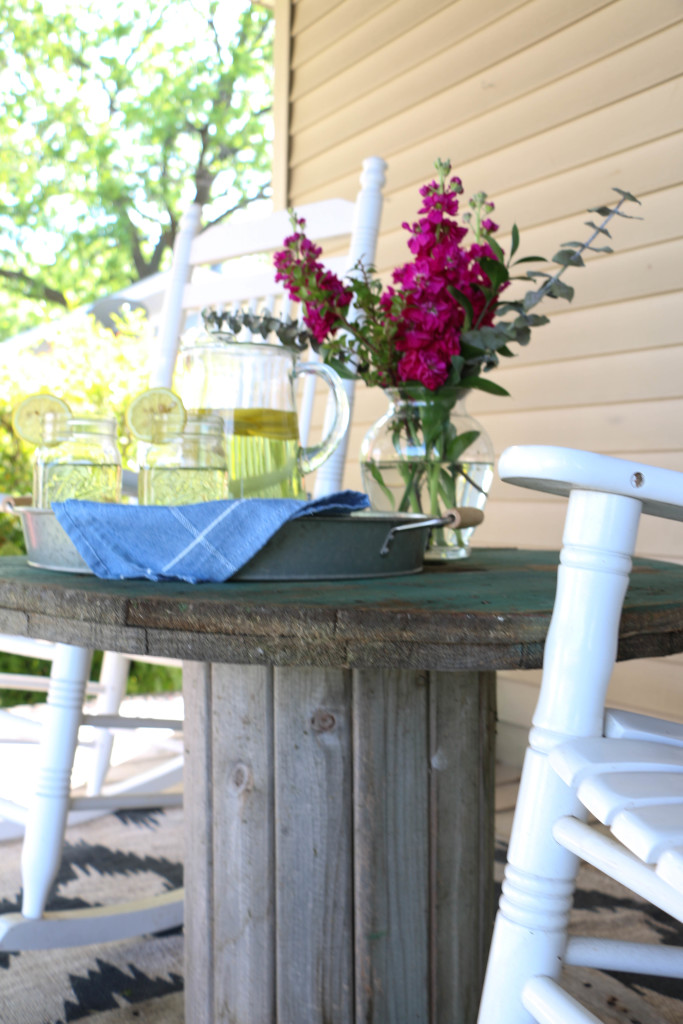
You might notice that the bottom piece it not a full circle. I actually found it this way, and was a little disappointed at first until I realized how much better this actually is. Since we have rocking chairs, the narrow bottom actually allows the chairs to fully rock while still being close to the tabletop.

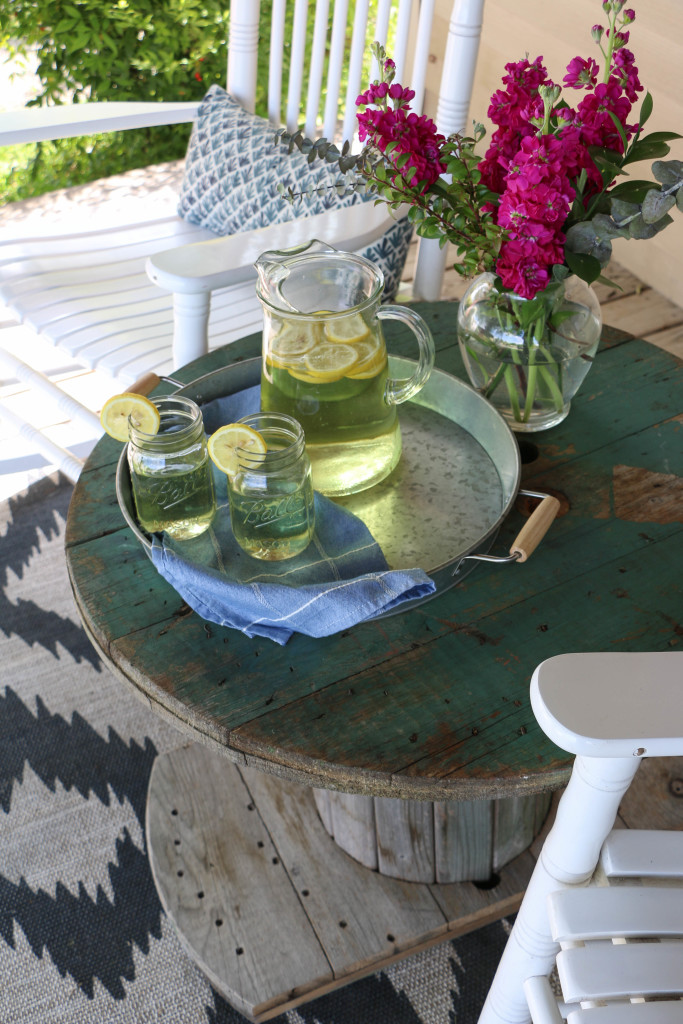
cable spool table 5

There’s so much more room on the surface than there was on the old table, I’m loving it! I can just imagine some plates out here, maybe a little pie….I don’t know where pie came from. I’m just really ready for summer, okay?!

cable spool table 9

cable spool table 8 cable spool table1

If you have your own cable spool, I would reccomend cutting the bottom to be more narrow.

cable spool table 6

cable spool table 4

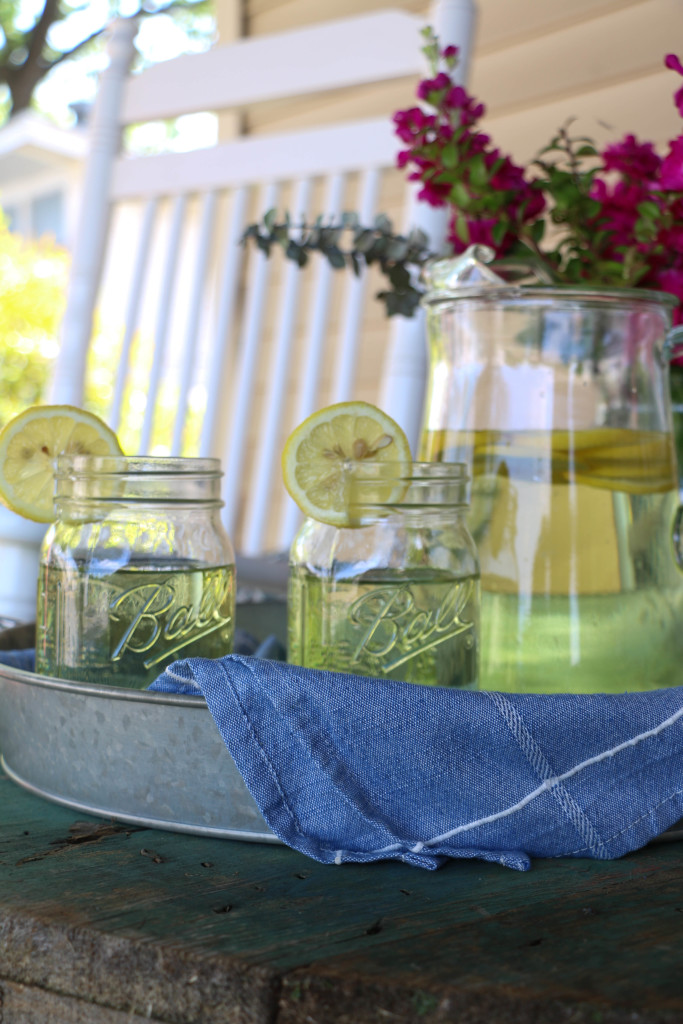
I case you were wondering, the rug is from Hobby Lobby, the chairs are from Cracker Barrel, the pillows are from Target, and the serving tray is from Walmart. This little outdoor area is fresh and cheery, and I cannot wait to get out here and enjoy myself. Especially since I’m so close to endless lounging during my carefree summer break. Ahhhh, summer. Alright, I’ll stop now y’all, I promise.

So what do you think of the cable spool as an outdoor table? Is this a trend you’re willing to go along with? I will say that even Ethan loves it! I am sensing some meals eaten out here together, and I cannot be more excited about that! That’s all for today, friends. Have a fabulous day!

Organization

Tips on Loving Your Closet

Do you have the perfect vision of what your dream closet is? I know I do. Cue soft playing music and a warm bright spot. My dream closet is ultra feminine, with a full window for natural light, and a vanity for doing makeup. My dream closet is obviously larger than my childhood bedroom. There’s room in there for a soft armchair where I can drink my tea, a freestanding full length mirror for trying on clothing, and perhaps a vintage mannequin. My wedding dress is displayed, and the whole thing is light and airy. Have I even mentioned the perfectly organized rows of clothing and shoes? My collection is expansive, yet impeccably organized just like a magazine. Can you tell I’ve thought about this? Just a little bit.

Raise your hand if you have something pictured in your head similar to what I just described. Yes, I’m talking to you. I know most of us have unrealistic dreams like this and that’s okay!

Cue reality though (we’ll use my closet for an example): my closet is a 2×3  foot box with one awkwardly placed pole (not even tall enough to hang a knee length dress from) and two measly shelves on the top (one of which I can barely reach). Like the rest of our house, it’s the color of a camel’s behind, and a carpet that hasn’t been touched since the 1960’s. Living the rental dream. 

Here’s the deal. It would be so easy for me to be discouraged by the size of my closet, or frustrated that I don’t have things as nice as others. Today I want to share with you some tips I’ve found on how to love the closet you have (that don’t include getting a new closet).

This year, my mission has been to organize everything and purge the excess. The closet was the first place to start! I started off the new year by reading The Life Changing Magic of Tidying Up. I am not kidding when I say thing book will change your life! It’s a pretty short book, but I had read the whole thing in a day. I finished feeling energized and ready to tackle my house! There are specific sections of the book designated specifically for clothing, and so I took some of the tips listed there and reorganized my closet. I can now tell you that when I walk over to my little closet, I feel refreshed and calm! And I don’t even have an armchair where I can drink my tea. Can you imagine?

closet2

Step One: 

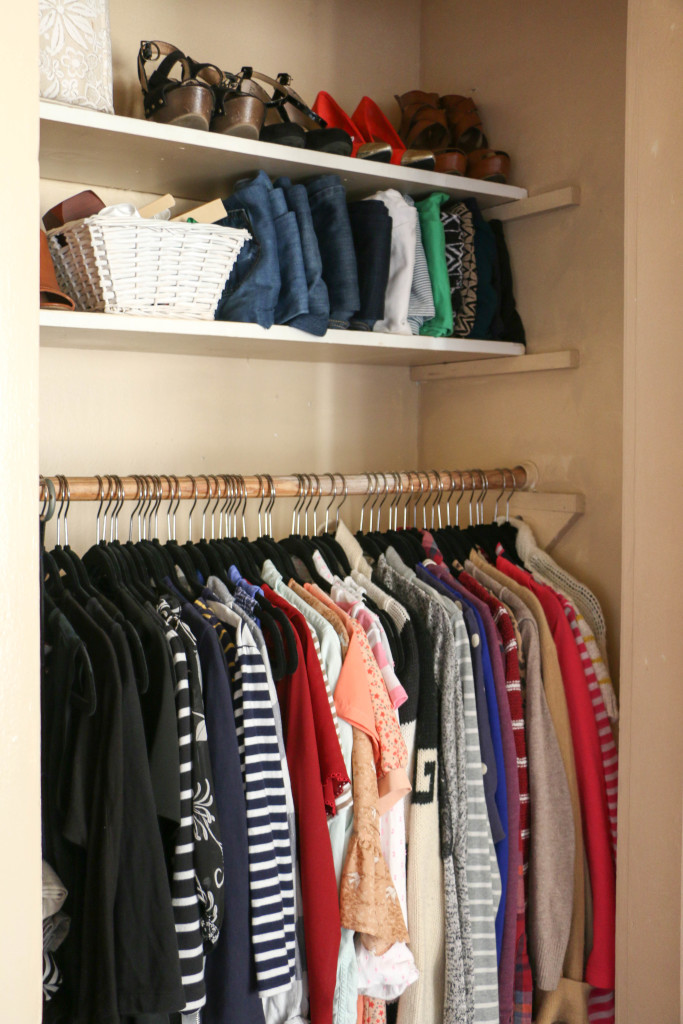
Get rid of everything. I’m not joking. I took every. single. piece. of clothing out of my closet and laid them on my bed. From there I looked at each item one by one and asked myself when the last time I had worn the item was. I had to be harsh with my answers about what to keep and what to get rid of. The things I love but wear infrequently because I’m too lazy to iron – those things went to the donate pile. The things I’ve been meaning to mend but secretly know I won’t get around to – donate. The things that are near duplicates of other items – donate. Because of the awkward height of the bar in this closet, my dresses are hung in Ethan’s closet. So all I have here are my tops (both blouses and sweaters). I wanted to keep only the things I have in my closet are the things I will actually wear on any given day.

closet3

Step Two:

Organize by color. One of the things that makes my teeny-tiny-barely-even-there closet bearable now is that the order of things is aesthetically pleasing. I kept my shirts and sweaters separate, each category moving from the darkest on the left to the lightest on the right. There is a whole psychology behind this method that I don’t really understand, but I will say that it does make things look intentionally placed. Each piece has a perfect spot, and the color scheming actually helps me plan my outfits with ease. All my black tops are in the same place, and I know exactly where the hanger is when I’m putting something away.

closet4

Step Three:

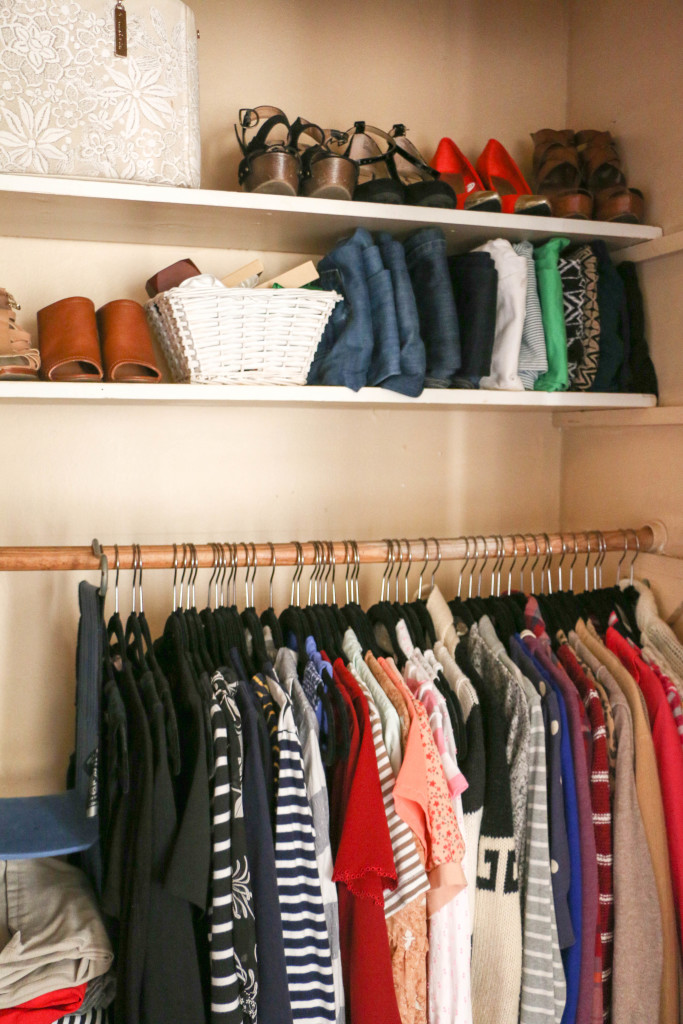
It’s all about the hangers. This step is definitely not necessary, but I would recommend it. Until this point, I still had the multi-colored plastic hangers I acquired in bulk in college. They were cheap, and I was broke. I’ve wanted to buy coordinating black velvet hangers for a long time, but could never justify the expense. The only reason I bought these is because I had extra Christmas money. Ethan was not really thrilled with the thought of me spending my Christmas money on hangers, but I assured him it’s what I really wanted. He’s the one who married this organizational freak, so he can’t really complain too much. Anyway, I bought two of these packs, and used Bed Bath and Beyond’s 20% off coupon. I will eventually need to get another pack or two to finish Ethan’s closet and the coat closet, but my wallet says it’ll have to wait.

closet1

Step Four: 

Tidy up all the non-hanging items. On the top shelf, I have a few pairs of shoes, a handbag filled with other handbags, pants stacked standing straight up, and a basket with scarves and important jewelry boxes. I also have a small hanging shelf unit with a few folded skirts hanging from the rod. Notice how I have extra room on these shelves? Before I purged and organized, I could barely cram anything else in this closet, and finding what I needed was never simple. Now everything has a location, everything has a purpose, and it all looks generally appealing.

I feel like I should mention a few disclaimers. The floor if this closet hosts the majority of my shoes, which aren’t perfectly organized yet. Additionally, this is not the entirety of my wardrobe. My dresses are stored in Ethan’s closet, and coats and special occasion outfits are stored in the coat closet. I also have casual wear that is stored in Ethan and my shared dresser.

My overall point is this: this is no way near the dream closet I described at the beginning of this post. However, it makes me feel refreshed and at ease when I open the door. I will likely never have this fantasy closet, but I’m willing to love the closet that I have now. I know that later in life, I’ll move up in closet. Right now though, I’m learning to love the closet I have. Right now, this is my dream closet. Purged, organized, and accessible. Do you have your dream closet or do you have something you have to learn to love like me? How do you organize? I’d love to hear all about it! That’s all for today, friends. Have a fabulous day!

DIY Projects, Furniture Makeover

Coffee Table Makeover

Hello all! Happy Monday from me to you! I hope you’re having a fantastic morning. Are you drinking your coffee as you’re reading this? I hope so!

Summer is in full swing for me here. I’m a teacher, and even though my summer break started a few weeks back, I spent the first bit of that away from home visiting different family members. I didn’t feel like my summer break had fully begun until this last week. I don’t have any kiddos to keep me busy (that is definitely not a complaint), so my days range between mindlessly watching Netflix for an embarrassing number of hours and finding odd projects around the house to keep me busy.

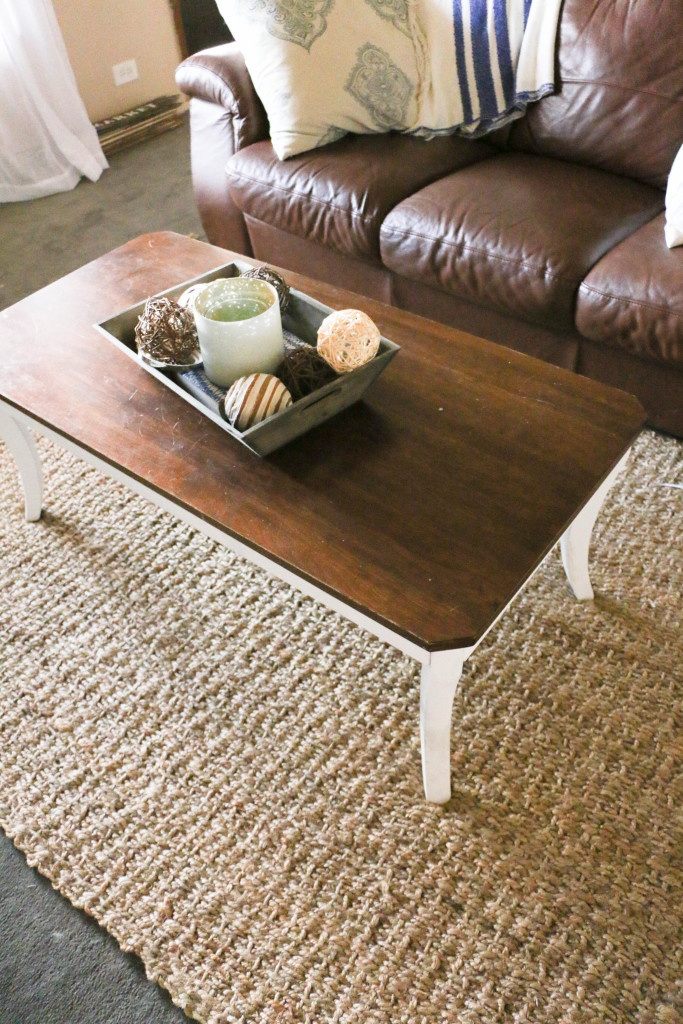
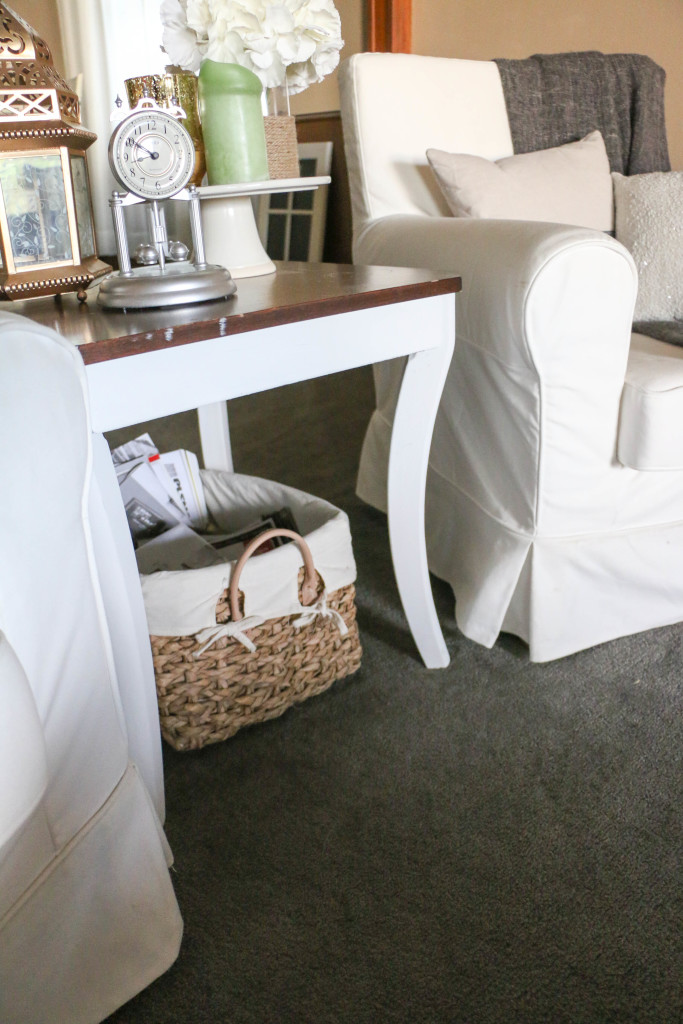
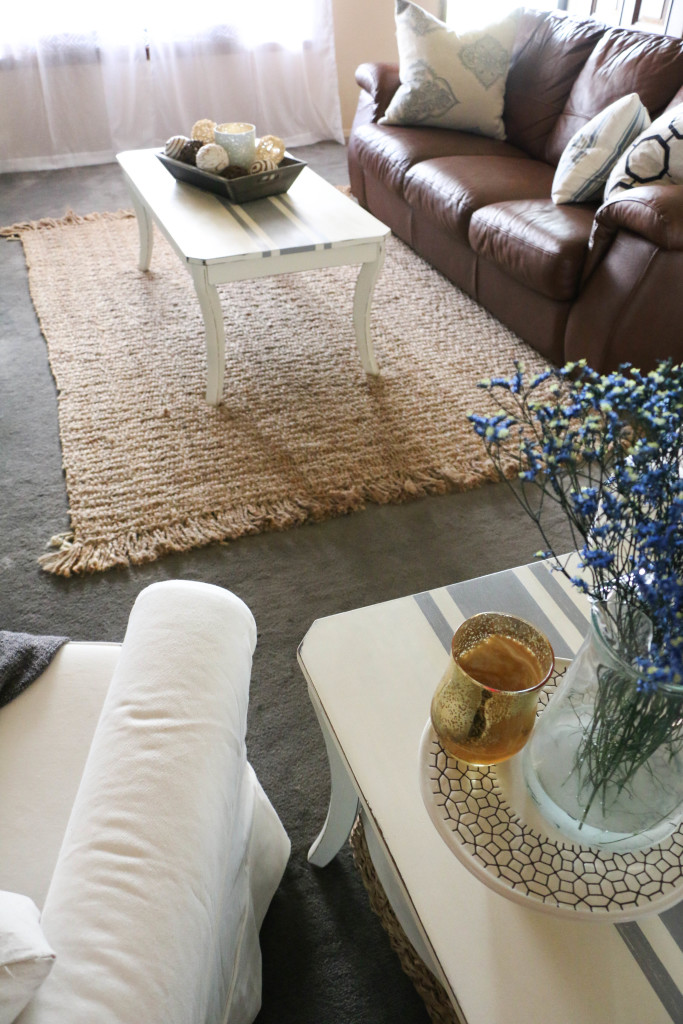
This week these old tables we have in our living room became the object of choice (I swear, nothing is safe from the paintbrush in this house. Except for the walls, because, landlords). These two tables were my husband, Ethan’s from his bachelor days. Who knows how old they are or where in the world they came from. Classic newlyweds, amiright?

tablebefore2

I painted the bases white when we first got married, and that was good for a while. But you can see how scratched and janky (I can use that word right?) they are. They weren’t looking so hot.

tablebefore1

So obviously I had to do something about it (which if you’re reading this and you still haven’t figured out that I am about to paint this table, then I’m sorry I ruined the surprise for you).

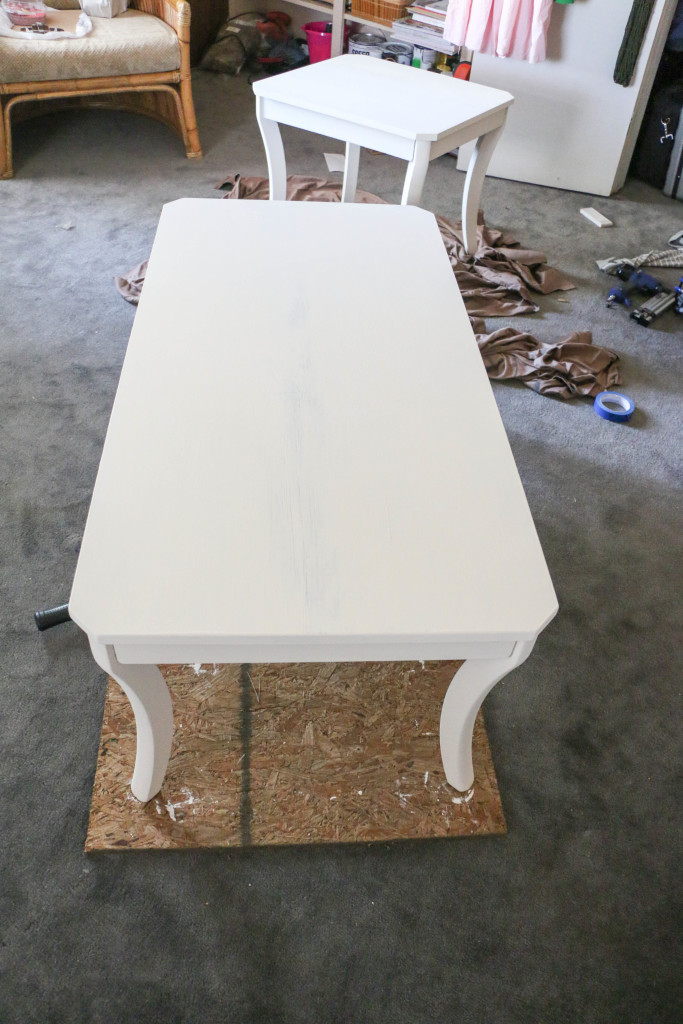
The first thing I did was put a fresh coat of Annie Sloan Old White over both tables. I’ve written previously more details about using this paint, which you can find here.

paintedtable

Don’t mind this background of this picture. It’s our totally-unfinished-not-fully-furnished-guestroom/paint studio. We all have that one room we don’t want anyone to see. Except you just saw mine. Don’t judge me, please keep reading.

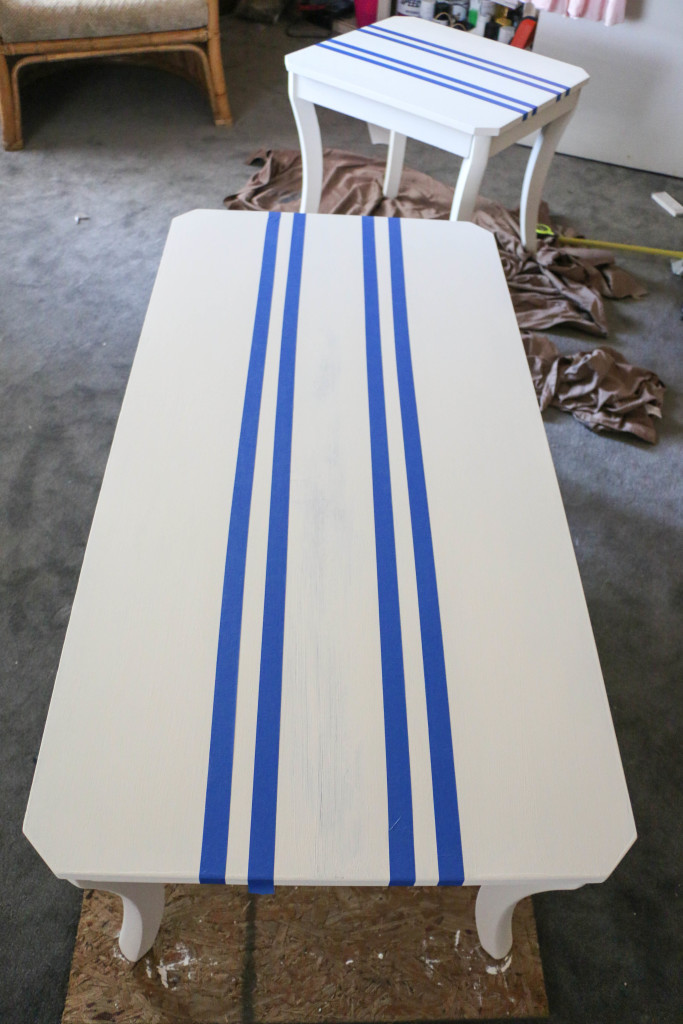
painterstape

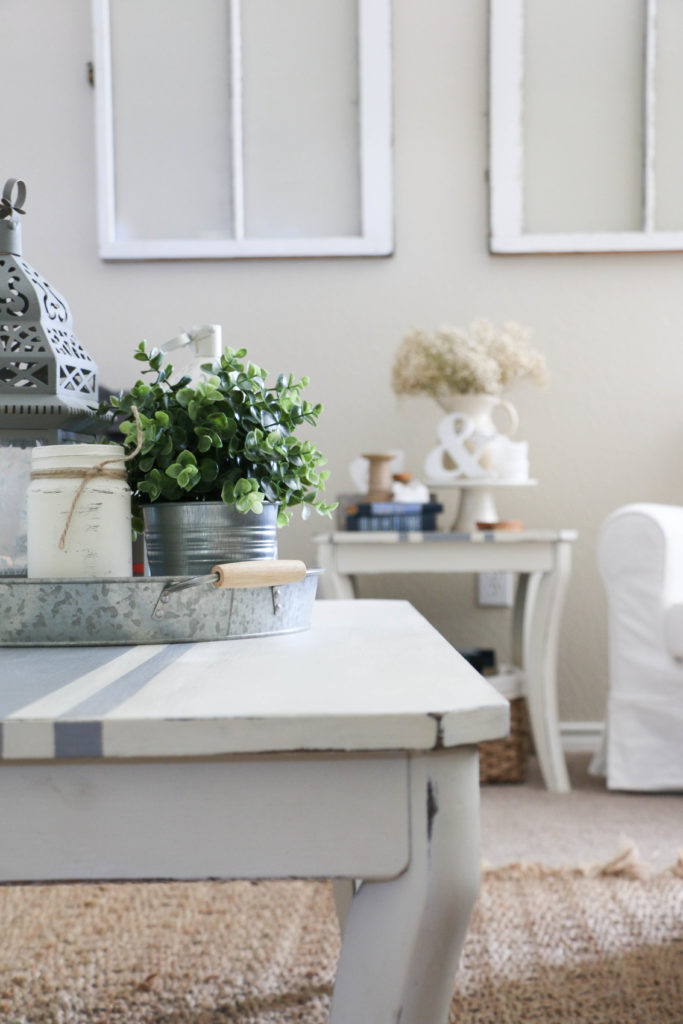
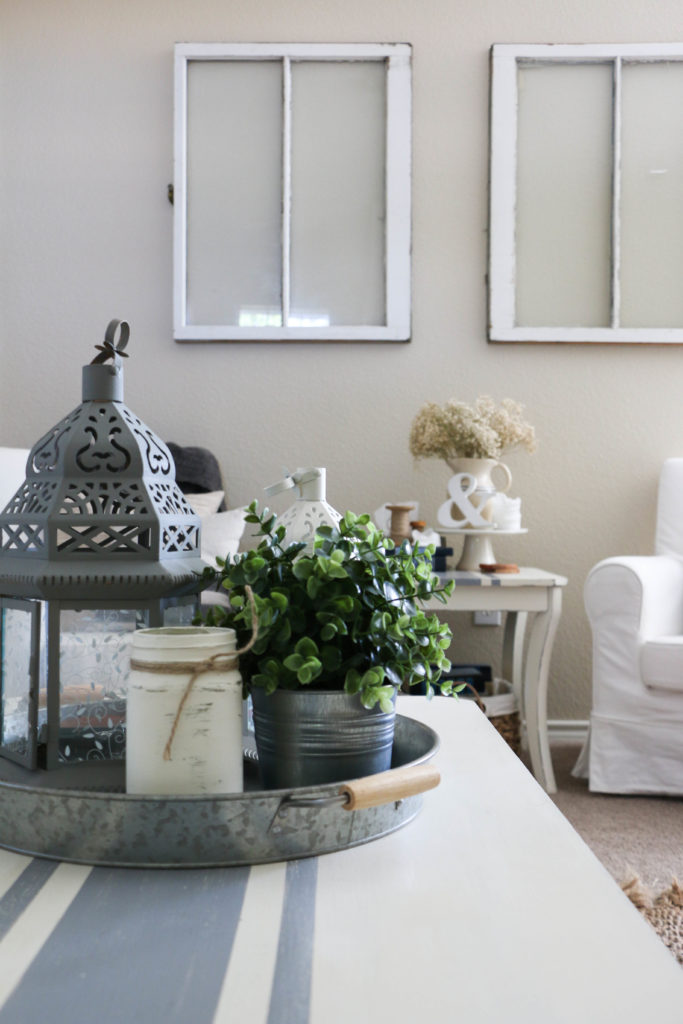
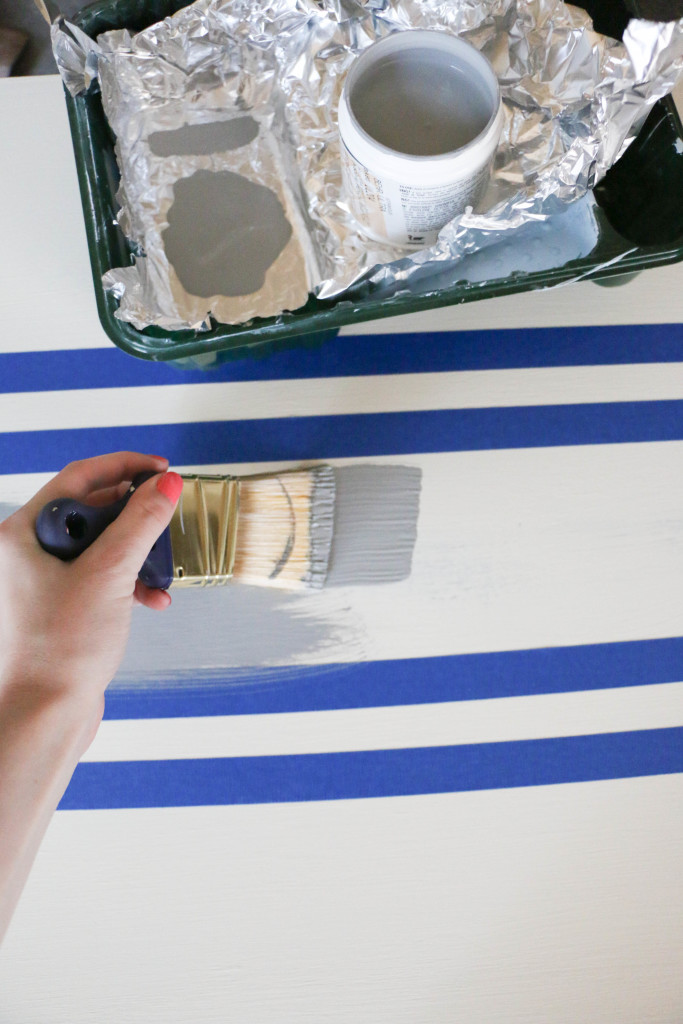
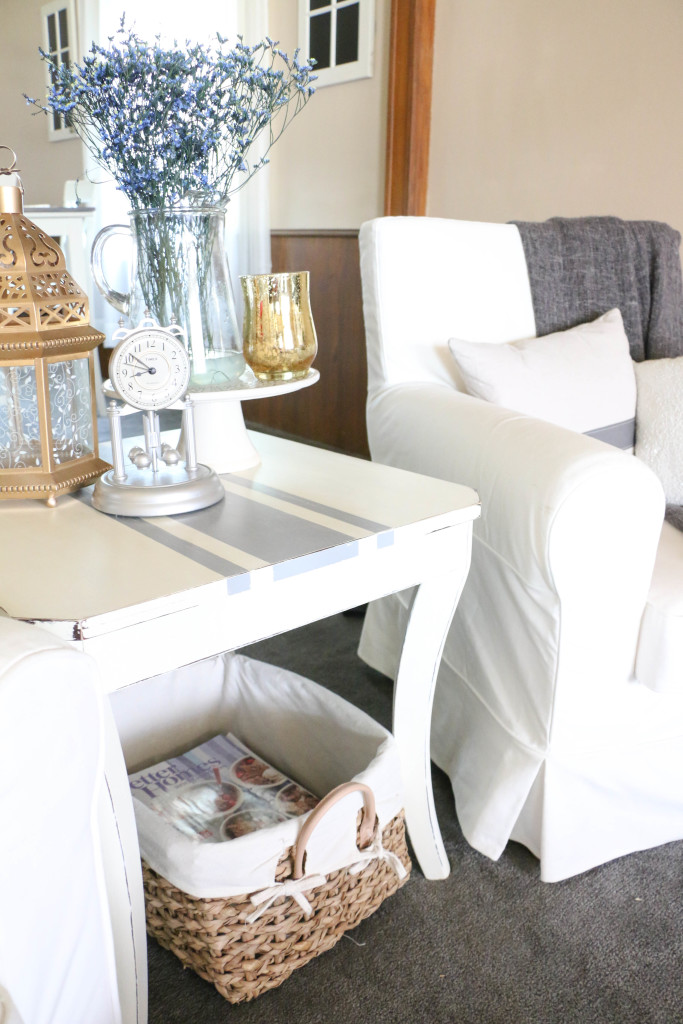
I wanted to go for a “farmhouse style” look, so I wanted to paint a grainsack stripe on each of the tables. I spaced a four inch wide line in the center, and a one inch wide line on either side.

paintingduring

I then painted in the areas I had taped off. The color is Pencil Sketch by Behr. I bought a sample jar of it at Home Depot in a flat finish and had plenty left over. The paintbrush is the 2″ Wooster Shortcut. This is the first time using this brush and I can tell you that I absolutely loved it! It’s inexpensive and easy to use.

distressing

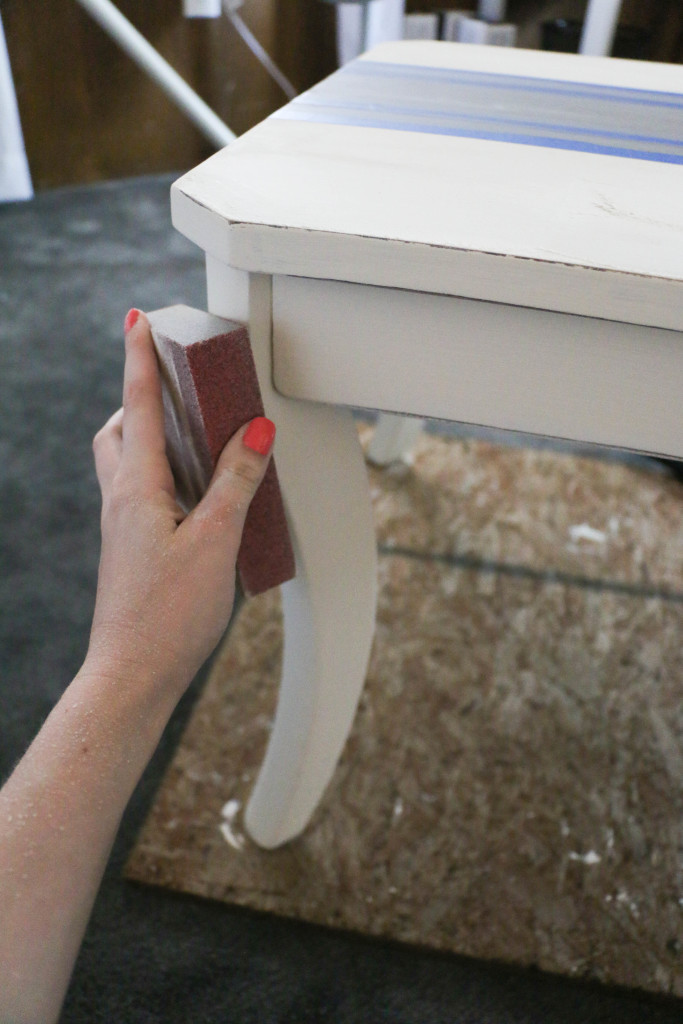
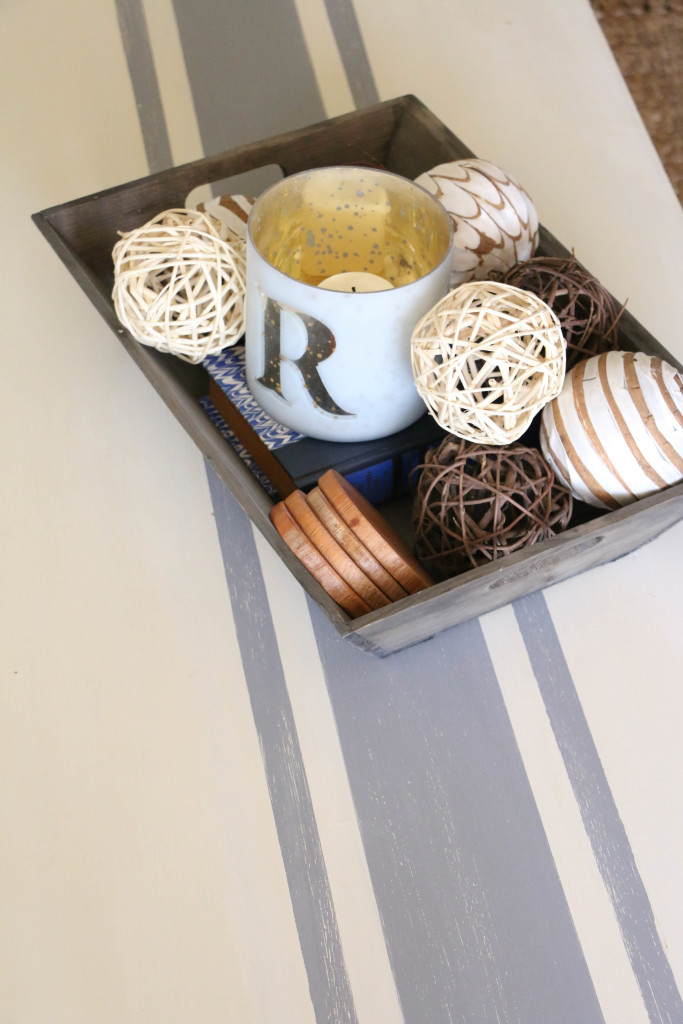
After painting my stripes, I got around to distressing lightly the edges of my table. I also sanded down over the gray stripes so that a bit of the white would show through. I wanted to give the stripes a bit of a worn look.

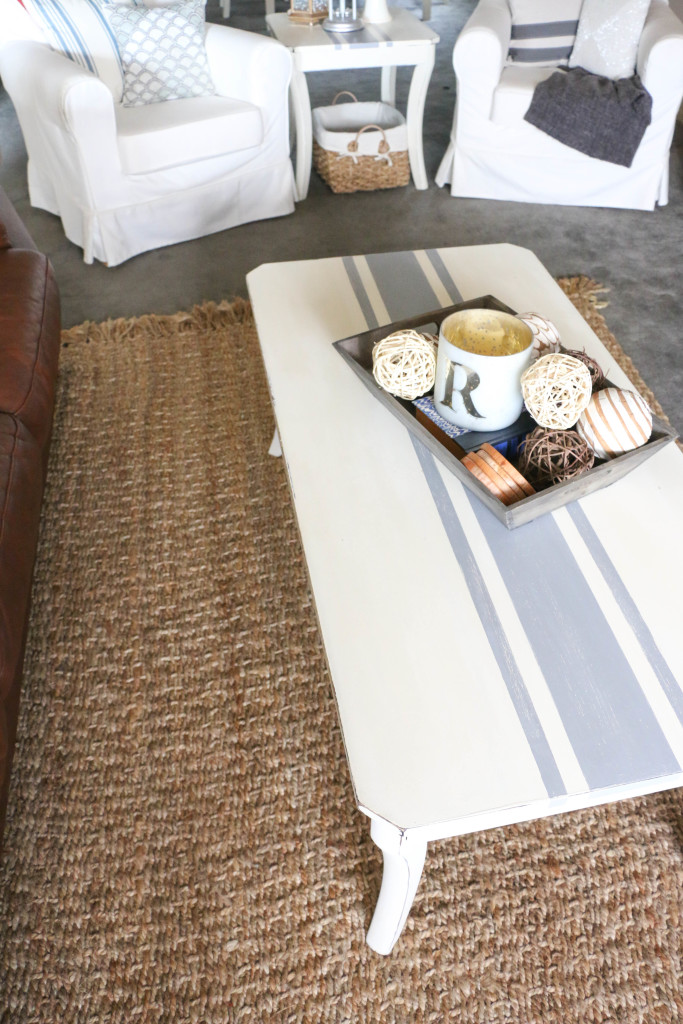
After distressing, removing tape, adding a finishing wax, and making a huge mess, my tables were done!

tableafter1

tableafter4

tableafter2

tableafter3

They make the room so much brighter, which I absolutely love. I also am really digging the rustic vibe they have. The best part about this project is that I had everything on hand except for the $3 paint sample I bought. That’s what I call a thrifty project! My favorite kind! That’s all for today. Have a fabulous day, friends!
CoffeeTableMakeover

DIY Projects, Furniture Makeover

Dining Room Table Makeover

Hey Y’all! Today I’m sharing what is hands down my favorite project to date. This is definitely the biggest impact project I have done, and I am IN LOVE with the result.

So, cue the before picture:

TableBefore

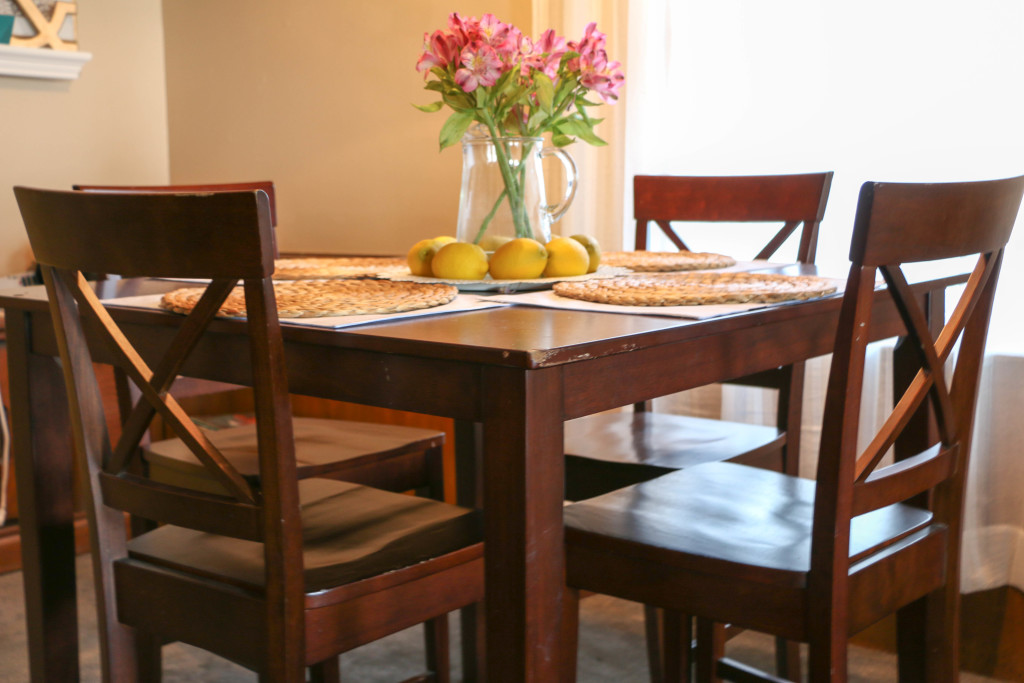
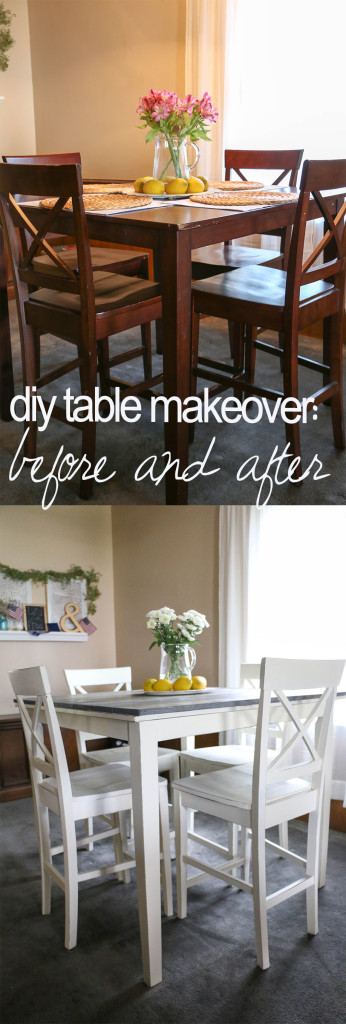
This dining set has seen better days. I believe it’s from Target, but I’m honestly not even sure. My husband bought it for $50 long before we were married from a couple who was moving. It had been their newlywed table, and we inherited it as our newlywed table. It’s not awful, but it’s a dark, basic, “starter” table in all its MDF glory. Clearly not my favorite thing. You can see why I needed to update this baby.

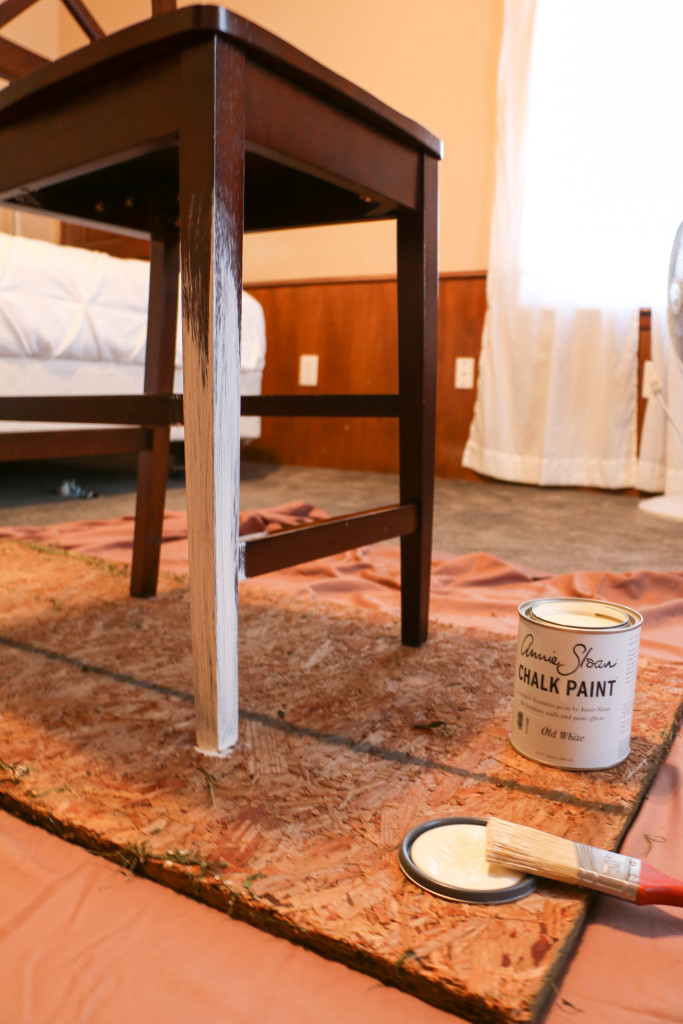
I got my first supply of Annie Sloan Chalk Paint for my birthday, and I decided to give it a try.

Chair during

This labor of love took several days, but it was so worth it. As you can see, I started with a coat of Annie Sloan’s Old White. What’s shown here is the very first coat. I ended up doing two full coats and a third coat just in certain areas.

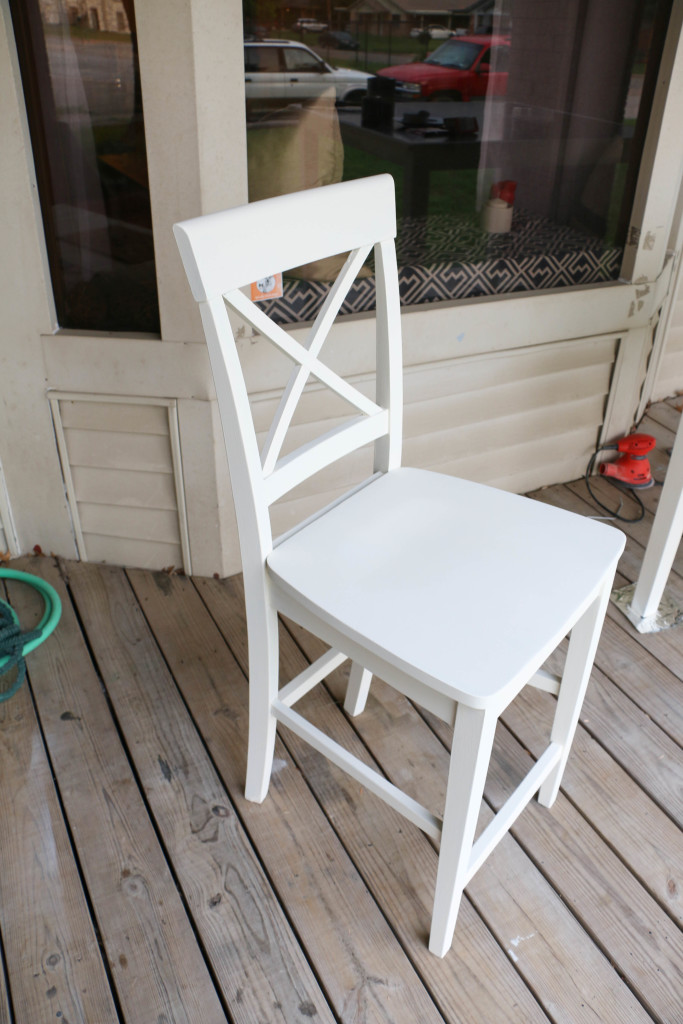
Chair After

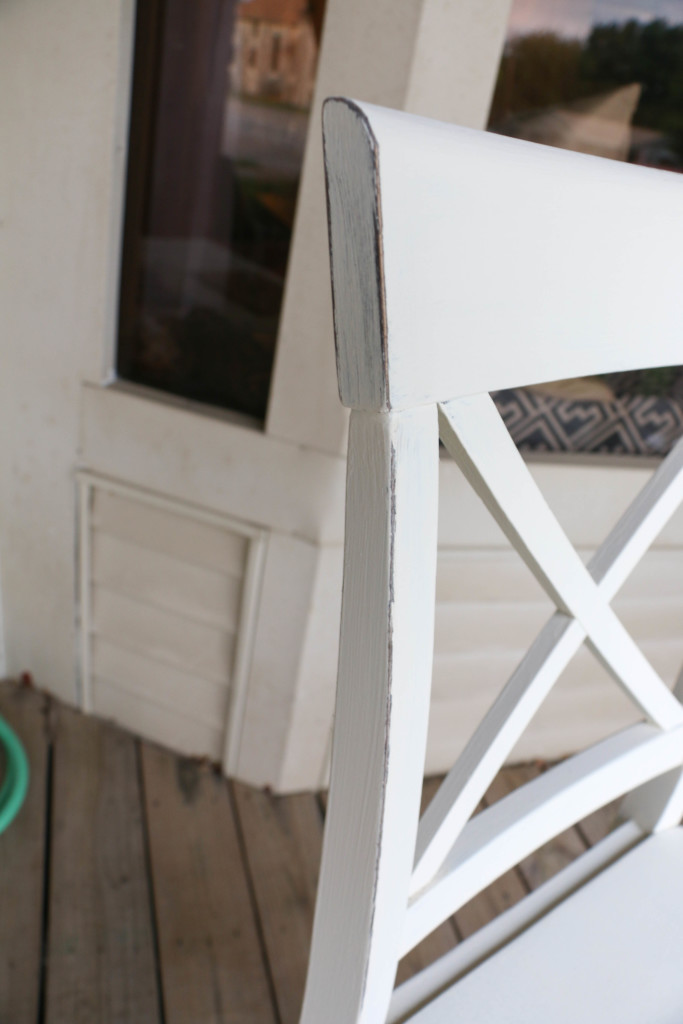
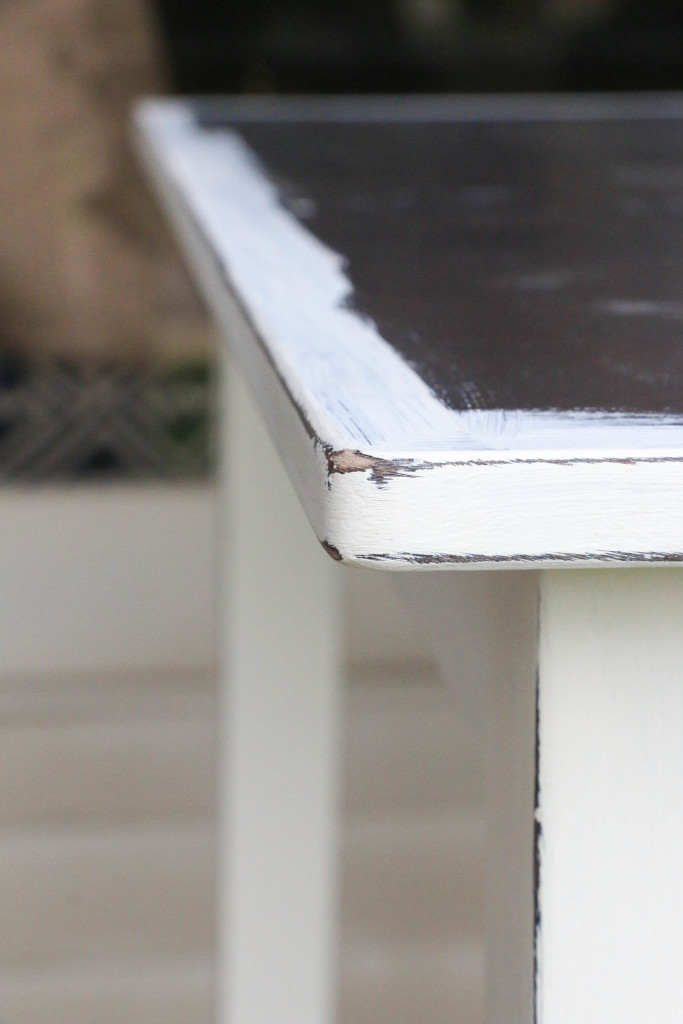
This is the end result of my hard work. I wanted to go for a bit of a distressed look (not too much), so I lightly sanded around the natural edges of the chairs and tables.

 Chair Close Up

table close up

That messy porch workshop of mine. Sorry, y’all. In the photo of the table, you can see that I painted about an inch onto the tabletop. I didn’t paint the whole thing, because I felt like that would just be a waste. I didn’t want any unpainted parts to show through when I added the top though, so I just painted around the edges.

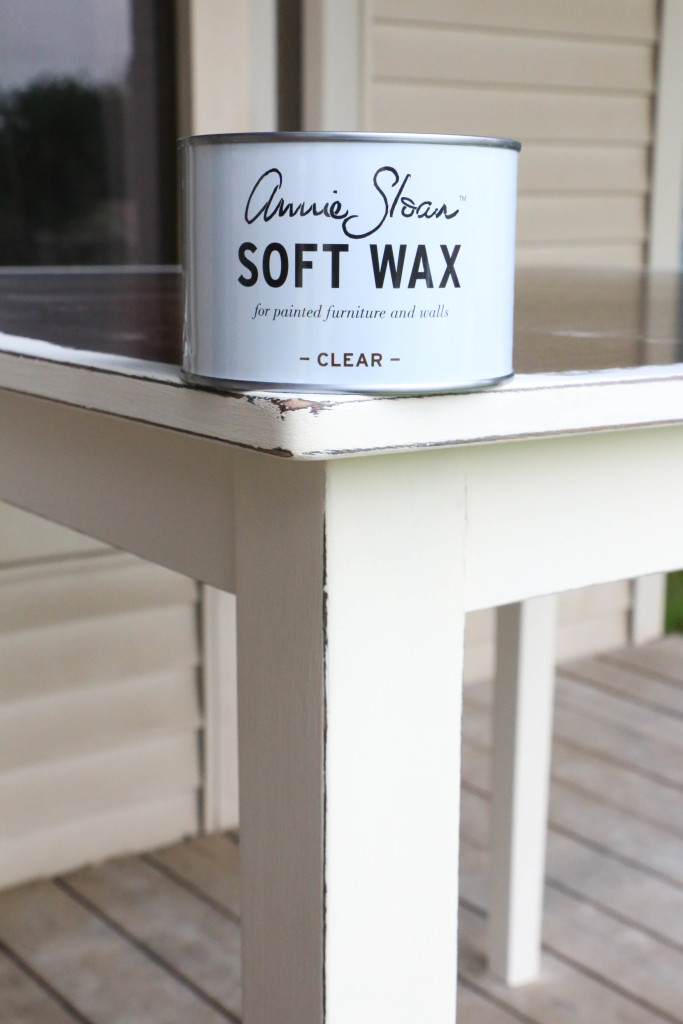
wax

Next comes the wax. Chalk paint needs an application of wax after the paint is dry. It’s a tricky process, but I seemed to manage. I think I’m going to do a separate post on my experience using this paint. Anyway, once the wax was applied, it was time to work on the tabletop.

Sanded Boards

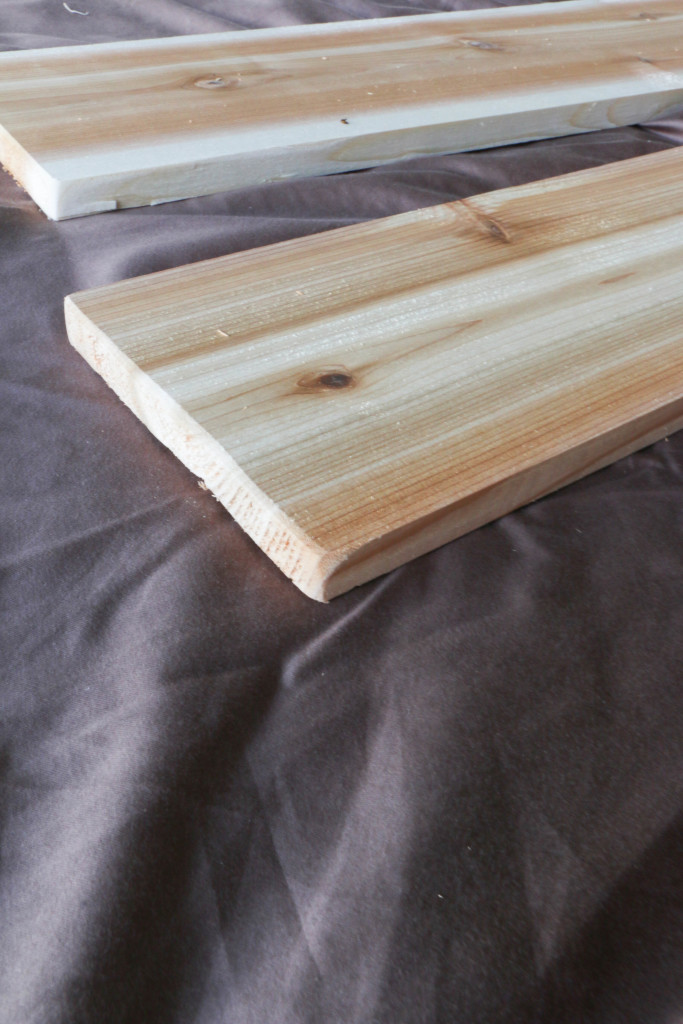
First thing I did was sand the sharp edges of each board. We used 8 1×6 cedar planks cut to 42 inches (the width of our table). I wanted a rustic look, but not a give-you-splinters-while-you’re-eating-dinner look.

Stained Boards

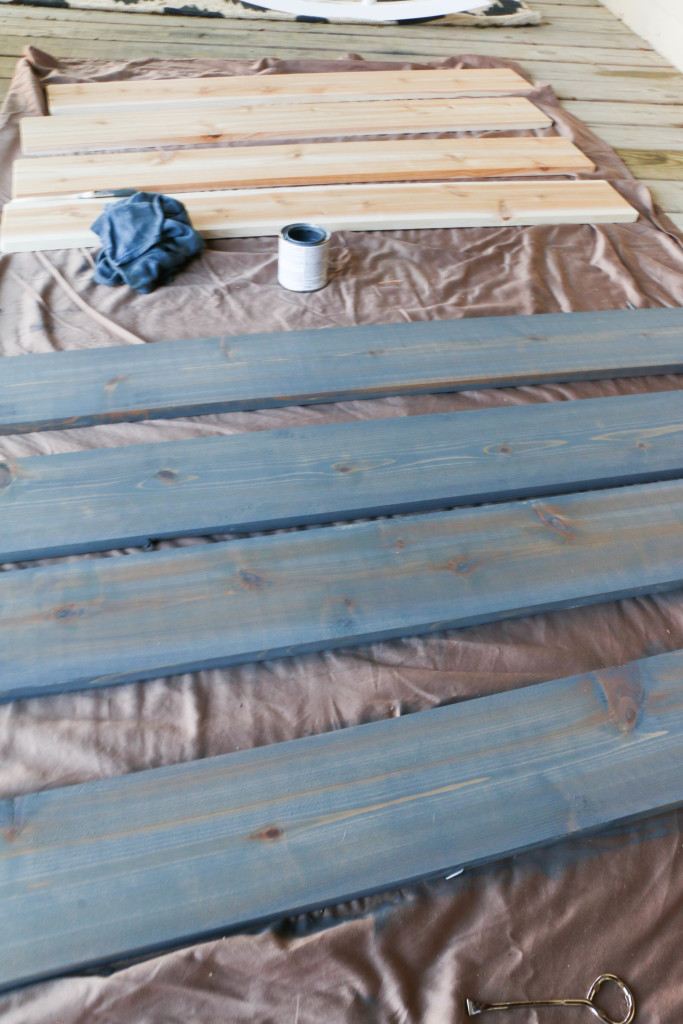
Then I stained each of the boards. I have learned by now that gloves are a must while staining. Just…don’t go to school with stain all over your hands and knees. Your students will not appreciate it.

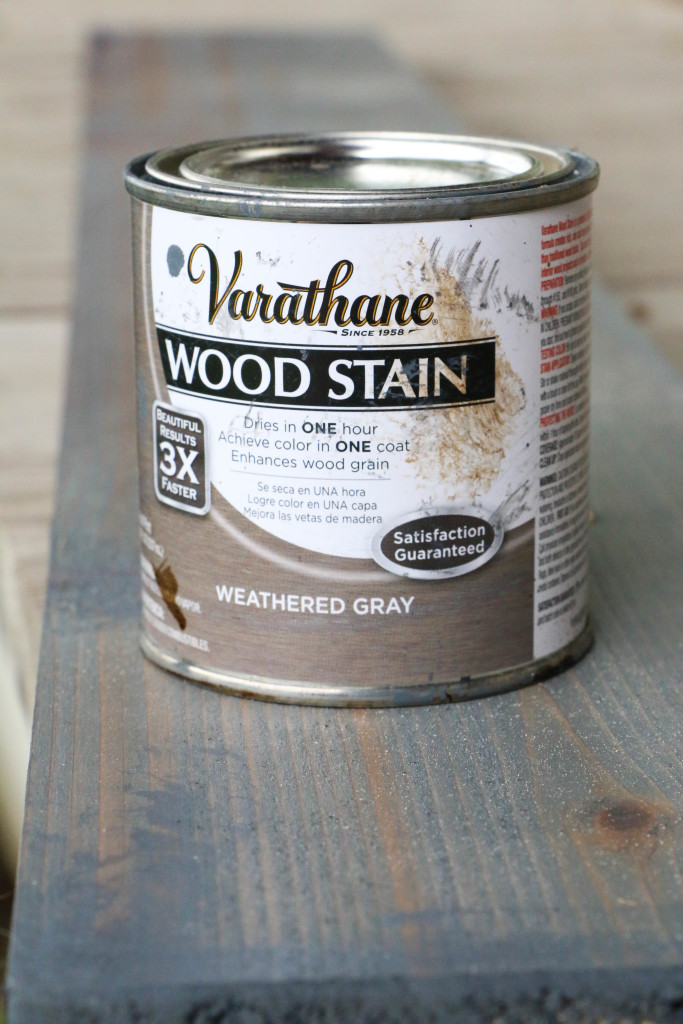
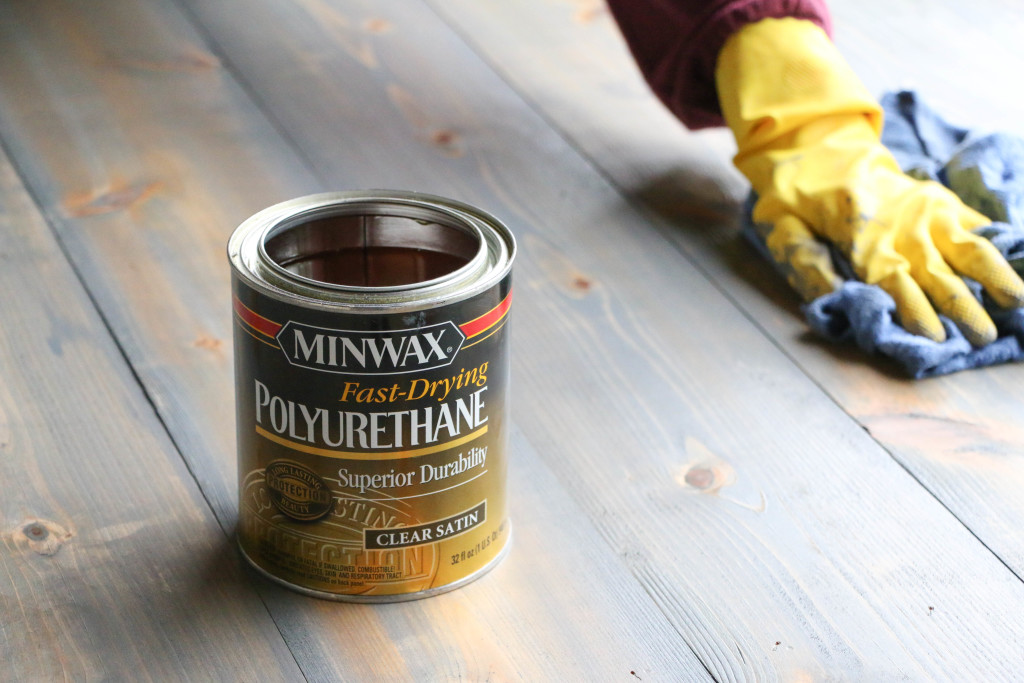
This is the stain I used:

IMG_1395

As you can see in the above photo, the color on the can isn’t quite how it turned out, but that’s alright. Up until this point, this project had been completely mine. I did have to enlist my husband to help with the next step, though.

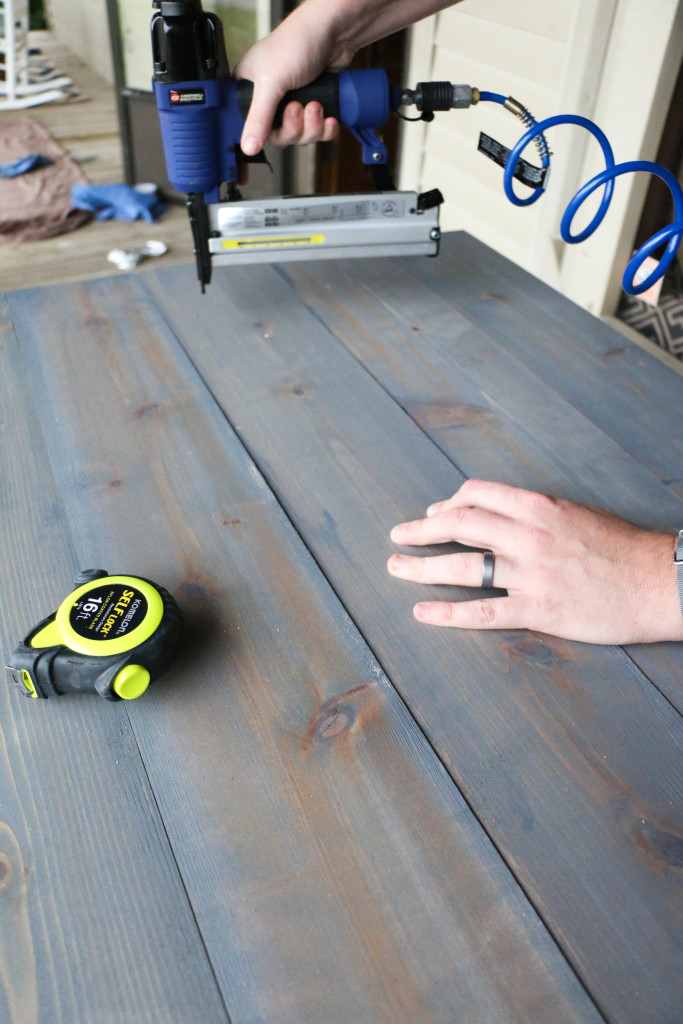
We lined the tabletop with the newly stained boards, and nailed them in place.

nailed boards

Can I also just say that nail guns are really awesome? Okay, that’s all.

Poly

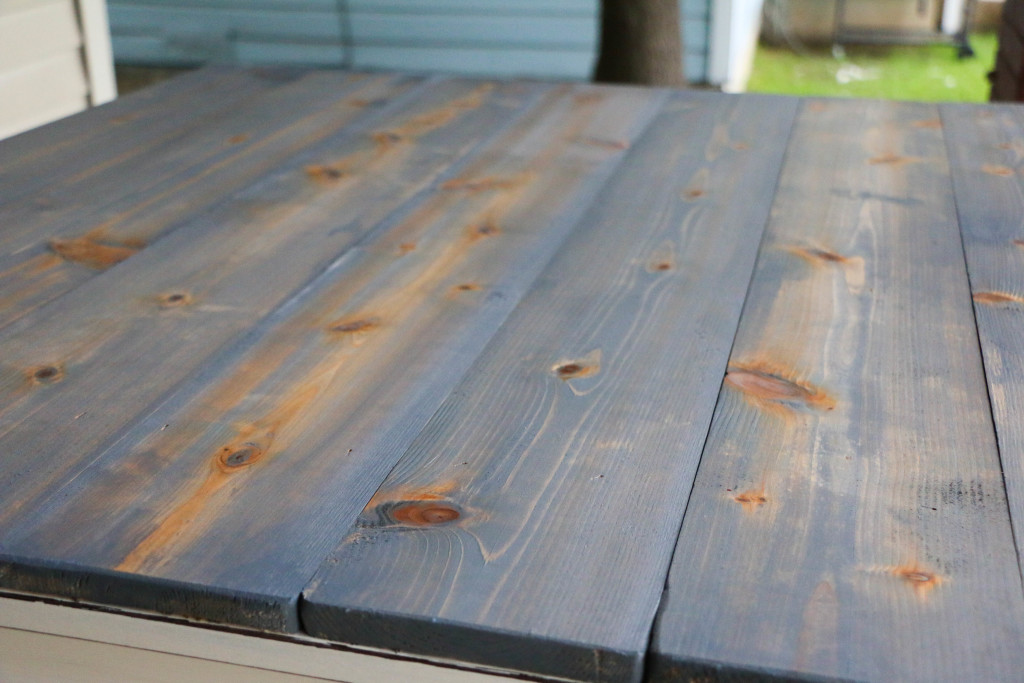
I added a coat of Polyurethane to the top to protect the finish. The poly brought out the wood grain even more and made the top look SO GOOD.

poly2

This photo shows how much the poly enhanced the wood grain. Hello, beautiful. After this, we waited for it to dry so we could move it back into the dining room. Never mind the fact that the dining room had been awkwardly empty for a week at this point.

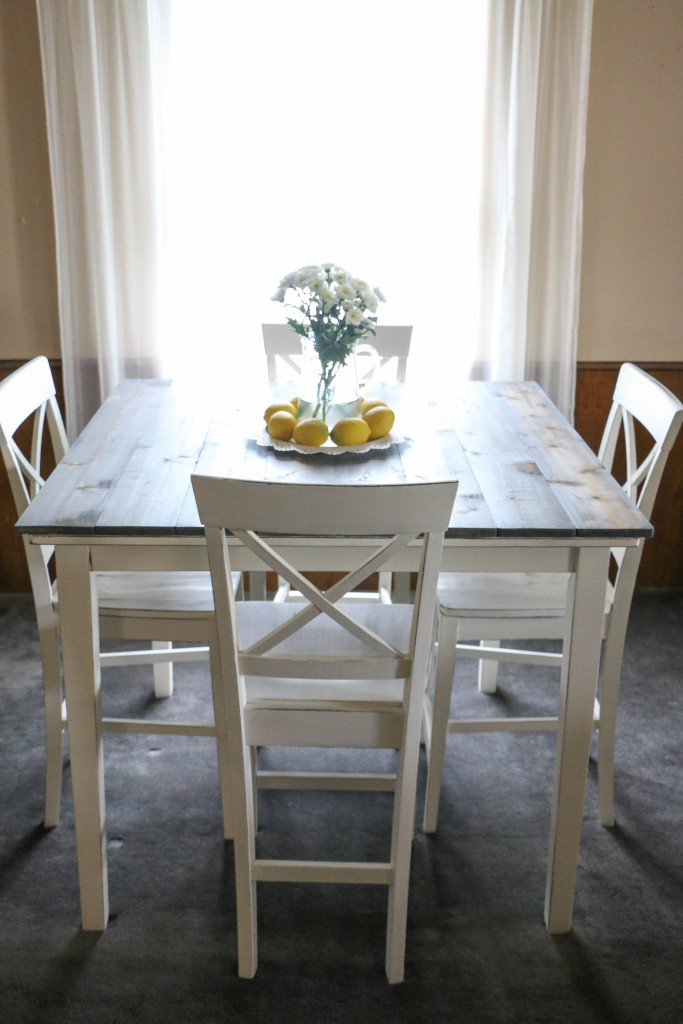
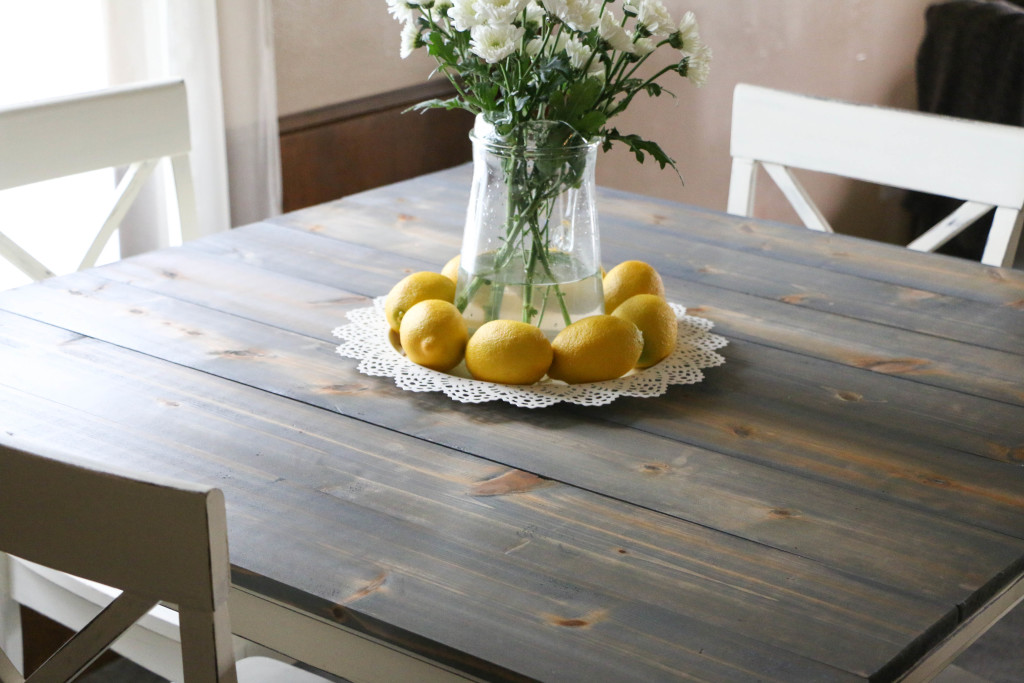
Here she is, my new table! She doesn’t look quite so newlywed basic anymore!

after5

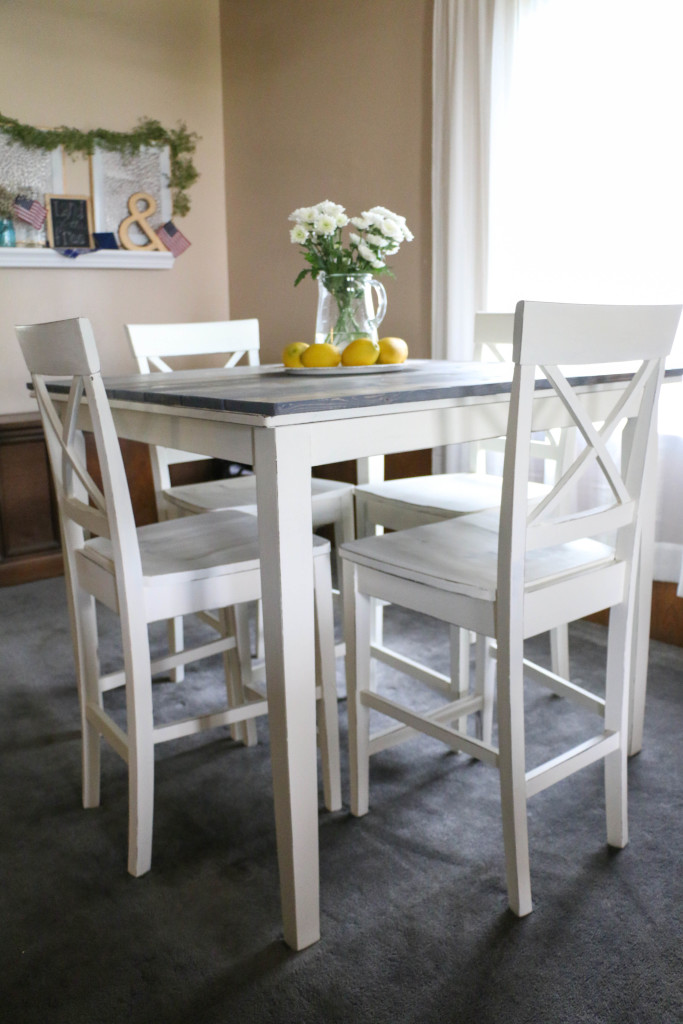
We decided to leave about an inch of overhang on either side to create just a little bit more surface area.

after4

We can’t do anything about the dark carpet or paneling, or wall color, so this table makes a big impact. It lightens up the space so much!

after3

after1

Remember how dark it was before? The before/after pictures were taken at the same time of day! I am loving this table now, and definitely won’t be parting with it for a LONG time.

Like I mentioned earlier, I’m going to do a more in depth post on my experience with Annie Sloan Chalk Paint, so stay tuned for that! That’s all for today. Have a fabulous day, friends!
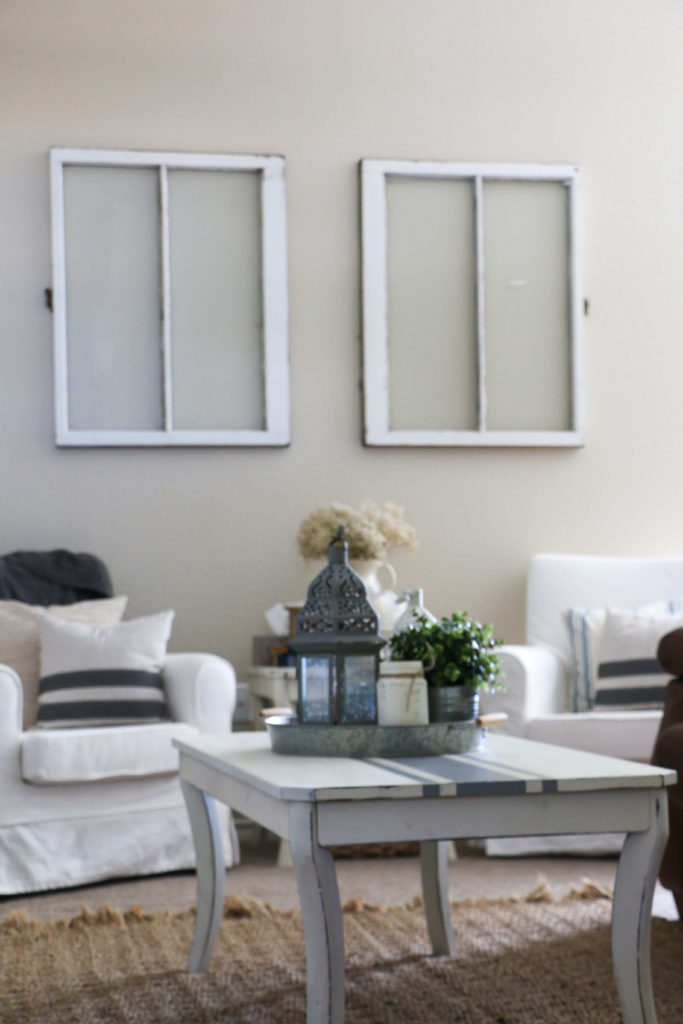
table before after