Browsing Tag

DIY

DIY Projects, Holidays

The Importance of Wrapping

When I was a kid, Christmas Eve was a big deal. Our family tradition was that everyone would sleep in the living room on Christmas Eve night, so that on Christmas morning, we would wake up right next to the tree. I remember how much I loved this tradition. I remember the year I pretended to still be sleeping as my parents rolled our new bikes into the living room from the garage. I also remember sitting in my nightgown on my sleeping bag opening my first “grown-up” tape recorder (and by grown up, I mean that it was a normal tape recorder, and not a Fisher-Price one). I spent hours in my room with that tape recorder making my own “radio show,” where I would be the DJ, playing my favorite songs, talking about my favorite things, and interviewing very interesting people (my brother and sister). I wonder if I still have those tapes somewhere.

We all have childhood memories associated with “the best gift we ever received.” Now please don’t hear me say that giving and receiving gifts is the most important thing about the holiday, because we all know it’s not. However, as we do give and receive gifts, we form emotional memories of years past. The feeling you have as a child of tearing open the package is a beautiful feeling. To me, giving gifts is a way of showing you love and appreciate someone.

So why in the world would we not do our best to make our gifts as presentable and beautiful as we can? Again, I am not implying that gifts must be perfect, or that pretty wrapping makes a gift any more meaningful. For me, it is simply another creative outlet. So here are a few of my tips for pretty (and inexpensive) gift wrapping.

giftwrapping3

giftwrapping8

giftwrapping1

giftwrapping5

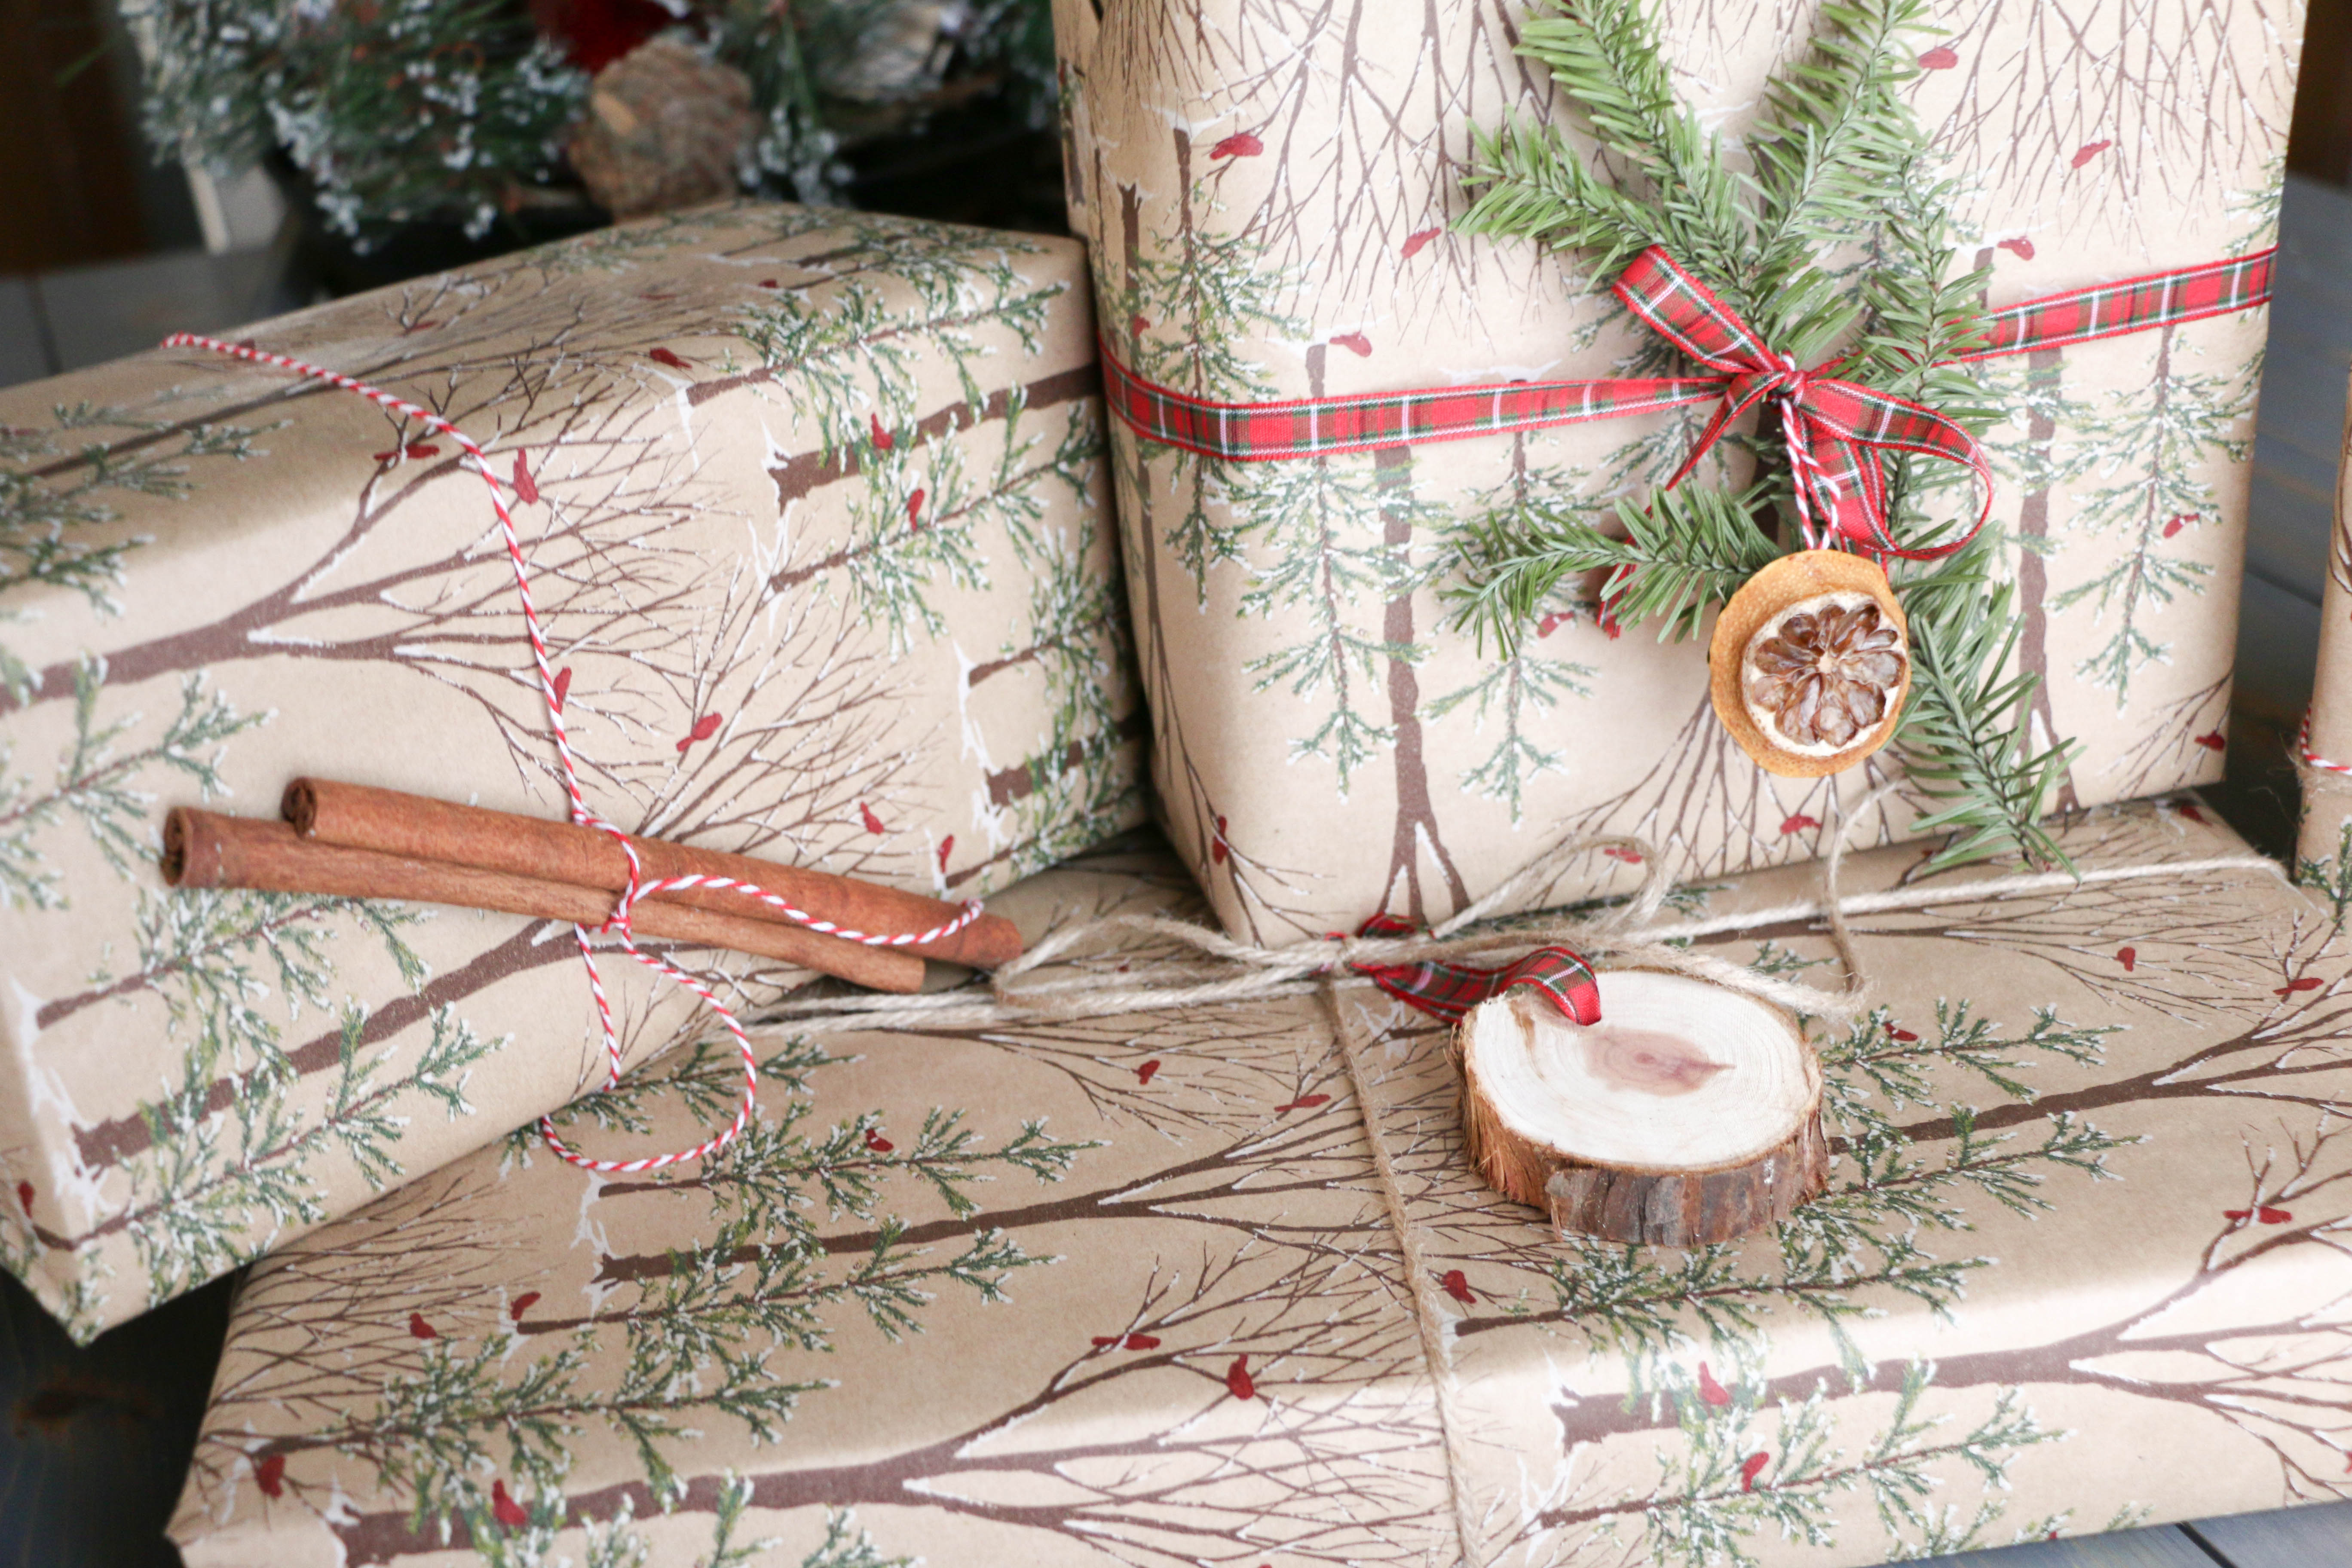
This paper came from Hobby Lobby last year or the year before, and everything else I had on hand.

Gift wrapping has three important factors: the paper, the ribbon, and some type of embellishment.

Let’s talk paper. I never pay full price for wrapping paper. I re-use the same paper from previous years most of the time. I also pick up a roll or two the day after Christmas when everything is marked down 50-70% off normal retail prices. If you’re without holiday paper, have no fear! One of my favorite things to use is plain brown craft paper because it works for all occasions. Baby shower? Check. Christmas? Check. Birthday? Check. Wedding gift? Check. You get the point. You can also use black and white newspaper (I have seen some GORGEOUS wrapping using newspaper), wrap your gift in a scarf (both pretty and reusable!), or in a real pinch, use any themed paper on its opposite side so that it simply shows white.

Next up is ribbon. The options are unlimited! I do occasionally use normal cloth ribbon, but my favorite things to wrap a gift in is regular twine, or colored baker’s twine. My suggestion is to look around your house and see what you can find. Thinly sliced strips of a coordinating wrapping paper can work as ribbon as well. A thin scarf can work here as well. Don’t go out and buy something new every time you have a gift to purchase. Look around your house and I’m sure you can come up with some thing to wrap your gift in. There’s a reason Julie Andrews mentions “brown paper packages tied up with string” as one of her favorite things…the string is an important detail!

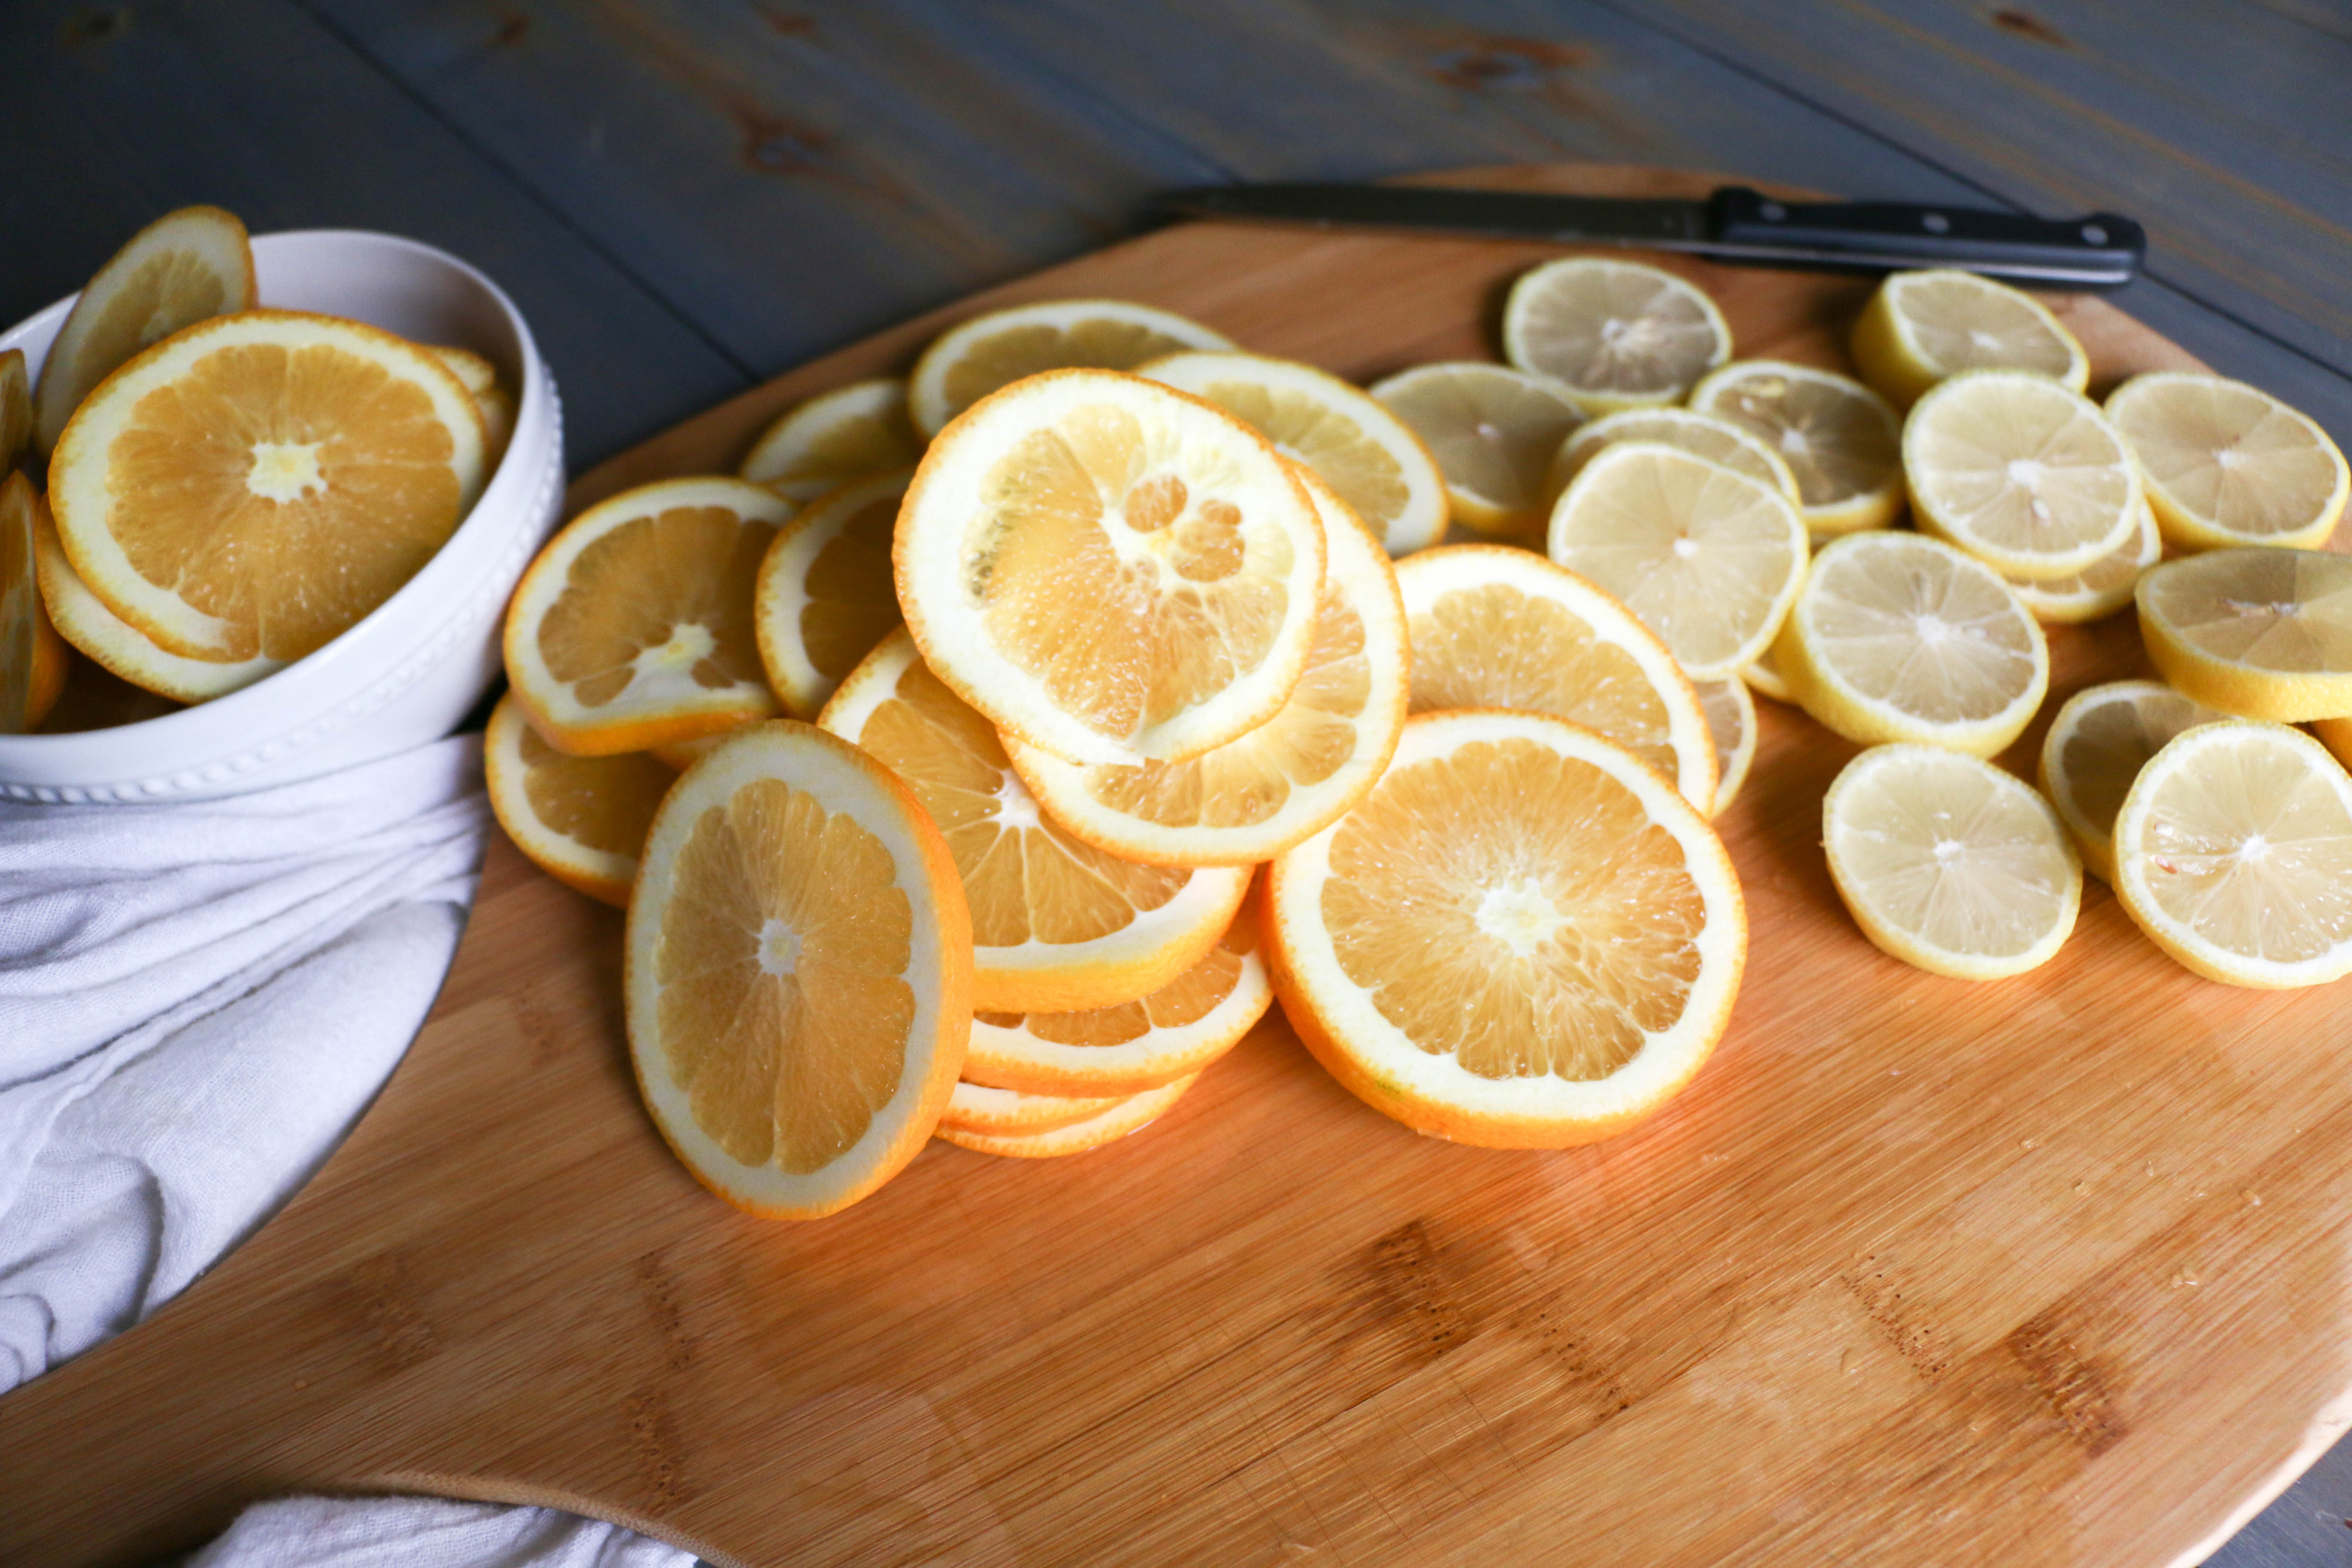
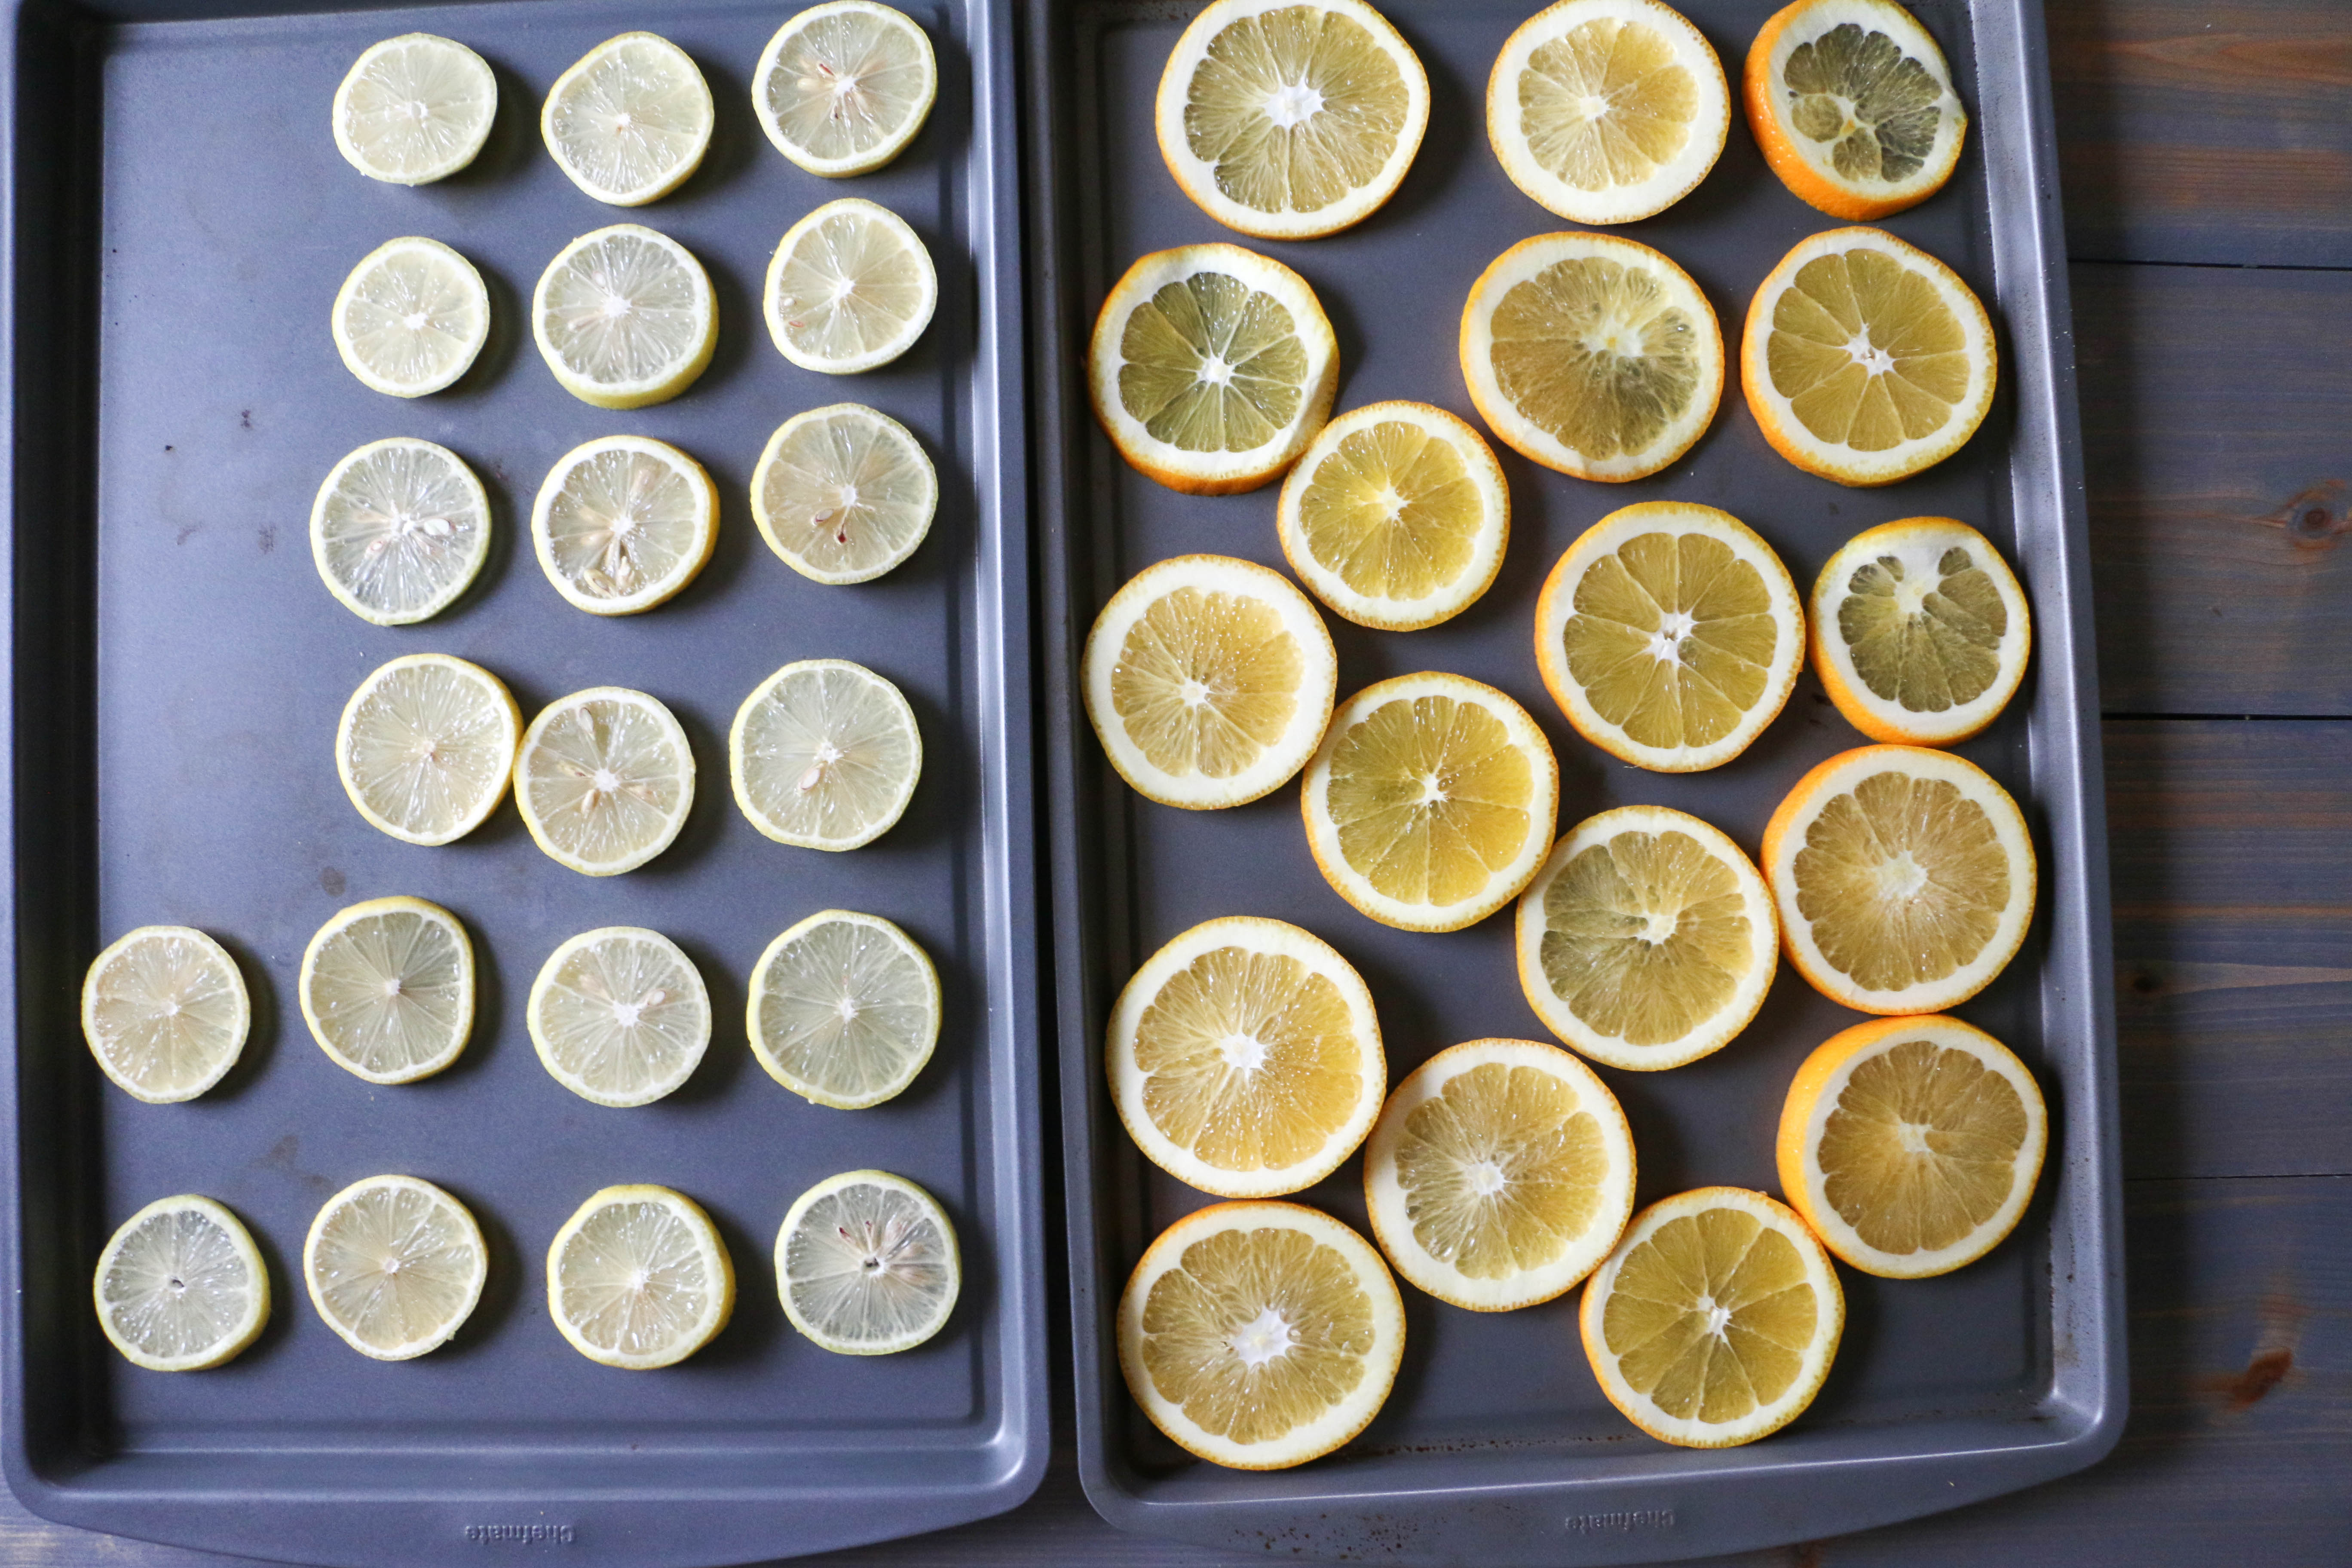
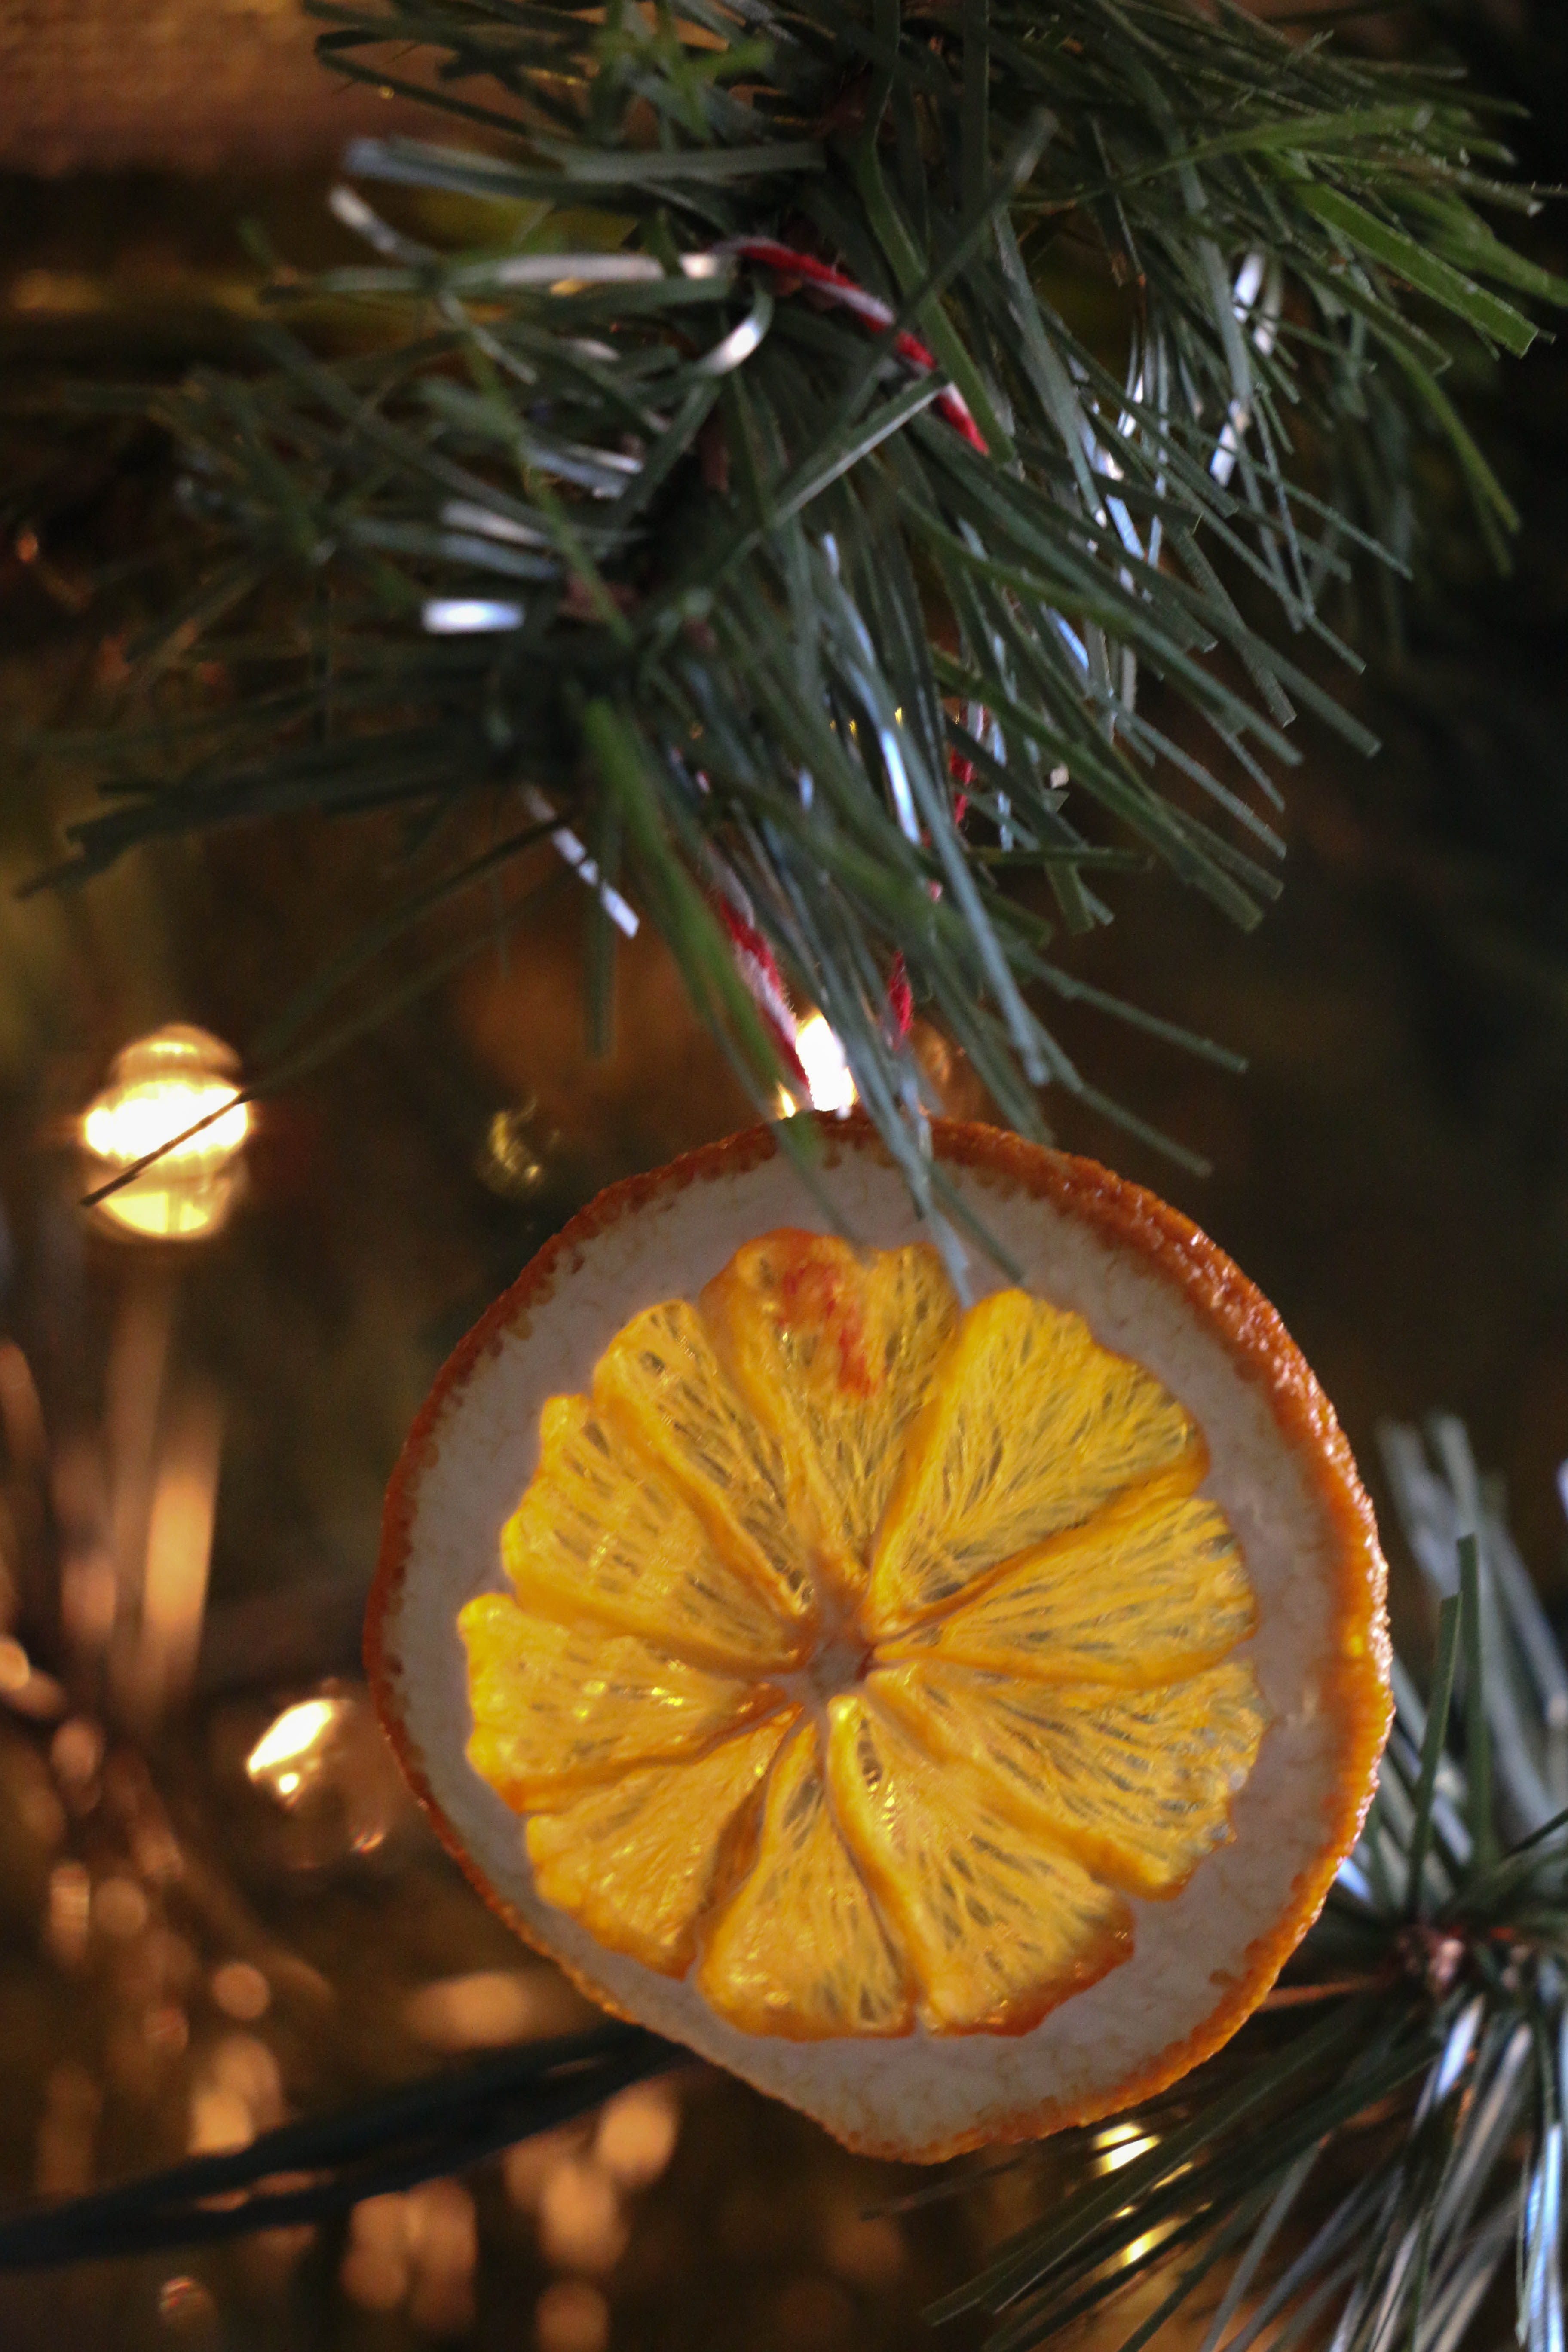
Lastly, let’s talk about embellishments. I think a gift looks perfectly topped off with anywhere from one to three finishings. The amount, of course, depends on what it is that you’re using. I like to use a lot of natural things, such as small pinecones, sticks, dried citrus slices (see my tutorial for that here), cinnamon sticks, leaves, pine clippings, wood slices. The possibilities are endless. I also often add a name tag of some kind, just so that I don’t forget who the gift is for after I finish wrapping it. For kids, you can add a tiny toy as embellishment, or a pretty piece of candy. This is the step that brings it all together, so it’s an important thing to add. The good news is that you can add just about anything you want here, so you can certainly find something you have at home or go out into your yard and find something just as easily.

How do you wrap your gifts? What’s your go-to accessory for finishing your wrapping? I’d love to hear about it! Be sure to follow me on Instagram @rumfieldhomestead for the latest updates on what I’m doing! That’s all for today, friends! Have a fabulous day!

Holidays, Tutorials

DIY Citrus Slice Ornament

HAPPY DECEMBER Y’ALL!!!! Okay, I’ll admit I’m excited. It’s officially the Christmas season now that it’s December. I can post all the photos of my tree and Christmas decor without shame! It’s a wonderful world, friends.

Today I wanted to show y’all the last of my DIY ornament ideas. My Christmas decor this year is super rustic and primitive, and so this last DIY was the one that I really think brought the whole look together. If you haven’t seen the other two ornament DIYs, you can check them out here and here. I remember seeing photos of dried fruit as Christmas decor years ago, but I never really thought anything of it until this year. I needed something with a pop of color, and so it was time to test out this project!

citrus slices

The first thing I did was slice several oranges and lemons. I think I did four of each. I wasn’t sure which I would prefer, so I did both. I cut the ends off and simmered them on the stove using this recipe so they wouldn’t go to waste. citrus slices2

I separated the oranges and lemons on my (badly stained) cookie sheets so that if they cooked at different rates it would be easier to remove them from the oven. I placed them on the lowest setting on my oven (I think it was about 150 degrees) and put the slices in. In total, I cooked them for about five hours. Every hour or so, I would turn the slices over so that they would dry evenly. I really don’t know if this necessary, but I’m a little paranoid. The good thing about the temperature being so low is that I could turn the slices over with my bare hand. In general, the lemons cooked a bit faster than the oranges did, because they were thinner I think.

citrus oranment1

After they were fully dehydrated came the fun part! I cut little pieces of red baker’s twine, the same twine I used previously on our pinecone ornaments, and hot glued it to the back to make a loop. Easy.

citrusornament3

When they were finished, they looked like this, and I am so excited about how they turned out. They have just the look I was hoping for. As it turned out, I ended up liking the orange slices better than the lemon slices because the oranges had a thicker rind (is that the right word? I don’t even know.). I did these a few weeks ago, and they’ve lasted just fine, which was an initial concern of mine.  I love the way the tree lights shine through the fruit. It feels super cozy! I also placed some of these slices on the wreath I have on the front door, and I love how it feels there too! I’m deeming this year “the year of the fruit” when it comes to decorating.

I’d love to hear what you think, and if you’ve tried this out. That’s it for today. Have a fabulous day, friends!

DIY Projects, Tutorials

Salvaged Wood Headboard DIY

It’s been a few weeks since we updated our bedroom and I am still living in a fairy-dream world because of it. I showed you guys the full result a week or so ago, and you guys have been so sweet about how it turned out. If you didn’t get a chance to check that post out, you can read all about it here. Today what I wanted to do was show you guys with a little more detail the headboard that I made for this space.

When I bought all the new pillows for the bed, I knew something was still missing. Our old headboard was a pre-blog DIY that was imperfect but served us well for the time that it did. I made it back when I was still unsure about the style direction I was heading in with our house, so it just didn’t quite work. And let’s be honest. I still don’t think I know the style I’m headed toward. Live and learn.

I wanted to make something, but I didn’t want to spend any money. Yes, you read that correctly. I wanted to spend zero dollars. Story of my life, right? I knew that I could only justify to Ethan building a new headboard if I could do it for free since I had just built one a year prior. Now that I think about it, I think Ethan has learned not to question my unreasonable antics. The other stipulation for this project was that I had to do it completely by myself. Normally our DIY projects are a team effort (and by that I mean Ethan does the work and I make it pretty). This time, before I knew what I was thinking, I told him that I was going to make this project for free, and I was going to do it completely on my own. Cue “On My Own” from Les Mis as I head to the garage to work on this project.

So here’s how it went down. A few months back, our neighbors were replacing a portion of their wood fence. I hoarded rescued some of the pieces and they have been sitting in my garage, safe from harm. I headed to my stash and chose the best looking pieces for the job. I (and when I say I, I do mean me myself and I. All by my lonesome) cut the pieces using a circular saw to 60″. We have a queen size bed, so that was the size we needed. If you were to do something similar, be sure to measure the size of your bed. I did wash these with warm water and soap, and lightly sanded them, just to make sure they were clean. And not going to give me splinters. Because those things are important, I guess.

So I laid out all the pieces on the garage floor to make sure I liked to order of them, since all the pieces were slightly different.

headboarddiy1

Then I used two cross pieces to screw onto the backside of my headboard. These pieces were vertical, and were 54″ tall. Our old headboard was a bit taller than this, but I always thought it looked kind of weird, so I was very mindful of how tall this one was going to be. I don’t know if there are official rules about how tall a headboard should be, but I think y’all all know that I make up my rules as I go when it comes to home decor. I wish I could show you the pictures of me screwing this together just to show off my brute strength, but alas, I did this one on my own. And I don’t have enough hands to photograph myself building a headboard. You’ll just have to trust me in the fact that I did make this.

headboarddiy2

After I screwed the back pieces together, I turned it around to paint it. It looked like this:

headboarddiy3

Technically, it didn’t need to be painted, I did like the way it looked like this, I just love lighter colors, so it didn’t really stand a chance. I used my dry-brushing technique, which you can read about here. It took about ten minutes total to paint. Have I mentioned that’s my favorite way to paint things?

headboarddiy4

The color is Mourning Dove by Behr, and I use that for tons of projects around the house.

After I let it dry (which didn’t take long with the amount of paint I used), Ethan helped me carry it into the house to put it behind the bed. So I guess he did help. BUT OTHER THAN THAT I did this one on my own, and I am so proud of myself. Picture me pridefully kissing my biceps.

diyheadboard9

 You can see more after photos in the original reveal post. I cannot tell you guys how much this little project changed the feel of our bedroom. And it was 100% free! This cheap-loving girl is jumping up and down with excitement over this one! I promise you, I am super wimpy, and I did this in an afternoon, so I know you can too!

All the sources for the items you see here are in my original reveal post, which you’re welcome to check out! I’d love to hear what you think about this project in the comments below, or you can find more on my Instagram. That’s all for today, friends! Have a fabulous day!

rusticheadboard