Browsing Tag

budget friendly

DIY Projects, Home Decor

DIY Gallery Wall Update

Hello there friends! I hope you’re having a wonderful Monday! It’s a three day weekend for me, so you know I’m having a great Monday! This past weekend has been really really awesome. I’ve gotten SO MUCH done, and I’ve been inspired to do several new projects. On Saturday, Ethan and I took the trip down to Magnolia Market (Joanna Gaines, Fixer Upper, fabulous home decor, my idol, you get the point). It’s only about an hour drive for us, but it was the first time we had been since they’ve opened their larger store.

I bought two small items while I was there, and it inspired me to update a little gallery wall we have in the corner of our bedroom. Now, since I had spent all my money at Magnolia Market, I didn’t have any more money to buy anything new. So, I had to get creative.

GalleryWallBefore

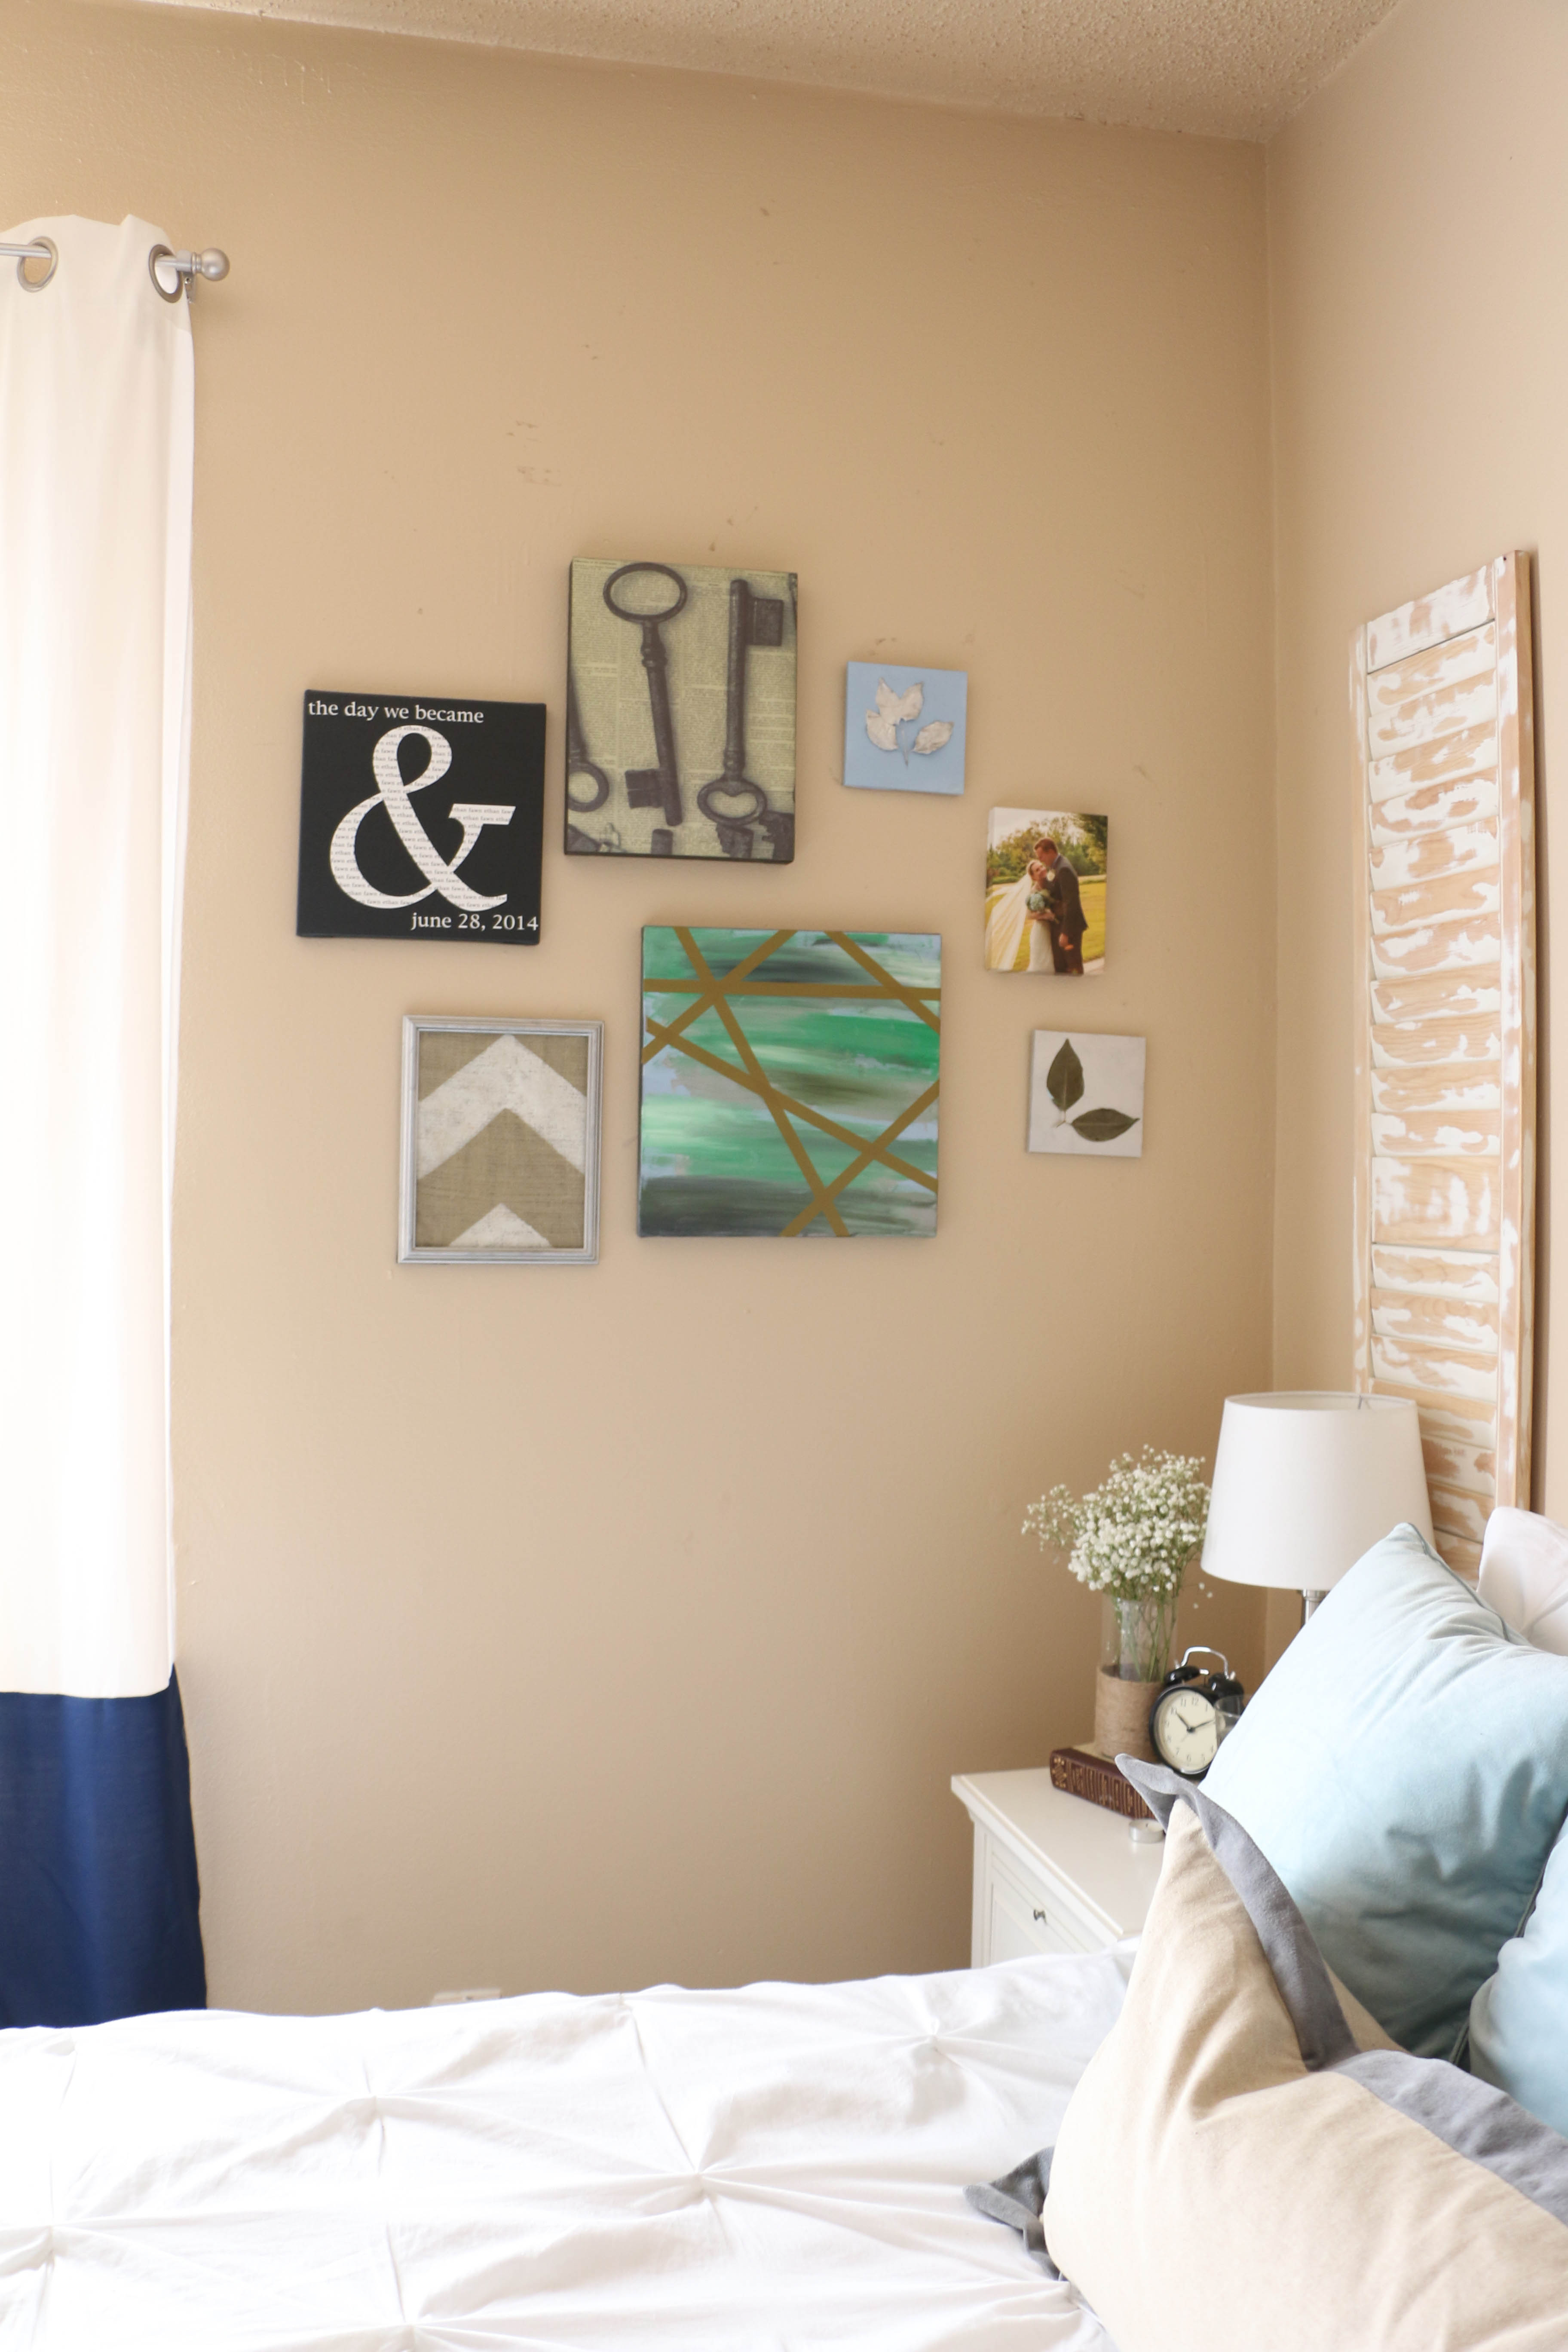
This is what this little corner of the room looked like before. I made/put together most of these pieces immediately after moving into the house when we got married. Let’s not talk about the multicolored canvas with washi tape all over it. Just, don’t even mention it. Obviously, this isn’t really my style. So when I brought home something new, I knew I needed to update this whole little corner. Here’s how it looks now:

GalleryWall8

The entire theme is a bit more neutral and monochromatic, which fits in this room SO MUCH BETTER. As you can see, some of the pieces stayed the same, but the overall look is something I’m much happier with. So let’s talk about how I got my creative on without any money.

GalleryWall5

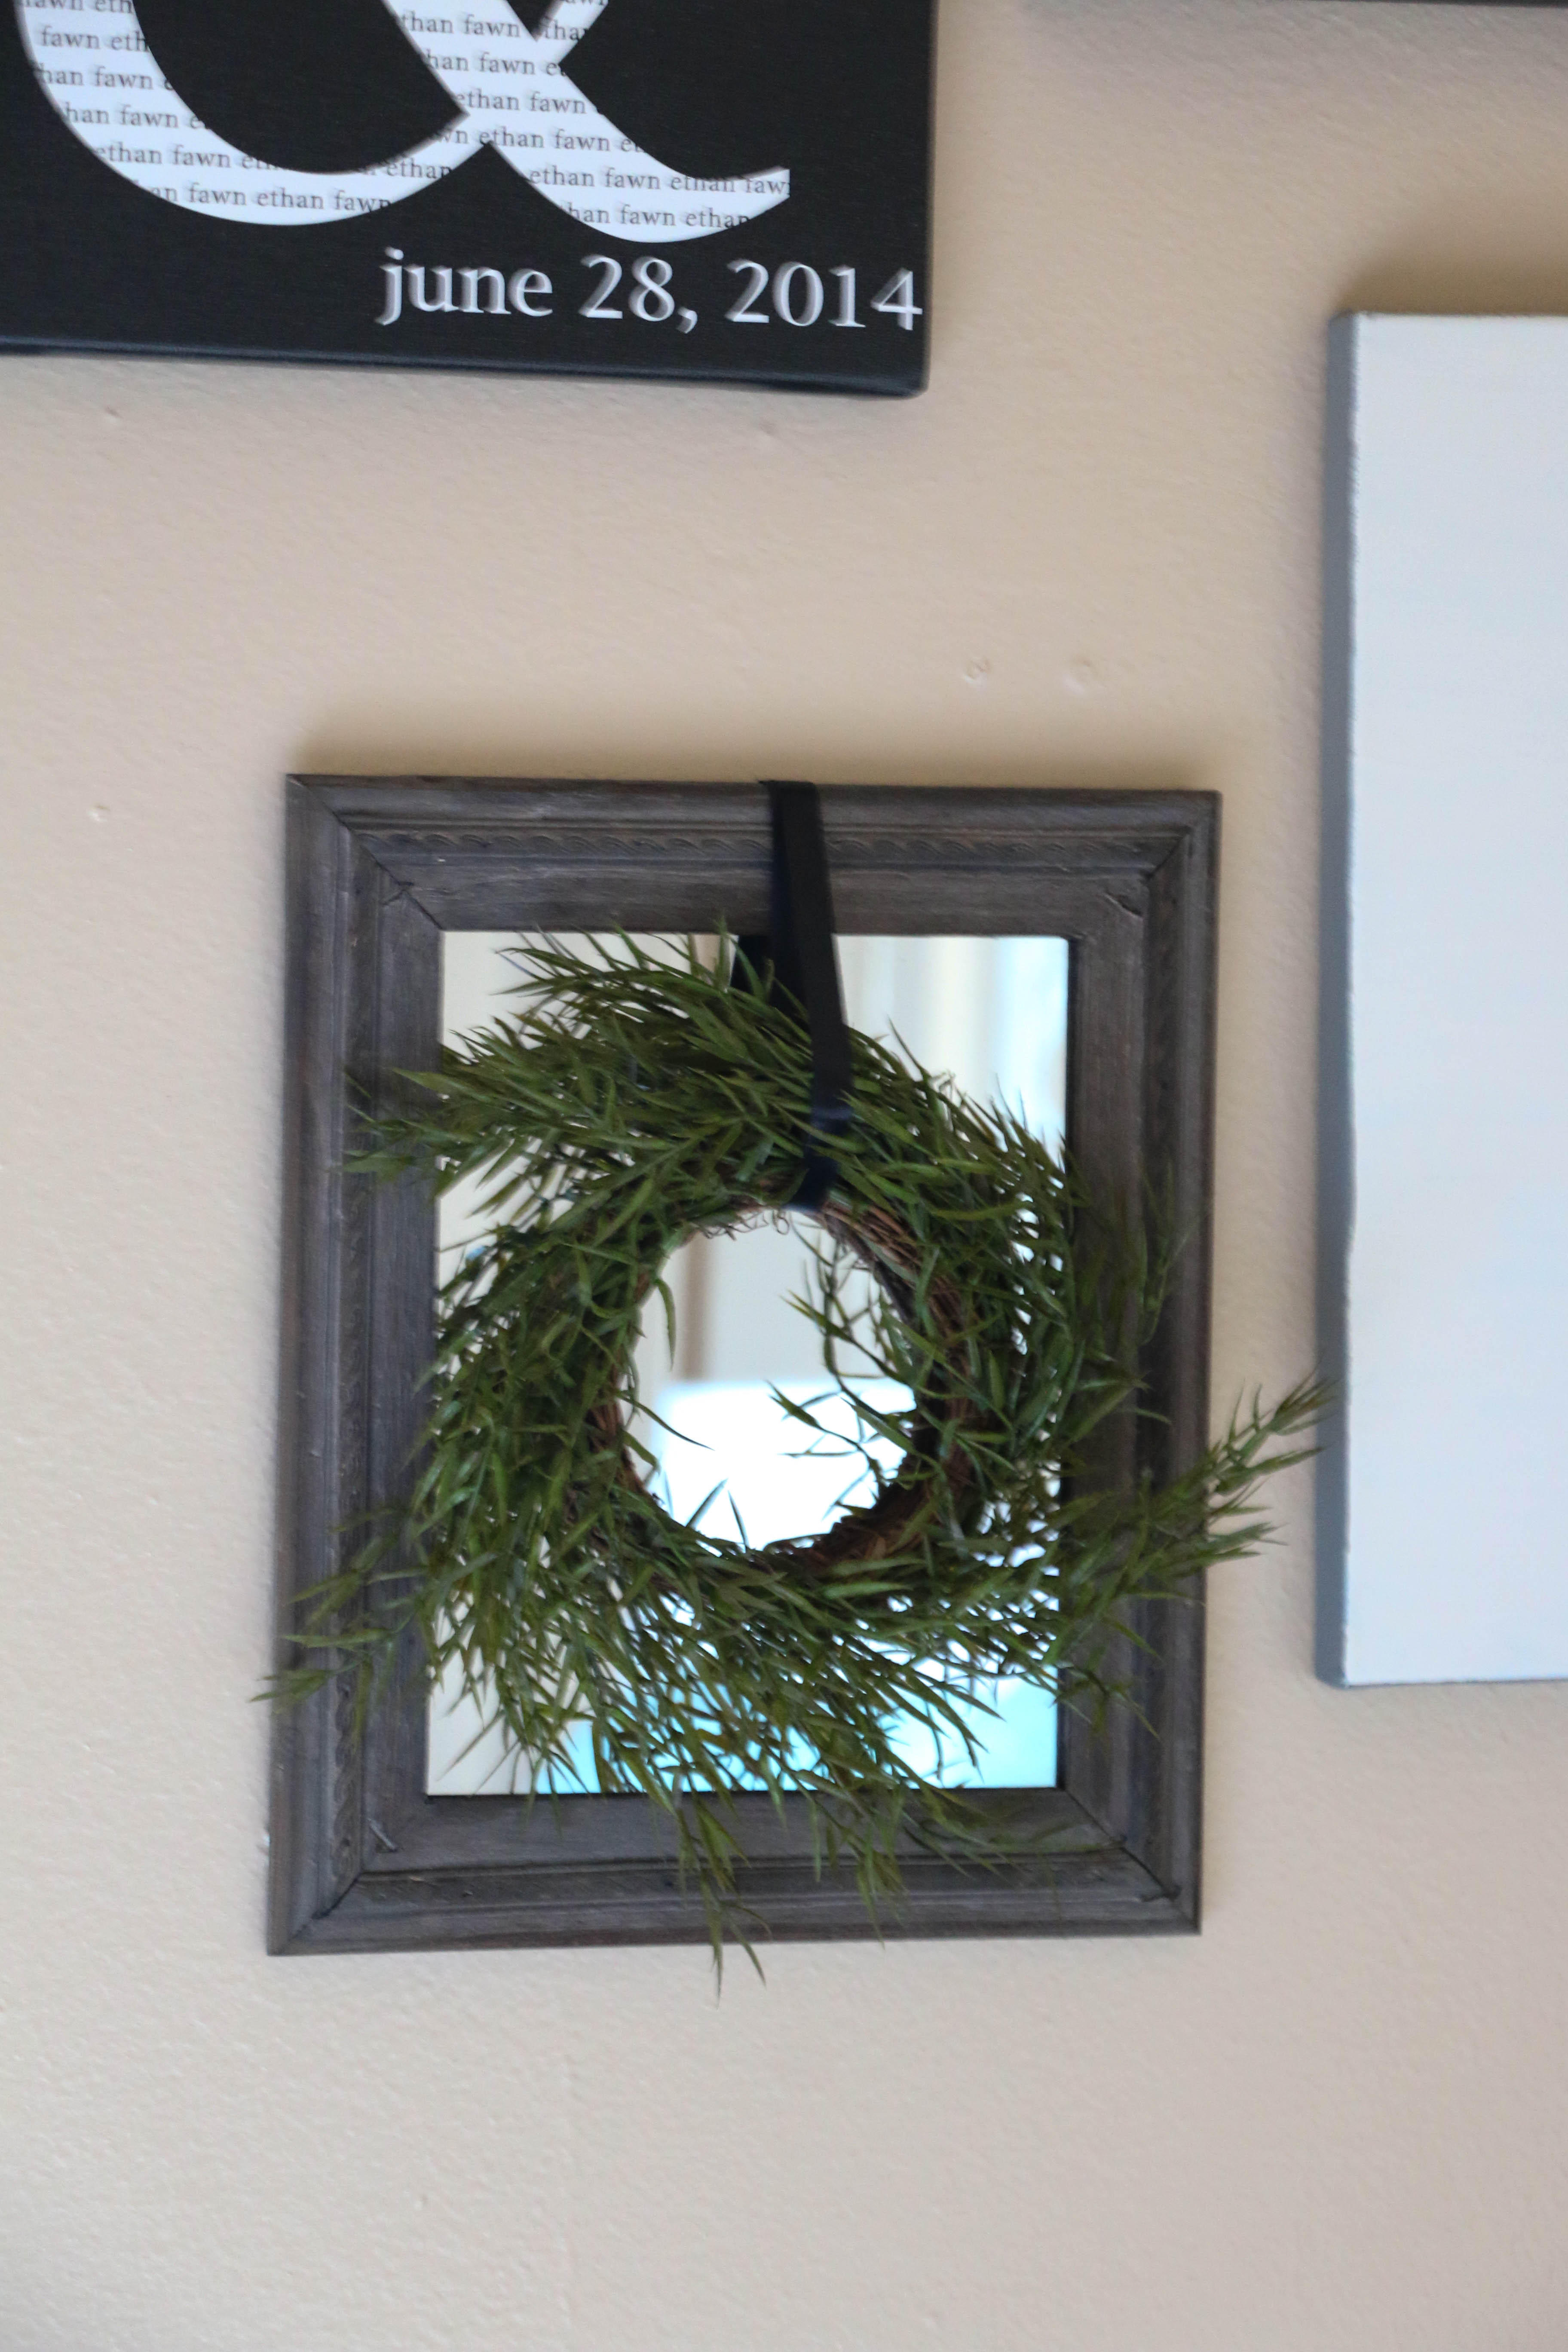
This is what I purchased from Magnolia Market this weekend (pardon this blurry picture, I don’t really know what was going on). The frame and the wreath came separately, but I attached the wreath with some thin black ribbon to the back of the frame.

GalleryWall1

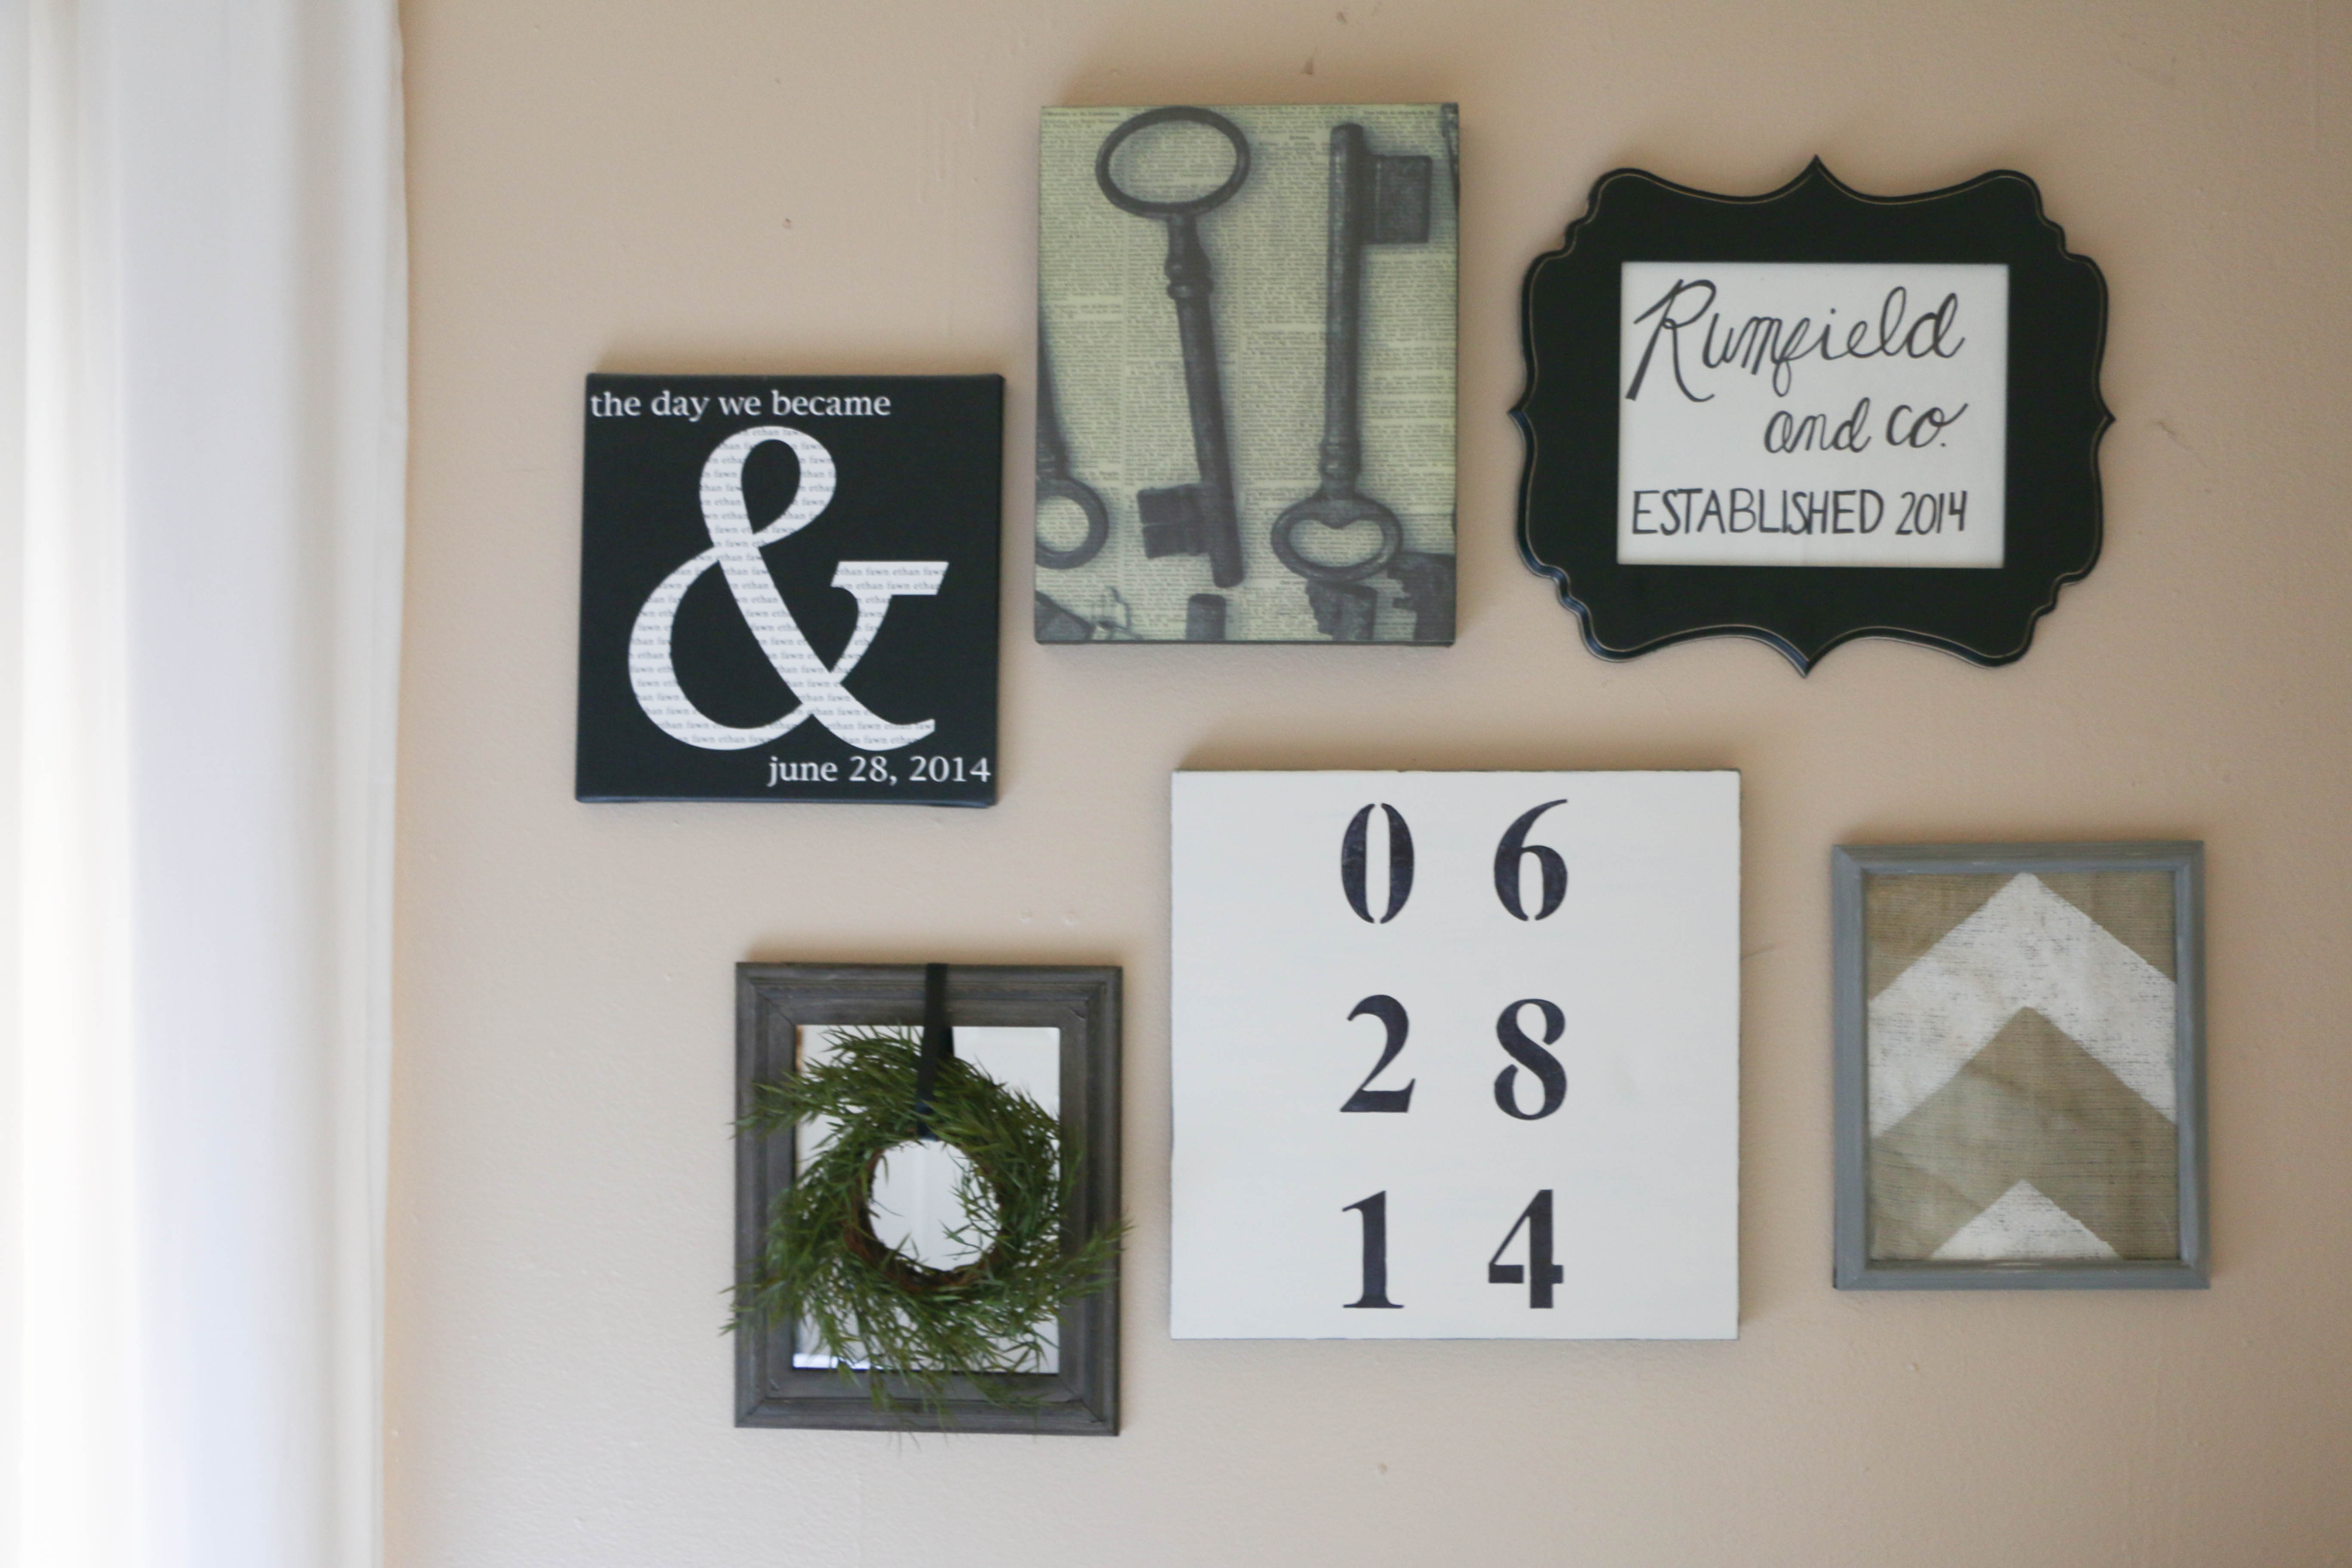
The hand lettered sign on the top right was something I whipped up with a Sharpie. Nothing fancy at all. The frame was something I had in storage with something else inside. I had never hung it because I wasn’t a fan of what was previously in the frame, but with a little art swap, I was good to go. I also moved the burlap arrow frame to the other side of the wall and painted the frame from a metallic silver to a matte gray. Just another way to go a bit more neutral.

GalleryWall7

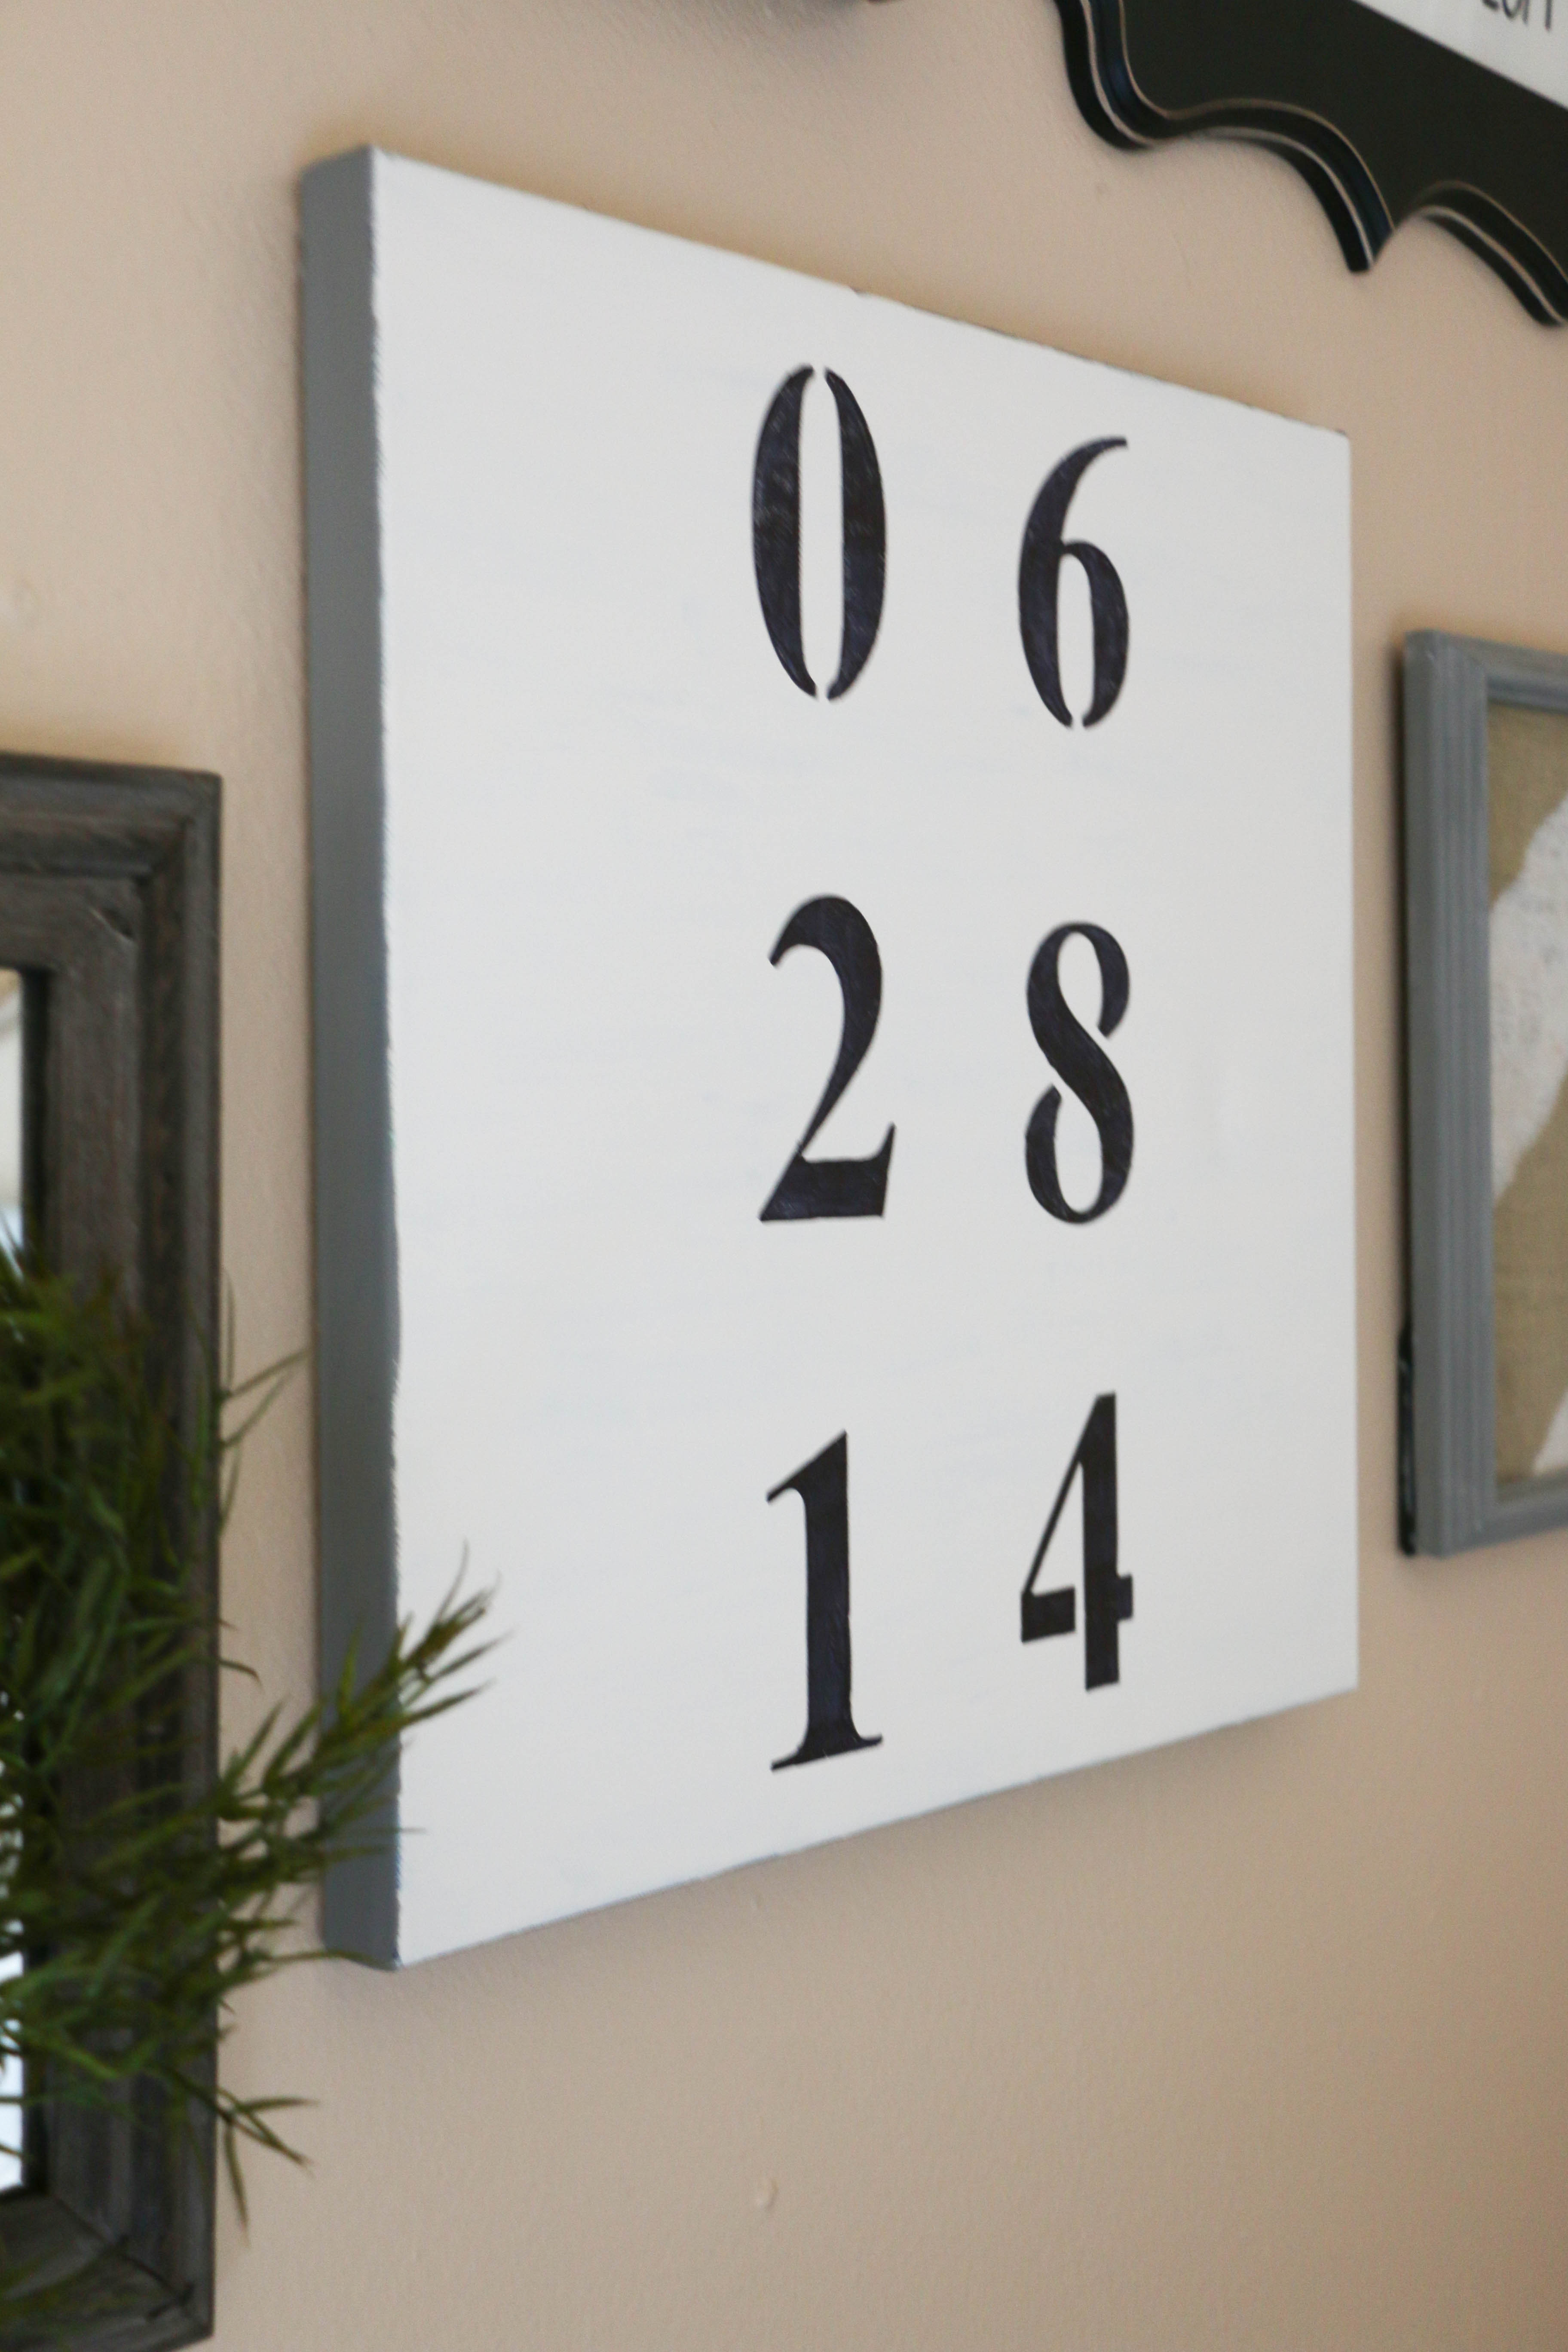
This piece is the biggest statement on the wall, and my personal favorite. It took Ethan a bit to figure out what “all those numbers mean,” but it’s our anniversary date. I used the same canvas from the first photo, peeled off the washi tape, and painted white over the cringe-worthy painting. I used stencils and a Sharpie to create the numbers, which was so easy anyone could do it! I believe this canvas was originally a picture of Audrey Hepburn I had in my college dorm room. It has now lived many lives! No one will be able to say that I didn’t recycle!

The other pieces from the original wall got trashed, as they had been reused one to many times, with the exception of our wedding photo, which will be relocated. GalleryWall3

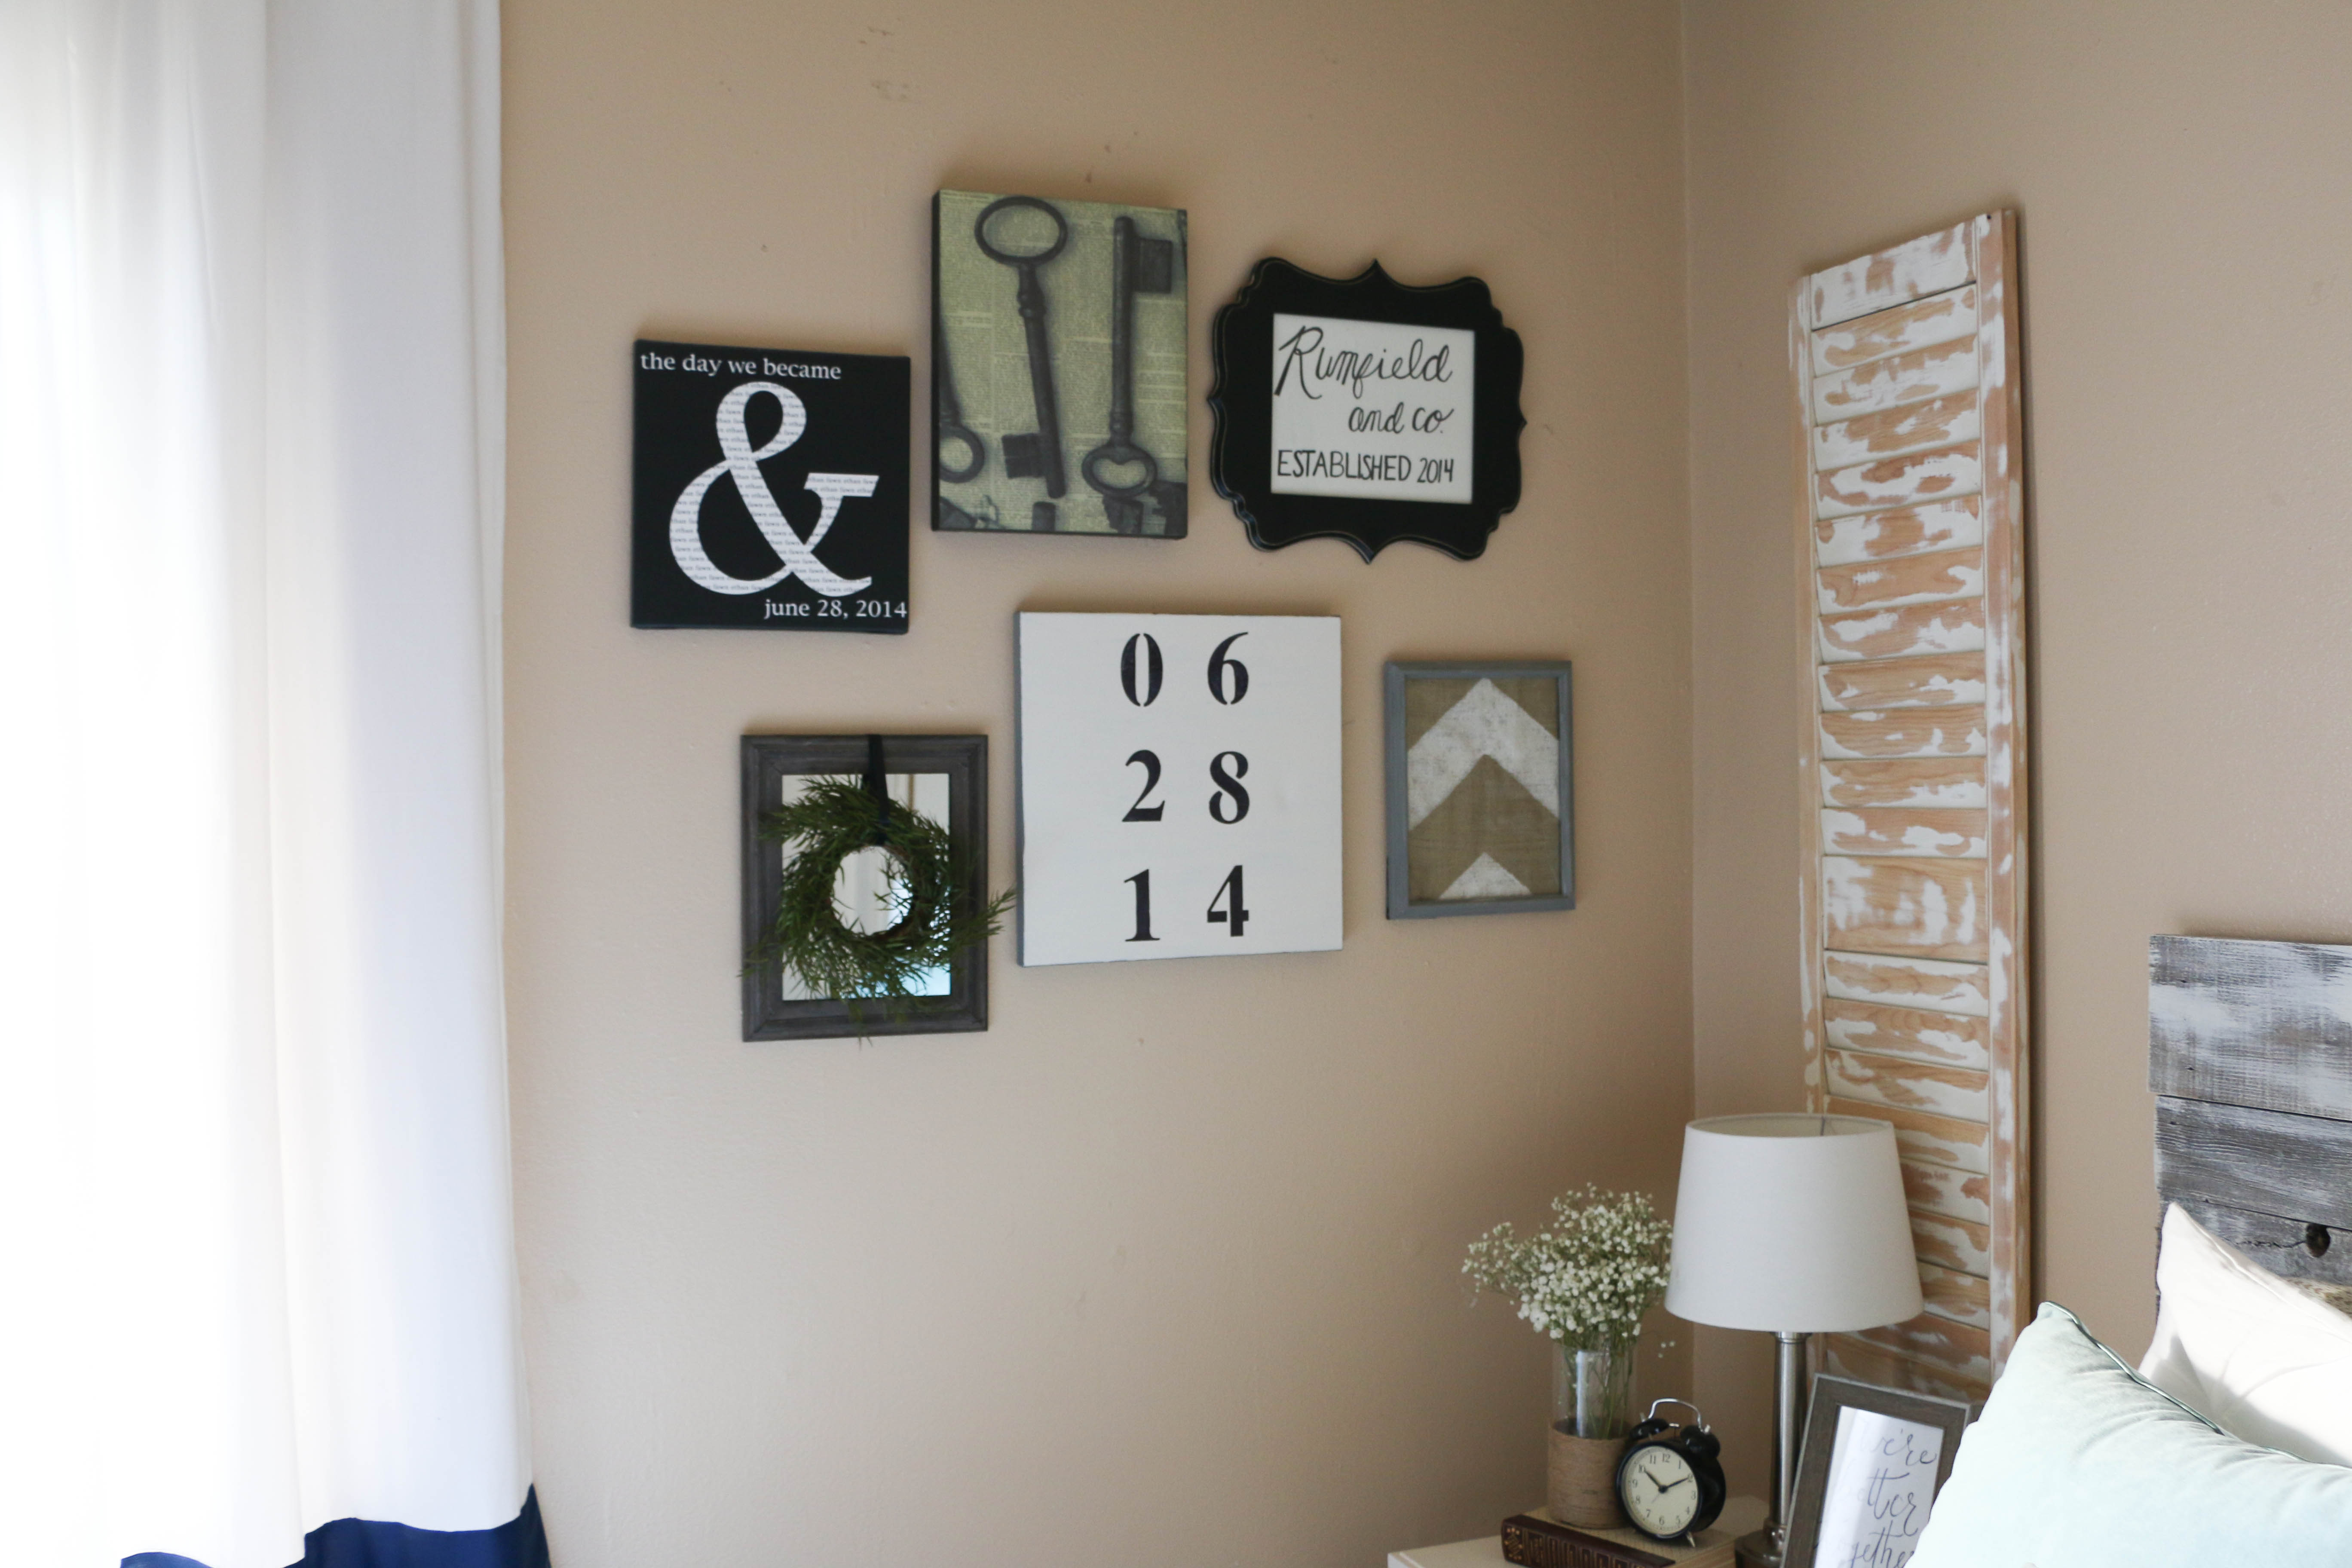
This little corner may not look totally different to everyone, but to me, the entire mood has changed now that it’s underwent its little makeover. It look me maybe an hour to update and make the three pieces, and aside from the new mirrored frame, it didn’t cost me anything.

Bringing new life to old gallery walls doesn’t have to be expensive! Look at the pieces you have already, and imagine new ways to rework them. Canvas can always be painted over, frames and always be painted. I’ve been known to hang wrapping paper in frames as cheap art, or free printables found online. Handwritten notes or drawings can also make great (free) additions to gallery walls. If you’re strapped for cash, look around your home and see what you can come up with! You might be surprised at what you find you already have.

What’s your go-to piece for artwork? Have you ever made a gallery wall mistake like I have? I’d love to hear about it! That’s all for today, friends. Have a fabulous day!

Organization

Tips on Loving Your Closet

Do you have the perfect vision of what your dream closet is? I know I do. Cue soft playing music and a warm bright spot. My dream closet is ultra feminine, with a full window for natural light, and a vanity for doing makeup. My dream closet is obviously larger than my childhood bedroom. There’s room in there for a soft armchair where I can drink my tea, a freestanding full length mirror for trying on clothing, and perhaps a vintage mannequin. My wedding dress is displayed, and the whole thing is light and airy. Have I even mentioned the perfectly organized rows of clothing and shoes? My collection is expansive, yet impeccably organized just like a magazine. Can you tell I’ve thought about this? Just a little bit.

Raise your hand if you have something pictured in your head similar to what I just described. Yes, I’m talking to you. I know most of us have unrealistic dreams like this and that’s okay!

Cue reality though (we’ll use my closet for an example): my closet is a 2×3  foot box with one awkwardly placed pole (not even tall enough to hang a knee length dress from) and two measly shelves on the top (one of which I can barely reach). Like the rest of our house, it’s the color of a camel’s behind, and a carpet that hasn’t been touched since the 1960’s. Living the rental dream. 

Here’s the deal. It would be so easy for me to be discouraged by the size of my closet, or frustrated that I don’t have things as nice as others. Today I want to share with you some tips I’ve found on how to love the closet you have (that don’t include getting a new closet).

This year, my mission has been to organize everything and purge the excess. The closet was the first place to start! I started off the new year by reading The Life Changing Magic of Tidying Up. I am not kidding when I say thing book will change your life! It’s a pretty short book, but I had read the whole thing in a day. I finished feeling energized and ready to tackle my house! There are specific sections of the book designated specifically for clothing, and so I took some of the tips listed there and reorganized my closet. I can now tell you that when I walk over to my little closet, I feel refreshed and calm! And I don’t even have an armchair where I can drink my tea. Can you imagine?

closet2

Step One: 

Get rid of everything. I’m not joking. I took every. single. piece. of clothing out of my closet and laid them on my bed. From there I looked at each item one by one and asked myself when the last time I had worn the item was. I had to be harsh with my answers about what to keep and what to get rid of. The things I love but wear infrequently because I’m too lazy to iron – those things went to the donate pile. The things I’ve been meaning to mend but secretly know I won’t get around to – donate. The things that are near duplicates of other items – donate. Because of the awkward height of the bar in this closet, my dresses are hung in Ethan’s closet. So all I have here are my tops (both blouses and sweaters). I wanted to keep only the things I have in my closet are the things I will actually wear on any given day.

closet3

Step Two:

Organize by color. One of the things that makes my teeny-tiny-barely-even-there closet bearable now is that the order of things is aesthetically pleasing. I kept my shirts and sweaters separate, each category moving from the darkest on the left to the lightest on the right. There is a whole psychology behind this method that I don’t really understand, but I will say that it does make things look intentionally placed. Each piece has a perfect spot, and the color scheming actually helps me plan my outfits with ease. All my black tops are in the same place, and I know exactly where the hanger is when I’m putting something away.

closet4

Step Three:

It’s all about the hangers. This step is definitely not necessary, but I would recommend it. Until this point, I still had the multi-colored plastic hangers I acquired in bulk in college. They were cheap, and I was broke. I’ve wanted to buy coordinating black velvet hangers for a long time, but could never justify the expense. The only reason I bought these is because I had extra Christmas money. Ethan was not really thrilled with the thought of me spending my Christmas money on hangers, but I assured him it’s what I really wanted. He’s the one who married this organizational freak, so he can’t really complain too much. Anyway, I bought two of these packs, and used Bed Bath and Beyond’s 20% off coupon. I will eventually need to get another pack or two to finish Ethan’s closet and the coat closet, but my wallet says it’ll have to wait.

closet1

Step Four: 

Tidy up all the non-hanging items. On the top shelf, I have a few pairs of shoes, a handbag filled with other handbags, pants stacked standing straight up, and a basket with scarves and important jewelry boxes. I also have a small hanging shelf unit with a few folded skirts hanging from the rod. Notice how I have extra room on these shelves? Before I purged and organized, I could barely cram anything else in this closet, and finding what I needed was never simple. Now everything has a location, everything has a purpose, and it all looks generally appealing.

I feel like I should mention a few disclaimers. The floor if this closet hosts the majority of my shoes, which aren’t perfectly organized yet. Additionally, this is not the entirety of my wardrobe. My dresses are stored in Ethan’s closet, and coats and special occasion outfits are stored in the coat closet. I also have casual wear that is stored in Ethan and my shared dresser.

My overall point is this: this is no way near the dream closet I described at the beginning of this post. However, it makes me feel refreshed and at ease when I open the door. I will likely never have this fantasy closet, but I’m willing to love the closet that I have now. I know that later in life, I’ll move up in closet. Right now though, I’m learning to love the closet I have. Right now, this is my dream closet. Purged, organized, and accessible. Do you have your dream closet or do you have something you have to learn to love like me? How do you organize? I’d love to hear all about it! That’s all for today, friends. Have a fabulous day!

DIY Projects, Holidays

The Importance of Wrapping

When I was a kid, Christmas Eve was a big deal. Our family tradition was that everyone would sleep in the living room on Christmas Eve night, so that on Christmas morning, we would wake up right next to the tree. I remember how much I loved this tradition. I remember the year I pretended to still be sleeping as my parents rolled our new bikes into the living room from the garage. I also remember sitting in my nightgown on my sleeping bag opening my first “grown-up” tape recorder (and by grown up, I mean that it was a normal tape recorder, and not a Fisher-Price one). I spent hours in my room with that tape recorder making my own “radio show,” where I would be the DJ, playing my favorite songs, talking about my favorite things, and interviewing very interesting people (my brother and sister). I wonder if I still have those tapes somewhere.

We all have childhood memories associated with “the best gift we ever received.” Now please don’t hear me say that giving and receiving gifts is the most important thing about the holiday, because we all know it’s not. However, as we do give and receive gifts, we form emotional memories of years past. The feeling you have as a child of tearing open the package is a beautiful feeling. To me, giving gifts is a way of showing you love and appreciate someone.

So why in the world would we not do our best to make our gifts as presentable and beautiful as we can? Again, I am not implying that gifts must be perfect, or that pretty wrapping makes a gift any more meaningful. For me, it is simply another creative outlet. So here are a few of my tips for pretty (and inexpensive) gift wrapping.

giftwrapping3

giftwrapping8

giftwrapping1

giftwrapping5

This paper came from Hobby Lobby last year or the year before, and everything else I had on hand.

Gift wrapping has three important factors: the paper, the ribbon, and some type of embellishment.

Let’s talk paper. I never pay full price for wrapping paper. I re-use the same paper from previous years most of the time. I also pick up a roll or two the day after Christmas when everything is marked down 50-70% off normal retail prices. If you’re without holiday paper, have no fear! One of my favorite things to use is plain brown craft paper because it works for all occasions. Baby shower? Check. Christmas? Check. Birthday? Check. Wedding gift? Check. You get the point. You can also use black and white newspaper (I have seen some GORGEOUS wrapping using newspaper), wrap your gift in a scarf (both pretty and reusable!), or in a real pinch, use any themed paper on its opposite side so that it simply shows white.

Next up is ribbon. The options are unlimited! I do occasionally use normal cloth ribbon, but my favorite things to wrap a gift in is regular twine, or colored baker’s twine. My suggestion is to look around your house and see what you can find. Thinly sliced strips of a coordinating wrapping paper can work as ribbon as well. A thin scarf can work here as well. Don’t go out and buy something new every time you have a gift to purchase. Look around your house and I’m sure you can come up with some thing to wrap your gift in. There’s a reason Julie Andrews mentions “brown paper packages tied up with string” as one of her favorite things…the string is an important detail!

Lastly, let’s talk about embellishments. I think a gift looks perfectly topped off with anywhere from one to three finishings. The amount, of course, depends on what it is that you’re using. I like to use a lot of natural things, such as small pinecones, sticks, dried citrus slices (see my tutorial for that here), cinnamon sticks, leaves, pine clippings, wood slices. The possibilities are endless. I also often add a name tag of some kind, just so that I don’t forget who the gift is for after I finish wrapping it. For kids, you can add a tiny toy as embellishment, or a pretty piece of candy. This is the step that brings it all together, so it’s an important thing to add. The good news is that you can add just about anything you want here, so you can certainly find something you have at home or go out into your yard and find something just as easily.

How do you wrap your gifts? What’s your go-to accessory for finishing your wrapping? I’d love to hear about it! Be sure to follow me on Instagram @rumfieldhomestead for the latest updates on what I’m doing! That’s all for today, friends! Have a fabulous day!