Home Decor

Sugar Mold Thanksgiving Styling

Can you believe it’s November already? This year is flying by, and I definitely have Christmas on my mind. (Christmas in first grade is a lot of fun, I have to admit). But before we get to Christmas, I have to at least give a little nod to Thanksgiving! I wanted to show you guys a cool piece I found recently and how I am styling it for Thanksgiving.

About a month ago, Ethan and I were shopping at Canton, our favorite place to go. I’ve shared about it before, but it’s a giant flea market in Canton, Texas. It’s one of the country’s oldest remaining flea markets, and it has a range of all sorts of things. Anyway, we were there and I totally had blinders on because I was looking for one specific thing. I don’t know about you, but I can talk myself out of almost any purchase. So I had my money that day, and because I was walking around looking for one particular thing, I didn’t buy anything for several hours. After maybe four hours or so, I realized I wasn’t going to find what I was looking for, and so I went into SHOPZILLA mode. That’s not a thing. I just made that up. What I mean is that after I gave up on that one thing, it was like my eyes were opened to so many more possibilities around me.

One of the things that I picked up that day was this sugar mold. sugar mold 1

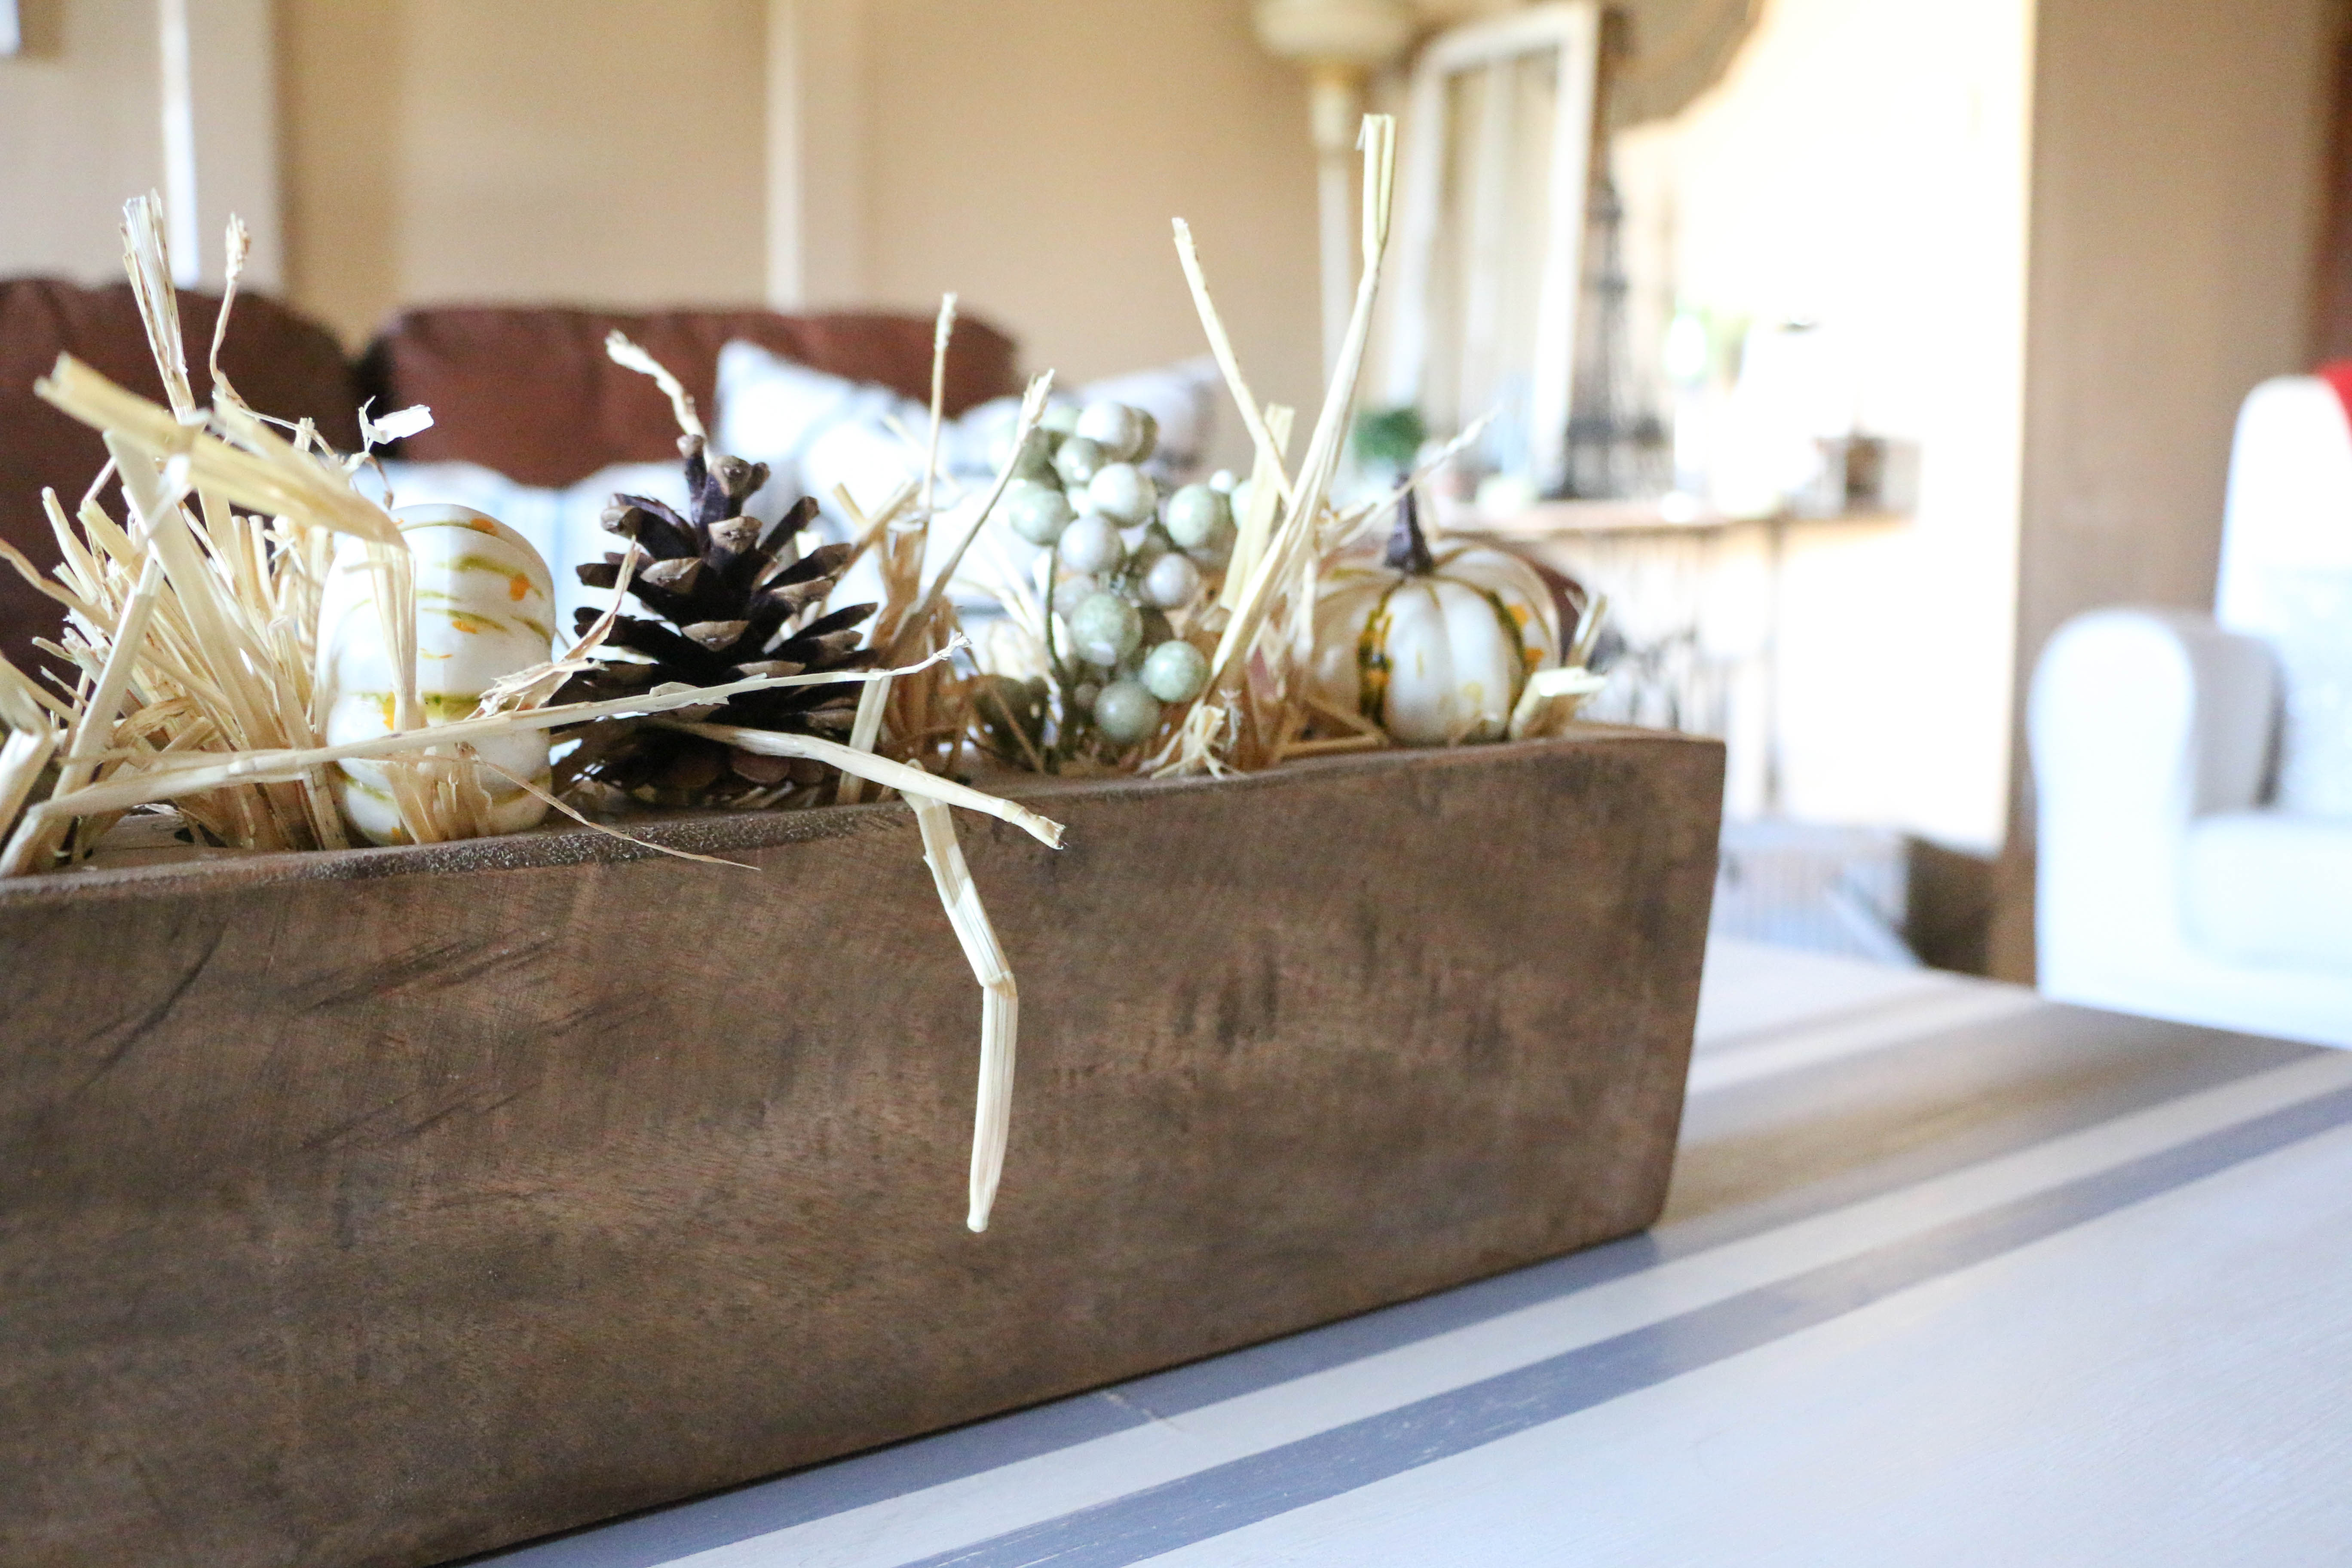
I paid fifteen dollars for it, although I had no idea how I was going to use it. I usually don’t buy things unless I have a plan for them, but this one time I broke my own rule. At the time that I purchased it, I didn’t really know what it was either. I know I had seen pictures of similar things on Instagram, but I didn’t know what the official name was or the history behind the pieces.

When I got it home, I didn’t know what to do with it, so I put it in the guest bathroom (arguably the least used room in our house) so i didn’t have to look at it. I was a little overwhelmed with how to use it, so I ignored it. Anyone else do that? No, you probably don’t, because that’s not normal. Anyway, while it was collecting dust in the guest bathroom, I did a little research on it.

Sugar molds started in medieval times and were used throughout the 19th century. Granulated sugar wasn’t really a thing until the 19th century so sugar was poured into these cone shaped molds to be sold. I never knew that, so when I was reading this, I found it super interesting! I’m a history nerd anyway, so random historical facts are totally my jam. The actual wooden mold has deep cone shaped grooves in the center (mine has six), which made it slightly difficult to style for me. While the origins of my piece are unknown to me, it’s becoming one of my favorite things. I’m sure it’s not an authentic antique, but I love it anyway.

When I finally pulled it out and decided to make it pretty, I was kicking myself for not doing it sooner! The little imperfections in the wood have so much character, and the piece is one of the more unique things in our home right now.

sugar mold 4 sugar mold 6 sugar mold 2 sugar mold 5

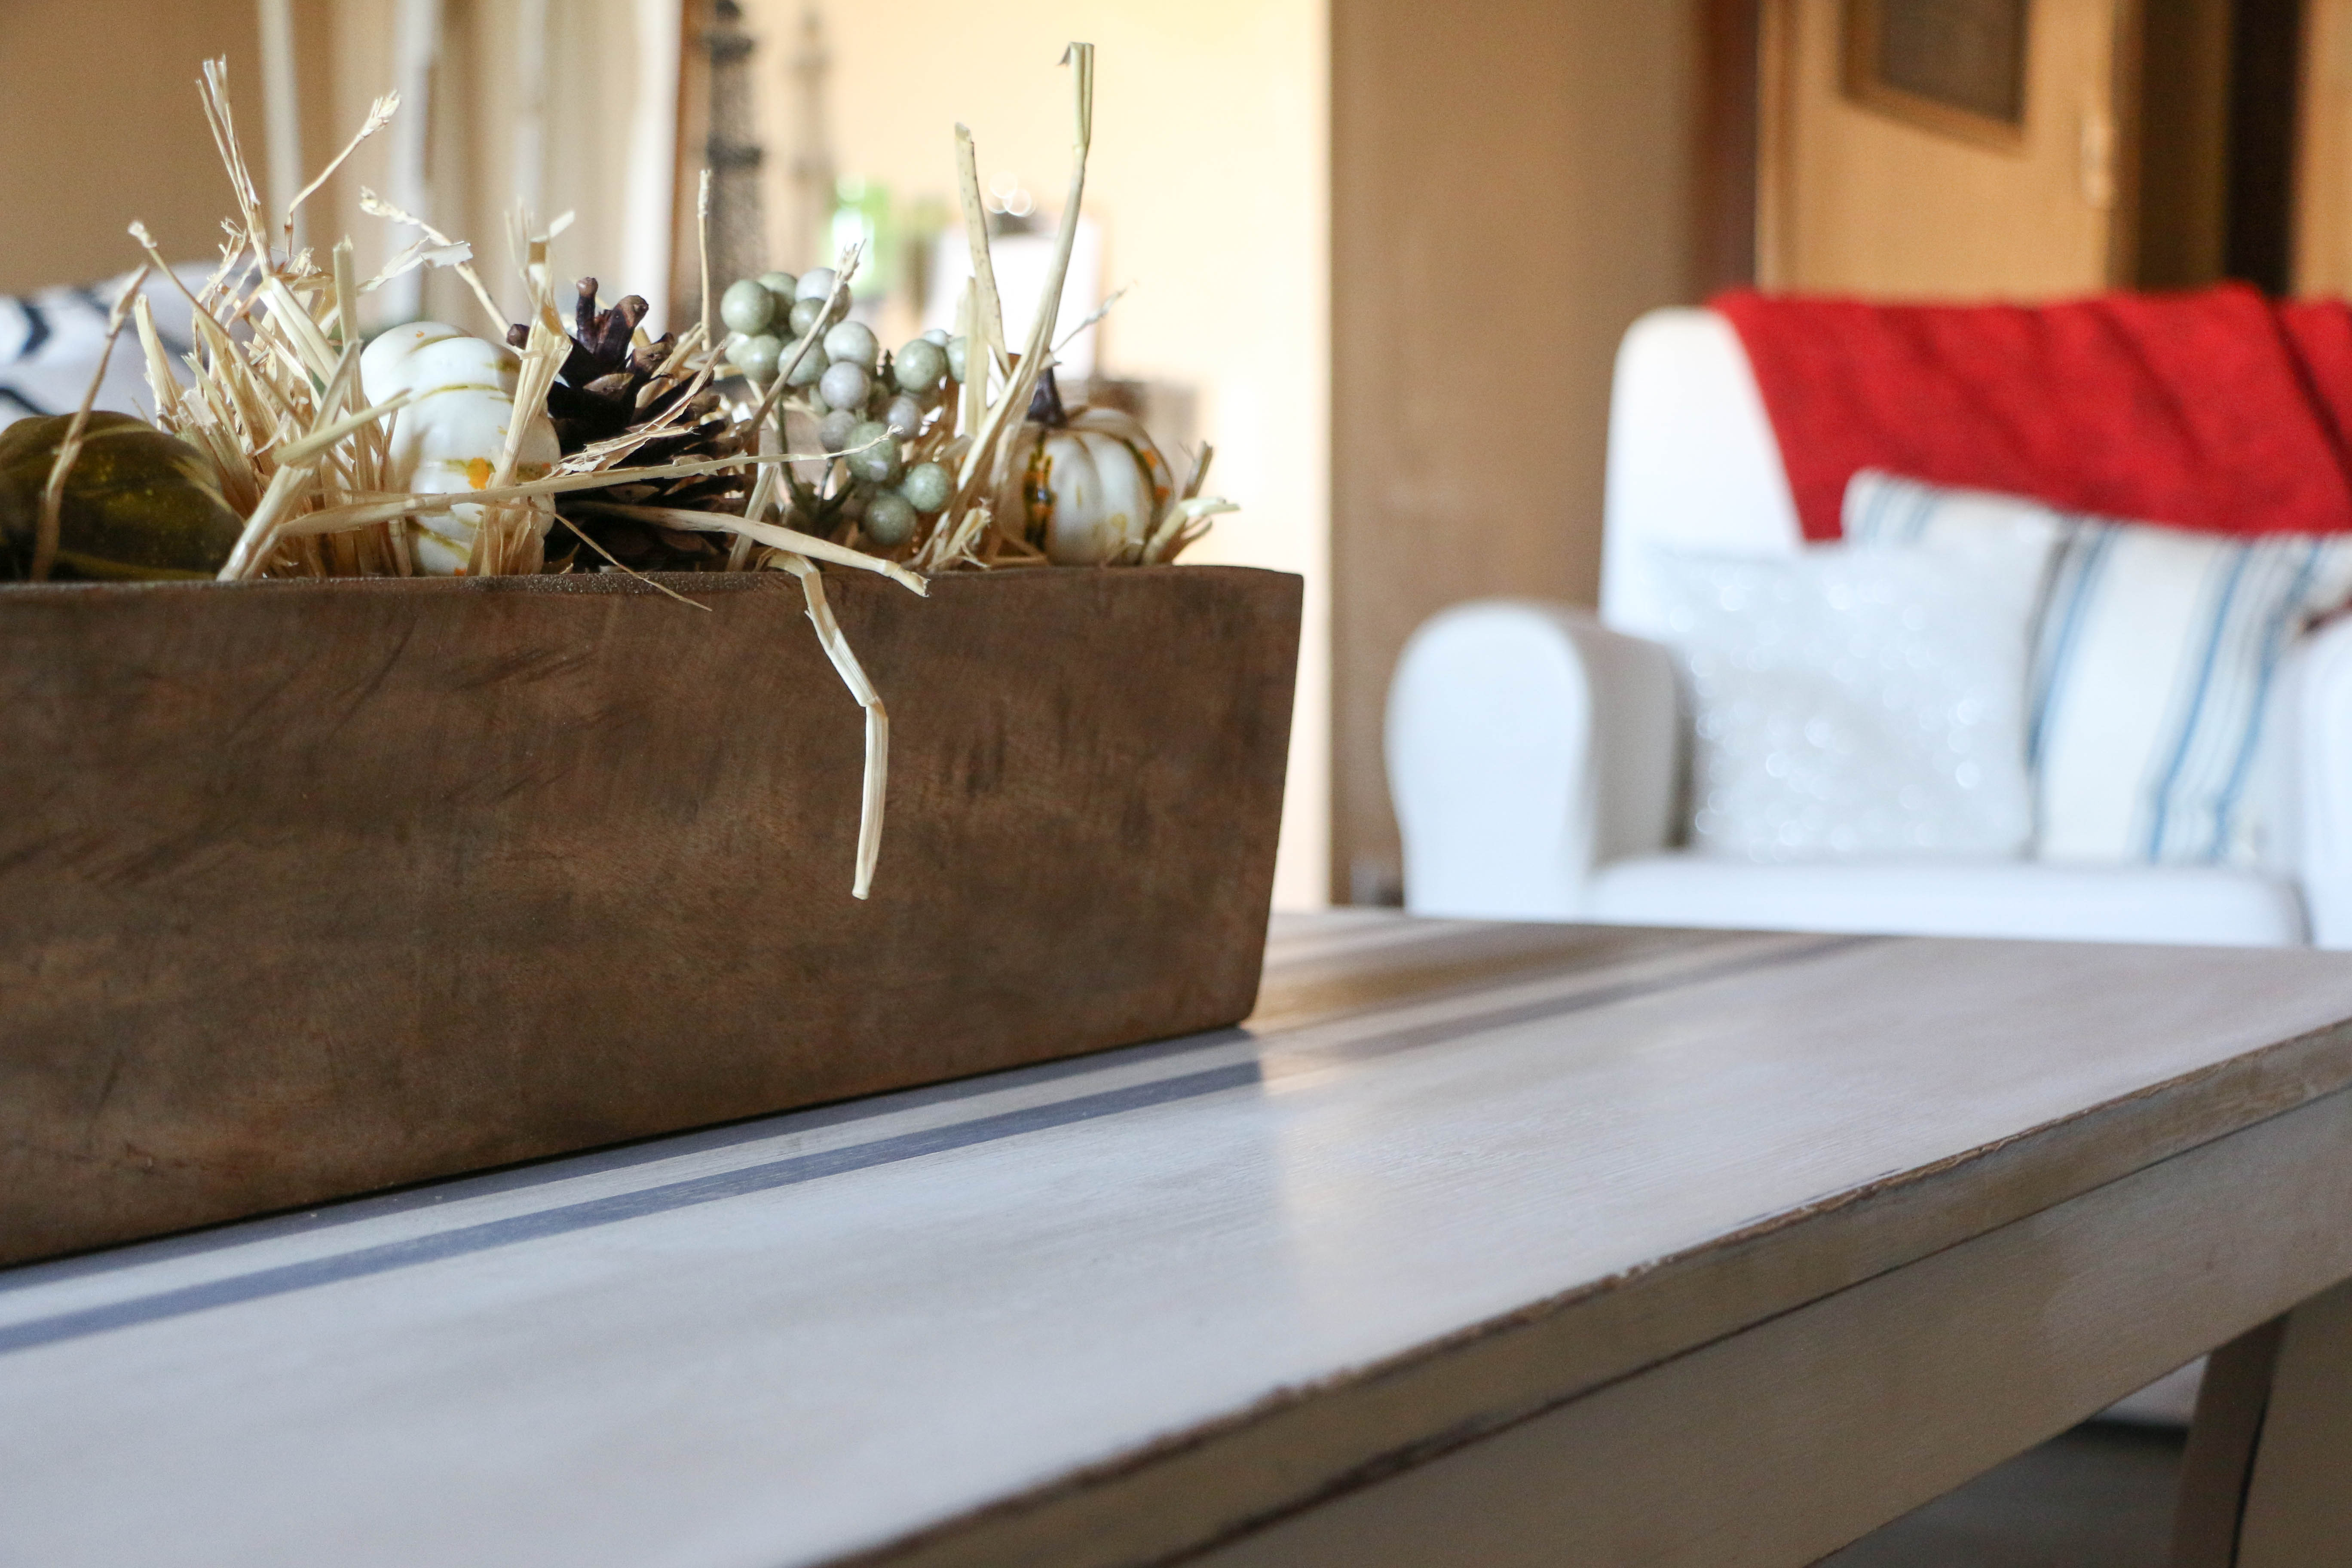
I used a bit of straw to fill in some of the depth of the molds, and then some fall vase filler. I got the filler items from Hobby Lobby (40% off of course). This little fall look was a quick and easy look to achieve, even though I was dreading it for almost a month! Just in time for Thanksgiving, and then I’ll be transitioning this piece into Christmas with some more festive holiday decor!

Do you have a sugar mold? I would love to hear about how you styled it…because it ha me stumped for a while! That’s it for today friends, I hope y’all have a fabulous day.

DIY Projects, Tutorials

Dry Brushing – The Easiest Painting Experience

Hey y’all! I hope you’re doing well! It’s been dark and rainy here, so the weather is perfect for Halloween tomorrow! (Let’s not talk about the fact that I am going to be running  walking a 5k on Halloween morning. Why do I do these things to myself?!) Hopefully the rain won’t deter Trick-or-Treaters though because Ethan and  I love sitting on the front porch passing out candy.

Anyway, before the rain set in, I completed a quick little project that is quickly becoming my favorite way to do things! I wanted to share this painting trick with you that really does save time, materials, and requires minimal experience (I always say that, but this time I mean it). Have you ever heard of dry brushing? It’s new to me, but I’m already obsessed with it, and I want to dry brush everything in sight! Here are the steps:

picnic basket before - Copy

First, you need to choose your victim (or in this little basket’s case, its lucky day because this thing about to get a serious makeover). I chose this basket because well, just look at it, and you can tell it needs a little help. It’s a vintage picnic basket that I found while junkin this summer, and although it has some damage, I think it just adds some character. What I don’t like about it is the orangey color it has. Plus the top has a weird uncleanable dusty look. But for six bucks, you can’t ask much.

You can also see the brush and paint I used in this picture. These little brushes are available at Home Depot, and they are awesome! The handle is rubber and so it’s really comfortable to handle while painting.

dry brush 2 - Copy

Dry brushing is a technique that uses a very minimal amount of paint and a dry brush (cleverly named technique, don’t you think?). When I do this, I find the stiffest brush I can find and  I don’t dip the brush in the can. Instead, I just use the lid and dab a small amount on the brush. I try to keep the paint limited to the top part of the bristles and not the sides. Does that make sense? (I also apologize for the lack of clarity on some of these photos, I haven’t yet mastered the photography-while-painting technique).

dry brush 3 - Copy

I then blot the top of the brush on my dropcloth to take off any excess paint. You can see in the above photo just how little paint there is on the brush. If you don’t use dropcloths, a paper towel will do. Before you put the brush on your object, it should look something like this:

dry brush 4 - Copy

The trick is not to use too much paint. You can always add more, but once you have too much, it’s hard to get the desired effect.

dry brush - Copy

When you’re ready to paint, you’ll want to use a short, side-to-side stroke. You’ll want to move quickly and paint lightly, as you don’t want too much coverage in one area. The look really lends itself more to a vintage, weathered look. Once you have too much coverage in one area, it becomes hard to fix it, so move fast! The awesome thing about it is that it uses practically no paint (I covered this basket just with what was on the lid of the can), and it dries super fast because it’s such a thin layer of paint.

picnic basket after - Copy

Here is the finished product! I think this project took maybe thirty minutes (including dry time). It saves so much time, and also money because it’s such an effective use of materials. What more can you ask for than quick and cheap?

picnic basket2

I placed this basket in the corner of my living room where I keep the coatrack and store blankets. This basket is pretty roomy, so it’s a good place to store odds and ends. I also really like how the white lightens up this space. The orange look definitely wasn’t doing itself any favors. She looks so much better now, don’t you think?

picnic basket1

What do you think of this technique? Have you tried it before? I promise it really is easy – I’m not lying! I am thinking about dry brushing everything now…nothing is safe! Let me know what you think, and if you plan to try it!

I hope y’all have a great weekend and that you have some fun Halloween activities planned (hopefully not completing a 5k like myself)! That’s it for today friends, have a fabulous day!

DIY Projects, Holidays

How to Make Your Home Feel Super Cozy

Hey y’all! I hope your week is going well! Fall has still not arrived here in North Texas, but we’re pretending. My students are busy making pumpkin crafts, and I’ve been drinking tea nonstop at the house. Even though it’s in the eighties every day still, I’ve broken out the boots for work. Call me crazy, but I’m not wasting my time when it comes to all things fall. #sorry #notsorry

Anyway, today I want to share with you something I like to do at home during the fall. And all the time, really, but during the fall it seems especially appropriate. I don’t know what it is about the month of October, but it makes me want to cozy up EVERYTHING. For me, cozy equals good smells. There’s nothing like a warm home that smells heavenly.

So here’s what I do. This isn’t even a DIY because it’s the easiest thing possible. IMG_2414

I like to take a few lemon slices, a sprinkle of cinnamon, and some cranberries (or in my case, dried cranberries, because that’s all I had on hand), and put them on the stove with just enough water to cover the fruit. I put them on a low heat and simmer alllllllll day long. Seriously, it is ah-mazing. I have to check and refill the water every once in a while, because the water will evaporate over time. Other than checking on it every now and then, there’s nothing else to it. It makes the house SO COZY. I kid you not. It puts me in a great mood, and the house just feels homey. Does that make sense? It might sound weird, but a house that smells good feels like home to me.

Fall makes me go into major nesting mode, and start doing lots of things around the house. This ‘recipe’ makes everything better. It just feels like fall. If fall is a feeling, this is it. If you try it out, I promise you won’t be disappointed. There are also other things that you can simmer in the pot like vanilla, oranges, lavender, pine needles, etc. Cranberries + lemon + cinnamon just happens to be my favorite combination. Find a combination that works for you, and run with it! I do this all the time and I cannot recommend it more. It’s the simplest of things and it totally makes me feel like Martha Stewart (even though there zero skills involved).

I hope you do try this out at home, it’s super easy. Have you already done something similar? I’d love to hear about it. Do you have a better recipe? I’d love to hear about that as well. Thanks for reading along. That’s all for today, friends. Have a fabulous night!

smelfall