Browsing Category

Tutorials

DIY Projects, Tutorials

Dry Brushing – The Easiest Painting Experience

Hey y’all! I hope you’re doing well! It’s been dark and rainy here, so the weather is perfect for Halloween tomorrow! (Let’s not talk about the fact that I am going to be running  walking a 5k on Halloween morning. Why do I do these things to myself?!) Hopefully the rain won’t deter Trick-or-Treaters though because Ethan and  I love sitting on the front porch passing out candy.

Anyway, before the rain set in, I completed a quick little project that is quickly becoming my favorite way to do things! I wanted to share this painting trick with you that really does save time, materials, and requires minimal experience (I always say that, but this time I mean it). Have you ever heard of dry brushing? It’s new to me, but I’m already obsessed with it, and I want to dry brush everything in sight! Here are the steps:

picnic basket before - Copy

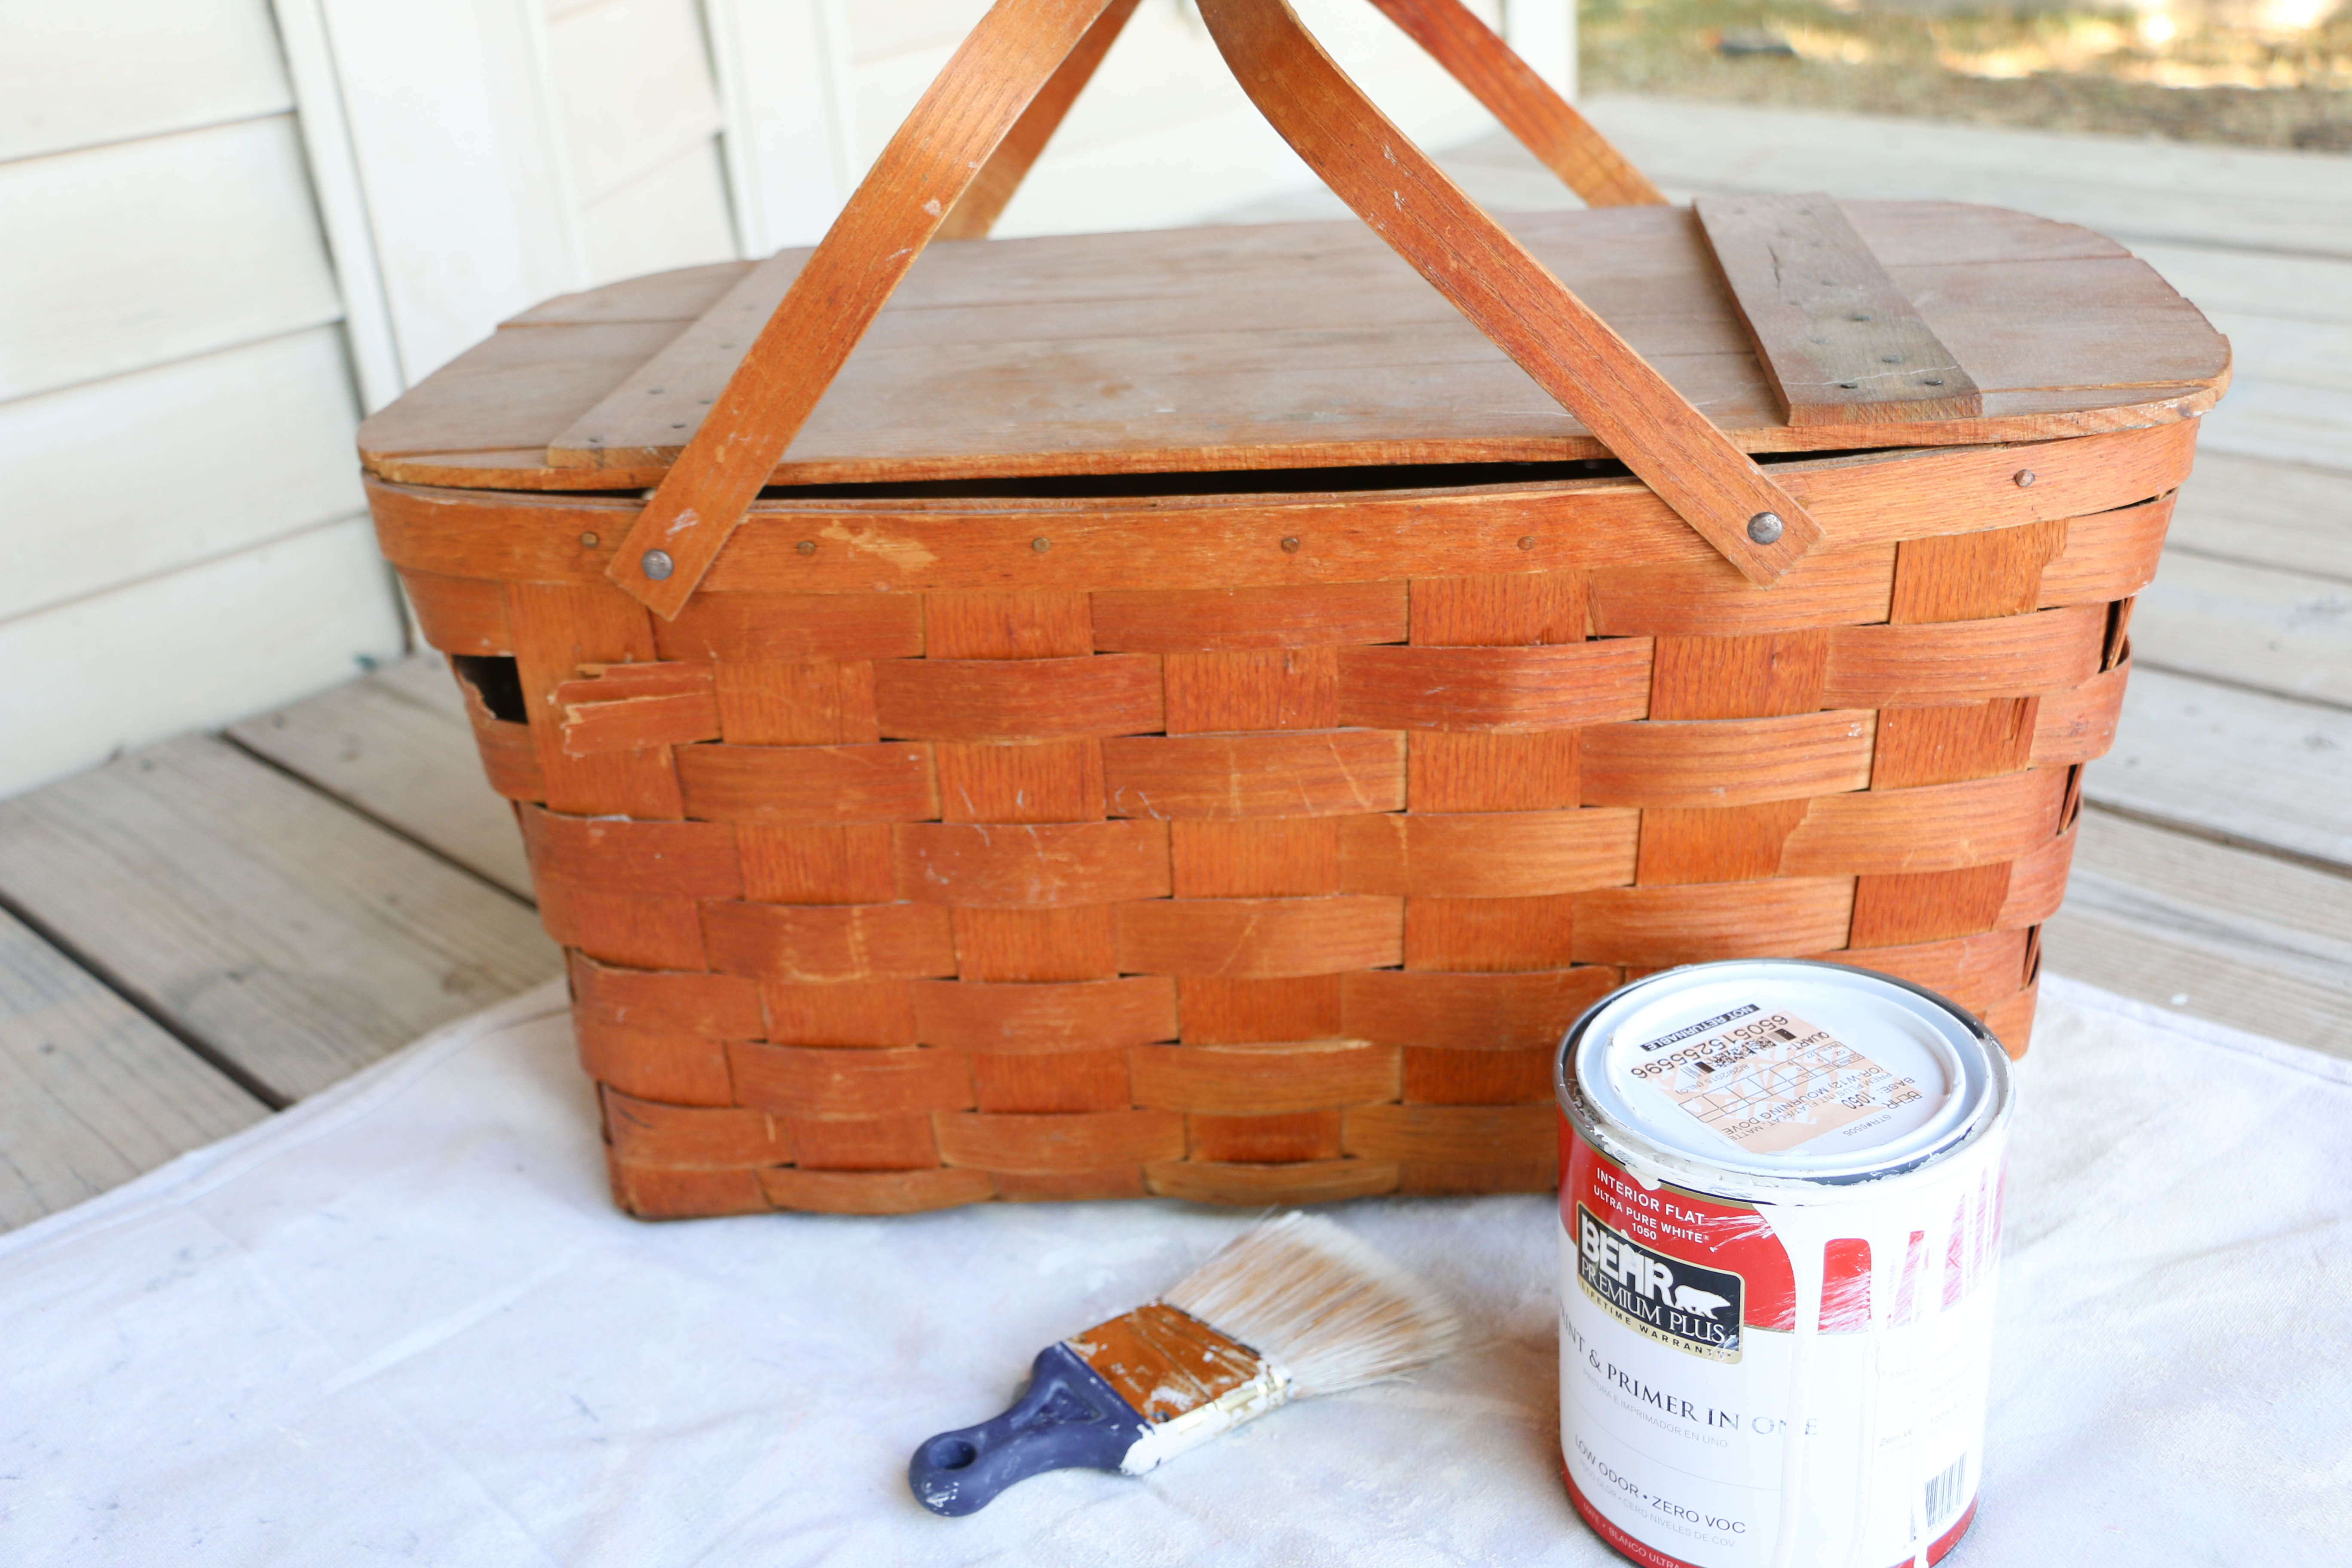
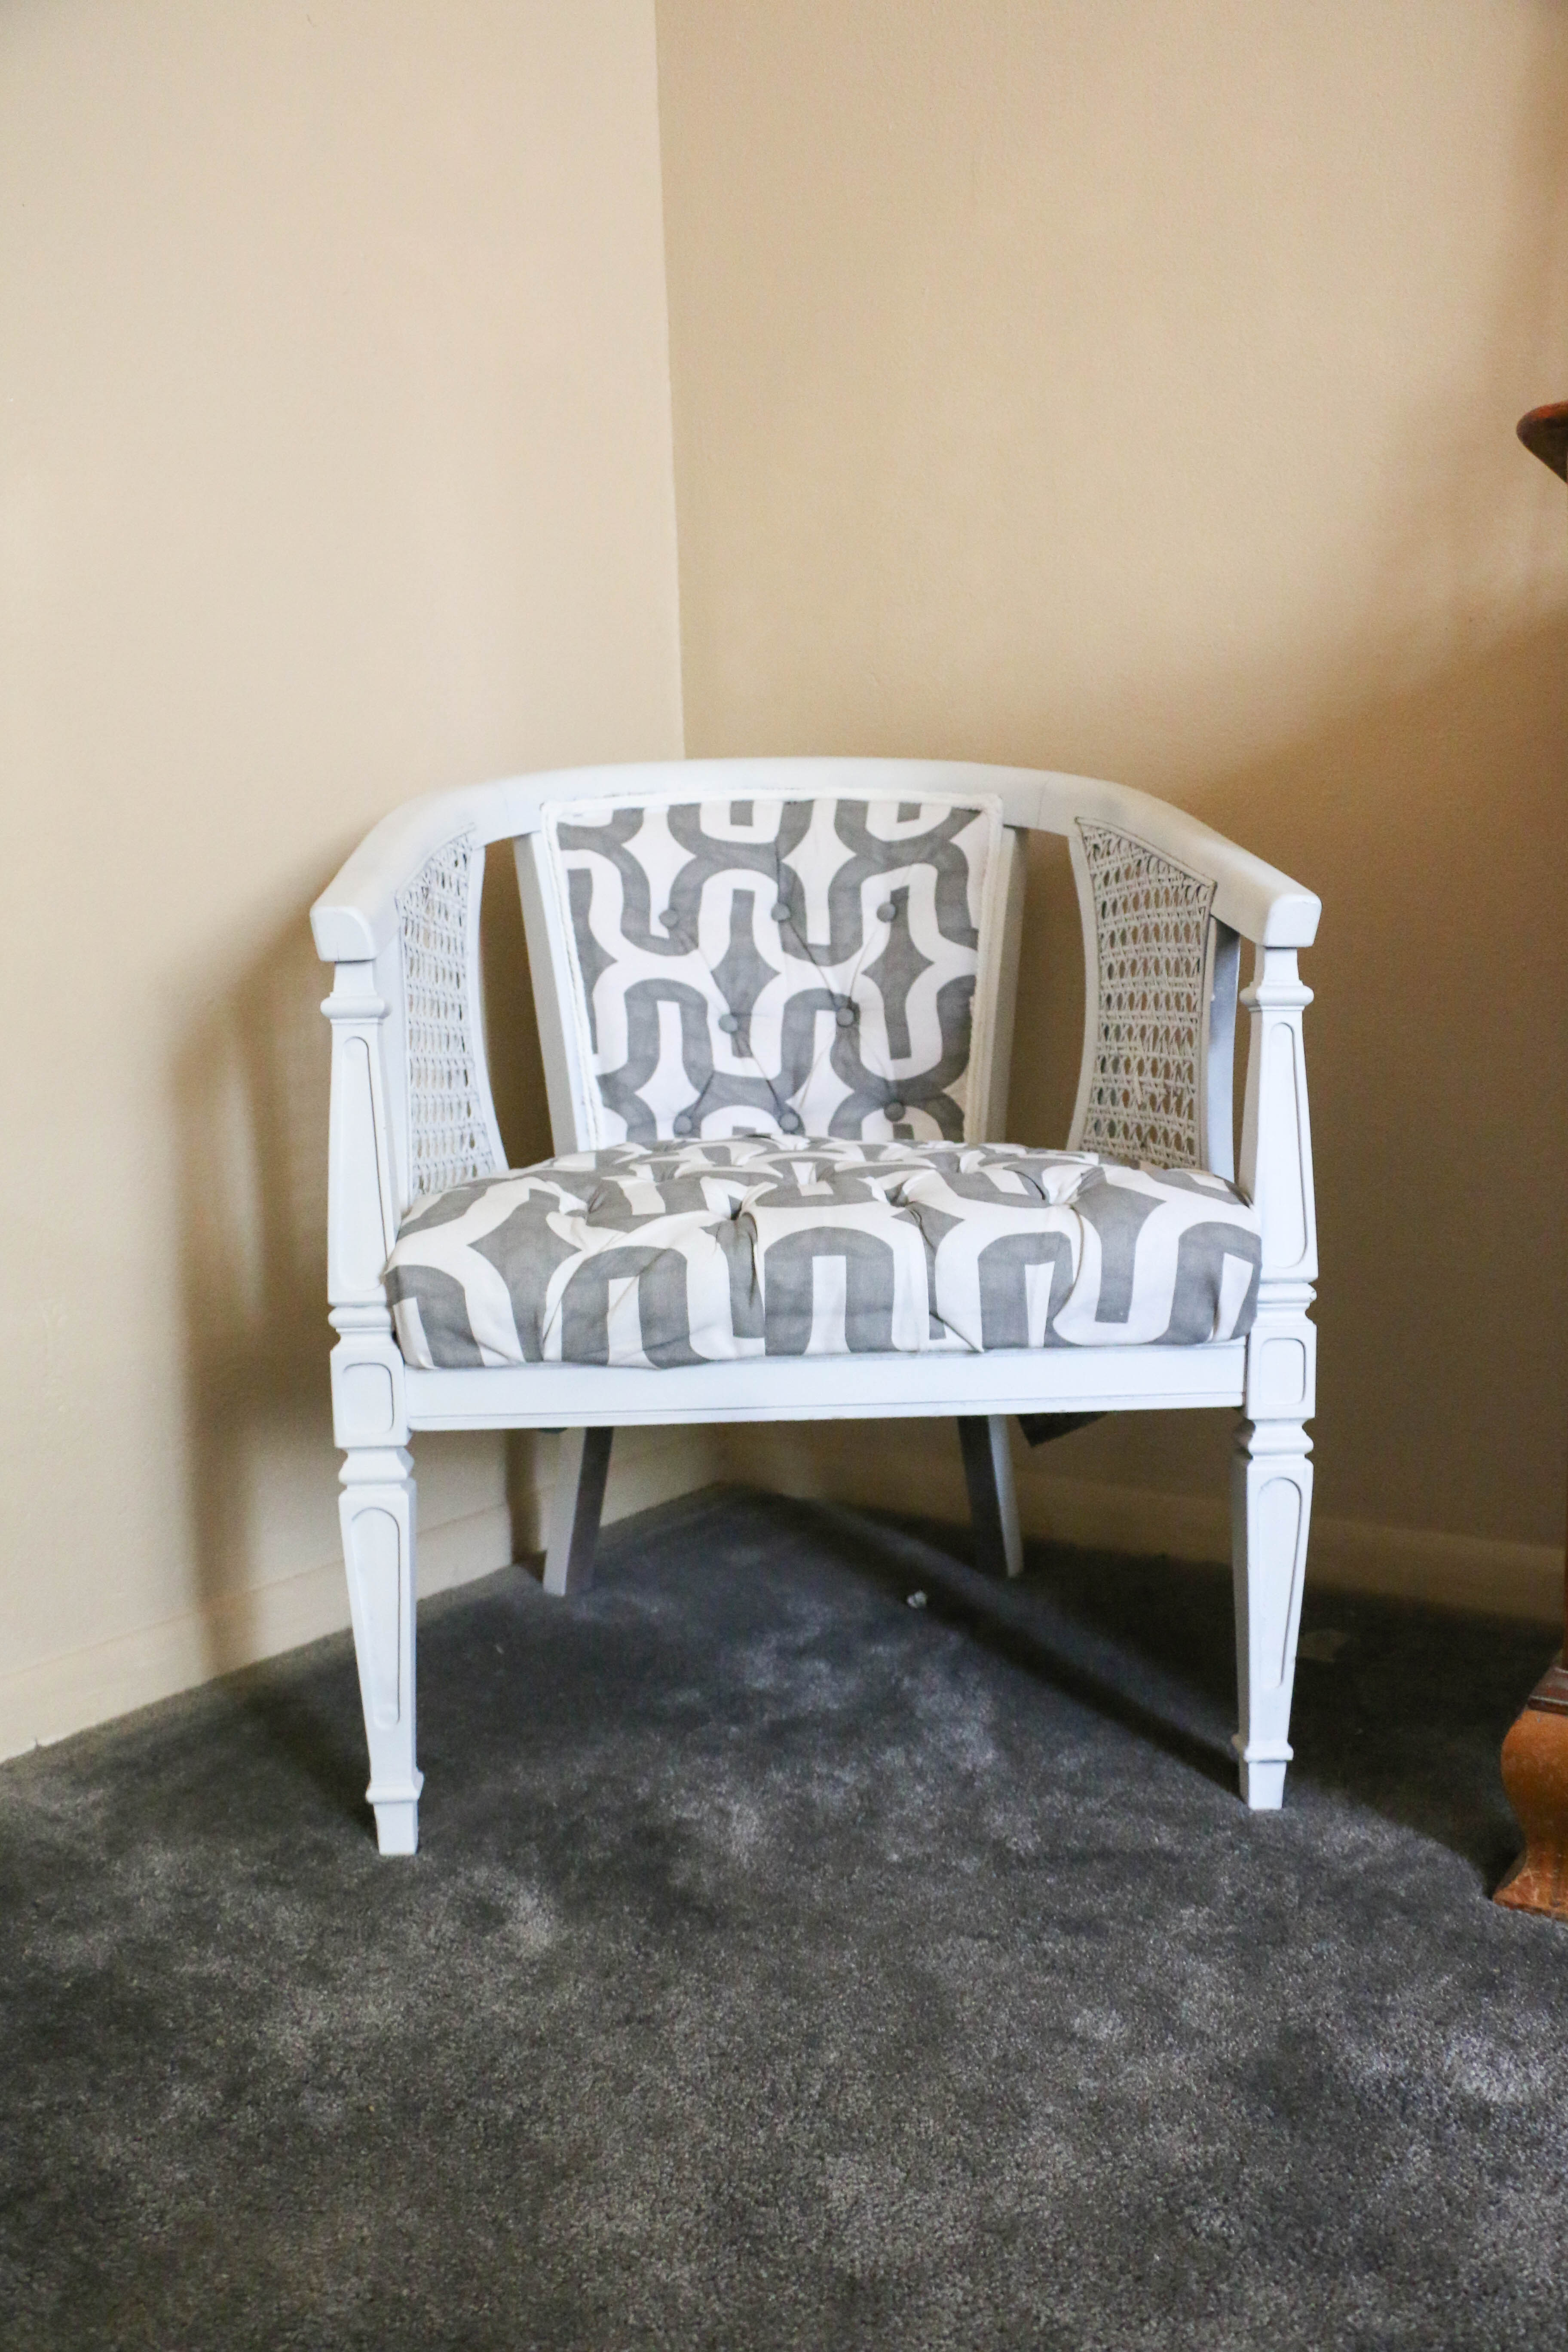
First, you need to choose your victim (or in this little basket’s case, its lucky day because this thing about to get a serious makeover). I chose this basket because well, just look at it, and you can tell it needs a little help. It’s a vintage picnic basket that I found while junkin this summer, and although it has some damage, I think it just adds some character. What I don’t like about it is the orangey color it has. Plus the top has a weird uncleanable dusty look. But for six bucks, you can’t ask much.

You can also see the brush and paint I used in this picture. These little brushes are available at Home Depot, and they are awesome! The handle is rubber and so it’s really comfortable to handle while painting.

dry brush 2 - Copy

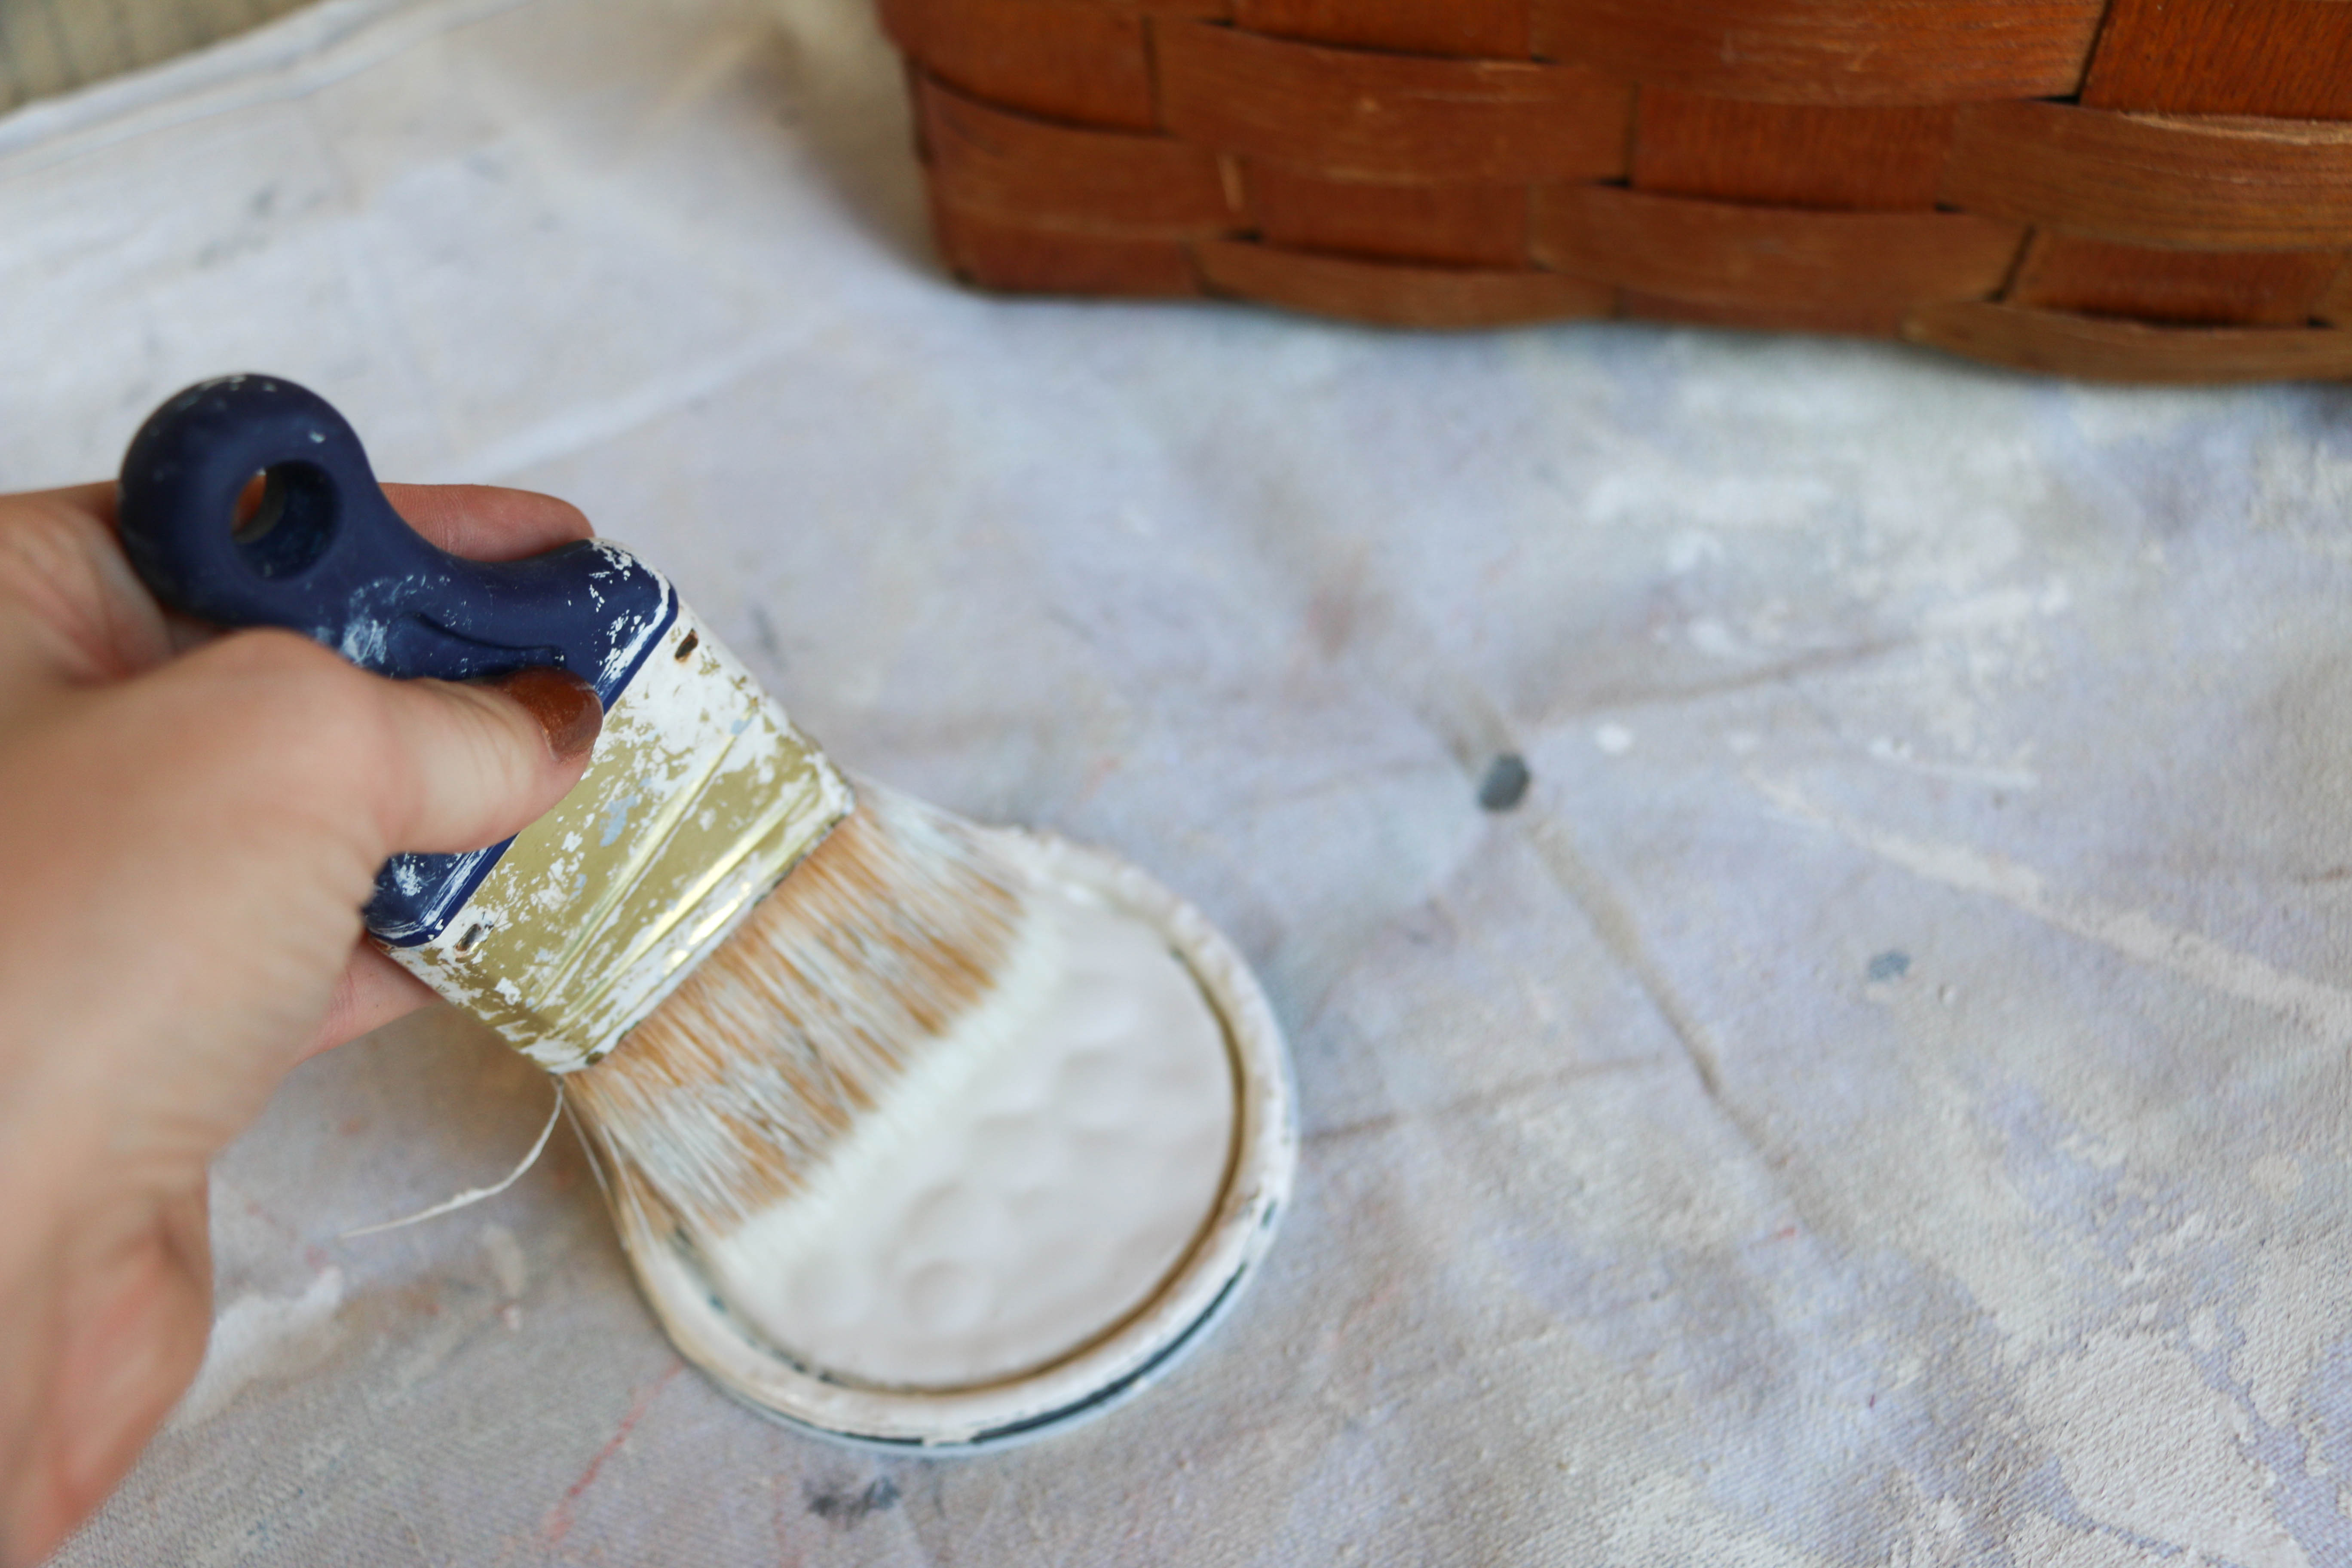
Dry brushing is a technique that uses a very minimal amount of paint and a dry brush (cleverly named technique, don’t you think?). When I do this, I find the stiffest brush I can find and  I don’t dip the brush in the can. Instead, I just use the lid and dab a small amount on the brush. I try to keep the paint limited to the top part of the bristles and not the sides. Does that make sense? (I also apologize for the lack of clarity on some of these photos, I haven’t yet mastered the photography-while-painting technique).

dry brush 3 - Copy

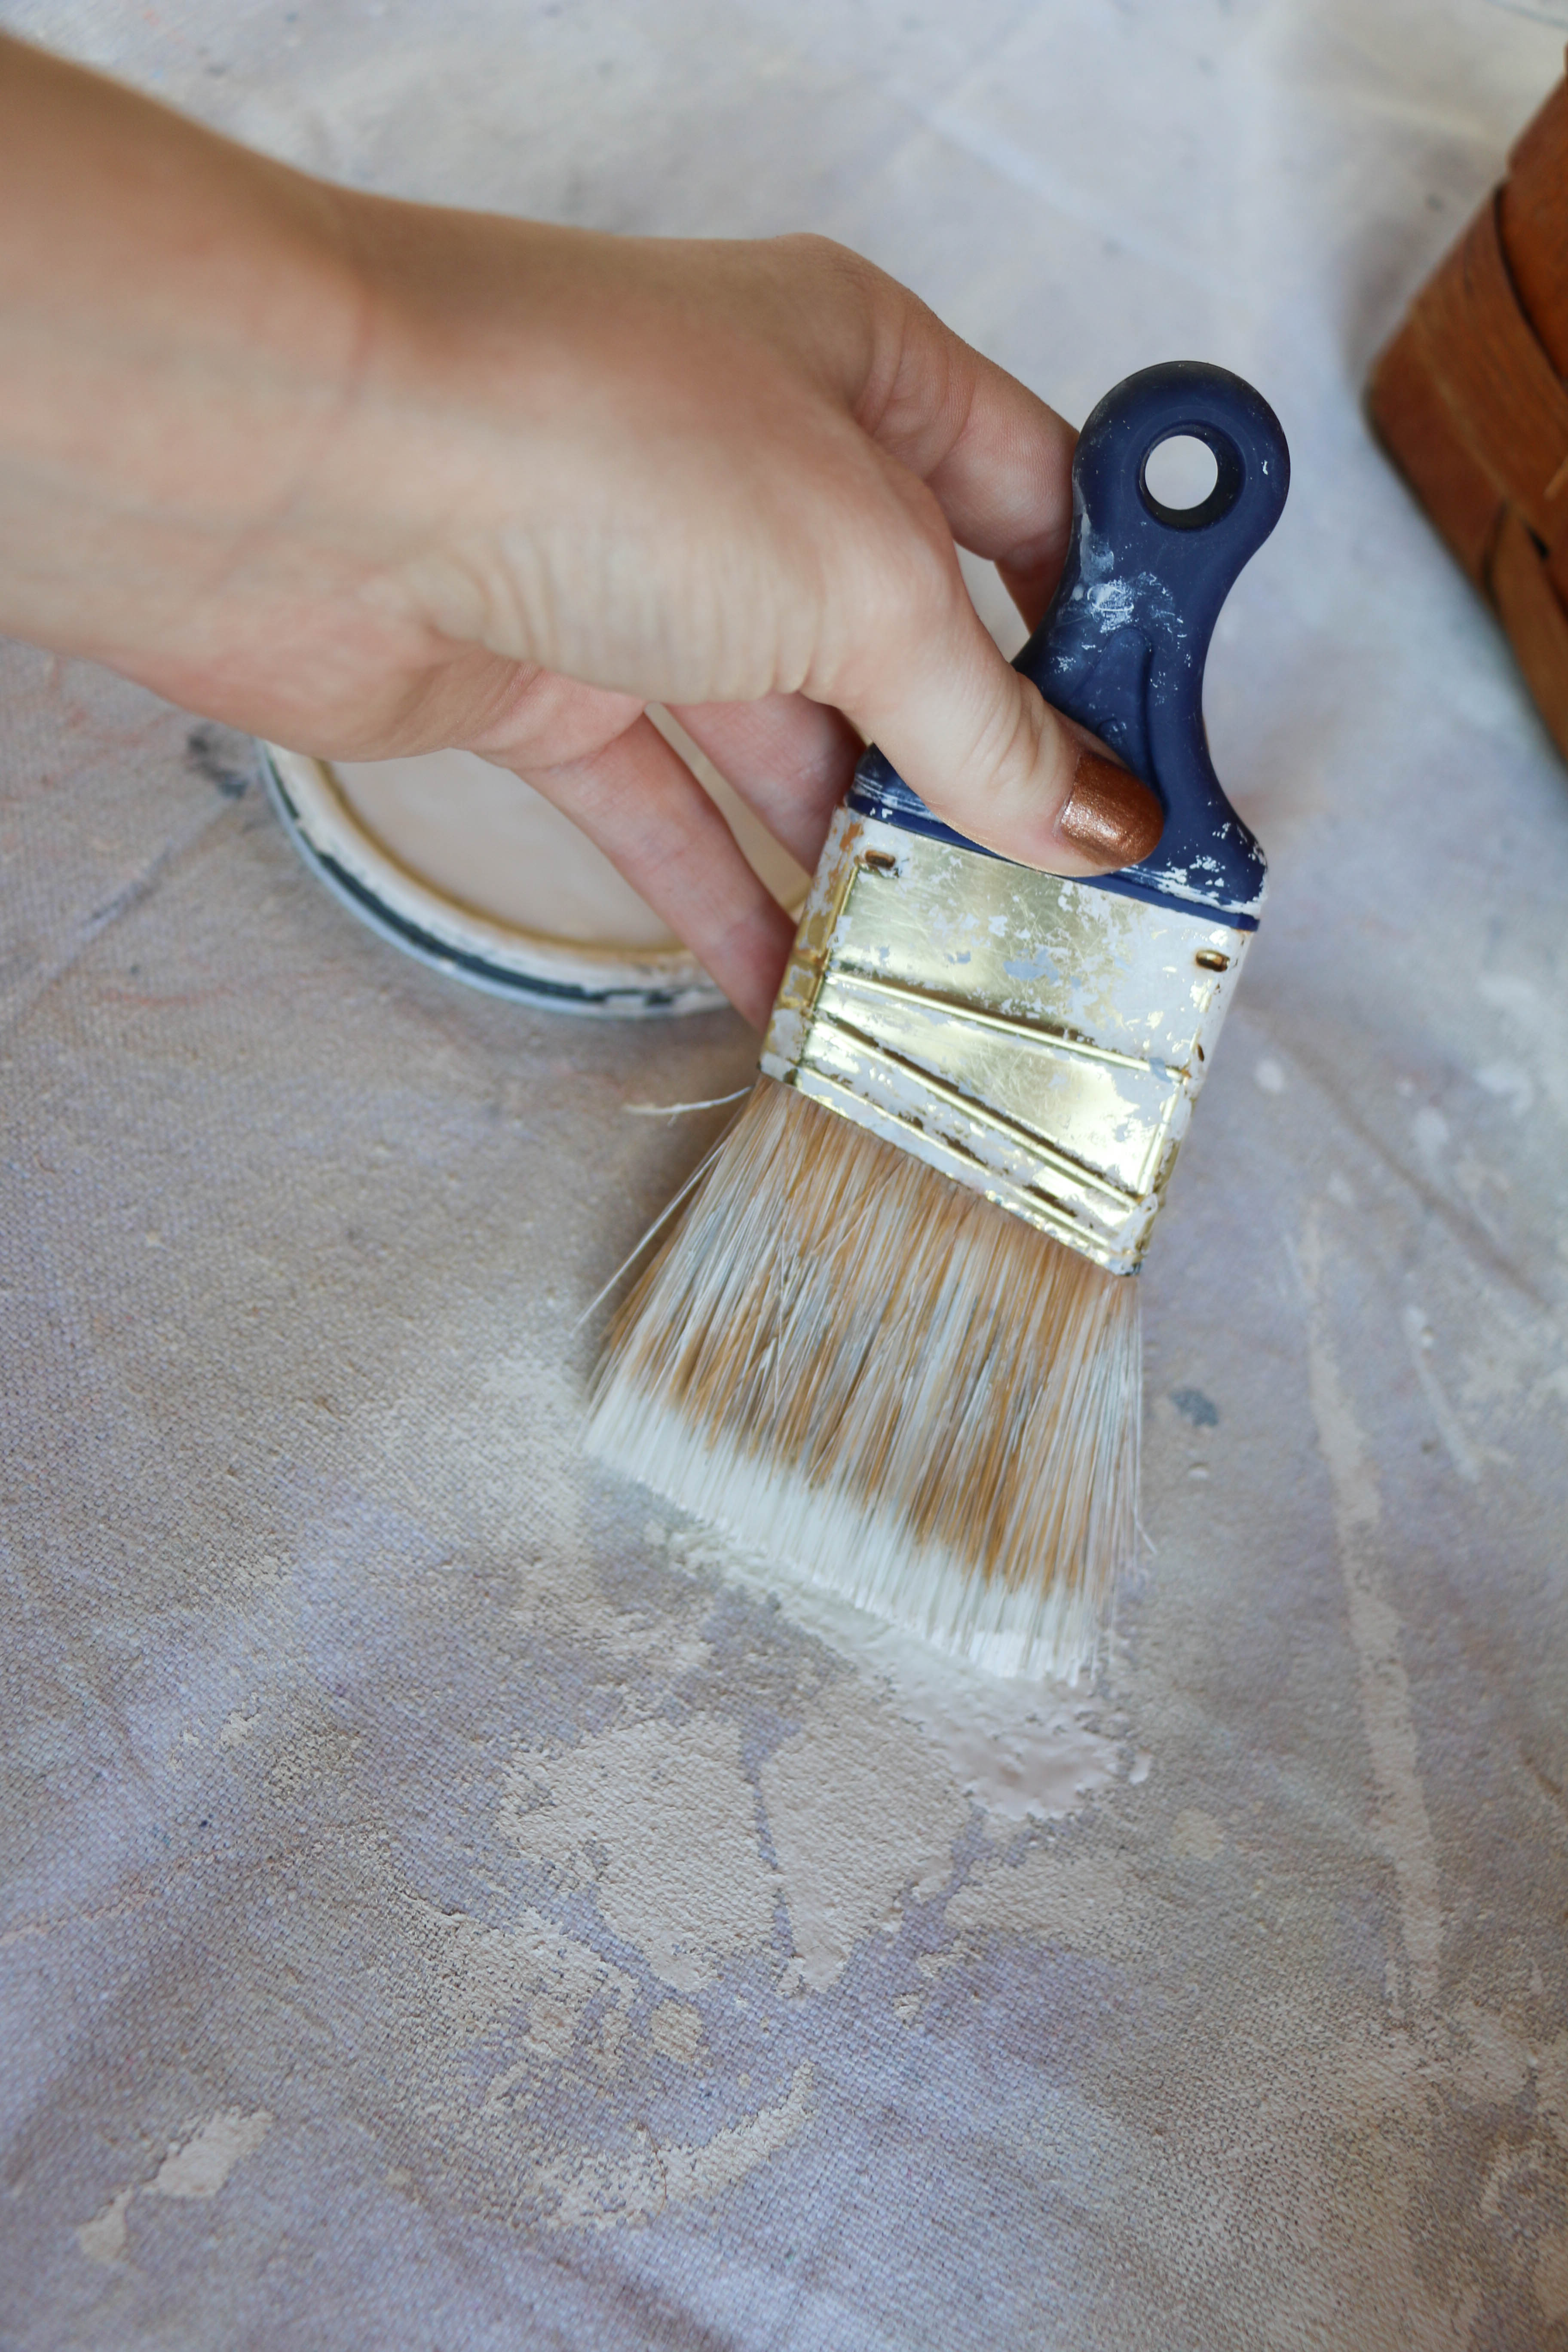
I then blot the top of the brush on my dropcloth to take off any excess paint. You can see in the above photo just how little paint there is on the brush. If you don’t use dropcloths, a paper towel will do. Before you put the brush on your object, it should look something like this:

dry brush 4 - Copy

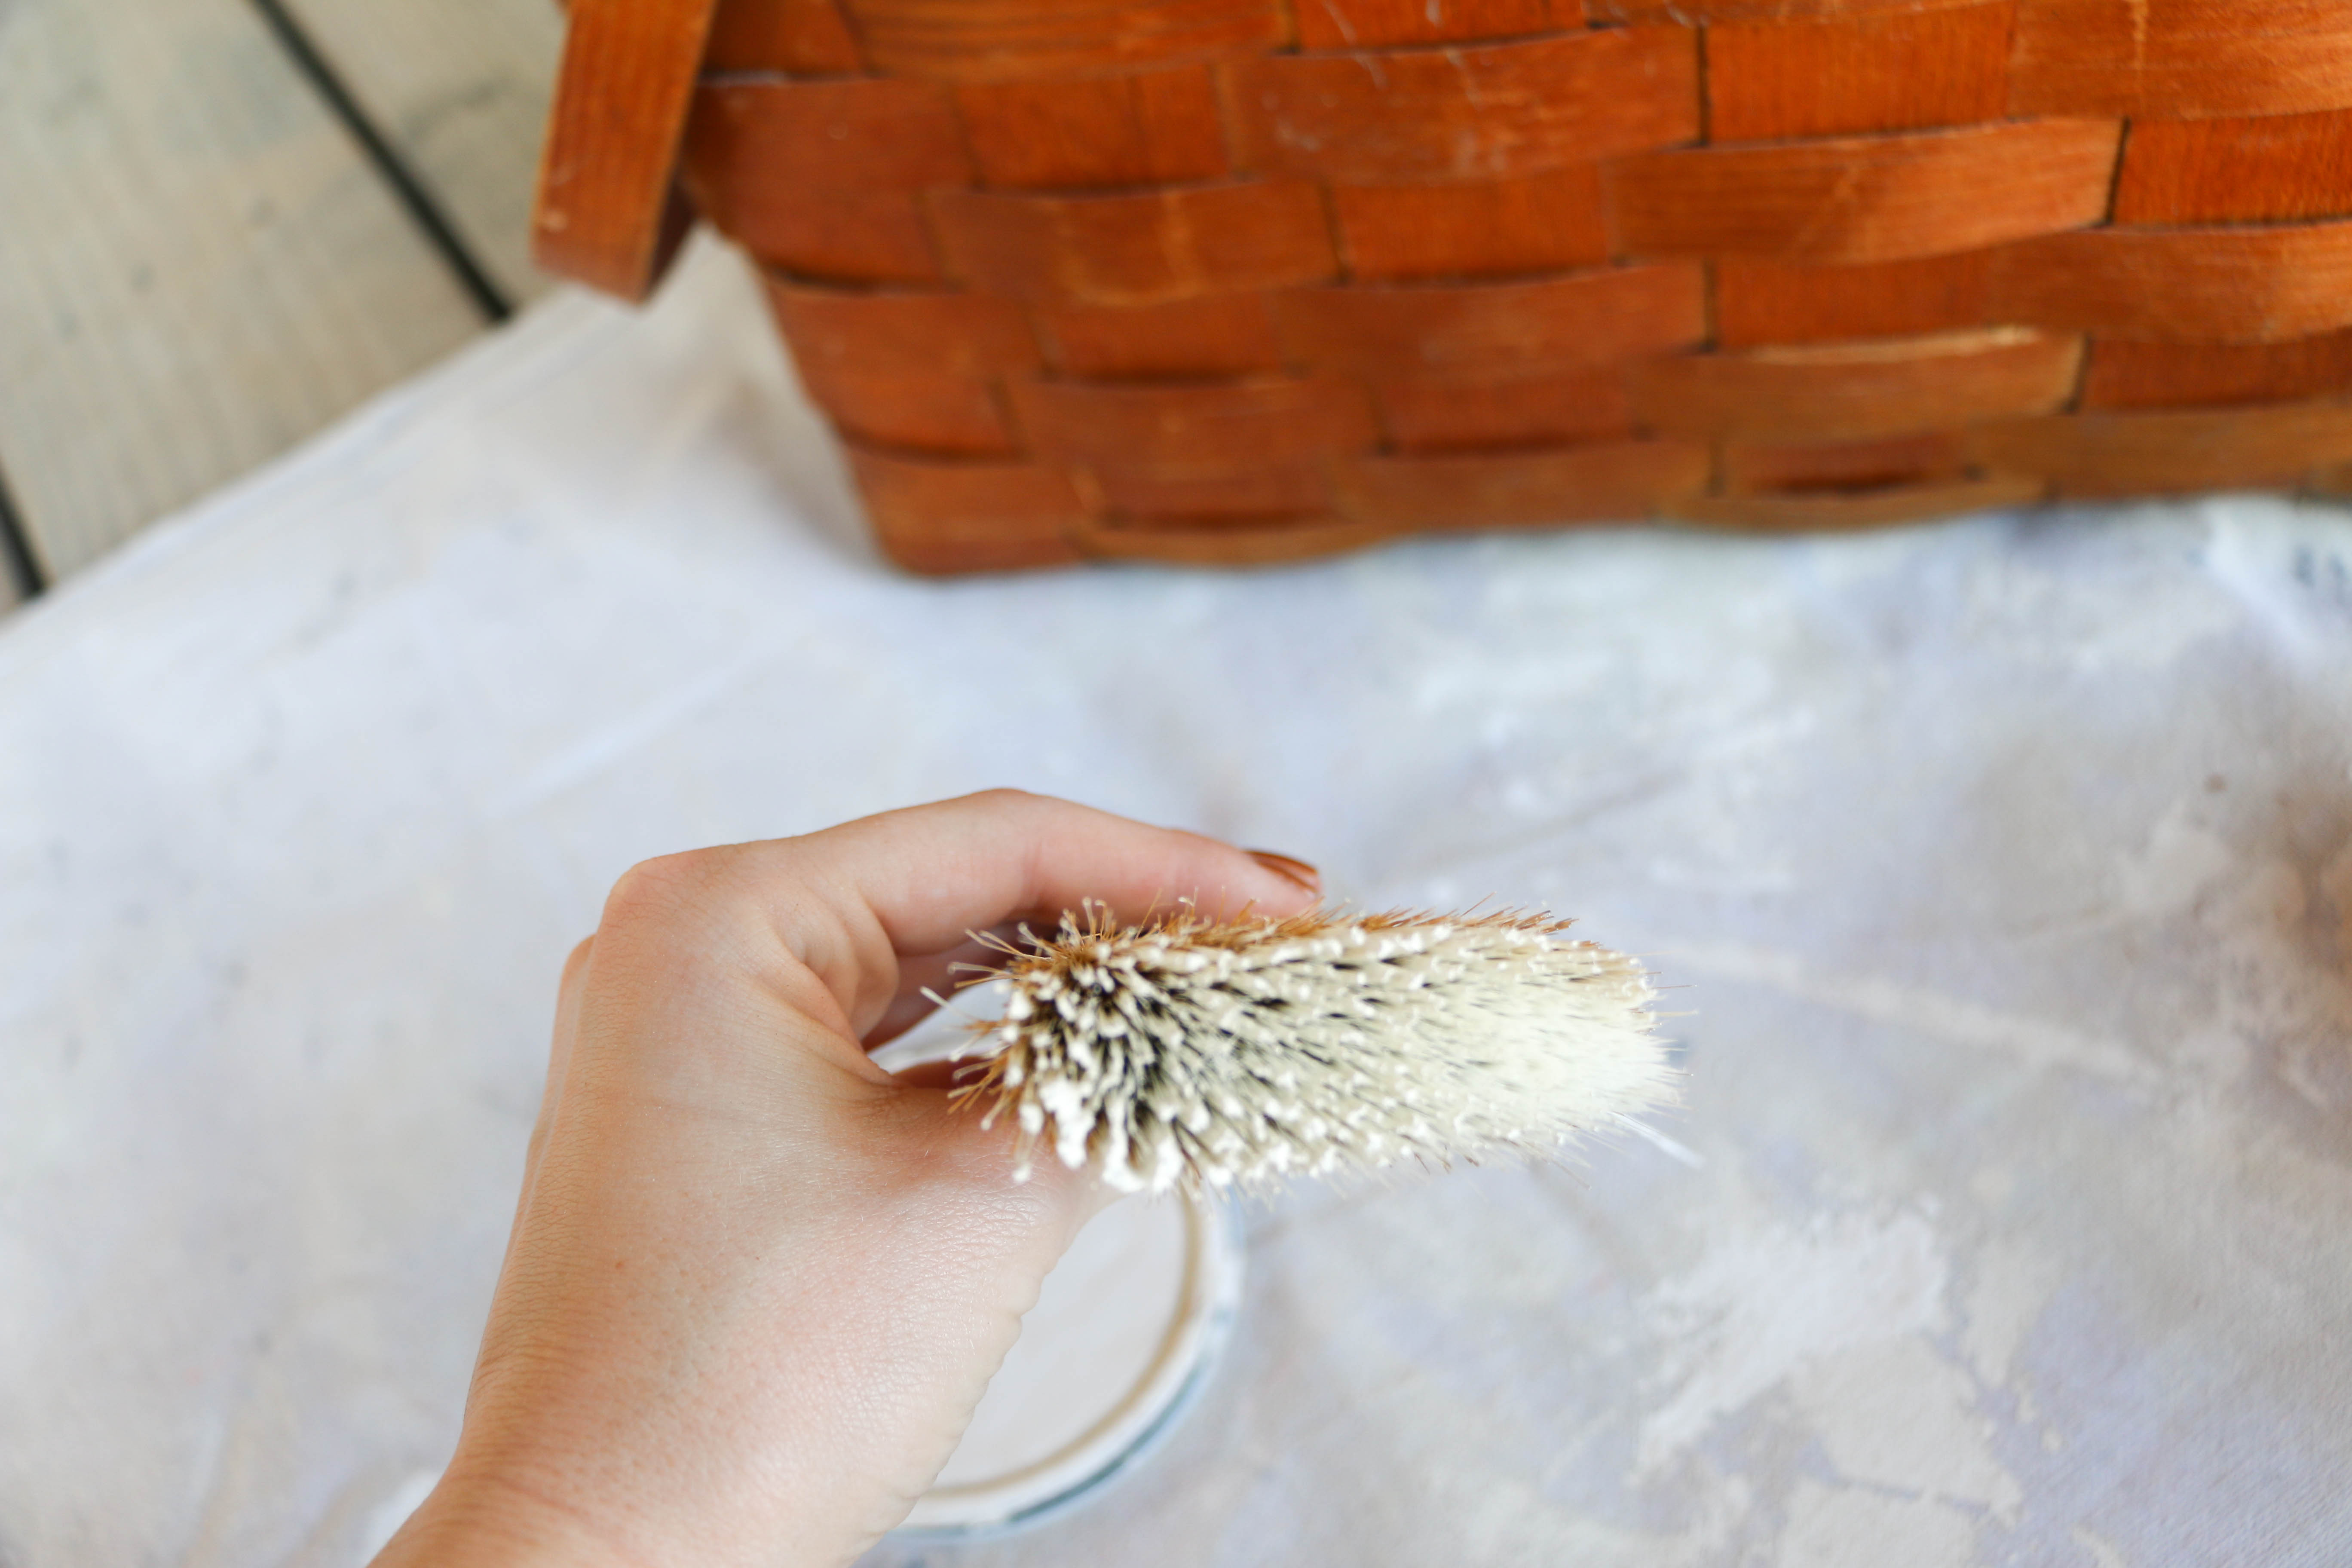
The trick is not to use too much paint. You can always add more, but once you have too much, it’s hard to get the desired effect.

dry brush - Copy

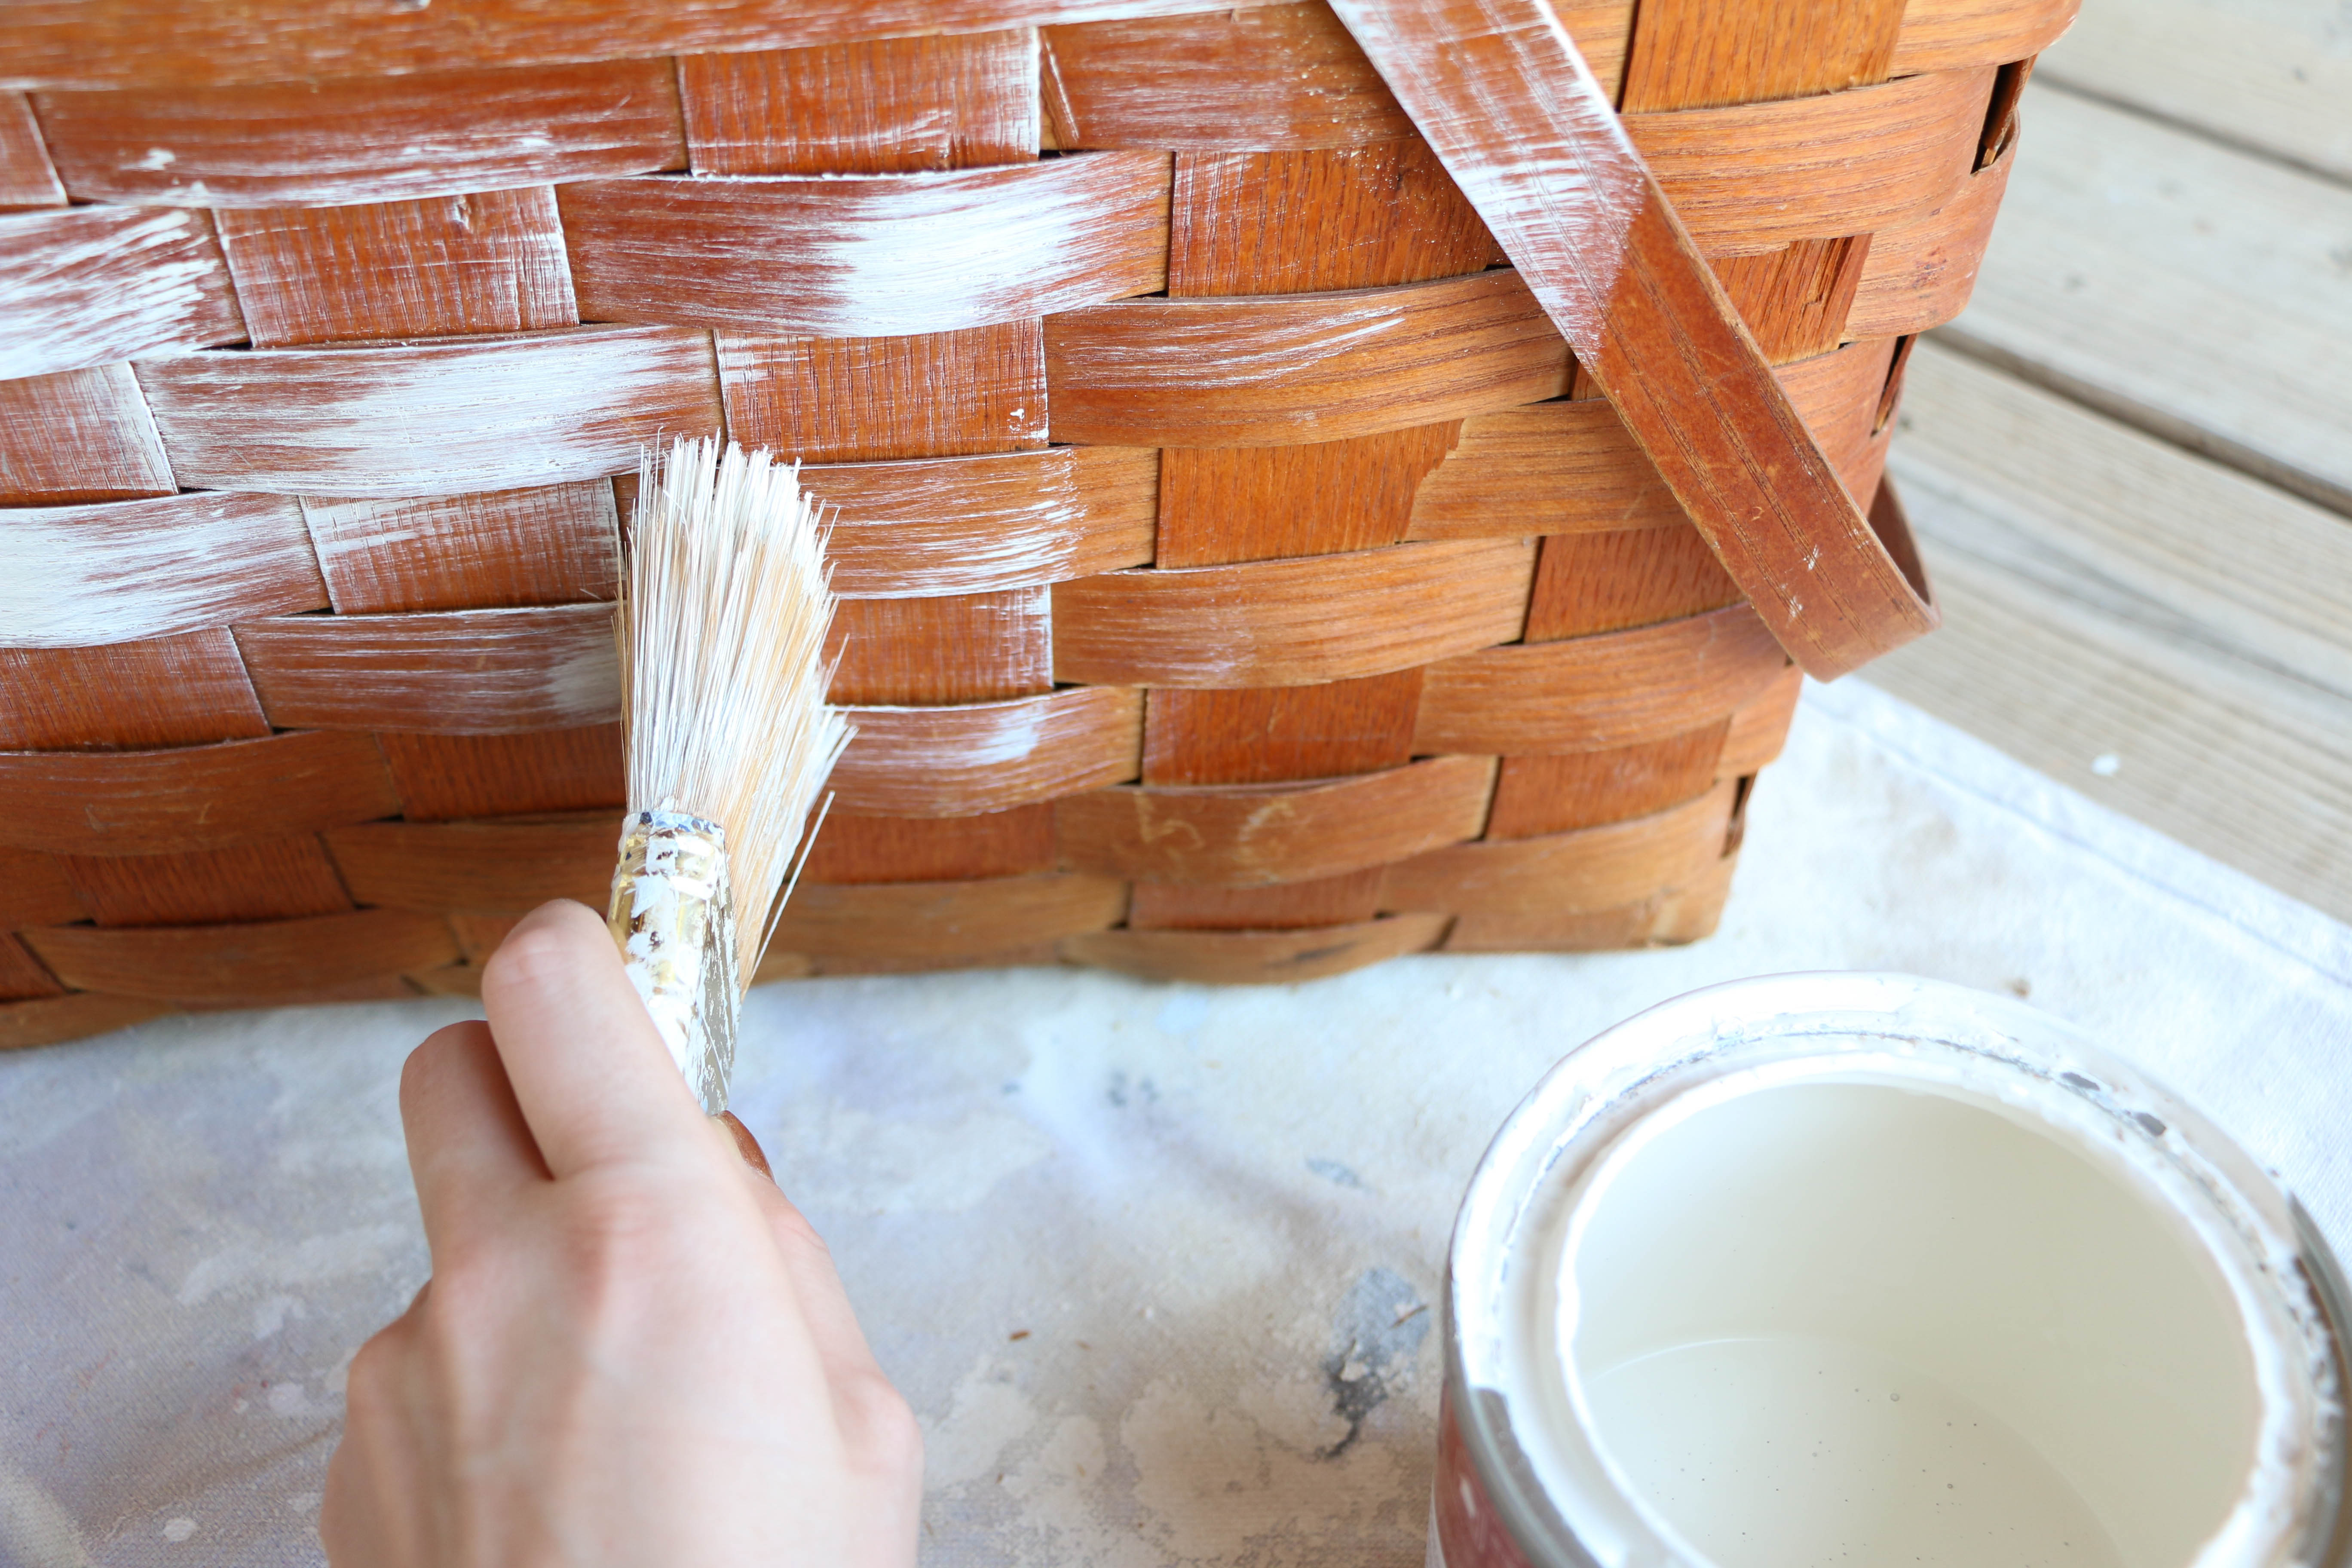
When you’re ready to paint, you’ll want to use a short, side-to-side stroke. You’ll want to move quickly and paint lightly, as you don’t want too much coverage in one area. The look really lends itself more to a vintage, weathered look. Once you have too much coverage in one area, it becomes hard to fix it, so move fast! The awesome thing about it is that it uses practically no paint (I covered this basket just with what was on the lid of the can), and it dries super fast because it’s such a thin layer of paint.

picnic basket after - Copy

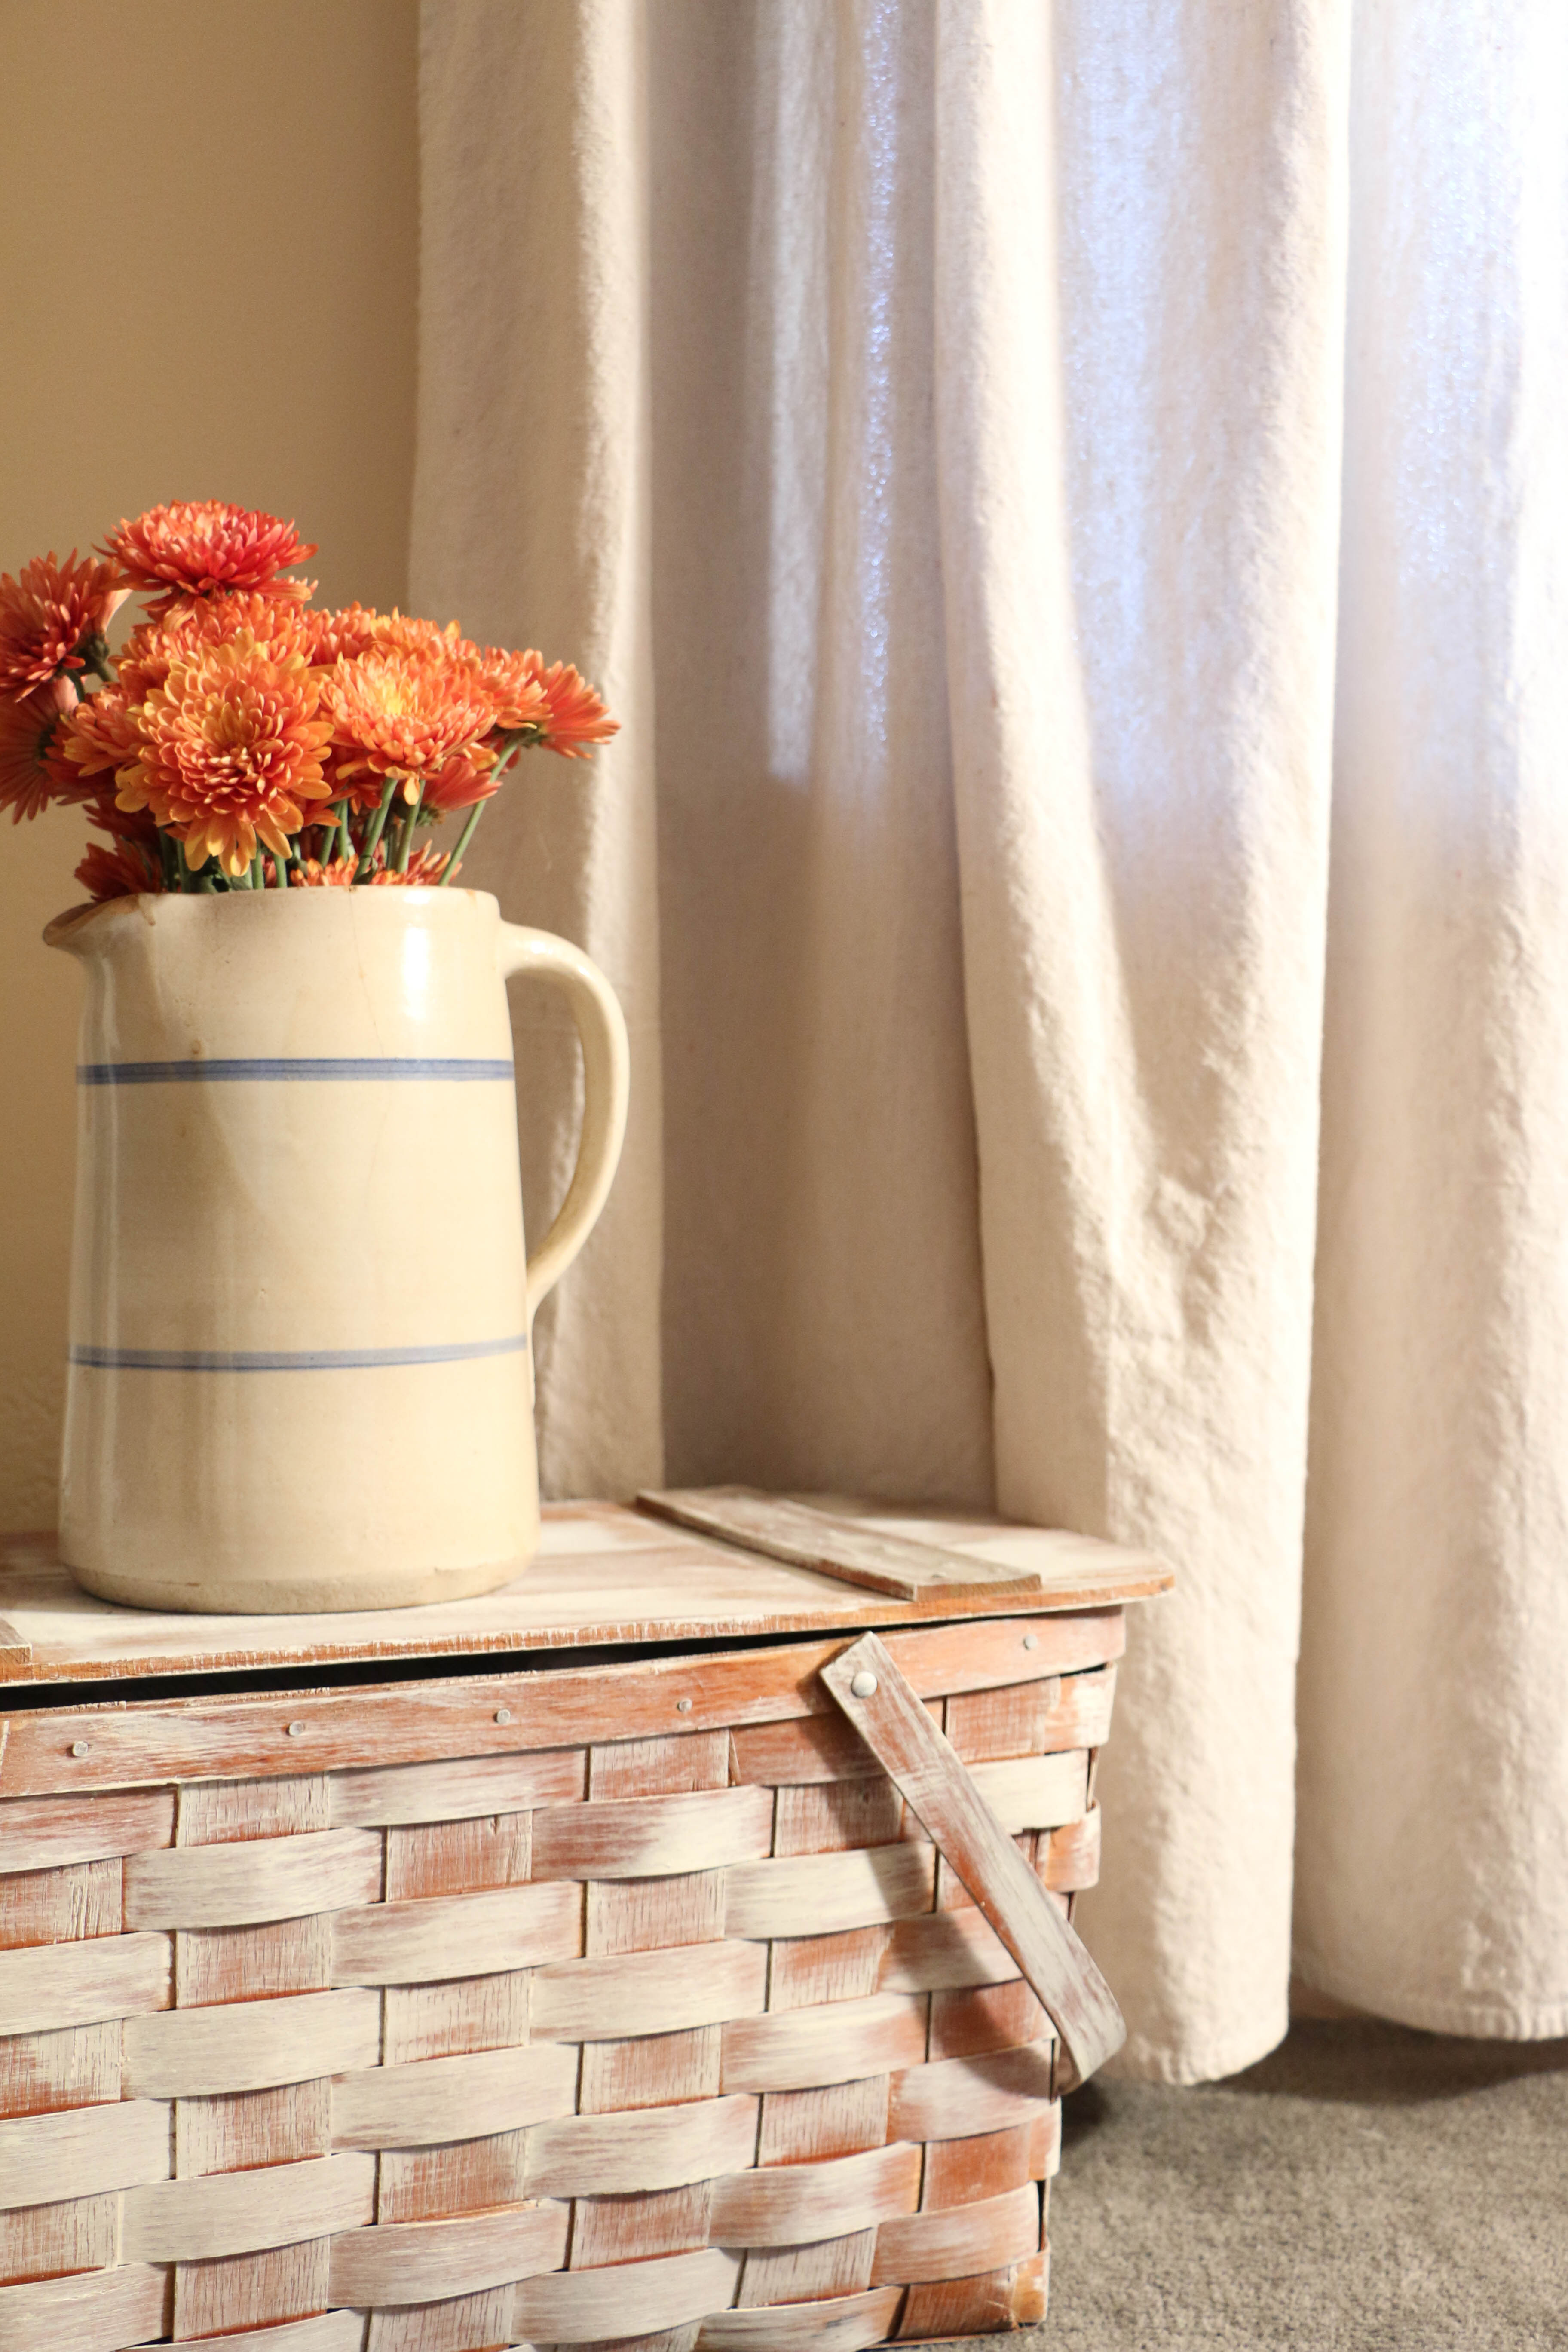
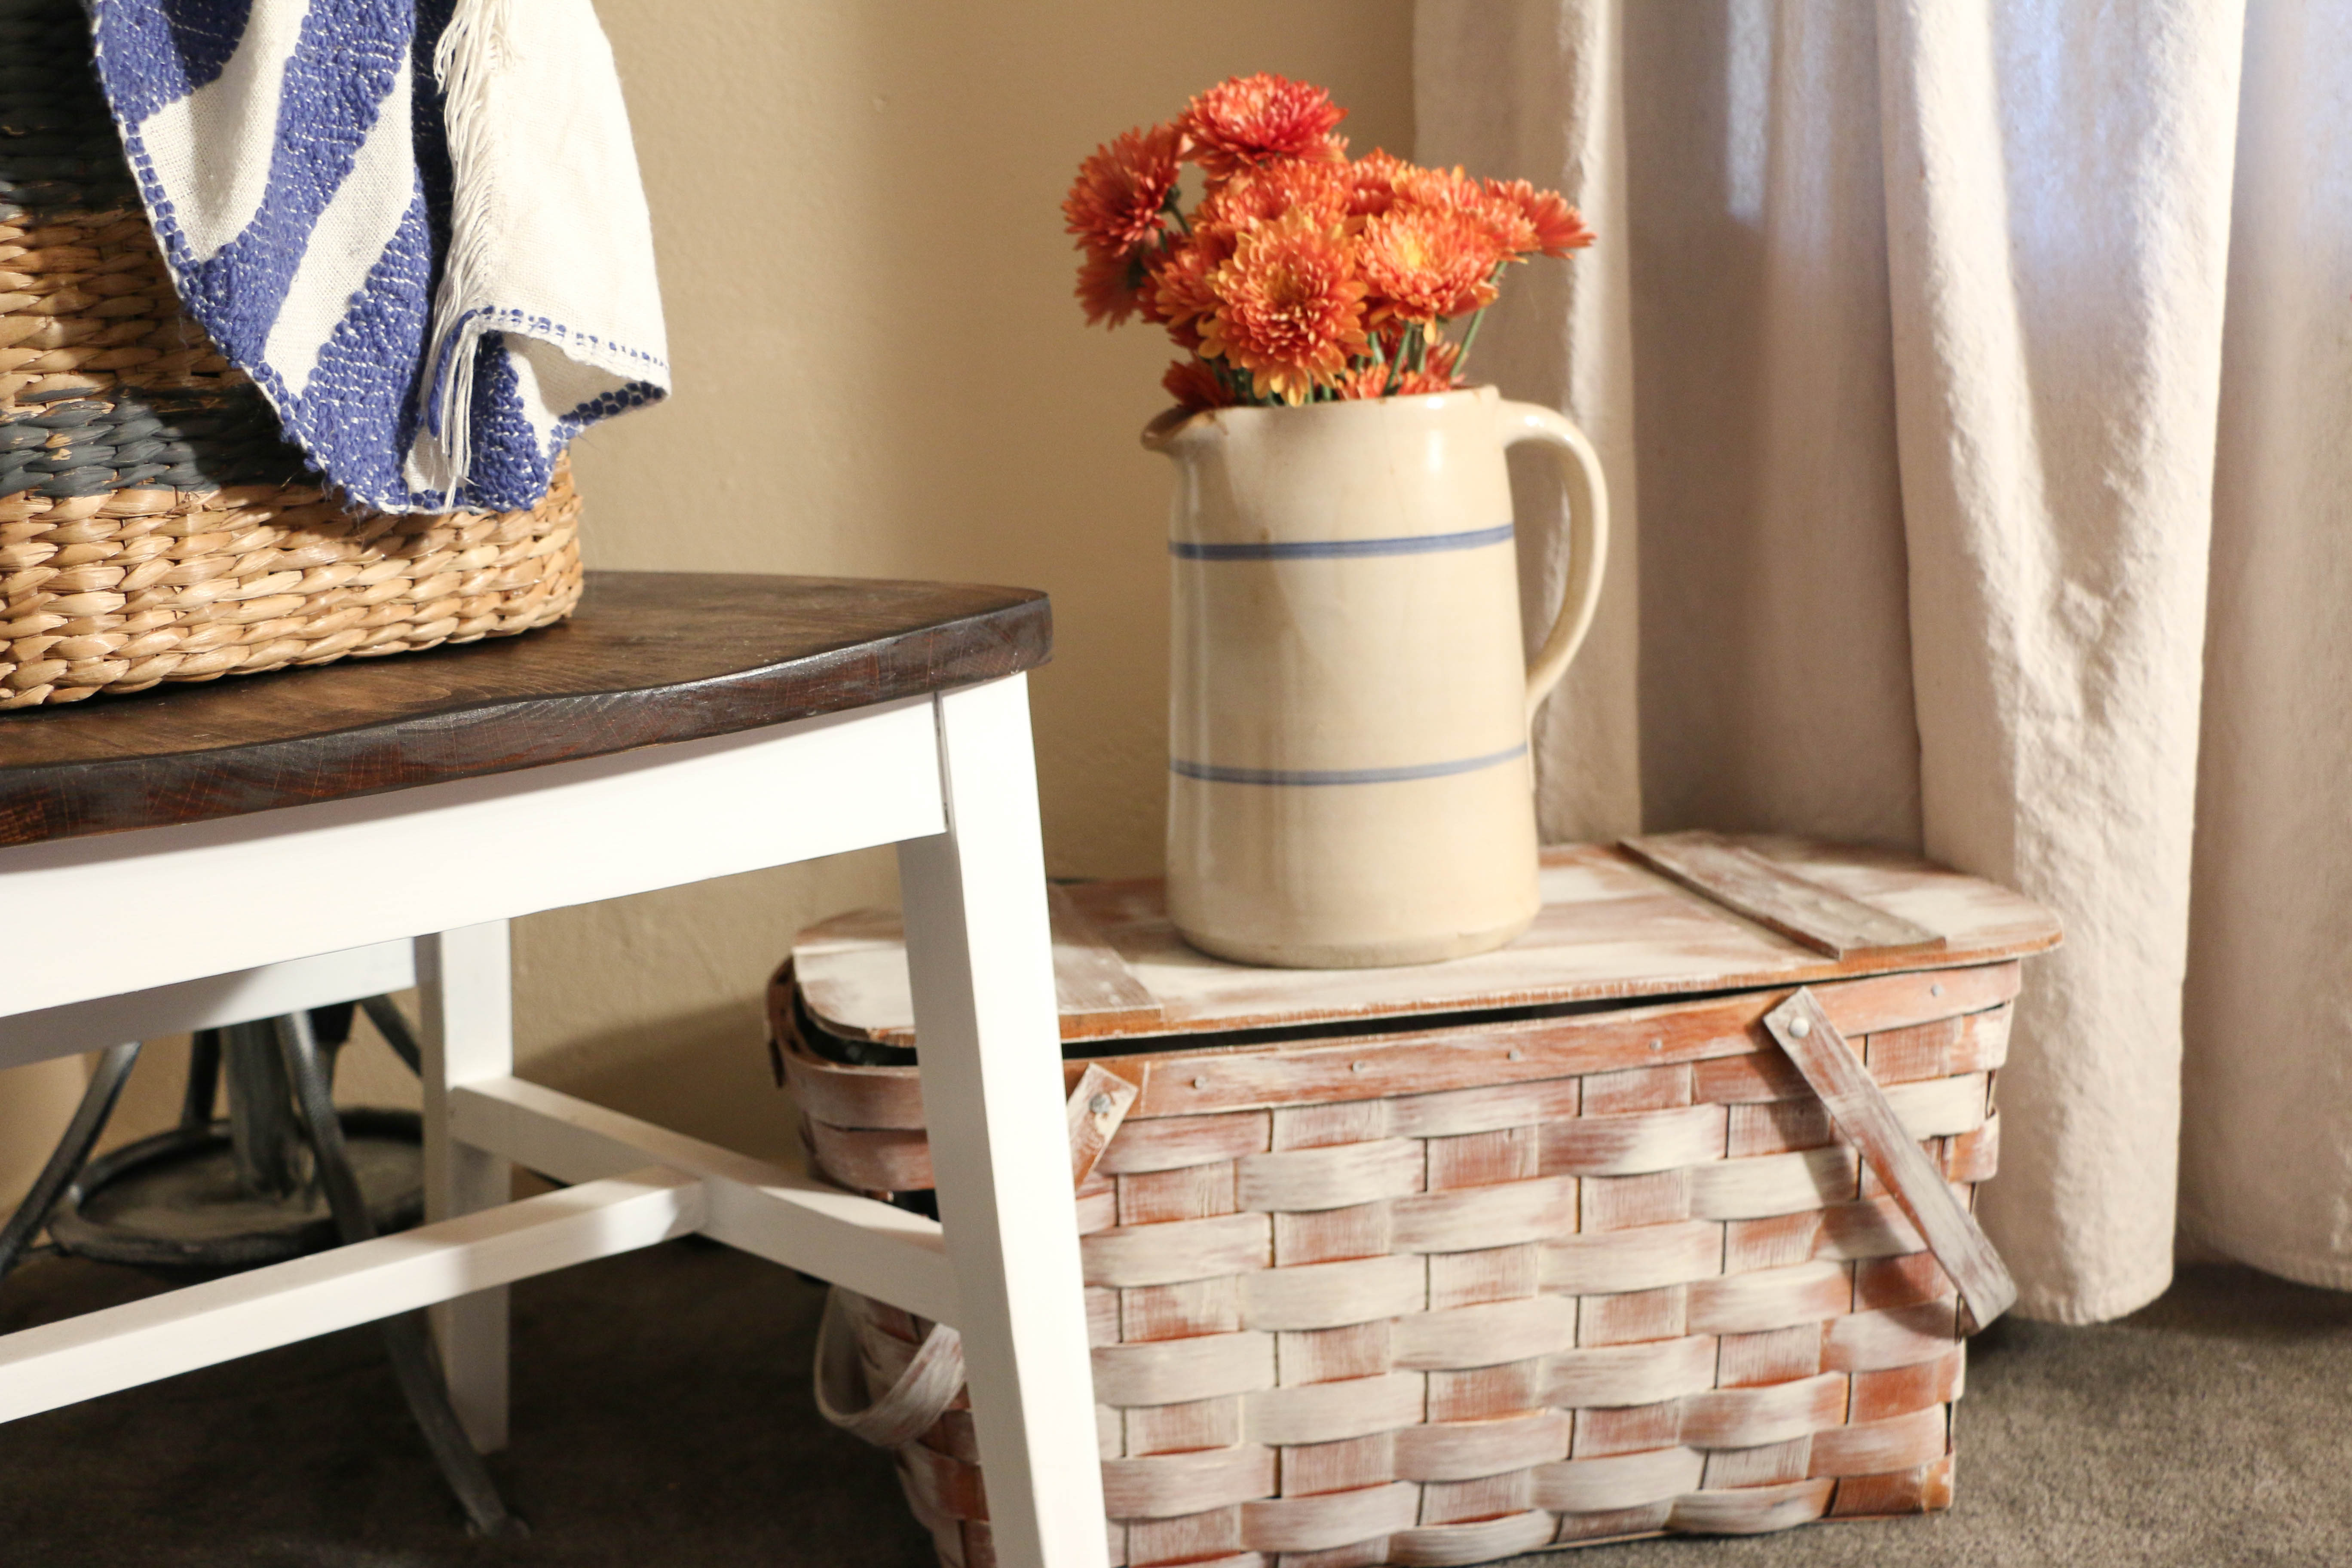
Here is the finished product! I think this project took maybe thirty minutes (including dry time). It saves so much time, and also money because it’s such an effective use of materials. What more can you ask for than quick and cheap?

picnic basket2

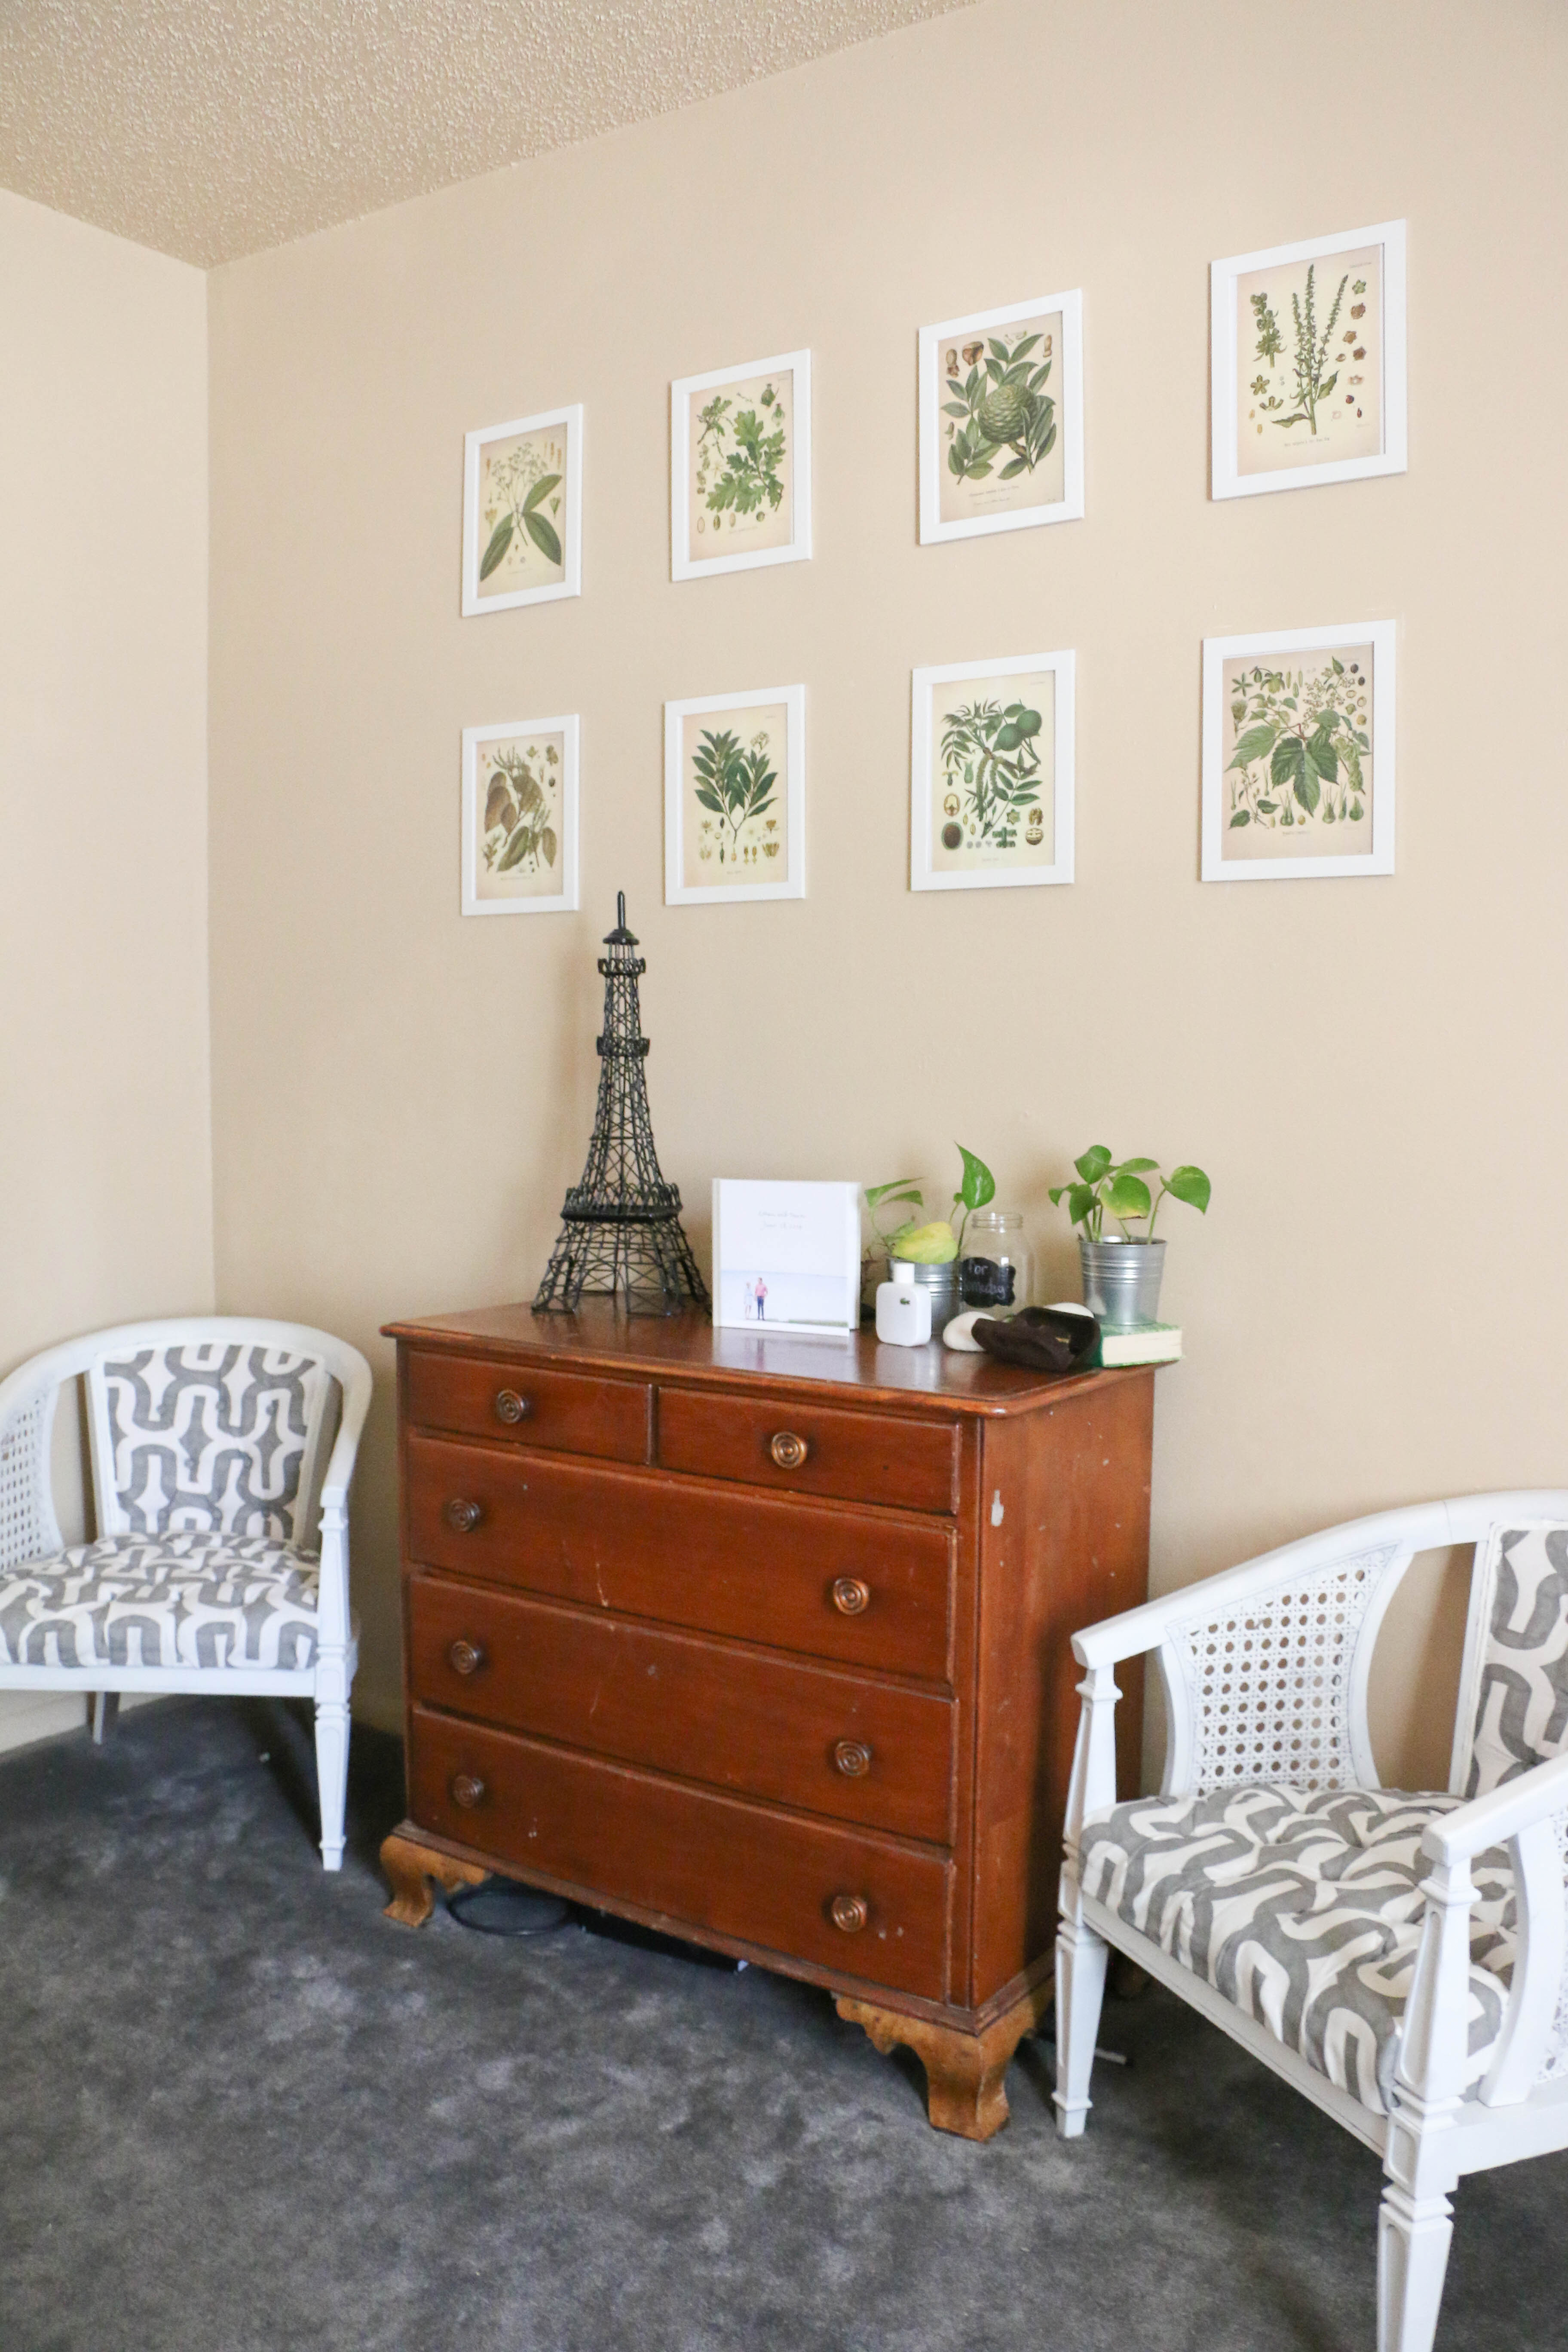
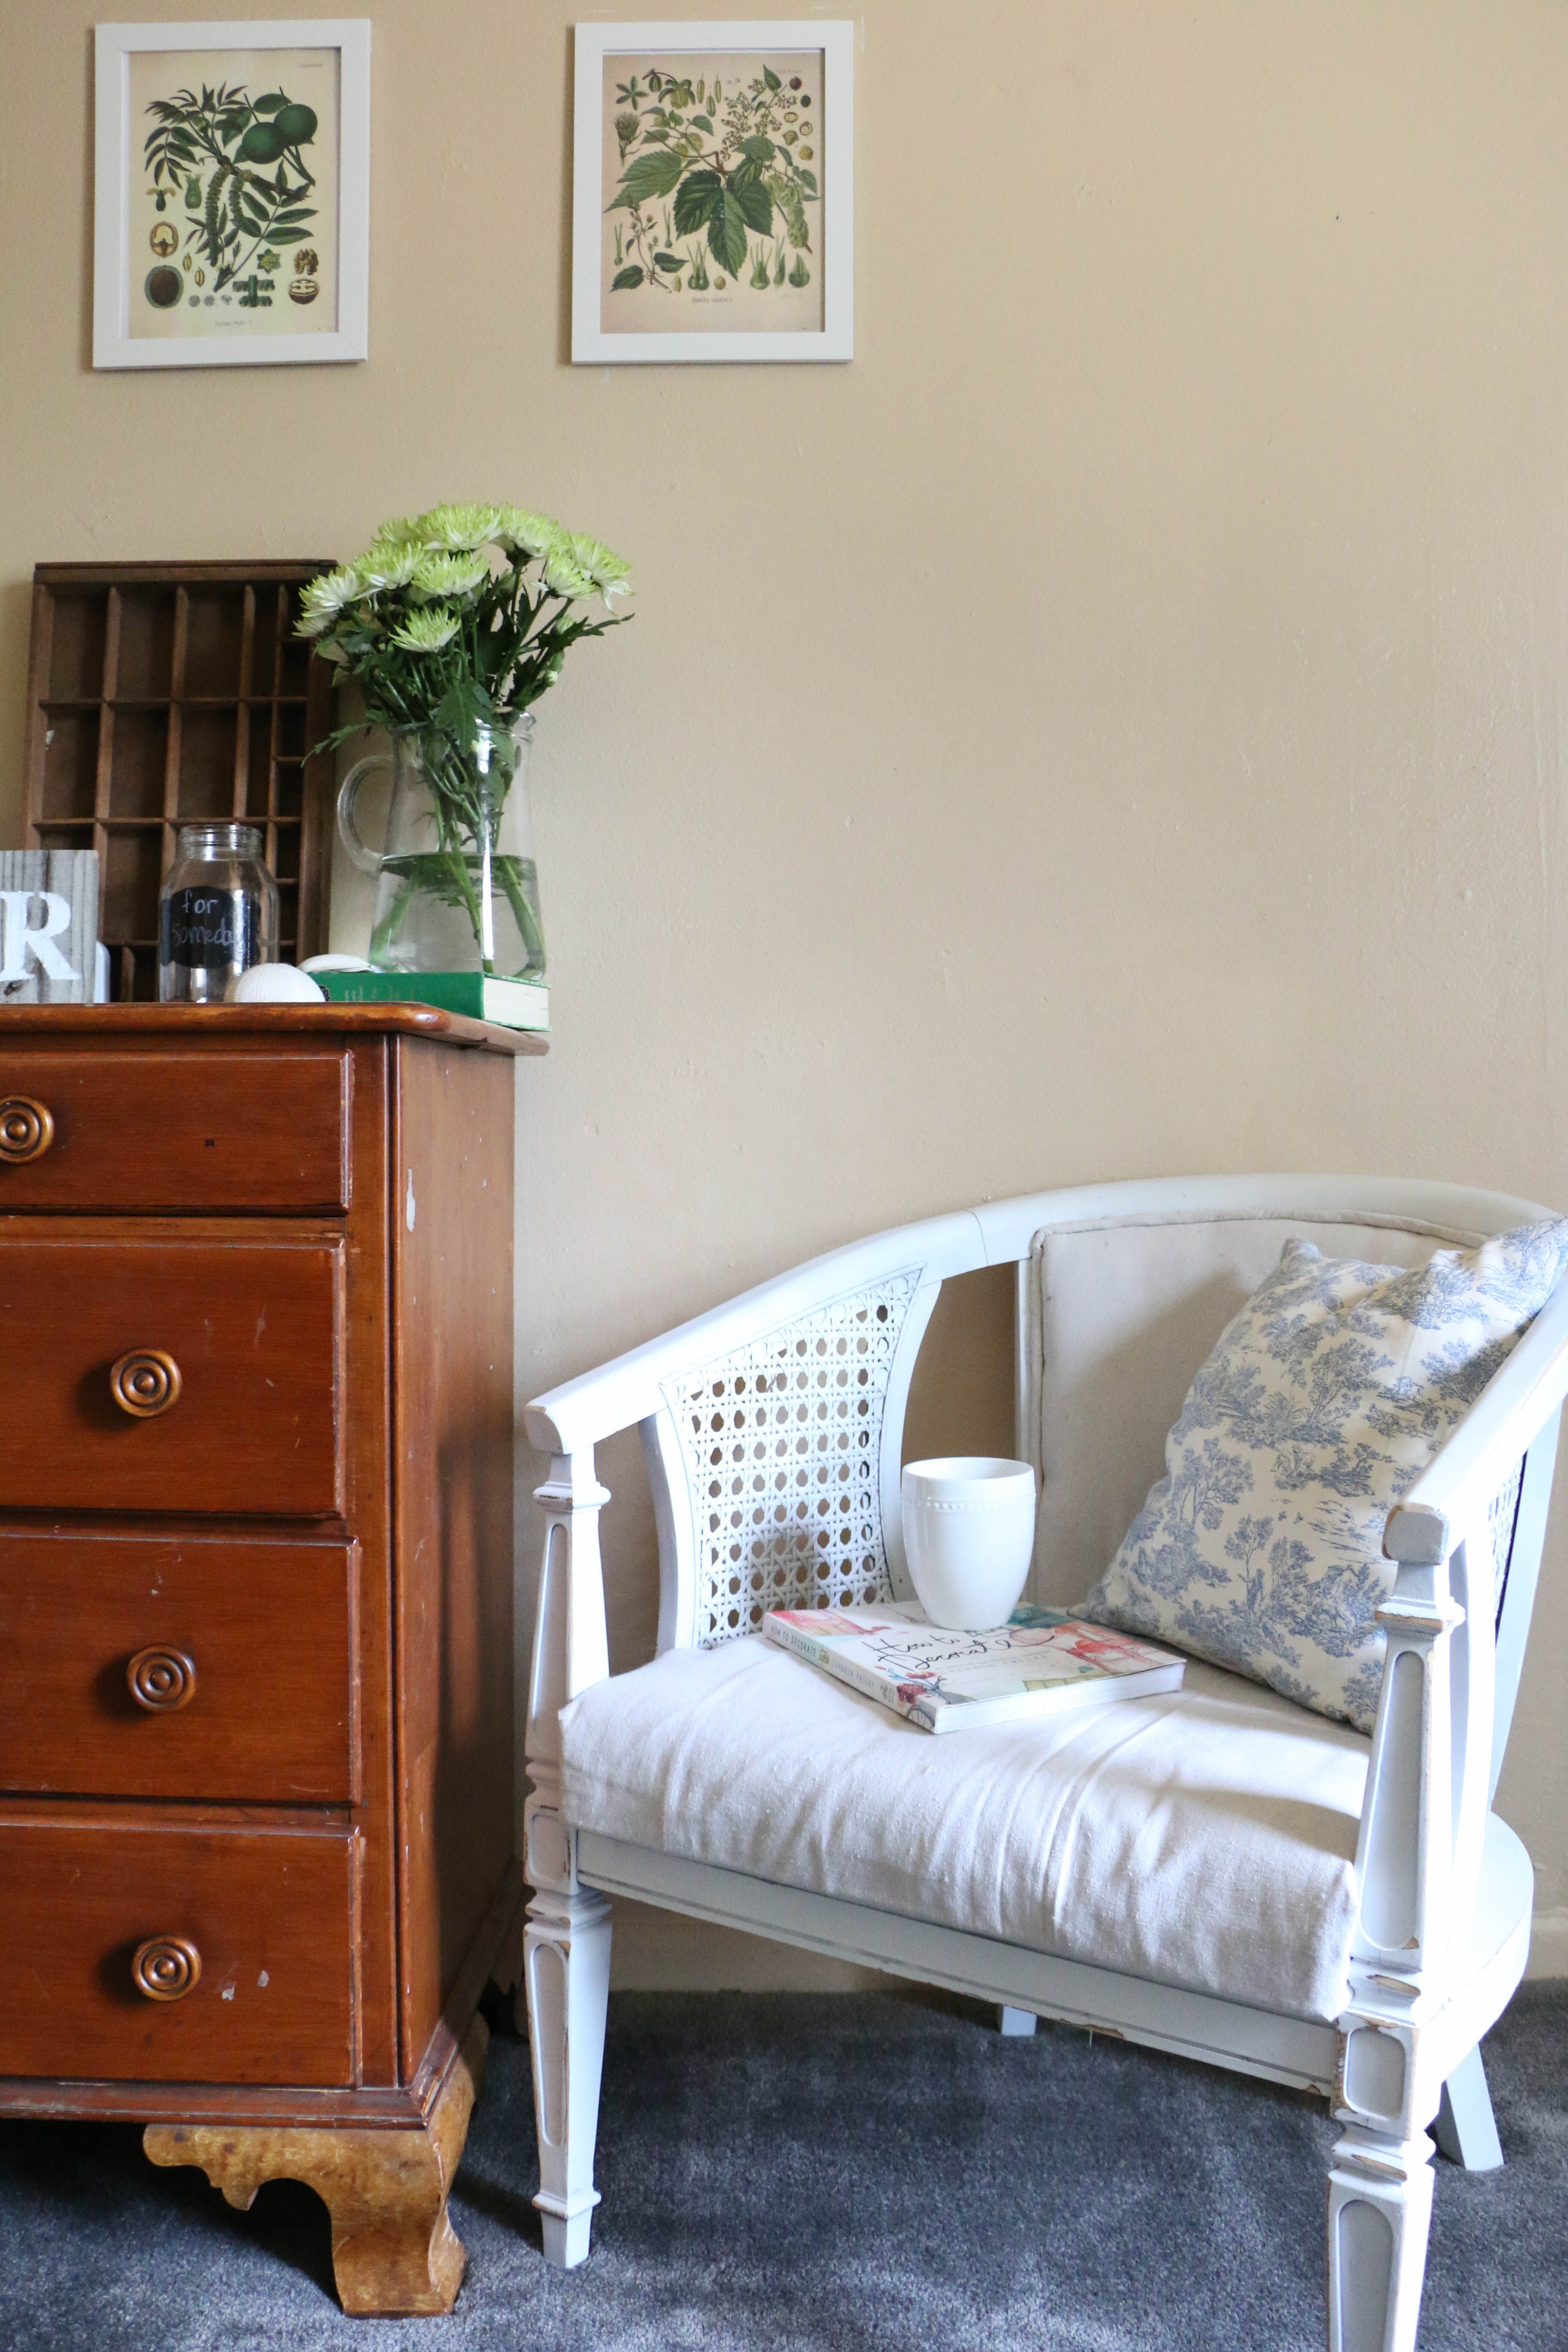
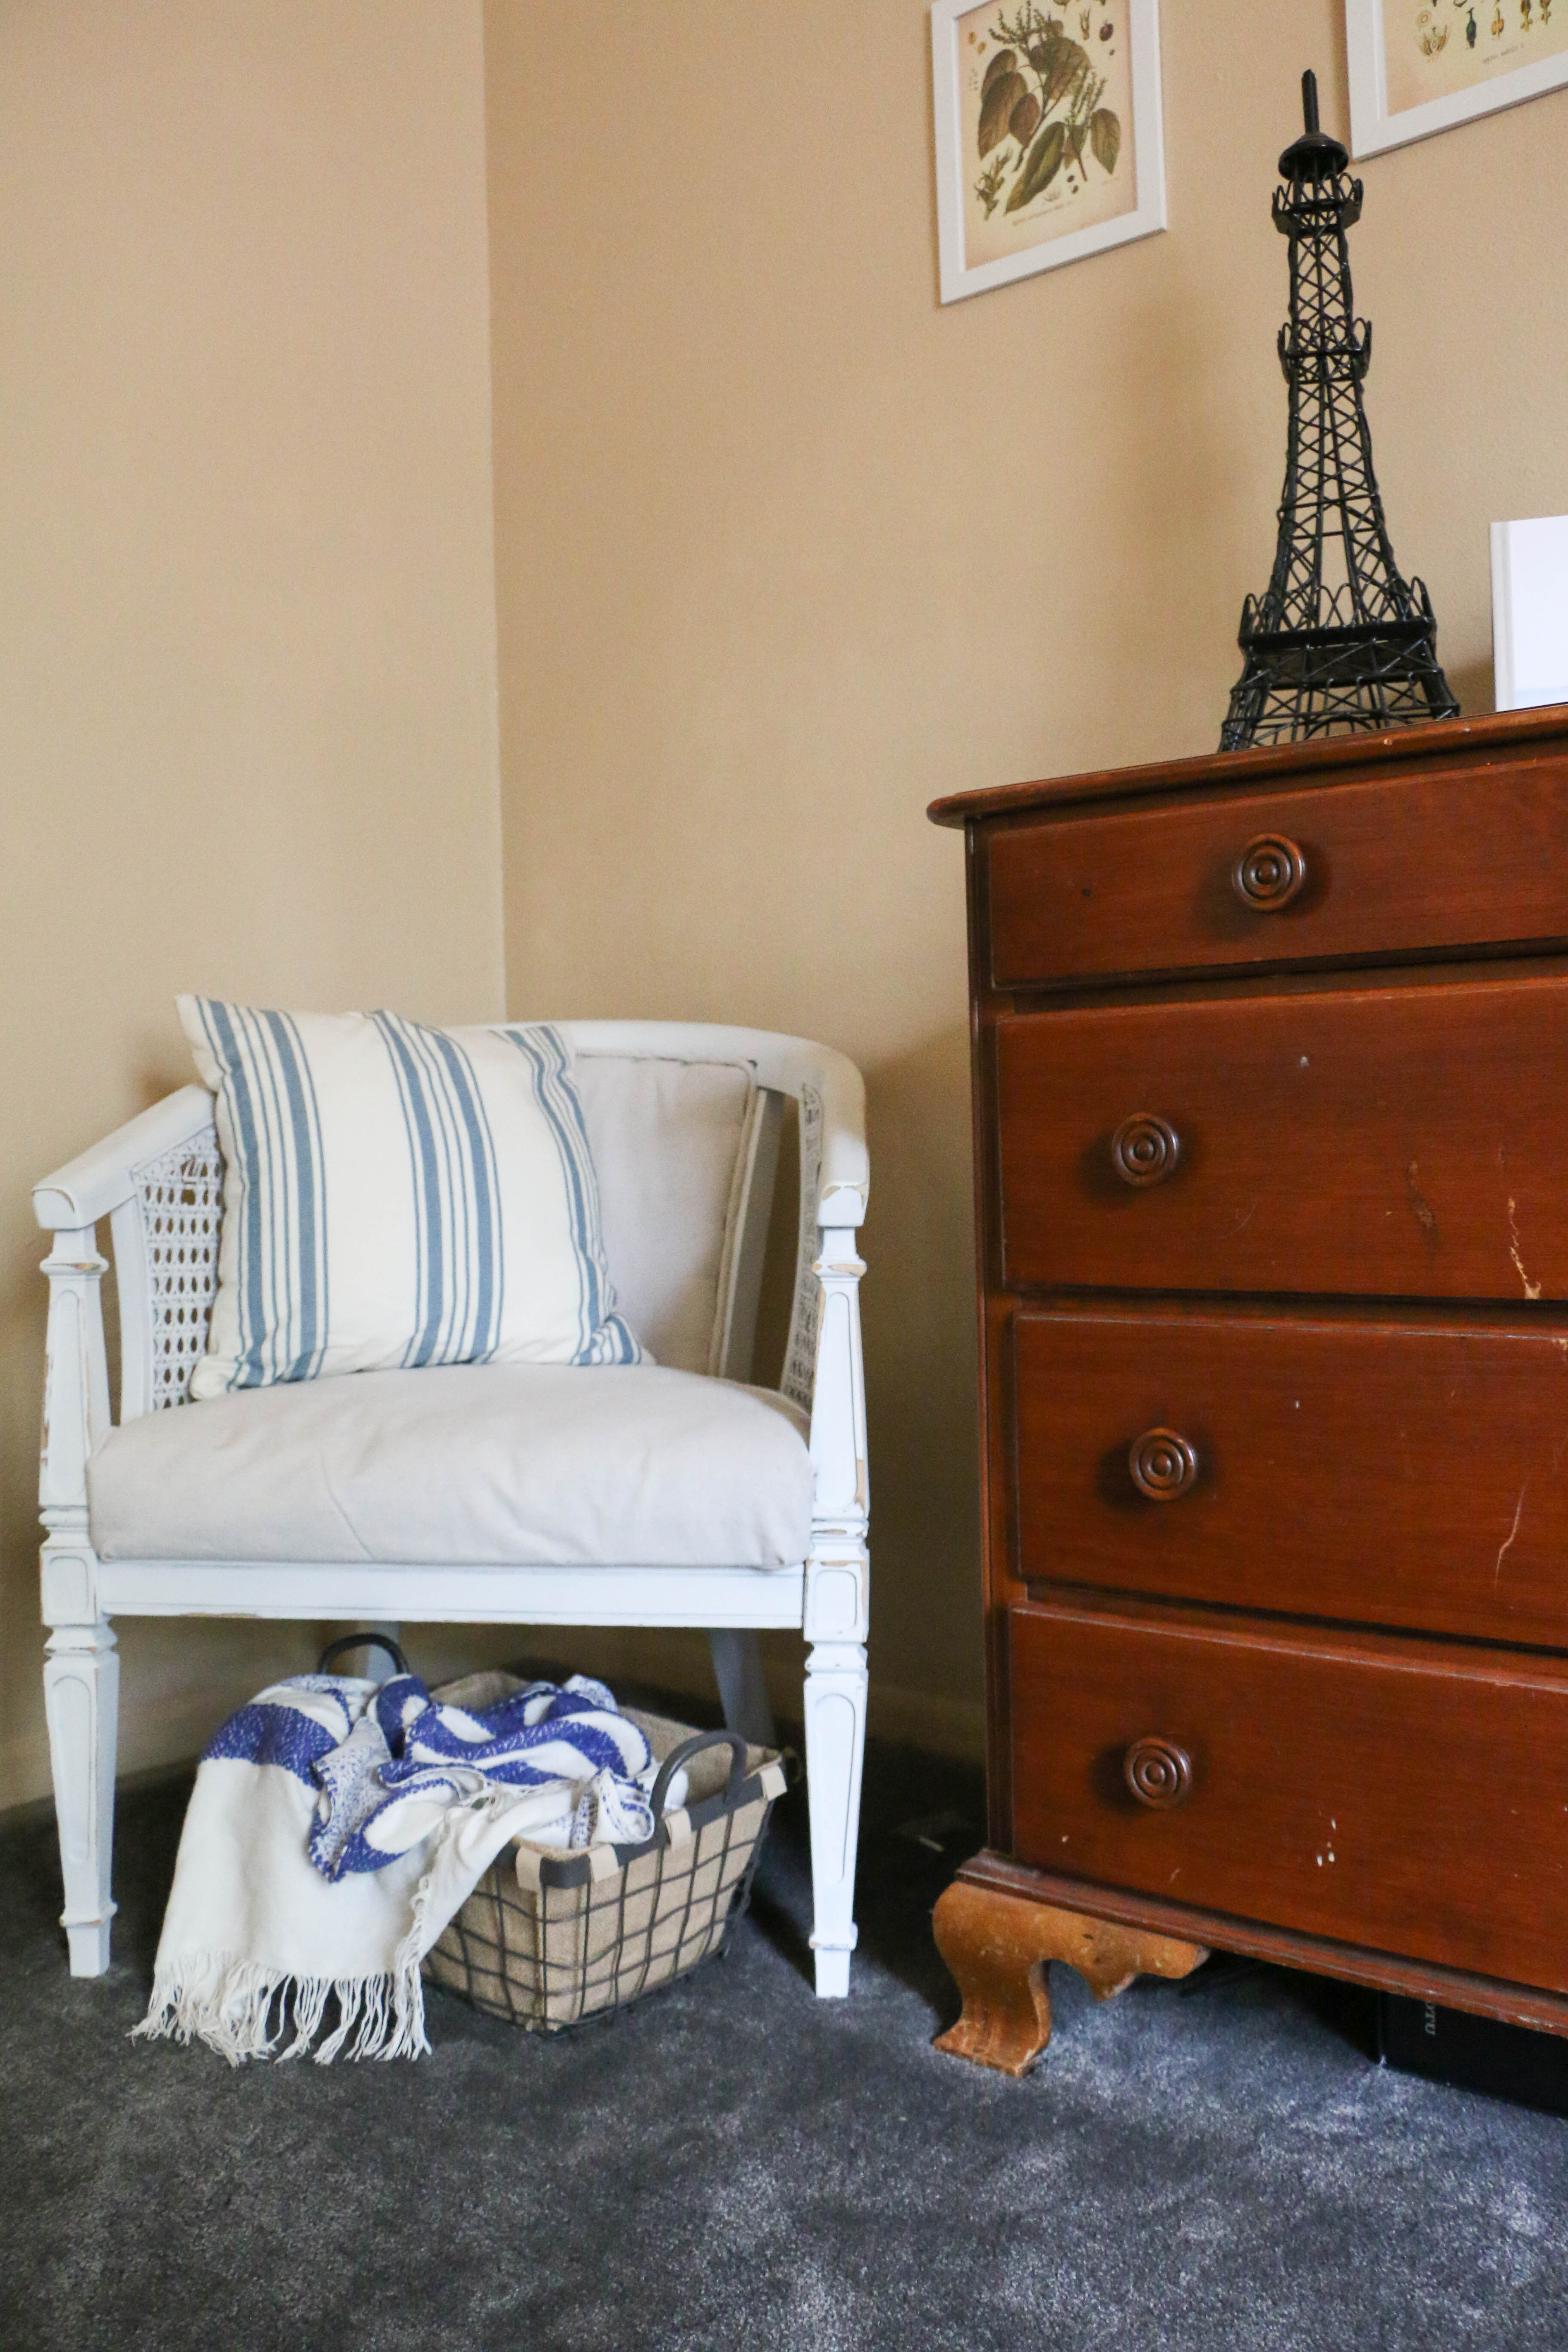
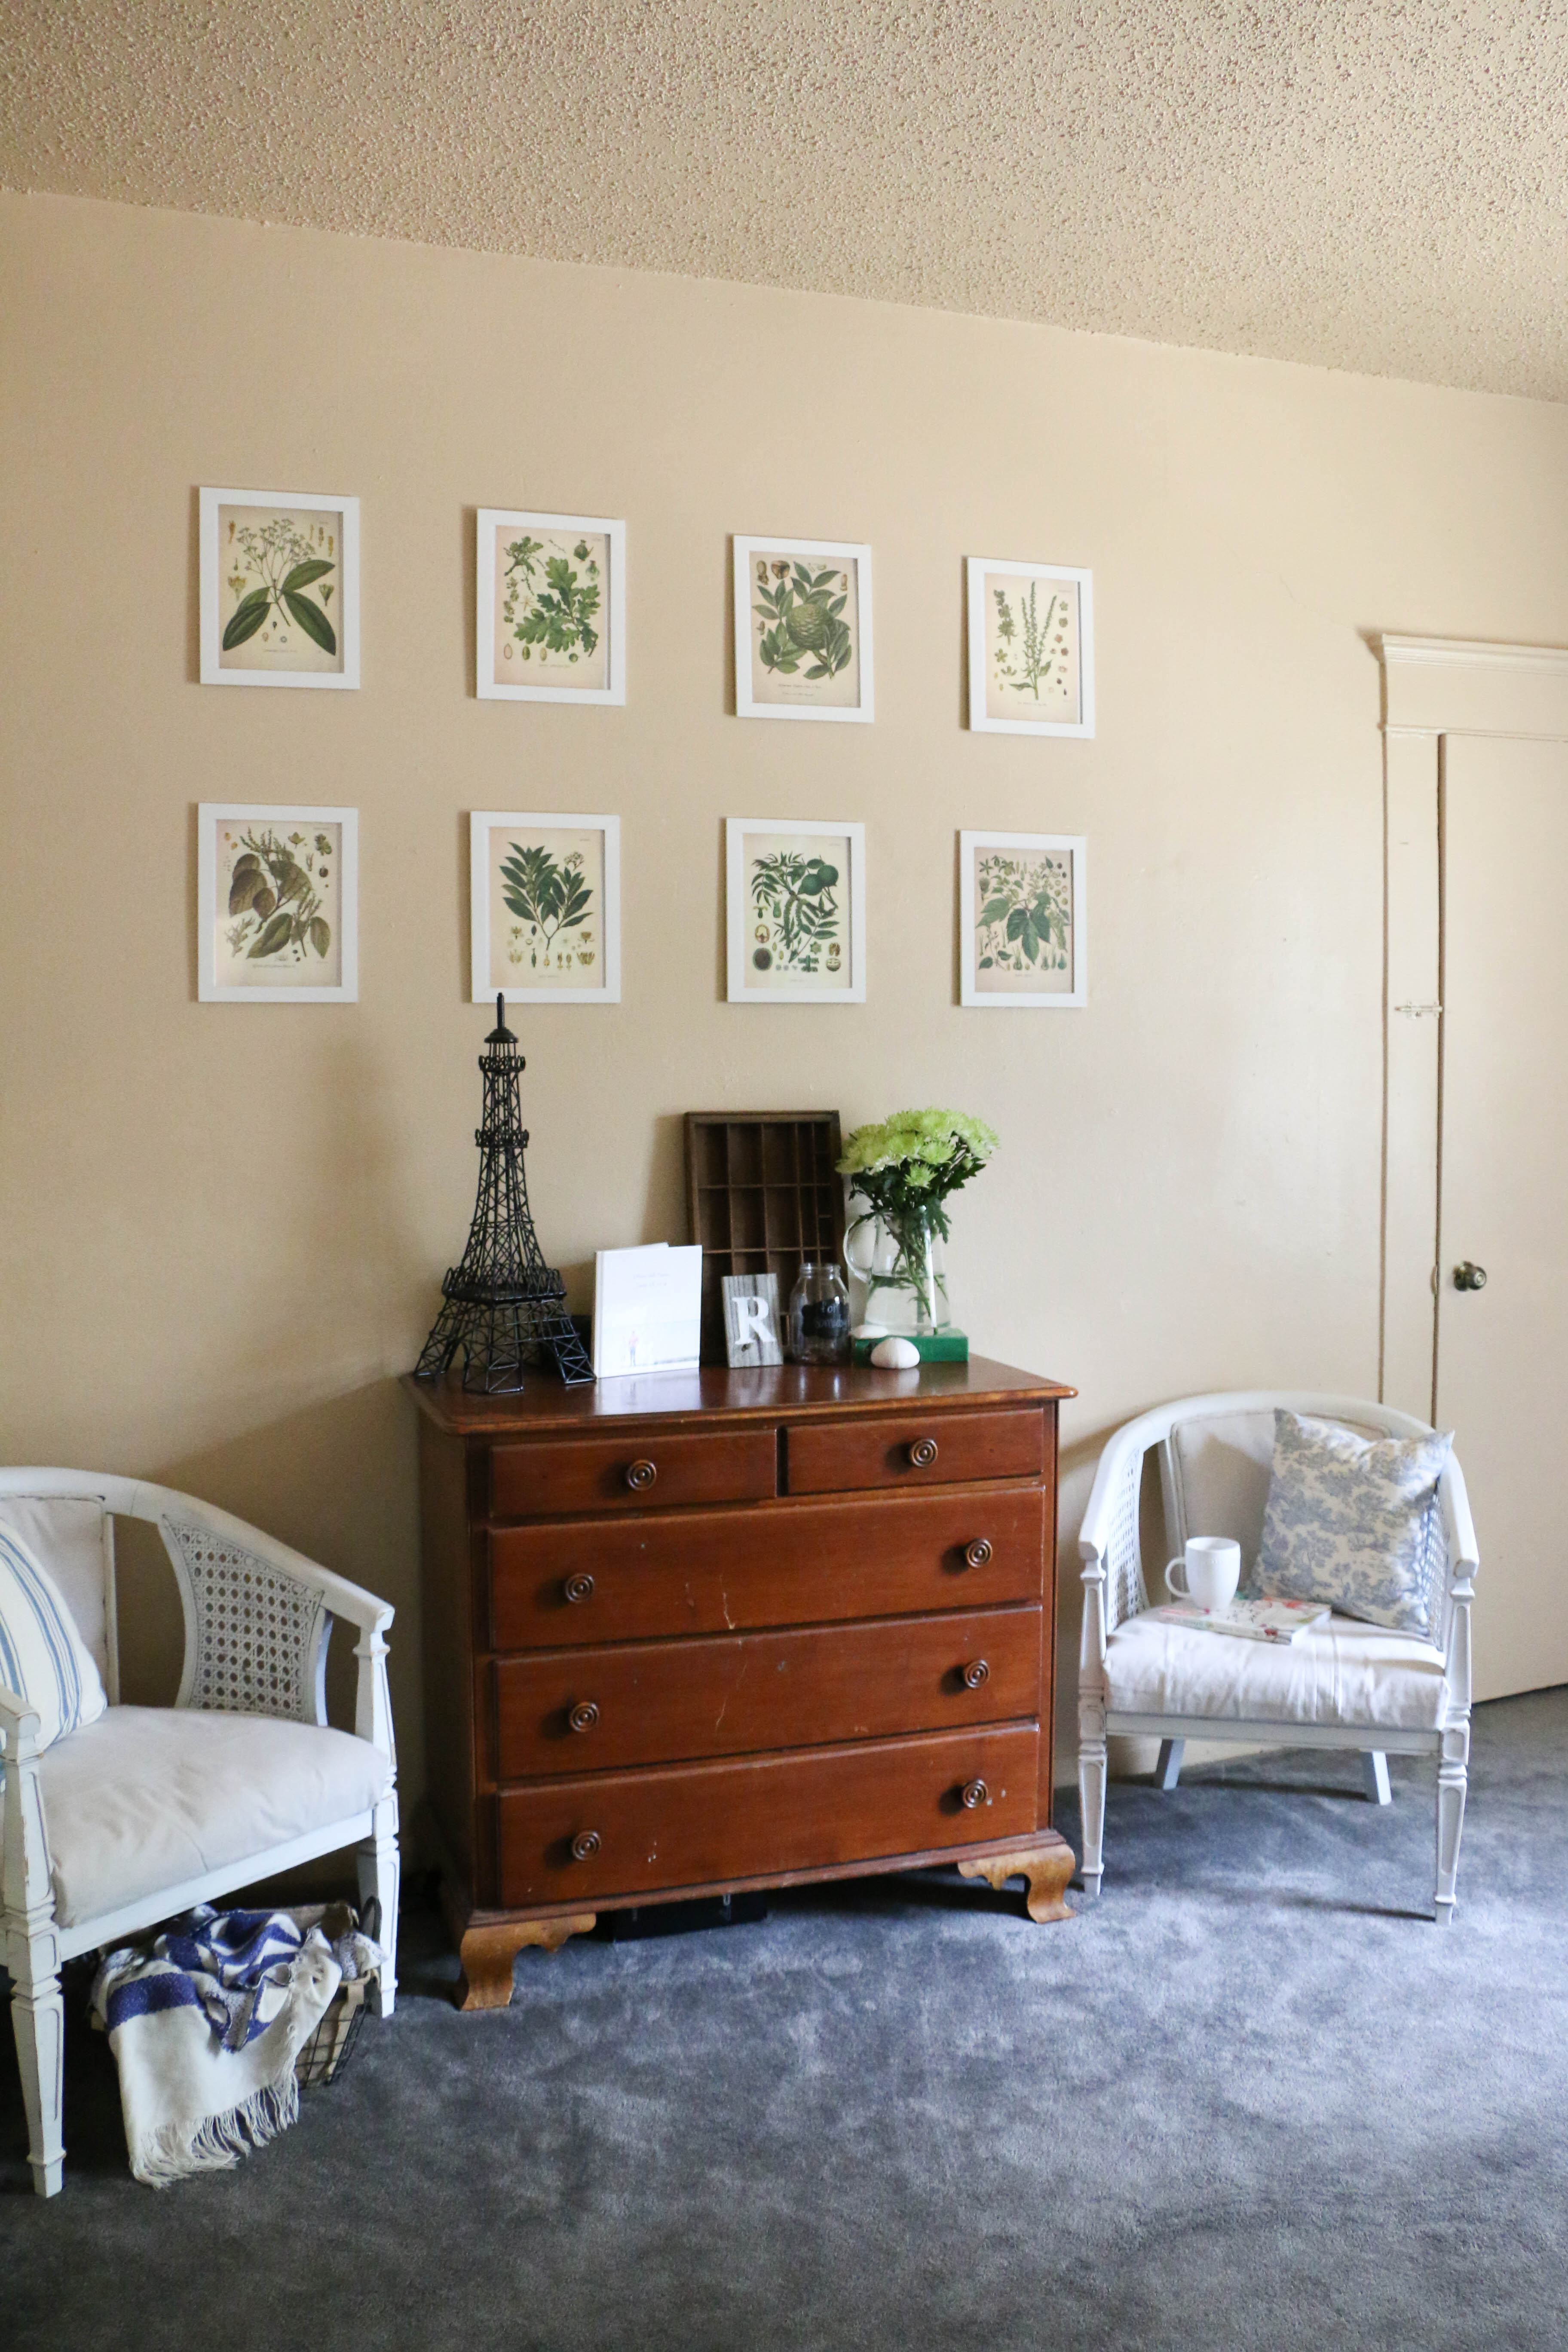
I placed this basket in the corner of my living room where I keep the coatrack and store blankets. This basket is pretty roomy, so it’s a good place to store odds and ends. I also really like how the white lightens up this space. The orange look definitely wasn’t doing itself any favors. She looks so much better now, don’t you think?

picnic basket1

What do you think of this technique? Have you tried it before? I promise it really is easy – I’m not lying! I am thinking about dry brushing everything now…nothing is safe! Let me know what you think, and if you plan to try it!

I hope y’all have a great weekend and that you have some fun Halloween activities planned (hopefully not completing a 5k like myself)! That’s it for today friends, have a fabulous day!

DIY Projects, Home Decor, Tutorials

DIY artwork for cheap

Hey y’all! I hope you’re doing well! Summer is winding down over here, and I’ve been super busy with preparing things for my classroom this year. I will pick up the keys to my classroom next week to begin setting up for the school year. I’m excited for this school year, but I’m sad to see summer go! Since I’ve been so busy with classroom projects I haven’t been working on house projects too much lately. I did however, whip up a couple of these easy “art pieces” to use in the house.

I can’t even call this a tutorial because it’s so easy! More like an idea you may not have thought of. I have done this several times throughout my house, because it’s SO easy and SO cheap. I think for this project it cost me a total of $4. Whoop-de-do!

I found these old frames at a thrift store for $1.

 before2

Those ducks are so cute, aren’t they? Kind if a 90’s chic, if you will.

Literally all I did was spray paint the mattes and frames and replace the duck print with a cute printed paper. I got mine from Paper Source. I like to get papers from there because they come in 20×30 inch sheets, which is convenient for many different projects. They also have so many pretty papers! You could also do this with any gift wrap or scrapbook paper.

paint1

I used this spray paint because it’s what I had on hand. I spray painted them, and once they were dry, I added the new paper, and done. That’s it!

after1

after2

I realize this is kind of an obvious DIY. But it’s so so easy, you have to give it a try! That’s it for today friends, have a fabulous day!

DIY Projects, Furniture Makeover, Home Decor, Tutorials

Cane Chair Makeover…again

Have you ever done a project and just hated the results? You work hard on something, and when it’s finished, it’s just not what you thought it would be? This is what I’m sharing today. About two years ago I bought a pair of cane chairs from a thrift store for $20. I was so excited to work on them. Like, SO excited. Unfortunately, I don’t have the original picture anymore, but they were dark wood, with a gross blue fabric. I knew I wanted to make them over, but I had no idea how.

I picked some fabric out for the chairs with no thought to how it might lay on the chair. I learned a lot from this first makeover, but they just weren’t doing it for me. Here’s how they looked after makeover number one (and don’t judge me):

chairbefore1

First of all, if you look close enough, you can see that the back legs aren’t even painted. How did I miss that?! I don’t know. I also don’t know how I lived with this for so long. Ugh.

chairbefore2

This is a wider shot of the chairs. They are convenient, really. Ethan puts his shoes on here, and they are pretty comfortable. I like to sit here and read on occasion as well. Sidenote, our dresser is my husband’s childhood dresser (a family heirloom), deemed untouchable by the paintbrush. Anyway, looking at these chairs just makes me cringe. I’ve wanted to do something about them for so long, but the amount of work I did the first time around was torturous, and I couldn’t imagine going through that again. So I put it off for a while, thinking that since I had done it, I’d have to live with it.

But that’s just not true. I did these chairs before I got married, before I was making a home, and WAY before I started figuring out what my style was. There’s no rule out there saying you have to live with your DIY mistakes. So, I decided to take the plunge. This time, with a few ground rules. I had to do this the easiest way possible. Because last time was awful.

So let’s go through it, step by step.

chairmakeover1

I didn’t want to go through the hassle of all the buttons, so I stuffed them with stuffing. A little hot glue on top of the button, and some stuffing. Easy peasy.

chairmakeover2

I bought a $4 drop cloth and placed the seat bottom face down on the fabric.

chairmakeover3

Then I carefully pulled the corners over and stapled the dropcloth material to the bottom. The key here is to pull as tight as you can, and keep everything as neat as possible.

The seat bottom took probably a total of ten minutes, but the top section was a bit more involved.

chairmakeover4

I cut a piece of material the size of the chair back and stapled starting at the top. I found that the best way to keep it tight and even is to start at the top, then staple the bottom, and finish with the sides.

chairmakeover5

I then wrapped the chair back in quilting batting. I did this to make it a bit more comfy, and to conceal the buttons.

chairmakeover6

I then wrapped the seat back in the material, and hotglued the extra material to the backside.

chairmakeover7

I then put the seat back up against the frame, and stapled as closely to the top as possible. This is tricky, and my staple gun was not kind to my hands.

chairmakeover8

I then covered the staples with trim. I make the trim by wrapping the existing trim in the material and hotgluing it. Hot glue for the win.

The new chairs are still not perfect, but they’re much simpler, and I can live with them now. This was only my second time with reupholstery (on the same set of chairs). I still don’t have it down, but I definitely appreciate these chairs a bit more now.

chairafter2

Overall, they just look cleaner, smoother, and more natural.

chairafter

The neutral look will allow them to be moved anywhere around our home and work.

chairafter3

So the moral of this story is: if you don’t like something, change it! And if you still don’t like it, change it again! I can’t say that these are perfect, but they’re working SO MUCH BETTER than before.

Have you ever done something you hated? What did you do? I’d love to hear about it! That’s all for today, friends. Have a fabulous day!