Browsing Category

Tutorials

DIY Projects, Tutorials

Salvaged Wood Headboard DIY

It’s been a few weeks since we updated our bedroom and I am still living in a fairy-dream world because of it. I showed you guys the full result a week or so ago, and you guys have been so sweet about how it turned out. If you didn’t get a chance to check that post out, you can read all about it here. Today what I wanted to do was show you guys with a little more detail the headboard that I made for this space.

When I bought all the new pillows for the bed, I knew something was still missing. Our old headboard was a pre-blog DIY that was imperfect but served us well for the time that it did. I made it back when I was still unsure about the style direction I was heading in with our house, so it just didn’t quite work. And let’s be honest. I still don’t think I know the style I’m headed toward. Live and learn.

I wanted to make something, but I didn’t want to spend any money. Yes, you read that correctly. I wanted to spend zero dollars. Story of my life, right? I knew that I could only justify to Ethan building a new headboard if I could do it for free since I had just built one a year prior. Now that I think about it, I think Ethan has learned not to question my unreasonable antics. The other stipulation for this project was that I had to do it completely by myself. Normally our DIY projects are a team effort (and by that I mean Ethan does the work and I make it pretty). This time, before I knew what I was thinking, I told him that I was going to make this project for free, and I was going to do it completely on my own. Cue “On My Own” from Les Mis as I head to the garage to work on this project.

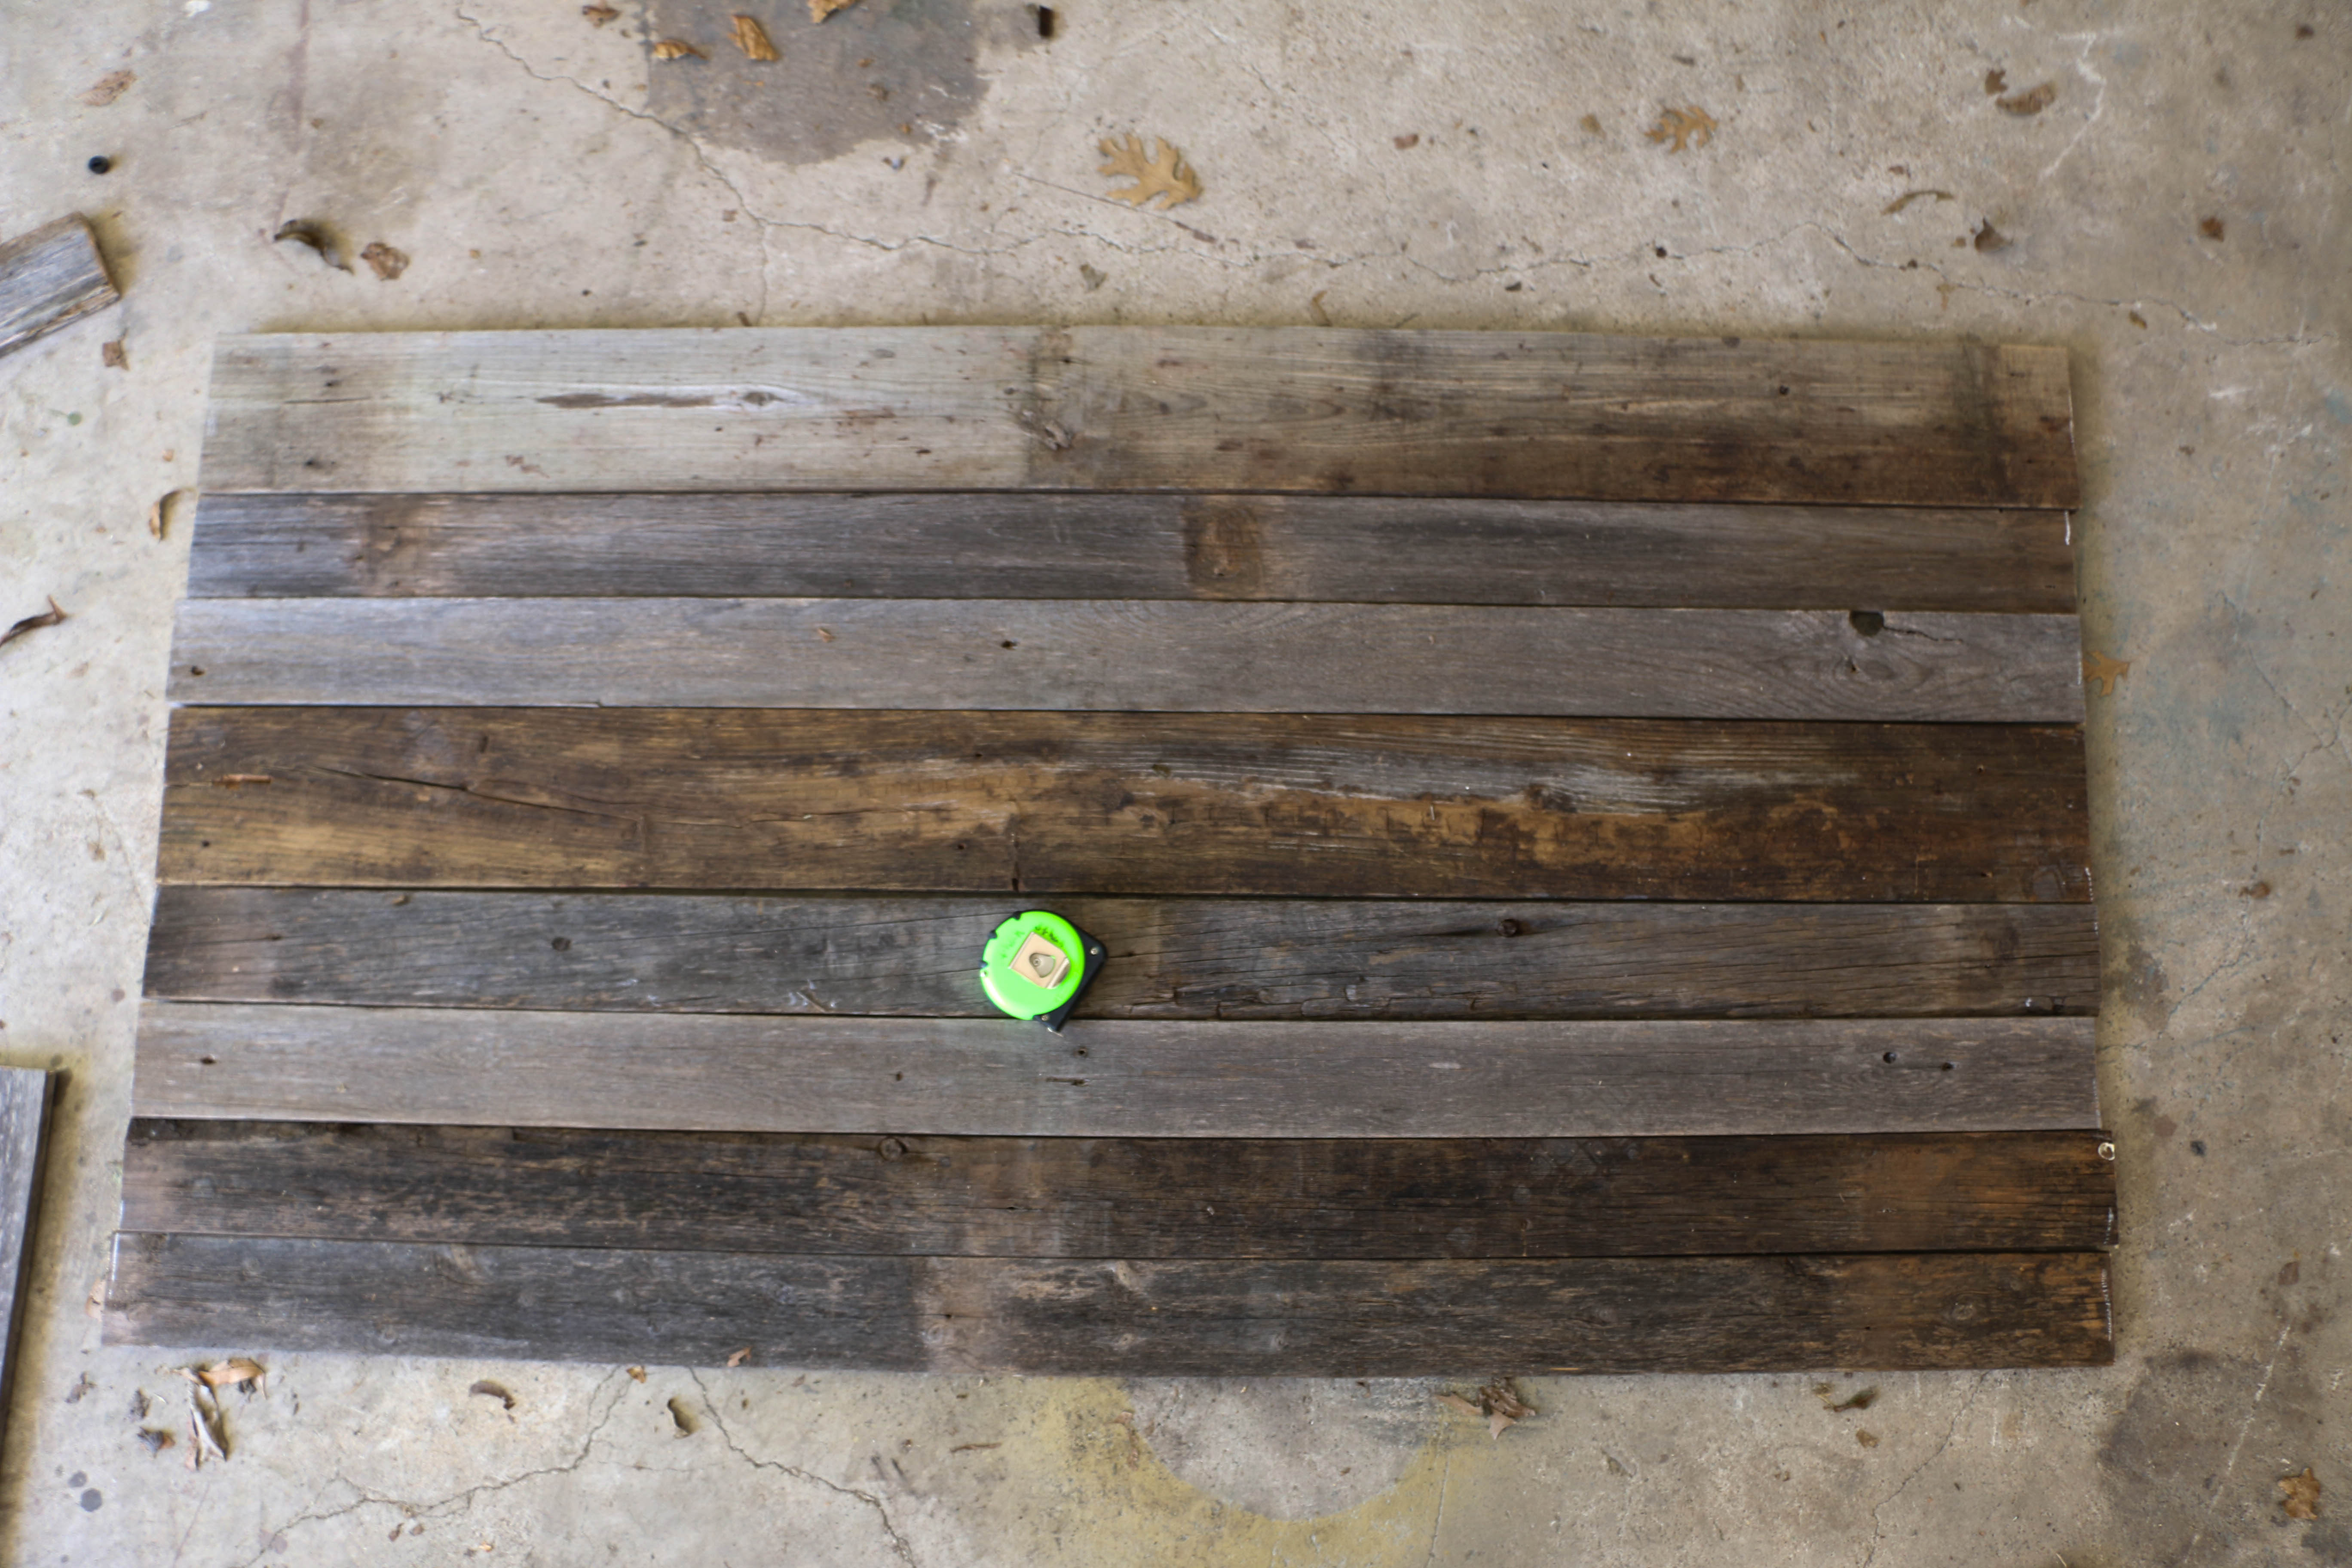
So here’s how it went down. A few months back, our neighbors were replacing a portion of their wood fence. I hoarded rescued some of the pieces and they have been sitting in my garage, safe from harm. I headed to my stash and chose the best looking pieces for the job. I (and when I say I, I do mean me myself and I. All by my lonesome) cut the pieces using a circular saw to 60″. We have a queen size bed, so that was the size we needed. If you were to do something similar, be sure to measure the size of your bed. I did wash these with warm water and soap, and lightly sanded them, just to make sure they were clean. And not going to give me splinters. Because those things are important, I guess.

So I laid out all the pieces on the garage floor to make sure I liked to order of them, since all the pieces were slightly different.

headboarddiy1

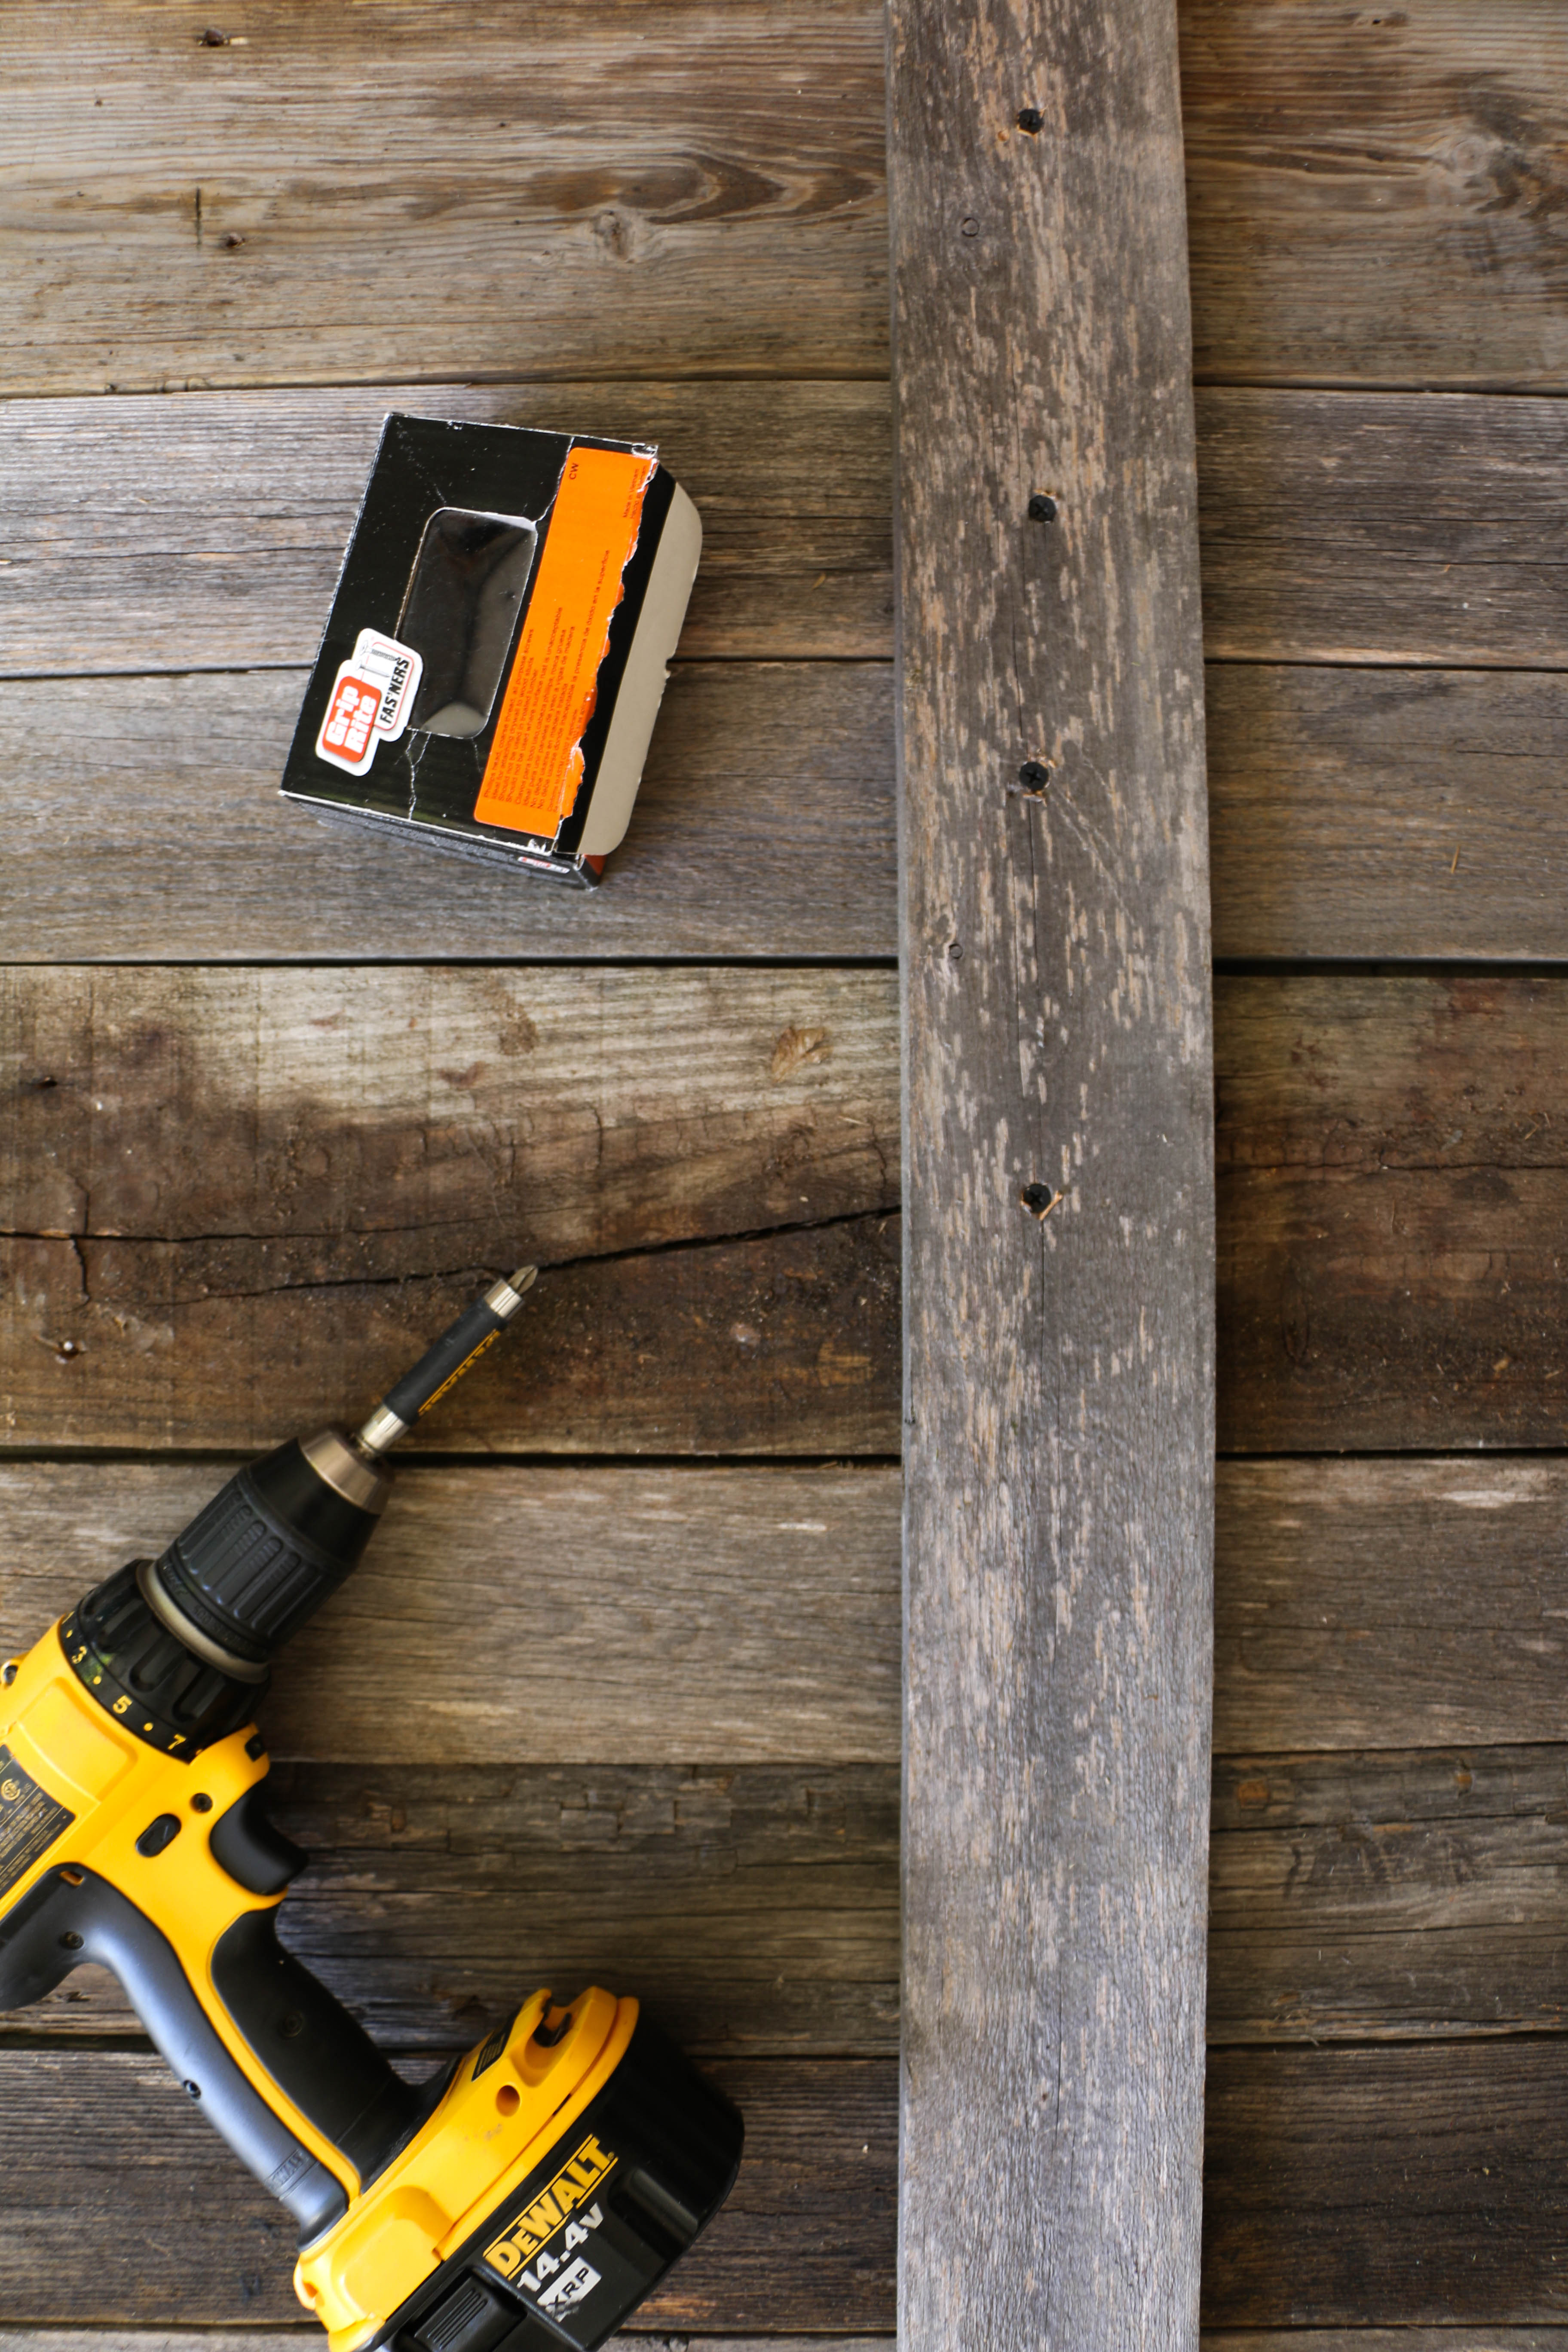
Then I used two cross pieces to screw onto the backside of my headboard. These pieces were vertical, and were 54″ tall. Our old headboard was a bit taller than this, but I always thought it looked kind of weird, so I was very mindful of how tall this one was going to be. I don’t know if there are official rules about how tall a headboard should be, but I think y’all all know that I make up my rules as I go when it comes to home decor. I wish I could show you the pictures of me screwing this together just to show off my brute strength, but alas, I did this one on my own. And I don’t have enough hands to photograph myself building a headboard. You’ll just have to trust me in the fact that I did make this.

headboarddiy2

After I screwed the back pieces together, I turned it around to paint it. It looked like this:

headboarddiy3

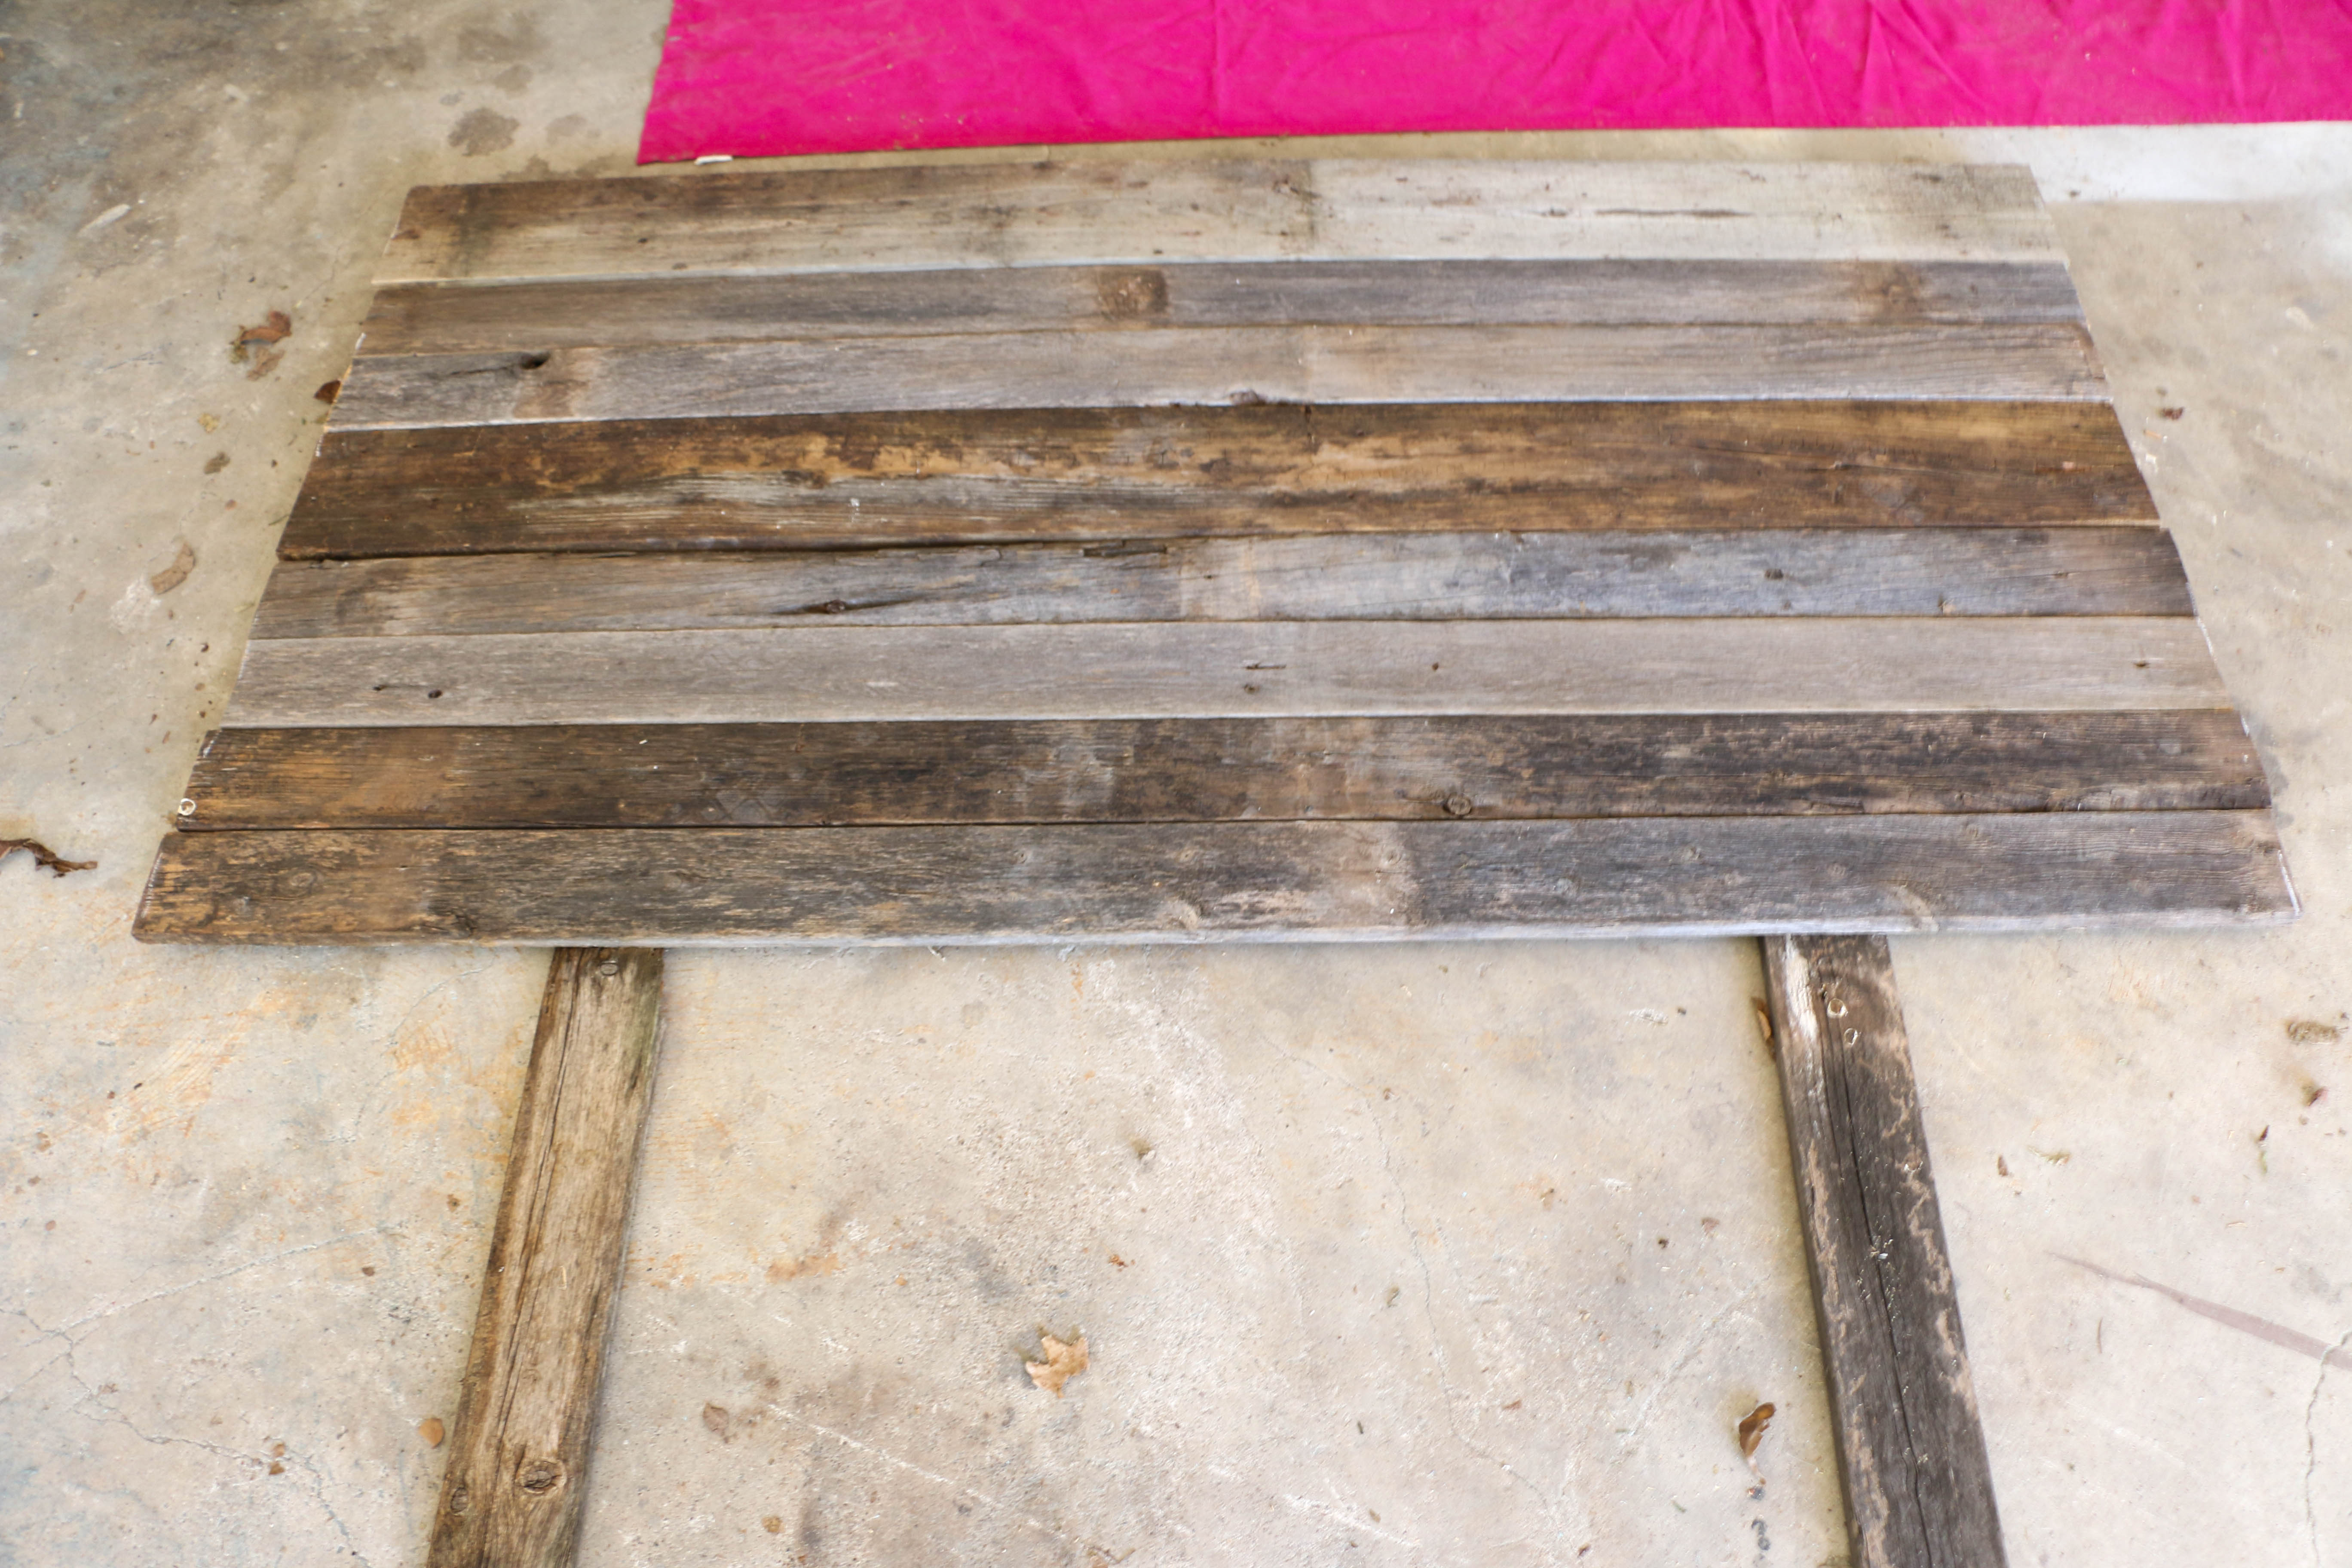
Technically, it didn’t need to be painted, I did like the way it looked like this, I just love lighter colors, so it didn’t really stand a chance. I used my dry-brushing technique, which you can read about here. It took about ten minutes total to paint. Have I mentioned that’s my favorite way to paint things?

headboarddiy4

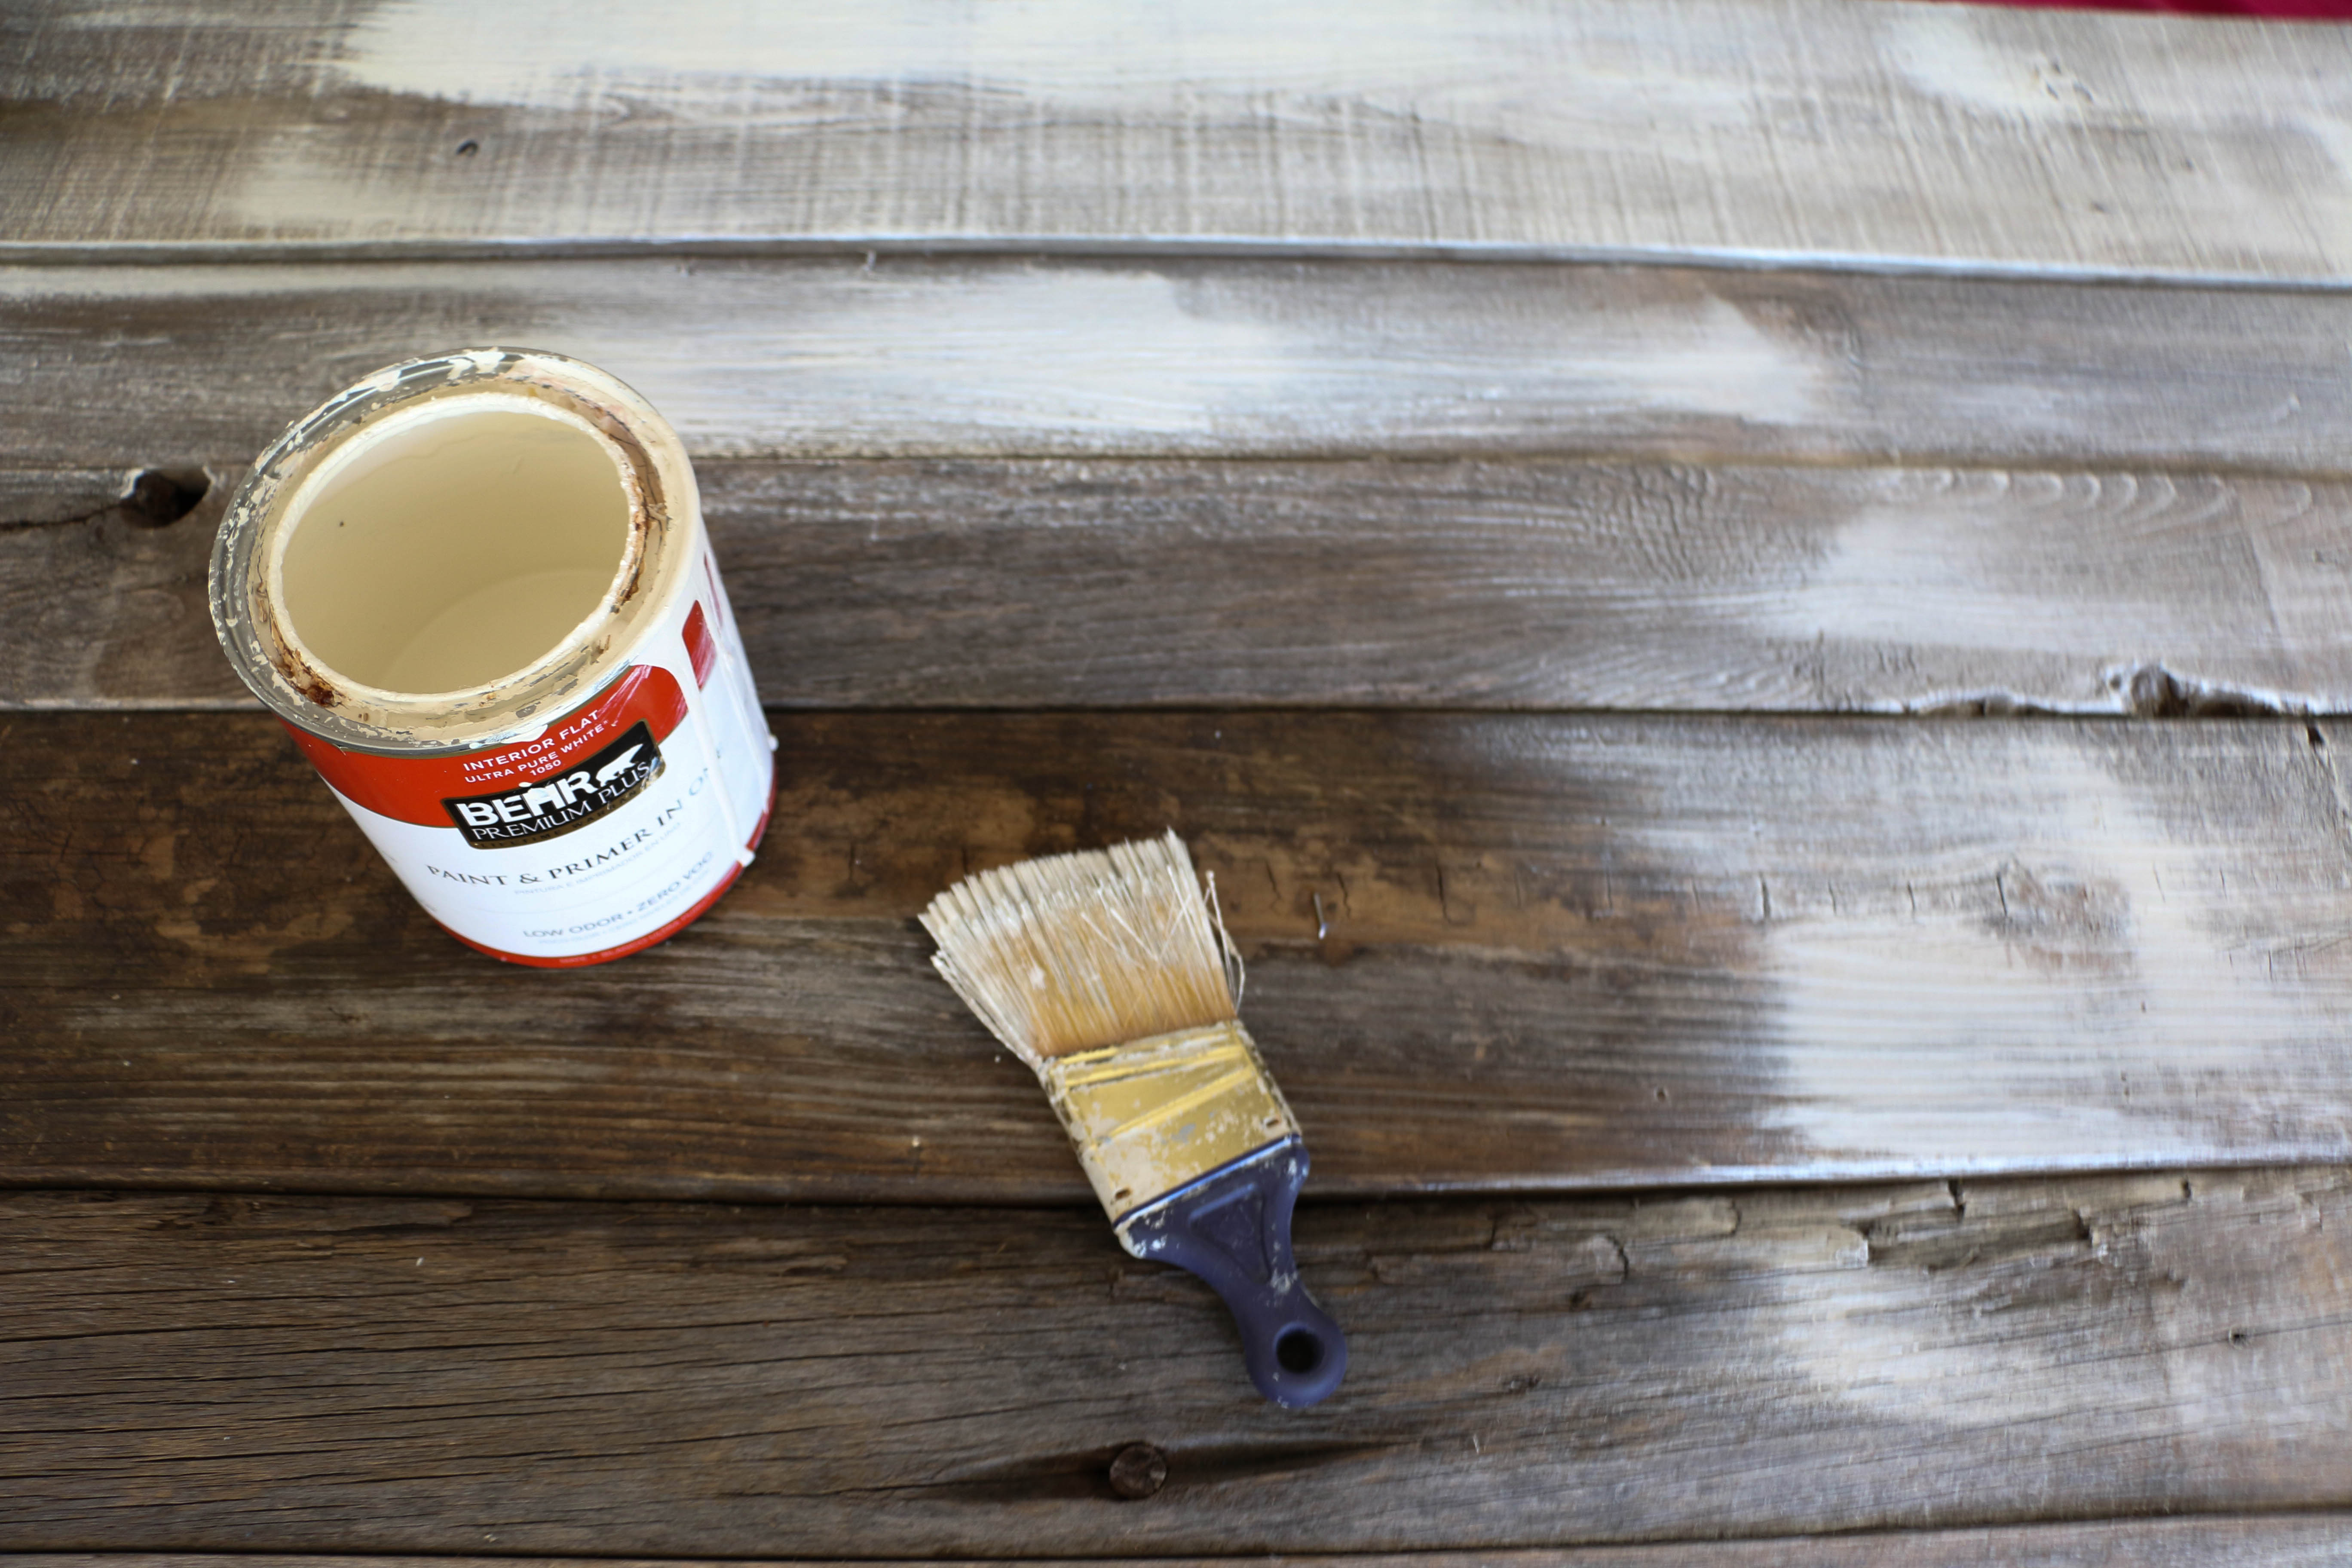
The color is Mourning Dove by Behr, and I use that for tons of projects around the house.

After I let it dry (which didn’t take long with the amount of paint I used), Ethan helped me carry it into the house to put it behind the bed. So I guess he did help. BUT OTHER THAN THAT I did this one on my own, and I am so proud of myself. Picture me pridefully kissing my biceps.

diyheadboard9

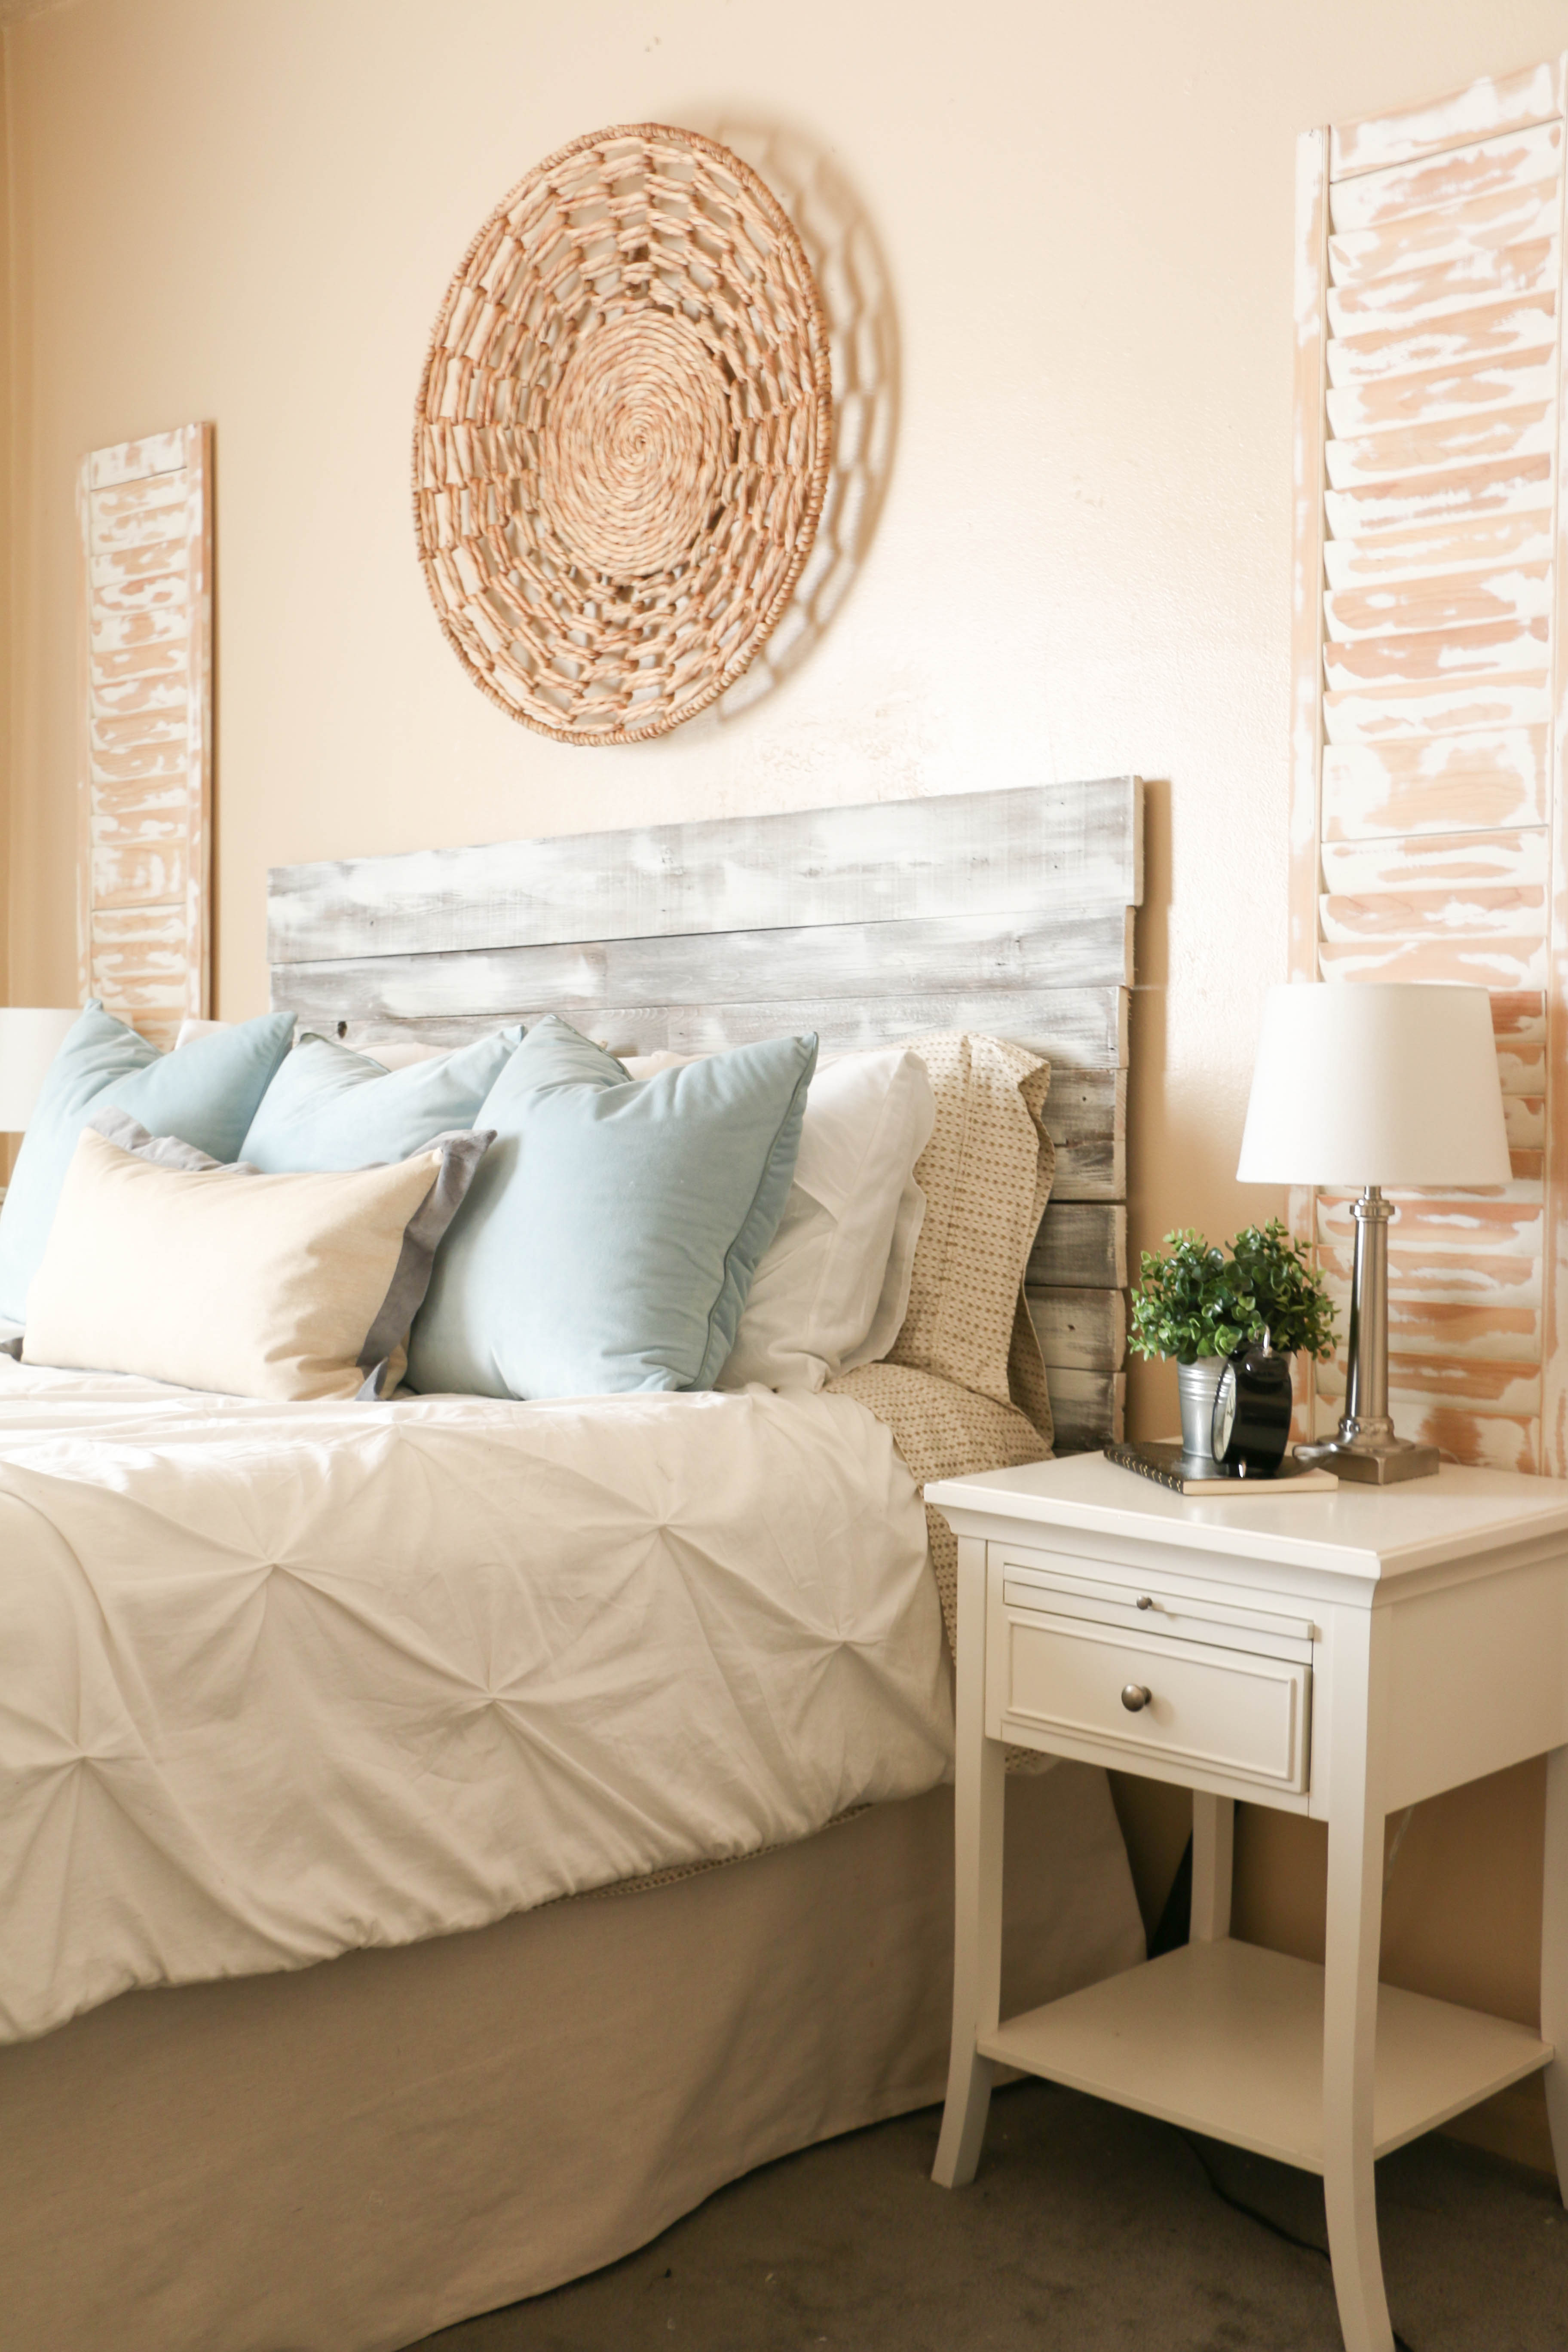
 You can see more after photos in the original reveal post. I cannot tell you guys how much this little project changed the feel of our bedroom. And it was 100% free! This cheap-loving girl is jumping up and down with excitement over this one! I promise you, I am super wimpy, and I did this in an afternoon, so I know you can too!

All the sources for the items you see here are in my original reveal post, which you’re welcome to check out! I’d love to hear what you think about this project in the comments below, or you can find more on my Instagram. That’s all for today, friends! Have a fabulous day!

rusticheadboard

Holidays, Tutorials

DIY Wood Slice Ornament

Hey y’all! Thanks for stopping by! Can you believe Thanksgiving is just around the corner? I’m SO READY for the turkey and mashed potatoes!  Seriously, that’s all I eat on Thanksgiving. I’m a really picky eater, I know. Don’t shun me, but I don’t even like pumpkin pie (even my mom’s). But I am all about turkey and mashed potatoes. This year I’ll be flying up to New York to spend the holiday with my family. It’ll be a super short trip, but I’m excited nonetheless.

Now, my family doesn’t have a tradition of setting up the tree the day after Thanksgiving, but I know that many people do. Growing up, we didn’t set it up until about a week before Christmas. Ethan and I have had our tree up for about two weeks now, so I guess you can say I’ve strayed as far from that tradition as possible. All that to say, I know a lot of y’all put out Christmas decorations Thanksgiving weekend, so I wanted to share another homemade ornament idea I’ve come up with for my home.

If you haven’t checked out my first post on pinecone ornaments, you can read all about that here. I wanted to keep with the primitive, rustic theme I had going on, so I added these wood slices and I am in love with how they turned out. Seriously y’all, this is the easiest DIY yet.

I bought some pre-sliced wood at a flea market for a steal. You could just as easily get a thin log and slice it yourself though. My slices were probably about a half an inch thick. First thing I did was drill a small hole near the top of the slice. The trick is to not drill too close to the top so as not to split it. I accidentally broke a few of them, but I had about twenty to start with, so I was okay with losing a few.

wood ornament1

After I drilled the holes, I strung some ribbon I had through the hole. I found this ribbon at Michael’s on sale. I was originally looking for a cream-based red gingham ribbon, but I found this one and it stuck out to me. I really like the way the plaid has an old-fashioned vibe. So this is the one that ended up in my cart.

wood ornament2

I thought about hand lettering something on each of the slices to complete the look, but ultimately decided against it. The reason why is simply because I thought I might reuse them in the future for something else, and I wanted them to be bare just in case. Also, I figured (since I’m so darn fickle) I might not like them as much next year if they were written on, so didn’t want to do anything I would regret.

So here they are in all their bare wood slice glory:

wood ornament3

The easiest project you ever did see.

Will you be setting up your tree next weekend? If so, why don’t you give this easy project a try? I’d love to see how you use this simple idea in your home.

Have a Happy Thanksgiving friends! And a Happy Decorating! That’s all for today. Have a fabulous day, friends!

<a href=”http://www.bloglovin.com/blog/13855015/?claim=9a8yvxbhj62″>Follow my blog with Bloglovin</a>

Holidays, Tutorials

DIY Pinecone Ornaments

I know it’s still early….but I have begun decorating for Christmas at our house! Last year, we got a real Christmas tree, which I loved having. They smell so good, and they’re so nostalgic I think. The only downside to them is that they don’t come out until early December because they don’t last very long. Which I suppose I can’t be upset about, but I was so impatient this year that we went out and got an artificial tree. I had too many decorating ideas that I couldn’t wait to get started.

So, now that our tree is up, I wanted to share with you a few of the quick projects I did for our tree. If you know me at all, I’m all about finding the cheapest way to do things, and so I created a few different types of ornaments on a shoestring budget. For our tree this year (and all of the decor, really) I wanted to go with a very natural, rustic-y, theme. I had a hard time putting into words exactly what I was going for, even to Ethan. I just kept saying to him, “I want it to look like how the pioneers would decorate a tree if they had one.”

As if that even makes sense.

Anyway, today I’m sharing how I turned regular pinecones  into ornaments for our tree. This is so simple, it’s even kid friendly!

pineconepaint

I painted the edges of several pinecones using some paint I had on hand. The color is Mourning Dove by BEHR. I’ve used it for a lot of projects, and it’s one of my favorite off-white colors. I didn’t worry about painting too neatly, I just kind of quickly brushed on the edges of the pinecones. I wanted to make it look like snow, because, you know, that makes total sense in Texas.

pineconeglue

When that was done, I put a dot of hot glue into the top of the pinecone. I tried to tuck it down inside so that hot glue wasn’t too visible once they were hung on the tree. pineconeornament

I added about a four inch piece of red baker’s twine in a loop to the hot glue. I bought the twine from the Target dollar spot. Can we just give a quick shout out for the Target dollar spot?! I swear, that place is like magic. Anyway, I chose red so it would have a little Christmas-y pop. And when it was done, it looked something like this:

pineconeornament2

This is by no means an original idea, I’m sure it’s been around for ages, but it’s something I whipped up super fast, and I wanted to share with y’all. I don’t have kids, but this could easily be done with little ones…it’s THAT easy. Plus (in my personal opinion), super cute. I’ll be sharing a two other ornament ideas soon, so stay tuned!

I hope you give this one a try! I know I’ll be enjoying them this season.  Well, that’s all for today friends, have a fabulous day!

DIY Pinecone