Browsing Category

Tutorials

Tutorials

How to Restore Old Doors that Have been Painted

Today’s post has been a long time coming. Because this project is not for the faint of heart. If you live in an old house, chances are, you have old doors. And, if you’re like me, many of those doors have been painted over time and time again. Now, maybe you’re luckier than me and a paintbrush has never touched your wood doors. But about half the doors in our house have been painted. With multiple layers of paint.

We plan on restoring all of them eventually, but hadn’t gotten around to any of it. But, since we’ve been working on the nursery, I figured the best doors to start with would be the two painted doors in there. Now, I’ve stripped a lot of furniture in the last several years, and restored a lot of tables and dressers, but I’d actually never done a door before. So consider this my totally non-professional guide on how to restore doors that have been painted.

Step One

Remove your door from the room that it’s in, and take it somewhere you’ll have room to work. Remove all the hinges and hardware.

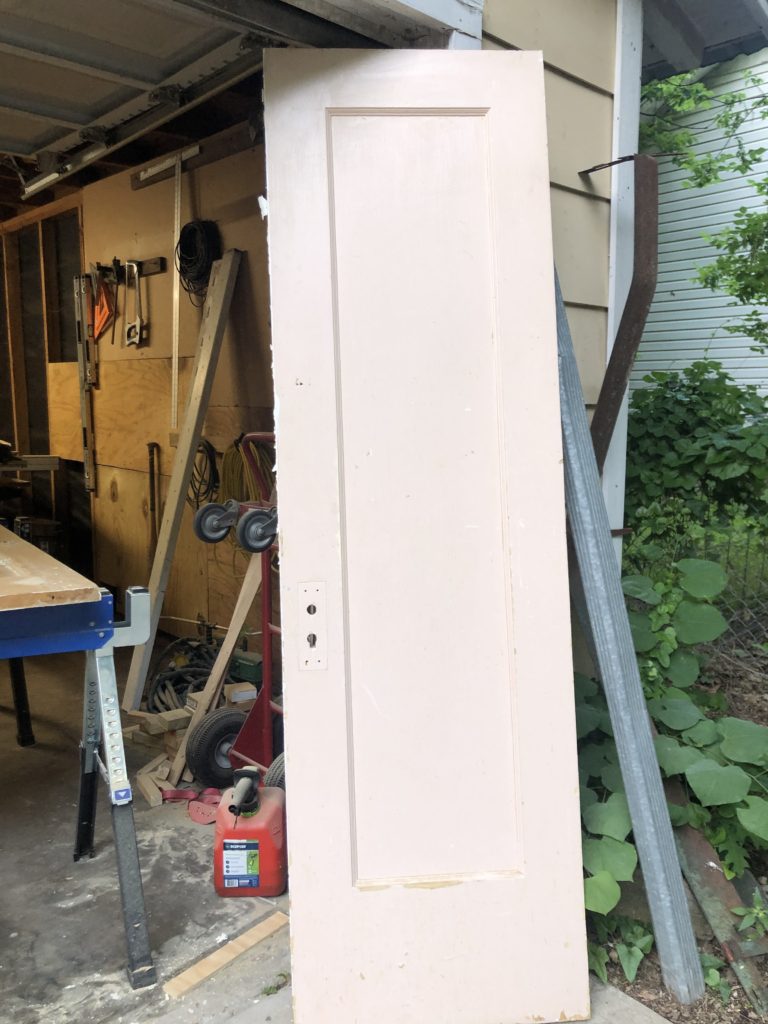
Because I’m such a professional blogger I forgot to take a photo of the door while it was still in the room, but here it is outside of my garage before I got started. You can see in the corner of this photo the other door that I was already working one. I did this same process to both doors.

Step Two

If your house was built before 1978, you may have some lead paint. I use these tests to check for lead. Luckily for me, neither of the doors I was working on had lead paint, so that meant I could continue. If your paint tests positive for lead, you may want to consider your options. I would not recommend the following method. If there are multiple layers of paint, the most likely culprit will be the oldest paint, or the bottom layer, so be sure to check that.

Step Three

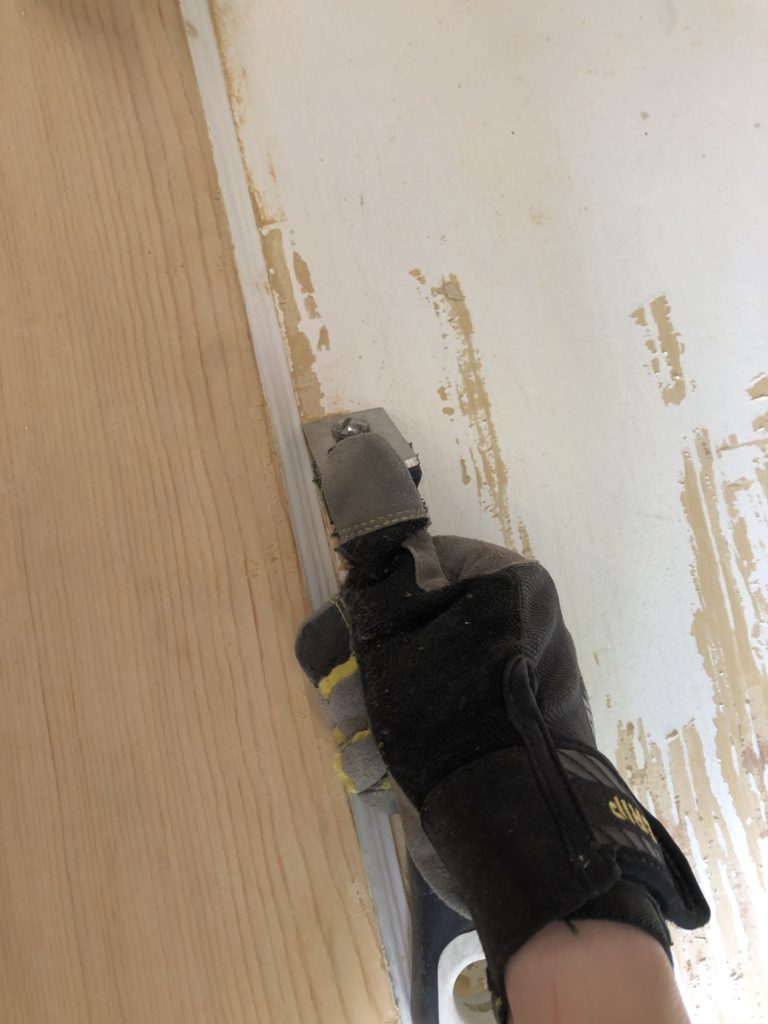
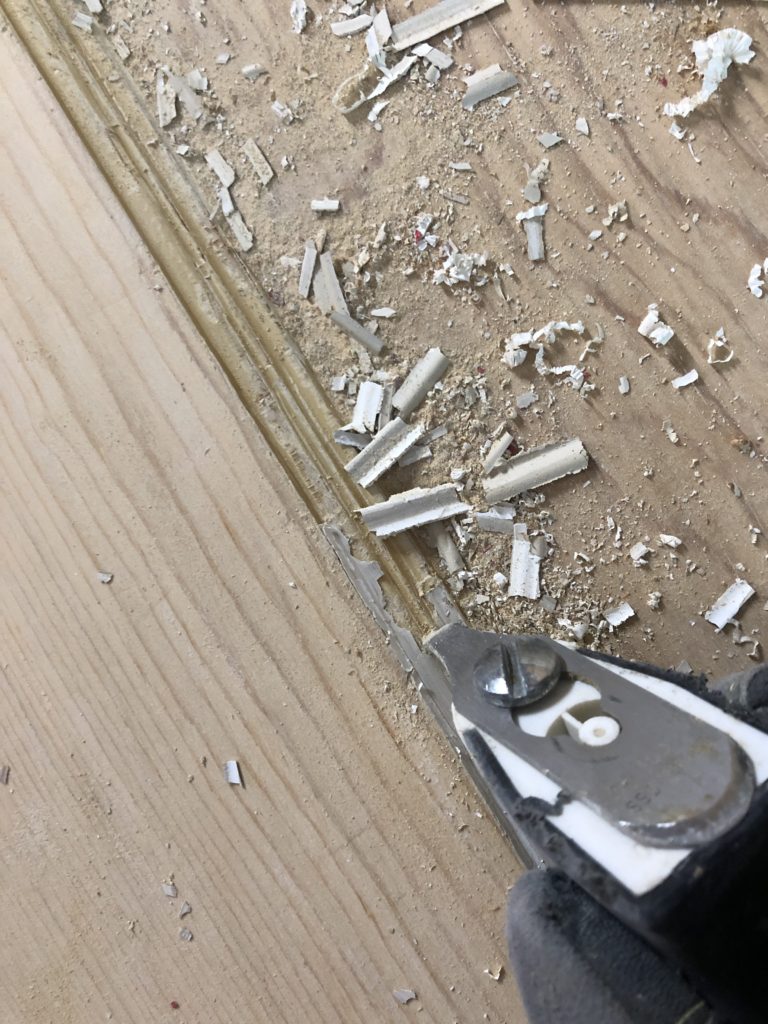
I found (after some trial and error with paint stripper) that the quickest way to go about removing paint quickly is to scrape it while it’s dry. I tried stripper, which worked, but it seemed to only take off a layer at a time. I found that this set worked well getting off lots of paint at once. The different shaped blades allow you to get into different cracks and crevices along the different surfaces of the door. I didn’t worry about getting 100% of the paint scraped off, but in general I got as much as I could.

Step Four

Sand. Sand like the world is ending. I used my orbital sander, and sanded first with a course 60 grit sandpaper to get the last of the paint off. On the edges of the panels where the orbit sander couldn’t reach, I sanded by hand. Once all the paint was off, I repeated the sanding with a 120 grit sandpaper and a 220 grit sandpaper.

Step Five

I used steel wool and mineral spirits to scrub the door one last time after all the scraping and sanding. Now, keep in mind, these steps took me like two weeks. I work in limited time shifts during naps and after toddler bedtime, so a normal schedule might allow this to get done in a matter of days, but I was averaging two weeks per door.

Step Six

This would be optional based on your wood and your preferences. I had one door in the room that was untouched, and I wanted the three doors I was working on to be all about the same color. So I used the stain we used on our floors throughout the house (Minwax Early American) and it ended up being a pretty close match to the door that was already in the room. I prefer to use a rag to apply (with rubber gloves on!), rather than brushing and wiping the excess. I just apply with the rag and rub it in immediately. If you like the color of your wood after you strip it all down though, you could totally skip this step.

Step Seven

The last thing I did was put a coat of Polyurethane on them. I like to buy the cheap paint brushes to apply the poly, and then just throw them out when I’m done. I ended up doing just one coat of poly (again, trying to match an existing finish!). I let the first side dry for 24 hours, then flipped the door around and did the other side. I let it sit for another 24 hours before moving them back into the room.

Step Eight

Bring your doors back into place, and re-install the hinges and doorknobs. And for goodness sake enjoy the fruit of your labor!

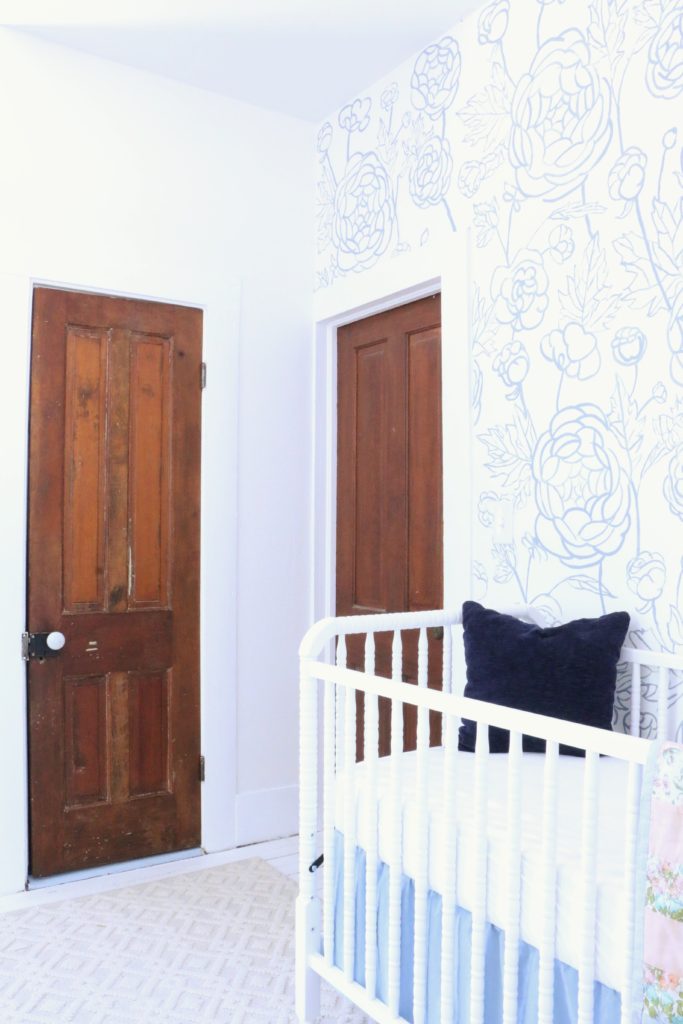
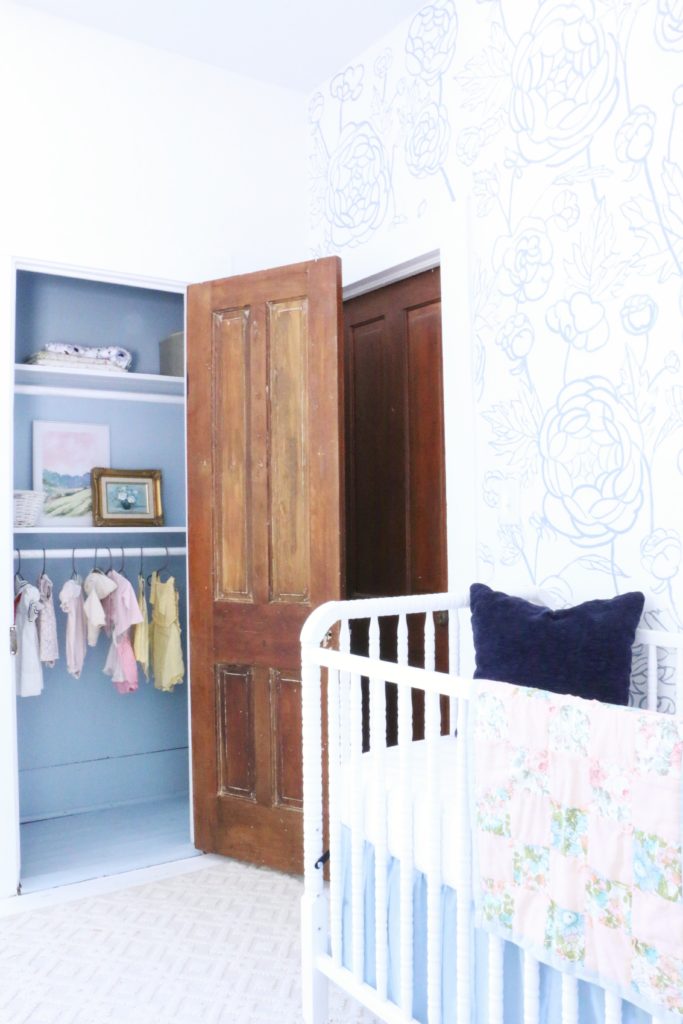
The door on the right is the entrance to the room, and the door on the left is one of the ones that were painted. There are a couple of white spots that you can see which are actually wood filler. They aren’t perfect…they’re 125 year old doors that had six coats of paint on them! But for goodness sake I think they turned out pretty good.

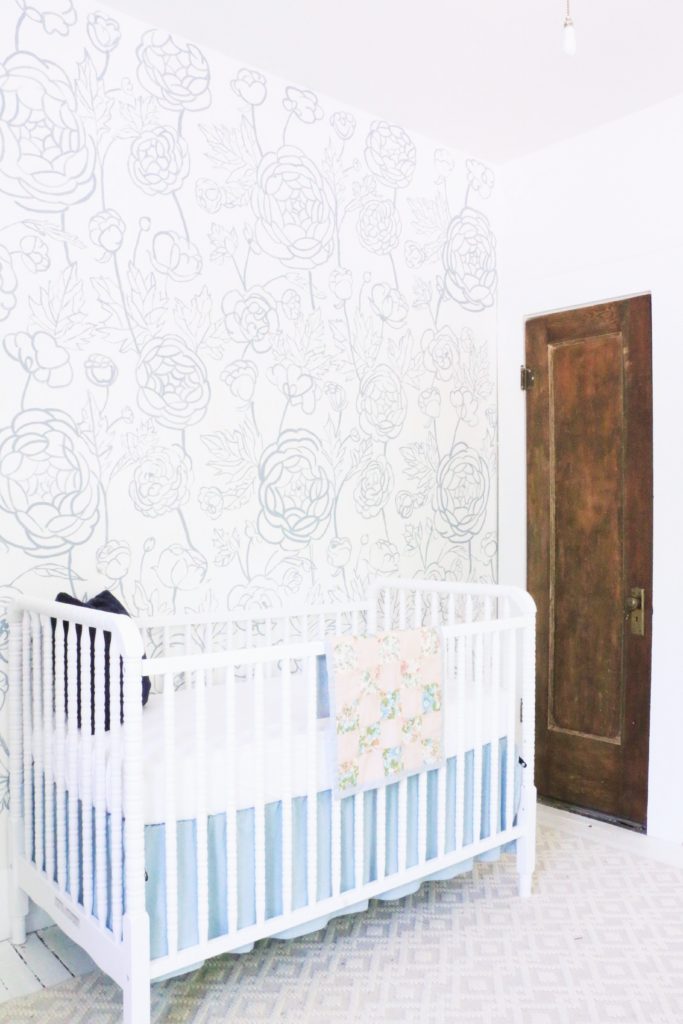
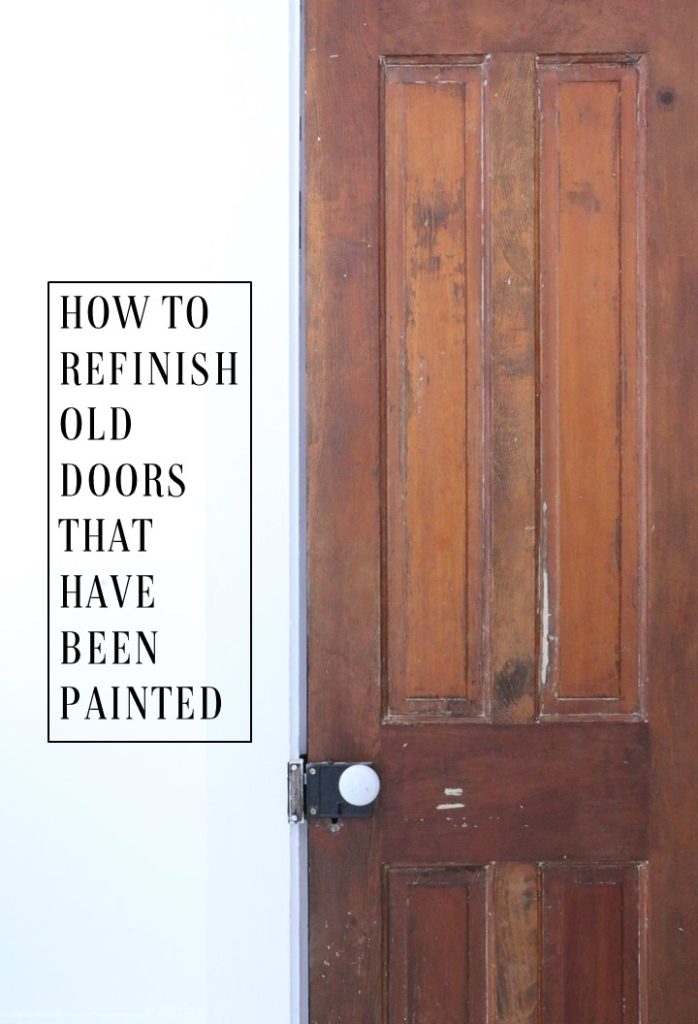
This door on the other side leads to the bathroom, and is the one from the first picture. Let me show you again:

Can you even believe that wood grain was hiding under all those layers of paint?!

This project was a doozy, I’m not gonna lie. It was weeks worth of work, sweating it out in my hot garage in a mask and protective gear. It wasn’t a fun DIY. But, they are back to the way they were intended to be in this house, and I think that’s what matters. And I’m stinking proud of the work that went into these. So, do you have any doors that need refinishing? Are you brave enough to take it on? (I totally think you can!) That’s all for today, friends! Have a fabulous day!

DIY Projects, Home Decor, Tutorials

Chalk Paint All the Things!

Hi there! Hope your day is going well! I’m here with a super easy project today that can’t even really be considered a project. It’s something that is seemingly obvious, but I had never thought to do, so maybe you haven’t either. I don’t know. Anyway, y’all know I love chalk paint. I use it all the time on my projects for both my house and my pop-up shows.

I have used it on a variety of items, but never lamps. I had these lamps that were out of commission from our bedroom. You can see the corner of it here in this photo. They were from our wedding registry, when I didn’t know what I liked or what I was doing. So they didn’t really mesh with my style anymore, now that I feel like I have an established theme in our home.

So while I replaced these lamps, they were still perfectly good lamps, and I wanted to see if there was something I could do to make them fit into my style a bit more. So, I used my trusty old chalk paint and went to work! Like I said, this isn’t really a tutorial or anything, because it’s seriously the world’s easiest DIY. I just slapped some paint on it and called it a day.

I used my own homemade chalk paint, so I don’t have an exact color match to show you, but I used a white, and then added some gray on top to give it a little more dimension.

I think it gives the lamp just the right touch to take away that builder-grade base we were working with.

It makes it a little more subtle and farmhouse-y. I moved one into the living room, and the other went over to my booth at Farmhouse in Downtown Waxahachie, TX. I should have tried this a long time ago; I’ve spent so long wanting to replace them that I missed a perfectly good opportunity to relove them! Waste not, want not, right?

So in case you were wondering, chalk paint works on all kinds of things! Don’t be afraid to slap a coat on to something that needs a little love. It’s not just for furniture!

Anyway. That’s pretty much it. Have you ever chalk painted anything in particular? How did it go? I’d love to hear about it in the comments below. Well, that’s all for today, friends. Have a fabulous day!

DIY Projects, Tutorials

What I’ve Learned Finishing Furniture

Hello all! I hope your week is off to a great start! I’ve been busy busy busy with school starting a few weeks back, but now I’m ready to get into the routine of school being in full swing and I’m ready to start thinking fall!

I’ve been out in my garage working away on tons of projects out in the garage, and if you follow along on Instagram, you might have seen the early stages of this dresser I’m about to show y’all on my IG Story. This dresser turned out even cuter than I thought it might, and so I wanted to share with you guys some of the process and tips I use, now that I have more than a project or two under my belt.

graydresser1

Okay, so this is how this little guy turned out. So cute, right? I didn’t take a picture when I first started, because I’m so forgetful when it comes to that kind of stuff, but it was dark green. Like 90’s dark green. Gross.

The first thing I did was strip all the paint off the dresser. Using a good paint stripper is not for the faint of heart, since it smells, and I burnt my arms a couple of times, but it is essential in removing old paint more quickly.

What I couldn’t take off with the paint stripper, I took my sander to. This took a while, but prepping the entire thing helps the end result. Once I finished sanding, I wiped the entire thing down with Mineral Spirits to clean it off.

graydresser4

See those cute little scallops on the bottom? Adorable. Anyway, once it was all clean, I primed the entire thing. Even though chalk paint claims to be prep-free, I have found that it saves paint to prime first, as well as makes it last longer. After I primed, I sanded everything down with a 220 grit sandpaper. This is super fine, and eliminates brush strokes. I do it super lightly and super quickly to make sure I don’t sand off the primer completely.

graydresser5

I painted the frame with Annie Sloan Old White, and the drawers with a local handmade chalk paint (sorry I don’t have the color for it). I lightly sanded everything down again, and on the drawers, I sanded a bit longer to expose some of the primer. That happened kind of accidentally, but I ended up loving it!

graydresser2

Here’s a closeup of how the drawers turned out. I love them! After I finished painting, I gave everything a coat of Annie Sloan Clear Wax. This sweet little dresser was a super fun project, and it turned out even better than I imagined.

graydresser3

Now, this piece won’t be staying with me. I’ve been working hard gathering materials and working on projects like this one because I am going to be a vendor at the upcoming Vintage Market Days! I love this event so much, and this will be my first time as a vendor! Here’s a link directly to the Facebook event. It’s in Waxahachie, which is just south of Dallas. If you’re going to be in the Dallas – Fort Worth area that weekend, you’ll have to stop by. This event is going to be amazing, and if you’re in the area, I would love to meet you! This dresser and many others will be headed to my booth, and I cannot wait to show y’all more!

That’s all for today friends! Have a fabulous day!