Browsing Category

Organization

Organization

Organizing Baby Clothes (and a free download!)

Do you know what I was most unprepared for with having my first child? It wasn’t a lack of “stuff,” or even a certain thing my kid did that I couldn’t handle. Nope, it was the alarming rate at which babies grow out of clothes and then having no where to put those clothes. I’m going to show you my secret shame today, in hopes that it might make you feel better. At least that’s the hope!

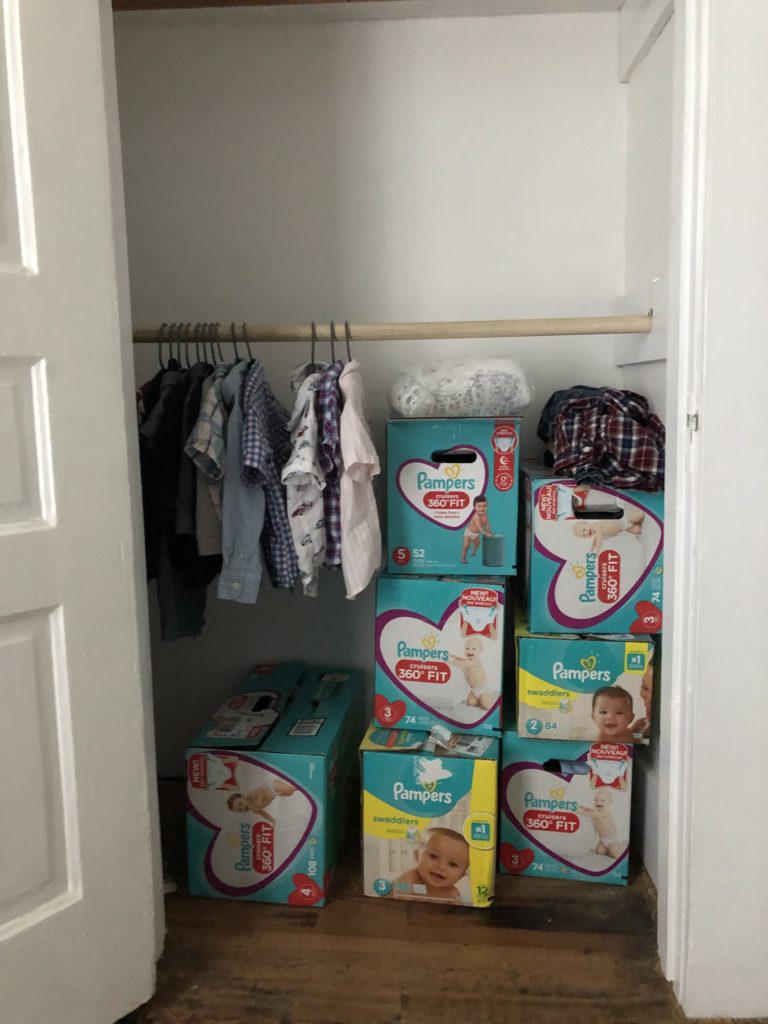
I had absolutely no game plan for clothing storage with my first. And now, almost two years later, this is what his closet looks like:

None of those boxes have diapers in them. Every time he would outgrow a size, I would just throw all the clothes into a diaper box and stash it in the closet. Now that he’s going on two, there are a lot of boxes! It’s rather unsightly, and now that I have another child’s clothes to deal with, I am realizing I need to get a handle on this. Like, immediately!

So, I’ve come up with a plan to take care of this situation. And I’m going to get to it! Nope, I haven’t done it yet, but I did create some labels for new storage bins, and that’s half the battle, right? Right? Just agree with me.

I haven’t even started yet (I’m waiting on my new storage boxes to arrive), but these labels are getting me excited about this pesky little project. I’m going to just print them and laminate them before attaching them to my storage bins. Easy! If you want to snag some of your own, click here to download. I made a set for boys and girls!

I’ll keep you updated once I get moving with this project. In the meantime, happy organizing! That’s all for today, friends! Have a fabulous day!

Organization

My Weekly Cleaning Schedule (and a Free Printable!)

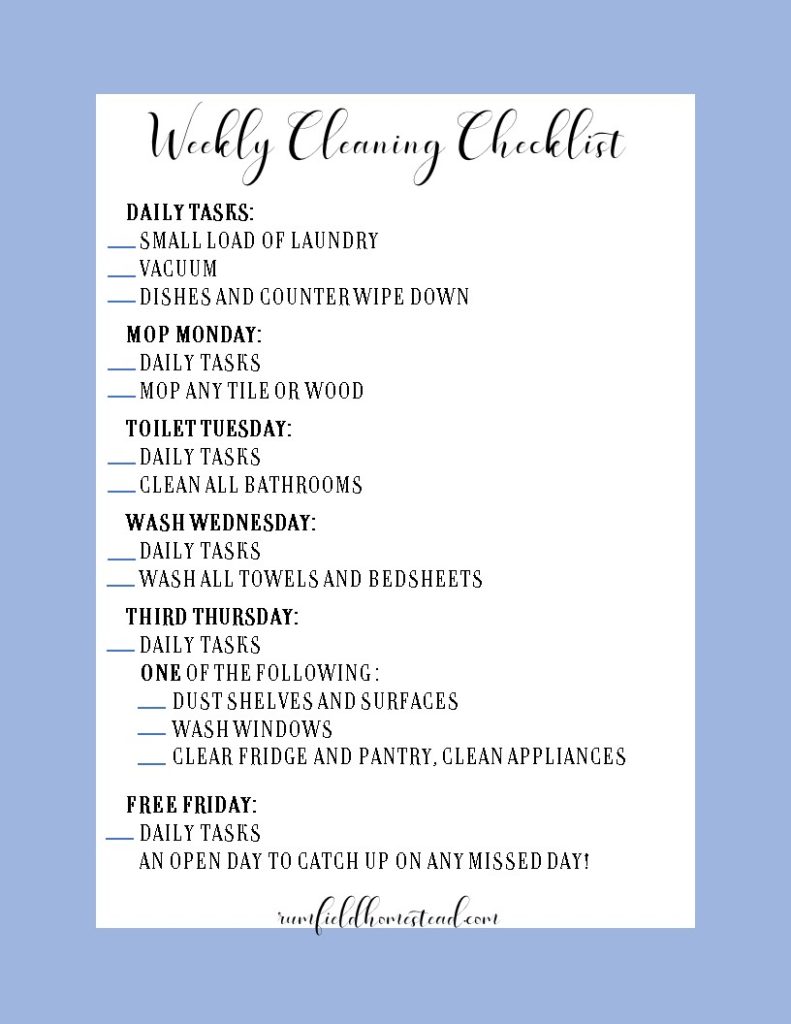
I shared a couple of weeks ago over on my Instagram how I have silly names for all the chores I do each day of the week, and several people were interested in it, so I decided to share!

I have always been a pretty “clean and organized person,” but I never really stuck to any sort of routine, I would just do things as needed. But then I had a child and when I went back to work after maternity leave, I was feeling very overwhelmed about keeping up with my house and so I knew it was time to start a real routine. So even though it’s summer, and I’m technically home right now, don’t think that this isn’t for you if you are working outside of the home full time. This is about getting a little bit done each day so that you never have to do a lot at once.

First, there are a couple things I do every single day (or weekday). A load of clothes is one of them. I know that may seem counter-productive to some, but trust me on this. I never spend more than 5-10 minutes folding and putting away laundry. I start a load as soon as I’m dressed in the morning, flip it over, and fold it while I’m waiting for my son to fall asleep after I put him down for his nap. During the school year, I start it on my way to work, Ethan flips it on his way to work, and when I get home, I quickly fold and put away. Because it’s only one day’s worth of clothes, it’s never overwhelming. (Also, our washer has an auto sensing fill, so it’s not using excessive water. We haven’t noticed any difference in our water billing since I used to only do clothes once a week or so.)

I also vacuum every day. I realize most people don’t need this, I just have a hairy dog and a crumb monster child, so it works for me. If you don’t need a daily vacuum, just consider that a quick kitchen floor sweep. I usually do this in the evenings after my son goes to bed.

The last thing I do every day is dishes. We actually don’t have a dishwasher (pre-renovated kitchen problems), so I wash by hand at the end of the day, let them dry on the counter overnight, and put them away first thing in the morning. I know this sounds like a lot. I promise it’s not.

Then each day of the week, I do one chore or task that needs to be done on a regular basis but not every day. I came up with names because I’m nerdy like that, but it helps me remember! On Mondays I mop, hence Mop Monday. I mop all the hard surface floors in my house. on Toilet Tuesday I clean my bathrooms (we have two). On Wash Wednesday in addition to my load of clothes, I also run a separate load of sheets, and one of towels. On Third Thursday, I rotate through different things that don’t need to get done every week, but should still be getting done somewhat regularly. One week I’ll dust my flat surfaces and shelves, the next week I’ll do windows (again, dog and toddler), and the week after that I’ll do my kitchen. I’ll throw away anything in the pantry or fridge that needs to go, as well as clean the outside of my appliances. On Free Friday I just catch up on anything that I may have missed through the week. Inevitably there will be something that didn’t get done, so I give myself a buffer. And on the weekends, I don’t do anything but the dishes and vacumming. I keep the weekend open for bigger projects around the house.

And that’s it! I spend about 30 minutes each day keeping up with my house, and it keeps me on track so I don’t wake up one day to a bathroom that hasn’t been cleaned in a month. I never have to worry about doing a huge cleaning day, or spending all my weekend working on housework. Although our house is in a perpetual state of disarray because of projects going on at any given time, the general cleanliness is usually up to par.

If you’re reading this in the days that it was first written, join me on Instagram, as I’ll be walking through each day on my stories. You can do it with me! You can either screenshot the photo above if you are wanting to save it on your phone, or if you’re a paper kind of person, you can click the link below to download and print your own copy. Check it off each day as you go! I can’t wait to get cleaning together!

Click here to download the printable cleaning schedule!

Well, that’s all for today, friends. Have a fabulous day!

Organization

Simplify All the Things!

Hello, hello! I’m so glad you’re here! Can you believe it’s already a new year? I’ve been pretty quiet around here for a while, but I think you’ll be hearing from me a bit more from now on… I have some great stuff planned!

So anyway…as I type this up, it’s the end of the first week of the year. I have been off work this week, which is always great, and it’s motivated me to get a bunch of things done around the house. I always like to take this time to reset. I’m known to purge all kinds of things and organize like crazy right after new years. Each year, I do a little more or do something a little different, in hopes that eventually my home will be perfectly organized. It may take me ten years, but I’m getting there, right?

On New Year’s Eve, I picked up A Simplified Life by Emily Ley. First of all, the book cover is my style to a T. Of course I’m not one to judge a book by it’s cover, but the cover was speaking to me! So the premise is, get rid of all the excess in multiple areas of your life and live simpler. Sounds good, right? Y’all. This book has got me so motivated to clean, simplify, and get rid of all kinds of things. I have set out to purge my entire house of stuff, and even though I’ve only just started, it feels amazing!

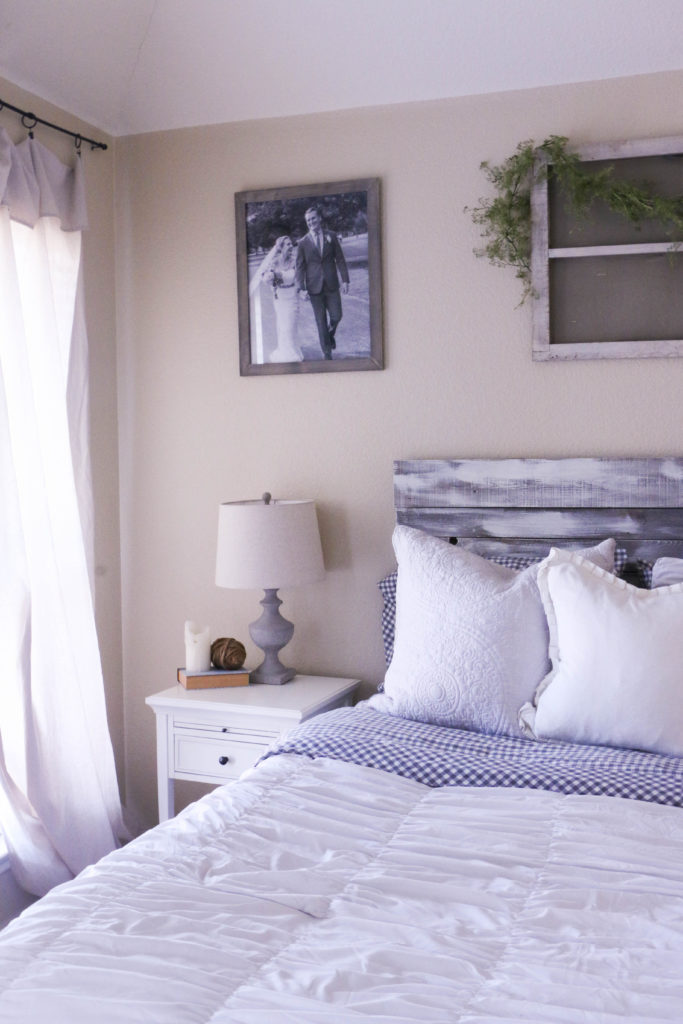
I started in the bedroom, just cleaning trash and getting rid of all kinds of things. I got a new set of sheets (totally not recommended by the book, but just so happened to purchase at the same time that I was reading) so things feel fresh and clean, and then I cleared my nightstand to have more room for a book, or my phone, etc. It looks bare, but also so clear, like there’s room to breathe.

That’s my overall goal for my home this year. Less cluttered, more room to breathe. My decorating style can lean toward the cluttery side, even though things are just as I planned them to be, I know it can look busy. I want to be more intentional about creating spaces that aren’t as busy looking. If nothing else, it’ll give me less dusting to do!  Last year (or was it two years ago? yeesh.), I read this book, The Life Changing Magic of Tidying Up by Marie Kondo. Also a great read if you’re looking to get organized this time of year.

That’s all for today, friends, have a fabulous day!

*This post may contain affiliate links, but as always, all opinions are my own.


Home Decor, Organization

How to Make Your Guest Room Guest Ready

Hey y’all! Don’t mind me over here just eating Hershey’s Kisses and listening to Johnny Cash records because #summer. Seriously someday I’m going to have responsibilities in the summertime like children, or a job that doesn’t have the summer off, but for now I’m going to soak up my precious freedom to do nothing!

This weekend my mom and my sister are flying in from New York to spend a week with us, and I’m super excited! I’ve been getting the guest room cleaned out because let’s be honest here: it’s the most neglected room in the house and we all know it. Our guestroom is super weird. We live in an old southern house, and apparently back in the day it was custom to have two front doors to a house. One for the family to enter, and one for guests to enter. The guest entry would lead into a nicer parlor than the family entrance. All that to say, we have two front doors to our weird little rental, and one of them leads directly into the guest room. It’s sealed, but it’s still weirdly there. It’s also the biggest room in our house, bigger even than our bedroom. Anyway, it’s usually filled with loads of furniture and drop cloths and paint until we have overnight guests and I’m forced to clean it out. Like now.

So that’s what I’ve been doing the past few days, and so I thought it might be a good idea to share some tips on how to make that poor neglected room a little more comfortable for visiting guests. So here’s a few things you might want to consider next time you have people staying.

guestroom

One. The most obvious thing: clean the room. Make sure the sheets are freshly washed, the floors are cleaned and the dust bunnies aren’t too big. Unless you intentionally use it for storage, check under the bed and in the closets. Make sure there’s no trash or random items that don’t belong.

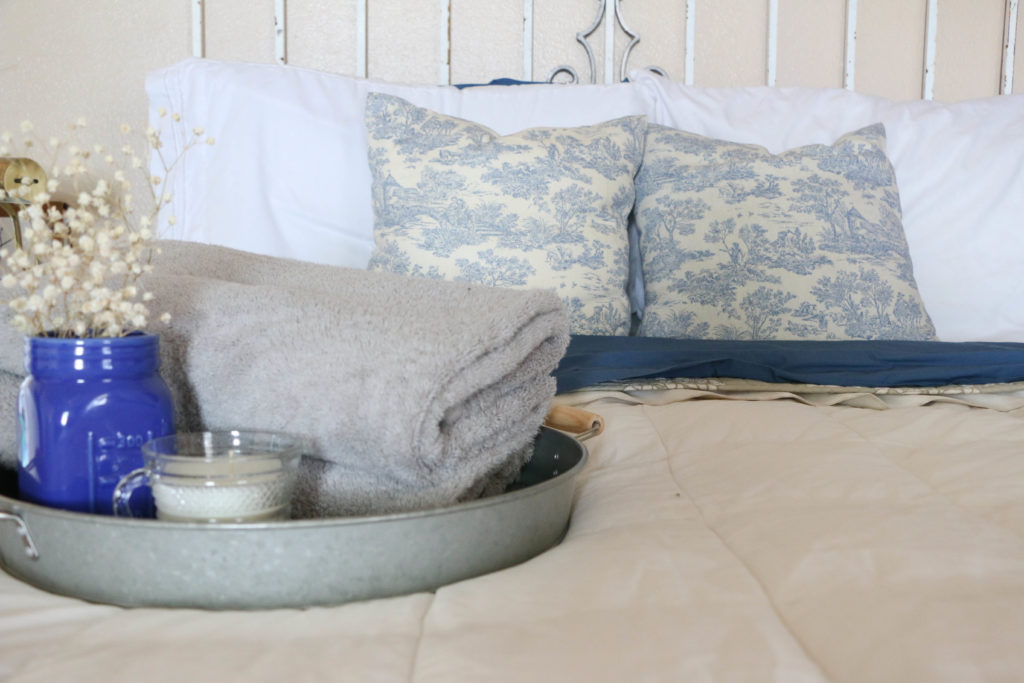
Two. Lay out towels for your guests in the guest room, even if you don’t have an attached guest bath. I try to think about how I feel when I stay overnight at other people’s house, and sometimes you don’t know where fresh towels are, or which ones you’re supposed to use. Make this easier for your guests by simply placing a few on the bed, or on the bathroom counter if your guest bath is attached.

guestroom2

Three. Post the wifi password somewhere. I have seen some really cute printables online that are for posting the wifi password. You can make your own, write it on a chalkboard, or find one online and print and frame it yourself. This way your guests don’t have to ask, and it’s just another thing you can do to make them feel at home.

Four. Do something about the smell. No, I’m not saying my house smells, nor yours. But have you ever noticed that every house you go into has a slightly different scent? Not even a bad one, just individual to the people that live there. It’s more noticeable the first time you walk into someone’s home, but if it’s your own home, you probably don’t even notice. Place a yummy scented candle or fresh flowers in the room to give it a pleasant smell. I’ll be burning one of my own homemade vanilla candles when my mom and sister arrive, but any candle or flower will do. If you’re really feeling festive, do both!

guestroom1

Five. Keep extra blankets and a fan available. Everyone has different sleep preferences when it comes to temperature, so have you’re guests covered either way. Make sure they’re comfortable whether it’s hot or cold at night.

Six. And this is just above and beyond. (And mom, if you’re reading this, don’t be expecting this one, since, you know, you’re my mom, not the president.) Have a tray of bottled water or drinks, and a bowl of candies. Bonus point if you have some local goodies for out of towners. Nothing better for your guests than to have something to drink or snack on at night without having to tiptoe through an unfamiliar house in the dark looking for the kitchen.

Well, that’s about it. I’ve got to get back to doing some laundry, and vacuuming out the guest room. What do you do to make your guests comfortable? I’d love to hear about it! That’s all for today friends, have a fabulous day!

Organization

DIY Household Cleaner

Hi friends! Long time no chat! I’ve seriously been so busy lately I haven’t had a spare moment to update here and I feel terrible! I’m so glad I could finally carve out a little time to stop by and say hello! School (which is work for me, since I’m a teacher) is moving full steam ahead into the end of the school year and I’m struggling to keep up. Thankfully in just two weeks I’ll actually have some free time!

Well, I’ll be short and sweet today, but I wanted to share with you a little homemaking tip for you fellow budget conscious friends. If there’s one thing I hate spending my money on, it’s cleaning products. They can be so expensive, and it seems like you need a different product for everything! I don’t know about you, but I’d rather spend my money on pretty things for the house than boring cleaning supplies. A while back, I shared my DIY laundry soap, which has saved me tons of money over the past few years. If you didn’t catch that post, you can read all about it here.

Recent’y I’ve started making an all purpose cleaner, something that takes the place of many of the bottles that I previously had under my sink. So here’s the super easy all purpose cleaner that I make for my home.

diycleaner1

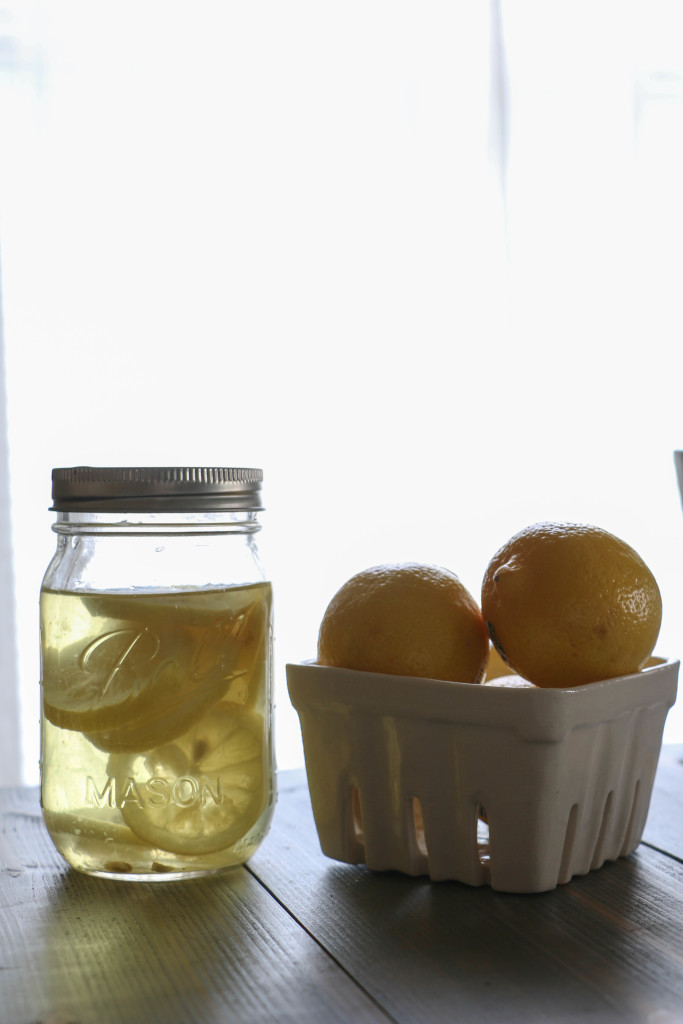
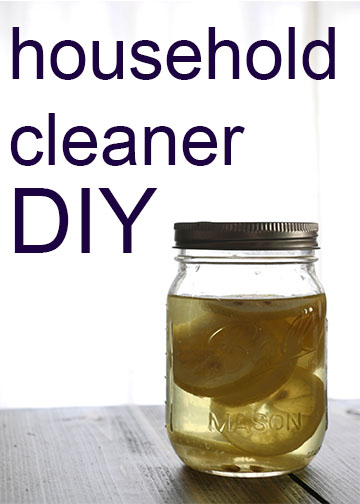
I use about 1.5 cups of vinegar and put it in a jar, and then add one small lemon, thinly sliced. I place the lemons in the vinegar, and leave the jar to sit for a few weeks. This will allow the lemons to fully soak into the vinegar. I don’t really know much about chemistry (I barely passed that class in high school), but I know both lemons and vinegar have some super strong stuff in them, so working together makes them doubly great I  suppose? Who knows. I just made that up.

After two weeks, I pour the liquid into a spray bottle, and that’s about it! My spray bottle has a pretty narrow neck, so I don’t bother trying to squeeze the lemon slices into it. I just throw them away.  My spray bottle was something I picked up for a dollar or so in the cleaning section at Walmart. Lemon and vinegar are both pretty inexpensive, so this is something that comes out to be much more budget friendly than typical cleaners.

I use this spray for just about anything. Countertops, stove top, sinks, shower walls, and even the inside of the fridge and microwave. The lemons take away the strong smell of the vinegar, and it smells more like citrus than like vinegar. I absolutely love using this method because it saves me a couple dollars, and I do enjoy making the things I use in my home. It’s also chemical free, which I know is a big deal for a lot of people. Safe for expectant mamas, and easy to make!

I told you I’d be short and sweet today, but once my summer vacation has started, I’ll be around much more frequently. I hope you enjoyed this little post, and that you’ll give it a try. I would definitely recommend this one, I can’t stress enough how easy it is! Well, that’s all for today, friends! Have a fabulous day!

diycleaner

Organization

DIY Laundry Soap

Hello friends! I hope this week has been treating you well! Spring Break is winding down for me, and I am silently crying tears of regret after not having accomplished everything that I had planned. Just kidding. Sort of.

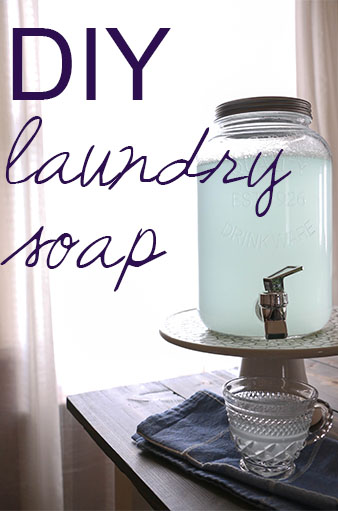
We did have a super fun and relaxing week of camping for a few nights, which was wonderful! Even though we were only about twenty minutes from home, it felt as though we were truly out of town. And it just feels good to get away! Coming home from camping, everything in our bags smelled like campfire smoke. Which is wonderful while you’re actually out, but once you come home, it’s not so great (in my opinion anyway). I had a bunch of laundry to do, and I realized it would be a great idea to share my homemade laundry detergent recipe with y’all.

DIYlaundrysoap2

I’ve been making my own laundry soap for about three years now, and I have not had to re-buy supplies since I first started. Talk about thrifty.

So here’s what you’ll need: 

3 Tablespoons of Washing Soda

3 Tablespoons of Borax

2 Tablespoons of Original Dawn Dish Soap

Any scent of essential oils (this part is totally optional)

Here are the (super simple) steps:

First, you’ll mix your washing soda, borax, and dish soap together in a gallon size container, adding about one cup of hot water. No need to boil the water, I just use the hottest water I can get out of my faucet. This amount of water is just enough to dissolve the power into the water. You’ll need to shake well until everything is dissolved.

Next (and you will need to do this in your sink), you’ll fill your container with the cold water. I just use the tap water from my faucet. This process will create a mess load of bubbles, so I cannot tell you how important it is to do this in a sink! Once the container is filled, I close it up and shake again. This will allow any particles that didn’t disolve before to fully dissolve.

Last, and this step is optional, I like to add a few drops of essential oil. No need for the expensive stuff, I just bought one bottle of lemongrass oil from my local grocery store, which may have cost about five bucks. The oil will make the laundry soap scented, which I prefer in a laundry soap. It is totally optional though. The cool thing is that you can make it any scent you want. After adding a few drops, I close it up and shake thoroughly.

That’s it! It really is that easy. like I mentioned before, I have been making this laundry soap for about three years, and I have yet to buy new supplies. I would estimate the total cost at about fifteen dollars, but for three plus years of laundry soap, I would say that’s a pretty good deal! Now, I use this recipe mainly for economical reasons, and not necessarily for all-natural health reasons, so if you’re looking for an organic or suchandsuch-free product, this is probably not for you.

Personally, I love it. It takes just a few minutes to make, and my clothes and linens smell and feel just as fresh as with any other laundry soap I have purchased. I use about a cup of the soap per load, and one “batch” will last me a few weeks. I would definitely recommend making your own laundry soap!

Have you tried making your own laundry soap before? If so, I’d love to hear about it! That’s all for today, friends. Have a fabulous day!

DIYlaundrysoap

Organization

Tips on Loving Your Closet

Do you have the perfect vision of what your dream closet is? I know I do. Cue soft playing music and a warm bright spot. My dream closet is ultra feminine, with a full window for natural light, and a vanity for doing makeup. My dream closet is obviously larger than my childhood bedroom. There’s room in there for a soft armchair where I can drink my tea, a freestanding full length mirror for trying on clothing, and perhaps a vintage mannequin. My wedding dress is displayed, and the whole thing is light and airy. Have I even mentioned the perfectly organized rows of clothing and shoes? My collection is expansive, yet impeccably organized just like a magazine. Can you tell I’ve thought about this? Just a little bit.

Raise your hand if you have something pictured in your head similar to what I just described. Yes, I’m talking to you. I know most of us have unrealistic dreams like this and that’s okay!

Cue reality though (we’ll use my closet for an example): my closet is a 2×3  foot box with one awkwardly placed pole (not even tall enough to hang a knee length dress from) and two measly shelves on the top (one of which I can barely reach). Like the rest of our house, it’s the color of a camel’s behind, and a carpet that hasn’t been touched since the 1960’s. Living the rental dream. 

Here’s the deal. It would be so easy for me to be discouraged by the size of my closet, or frustrated that I don’t have things as nice as others. Today I want to share with you some tips I’ve found on how to love the closet you have (that don’t include getting a new closet).

This year, my mission has been to organize everything and purge the excess. The closet was the first place to start! I started off the new year by reading The Life Changing Magic of Tidying Up. I am not kidding when I say thing book will change your life! It’s a pretty short book, but I had read the whole thing in a day. I finished feeling energized and ready to tackle my house! There are specific sections of the book designated specifically for clothing, and so I took some of the tips listed there and reorganized my closet. I can now tell you that when I walk over to my little closet, I feel refreshed and calm! And I don’t even have an armchair where I can drink my tea. Can you imagine?
closet2

Step One: 

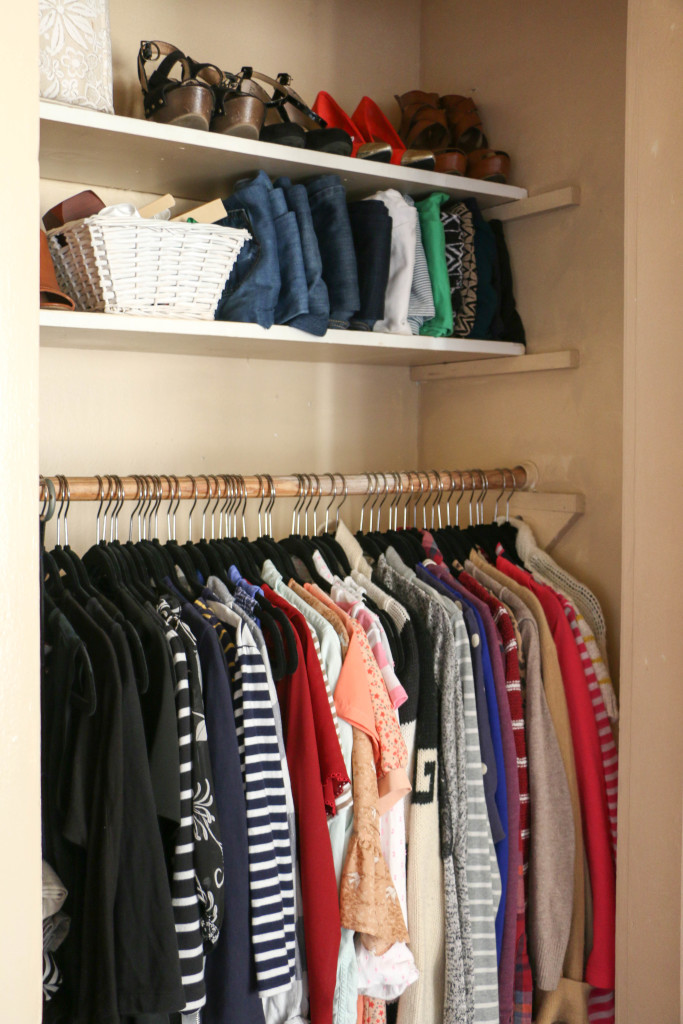
Get rid of everything. I’m not joking. I took every. single. piece. of clothing out of my closet and laid them on my bed. From there I looked at each item one by one and asked myself when the last time I had worn the item was. I had to be harsh with my answers about what to keep and what to get rid of. The things I love but wear infrequently because I’m too lazy to iron – those things went to the donate pile. The things I’ve been meaning to mend but secretly know I won’t get around to – donate. The things that are near duplicates of other items – donate. Because of the awkward height of the bar in this closet, my dresses are hung in Ethan’s closet. So all I have here are my tops (both blouses and sweaters). I wanted to keep only the things I have in my closet are the things I will actually wear on any given day.

closet3

Step Two:

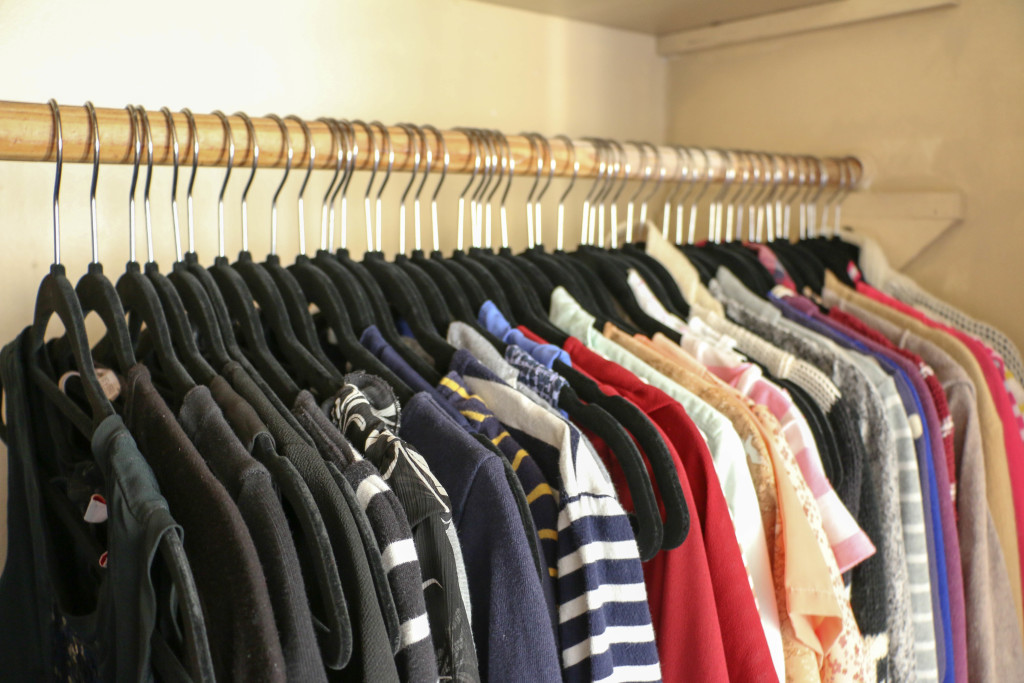
Organize by color. One of the things that makes my teeny-tiny-barely-even-there closet bearable now is that the order of things is aesthetically pleasing. I kept my shirts and sweaters separate, each category moving from the darkest on the left to the lightest on the right. There is a whole psychology behind this method that I don’t really understand, but I will say that it does make things look intentionally placed. Each piece has a perfect spot, and the color scheming actually helps me plan my outfits with ease. All my black tops are in the same place, and I know exactly where the hanger is when I’m putting something away.
closet4

Step Three:

It’s all about the hangers. This step is definitely not necessary, but I would recommend it. Until this point, I still had the multi-colored plastic hangers I acquired in bulk in college. They were cheap, and I was broke. I’ve wanted to buy coordinating black velvet hangers for a long time, but could never justify the expense. The only reason I bought these is because I had extra Christmas money. Ethan was not really thrilled with the thought of me spending my Christmas money on hangers, but I assured him it’s what I really wanted. He’s the one who married this organizational freak, so he can’t really complain too much. Anyway, I bought two of these packs, and used Bed Bath and Beyond’s 20% off coupon. I will eventually need to get another pack or two to finish Ethan’s closet and the coat closet, but my wallet says it’ll have to wait.
closet1

Step Four: 

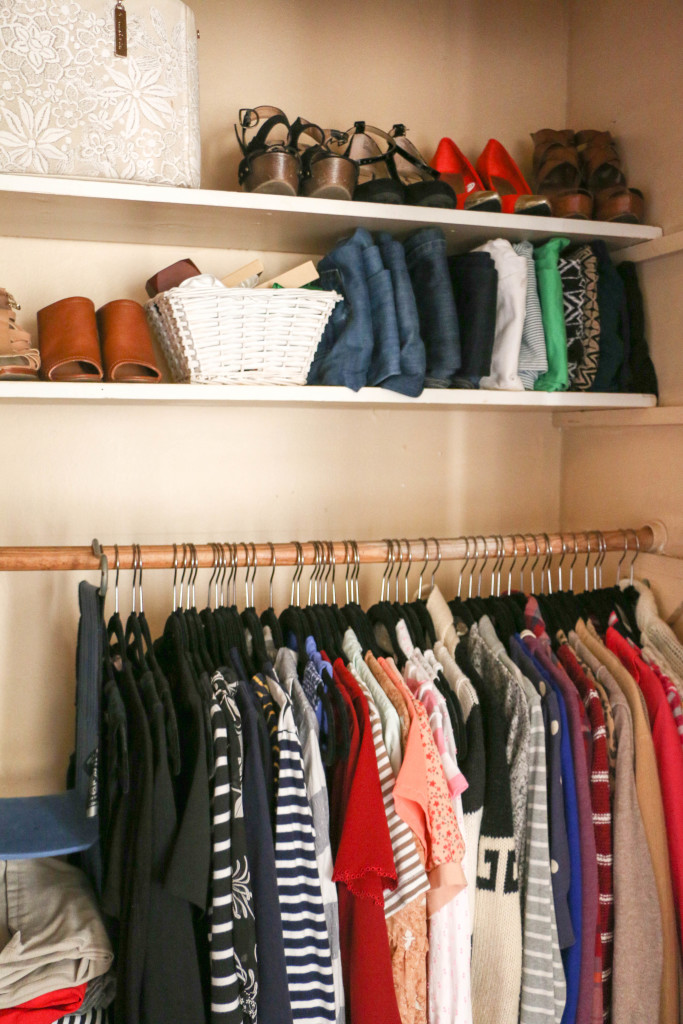
Tidy up all the non-hanging items. On the top shelf, I have a few pairs of shoes, a handbag filled with other handbags, pants stacked standing straight up, and a basket with scarves and important jewelry boxes. I also have a small hanging shelf unit with a few folded skirts hanging from the rod. Notice how I have extra room on these shelves? Before I purged and organized, I could barely cram anything else in this closet, and finding what I needed was never simple. Now everything has a location, everything has a purpose, and it all looks generally appealing.

I feel like I should mention a few disclaimers. The floor if this closet hosts the majority of my shoes, which aren’t perfectly organized yet. Additionally, this is not the entirety of my wardrobe. My dresses are stored in Ethan’s closet, and coats and special occasion outfits are stored in the coat closet. I also have casual wear that is stored in Ethan and my shared dresser.

My overall point is this: this is no way near the dream closet I described at the beginning of this post. However, it makes me feel refreshed and at ease when I open the door. I will likely never have this fantasy closet, but I’m willing to love the closet that I have now. I know that later in life, I’ll move up in closet. Right now though, I’m learning to love the closet I have. Right now, this is my dream closet. Purged, organized, and accessible. Do you have your dream closet or do you have something you have to learn to love like me? How do you organize? I’d love to hear all about it! That’s all for today, friends. Have a fabulous day!