Browsing Category

DIY Projects

DIY Projects

Shutter Styling

Hey y’all! Thanks for stopping by! Today I’m sharing a super quick update we made in our master bedroom. A quick and easy thing that I am loving!

Last weekend, my husband and I traveled to Canton, TX to visit First Monday Trade Days. It’s just over an hour from where we live, and it’s one of the largest and oldest flea markets in the United States. This place is seriously AMAZING. If you live in the area (or even if you don’t) I would definitely recommend checking it out. We saw antiques, collectibles, handmade items, junk, and everything in between. Definitely one of the coolest places if you’re looking for unique items. PLUS it’s free admission, so you really can’t go wrong.

While we were there, I picked up some old window shutters. The seller was very confused about why I only wanted one pair, and even when I tried to explain that I wouldn’t be using them on the outside of a window, he was still confused. Sir, if you’re reading this, I’m sorry! I paid $15 for this beauty:

shuttersbefore

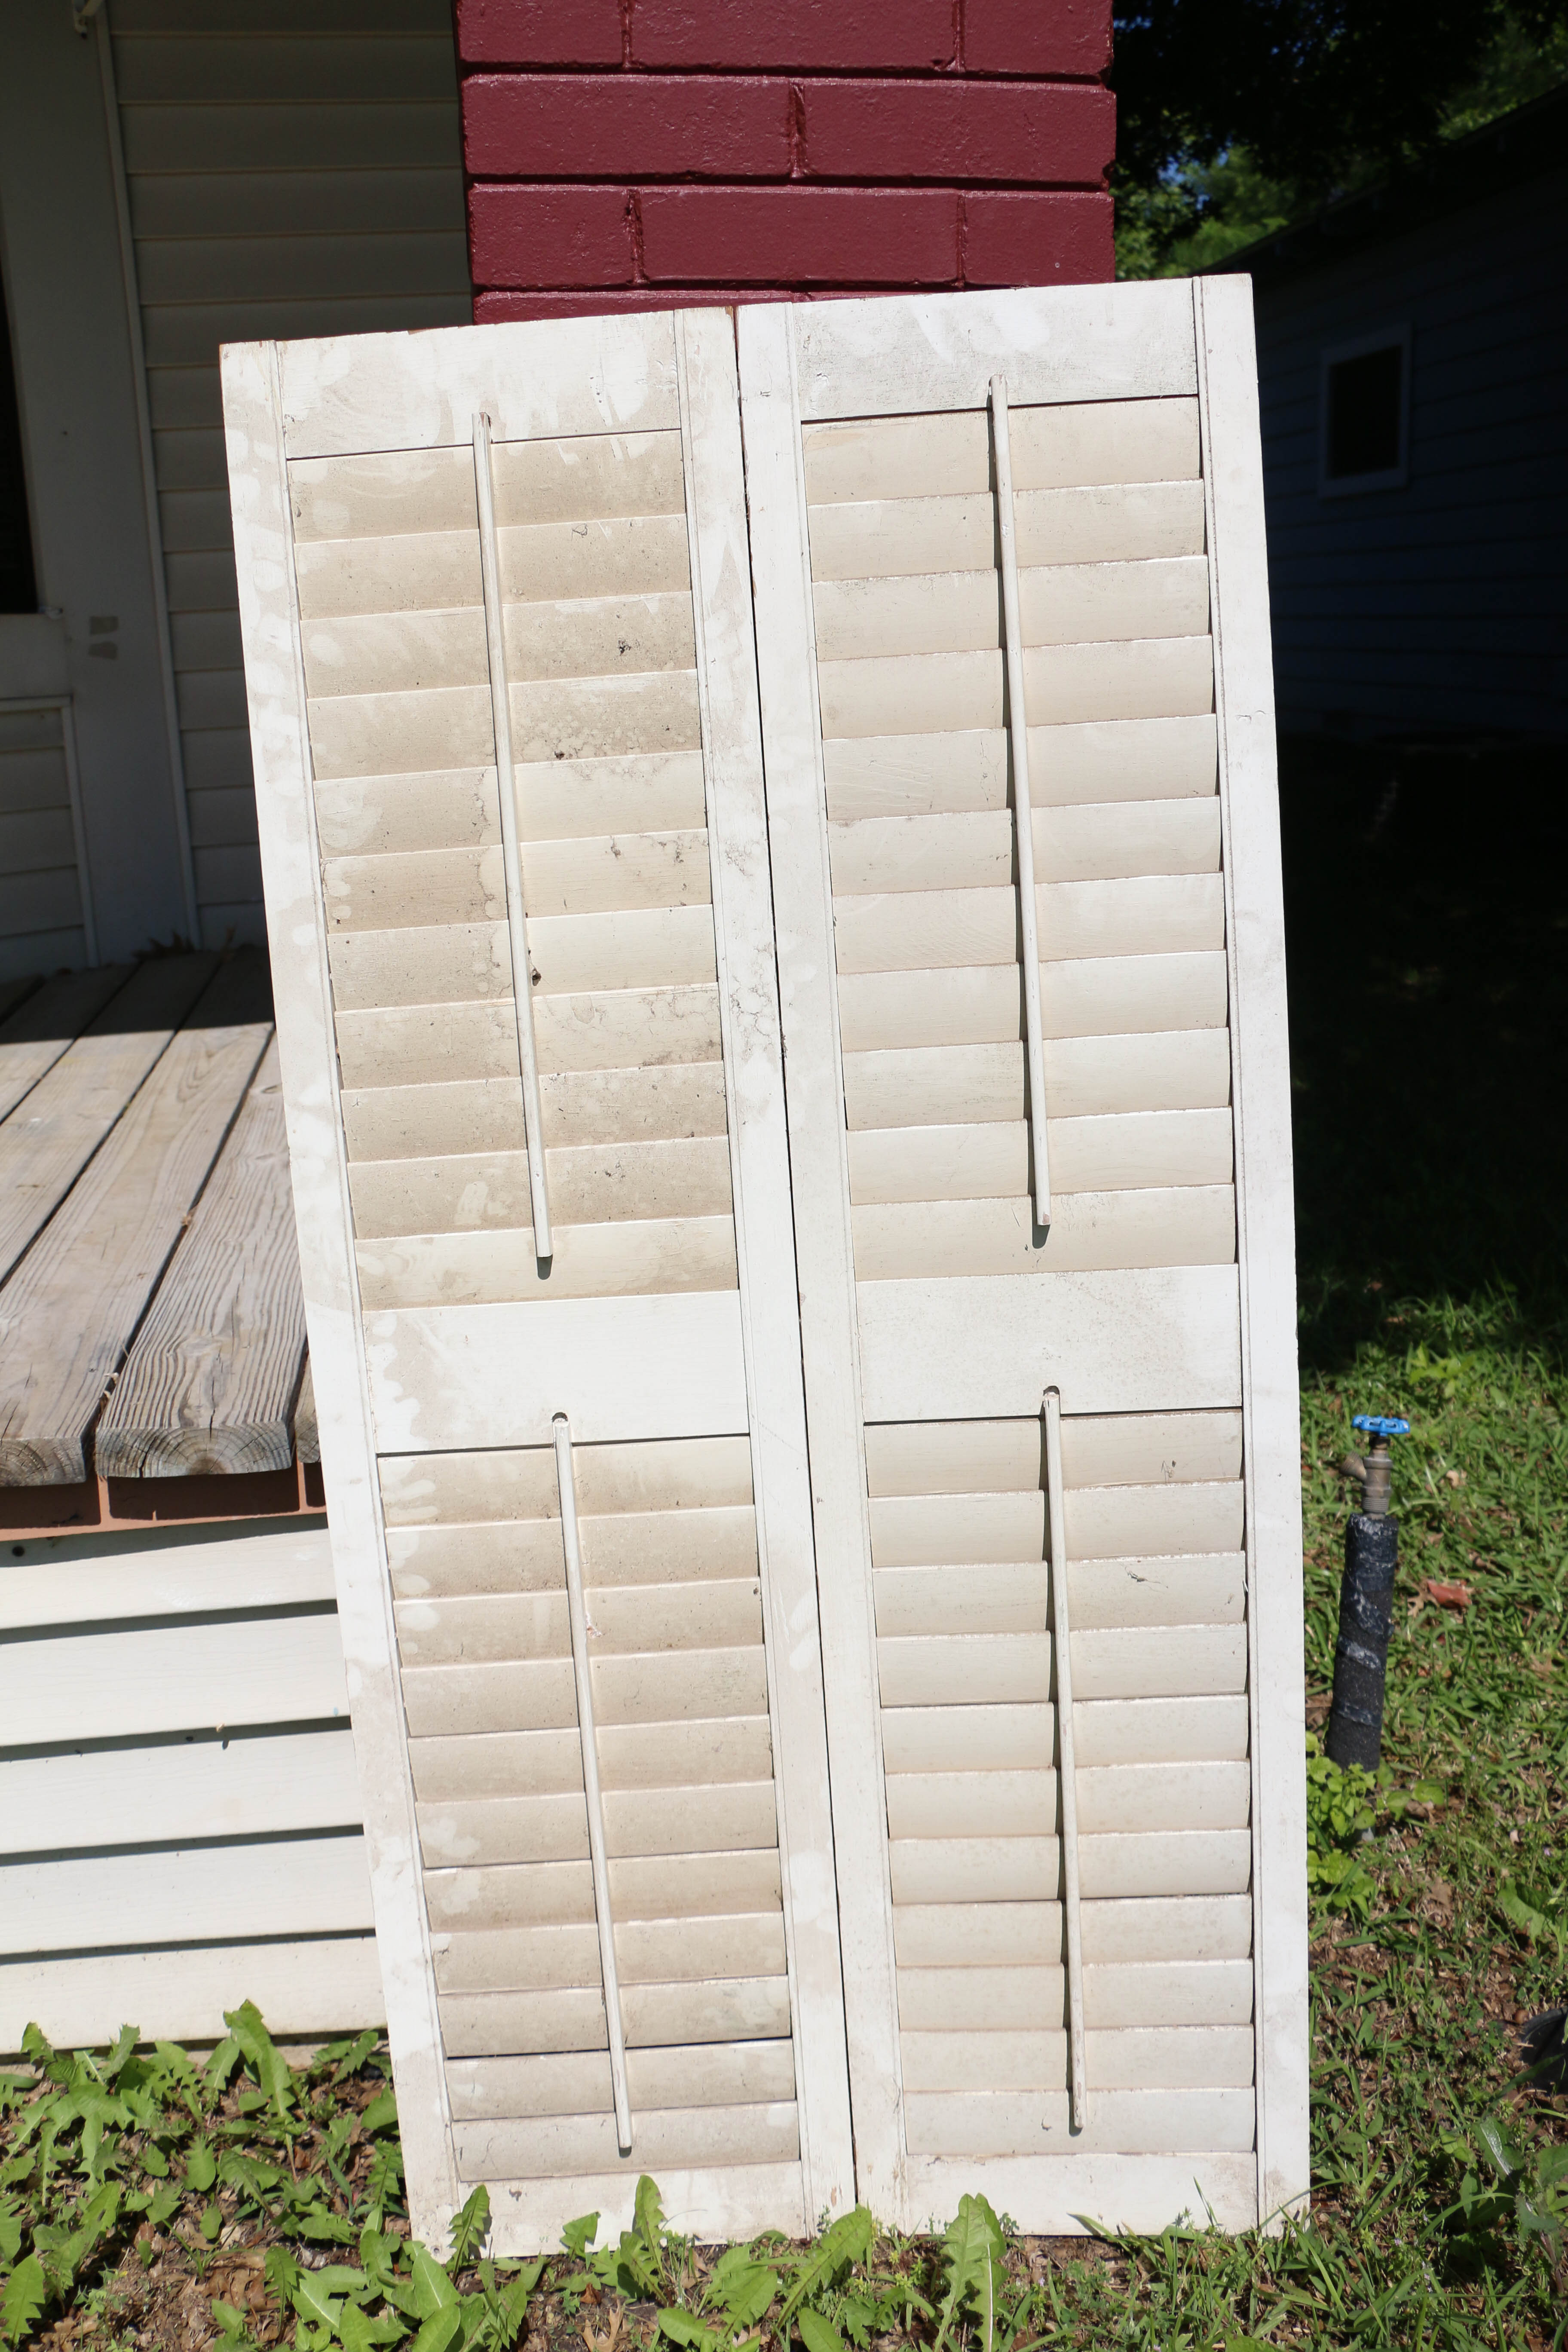
Ignore the water spigot. And the weeds in my yard. Whatevs. Anyway, super dirty and gross, I know. I hosed them down and had the intention of sanding and repainting them. Keyword being intention.

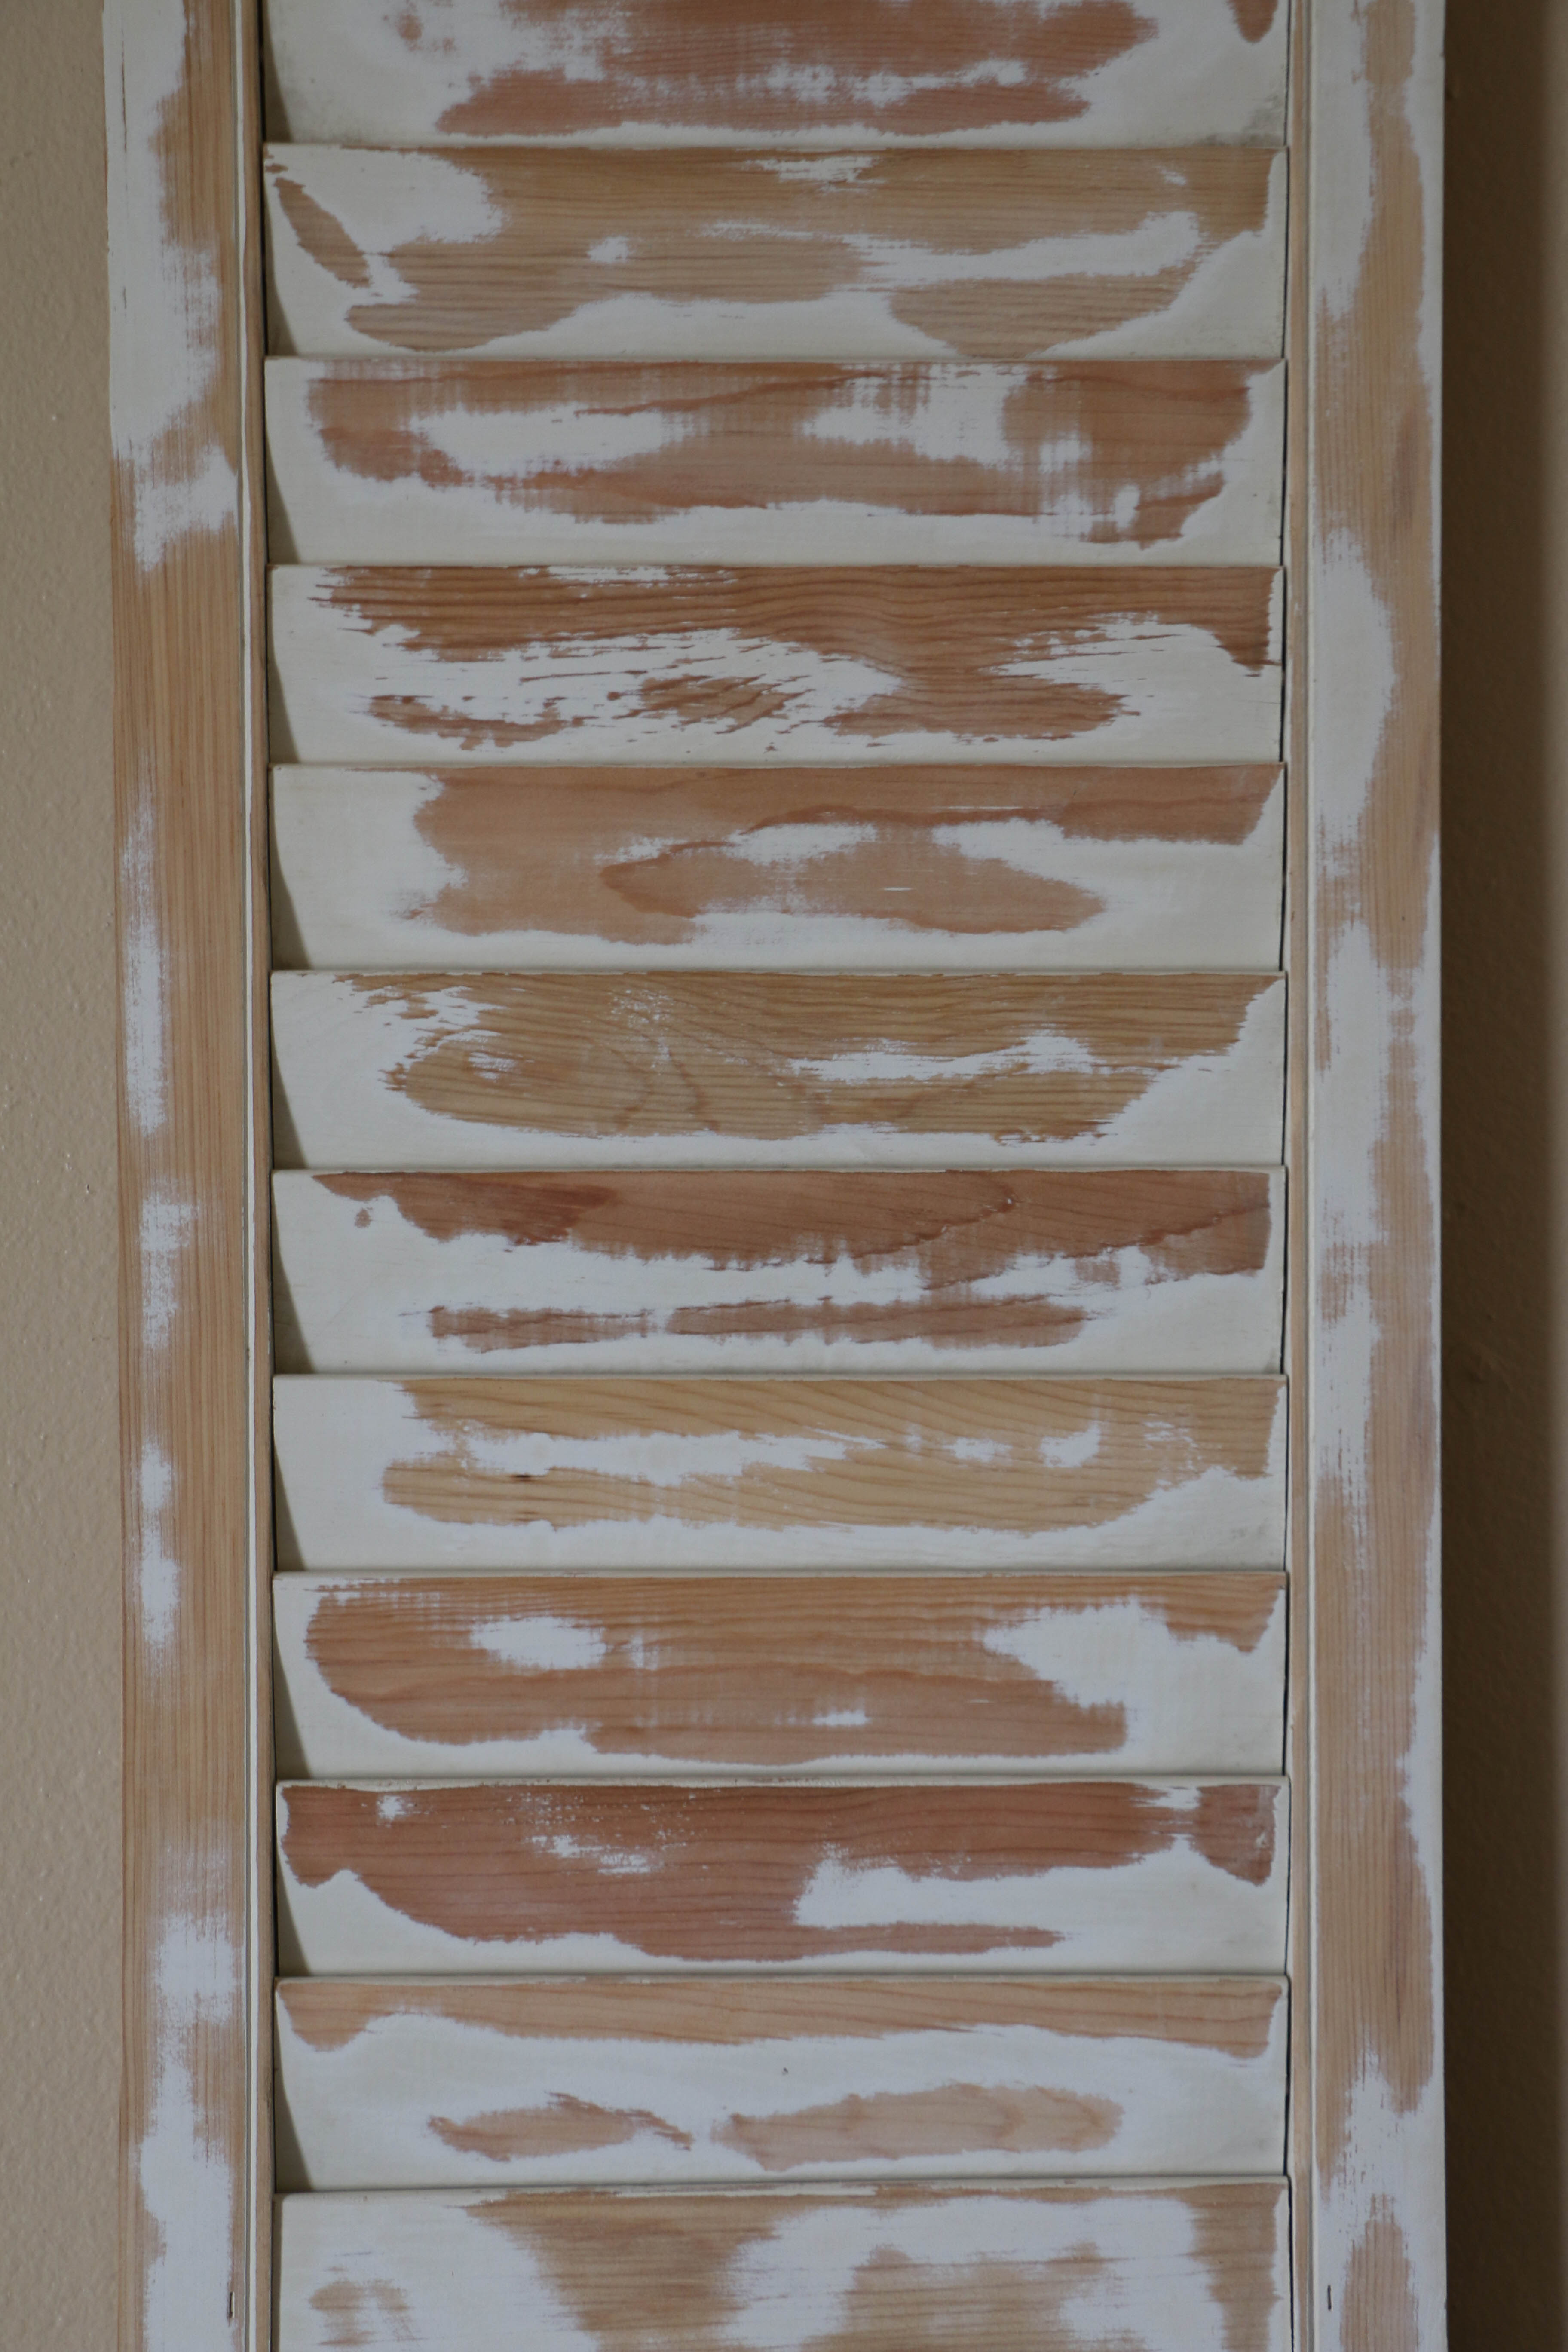
After days of sanding this thing, I was over it. I mean OVER IT. My sander couldn’t reach in all the slats, and I’m pretty sure my hand is still shaking from using it. Now before you judge me, this is not my first go-around using a power sander, just my first go-around sanding shutters. Sanding flat surfaces > sanding EIGHT MILLION nooks and crannies.

So I left them half sanded and left some of the primer exposed. I’m a half quitter. But I’m kind of glad I’m a half quitter because I love the way they are, even without a fresh coat of paint.

IMG_1318

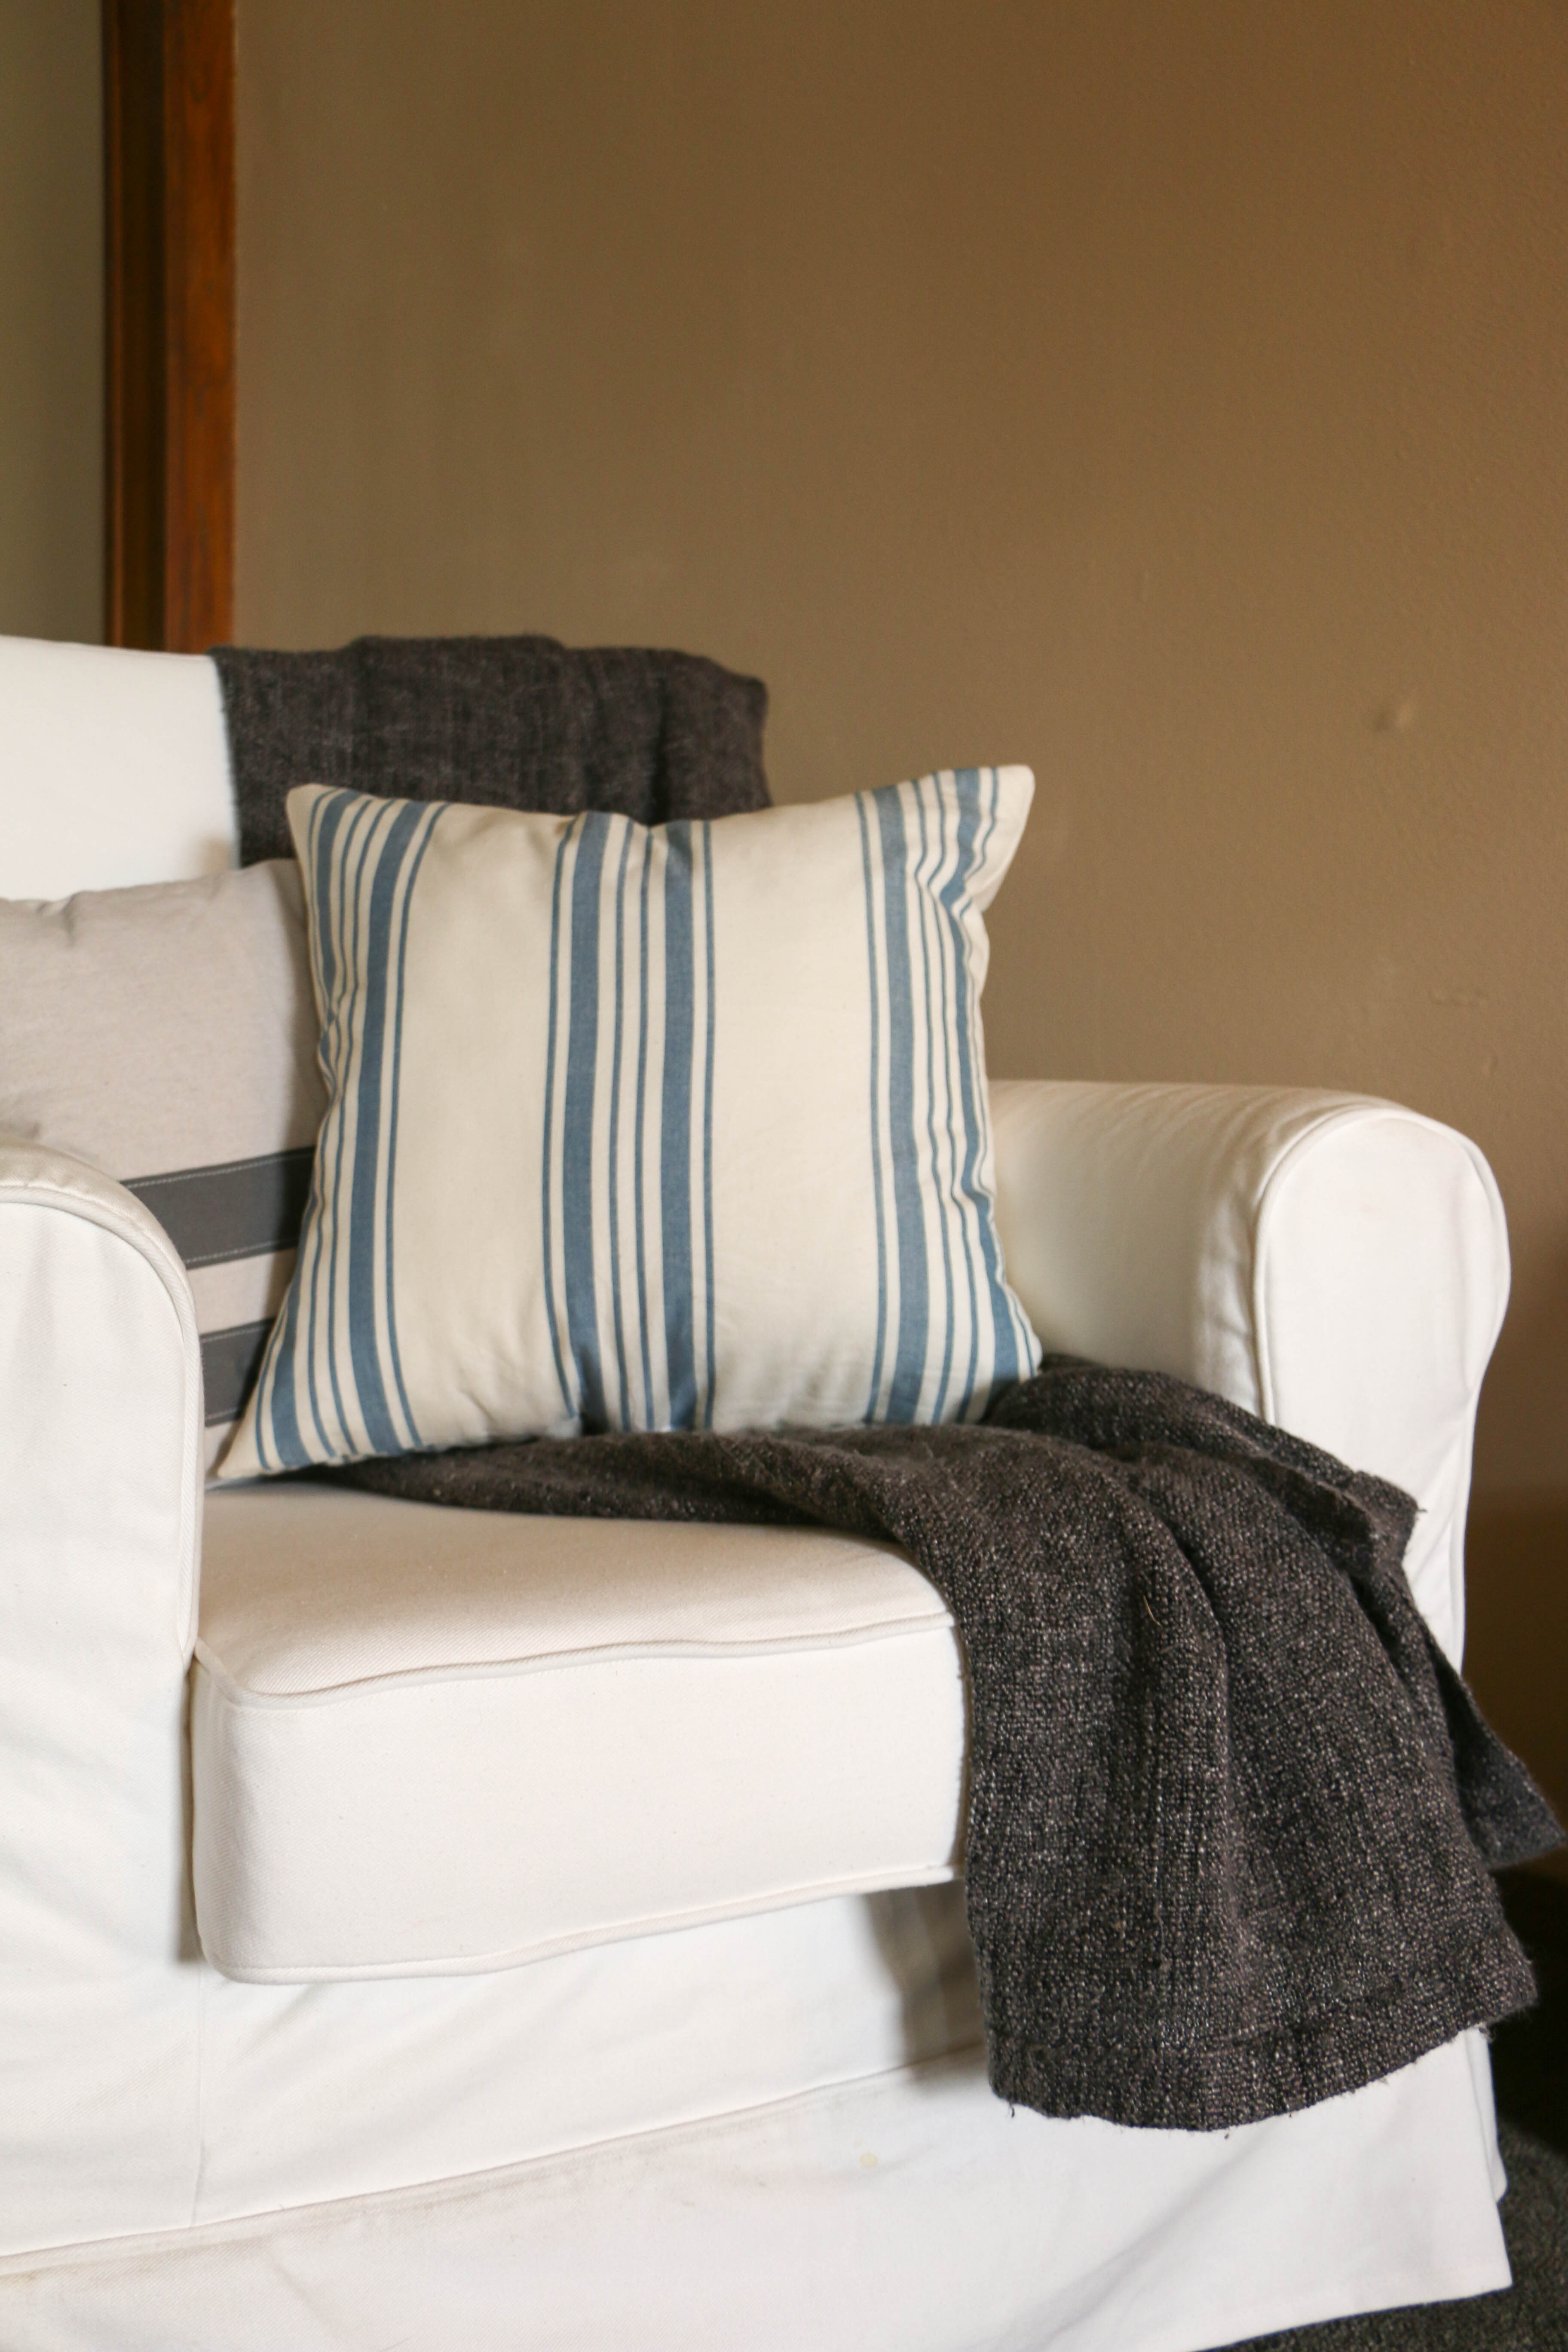
We hung them on either side of our bed, just above our nightstands.

shutters1

I love the rustic feel they bring to the room now.

shutters3

shutter4

shutter2

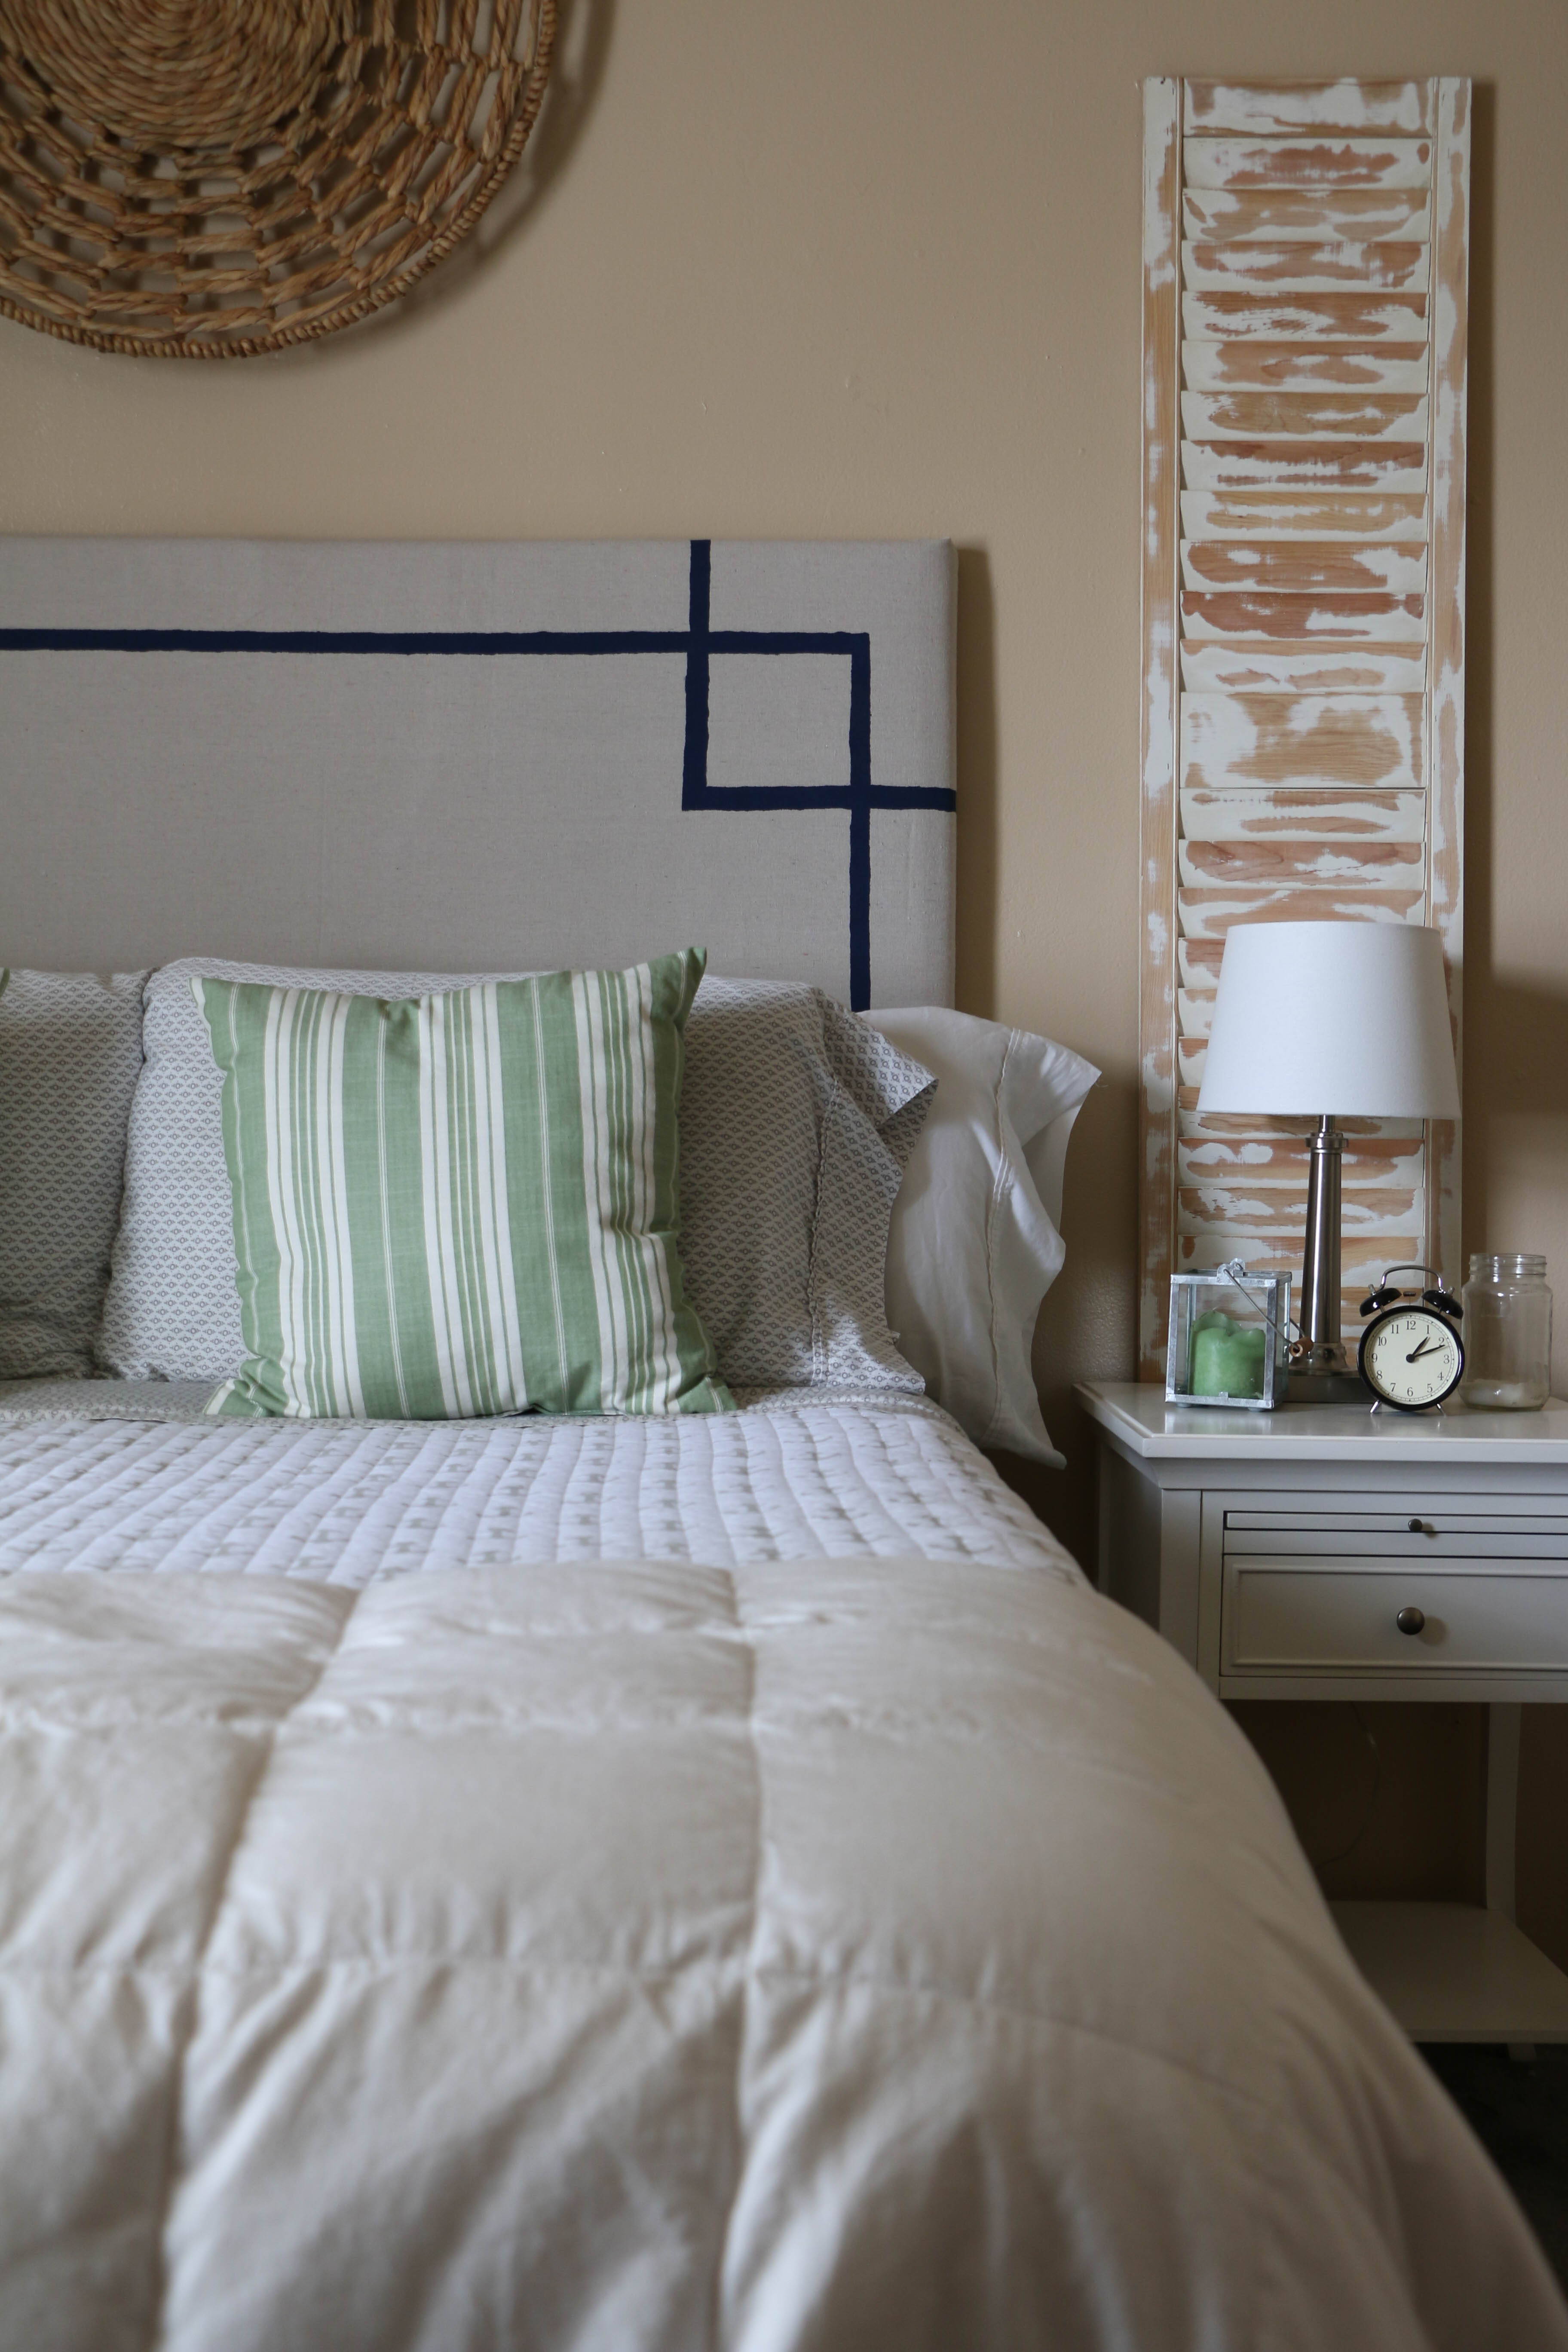
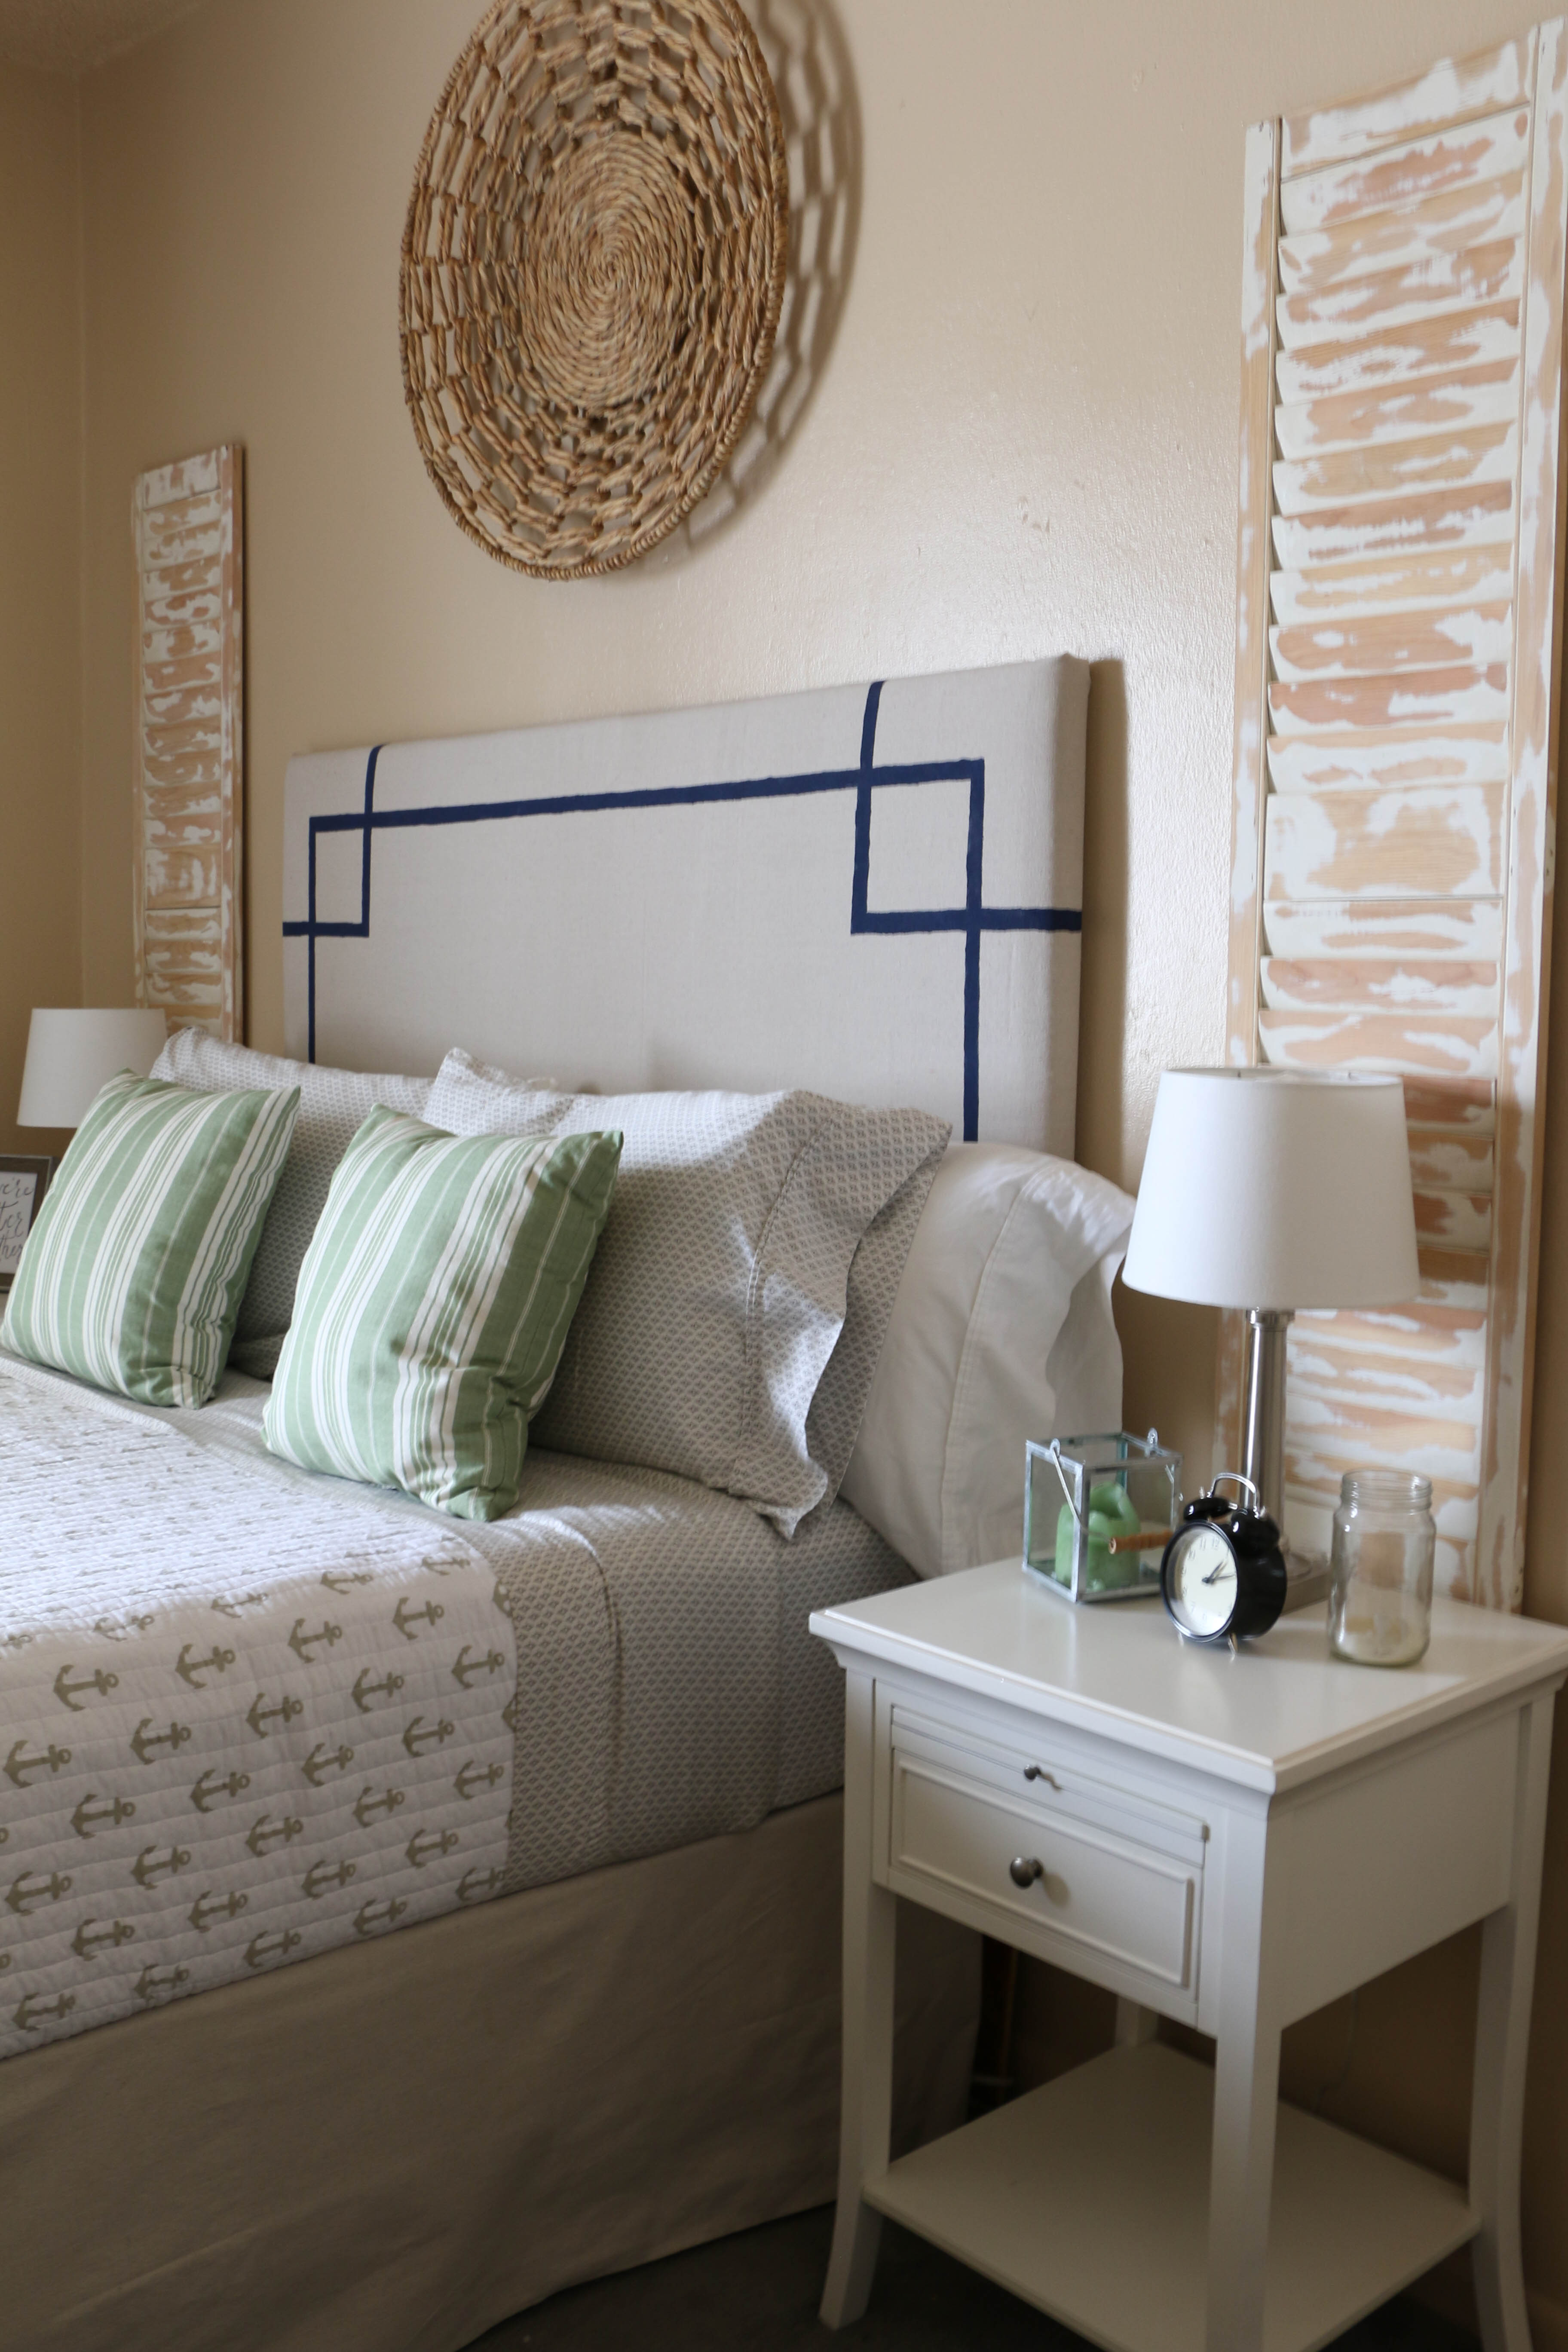
The woven basket piece is from Target, and the headboard was a DIY project.

nightstand1

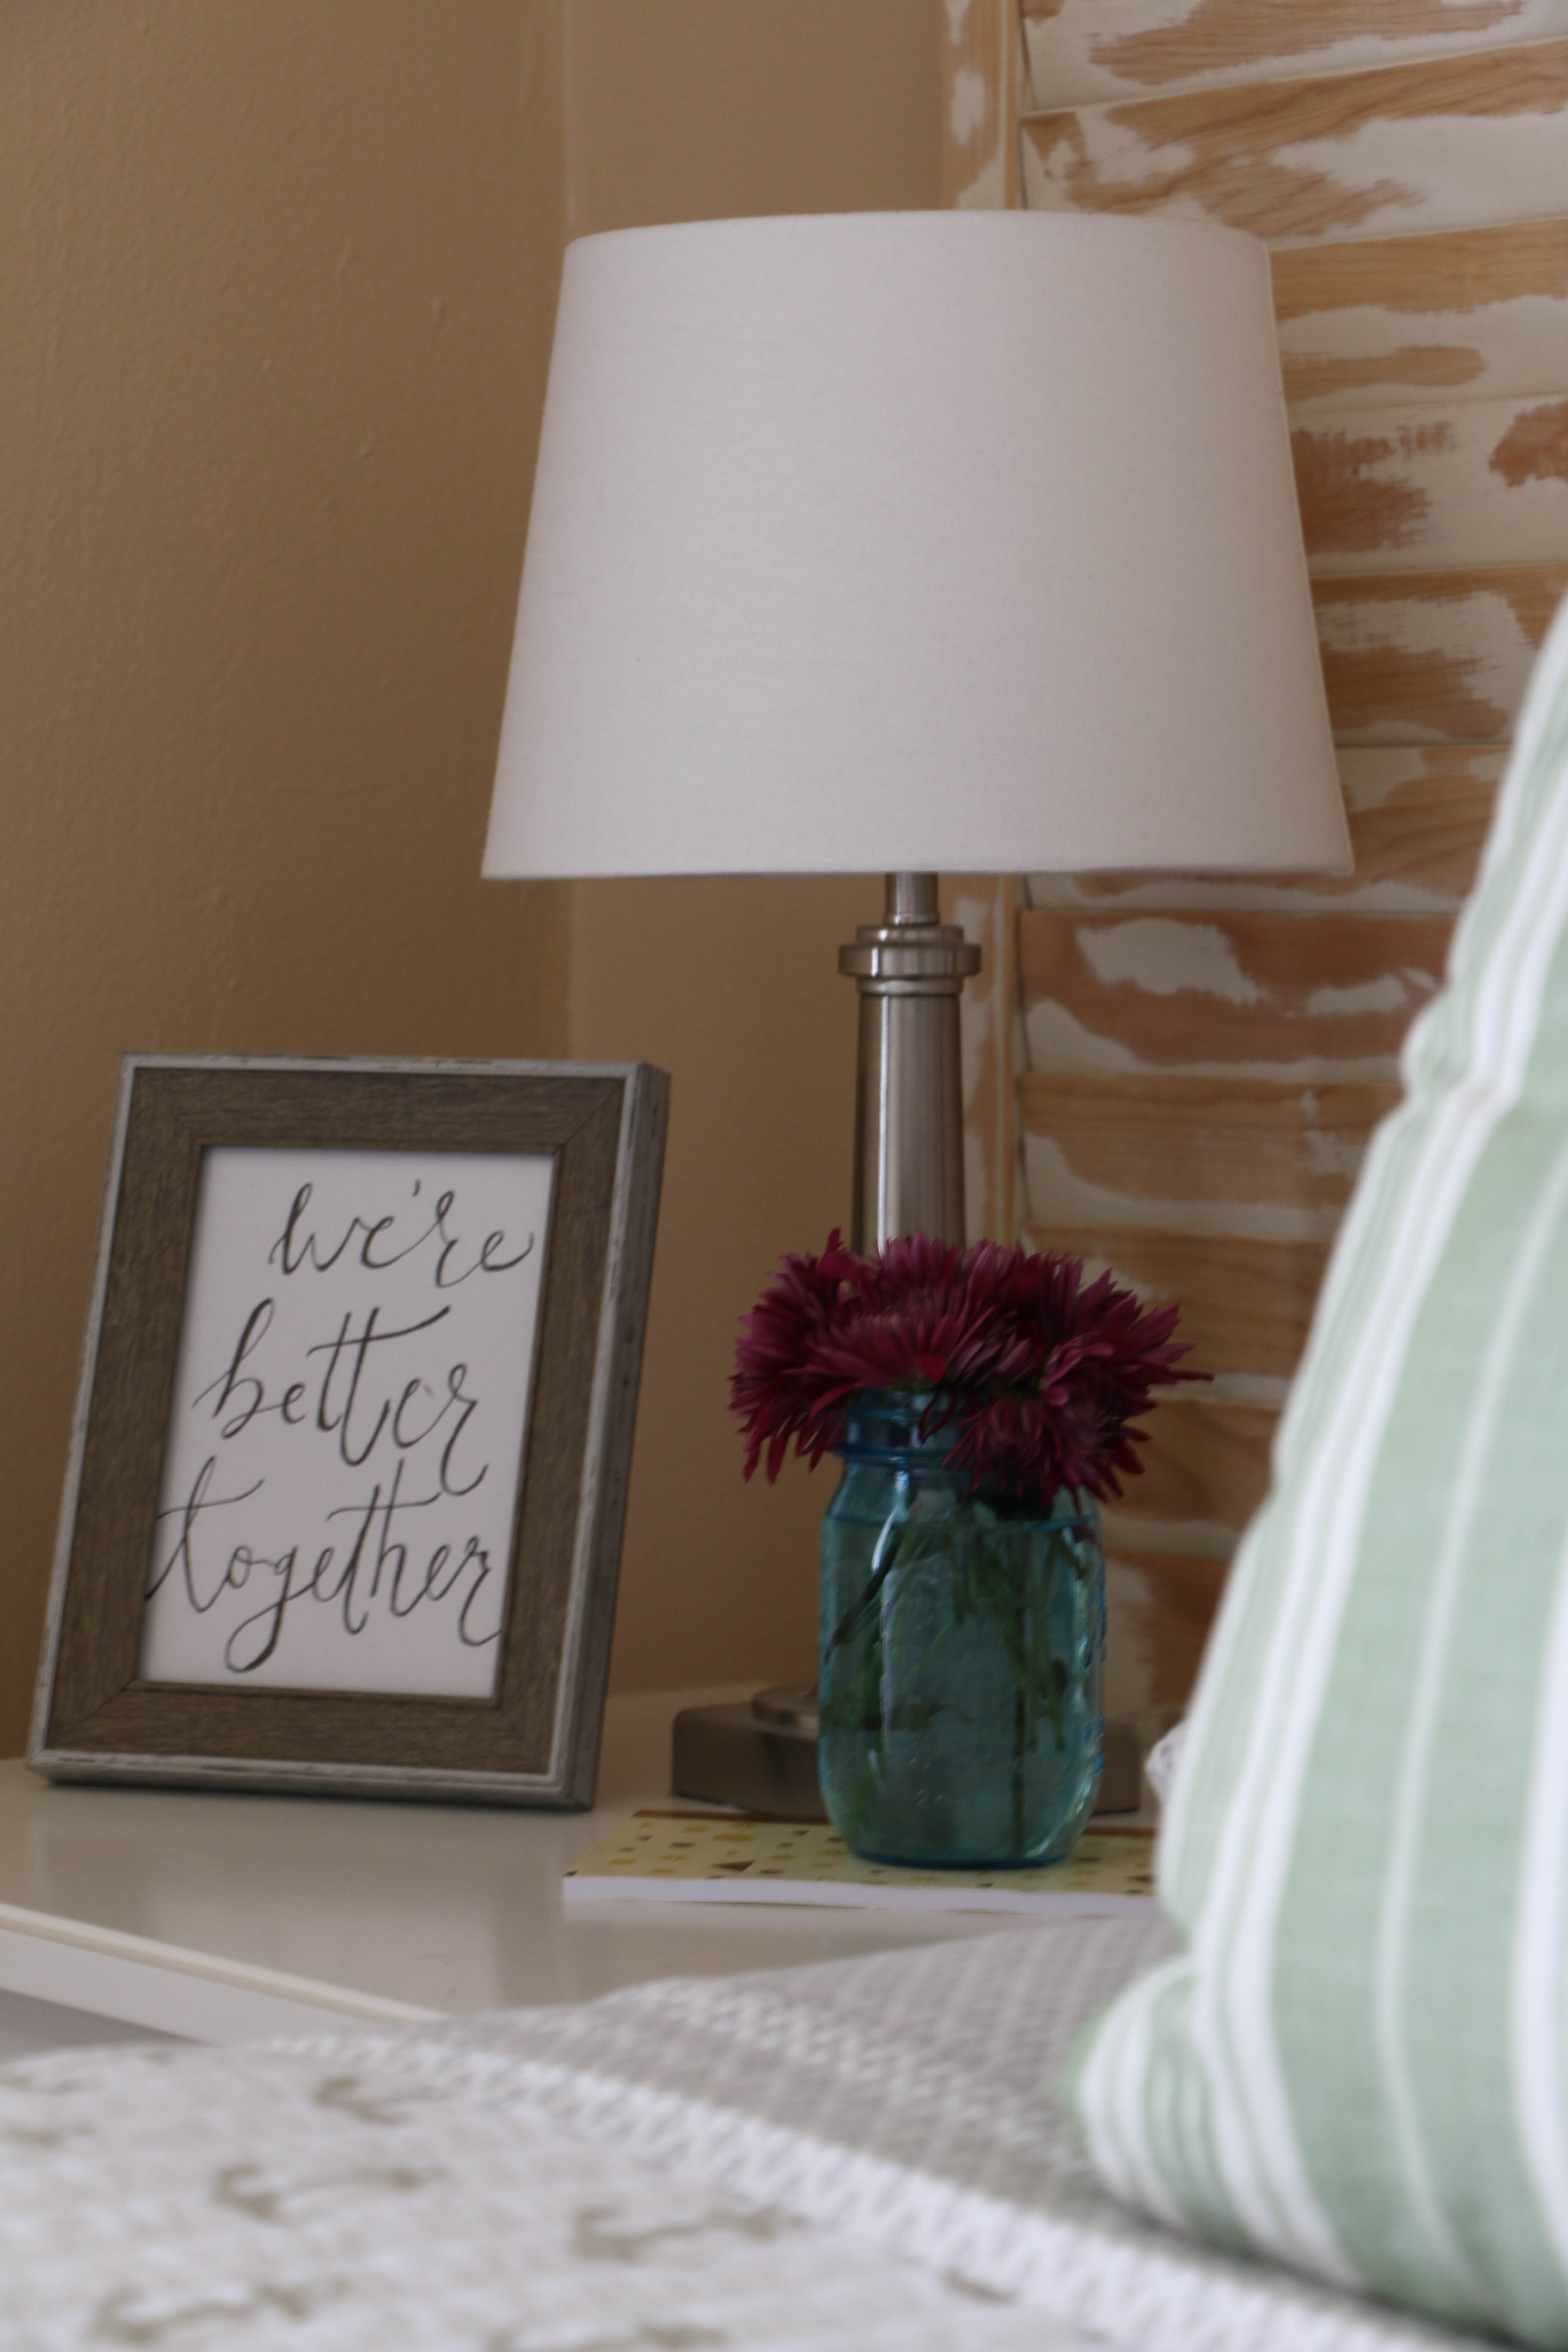
And this little print was one I whipped up quickly just to fill space on my nightstand. Whatever works. Overall, I think the shutters add a much needed texture to the room, and I love the warm tone of the wood and the coziness it brings.

I think decorating with shutters might quickly become an addiction. I need more, more, MORE! I’m also thinking a full room tour of this room might be in order soon, so we’ll have to see about that (I have a few more projects up my sleeve first). What about you? Have you used shutters in your home? I’d love to hear about it!

That’s all for today. Have a fabulous day, friends!

DIY Projects

DIY Antique Metal

Hello friends! Today I’m sharing my experience with making new metal look like antique metal. If you’ve been to Target recently, you know that they have some AMAZING metal goodies in their One Spot. Last week, I bought a cute little olive bucket for $3. Awesome, right? The only problem was that it was all shiny and new (totally doesn’t match the rustic vibe I’m going for on the front porch). Anyway, I brought it home thinking it would definitely be worth an attempted DIY, even if it wasn’t successful.

So here’s what we’re working with. I have this olive bucket (I couldn’t find it on their website, but it came from the Target One Spot), and I also decided to try it with this watering can I’ve had for a while from Ikea.

Aged Metal Before

This is definitely an OUTDOOR project, so take your items outside, and gather your supplies. My front porch is a never ending project workspace, and I’m constantly wondering what my neighbors are thinking of me. There’s that weird girl painting someone else’s trash. There she is, sanding something again. Can she possibly paint anything else? What on earth is she doing now?

There are some supplies that are necessary for this DIY, and some are optional. Here’s what I used:

Aged Metal Supplies

-bleach

-vinegar

-bucket

-rubber gloves

-steel scouring pads (optional)

-sander (optional)

So first things first, I removed the twine handles from the olive bucket. Then I sanded these bad boys down. I’m not sure this was totally necessary, but I like using my sander, and I figured it wouldn’t hurt. If you don’t have one, I think it’ll still work, so you’re good.

IMG_1163

Next comes the reason why this really needs to be an outdoor project. I filled my bucket with vinegar and bleach. I didn’t measure exactly, but I think I used about 1.5 gallons of vinegar and 1 gallon of bleach. This smells AWFUL. I didn’t wear one of those mask thingies (totally correct name), but I probably should have. It seriously is one of the nastiest things.

I submerged my metal in the bucket. With my rubber gloves on, I used the scouring pad to scrub the metal while in the bucket. It sat in the sun, and I would scrub every 15 minutes or so.

Aged Metal2

As you can tell in the above picture, the bleach/vinegar concoction turned orange. This is because I left the scouring pad in the bleach when I wasn’t using it. This rusted the pads and changed the color. It was totally unintentional, but it made the metal come out with a more orange, rusted look, which I really like. Overall, these sat in the bucket for about an hour each, scrubbed every fifteen minutes. As you can see, my bucket wasn’t quite big enough, so I had to flip the metal over about halfway through.

When I was done, I pulled the metal out of the bucket and hosed them down. When they were finally dry, I put them back on my front porch. I am IN LOVE with how these tuned out. This was a total experiment and I had very little idea what I was doing, so I’m super pleased.

Aged Metal 3

Aged Metal7

I placed a smaller vase inside to hold flowers because there are holes in this, and well obviously that can’t work.

The lines that appear around the top and bottom are due to not having the whole thing submerged at once, but I’m really okay with it. More character.

Aged Metal 6

I keep hearing Taylor Swift lyrics in my head: Did you have to ruin what was shiny, now it’s all rusted?

To answer your question Taylor, yes. I kinda did.

If you can get over the smell, this is a really easy project to try. It’s messy (but not messy enough to stain my shirt!), but in my opinion, totally worth it! I’m obsessing over these! Now I need to rust all the metal things!!

Aged Metal1

Let me know if you try this one! I’d love to hear about it!

That’s it for today. Have a fabulous day, friends!

DIY Projects

DIY Pillow Covers

Hey y’all! Today I’m sharing my super secret cheapest possible pillow covers. Except it’s totally not a secret since I’m about to tell you all about it. Whatever. By this time, everyone on the planet knows what a huge impact throw pillows can have on changing the feel of a space. But if you’re like me, you can’t bring yourself to pay $30+ dollars for one pillow. I’m the kind of girl who walks into a Target with three dollars in her pocket fully intending to find the best possible deal. (Don’t lie, you’ve been there too.)

Back to what I was originally talking about. I’ve discovered the secret to time travel the cheapest throw pillows! A few weeks ago, I went into a World Market for the first time, and it suddenly hit me! I could make pillow covers from napkins! Now, before you stop reading this, I’m not talking about paper napkins covered in pizza grease (why pizza grease? I don’t know.). World Market has a great selection of cloth napkins that are perfect for making pillow covers. On my trip there, I picked up these cloth napkins. Under $8 for four! I was in cheap girl heaven!

Okay, so here’s the deal. This is not a sewing tutorial. My sewing skills are basic at best, so I’m not going to explain in that great of detail how to sew these. These napkins are 20×20 inches, so they are perfect for and 18×18 size pillow or smaller. After bringing my napkins home, I ironed them, and got them pinned and ready to go.

pillowsewing

Again, I’m not going full out with the sewing tutorial here. The napkins are already cut in perfect squares, so I just sewed in some straight lines. Easy enough. Here’s how they look afterward:

throwpillows1

I really love the way that these turned out, and it was SO EASY. I made two covers for four dollars each. You really can’t beat that price.

throwpillows2

I chose this pattern because it plays well with the neutral tones in our living room (and because the only color I add in decorating is blue). But there are so many choices at World Market, the possibilities are endless!

Throw Pillows

Seriously guys, this is so easy, and so cheap! You should definitely try this one!

That’s it for today. Have a fabulous day, friends!