All Posts By

Fawn Rumfield

Personal

Five Things I’ve Learned Running a Vintage Booth

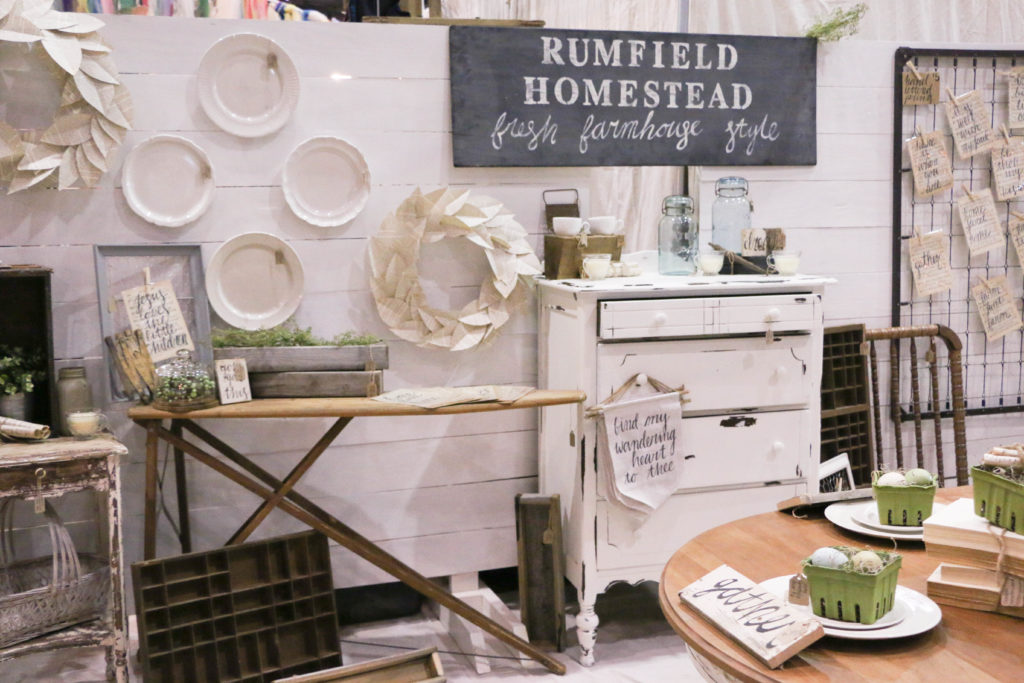
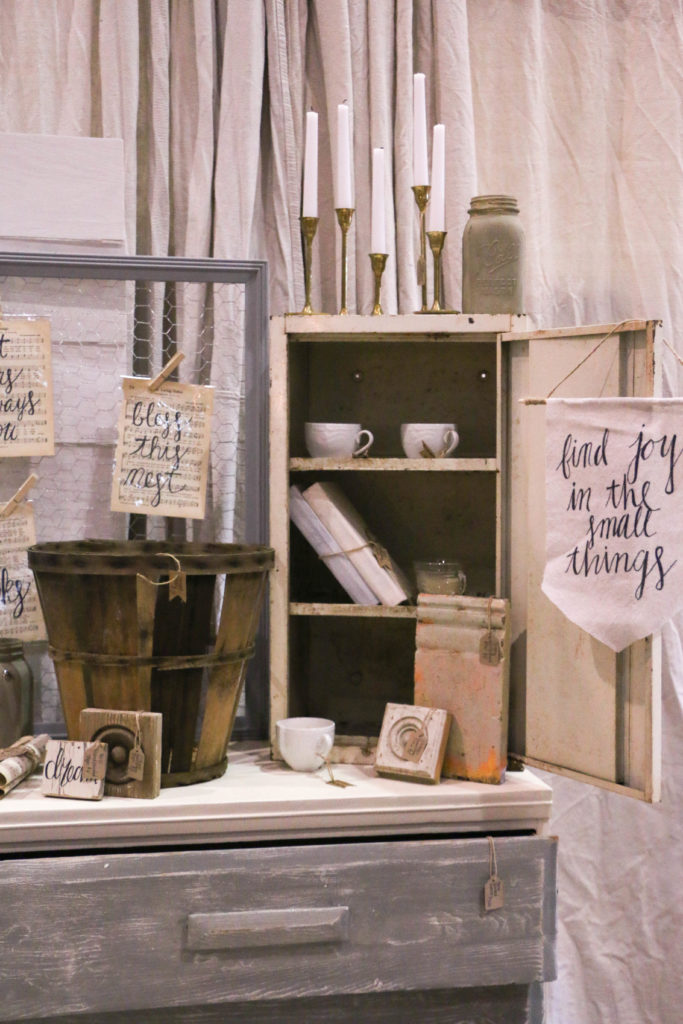
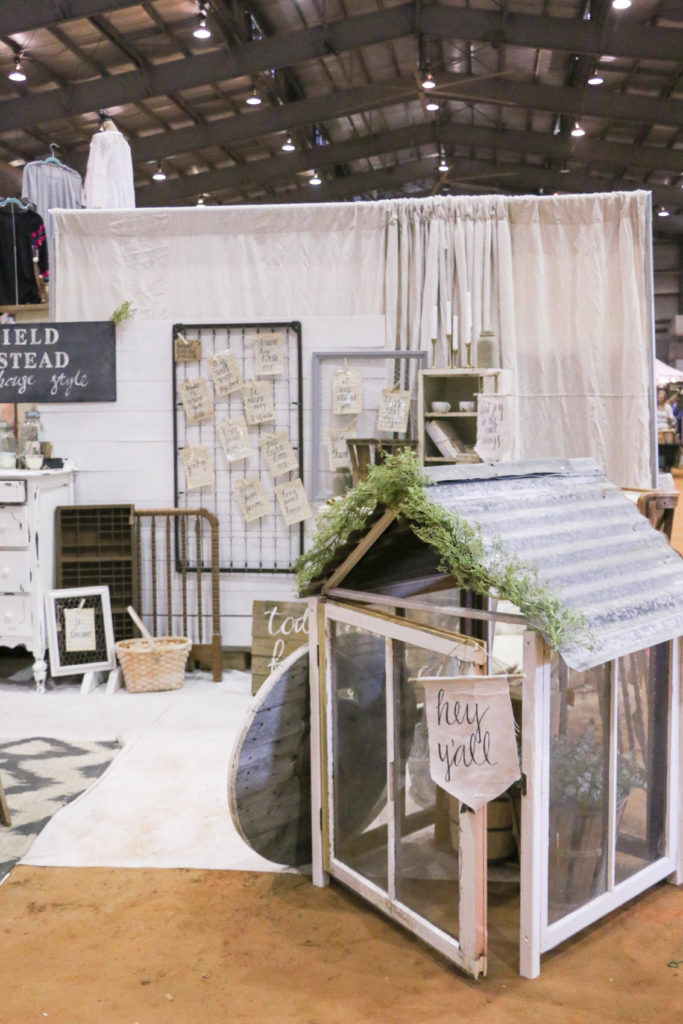
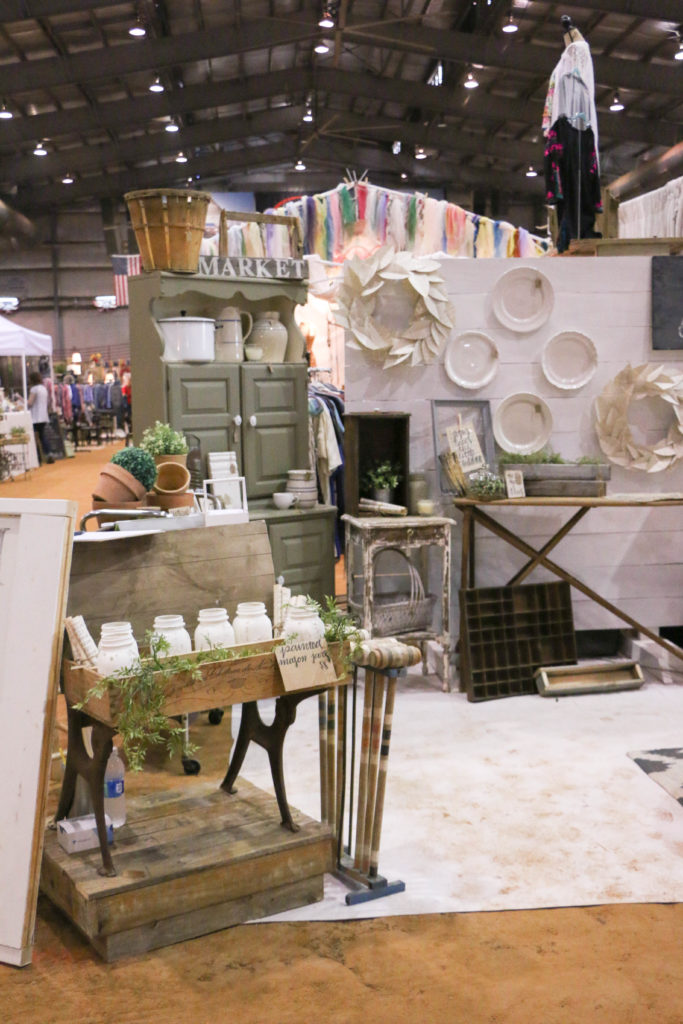
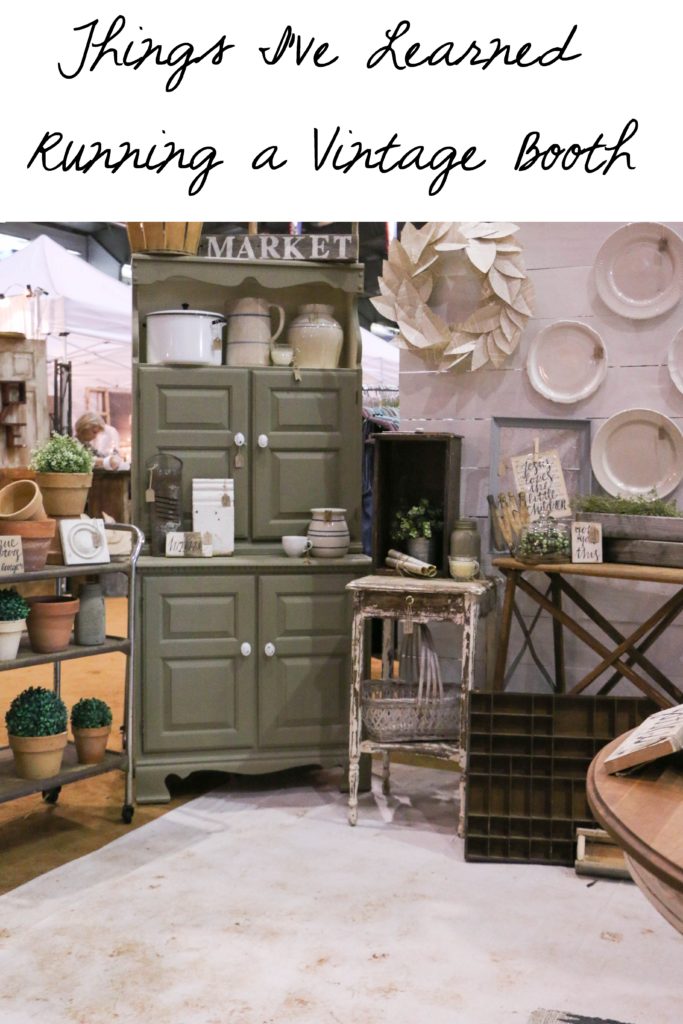
Hey y’all! I am just coming out of a great weekend, and while it’s fresh on my mind, I wanted to share with you everything! This weekend I had a show with Vintage Market Days, which is my favorite event, both as a shopper and as a vendor. This was my second show with VMD, and I have continued to learn so much now that I have two shows under my booth. I still would consider myself a novice by all means, but I’d love to share the top five things I’ve learned, should you ever consider running a booth yourself!

Style the booth like a room. 

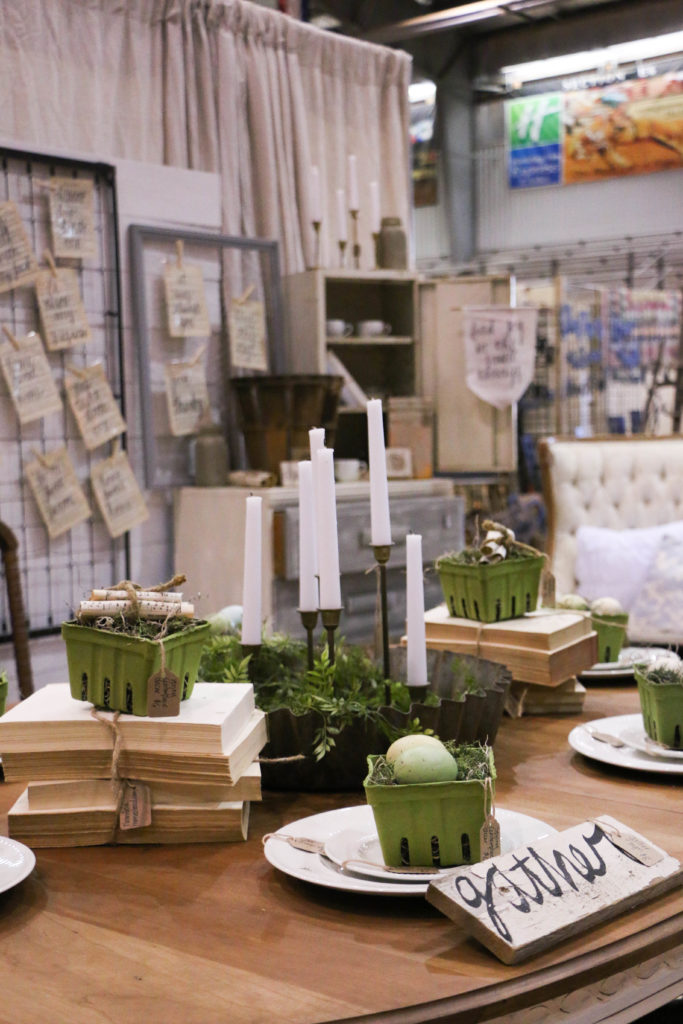
The first thing you want to do is think about your booth as a room. You don’t want to just randomly place furniture around a room in your house and call it a day. You think carefully about walkways, flow, and how you decorate. Think carefully about how to piece things together. I added walls to the back of my booth, a portable faux shiplap backdrop that I could hang things on. This created not only the feeling of being in a defined space, but also gave me vertical space to display things on. That is huge! Your house has walls where you hang things, so should your booth! You may be placed up to a wall, but chances are, you’ll be backed up against another booth or an ugly wall. Put something up so you can make your booth look homey! The shiplap walls were a big hit, and I am so impressed with how Ethan made these!

Think big! (But also small.) I would consider myself to run a redesigned furniture booth. However, not everyone who walks into a market is going to be in the market for (or have money for) a large furniture piece. I don’t know how many times people walked by my booth to admire my farmhouse table but walked away saying but I don’t need a table. People won’t usually spontaneously purchase a large furniture piece, but they will buy something small. Have items at all price points! I had pieces ranging from three to five hundred dollars. Make your items mass appeal. This doesn’t mean you have to offer things that aren’t true to your style, but bring things in that can match anyone’s price point. Even though I have furniture in my booth, I made most of my sales on small items.

Constantly rearrange. 

Things will sell. Even if you have your booth perfectly styled before the market starts, things will sell and leave gaping holes in your booth. You have to be quick on your feet and be able to move things around to constantly make the booth presentable. Another vendor gave me some great advice this weekend and told me not to be afraid to rearrange during the show. It will make shoppers less intimidated to come in and check things out, plus it brings different items to the attention of shoppers if they walk by more than once. Someone may think they’ve seen everything, but when you rearrange, they may notice something they haven’t seen the first time around. They’re much more likely to stop and shop!

Make friends with other vendors! 

Other vendors are a wealth of knowledge. Everyone has different experiences and expertise, and they all have something to offer. And the best part is that if you’re warm and friendly, they’ll be warm and friendly in return! As someone just starting out, this is huge! They are so generous with advice and tips, especially those who have been doing things for a while. You never know who you’re going to be set up next to, so make sure you learn everything you can from those around you!

Be mindful of logistics. 

Lastly, don’t forget about the logistics. Bring canvas dropcloths if you’re on a dirt floor. Bring change for cash buyers. Be prepared for shoppers to pay with card. Bring tools, because something will invariably go wrong. Bring chairs for sitting during the show. Have a plan for load in and load out, whether that means a truck, trailer, or strong muscles. Make a list and check it more than once, because you’ll always forget something.

These are just some of the things I’ve learned, but I feel like I’m way more experienced than I was before! Each show is a learning experience, and I am so thankful to have the opportunity to continue to grow this little side business I have. It’s exhausting, exhilarating, and exciting at the same time. Creating the pieces for these shows and seeing my ideas come to life is an indescribable feeling. Have you ever thought about becoming a vendor at a craft fair or antique market? I hope these tips help you out!

Well, that’s all for today friends! Have a fabulous day!

DIY Projects

Easy Spring Craft

Hello everyone! It has been a LONG time since I’ve been here, partially due to my own lack of inspiration, but also due to some website hosting transferring issues which prevented me from updating the site at all. I am back and full of inspiration and ready to share with you some fun little things I’ve been working on!

Spring is here, and I am in spring mode! When it comes to most seasonal décor, I tend to shy away from overtly seasonal things. I’m not into bunnies for Easter, or turkeys for Thanksgiving. I prefer a simple and understated look for each season. That being said, I wanted to share a super simple craft for spring time I have! It’s one of those things that makes me feel almost silly for sharing because duh, it’s that easy.

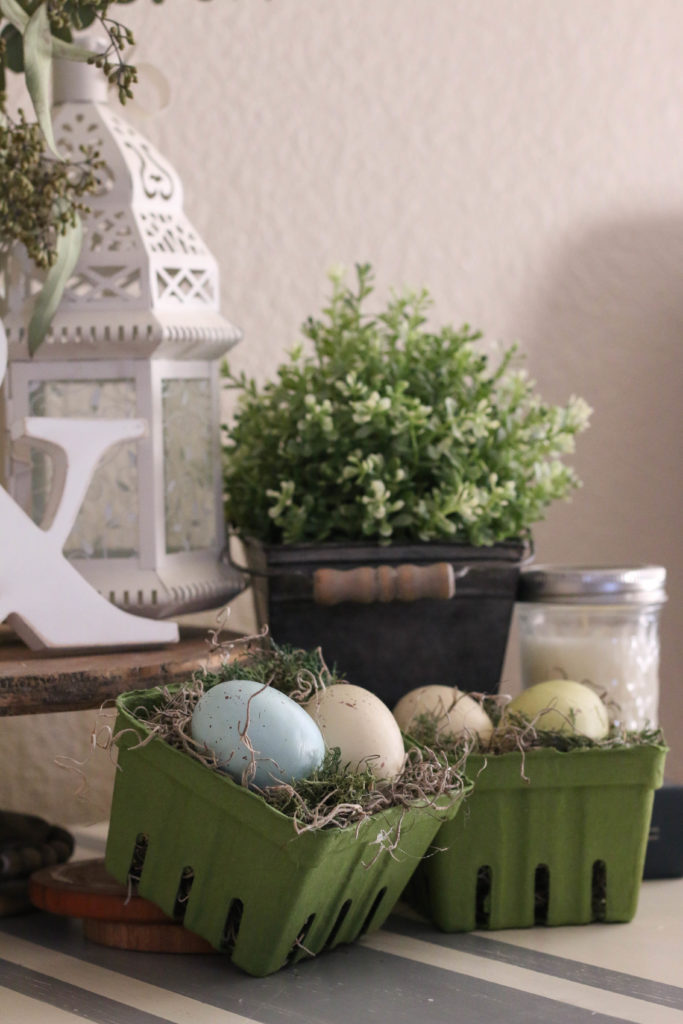
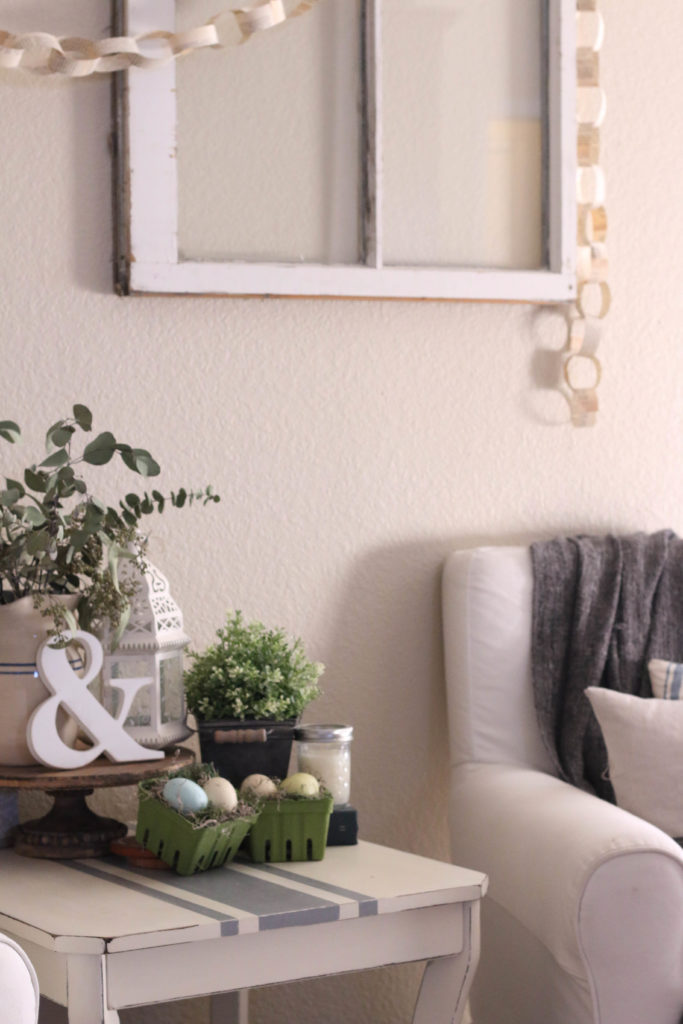
I wanted to make something small enough to be used in a tablescape, but didn’t necessarily have to be used in a place setting. Here’s what I came up with:

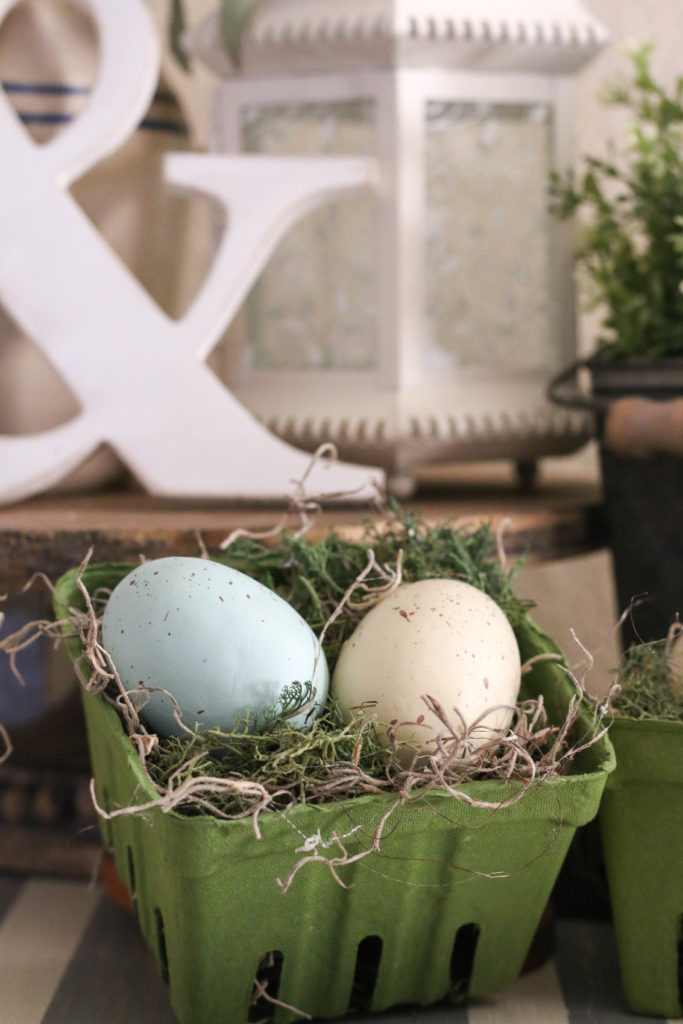
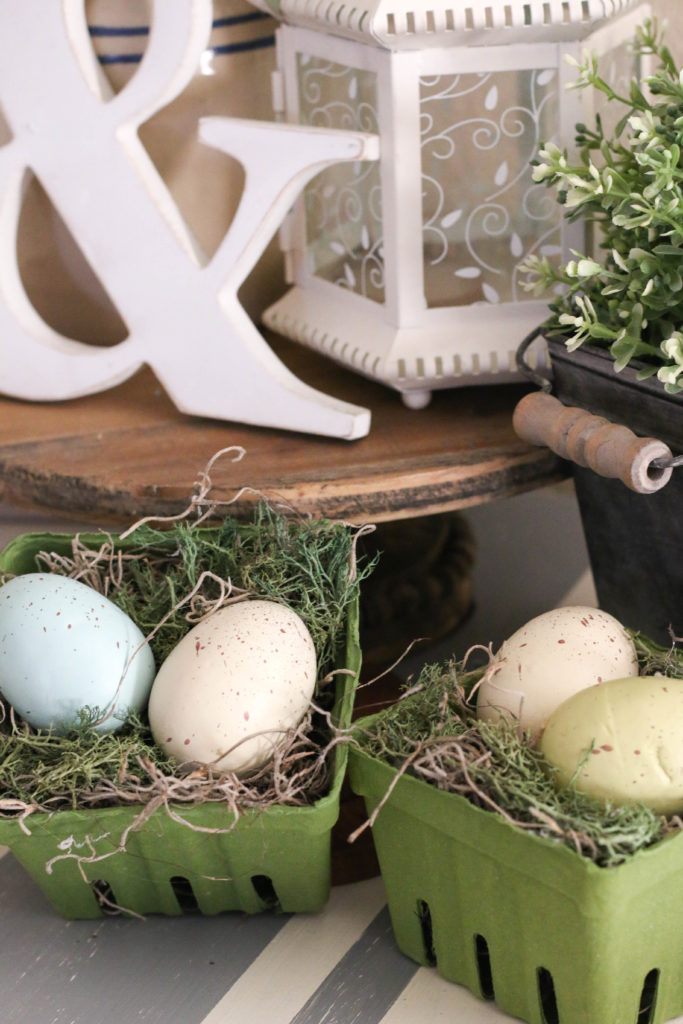
Most of the materials can be found at a local craft store. I hot glued the Spanish moss into the bottom of the berry basket, and added a tiny bit of green moss on top. I hot glued that down as well, trying (unsuccessfully) not to burn my fingertips. I then placed the eggs on top of the moss and glued them down. Again, I’m kind of embarrassed to share these because it’s so simple. But this is the only official spring thing I’ve made for the house, so I had to share!

The cool thing about this is that it is totally just a template and you could do whatever you’d like! You could customize this with items you have around the house, or any other small item that suits your fancy. Easy enough, right?

And if you’re not keen on making these yourself, I will have lots of these little cuties available at my booth during Vintage Market Days in Glen Rose, TX. It’s going to be an awesome event that you are not going to want to miss! I have been working really hard to bring some items for this event and I would love to see you there.

Have you gotten your spring craft on yet? I think this season is the perfect one to get crafty! Push away those winter blues with some fun projects! I’d love to see what projects you’re working on! Feel free to tag me on Instagram or Facebook. Happy crafting! That’s all I have for today, have a fabulous day friends!

Personal

We Didn’t Watch TV for a Month!

Yes, you read that correctly. If you’re new here, don’t quit reading on me. This blog is typically about my house and how I decorate on a budget, but this post is more personal. Bear with me.

For the month of January we decided not to watch TV at the house at all. It wasn’t really a new year’s fast thing, it was just something I thought would be fun to try. Sometimes I (and most Americans probably) can get sucked into sitting on the couch for hours on end. Which is totally fine. I work really hard during the week and sometimes I just need to do nothing.

The problem is that when I sit around doing nothing for multiple hours, I just feel unproductive and gross. So when I brought up the possibility of not watching anything for a whole month, Ethan was on board. He may have been a little bit reluctant, but if he was, he didn’t let on. I wanted to see what it would be like without it in the house. And let me tell you: it was awesome. Here’s what happened.

First, I just did more. More of everything. I worked on projects more frequently. I actually got off my butt and got into the garage to get stuff done. I painted more, finished a lot of things that had been in my garage for months, and got ahead on pieces for my upcoming spring shows. That alone would have been enough to call it a success, but there was so many other benefits.

I read more books. On a normal weeknight, when I would normally be watching my shows, I was reading books. I frequented the library much more often, and read four books this month. Which is a lot for me. I have always enjoyed reading, but I’m not what you might consider an avid reader. I have always used the excuse that I didn’t have time. Which wasn’t really true. I had the same amount of time, I just didn’t prioritize well.

I also felt more rested. Somehow even though I was getting more accomplished, I just felt better. I had more energy, and I wasn’t a total zombie when it came to the end of the day. Teaching can sometimes drain your energy, and so when you’re teaching all day you tend to be exhausted. And there were those days. But overall, I wasn’t super drained. I felt all around good. I cooked at home more and even baked some too! At first I thought that we would spend more money because we would be bored at home, but honestly I think we spent less money than we normally do because I was so much more productive and energetic.

There were things I thought I’d miss, and I’ll be honest, it was hard not tuning in to the newest episode of Fixer Upper each week when everyone else was posting and sharing photos of the great episodes, but there were other things I didn’t even miss (cough* The Bachelor *cough). As the month went on, it seemed like the feeling of missing out on things kind of passed.

Overall, it was a month of rest and rejuvenation. It was the perfect way to start the year off right, and it set the tone for what’s to come this year. I think it might be a good tradition to continue into the years to come, but we’ll see. Ethan may not quite agree. 🙂 Either way, I’d recommend it! I enjoyed this month, and I think if you gave it a try, you’d be surprised at how it turns out! That’s all for today, friends. Have a fabulous day!

DIY Projects, Furniture Makeover

DIY Antique Farmhouse Dresser

Hello friends! Happy Monday! Today is good day for a good day, am I right? I’ve been super busy lately with projects and it is a wonderful feeling! Last weekend Ethan and I cleared out our garage, which gave me plenty of room to work. We organized all my materials, and made a place for everything.

It used to be super full and I barely had room to work on anything, but now that it’s all clean, I’ve been super inspired to work on projects in there. It feels like I can finally breathe!

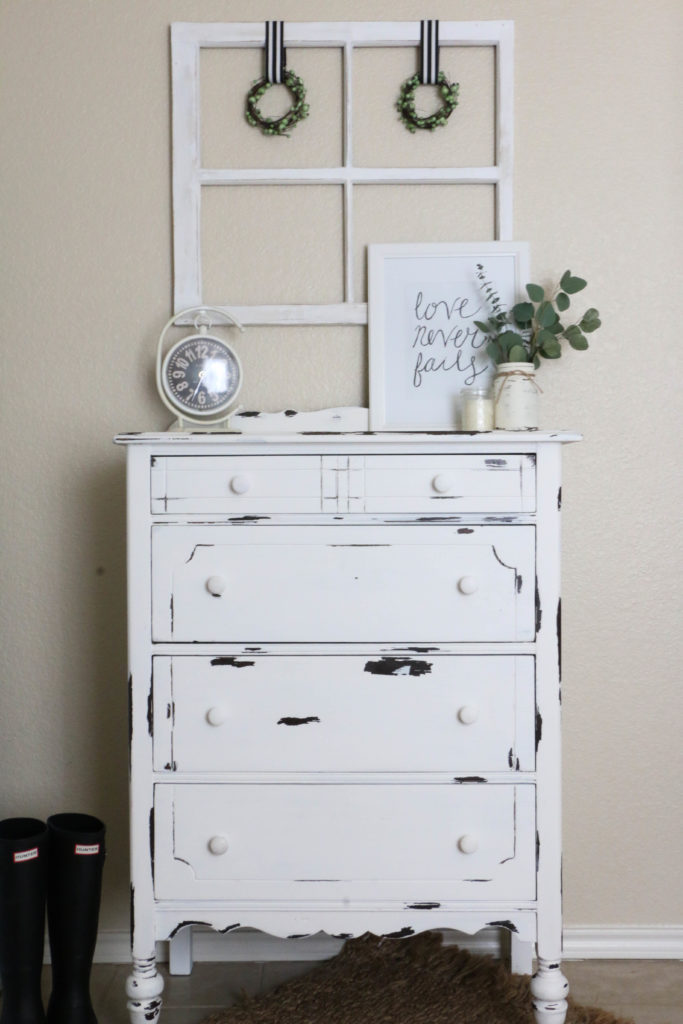
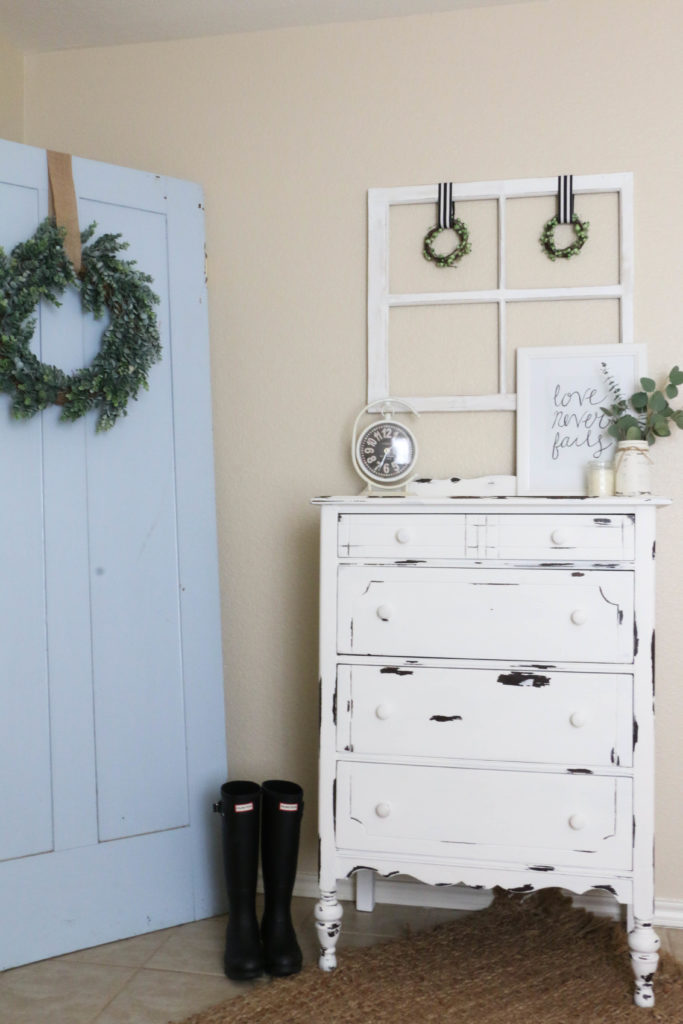
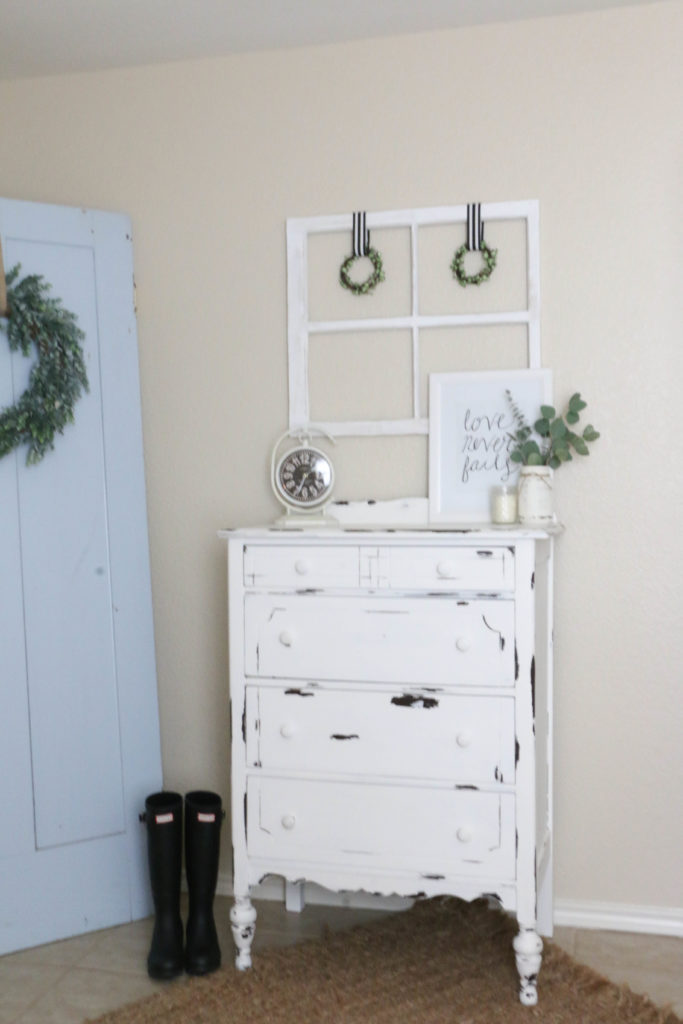
One of the projects that I finished up this week was this little antique dresser. I snagged this dresser up from a friend who was selling it at her garage sale. I saw it and knew I had to have it! And because I am the worst at taking before pictures, you’ll just have to use your imagination. It was just plain brown and missing a few handles.

Well, I painted her up, and here she is in all her antique farmhouse style glory:

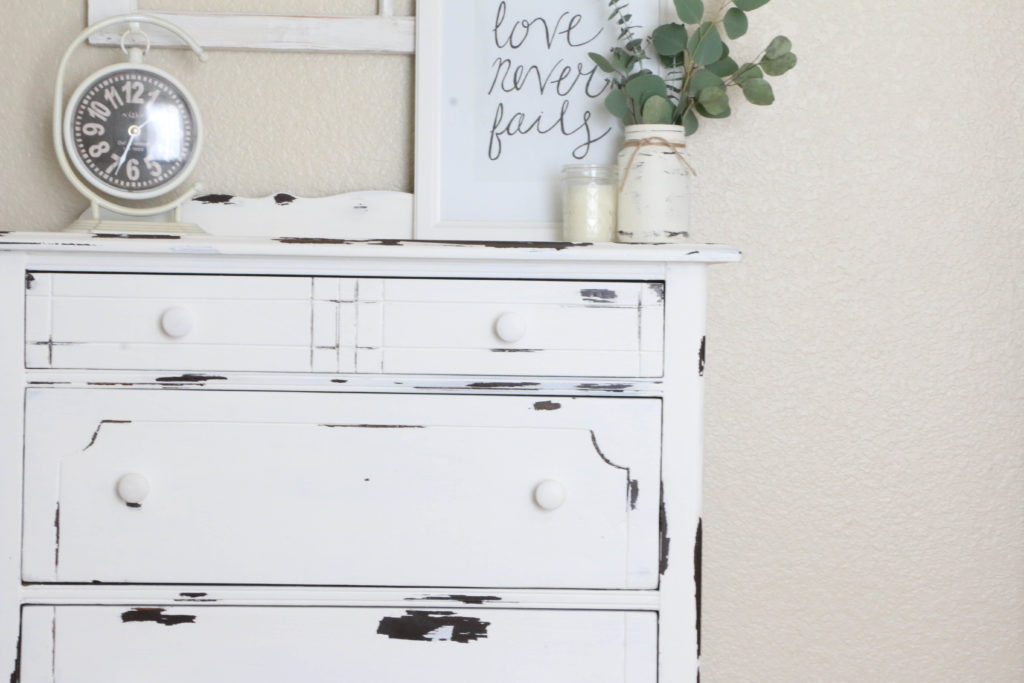
Okay, so with this project, I tried something new. I knew I wanted it to be super distressed, and rather than use my sander, I wanted to try the Vaseline trick that furniture painters everywhere have been talking about. So I applied Vaseline all on the edges of the dresser. (Basically where you see distressing is where I applied.) I found that it was easiest just to use my finger rather than messing with a paint brush.

After I applied my Vaseline, it was time for paint. I used Palais White by Behr in a flat finish. I painted everything evenly, including the areas that where I had used Vaseline. Now here’s where it gets tricky. My dresser needed two coats. Being the impatient person that I am, I could not wait to see the effects of the Vaseline after the first coat of paint. So, I began rubbing the areas with a rag. This was a dumb idea because I still had to paint a second coat.

The paint will not adhere to the Vaseline, and it basically makes a crackly looking paste in the areas where the Vaseline was applied. If you have to paint two coats, do not remove the Vaseline until finished with both coats. That was my biggest mistake. The technique worked well enough, but I had to reapply Vaseline so I could do my second coat.

Personally, I think I would rather just take my sander to the project afterward, but it’s good to try new things. Plus that’s mostly because of my own impatience.

After I finished the painting, I topped it with Annie Sloan clear wax to give it a protective finish. The wax is technically used for chalk paint, and I previously had only ever used it on chalk paint, but because flat paint is pretty porous, I figured I’d give it a try, and it worked pretty well!

I just love this cute little dresser, and it matches my light and bright farmhouse style perfectly! But alas, I won’t be keeping this one. She will be heading with me to my spring shows (which I will be keeping you posted about more soon, but the first one will be the Vintage Market Days in Glen Rose Texas in March. So that’s good news for you, because this cutie could be yours!

So, have you ever tried using Vaseline to distress painted furniture? I’d love to hear about your experience! Don’t forget you can find me on Instagram and Facebook for more behind the scenes fun of my day to day life! Well friends, that’s all for today. Have a fabulous day!

Home Decor

Clean and Wintry Tablescape

How is it January already?! This is crazy! I am heading into two years of blogging, and that is crazy to me as well! Every year when Christmas is over, and all my decor comes down, I crave simplicity. And, let’s be honest, I am pretty much ready for spring. I know that we will have winter weather yet, but so far the temperatures have been around sixty each day, which just feels wonderfully spring-like.

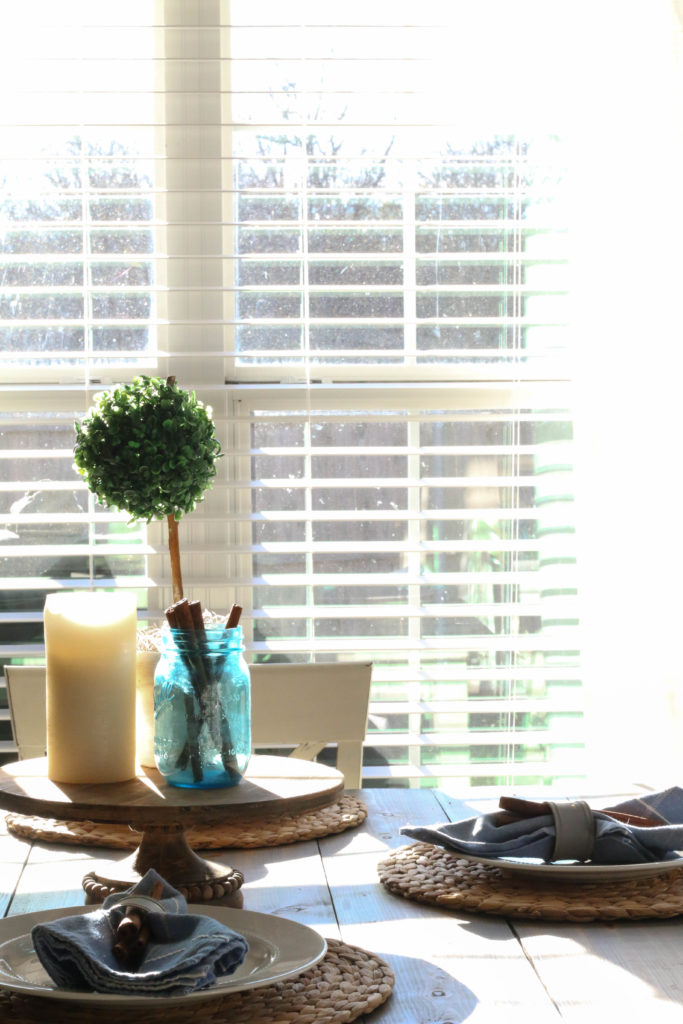
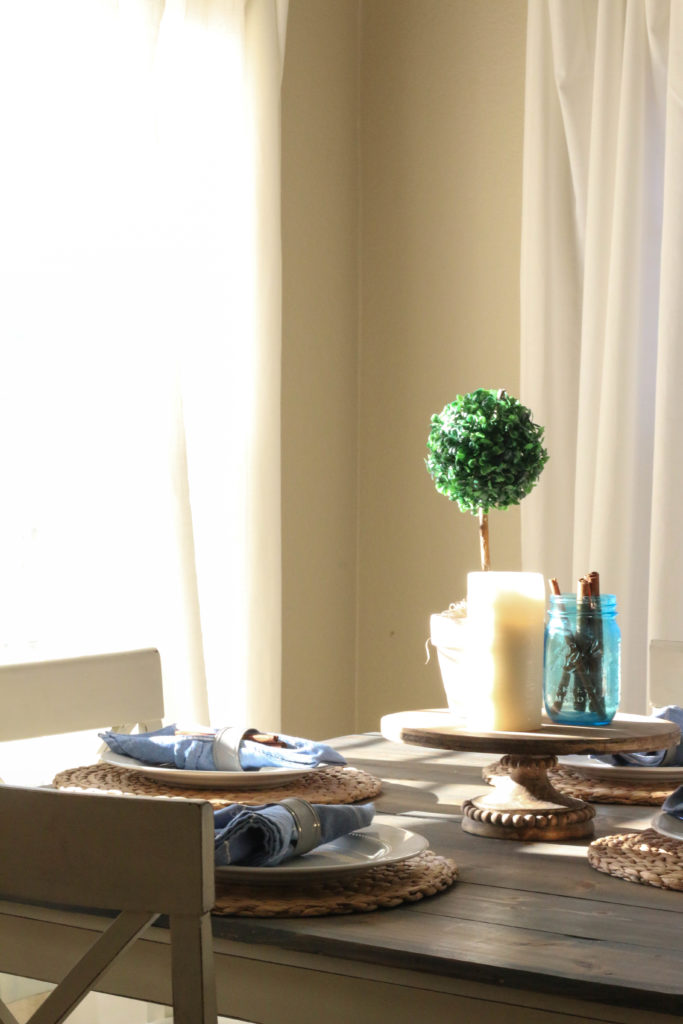
Anyway, I took down all my Christmas decor and I made my table simple and clean for the wintry months ahead. I know it might seem silly, but I really do always have my table made up. It brings me joy to have a pretty looking table, and no one should be able to steal your joy, so I say do what you want! I like to use a lot of blues in our house, and so I have one set of blue napkins that are my absolute favorite. I tend to mix these in with each season.

winter-table-1

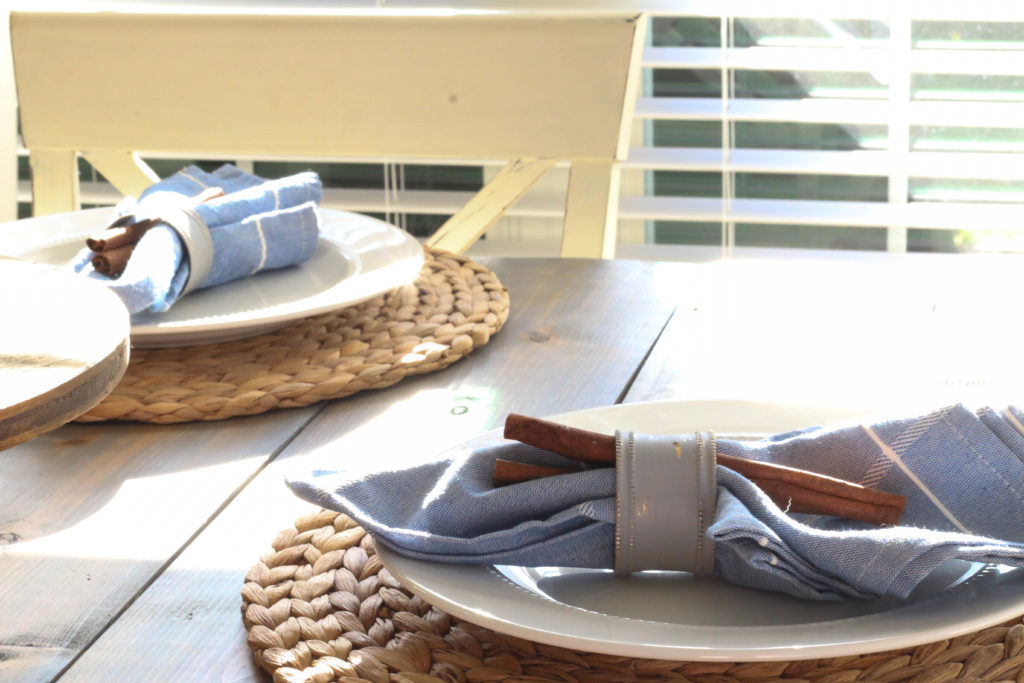
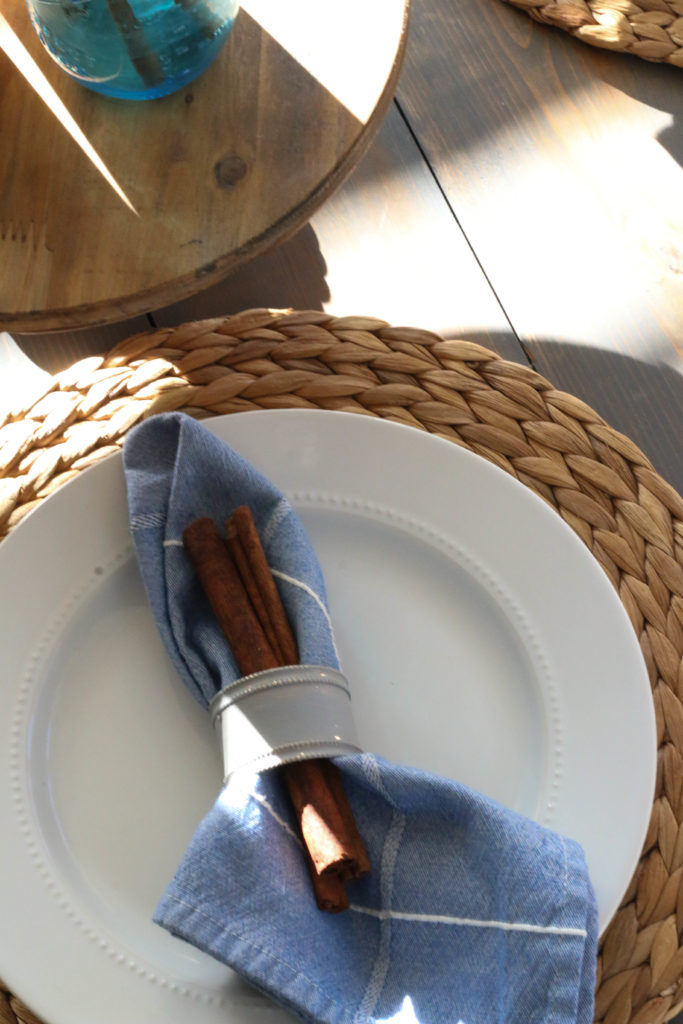
I’ve been meaning to buy some napkin rings for a while now, but my cheap self never could pull the trigger. I found these the day after Christmas at Hobby Lobby. They were a metallic gold, which was a little too “holiday glitzy” for me, so I painted over them with a quick gray paint. The paint naturally wore off in a few areas (probably because of the slick texture), and it turned out to be perfectly chippy. I love it!

winter-table-4

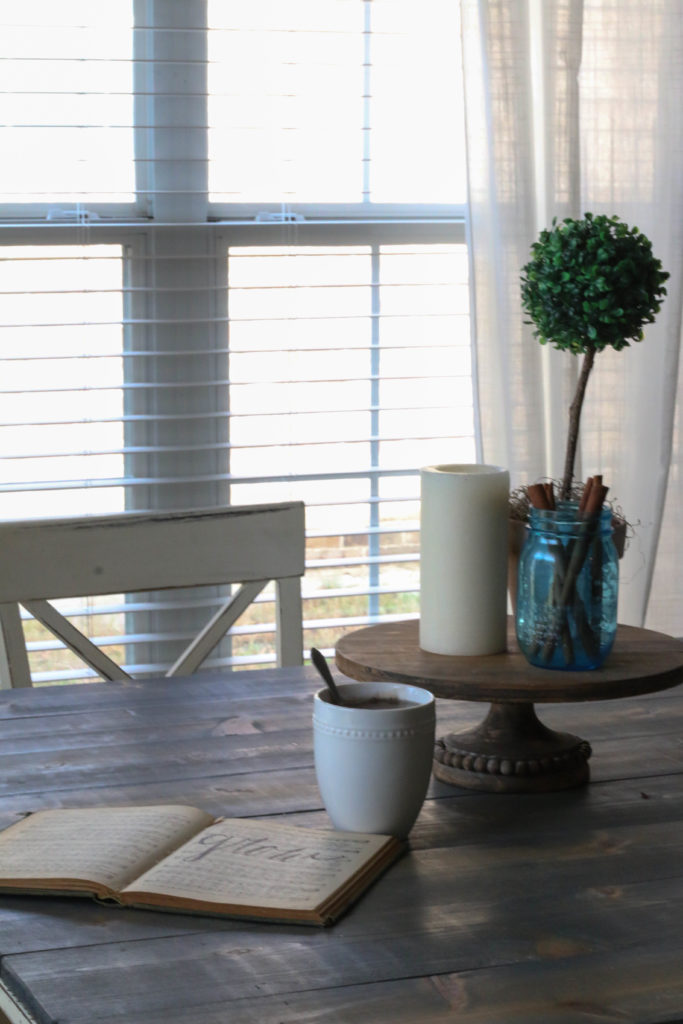
The white pillar candle was also an after Christmas clearance special (my favorite time to shop). A simple jar with cinnamon and my DIY Boxwood Topiary  make my little cakestand look finished yet clean.

 winter-table-6

And can we talk about this afternoon sunlight pouring in? For some reason late afternoon sun perfectly equates to winter for me. I’m not sure why, but this season really can be beautiful (even if it gets dark incredibly early and we don’t even have snow).

winter-table-5

For me, setting the table really can be a theraputic and meaningful time. I love the finished product of course, but the act of designing and putting together a table is incredibly rewarding to me. What about you? Do you have a table that’s typically set, or do you prefer a blank canvas?

A few sources for this design if you’re interested:

Napkins: Tuesday Morning

Napkin Rings: Hobby Lobby

Cake Stand: Magnolia

Plates: Target

Chargers: IKEA

That’s all for today, friends. Have a fabulous day!

Personal

2017: My Word for the Year

Hello all! Can you believe that Christmas has already passed? It seems like the season moves more quickly with each passing year. I saw someone post on social media the other day about the time between Christmas and New Years being “a week of not knowing what day it is or what you’re doing with your life.” It’s funny, but it’s so true! Especially for me because I’m a teacher, I don’t have to work on the in between week, and so I’m at a total loss. Every day is leisurely and wonderful.

It is always a time for reflection though, and I love to use this time to reset before the new year. Last year I wrote a quick reflection on the year, and you can read that here . I was reading over it, and it is so awesome to see what this year has held for us, even when I didn’t know it. God is funny that way, isn’t He? Always knowing what’s ahead even when we’re doubting the plan.

This year rather than making any official resolutions, I am choosing one single word to represent my outlook for this upcoming year.

wordoftheyear1-1

I’ve never done this before, but it’s an alternative approach to resolutions. One with lower stakes. I’m not one for making make or break resolutions, but I can get on board with one single word. So for this next year, my word is:

wordoftheyear1-2

grow. 

It seems simple, but for me, it has so much meaning. This past year, we moved into a new rental house, I continued blogging, and we had our first successful show as a vendor at a vintage market.

This upcoming year, all I want is to grow. I want to continue to grow this blog, and grow more relationships with the people who read this blog or are in my so called “community.”

I want to grow my little business (it’s literally a family joke that I am technically a small business owner, because I had to get a tax license to be a vendor at a certain event). I want to grow my little side business into an actual side business. Something that is continually bringing in a side income while allowing me to be creatively fulfilled. I was able to get my feet wet a little bit this year, but I really want to dive in this next year.

I want to grow professionally as well. Teaching is no easy career, and there’s always areas of improvement. I want to continue to grow in that area.

And of course, there’s always room for spiritual growth. That’s something that almost seems silly to include, because it’s a no brainer for me, and it’s nothing new this year, but still an important facet to my word this year.

And that’s it! Do you make resolutions? Do you choose a word for yourself each year? I’d love to hear what you’ve chosen!

DIY Projects, Room Tours

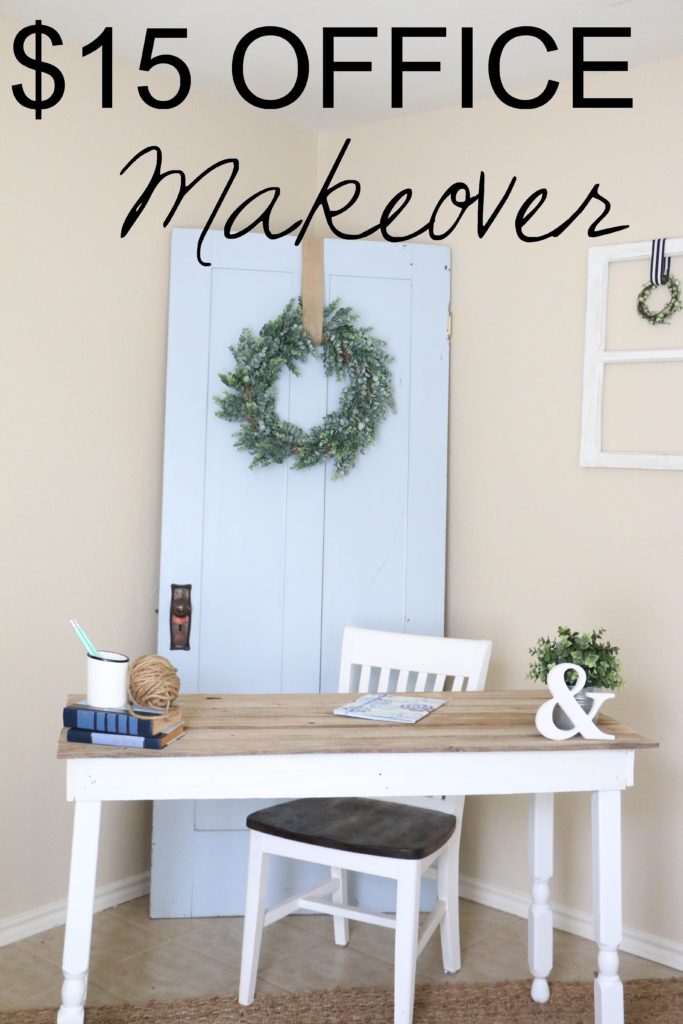
DIY $15 Office Makeover

Hello friends! If you are here today because you clicked on a link that said I spent fifteen dollars on a room makeover and you’re wondering what in the world this is about, welcome. If you’re wondering how in the world that is possible, hold on. I’m about to tell you. But first, let’s rewind.

We moved into this rental house in July. And in July we had fabulous plans of quickly making each of the additional bedrooms into a purposeful, functional space. The guestroom quickly became usable (albeit with mismatched hand-me-downs from other rooms), but then there was this third room. It was like the junk drawer of rooms. No organization, no purpose. It housed all the things I hadn’t used in the months since moving in. You know, all the super important things. I’m going to show you some before pictures, but before I can do that, you have to promise that you’re actually going to scroll to the bottom and see what it looks like now. Don’t judge me based on my ugly junk drawer room and then leave. Promise? Okay cool. Here’s some pictures of what the room looked like four months after moving in:
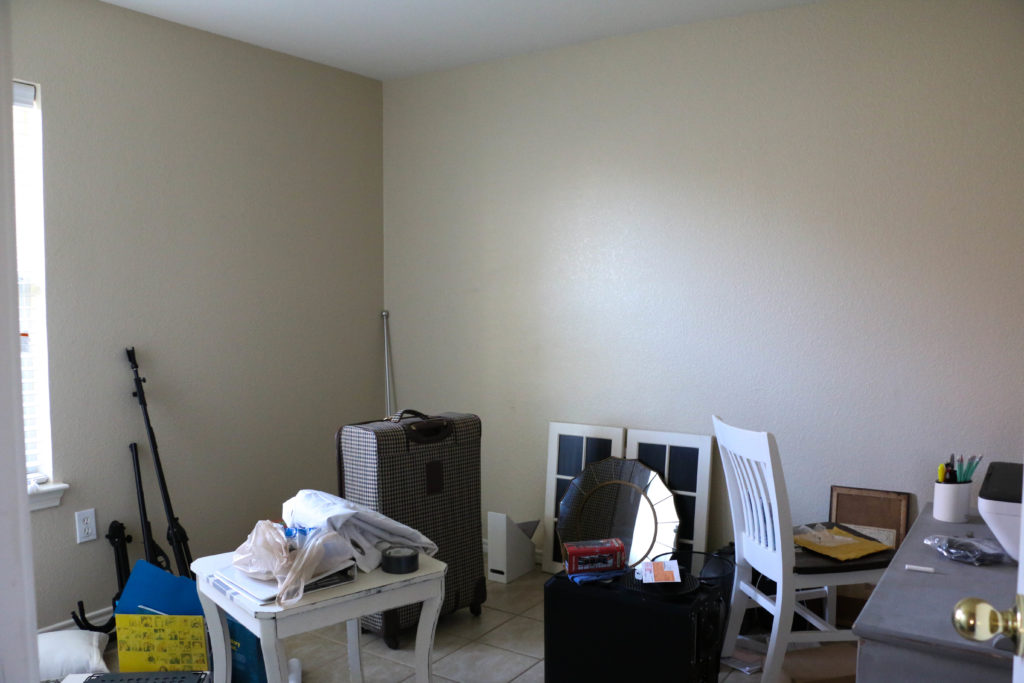
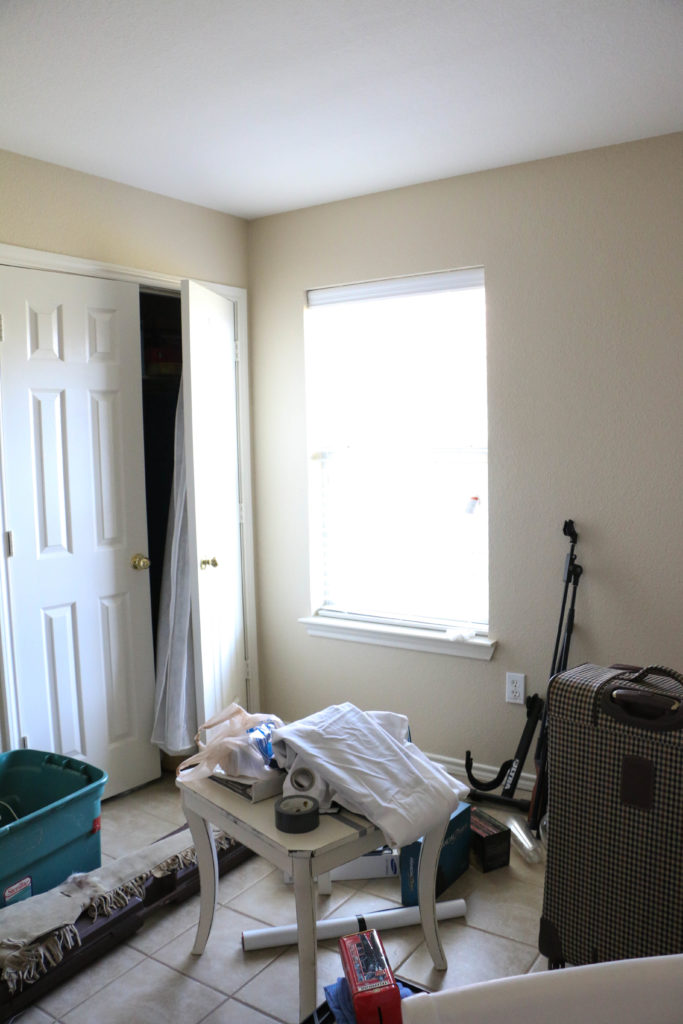
office-before-1 office-before-2

Now, don’t stare too long because you might get sucked into a vortex of clutter. You get the point. Moving on.

So my plan was to make this room into something usable pretty. The only problem being that I didn’t really want to spend any money on this room. So, I did what I always do and put my super cheap creative thinking hat on and got to work.

I shopped the house for items that I could re-use in this room. I dug things out of the garage from our previous house that we weren’t using and brought everything together. I slowly started piecing things together until a room started to form. The only problem was that I didn’t have a desk. Can’t really have an office without a desk, huh?

I had some scrap wood in the garage, enough to make part of a desk, but my rudimentary woodworking skills didn’t know how to fashion legs for a desk on my own. So I went to the architectural salvage shop in town and told the gentleman what I was looking for. Thankfully he makes all kinds of repurposed furniture and so he was super helpful.

He showed me an old child’s bedframe with decorative posts on the ends. He told me that he could cut the posts off for me in the shop, and they would work perfectly as legs to a table. The best part is that he would charge me fifteen dollars for the four legs. (Now is the title of this blog post coming together?)

So on my very own, with no help from Ethan (my choice, not his) I built this desk for the office for a grand total of fifteen dollars.
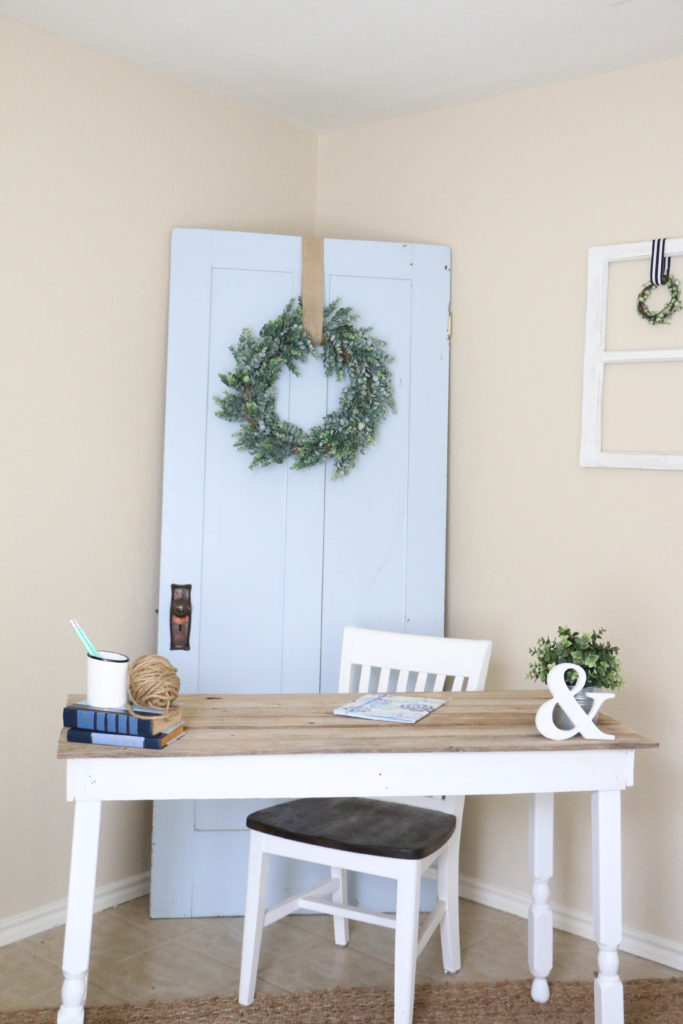
diy-office-2

I added a little frame and then the top, which was all made from scrap wood we found on the side of the road. Can you picture the legs as part of a bed frame? I turned them upside down and painted them white.

Literally every other thing in this room was something I already owned. Which is why this room isn’t quite the office of my dreams, but it’s something that’ll do for now.
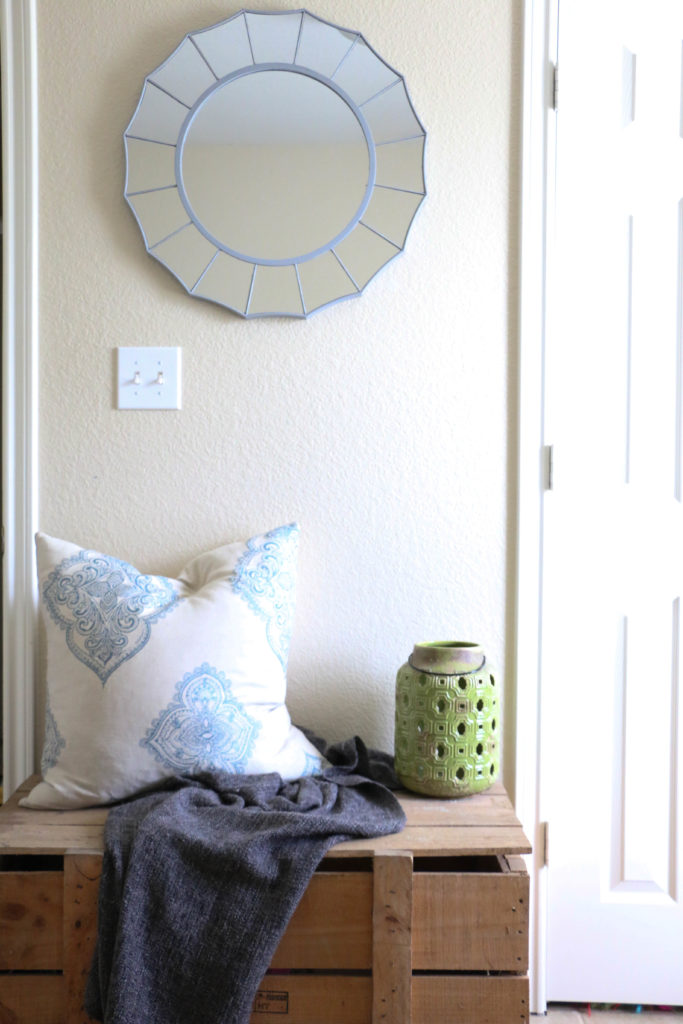
diy-office-5

This crate was something I found at a yard sale this summer and it had been sitting in my garage for a while. It houses our record collection, and offers a place to sit or drop a bag by the door to the room.
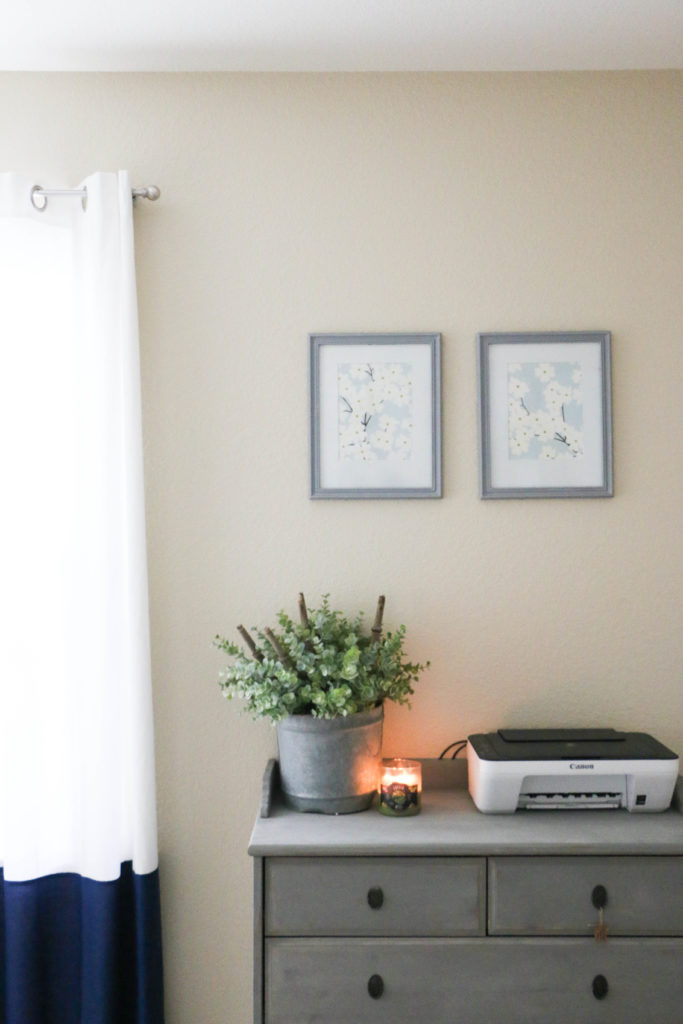
diy-office-4

The dresser was a piece I made to sell (see the tag still on it?), but I decided to keep it rather that taking it to my next show. We needed a place for storage, and it’s a perfect spot to put the printer.
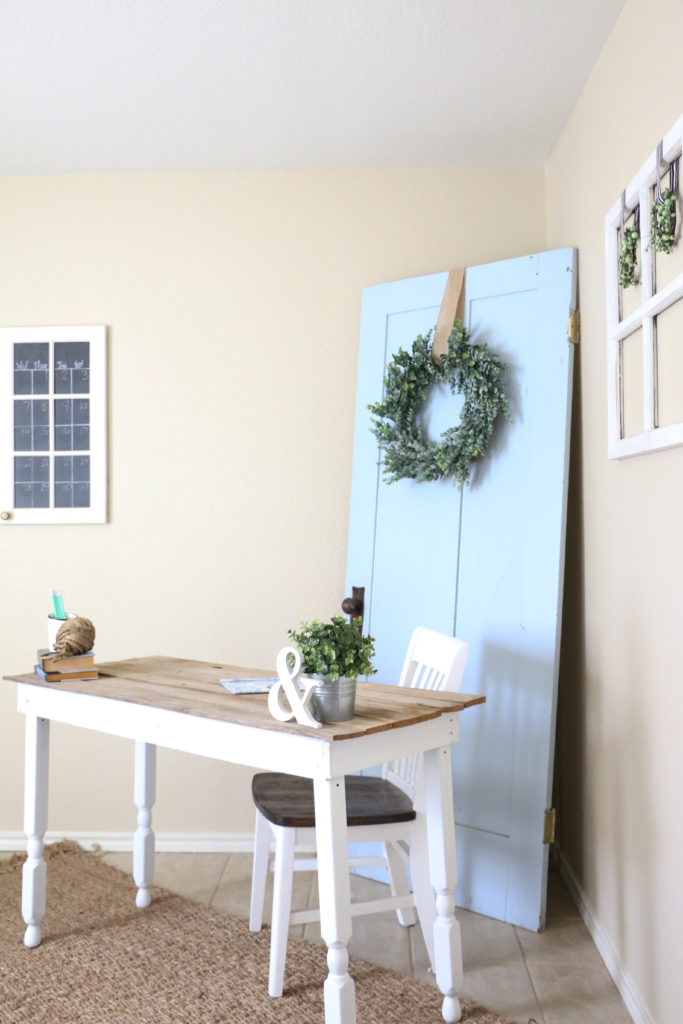
diy-office-1

In the top left of this photo you can see my calendar that I made from some old cupboard doors. We used them originally as decor at our wedding, and they’ve been useless since then. I used a chalkboard marker to add dates to it, and now we have a functional calendar that doubles as wall art. Plus it was free, so I’d call that a win.
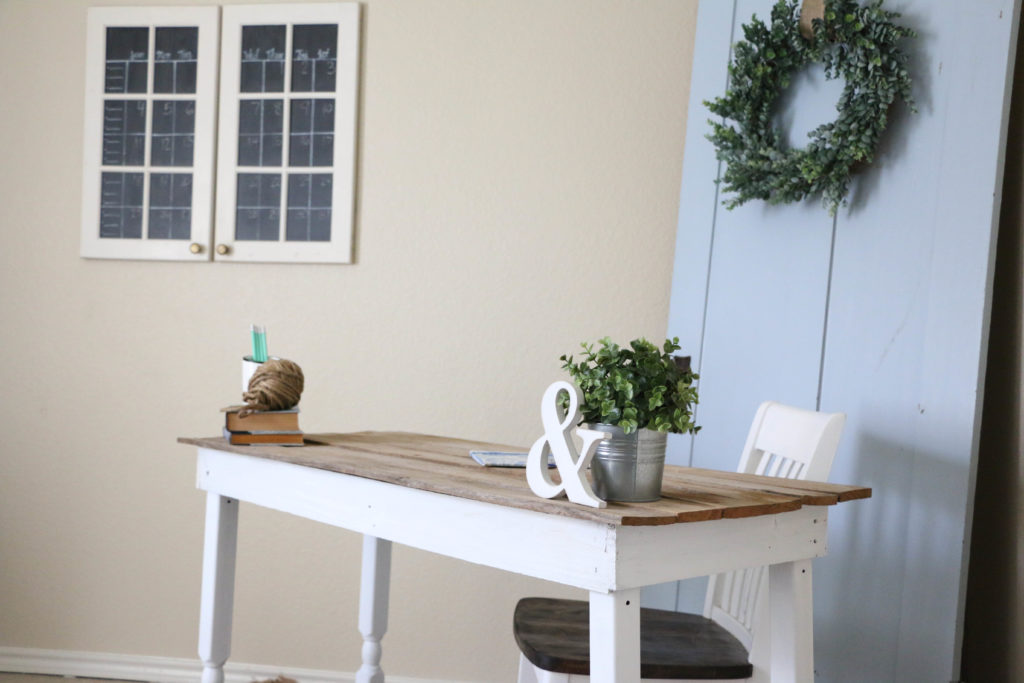
diy-office-3

I placed this old door behind the desk as a focal point to the room, another thing I found at a yard sale this summer. It was an original door to a church in our town built in the 1890’s. I love that I know where exactly it came from.

Literally everything in this room had been sitting in a closet or in my garage until I brought it in here and cleaned out the space. I just love the fact that it’s possible to make do with what you have and still have a pretty home.

I could have spent hundreds of dollars in here, buying all kinds of things to fit here, but at the end of the day, I’d rather stretch myself creatively and do it on a budget anyway. I ended up making that desk on my own. It’s pretty rickety, but I’m super proud of it because I did it by myself. I wouldn’t have the same feeling if I had bought a desk from Target or wherever. My wallet wouldn’t be as happy either!

Well, that’s all for today, friends. I hope you’re inspired by my little office. Maybe it’ll inspire you to shop your house instead of buying something new. Have a fabulous day, friends!
office-makeover

DIY Projects, Holidays

DIY Christmas Sign

Hello friends! Thanksgiving is over and I’m just here in my stretchy pants trying to recover from the delicious feast fest that was yesterday. Now that Thanksgiving is over though, I am super excited because I can officially without shame decorate for Christmas!

Not like I haven’t had my tree up for weeks. But now I’m going to share my Christmas posts without shame! Anyway, I want to show you guys this super simple sign that I made for outside our entryway. It’s totally something you can do yourself too!

I know this is a super popular look right now, and so I wanted to do my own version with some things I had laying around the house. Here’s what I came up with:

christmassign1

The board was an old child’s headboard I had in the garage. As soon as I got it, I knew it would be perfect for making a sign with. I used acrylic paint from the craft store, and some stencils I’ve had for a long time. So long, in fact, that I don’t even remember where I got them.

christmassign2

I used a pencil to free hand the arrow and the trees. It was so easy it’s not even funny.

christmassign4 christmassign5

This sign along with my mini trees in galvanized buckets are the perfect simple entry way. Now I just have to get Ethan to climb up on the roof to hang the outdoor lights. 😉

It’s super simple and fresh, but I kind of love it. That’s how I like to describe my style, so I think this works perfectly.

If you wanted to recreate this look, you could easily use a canvas or a pre-made wooden sign from Hobby Lobby or Michael’s. It’s a perfect weekend for some DIY Christmas crafts, so get out there and make something you love for your home!

I still have more holiday decorating to do, but I’m happily doing it slowly. I’m taking my time and bringing in the season slowly and trying to savor each moment. I’ll be sharing more of my Christmas decor little by little, so make sure you check back for that!

That’s all for today, friends. Have a fabulous day!

diy-christmas-sign

Home Decor

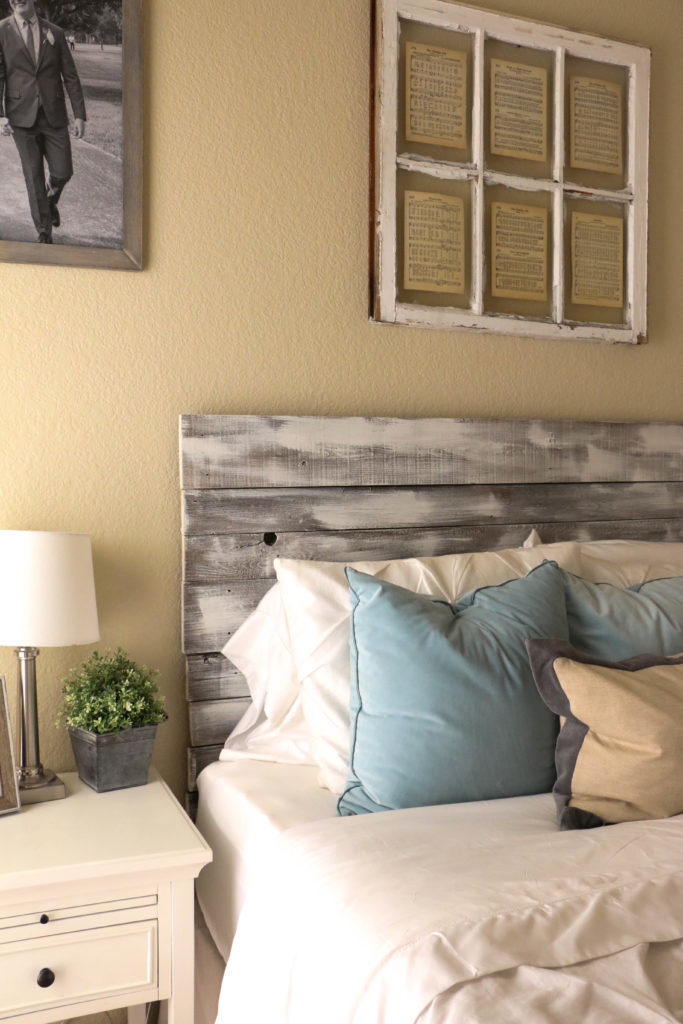
Comfy Bed Sheets

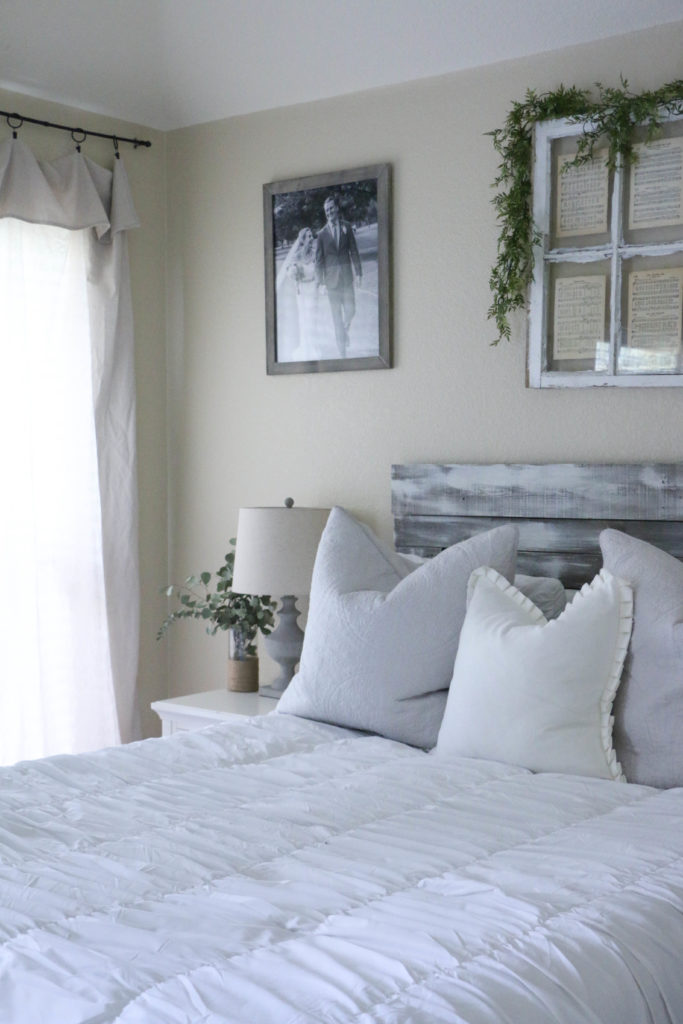
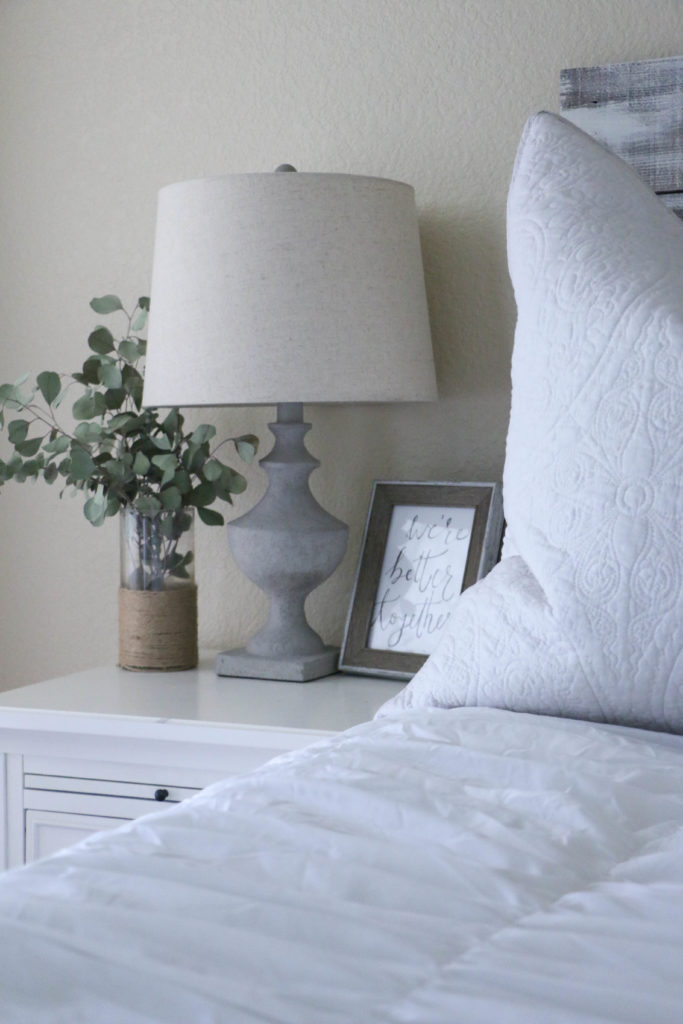
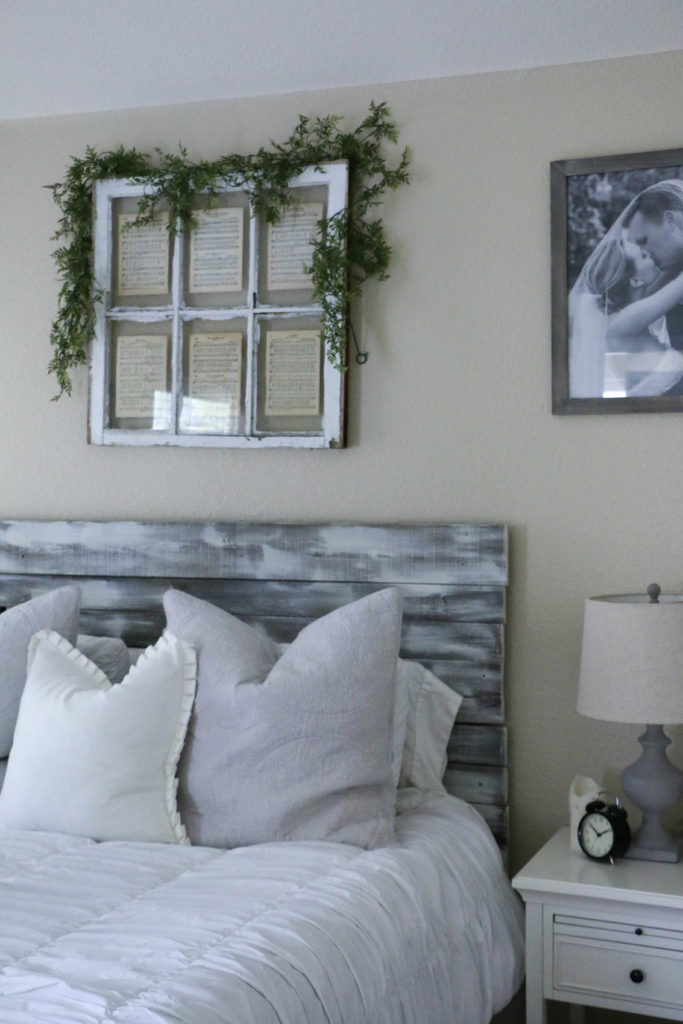
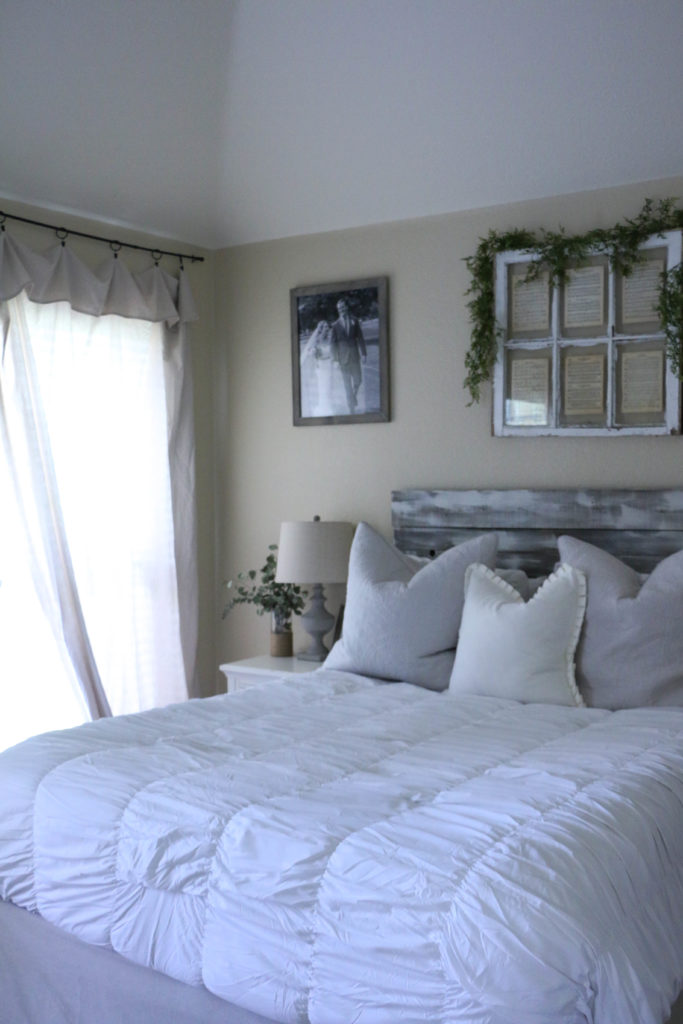
Hello friends! Happy Thanksgiving week! I’m excited to stop by and share with you another part of our ever-evolving home. We’ve been in this rental for four months now, and I’m still working on cozying up the space. The bedroom feels mostly finished, other than a large rug on (which I’m waiting on the budget for).

I’m all about repurposing and making things last as long as possible, but one thing I always want to feel new and fresh is our bed sheets.  I’ve had a difficult time finding good quality sheets that don’t wear out super quickly but also don’t break the bank. I recently discovered a new source for all things home where I ordered some new sheets, and I just couldn’t wait to share!

bedsheets5

I finally caved and bought white sheets because I can bleach the whole thing every time I wash them. My style is pretty light and bright, but I’ve always been hesitant with white bedding because of how quickly it can get dingy looking.

bedsheets8

I ordered these sheets from Hayneedle.com, and so far I absolutely love them! We’ve had a couple weeks to sleep on them, and they are super comfortable and I love that I finally have white sheets!

bedsheets7 bedsheets6 bedsheets3

They help to make our bedroom a little bit more cozy! I’ve washed them a few times, and they have just gotten more and more soft and cozy.

bedsheets2 bedsheets1

I would absolutely recommend these sheets to anybody; they are so soft! Not to mention the price is awesome, and the quality is great. I’m super happy with them, and it’s another thing to check off the list in making this bedroom complete. Now I’m waiting on a rug and this room will be “finished.” I say that loosely because nothing is ever actually finished around here.

Now I’m off to work on some more projects today! Well, that’s all for today, friends! Have a fabulous day!
A few sources for this bedroom:

Comforter, lamps, and nightstands: Target

Blue Pillows: Pier One Imports

Gray and Linen Pillow: Homegoods

**Hayneedle was kind enough to send me this gorgeous bedding, but as always, opinions are my own.

DIY Projects

DIY Dog Crate

Hello all! Today I am sharing something I have been waiting to share for a while. Like a long while. Let me backtrack. We moved into this house in July, and when we first moved in, the only major issue I had with the house was Atlas’ dog crate. I don’t know how many of you are dog owners, specifically large dog owners. If you are, you know how massive and ugly dog crates are. Well in this new house, we don’t have a designated separate area for a crate.

In our previous rental home, we had an area off the kitchen that was out of the way and perfect to hide a huge gaping hole of ugly crate. In this new house however, we had no such luck. There was no other option for us (without allowing Atlas to have a spare bedroom, and we’re just not really into that) other than to put his crate into the living room. So for the past few months we have had a massive eyesore of a dog crate sitting in the corner of the living room and it’s been totally cramping my style.

I haven’t been able to decorate around it because it’s been driving me crazy. I had an idea for a crate that Ethan could build that might look a little less ugly than the typical black metal that I could decorate around. It took a while for this to actually come into fruition, but this is what we came up with:

dog-crate-3

Ethan gets better with every building project he does, and this turned out perfectly! He pieced together the sides each made with chicken wire.

dog-crate-4

The top is made from old fence boards, and Ethan sanded them down to make a nice smooth finish.

dog-crate-7

The front has a door that swings open with a little hook to keep it locked.

dog-crate-9

The best part is that I actually have actually been able to decorate around, without it looking too ugly. The plan is to eventually add curtains that we can close when we have company over, which is why we raised the top a bit off the sides.

It fits into our decor, and Atlas likes it pretty well too! He was even so kind as to pose for the camera while I was taking these photos! (Just kidding. You have no idea how hard it was to catch him not looking stupid.) Seriously though. This project is just what we needed to finish out this side of the living room, and I could not be more pleased with how it turned out.
In case you were curious, this whole project cost about $40. The most expensive part of it was the chicken wire which was about $30. (In order to get the height we wanted, we had to buy at least 50 feet.) The reclaimed wood was donated by a friend who had replaced a portion of their fence. The only thing we bought was the wood and the hardware, and of course the chicken wire.

The chicken wire isn’t super strong, but Atlas is pretty well behaved so we trust him not to try to bust out of his crate. Definitely a pretty and functional piece to add to our decor. Do you have an ugly dog crate at home? Would you ever do something like this instead? I’d love to hear about it!
Well, that’s all for today, friends. Have a fabulous day!

diy-dog-crate