Browsing Category

Home Decor

DIY Projects, Home Decor

How to Hide the Ugly Media Stuff

I am so so so excited to show you today’s project. This one has me absolutely giddy. Y’all know this has been the year of the trash bag, aka I’m getting rid of everything and despising clutter. I’ve been thinking long and hard about what “clutter” even is, and sometimes I think it can be anything that isn’t pleasing to the eye. Even if it’s necessary. So then the dillema becomes how do I get rid of the clutter if it’s necessary? Today I want to share with you some simple things I did in my living room that make everything look SO MUCH neater and cleaner and just all around better.

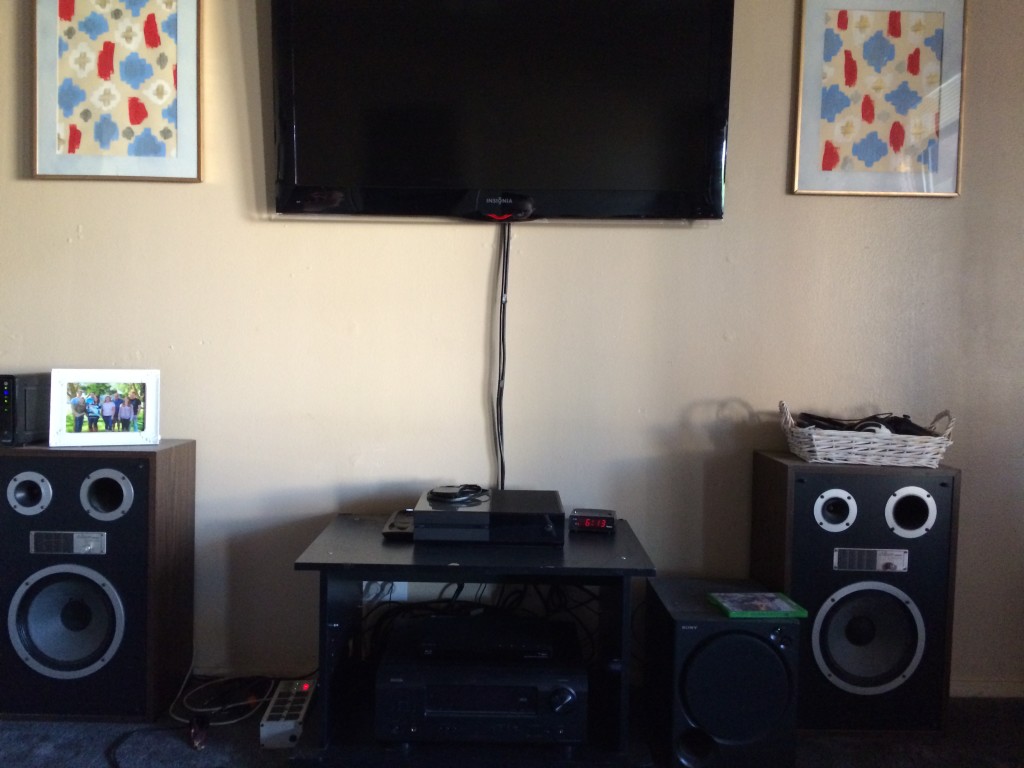
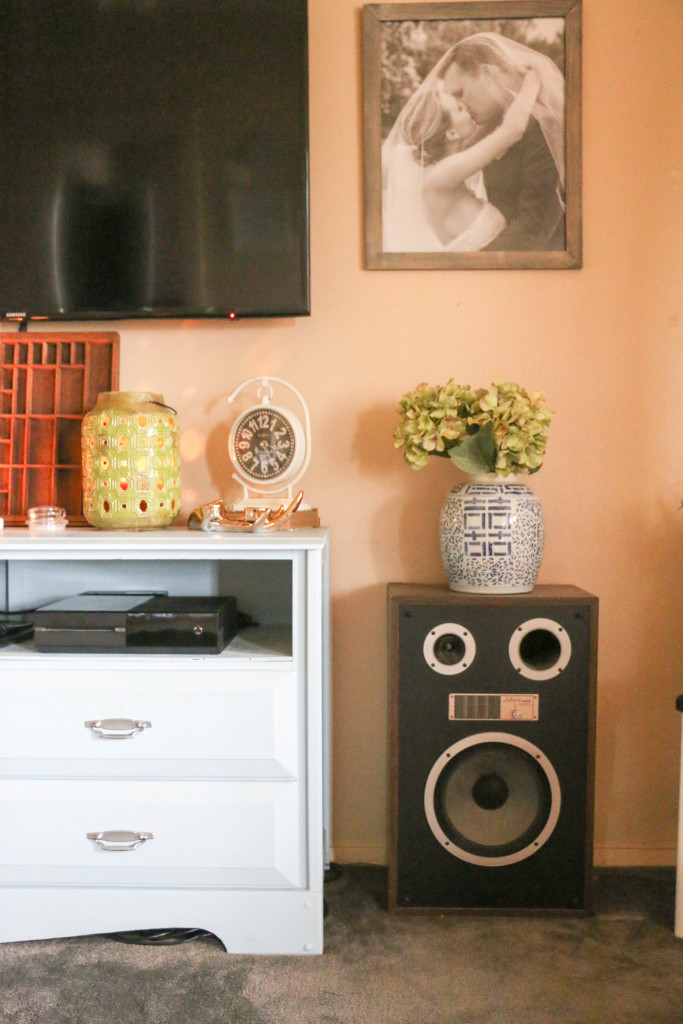
So Ethan is a media guy. He loves sound, and “equipment” is important to him. If it were up to me, I’d be listening to the TV sound from the speakers that are built into the TV. But apparently, my poor untrained ears don’t even know how awful that is. Needless to say, the large speakers and subwoofer weren’t going anywhere. Don’t know what a subwoofer is? You’re not alone. I didn’t either until I met my husband. Marriage is compromise people. But you can at least make the compromise pretty. First, let me show you what sort of equipment we were dealing with here.

speakerbefore1

See how I tried to make it pretty with a vase on top? I wasn’t fooling anyone.

mediaconsolebefore

The media dresser was a project I completed a long time ago, pre-blog, when we first got married. It’s helping the situation, but in about the same way that a bandaid helps a broken arm.

speakerbefore2

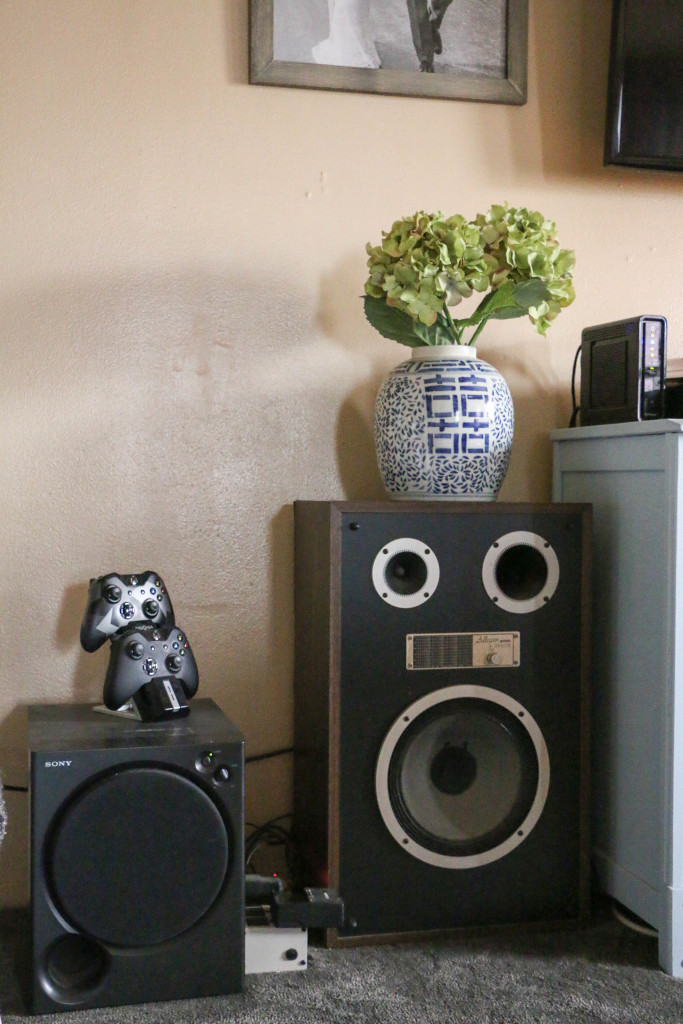
This side is the worst of all. (That on the left is the subwoofer, by the way. It’s the bass of speaker sound. Or something like that.) The power strip, the X-box controlers, all of it.

We tossed around the idea of building a completely new unit that would fit the speakers into it, but ultimately decided against it for two reasons. First, it would end up being extremely long were it long enough to keep the storage we currently had in the drawers and hold the excess equipment. Knowing this house is not our permanent home (thankfully), we didn’t want something so long that its use would be limited in another house. Second, the cost would be higher to build something new entirely than to fix what we already had. So, you know me. I was on a mission to DIY the heck out of this thing.

mediaconsole3

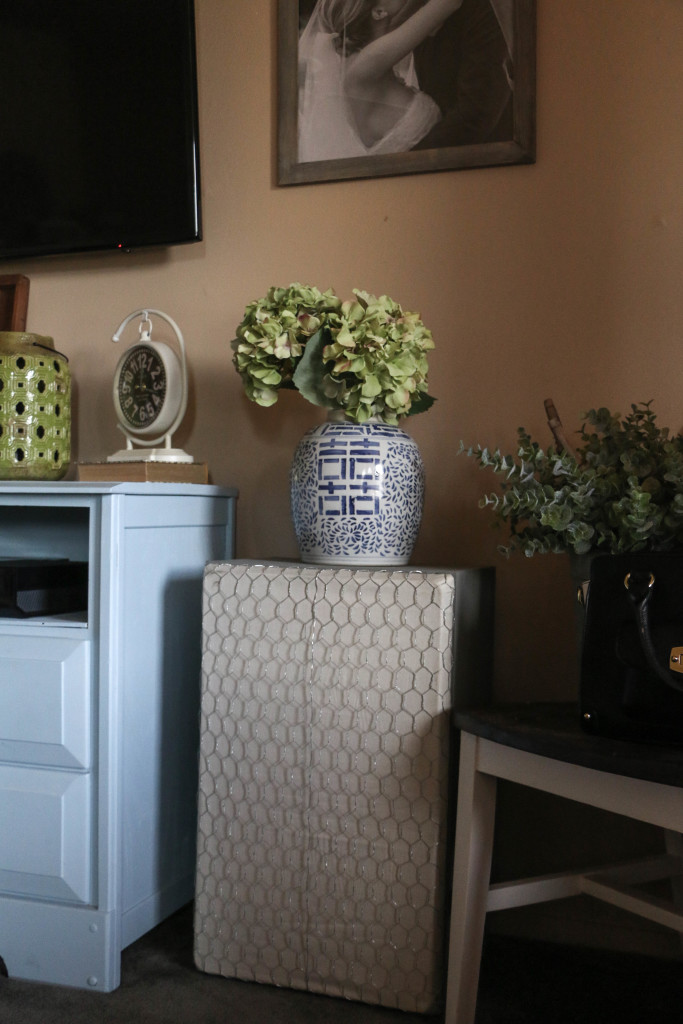
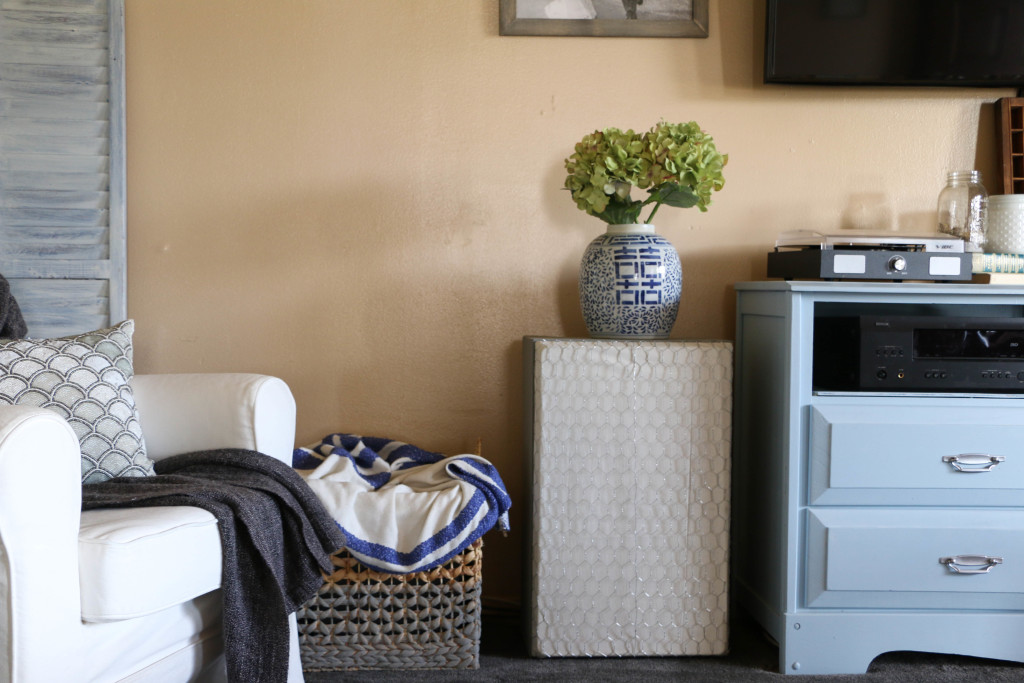
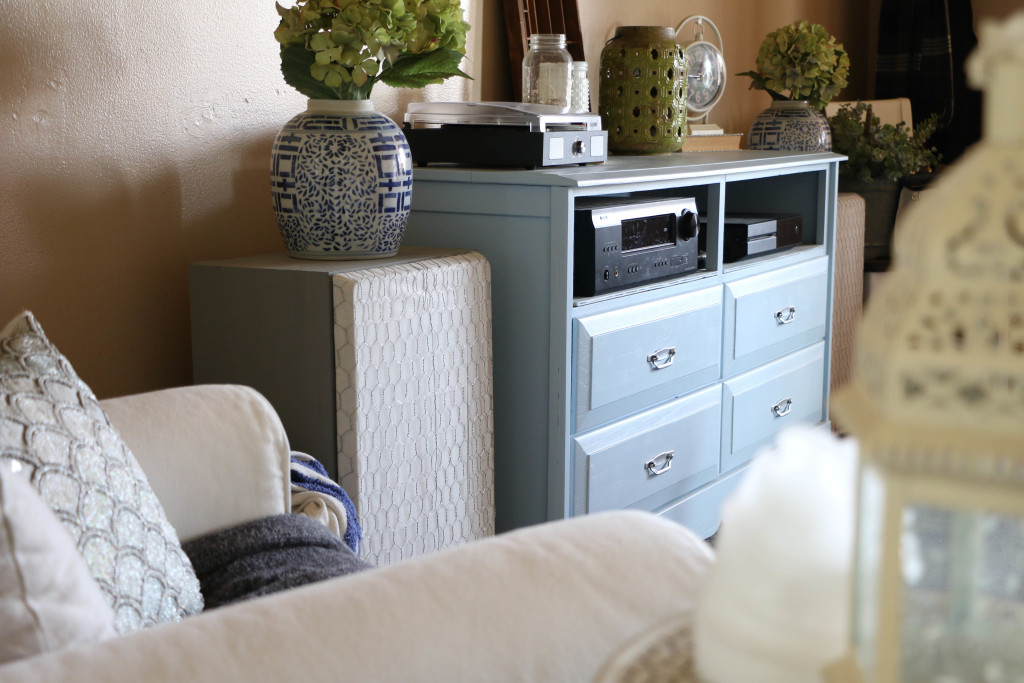
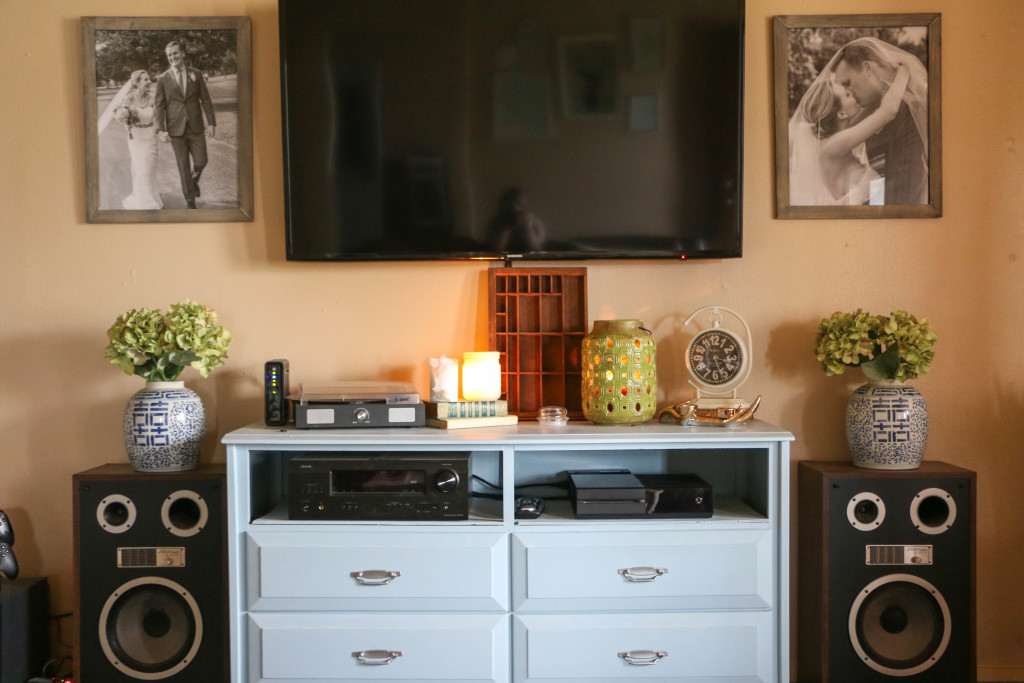
Here’s a closeup of one of the speakers when I finished it. Using the old coverings for the speakers (they were not pictured in the original photo, but luckily we had them stored in a closet), I tore off the old black material. I recovered the frames with a cream colored muslin. With my 40% off coupon at Hobby Lobby, it cost me under two dollars. I then added chicken wire over that just to add some texture. The chicken wire cost about six dollars at Home Depot, bringing my project up to a grand total of eight dollars.

mediaconsole4

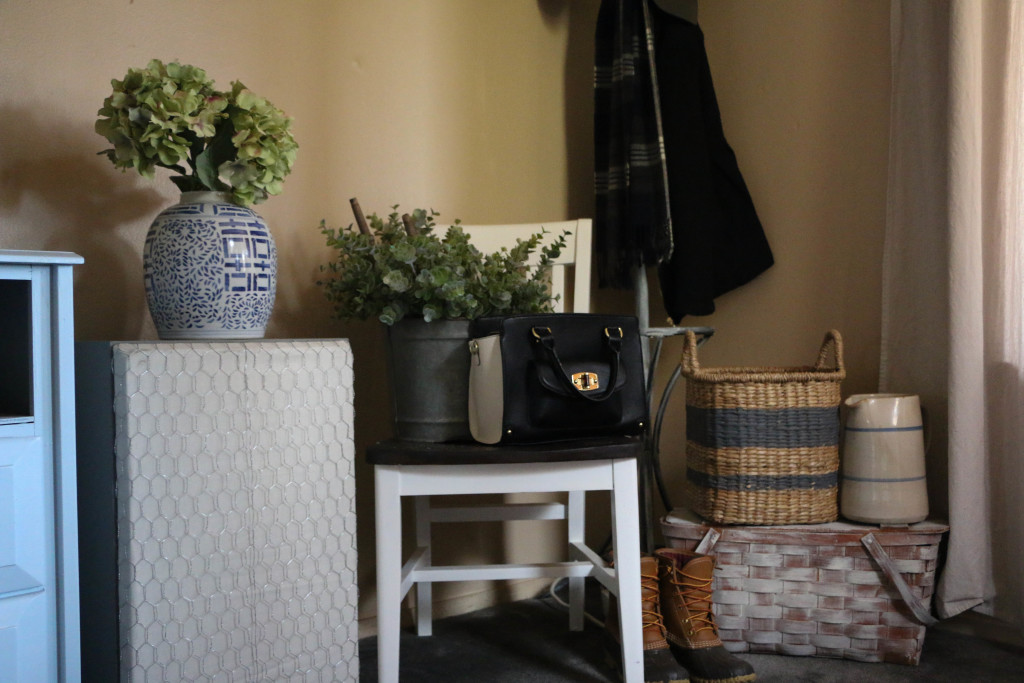
The sides of the speakers got a coat of gray chalk paint. The paint was a new-to-me brand from a local shop, and I really liked the way it turned out. Goodbye dark wood veneer!

mediaconsole11

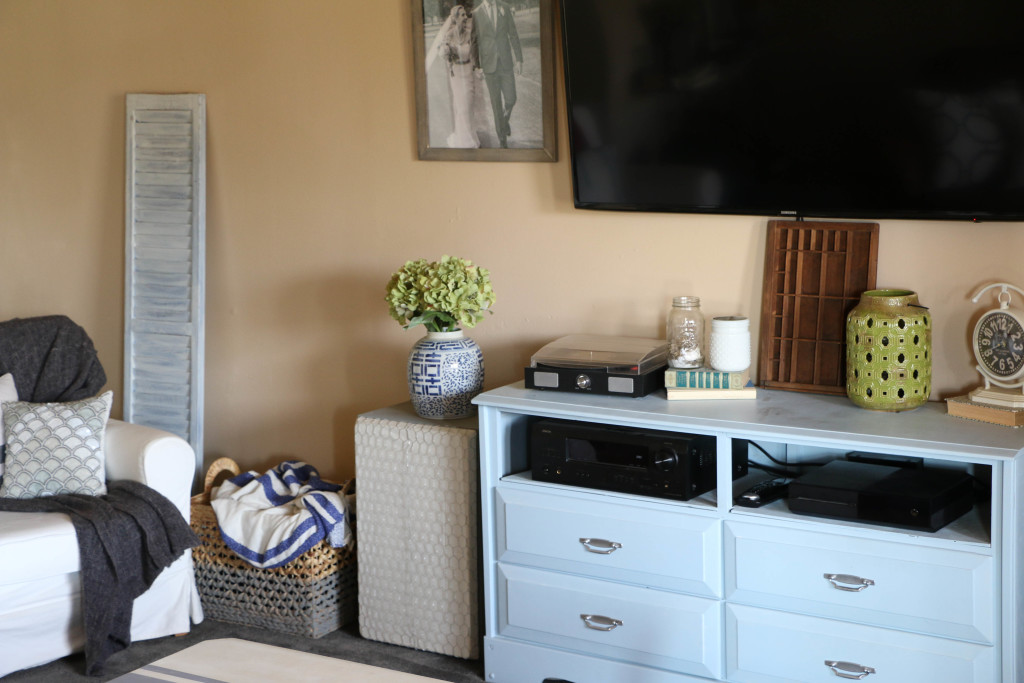
The last and most important (in my opinion) part was the basket on the far left. It took me a couple of weeks to find a basket big enough, but I finally found one large enough to fit the subwoofer, power strip, and X-box controllers. I painted the bottom half of it the same color as the speakers just to break up so much of the tan color on the front. On the backside of the basket I used wirecutters to cut just enough of the weaving to push power cords through. Topped with a blanket, you cannot even see all the necessary uglies inside!

mediaconsole9 mediaconsole7

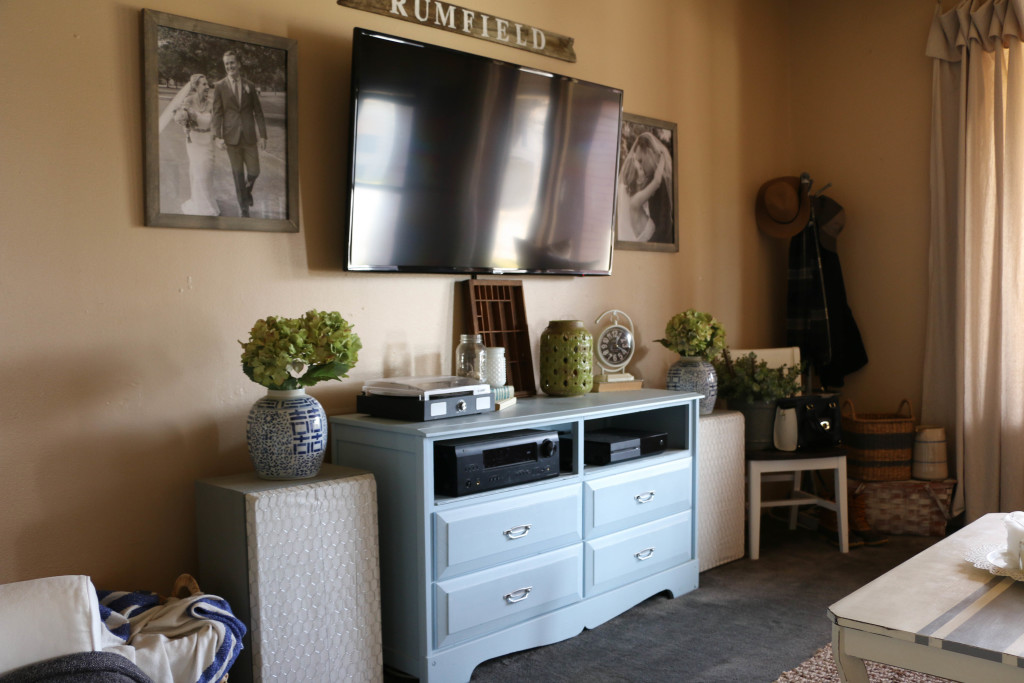
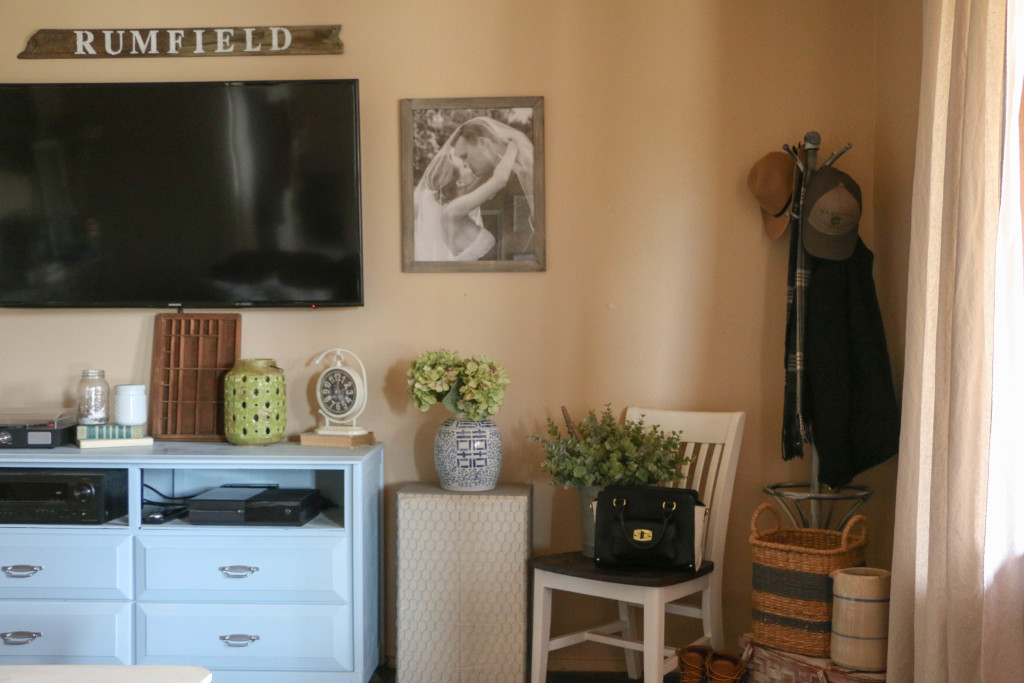
My goal was to make the speakers look more like a piece of furniture that belongs in the room, rather than an eyesore that I have to crop out of photos.

mediaconsole12 mediaconsole1

Ethan even agrees that they look better, and luckily for me, it doesn’t affect the sound quality having the chicken wire over the speakers. Also note the printer’s drawer? That conveniently covers the cord that hangs from the TV.

Maybe I’m crazy for thinking this, but technology is just ugly. If it were up to me, I wouldn’t have any of this stuff in the house at all. What a beautiful sight that would be! But alas, this is the life we live. The remaining visible pieces are the few that I don’t mind having out. The record player on top is where I play my Julie Andrews and Johnny Cash, and the other stuff needs to be accessible for the remote. Overall, I am so happy with the way this area looks.

It only took a year and a half, but I do love how this turned out.

And just for fun and a good laugh, here’s a throwback to what this area looked like when I first moved in after we got married. (Ethan lived here alone before we were married and I moved into his turf.)

AB7D9B71-D413-44FD-9E18-A7EFE8ECE9CC

YIKES. I know. I may not know much about design, or have a beautifully furnished house that I’m completely in love with, but at least I can sit back and be proud of the fact that we’re not living like this anymore.

Okay, enough of my ranting. I hope you’ve gained some ideas for yourself. I am so much happier with our new setup! How do you organize your media area? I’d love to hear about it! That’s all for today, friends. Have a fabulous day!

DIY Projects, Home Decor

DIY Gallery Wall Update

Hello there friends! I hope you’re having a wonderful Monday! It’s a three day weekend for me, so you know I’m having a great Monday! This past weekend has been really really awesome. I’ve gotten SO MUCH done, and I’ve been inspired to do several new projects. On Saturday, Ethan and I took the trip down to Magnolia Market (Joanna Gaines, Fixer Upper, fabulous home decor, my idol, you get the point). It’s only about an hour drive for us, but it was the first time we had been since they’ve opened their larger store.

I bought two small items while I was there, and it inspired me to update a little gallery wall we have in the corner of our bedroom. Now, since I had spent all my money at Magnolia Market, I didn’t have any more money to buy anything new. So, I had to get creative.

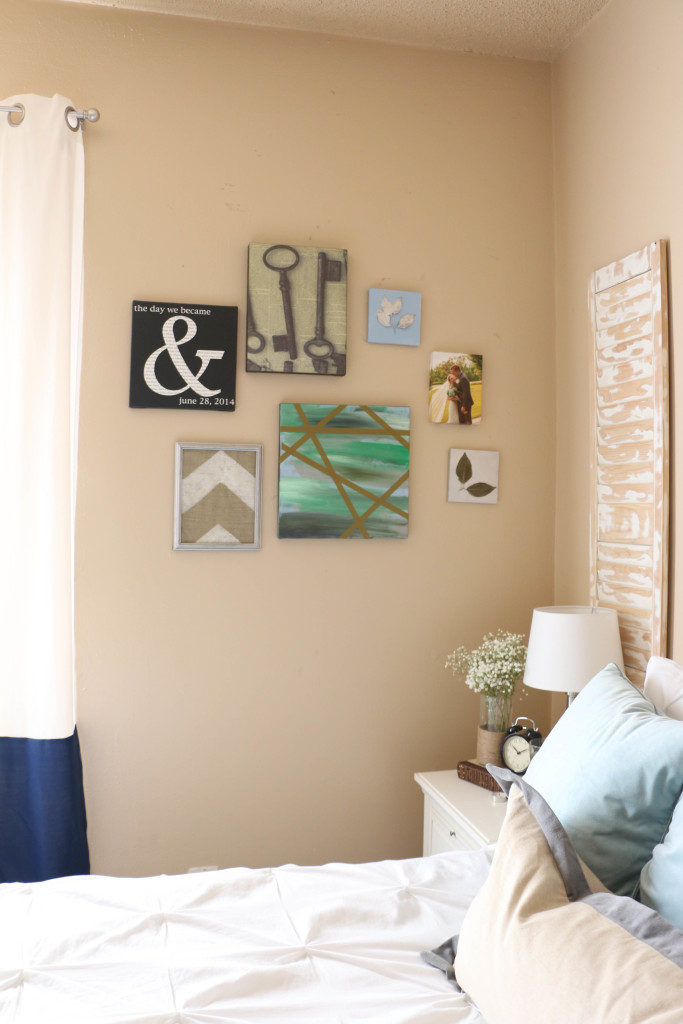
GalleryWallBefore

This is what this little corner of the room looked like before. I made/put together most of these pieces immediately after moving into the house when we got married. Let’s not talk about the multicolored canvas with washi tape all over it. Just, don’t even mention it. Obviously, this isn’t really my style. So when I brought home something new, I knew I needed to update this whole little corner. Here’s how it looks now:

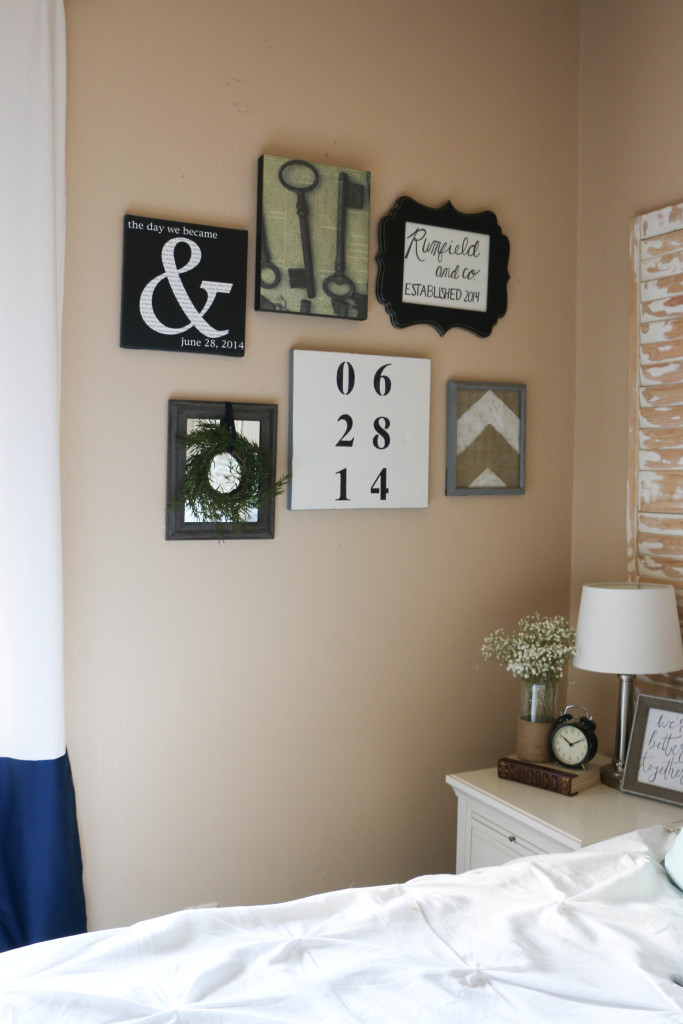
GalleryWall8

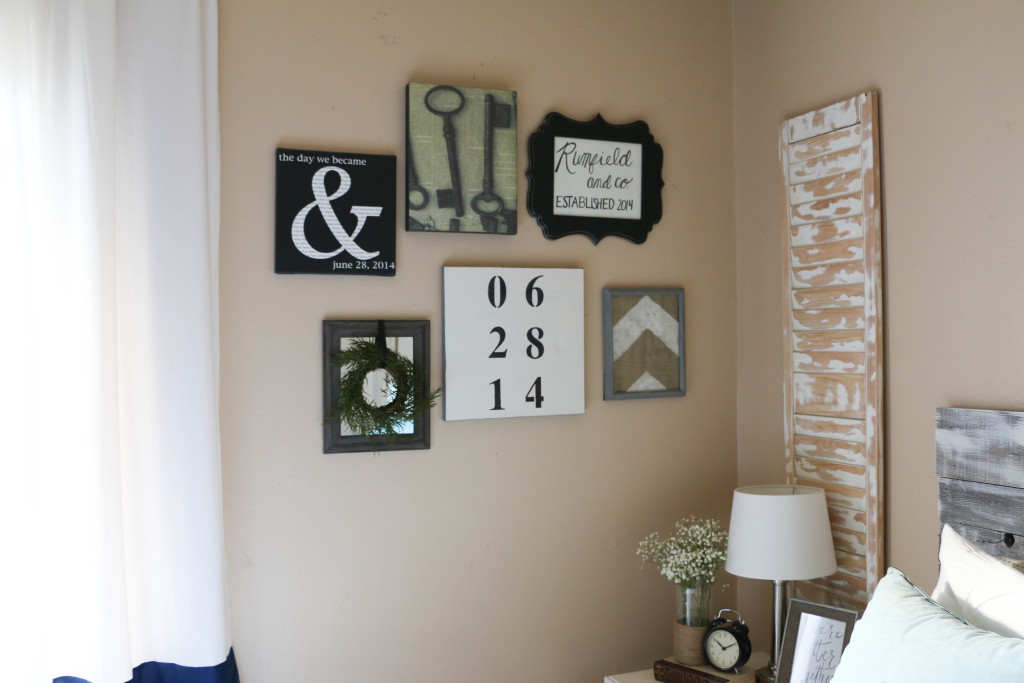
The entire theme is a bit more neutral and monochromatic, which fits in this room SO MUCH BETTER. As you can see, some of the pieces stayed the same, but the overall look is something I’m much happier with. So let’s talk about how I got my creative on without any money.

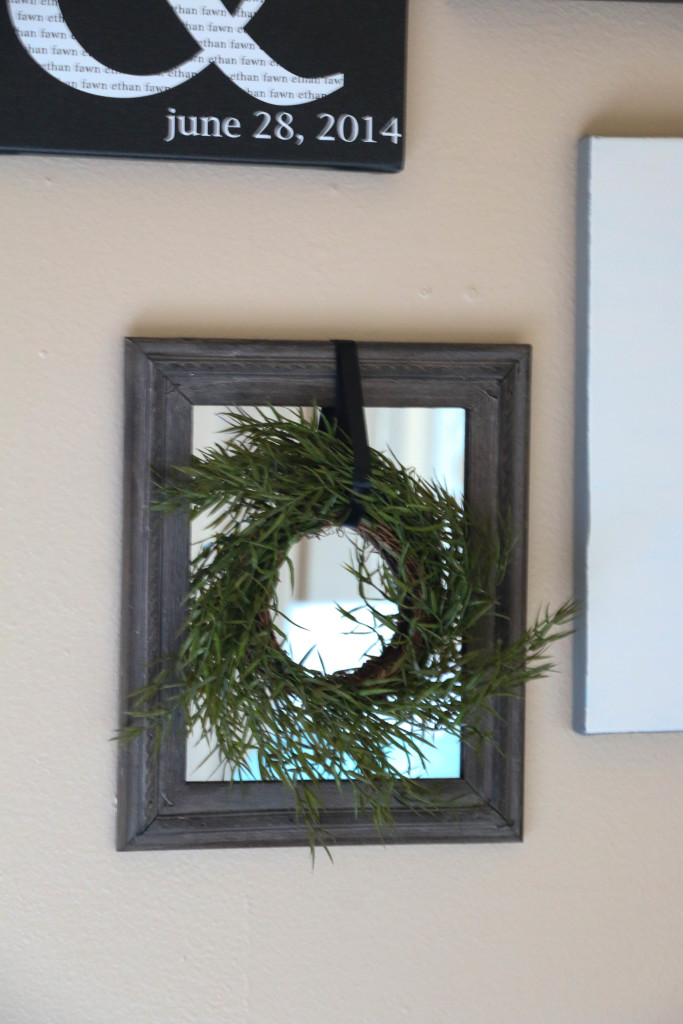
GalleryWall5

This is what I purchased from Magnolia Market this weekend (pardon this blurry picture, I don’t really know what was going on). The frame and the wreath came separately, but I attached the wreath with some thin black ribbon to the back of the frame.

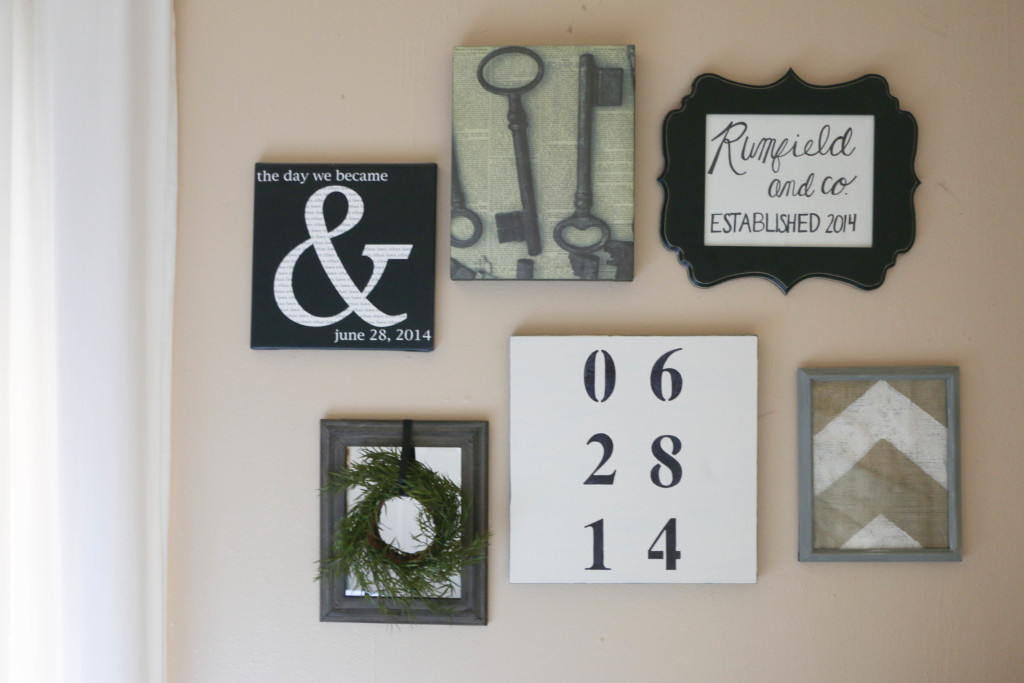
GalleryWall1

The hand lettered sign on the top right was something I whipped up with a Sharpie. Nothing fancy at all. The frame was something I had in storage with something else inside. I had never hung it because I wasn’t a fan of what was previously in the frame, but with a little art swap, I was good to go. I also moved the burlap arrow frame to the other side of the wall and painted the frame from a metallic silver to a matte gray. Just another way to go a bit more neutral.

GalleryWall7

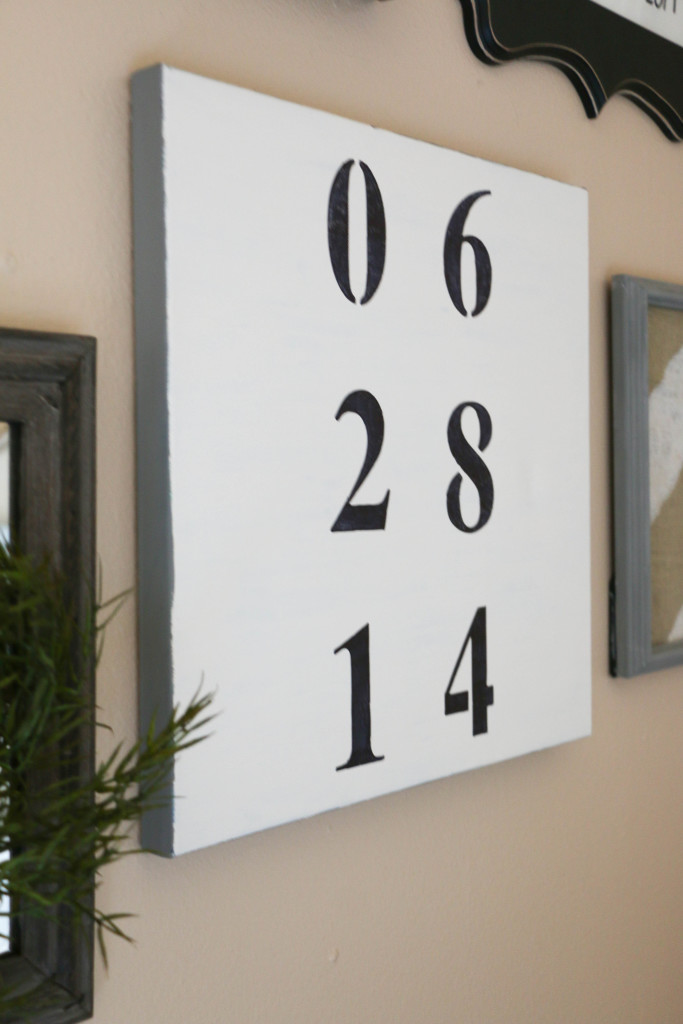
This piece is the biggest statement on the wall, and my personal favorite. It took Ethan a bit to figure out what “all those numbers mean,” but it’s our anniversary date. I used the same canvas from the first photo, peeled off the washi tape, and painted white over the cringe-worthy painting. I used stencils and a Sharpie to create the numbers, which was so easy anyone could do it! I believe this canvas was originally a picture of Audrey Hepburn I had in my college dorm room. It has now lived many lives! No one will be able to say that I didn’t recycle!

The other pieces from the original wall got trashed, as they had been reused one to many times, with the exception of our wedding photo, which will be relocated. GalleryWall3

This little corner may not look totally different to everyone, but to me, the entire mood has changed now that it’s underwent its little makeover. It look me maybe an hour to update and make the three pieces, and aside from the new mirrored frame, it didn’t cost me anything.

Bringing new life to old gallery walls doesn’t have to be expensive! Look at the pieces you have already, and imagine new ways to rework them. Canvas can always be painted over, frames and always be painted. I’ve been known to hang wrapping paper in frames as cheap art, or free printables found online. Handwritten notes or drawings can also make great (free) additions to gallery walls. If you’re strapped for cash, look around your home and see what you can come up with! You might be surprised at what you find you already have.

What’s your go-to piece for artwork? Have you ever made a gallery wall mistake like I have? I’d love to hear about it! That’s all for today, friends. Have a fabulous day!
Holidays, Home Decor

My Christmas Decorating Secret

Christmas prep is in full swing over here! I’ve been super busy with the semester winding down at school, and the buzz of Christmas is alive and well in first grade. Thankfully there’s just ONE WEEK left of school before it’s officially Christmas vacation! Our home is fully decked out for Christmas, and I am *almost* done with my Christmas shopping. There are always those last minute things to get accomplished, but I can’t deny that I love the hustle and bustle of the holiday season.

Today I want to share with you all what I’m deeming THE BEST KEPT SECRET OF CHRISTMAS (y’all know I’m dramatic). Seriously though, if you’re cheap like me, you’ll want to keep reading.

I was too impatient this year to wait around for the real Christmas trees to come out, and so we caved and bought an artificial tree in early November. I don’t regret that at all, however, we missed the homey scent that comes with a real tree. Ever the optimist, I came up with a plan to get the best of both worlds: get an artificial tree early in the season, and still have the homey smell of a real tree. I was inspired by some friends who used tree clippings from their yard to make garland for their staircase. Now, I have neither a staircase nor the proper tree (nor the money to spend for that matter). But that has yet to stop me!

Here’s what I did. THIS IS THE SECRET, SO READ CLOSELY. Did you know (I didn’t) that Home Depot has their own tree selection (0kay this part I knew, but the rest I didn’t)? Each time someone purchases a tree, they trim the bottom/excess and put the clippings in a large bin. Here’s the cool part: the clippings are FREE for anyone to take. I said they’re FREE!!! How awesome is that?!

We simply asked the kind gentleman at the cutting counter for the clippings, and he directed us to the free bin. I may be the only person on the planet who didn’t know this, I don’t know. But if there’s someone out there who is like me, you might be excited to find this information out. I broke the boughs down when we got home and placed them in various places around the house.

treeclippings

treeclippings2

treeclippings3

treeclippings4

treeclippings5

treeclippings6

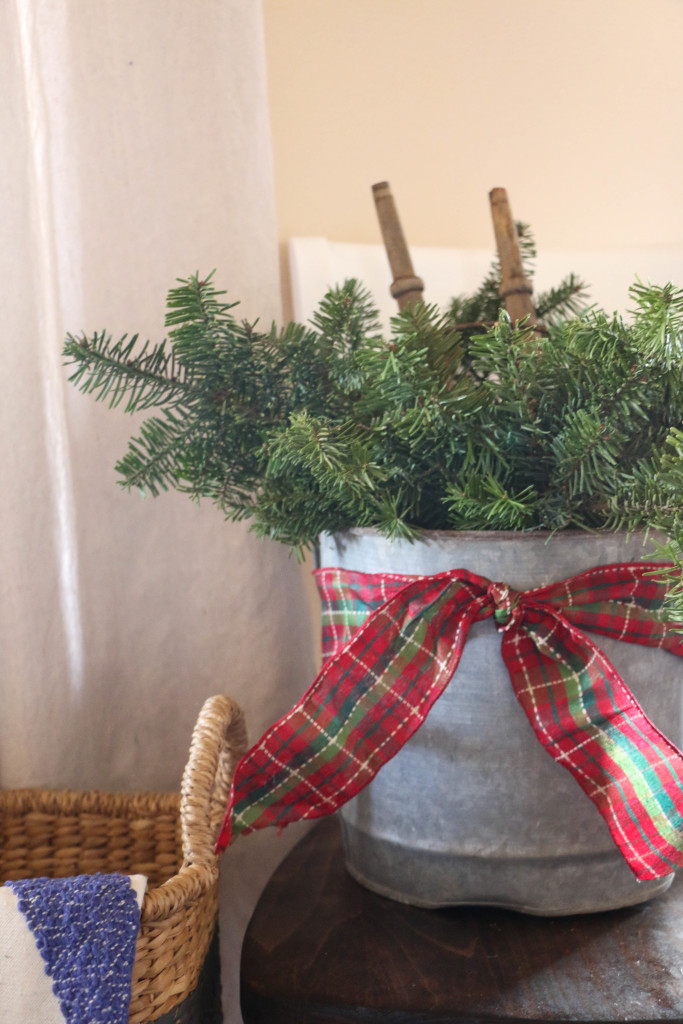
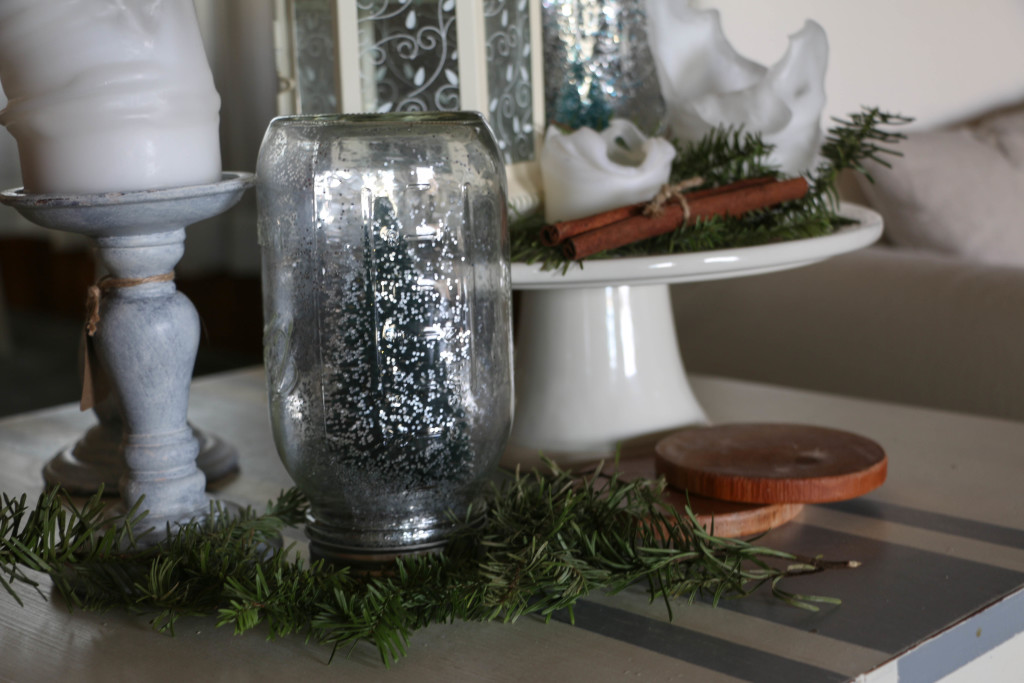
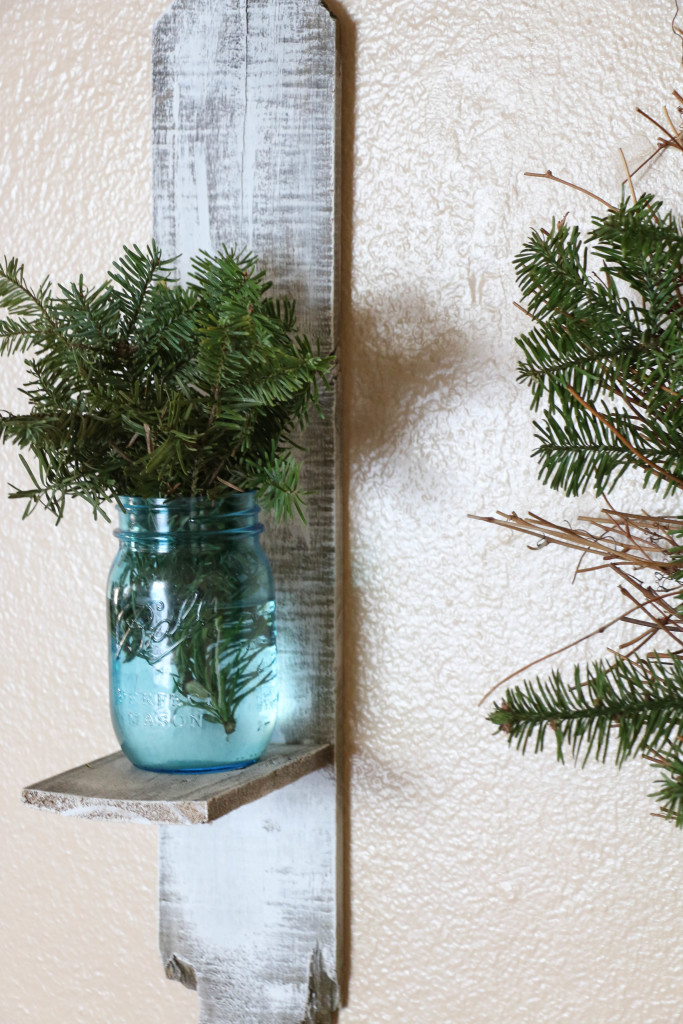
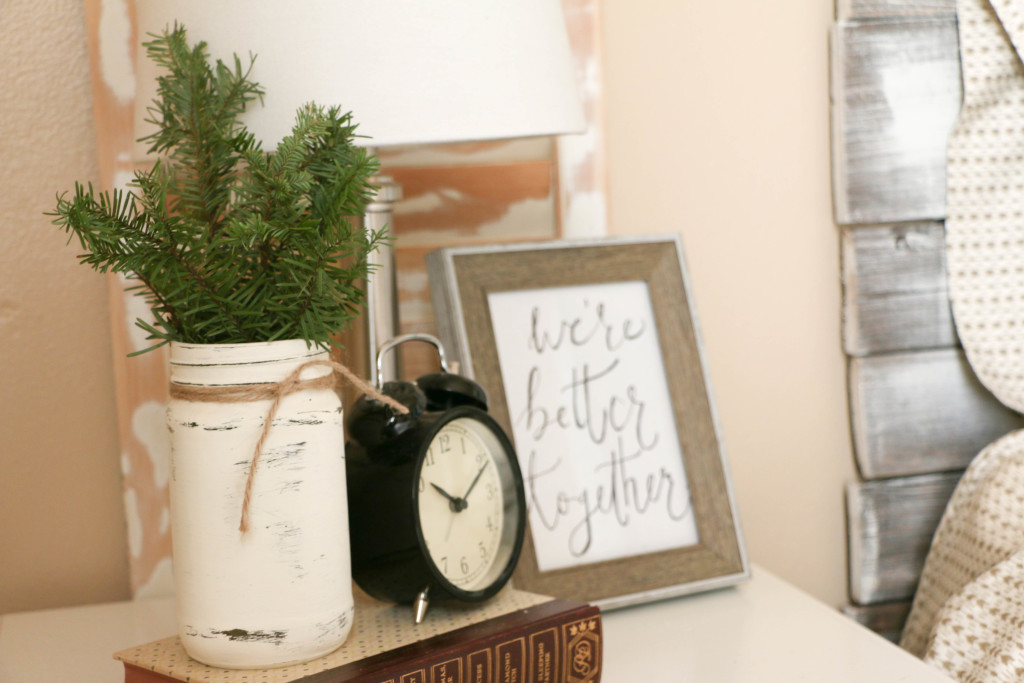
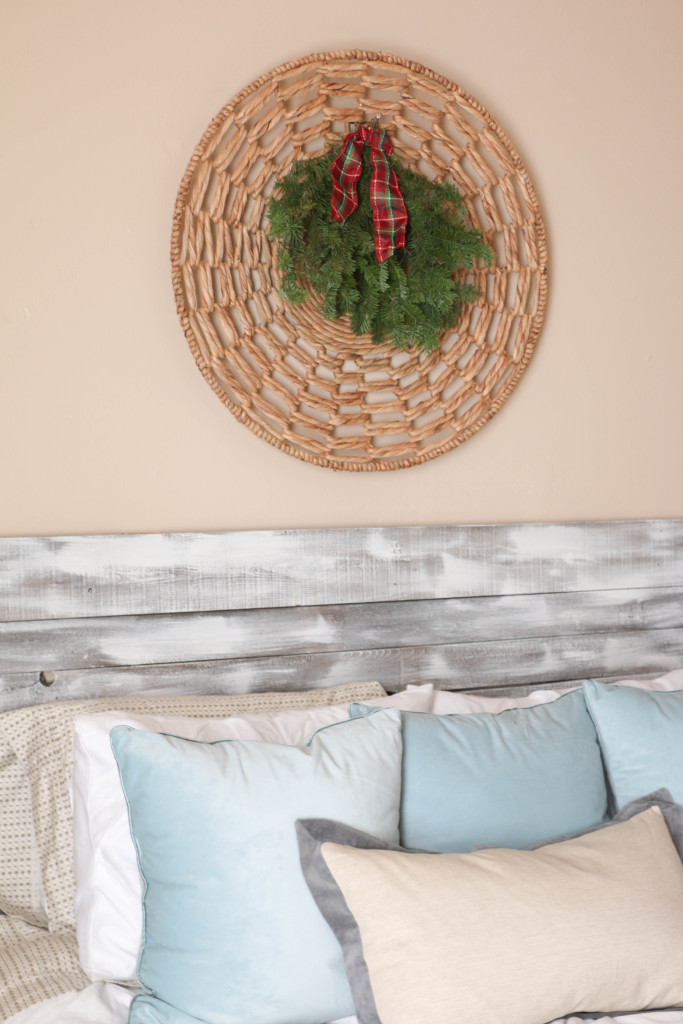
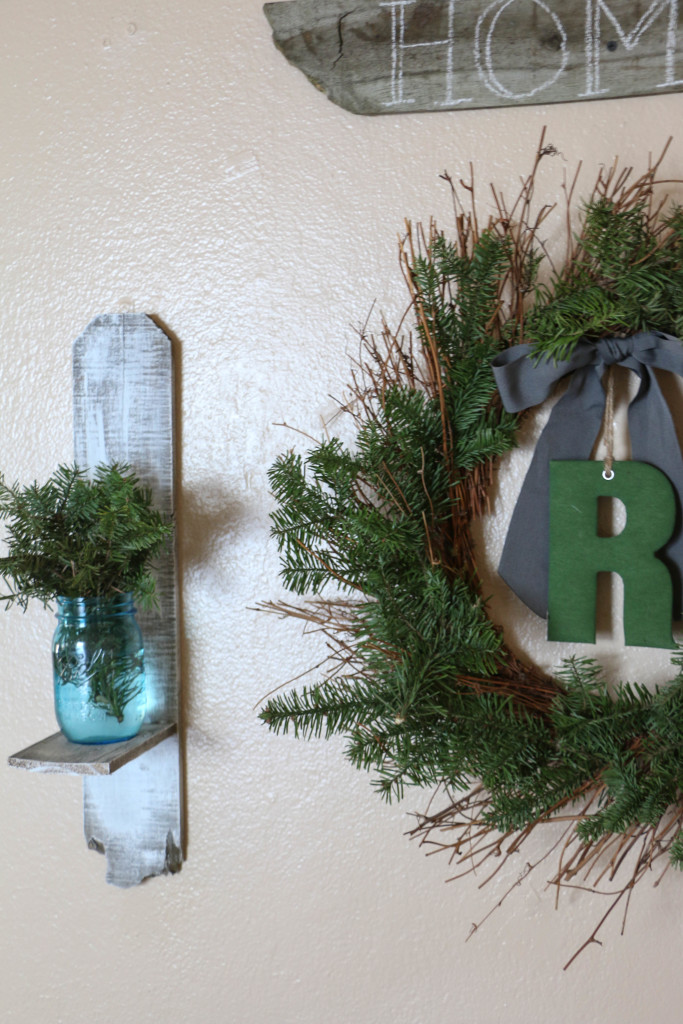
I spread them out all around my home in jars, vases, wreaths, and mixed in with my decor. It smells amazing! We’ve had our tree up for weeks, but now it smells like Christmas in our home too! I think my favorite look is in the first picture, the cuttings in a big bucket. Having these clippings around makes the house not only feel homey, but it also adds to the rustic/primitive look I was going for this year.

I got mine from Home Depot just because that was the closest thing to us locally, but I’ll bet you could ask just about anywhere trees are sold and you’d be able to take some some clippings free of charge. I’m a pretty budget conscious gal, but this is big even for me! The clippings make an impact in several rooms in our house and it cost me nothing at all!

Have you done this before? Did you already know about The Best Kept Secret Of Christmas? I’d love to hear about it in the comments below or if you plan on trying it this year. That’s all for today. Have a fabulous day, friends!

Home Decor

Quick and Easy Bedroom Update

Hi you guys! Thanks for stopping by! I am so excited about today. It’s the last week before Thanksgiving Break (I know y’all will hate me for saying this, but I get the whole week of Thanksgiving off!). I cannot even tell you how excited I am to have next week off. And we all know what comes quickly approaching after Thanksgiving, right… Not that any of that has anything to do with what I’m talking about today. But this teacher’s got a one track mind. What can I say?

So a while back (like several months back), Ethan and I were talking about some changes we wanted to make with bedding in our bedroom. We’ve only been married a little over a year, and the bedding I picked out on our registry wasn’t quite working out. I still have no idea what I’m doing when it comes to decorating, but I’d like to think I’ve learned a few things at least about what doesn’t work in our home. Maybe I’m completely wrong. Who knows?!

shutter21

Okay, so this is what our bedroom looked like beforehand. This quilt was just a light quilt that we used this summer, but this is the best photo I could find (why didn’t I take a better photo for you guys before I redid the bedding? I don’t know.) So the bedding you’ll see today is our permanent bedding that we’ve had. There are a couple of problems we ran into with this arrangement.

First, those pillows in the back are too long for the bed. Like, they’re falling off. What was I thinking?

Second, the gray patterned pillows are the ones we actually sleep on, and I don’t like that they’re in the front. I know that’s probably like the first thing you would learn in a design book. But let’s be real, I haven’t read a lot of design books. Because, in case you hadn’t noticed, I still have no idea what I’m doing.

Lastly, (and I can’t even believe I’m typing this) the light gray patterned sheets don’t hide sweat stains very well aren’t very aesthetically pleasing. In case you forgot, I am married. Which means a man sleeps in my bed. So while I’m all for solid white sheets, I do have a husband to consider.

So we decided we needed to change some things up. We were anticipating an extra bit of money, so we waited until then to purchase anything. Which ended up being several months. But what are ya gonna do? Most couples probably spend their money on more important things when extra money comes in, but lucky for me, I have a husband who agrees to let me spend our money on what’s really important. Like throw pillows. He’s kinda the best. Okay, so here’s what I came up with:

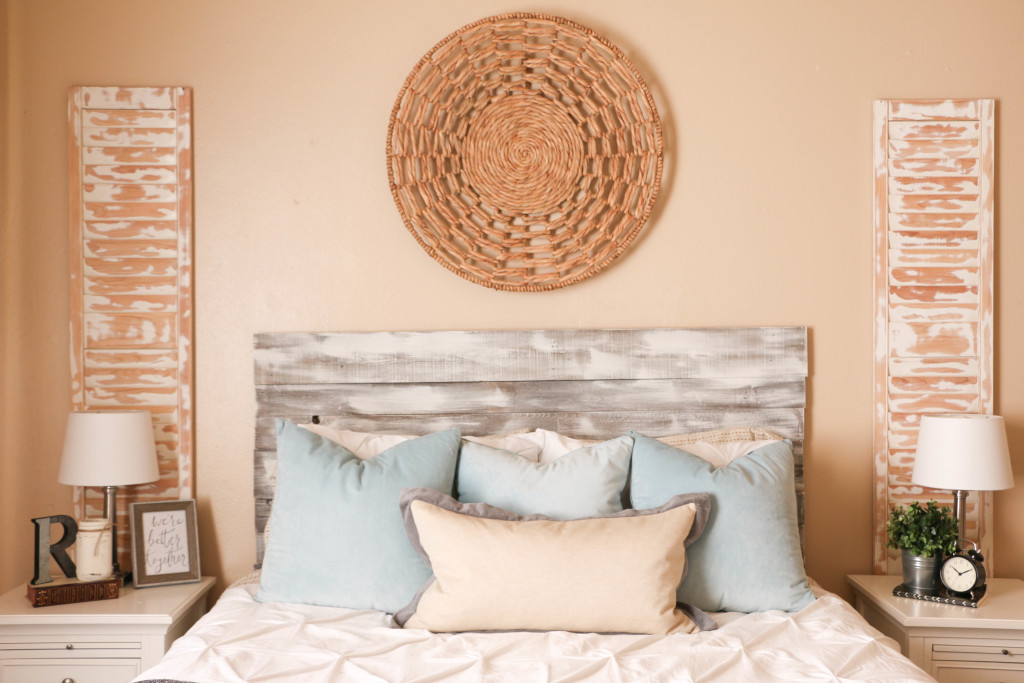
diyheadboard9

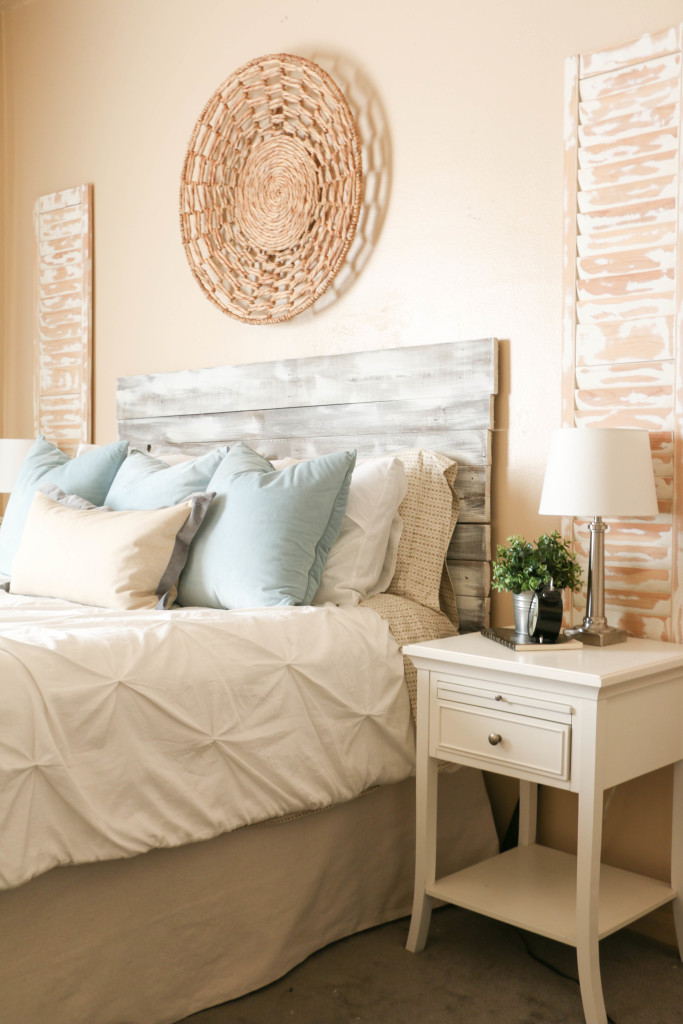
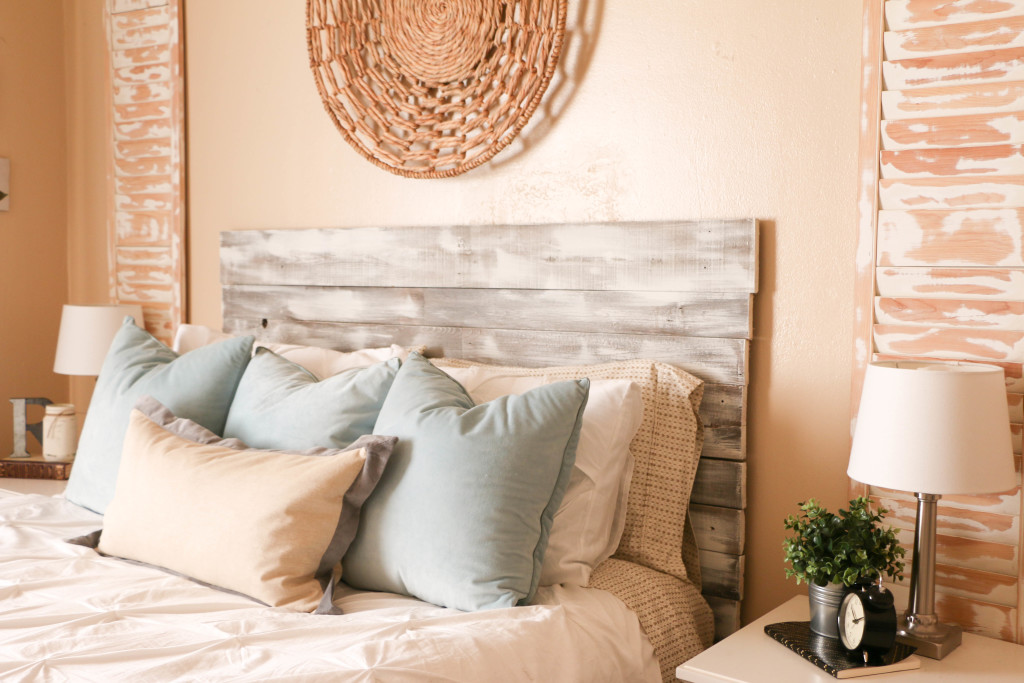
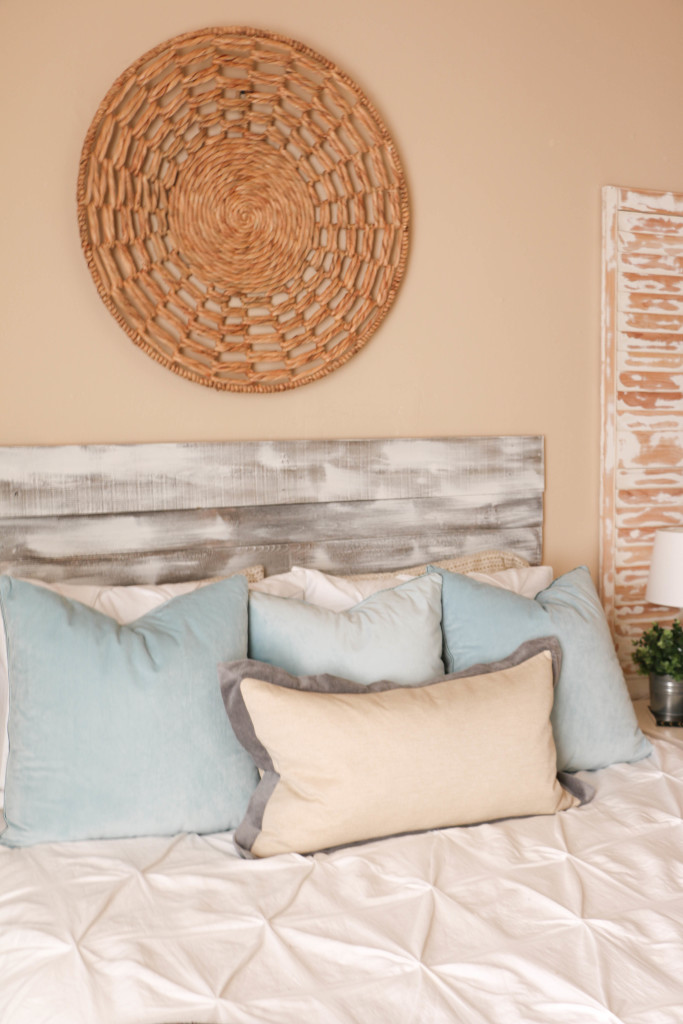
So what I actually purchased were the sheets and the throw pillows. I am liking this arrangement SO MUCH better.

diyheadboard8

So the sheets are these from Target. I wanted to get something neutralish, but would still be dark enough that everyday wear wouldn’t be too evident. I’m a total white lover when it comes to pretty much all things home, but in this case I made an exception.

The white shams came with the bedding but we had never used them before. I was happy to pull them down from the closet and put them on some NORMAL sized pillows. Not ones that are literally falling off the side of the bed.

diyheadboard6

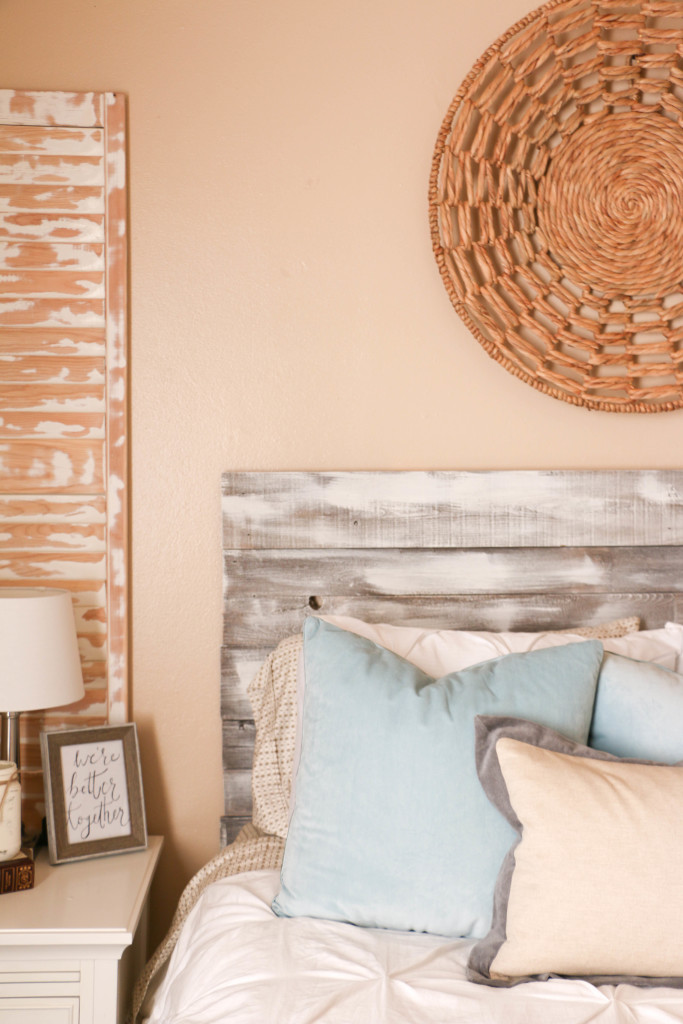
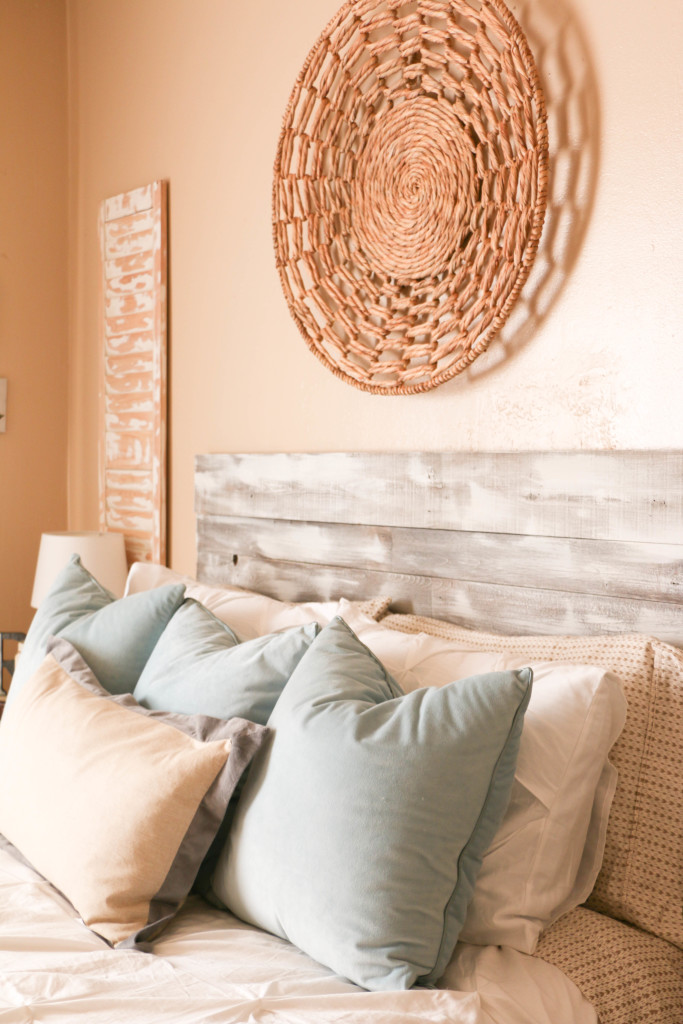
The blue throw pillows have a super soft velvet-like finish that I got from Pier1 imports. I was surprised to find out at the register that they were also on clearance. So hello, happy shopper here! They come in a wide variety of colors, and they’re super comfy!

diyheadboard10

The long throw pillow in the front is my favorite of all! I found it at HomeGoods. Funny story about it. I knew I wanted something of this shape for this spot, but I couldn’t find just the right thing. So we were at HomeGoods one weekend, and Ethan found this same pillow with yellow trim. Which of course would have been perfect if it hadn’t been yellow. I told Ethan, “I wish we could find the exact same thing, just with gray trim instead!” But they had no such thing.

So what do you know, the next day we were at a DIFFERENT HomeGoods (don’t question how often we go there, okay?), and I found this one! It was like the pillow heavens opened up and smiled down on me that day (it was also five dollars cheaper than the original yellow one I found).

diyheadboard11

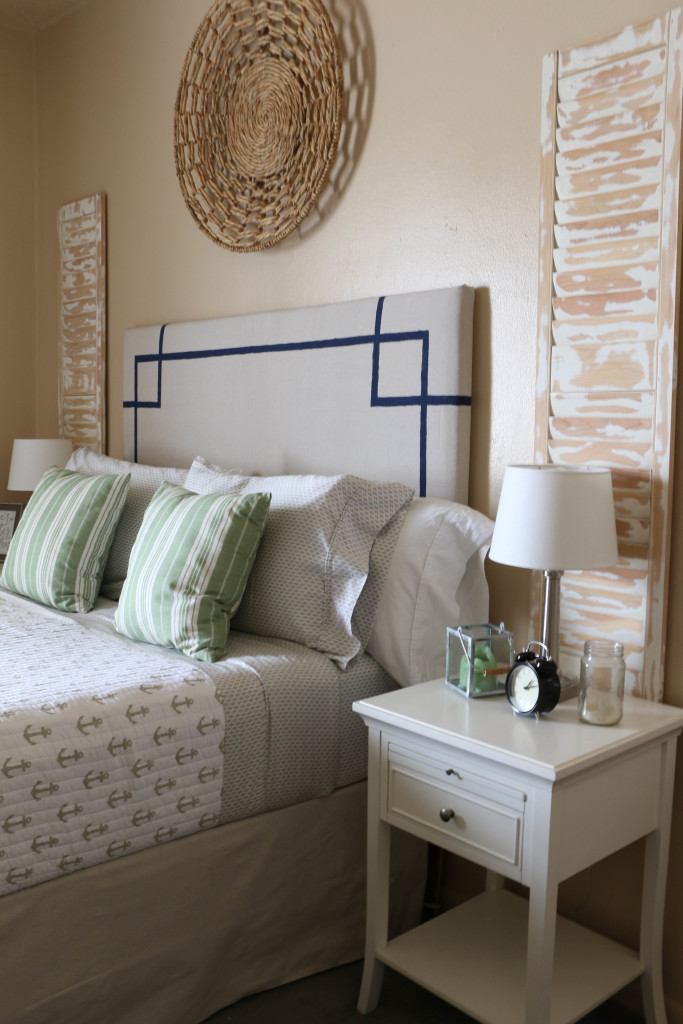
I think the sheets and pillows went a long way here, but in case you didn’t notice from the first photo…I impulsively changed the headboard too! I made it by myself for completely free, because I didn’t think the old headboard worked well with the new bedding. Plus, I’m fickle and I just changed my mind too quickly. I’m going to do a full separate tutorial on the headboard, but I do think it’s the thing that brings the bedding together.

diyheadboard7

Stay tuned for that tutorial! I’m so happy with how this mini bedroom refresh turned out. I brought in so few new pieces, and the result is something I really love. I hope this inspires you to change things up at home, even if it’s just moving pillows around! 🙂

That’s it for today friends, have a fabulous day!

Home Decor

Sugar Mold Thanksgiving Styling

Can you believe it’s November already? This year is flying by, and I definitely have Christmas on my mind. (Christmas in first grade is a lot of fun, I have to admit). But before we get to Christmas, I have to at least give a little nod to Thanksgiving! I wanted to show you guys a cool piece I found recently and how I am styling it for Thanksgiving.

About a month ago, Ethan and I were shopping at Canton, our favorite place to go. I’ve shared about it before, but it’s a giant flea market in Canton, Texas. It’s one of the country’s oldest remaining flea markets, and it has a range of all sorts of things. Anyway, we were there and I totally had blinders on because I was looking for one specific thing. I don’t know about you, but I can talk myself out of almost any purchase. So I had my money that day, and because I was walking around looking for one particular thing, I didn’t buy anything for several hours. After maybe four hours or so, I realized I wasn’t going to find what I was looking for, and so I went into SHOPZILLA mode. That’s not a thing. I just made that up. What I mean is that after I gave up on that one thing, it was like my eyes were opened to so many more possibilities around me.

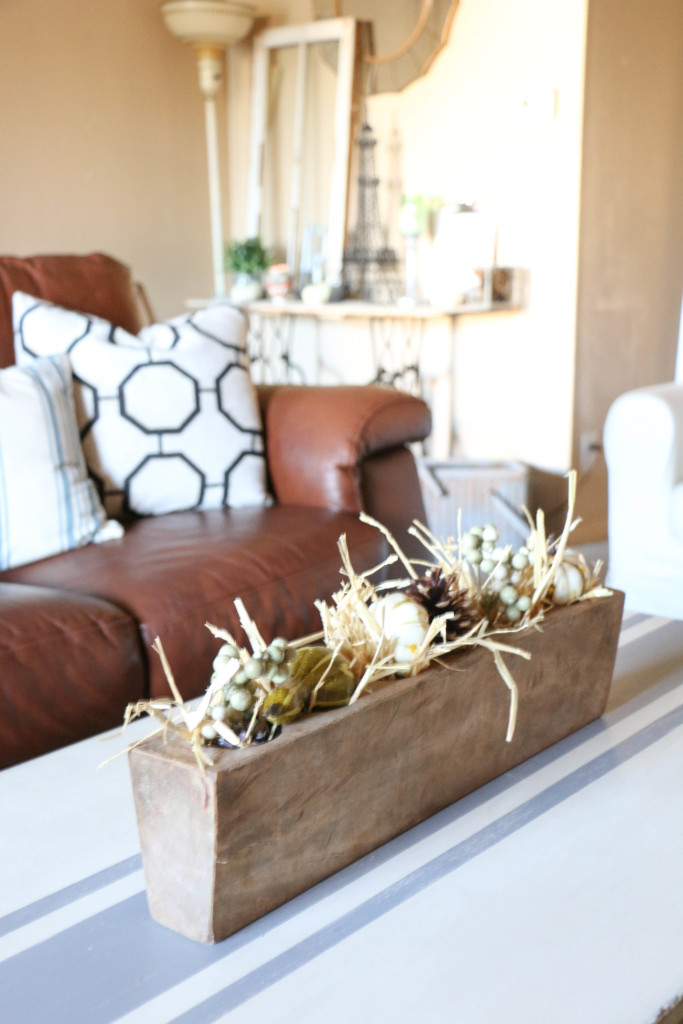
One of the things that I picked up that day was this sugar mold. sugar mold 1

I paid fifteen dollars for it, although I had no idea how I was going to use it. I usually don’t buy things unless I have a plan for them, but this one time I broke my own rule. At the time that I purchased it, I didn’t really know what it was either. I know I had seen pictures of similar things on Instagram, but I didn’t know what the official name was or the history behind the pieces.

When I got it home, I didn’t know what to do with it, so I put it in the guest bathroom (arguably the least used room in our house) so i didn’t have to look at it. I was a little overwhelmed with how to use it, so I ignored it. Anyone else do that? No, you probably don’t, because that’s not normal. Anyway, while it was collecting dust in the guest bathroom, I did a little research on it.

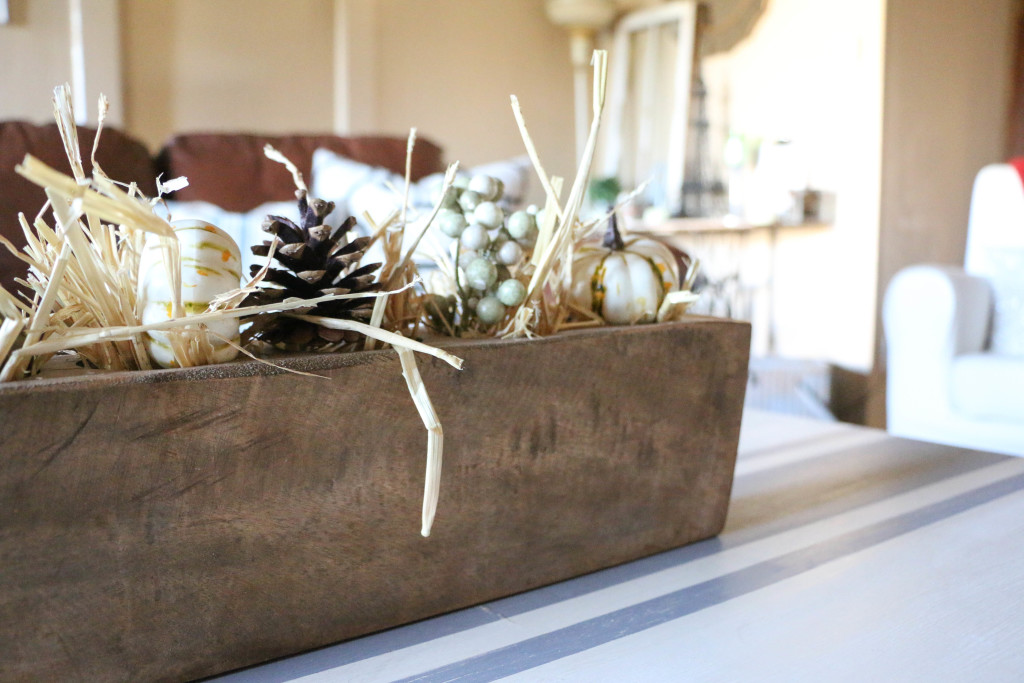
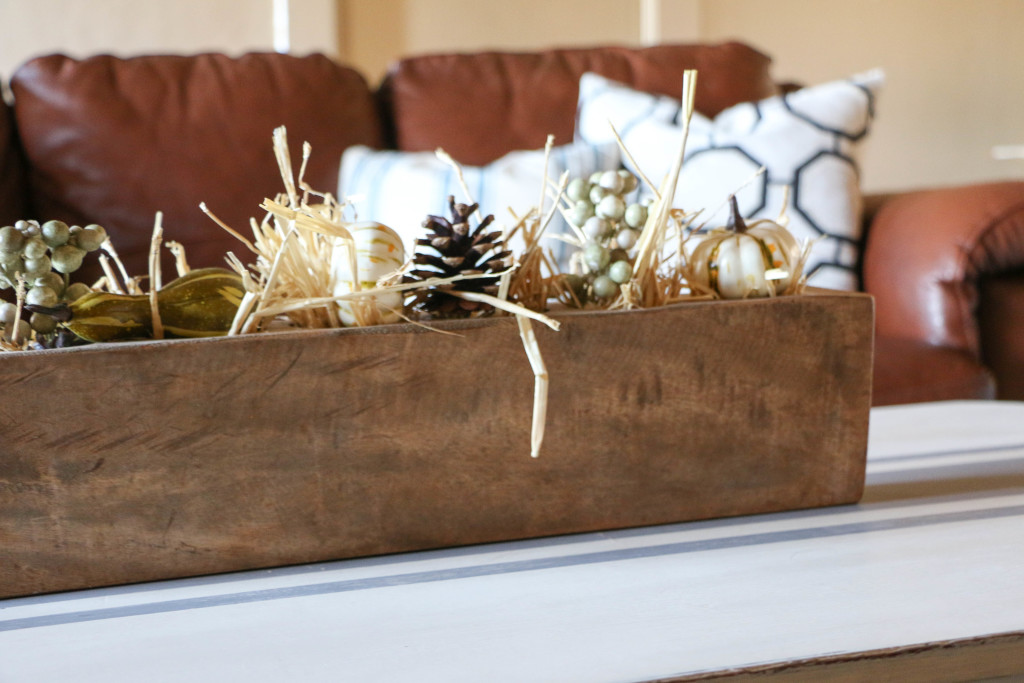
Sugar molds started in medieval times and were used throughout the 19th century. Granulated sugar wasn’t really a thing until the 19th century so sugar was poured into these cone shaped molds to be sold. I never knew that, so when I was reading this, I found it super interesting! I’m a history nerd anyway, so random historical facts are totally my jam. The actual wooden mold has deep cone shaped grooves in the center (mine has six), which made it slightly difficult to style for me. While the origins of my piece are unknown to me, it’s becoming one of my favorite things. I’m sure it’s not an authentic antique, but I love it anyway.

When I finally pulled it out and decided to make it pretty, I was kicking myself for not doing it sooner! The little imperfections in the wood have so much character, and the piece is one of the more unique things in our home right now.

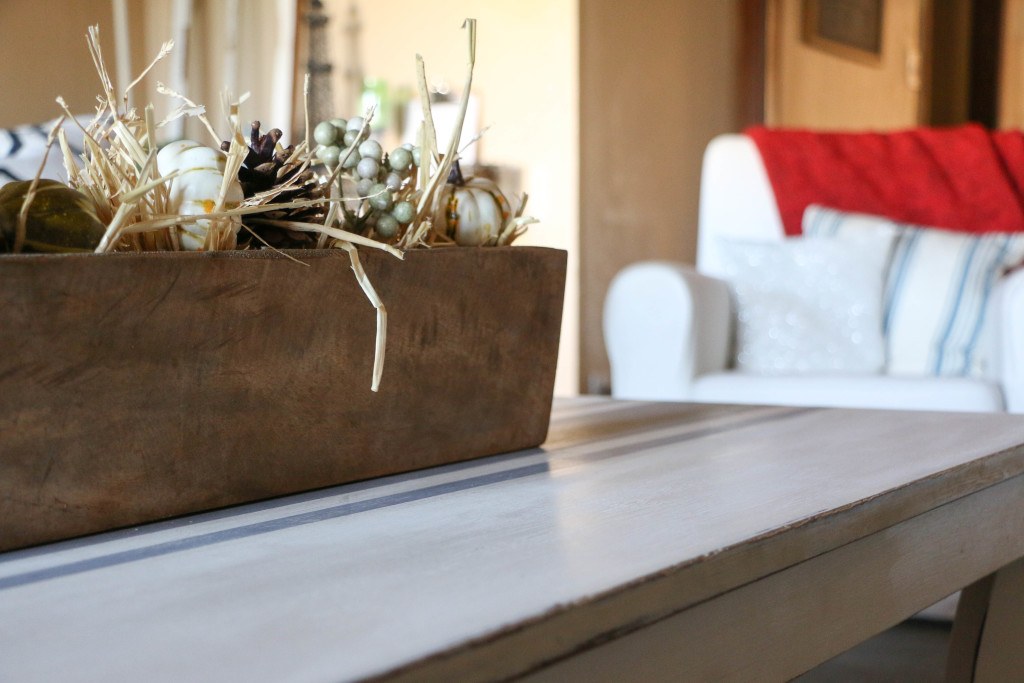
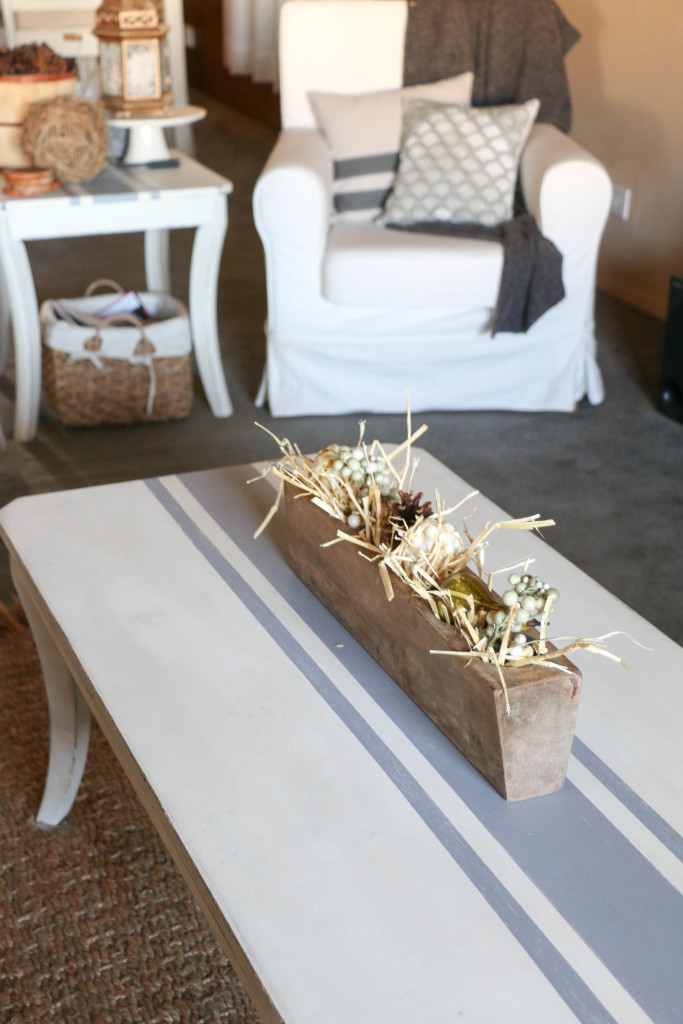
sugar mold 4 sugar mold 6 sugar mold 2 sugar mold 5

I used a bit of straw to fill in some of the depth of the molds, and then some fall vase filler. I got the filler items from Hobby Lobby (40% off of course). This little fall look was a quick and easy look to achieve, even though I was dreading it for almost a month! Just in time for Thanksgiving, and then I’ll be transitioning this piece into Christmas with some more festive holiday decor!

Do you have a sugar mold? I would love to hear about how you styled it…because it ha me stumped for a while! That’s it for today friends, I hope y’all have a fabulous day.

Holidays, Home Decor

Transitional Fall Table Setting

Hey y’all! I don’t know if you’ve realized this…but it’s September now, so that means when it comes to fall decor, it’s on! Here in Texas though, we’re still averaging temps in the nineties each day. I’m ready for fall, but the weather says otherwise! My response to that is a sort of transitional summer/fall decor theme around my house. I’ve put out pumpkins and pinecones, but my hydrangeas are still out as well.

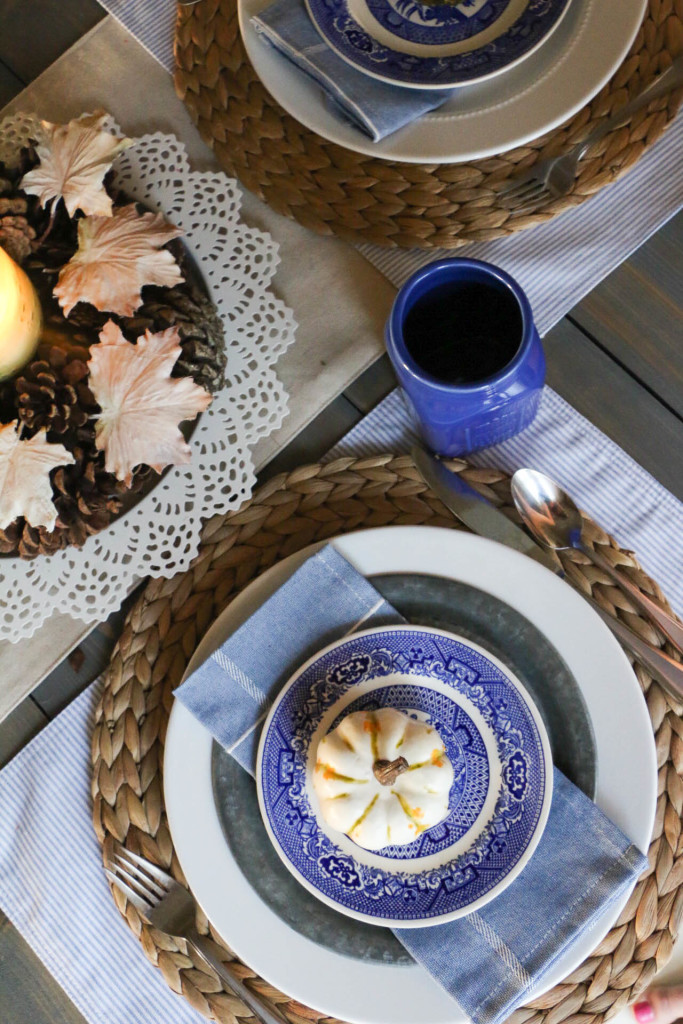
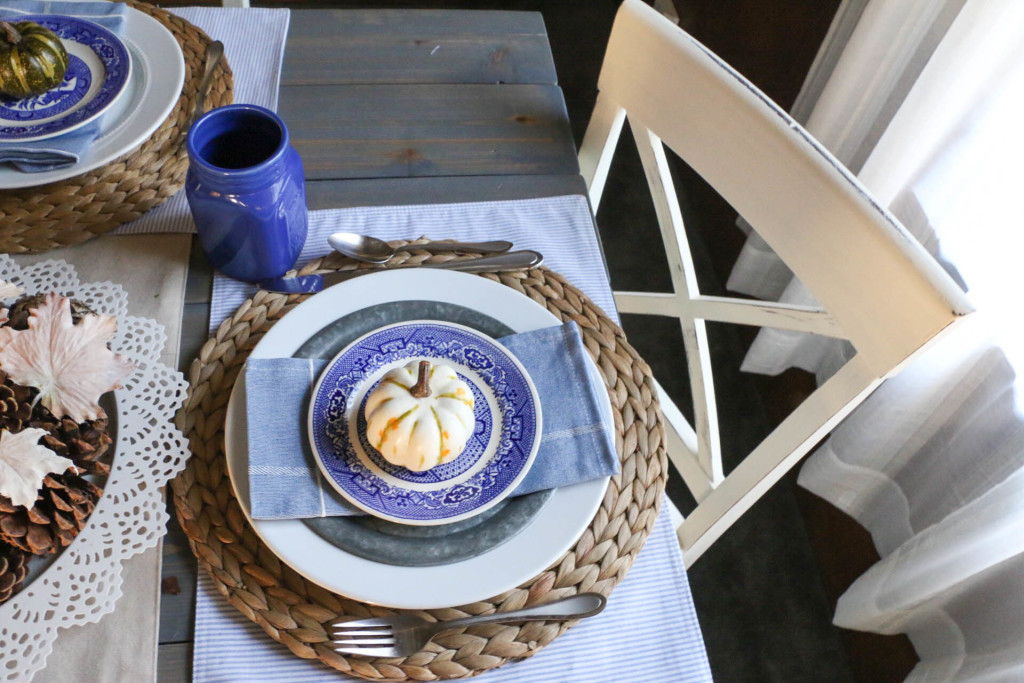
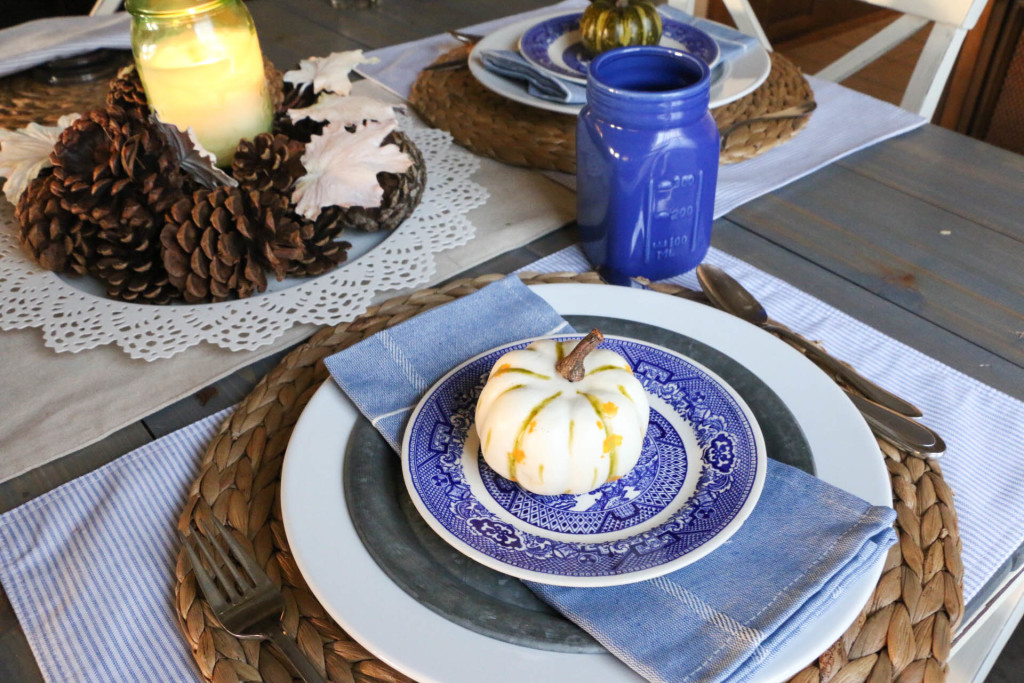
Today I wanted to share with you a quick summer/fall table setting. Y’all know I’m all about cheap decor around here, so this table setting is a hodge-podge of thrifted, gifted, and found items. summerfalltable3

My smaller plates were found at a flea market, and everything else has been bought on sale. I’m learning in decorating that there really aren’t many rules that can’t be broken. Seersucker and pumpkins? Sure, why not?!

(Is there a hand hidden in this picture? I’ll never tell.)

Summerfalltable1

I wanted this setting to say both “summer” and “fall” without being too clashy. This eclectic mix of pieces works for me because it’s casual, easy, and it feels both summery and autumnal.

summerfalltable2

Just wanted to drop in and show y’all a little seasonal inspiration. I realize this is super quick, but it was easy! Set your table, I promise you, it’ll make you feel like you’re way on top of things. A pretty table inspires me to sit and eat dinner (and staying away from dinner on the couch…which NEVER happens at our house. *cough*).

 Are you bringing in fall decor? Are you in full blown pumpkin mode, or are you more like me doing things slowly? I’d love to hear about it! That’s all for today. Have a fabulous day, friends!

DIY Projects, Home Decor

DIY Console Table

Guys. School has started and this first grade teacher is T-I-R-E-D. #isitsummeryet? Despite my tiredness and all my extra beginning of the year school year work, I managed this super quick project.

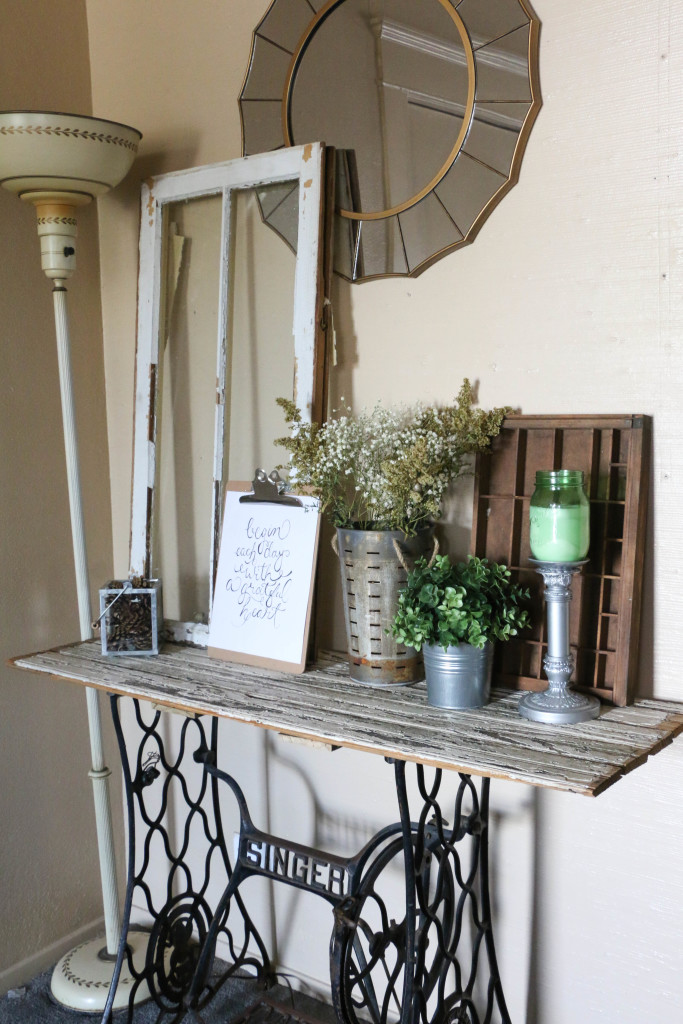
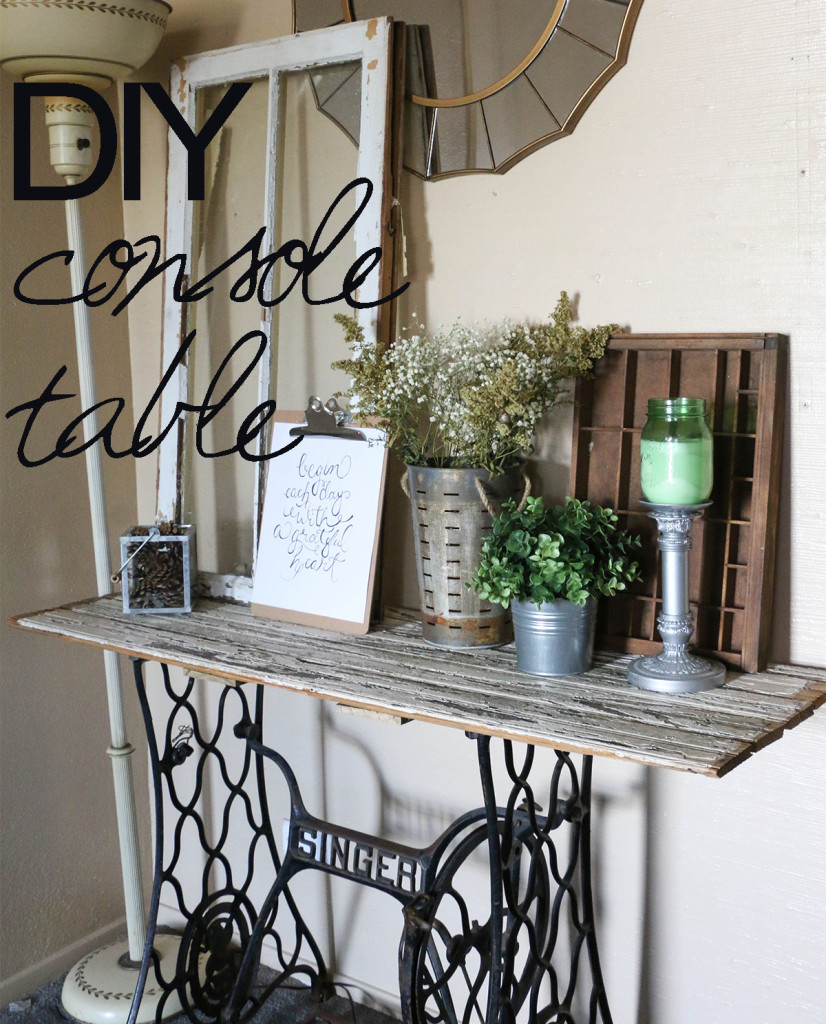
Our house doesn’t have a formal entry way, so we’ve been living with a makeshift chair-and-coatrack-in-the-corner deal. I wanted to add a console table in our living room to fake a bit of an entry. This project was so easy, it took mayyyybe 45 minutes in total. I used an antique sewing machine base as the base for my new table. I found it at a flea market and I love it! I then added a wooden planked top, and BOOM! Project done. (Well not quite, but keep reading for the details.)

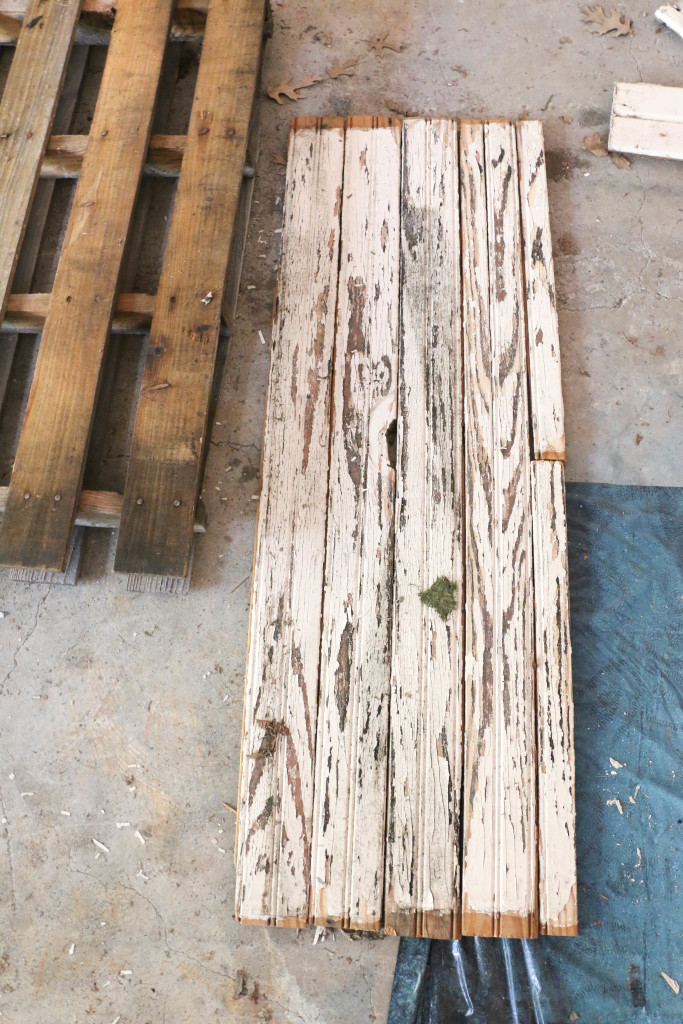
salvagedwood

We had a bunch of salvaged wood from a home in our neighborhood. It’s probably about 80 years old and LOOK AT ALL THAT CHIPPY GOODNESS. I didn’t do a thing to the wood. I wanted it to be all chippy-rustic-like.

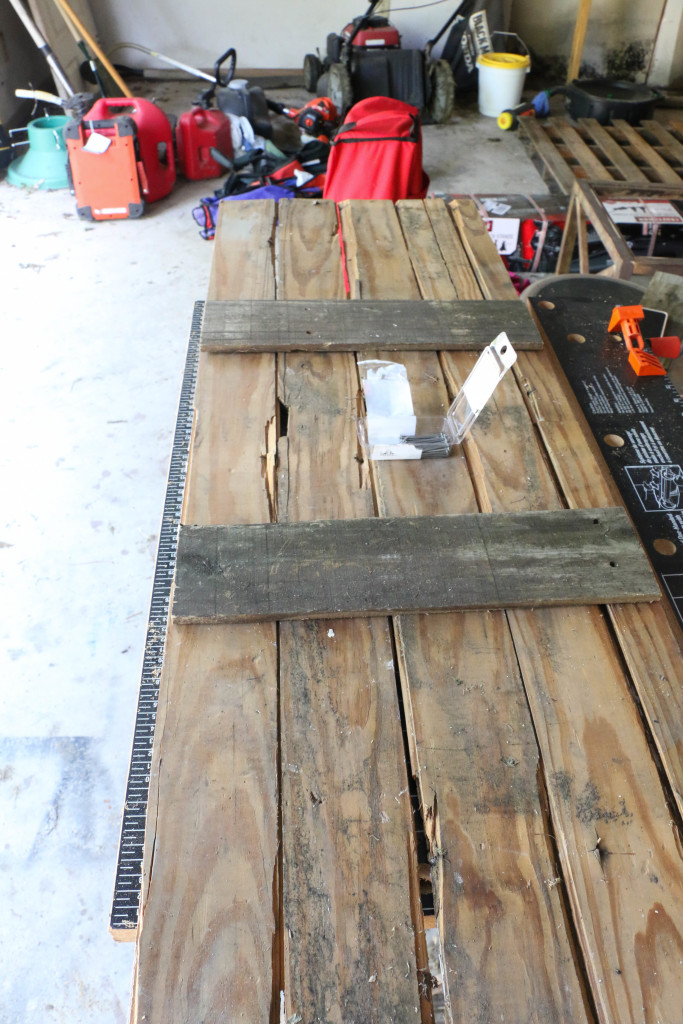
consoleback - Copy

I laid the planks on top of my workspace and placed boards across them. I just used a hammer and nails because the wood is a bit fragile, and because it’s really a simple project.

After securing the boards together, I placed them on top of my base. (Total nonprofessional here): I didn’t secure the top to the base because I think I may change things up a bit in the future. I figured it wasn’t a big deal because this table won’t be getting a lot of wear-and-tear. But don’t trust me. I’m not a professional.

And here is the finished product:

consoletable2 - Copy

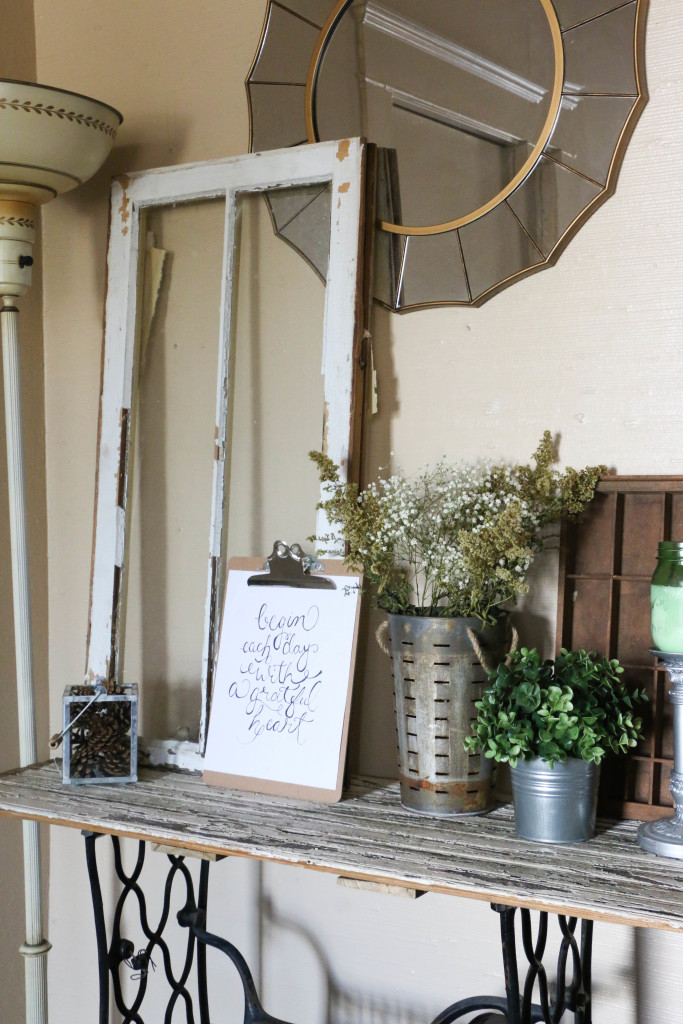
I love the rustic element it has! This was a super simple project, I almost feel like it’s too simple to share, but whatevs.

consoletable3 - Copy

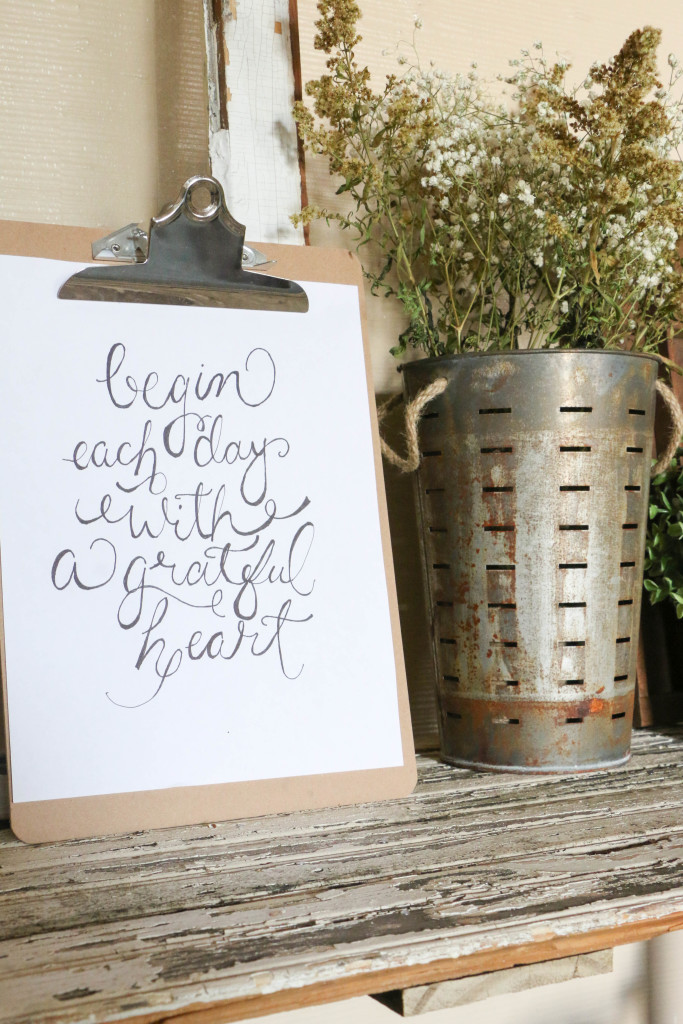
Here’s a closer look at all that paint texture. And sidenote, a super cheap art trick I use is displaying handwritten phrases on clipboards.

consoletable1 - Copy

I’m still having to re-adjust my habits when I walk in the door, since this is where our coatrack was. Other than that, I am obsessed with this little table! It was so easy! It’s one of those “why didn’t I do this earlier?” things.

Have you ever made something like this? I’d love to hear about!

That’s all for today, friends. Have a fabulous day!
Untitled-1

Home Decor

Flea Market Tips and Tricks

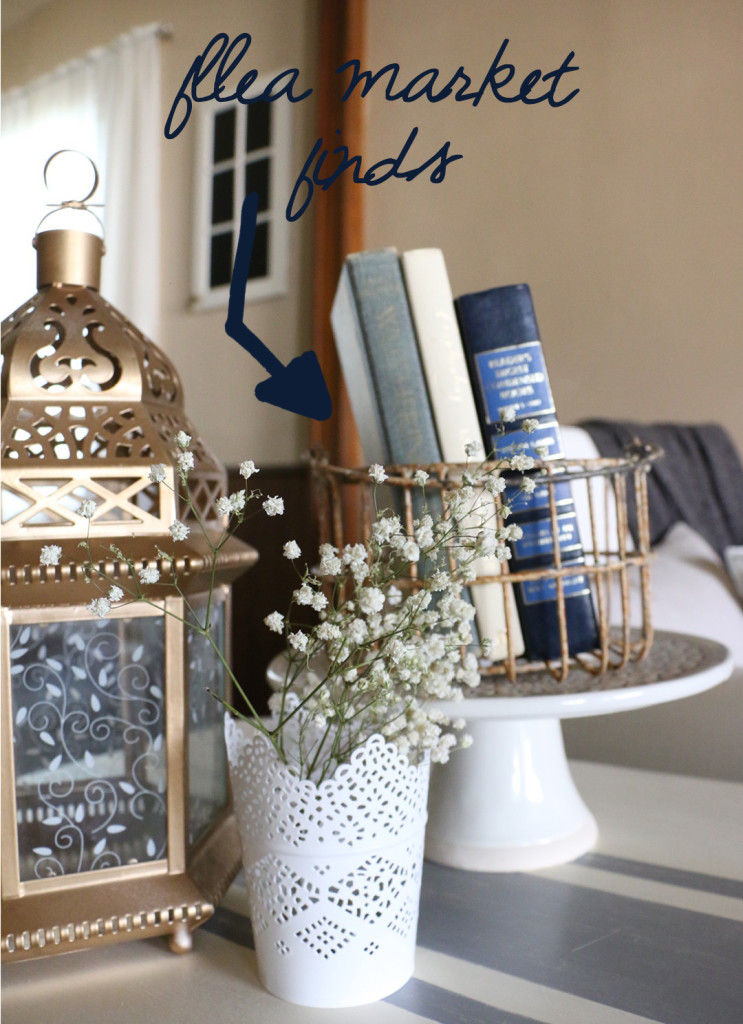
Do y’all shop at flea markets? It is one of my favorite things to do. I have to admit, it can be a bit addictive. I have found that shopping at flea markets can be great for decorating my home on the cheap. I decorate with TONS of items I’ve picked up from flea markets over time.

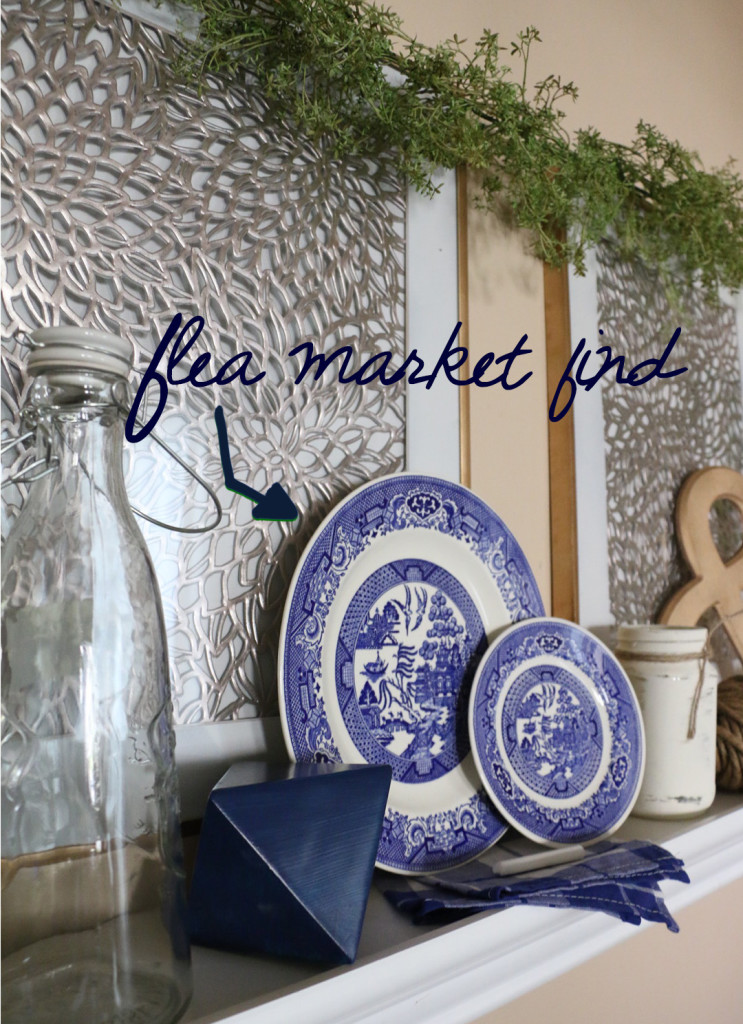
flea market 2 Untitled-1

I wanted to share a few tips with you guys for navigating flea markets the smart way (and by smart I mean the way that allows you to bring home the most stuff. Which your husband will LOVE. Trust me.).

1. Separate your money and keep it in separate pockets. 

When I’m shopping, I’ll leave my wallet in the car. It’s a hassle to keep in a bag and pull it out, and keeping it in your pockets can work to your advantage. I’ll bring as many different bills as possible, and put them in separate pockets. For example, I’ll have ones in one pocket, fives in another, etc. I also don’t fold them all together, I keep each bill folded individually. This way you can grab the exact amount that you want without having to dig around and look for it. It also keeps the vendor from seeing how much cash you have on you. If a vendor is asking $25 for an item, he is mostly likely willing to accept $20 if you pull a single bill out without flashing all your cash.

2. Sometimes it’s best to walk away. 

If a vendor just isn’t willing to come down in price, WALK AWAY. One of two things can happen here. First, a desperate vendor might change his mind once you’re willing to leave the item behind. If he doesn’t: keep walking. Walk around, look at other vendors, see if you can find something similar somewhere else. If not, the second of two things can happen. Close to the end of the day, head back to the vendor and see if they still have the item (they may not, and that’s a risk you’ll have to take). If a vendor hasn’t been able to sell the item all day, they’re much more likely to come down to the price you want if you come back for it.

3. Have a list of items that you’re looking for. 

This isn’t absolutely necessary, but it’s especially helpful if you’re like me. I hate to buy things without a list because I’m afraid I’ll find something better later on after I’ve already spent my money. When I go in with a list, I’m much more likely to pick up something I like and actually buy it. I won’t talk myself out of it for fear of finding something better later because it’s on the list.

4. Know where you’re going to put something before you hand over the cash. 

Don’t buy something unless you know where it’s going to go or how it’s going to be used. If you don’t know, don’t buy it. Buying something just because it looks cool is a great way to add more unnecessary junk to your house. And let’s be honest, no one wants that. Don’t bring in more junk for no reason. Just don’t.

5. Start at the back.

Just like in any retail store, you’ll find the cheaper items in the back. At flea markets you’ll usually find that there are more organized, professional vendors toward the main entrances. Steer clear of these as they’ll be much more expensive. Head to the back where people are selling items that obviously came out of their van that morning. These people are much easier to haggle prices with, and you’ll usually find more interesting pieces. These sections are usually less organized, but so worth the hassle!

6. Be kind, friendly, and courteous. 

A smile and a “hey y’all” goes a long way. Talk to the vendors, make polite conversation. If they feel like they know you, they may offer a lower price, or they may be willing to offer a second item for free along with an item you’re purchasing.

7. Ask questions. 

There may be a really cool story about a piece that you might never know if you don’t ask. Ask where it came from or if they know how old it is. Some vendors can tell you a personal story connected to an item. They like talking about their stuff, and in my opinion, having knowledge of the history of the piece makes it more special.

flea market tips

I hope these tips are helpful for you next time you find yourself at a flea market. That’s all for today, friends. Happy flea marketing!

DIY Projects, Home Decor, Tutorials

DIY artwork for cheap

Hey y’all! I hope you’re doing well! Summer is winding down over here, and I’ve been super busy with preparing things for my classroom this year. I will pick up the keys to my classroom next week to begin setting up for the school year. I’m excited for this school year, but I’m sad to see summer go! Since I’ve been so busy with classroom projects I haven’t been working on house projects too much lately. I did however, whip up a couple of these easy “art pieces” to use in the house.

I can’t even call this a tutorial because it’s so easy! More like an idea you may not have thought of. I have done this several times throughout my house, because it’s SO easy and SO cheap. I think for this project it cost me a total of $4. Whoop-de-do!

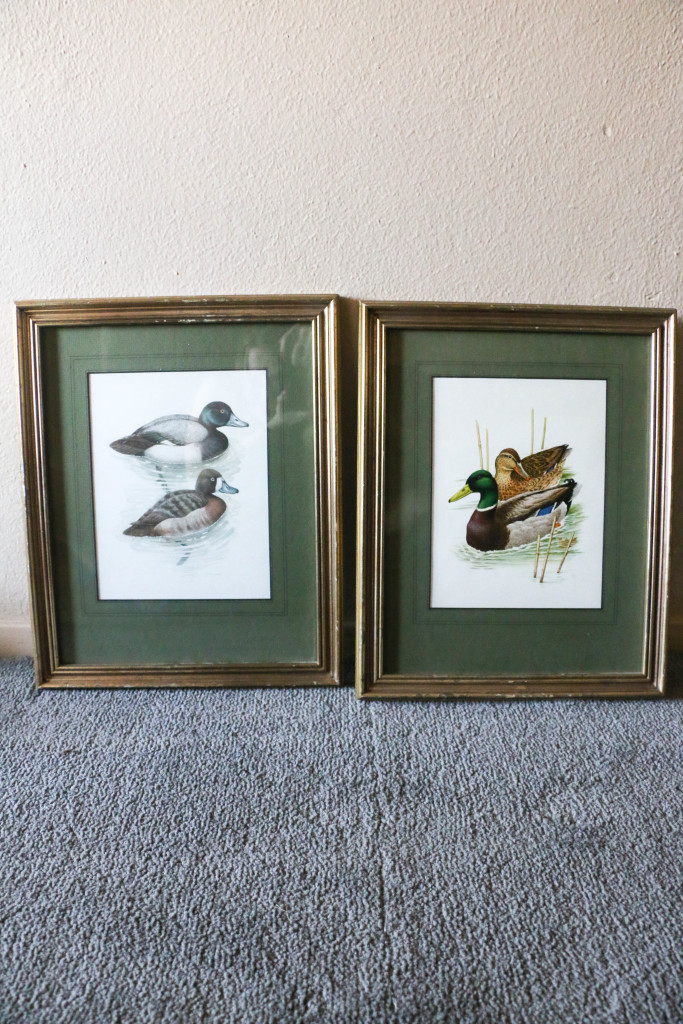
I found these old frames at a thrift store for $1.

 before2

Those ducks are so cute, aren’t they? Kind if a 90’s chic, if you will.

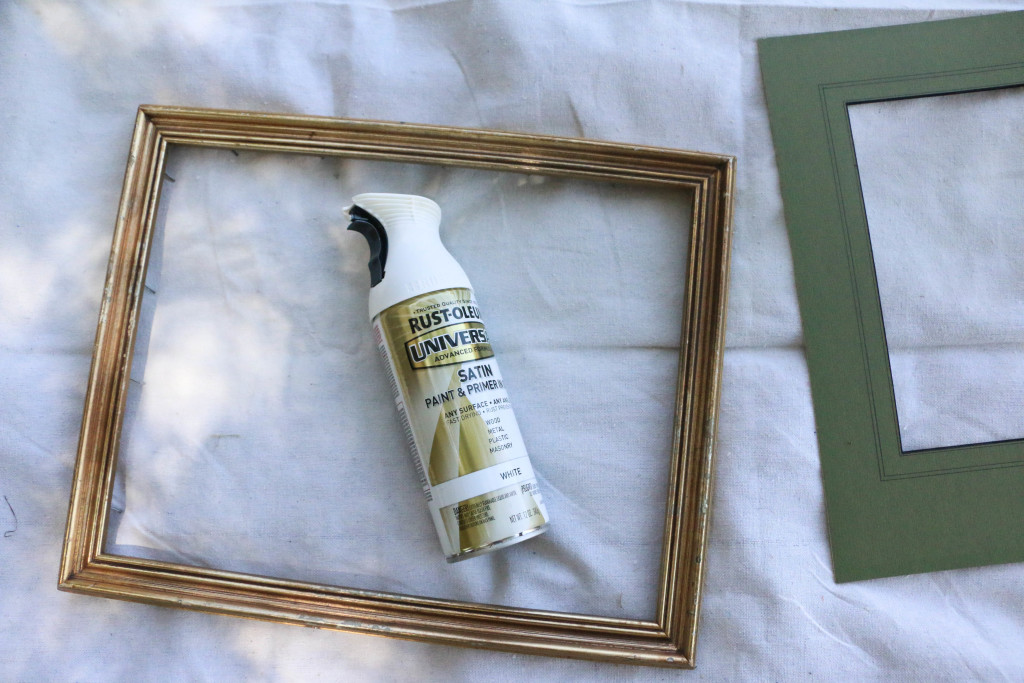
Literally all I did was spray paint the mattes and frames and replace the duck print with a cute printed paper. I got mine from Paper Source. I like to get papers from there because they come in 20×30 inch sheets, which is convenient for many different projects. They also have so many pretty papers! You could also do this with any gift wrap or scrapbook paper.

paint1

I used this spray paint because it’s what I had on hand. I spray painted them, and once they were dry, I added the new paper, and done. That’s it!

after1

after2

I realize this is kind of an obvious DIY. But it’s so so easy, you have to give it a try! That’s it for today friends, have a fabulous day!
DIY Projects, Furniture Makeover, Home Decor, Tutorials

Cane Chair Makeover…again

Have you ever done a project and just hated the results? You work hard on something, and when it’s finished, it’s just not what you thought it would be? This is what I’m sharing today. About two years ago I bought a pair of cane chairs from a thrift store for $20. I was so excited to work on them. Like, SO excited. Unfortunately, I don’t have the original picture anymore, but they were dark wood, with a gross blue fabric. I knew I wanted to make them over, but I had no idea how.

I picked some fabric out for the chairs with no thought to how it might lay on the chair. I learned a lot from this first makeover, but they just weren’t doing it for me. Here’s how they looked after makeover number one (and don’t judge me):

chairbefore1

First of all, if you look close enough, you can see that the back legs aren’t even painted. How did I miss that?! I don’t know. I also don’t know how I lived with this for so long. Ugh.
chairbefore2

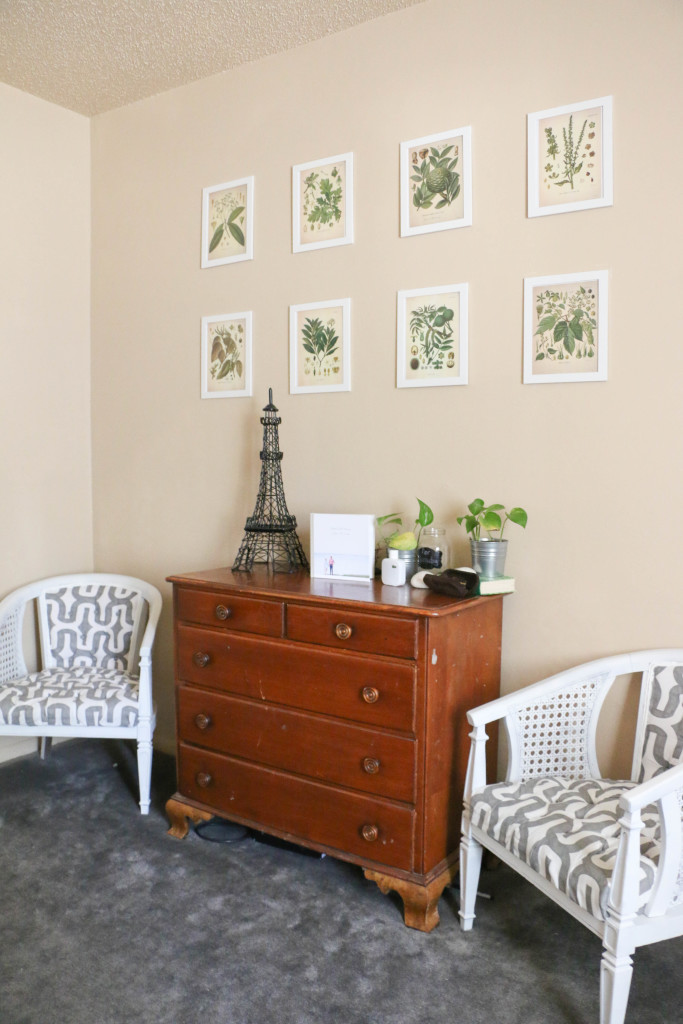
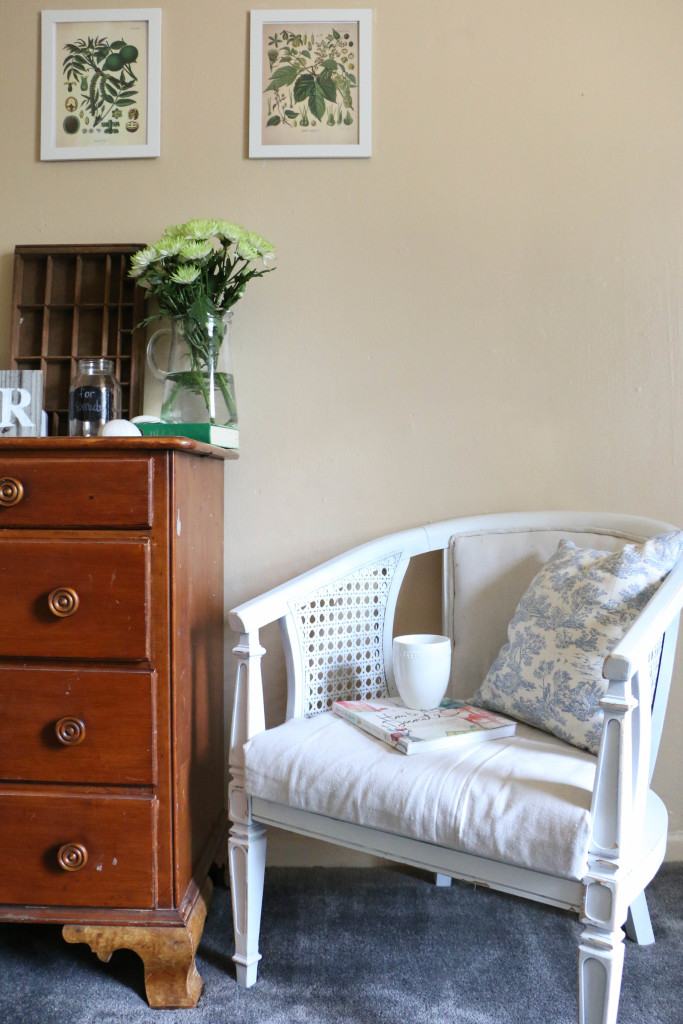
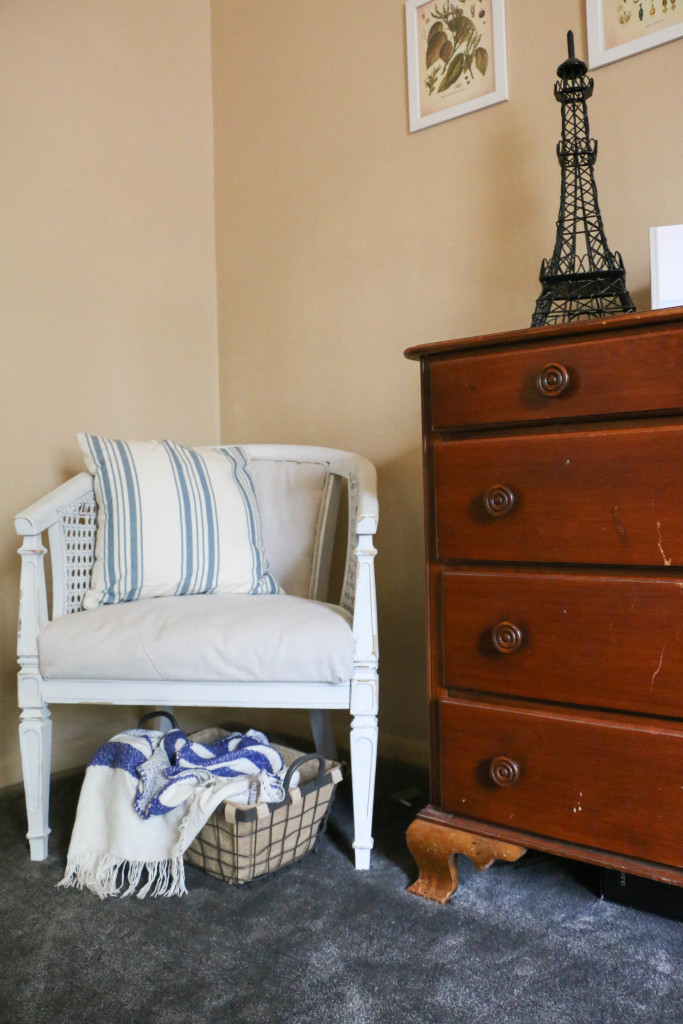
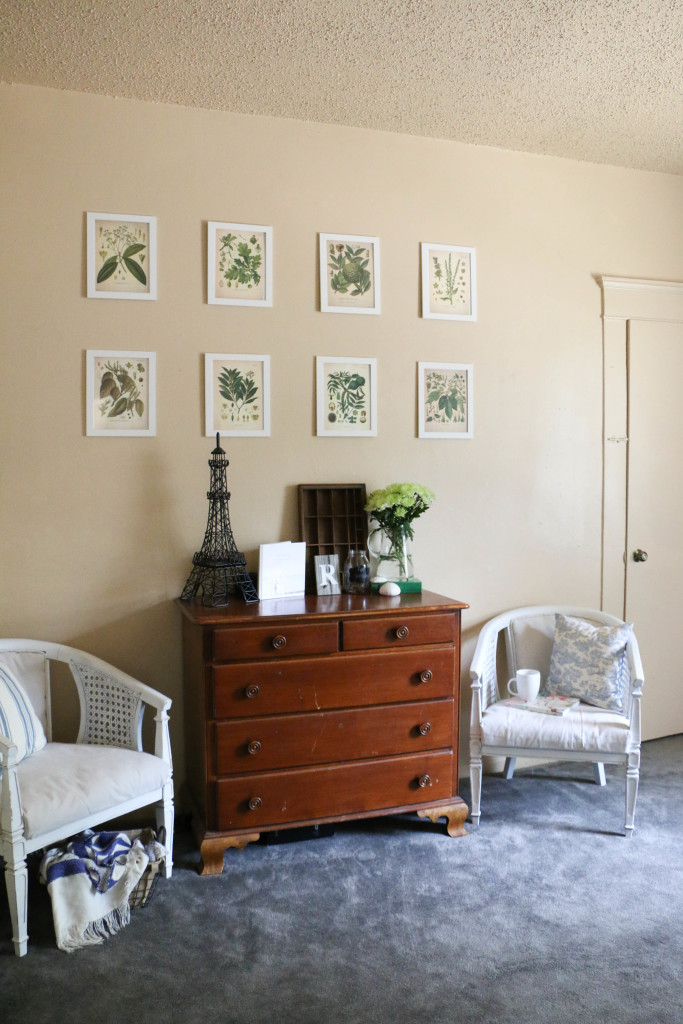
This is a wider shot of the chairs. They are convenient, really. Ethan puts his shoes on here, and they are pretty comfortable. I like to sit here and read on occasion as well. Sidenote, our dresser is my husband’s childhood dresser (a family heirloom), deemed untouchable by the paintbrush. Anyway, looking at these chairs just makes me cringe. I’ve wanted to do something about them for so long, but the amount of work I did the first time around was torturous, and I couldn’t imagine going through that again. So I put it off for a while, thinking that since I had done it, I’d have to live with it.

But that’s just not true. I did these chairs before I got married, before I was making a home, and WAY before I started figuring out what my style was. There’s no rule out there saying you have to live with your DIY mistakes. So, I decided to take the plunge. This time, with a few ground rules. I had to do this the easiest way possible. Because last time was awful.

So let’s go through it, step by step.

chairmakeover1

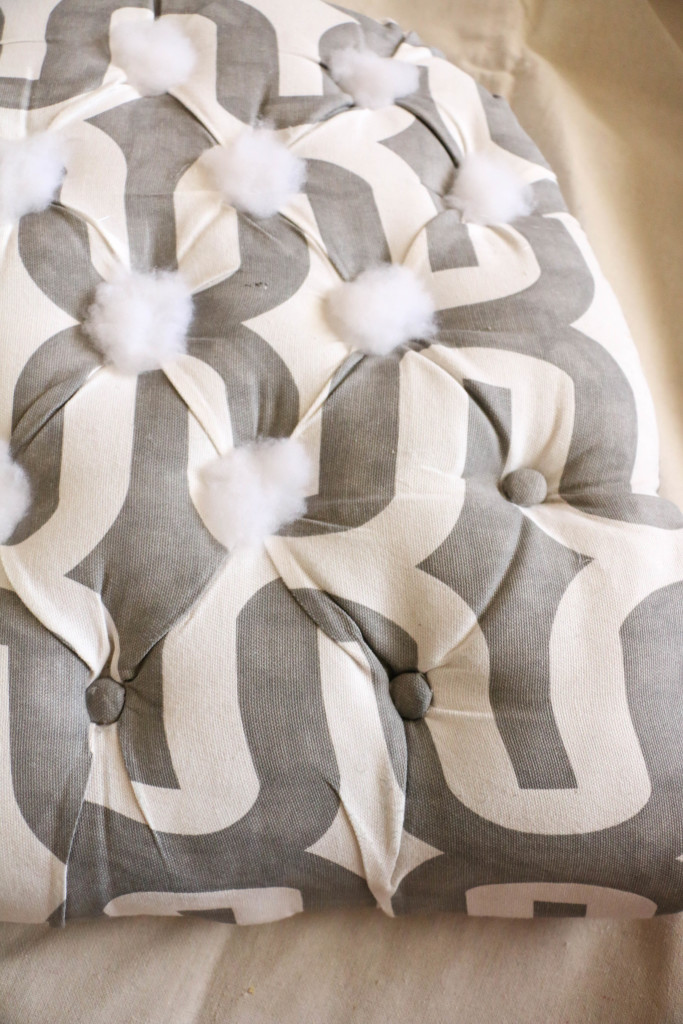
I didn’t want to go through the hassle of all the buttons, so I stuffed them with stuffing. A little hot glue on top of the button, and some stuffing. Easy peasy.

chairmakeover2

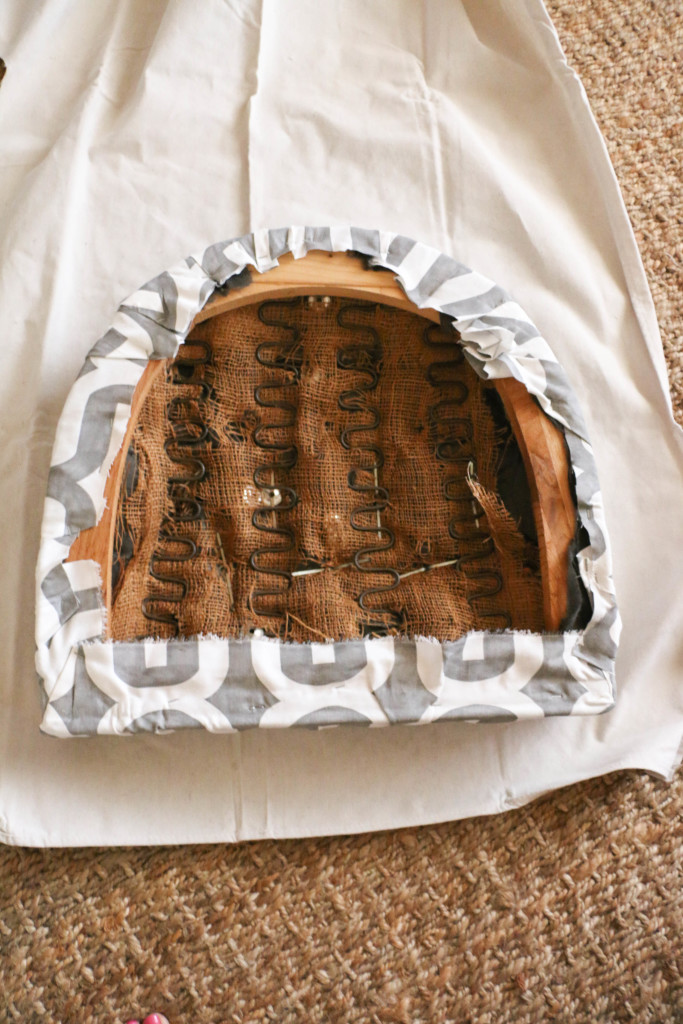
I bought a $4 drop cloth and placed the seat bottom face down on the fabric.

chairmakeover3

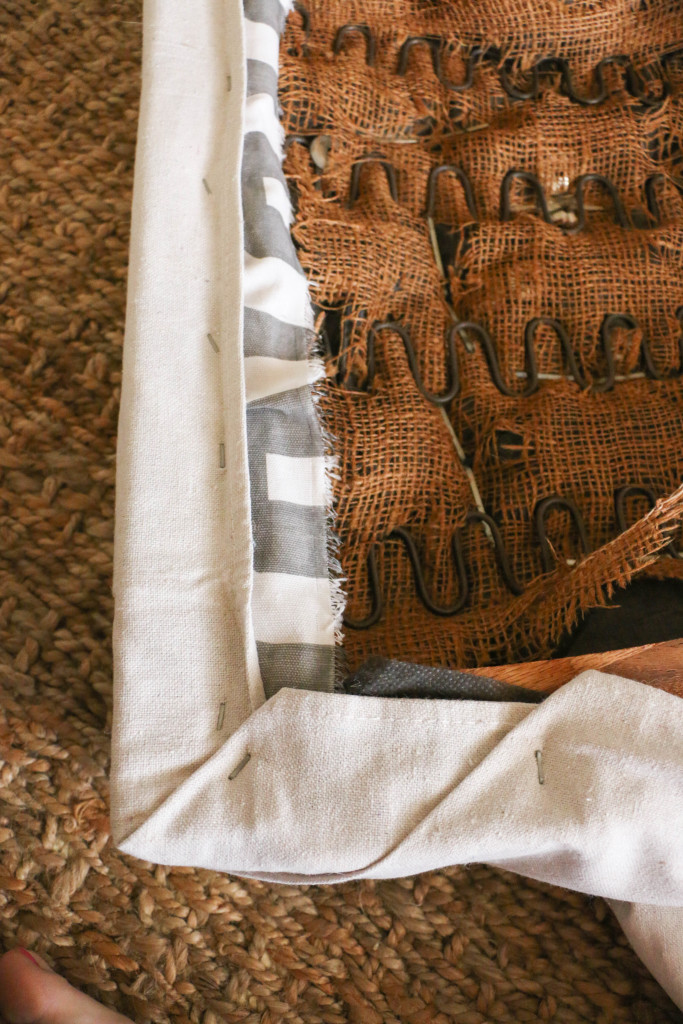
Then I carefully pulled the corners over and stapled the dropcloth material to the bottom. The key here is to pull as tight as you can, and keep everything as neat as possible.

The seat bottom took probably a total of ten minutes, but the top section was a bit more involved.

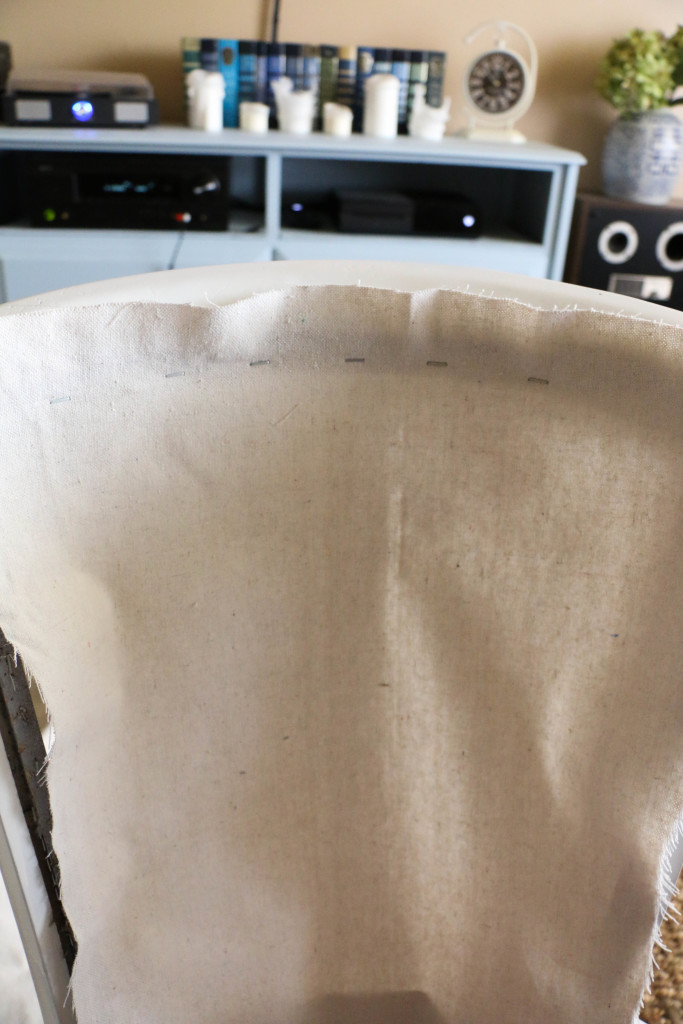
chairmakeover4

I cut a piece of material the size of the chair back and stapled starting at the top. I found that the best way to keep it tight and even is to start at the top, then staple the bottom, and finish with the sides.

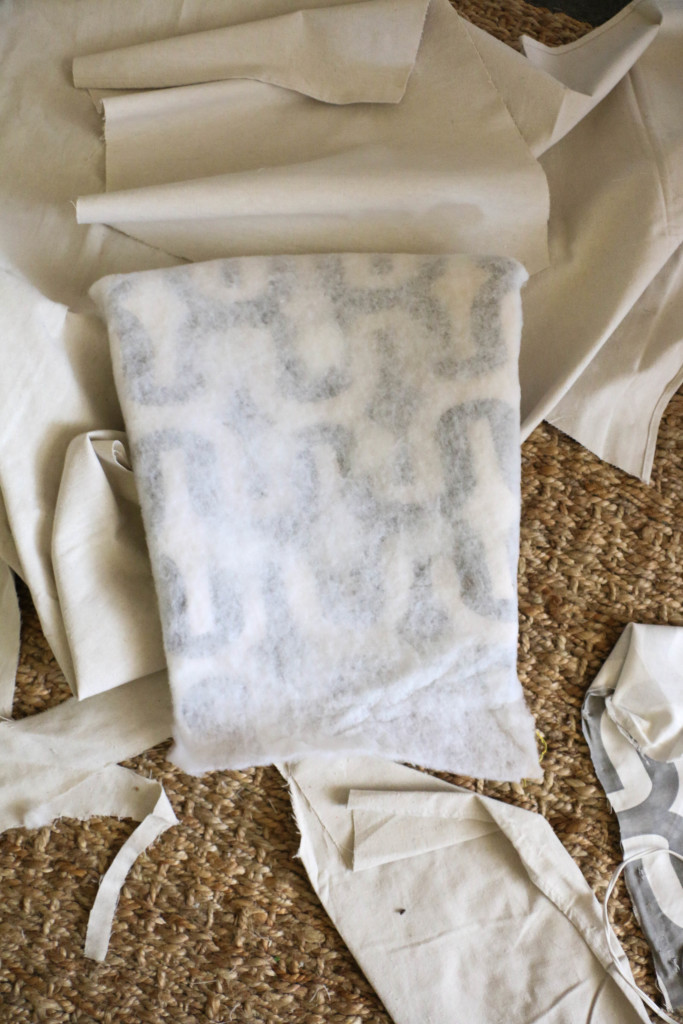
chairmakeover5

I then wrapped the chair back in quilting batting. I did this to make it a bit more comfy, and to conceal the buttons.

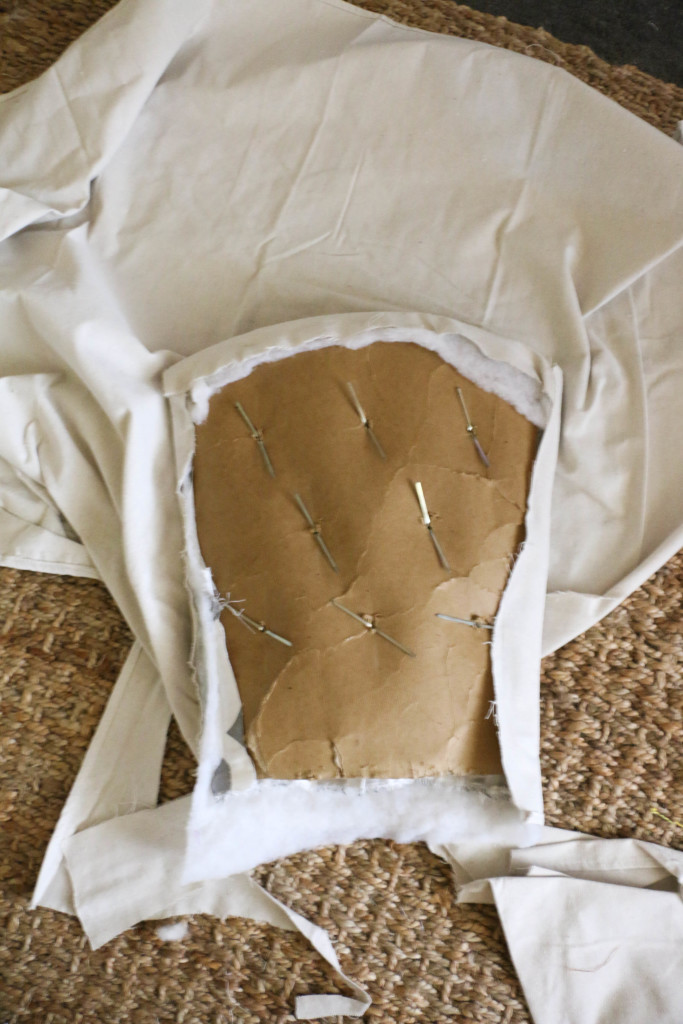
chairmakeover6

I then wrapped the seat back in the material, and hotglued the extra material to the backside.

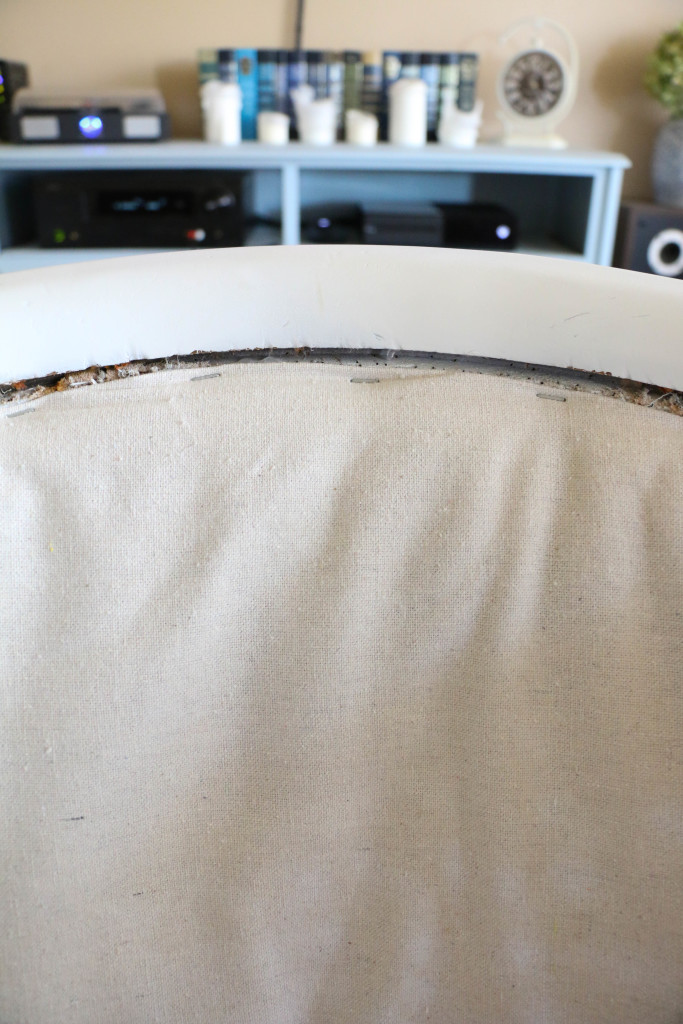
chairmakeover7

I then put the seat back up against the frame, and stapled as closely to the top as possible. This is tricky, and my staple gun was not kind to my hands.

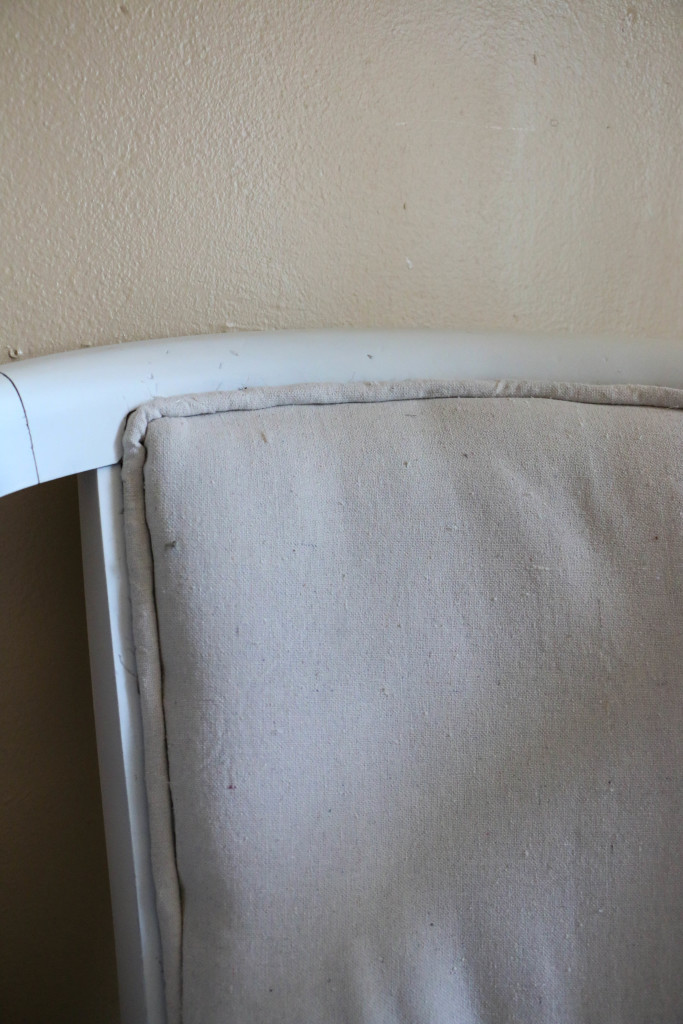
chairmakeover8

I then covered the staples with trim. I make the trim by wrapping the existing trim in the material and hotgluing it. Hot glue for the win.

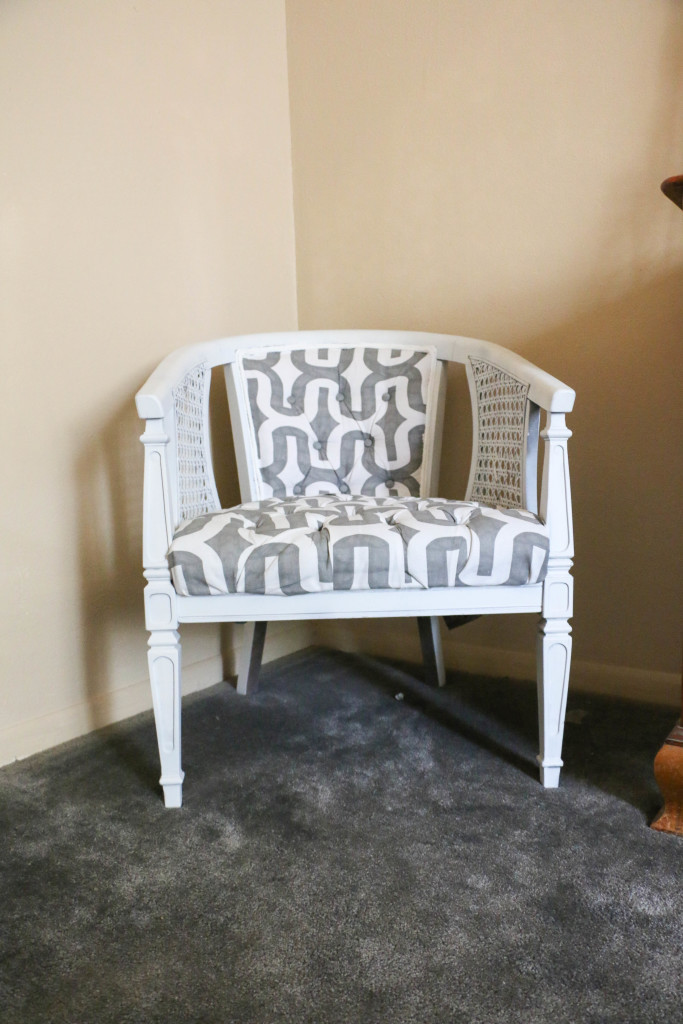
The new chairs are still not perfect, but they’re much simpler, and I can live with them now. This was only my second time with reupholstery (on the same set of chairs). I still don’t have it down, but I definitely appreciate these chairs a bit more now.

chairafter2

Overall, they just look cleaner, smoother, and more natural.

chairafter

The neutral look will allow them to be moved anywhere around our home and work.

chairafter3

So the moral of this story is: if you don’t like something, change it! And if you still don’t like it, change it again! I can’t say that these are perfect, but they’re working SO MUCH BETTER than before.

Have you ever done something you hated? What did you do? I’d love to hear about it! That’s all for today, friends. Have a fabulous day!