Browsing Tag

Furniture Makeover

DIY Projects, Furniture Makeover, Home Decor, Tutorials

Cane Chair Makeover…again

Have you ever done a project and just hated the results? You work hard on something, and when it’s finished, it’s just not what you thought it would be? This is what I’m sharing today. About two years ago I bought a pair of cane chairs from a thrift store for $20. I was so excited to work on them. Like, SO excited. Unfortunately, I don’t have the original picture anymore, but they were dark wood, with a gross blue fabric. I knew I wanted to make them over, but I had no idea how.

I picked some fabric out for the chairs with no thought to how it might lay on the chair. I learned a lot from this first makeover, but they just weren’t doing it for me. Here’s how they looked after makeover number one (and don’t judge me):

chairbefore1

First of all, if you look close enough, you can see that the back legs aren’t even painted. How did I miss that?! I don’t know. I also don’t know how I lived with this for so long. Ugh.

chairbefore2

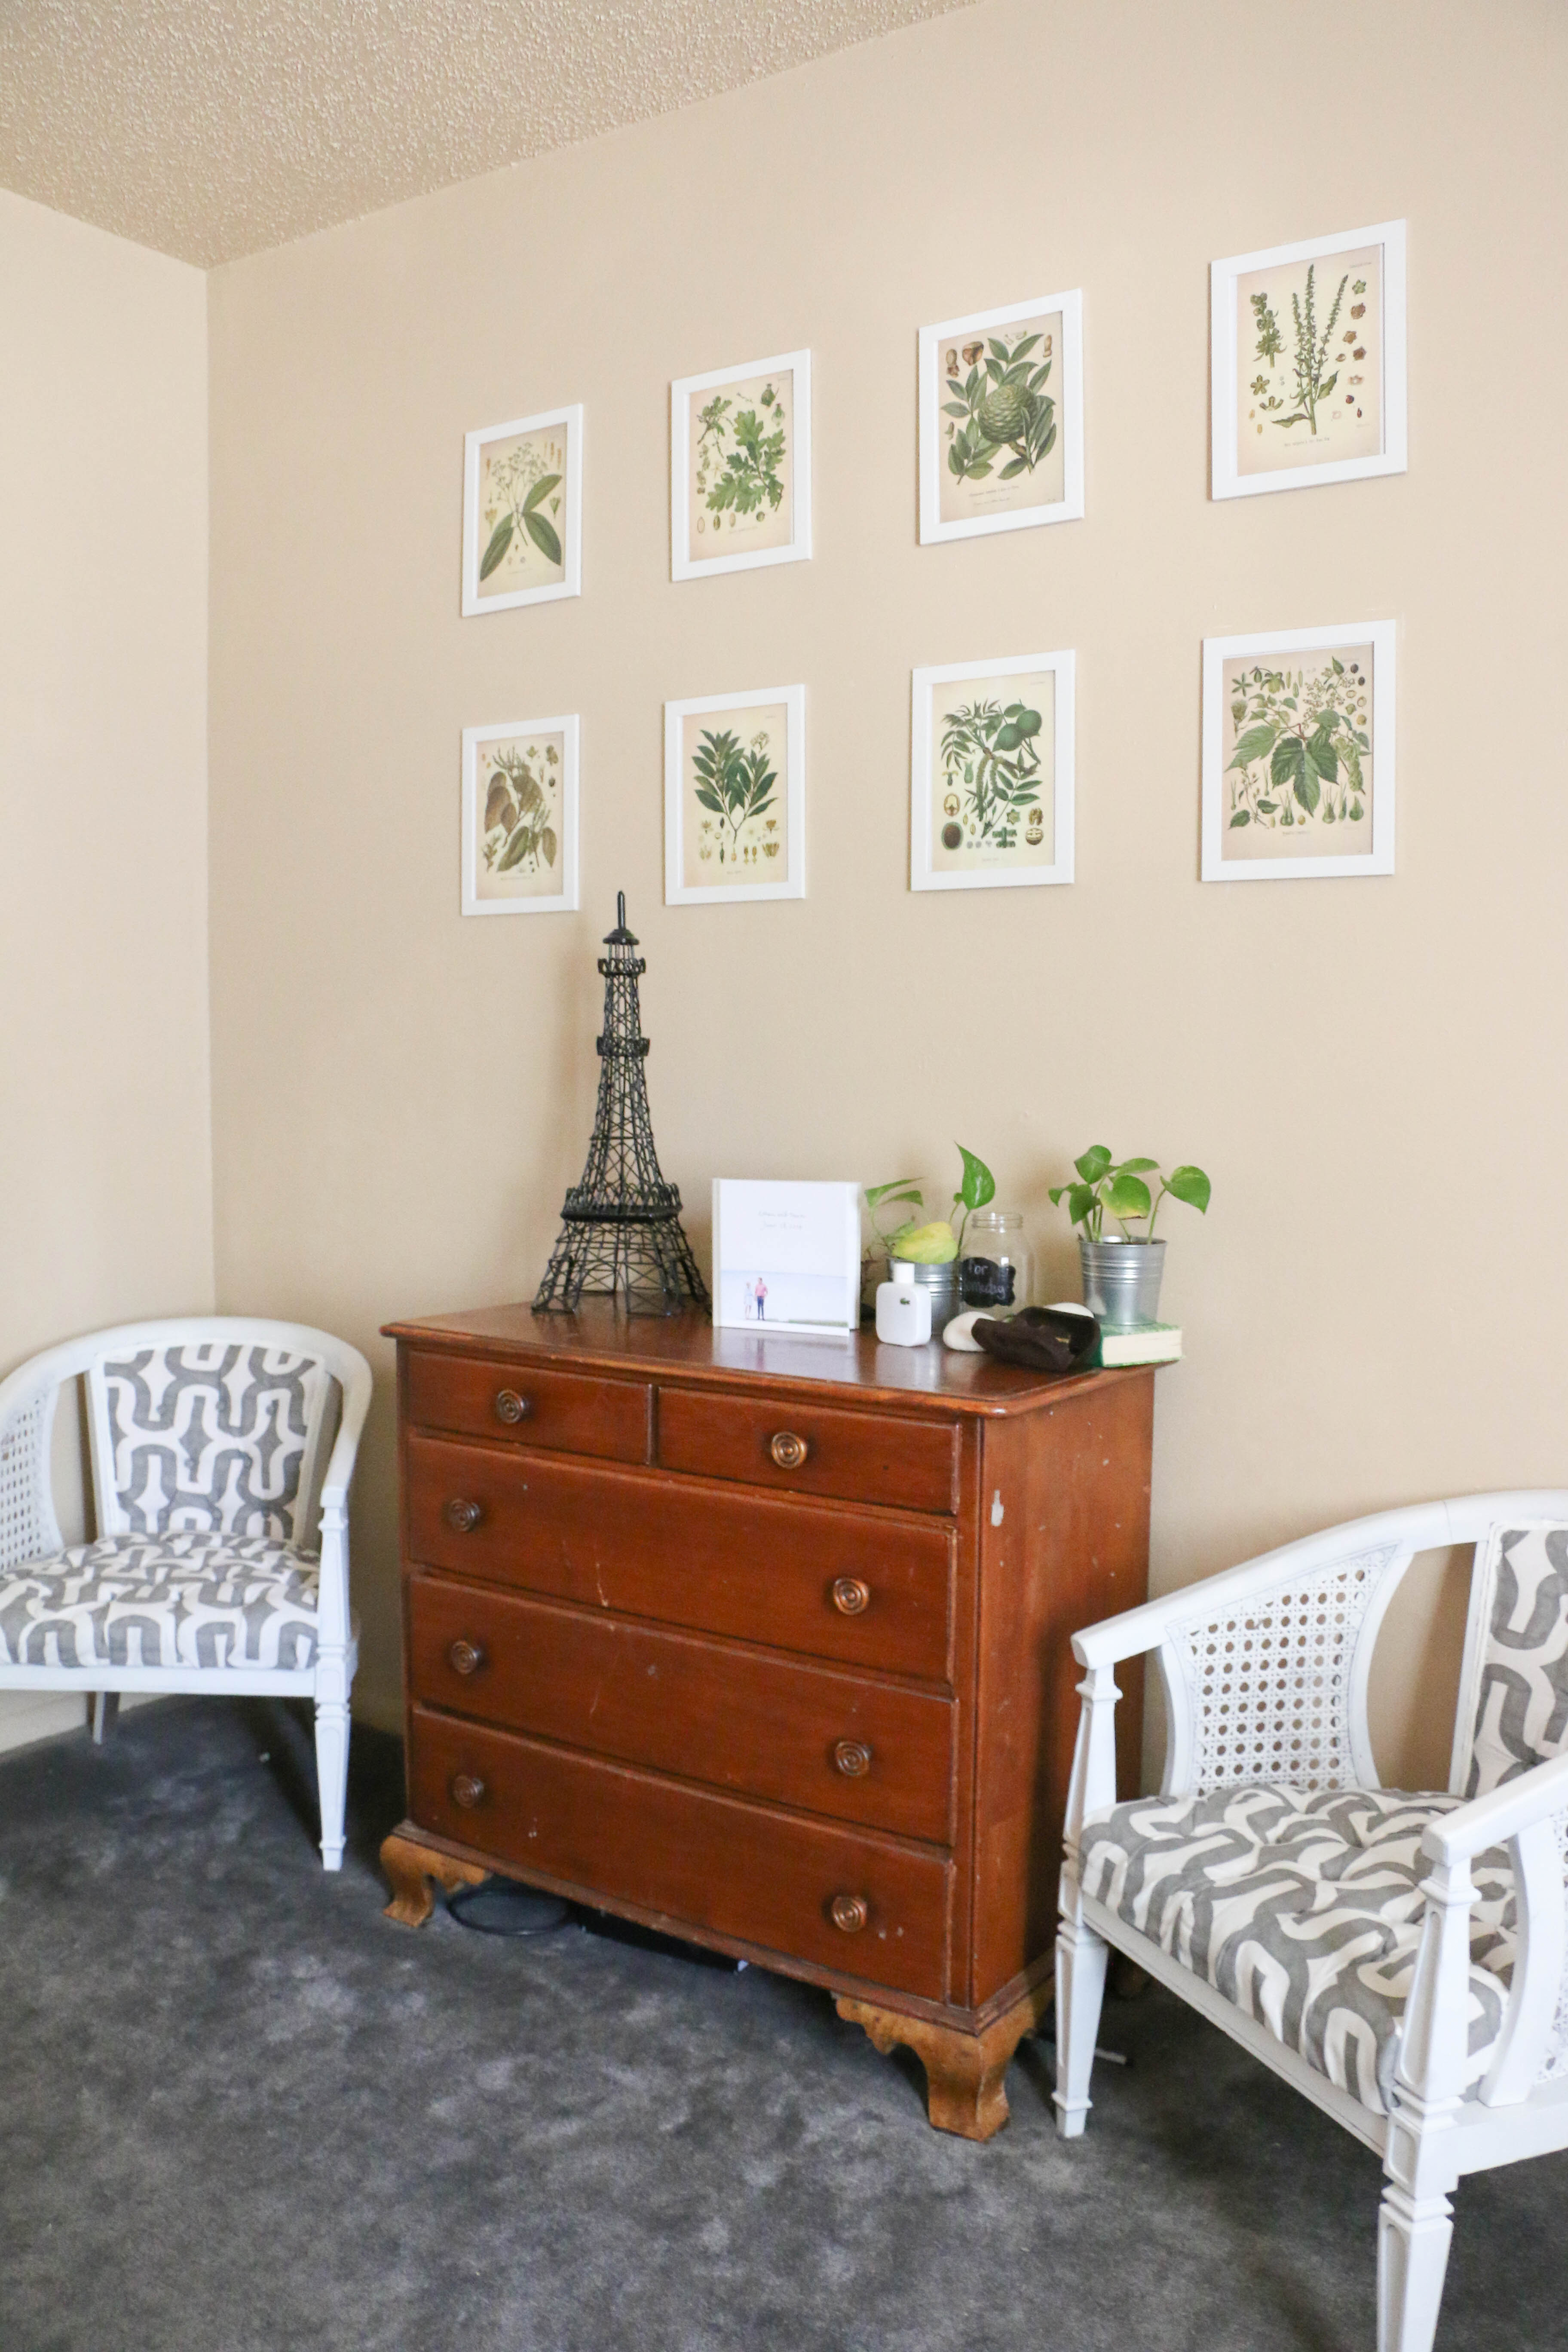
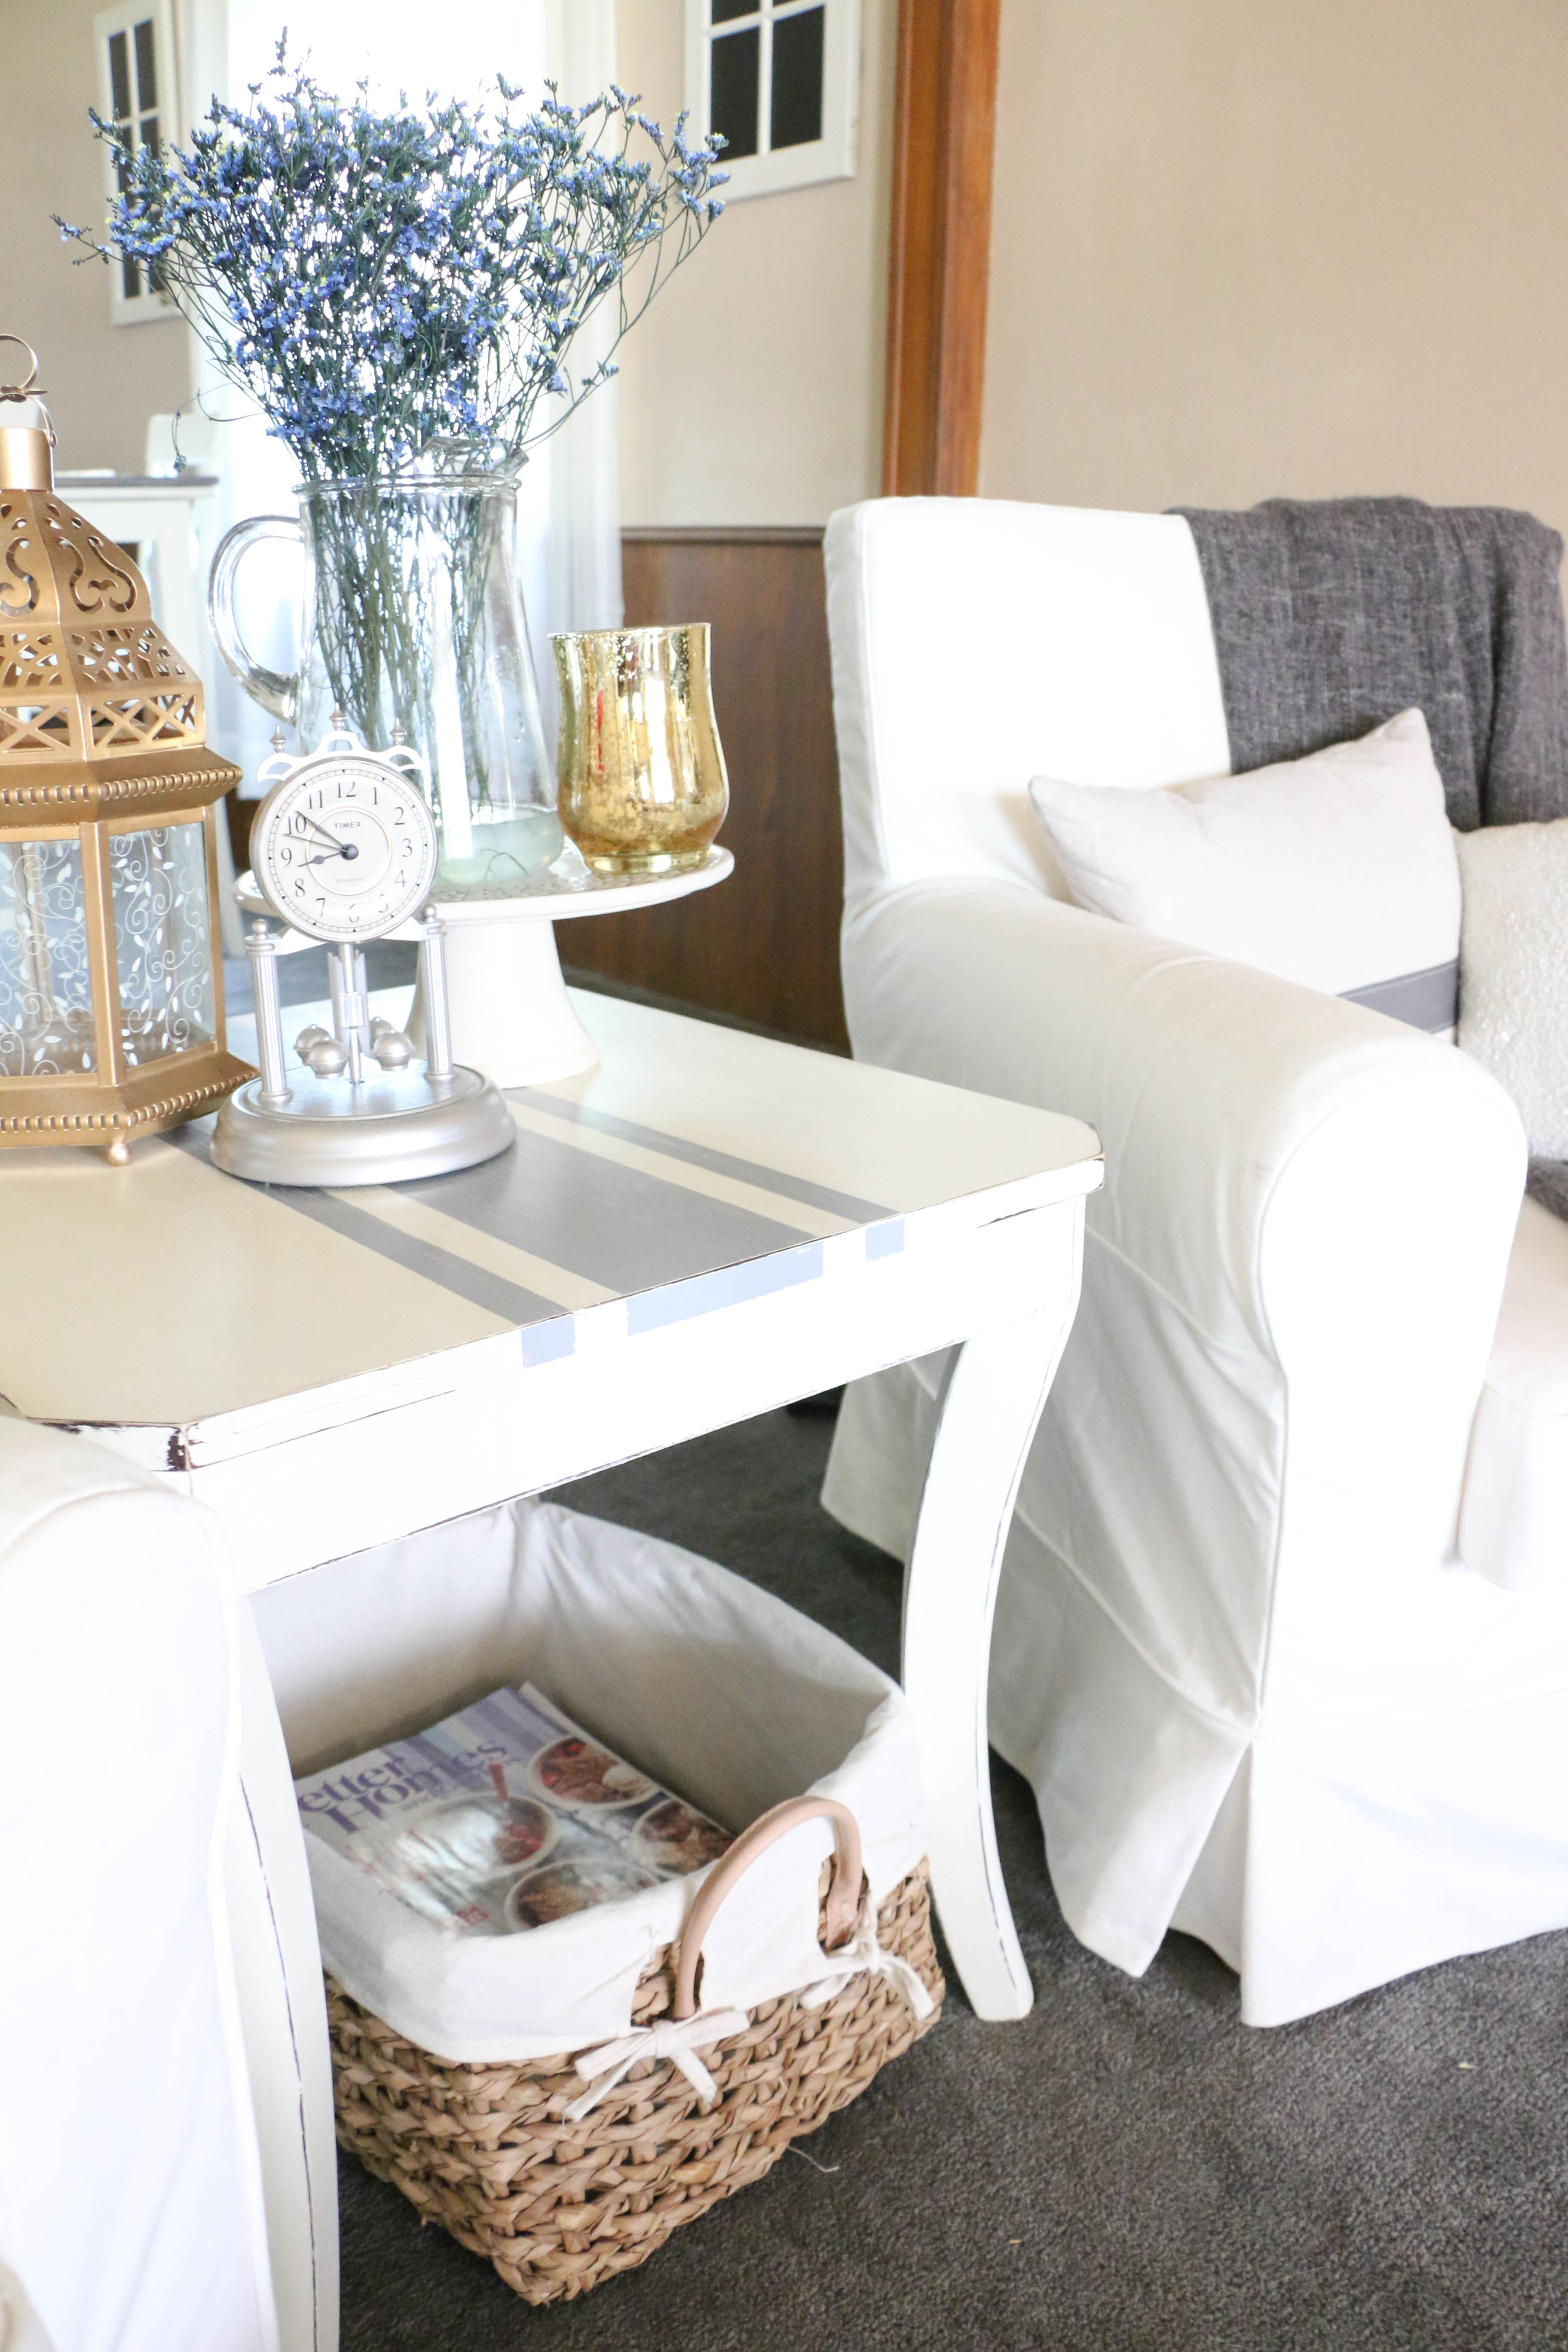
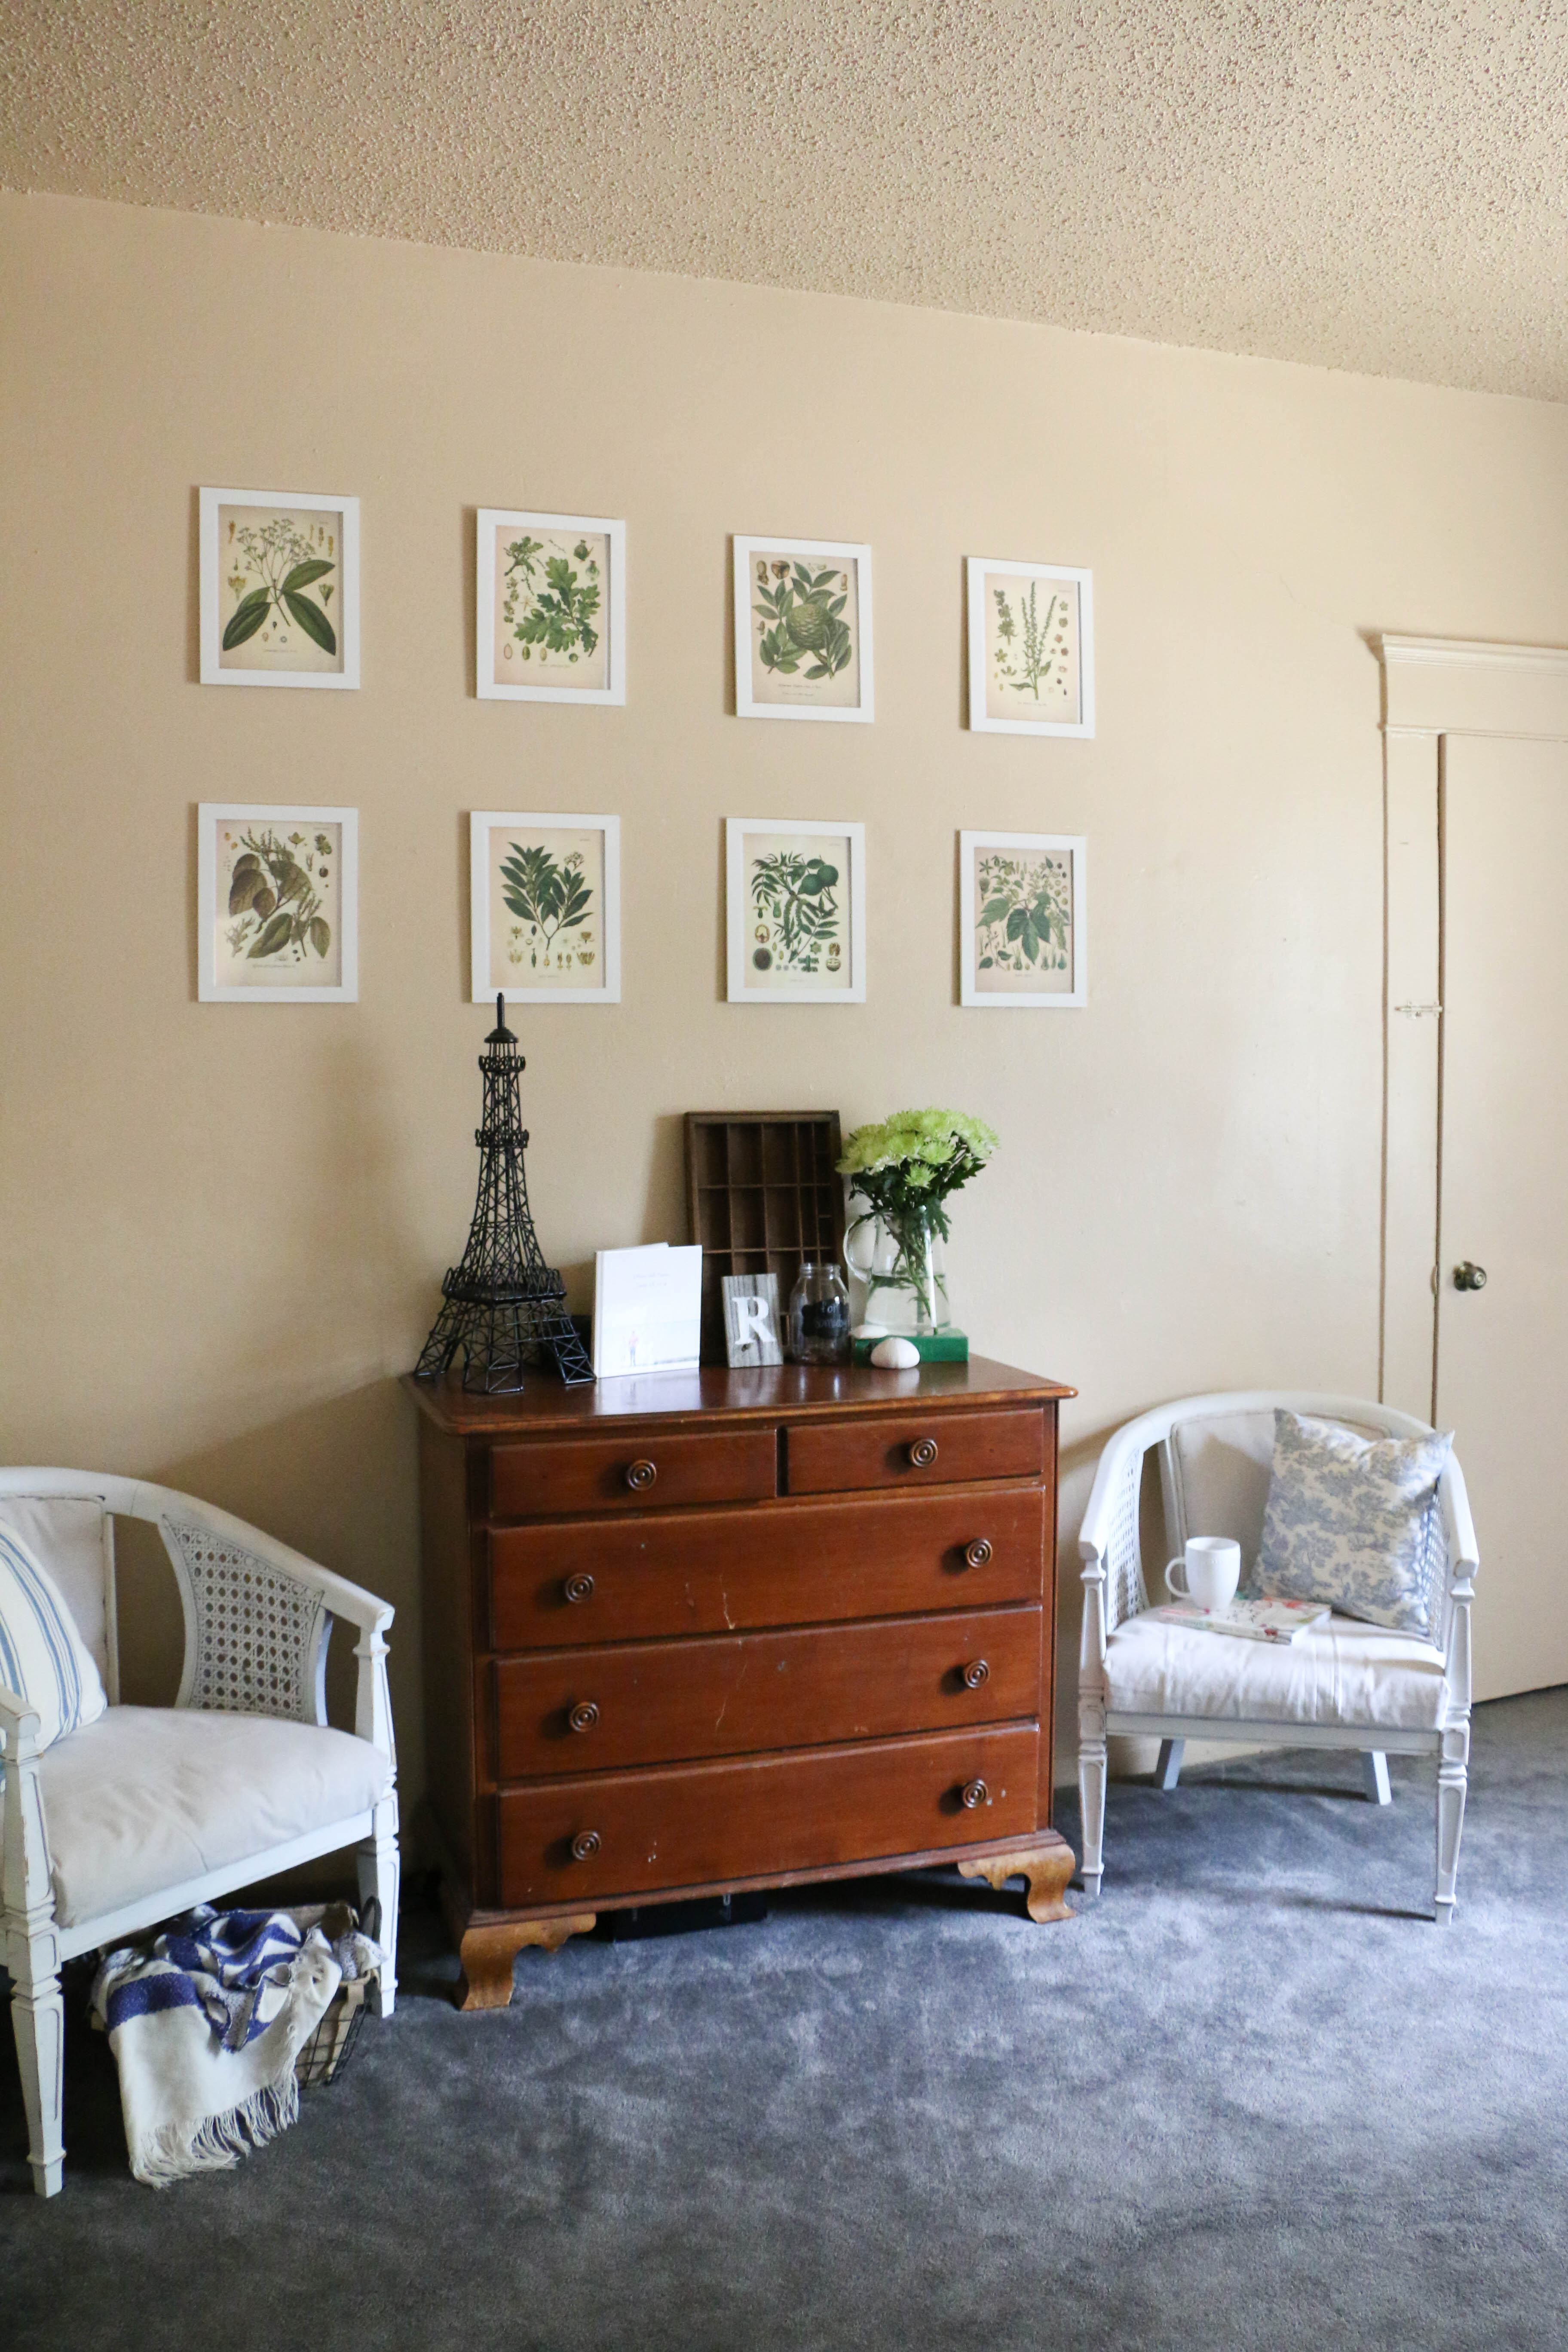
This is a wider shot of the chairs. They are convenient, really. Ethan puts his shoes on here, and they are pretty comfortable. I like to sit here and read on occasion as well. Sidenote, our dresser is my husband’s childhood dresser (a family heirloom), deemed untouchable by the paintbrush. Anyway, looking at these chairs just makes me cringe. I’ve wanted to do something about them for so long, but the amount of work I did the first time around was torturous, and I couldn’t imagine going through that again. So I put it off for a while, thinking that since I had done it, I’d have to live with it.

But that’s just not true. I did these chairs before I got married, before I was making a home, and WAY before I started figuring out what my style was. There’s no rule out there saying you have to live with your DIY mistakes. So, I decided to take the plunge. This time, with a few ground rules. I had to do this the easiest way possible. Because last time was awful.

So let’s go through it, step by step.

chairmakeover1

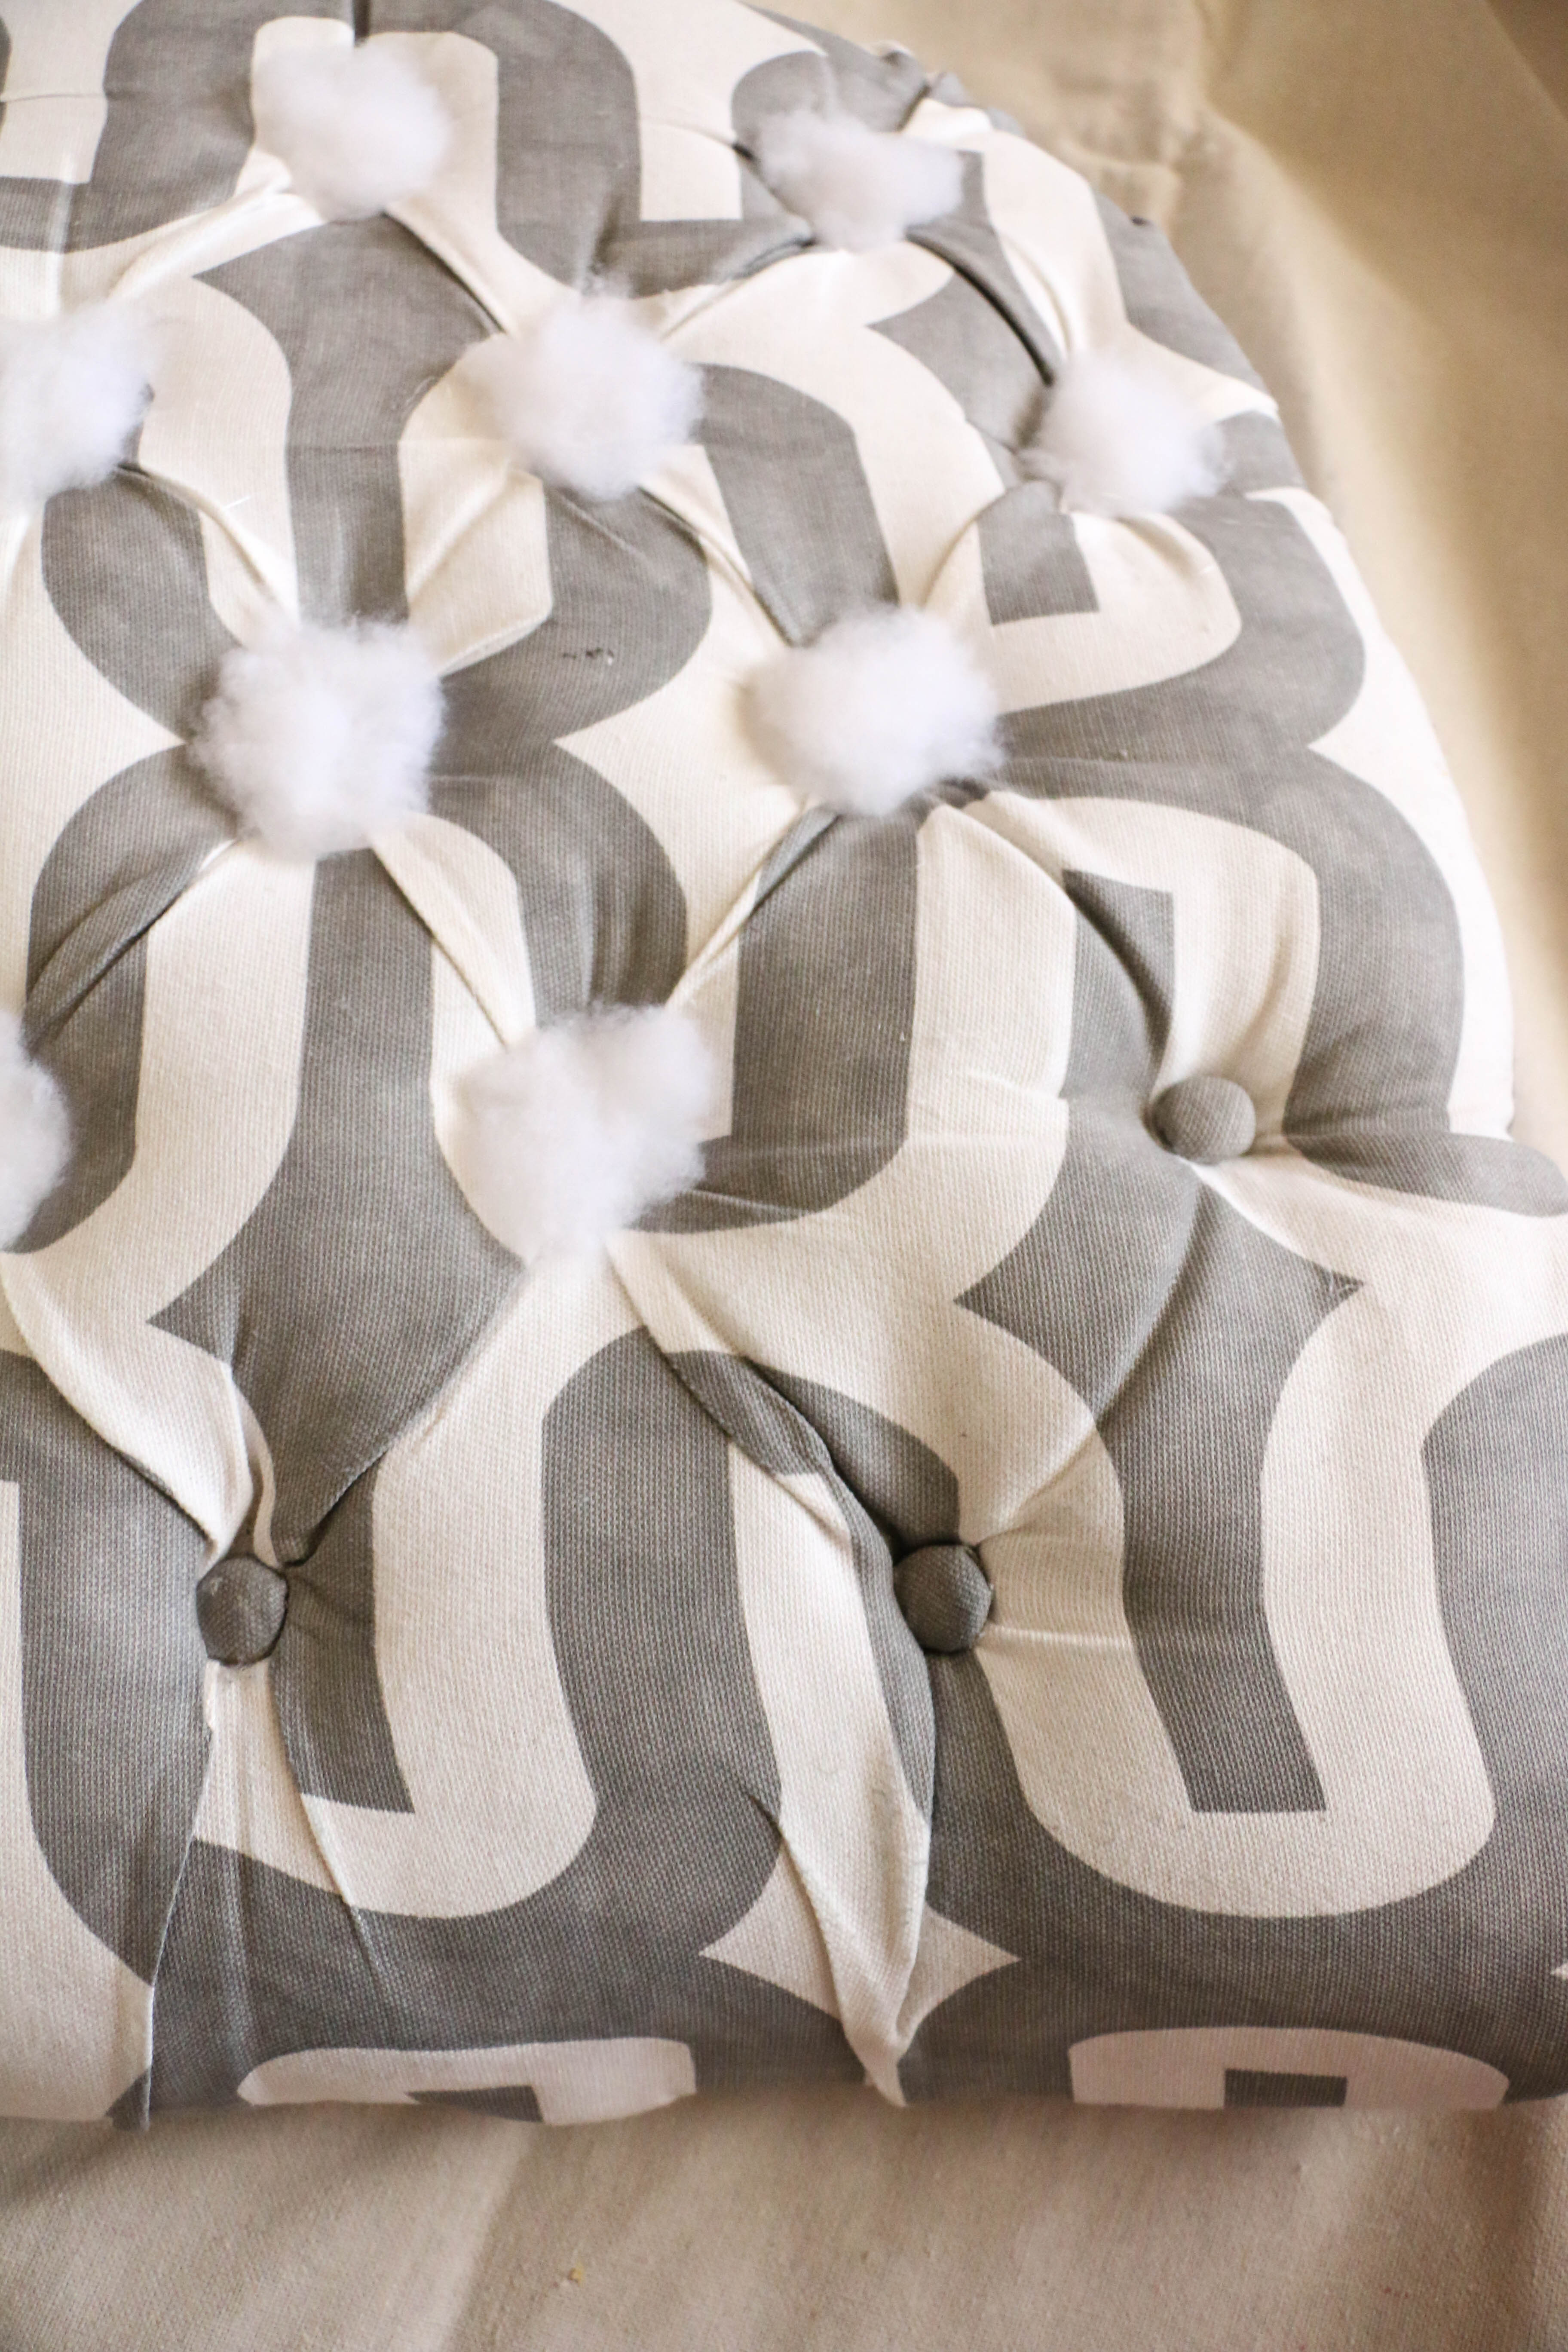
I didn’t want to go through the hassle of all the buttons, so I stuffed them with stuffing. A little hot glue on top of the button, and some stuffing. Easy peasy.

chairmakeover2

I bought a $4 drop cloth and placed the seat bottom face down on the fabric.

chairmakeover3

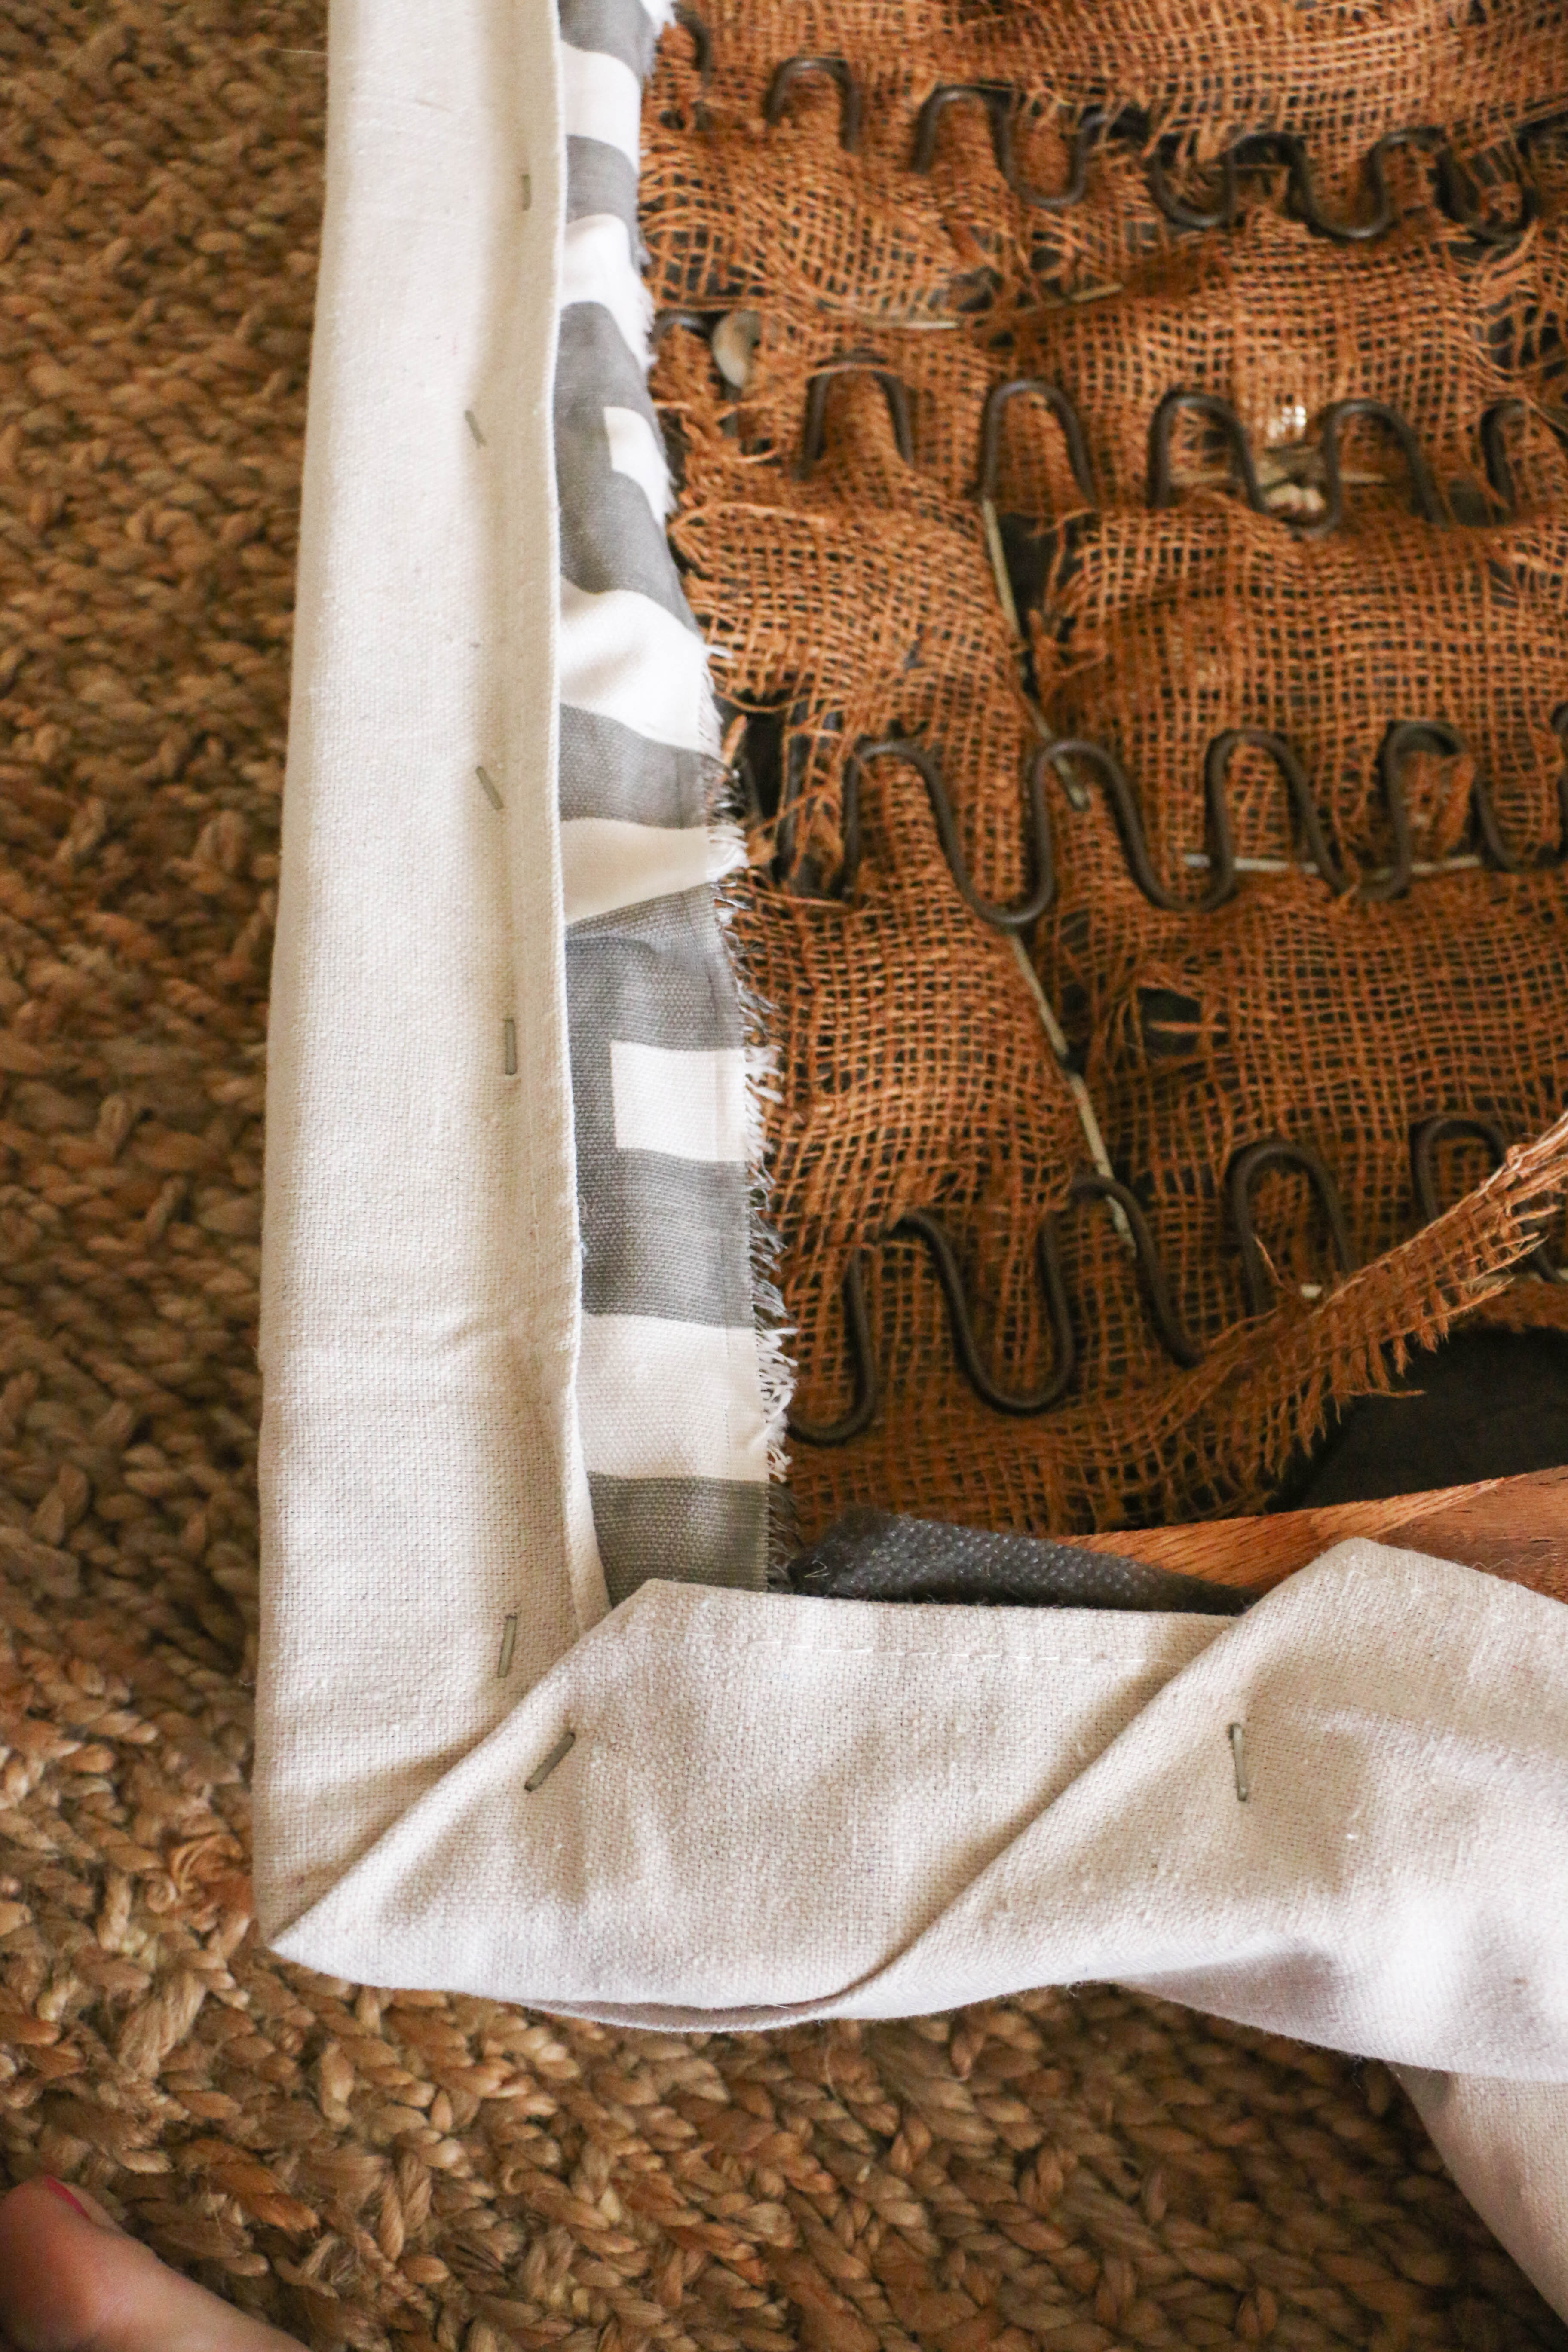
Then I carefully pulled the corners over and stapled the dropcloth material to the bottom. The key here is to pull as tight as you can, and keep everything as neat as possible.

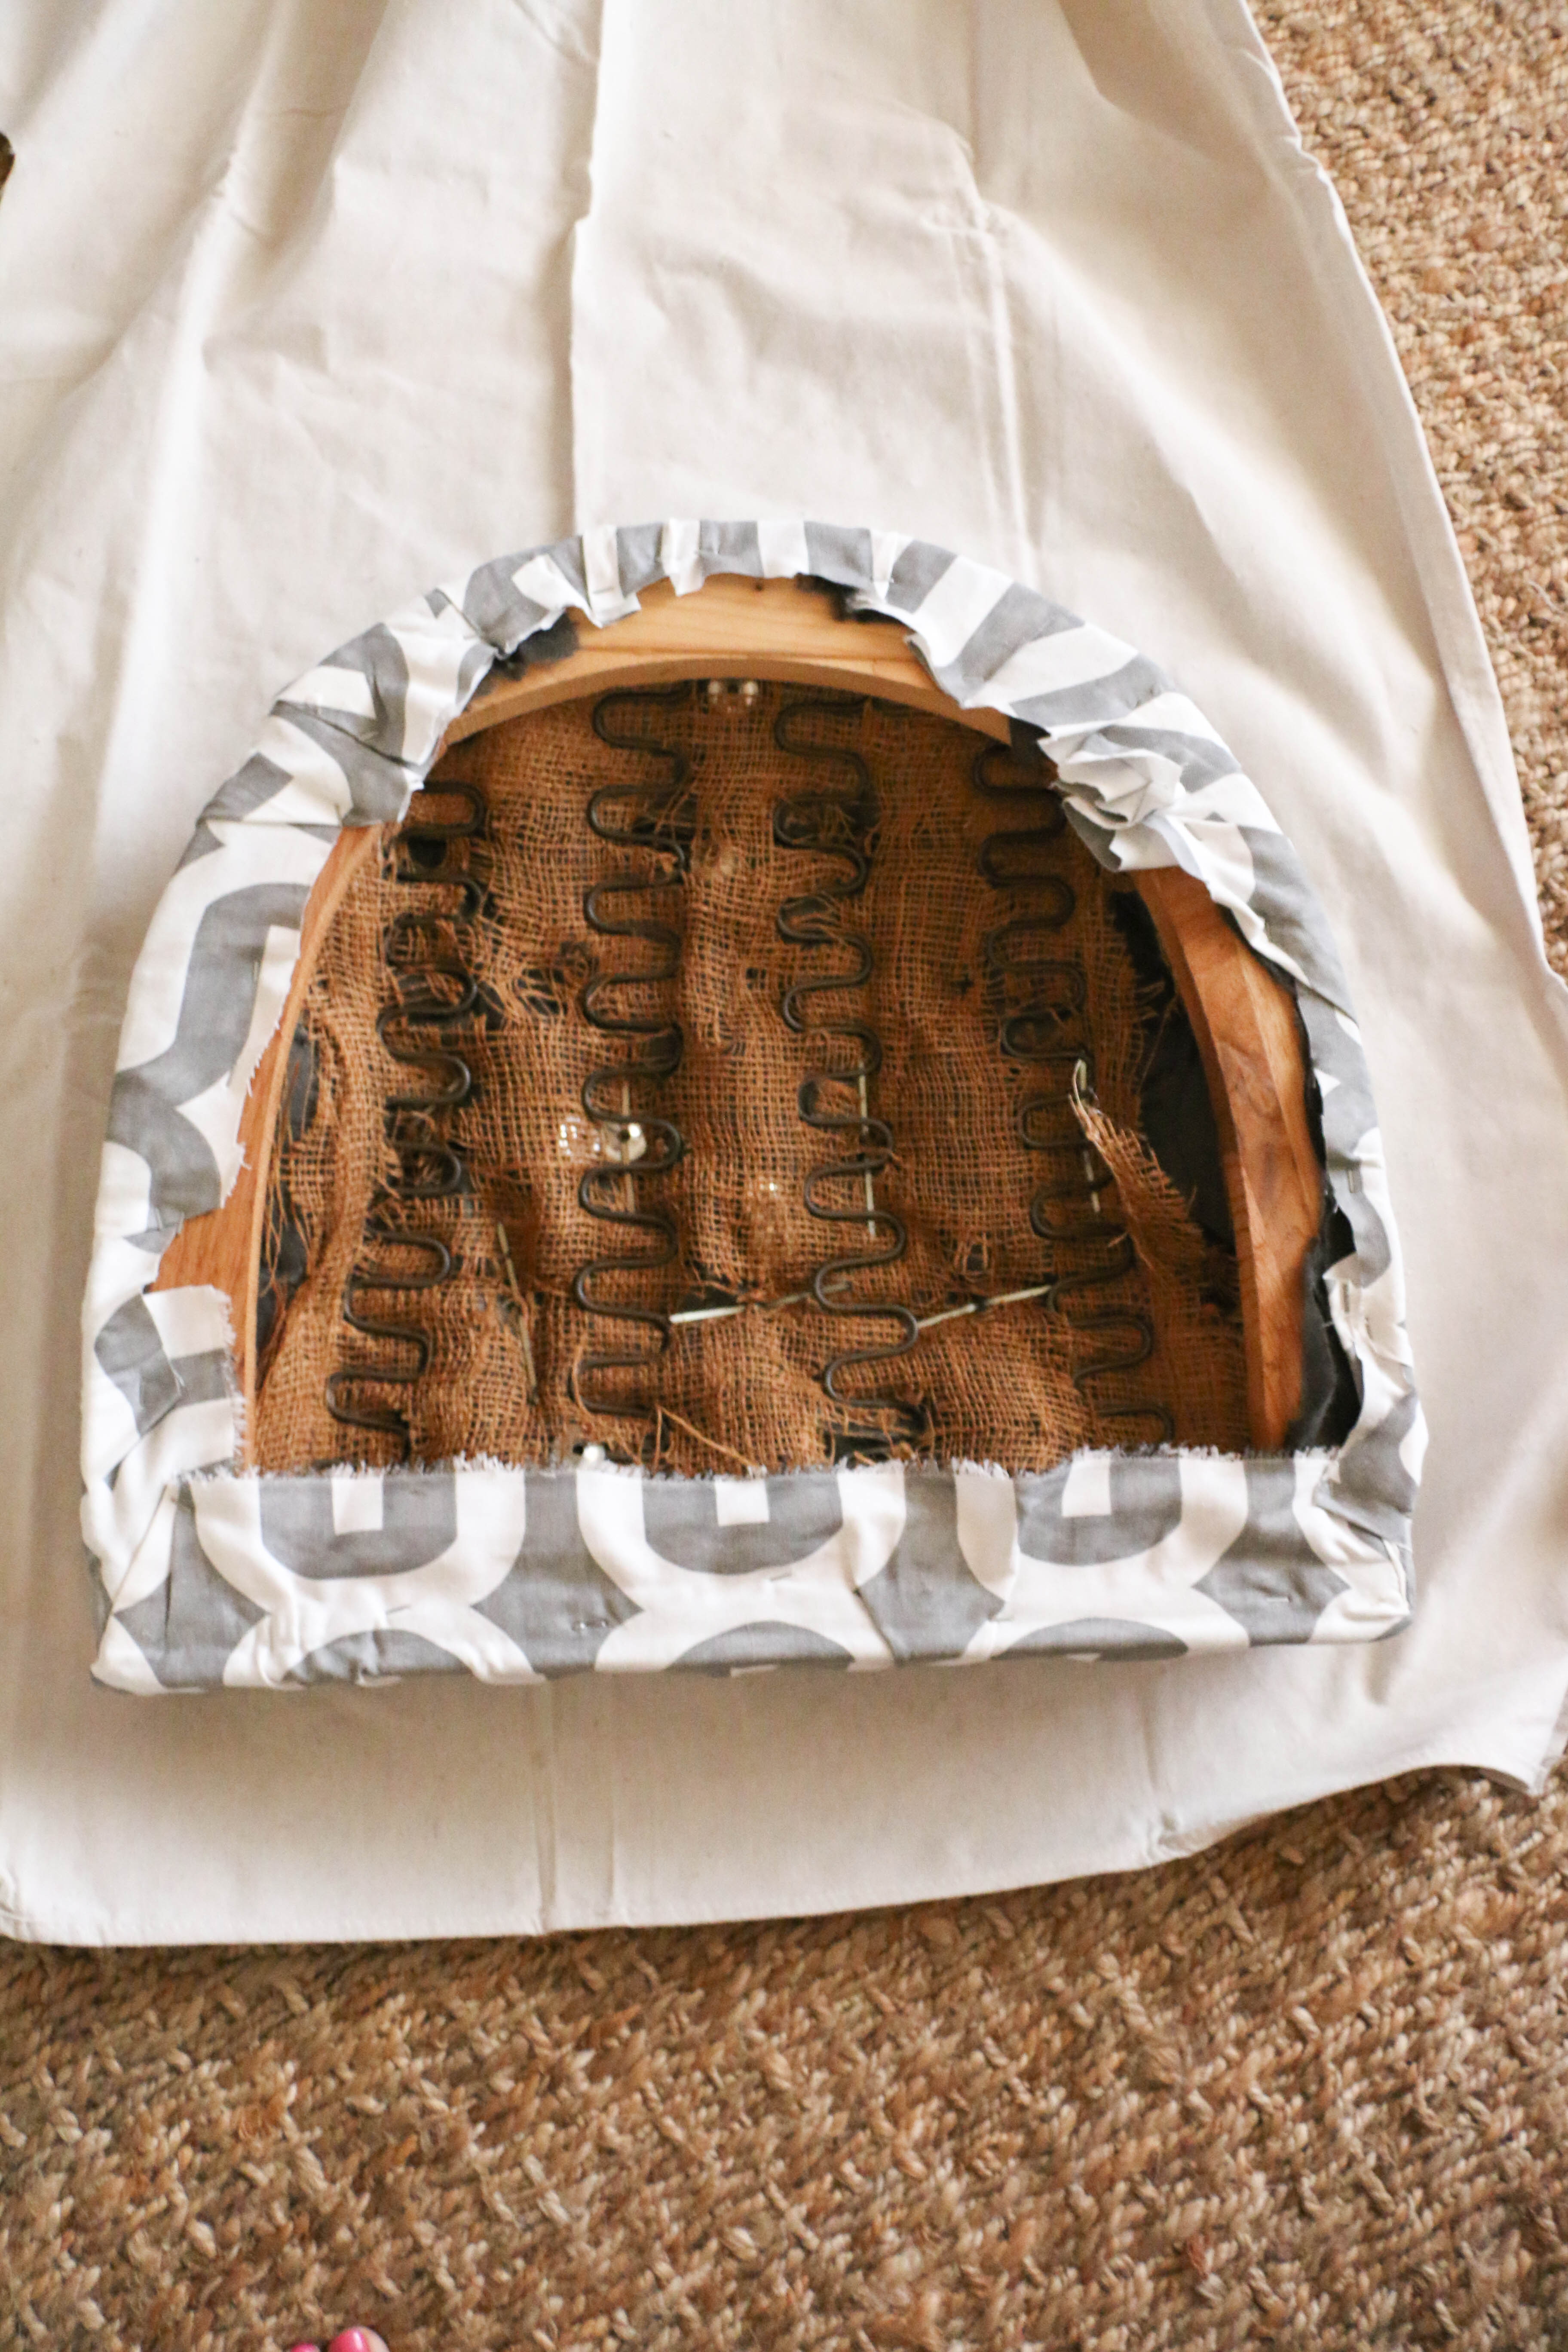
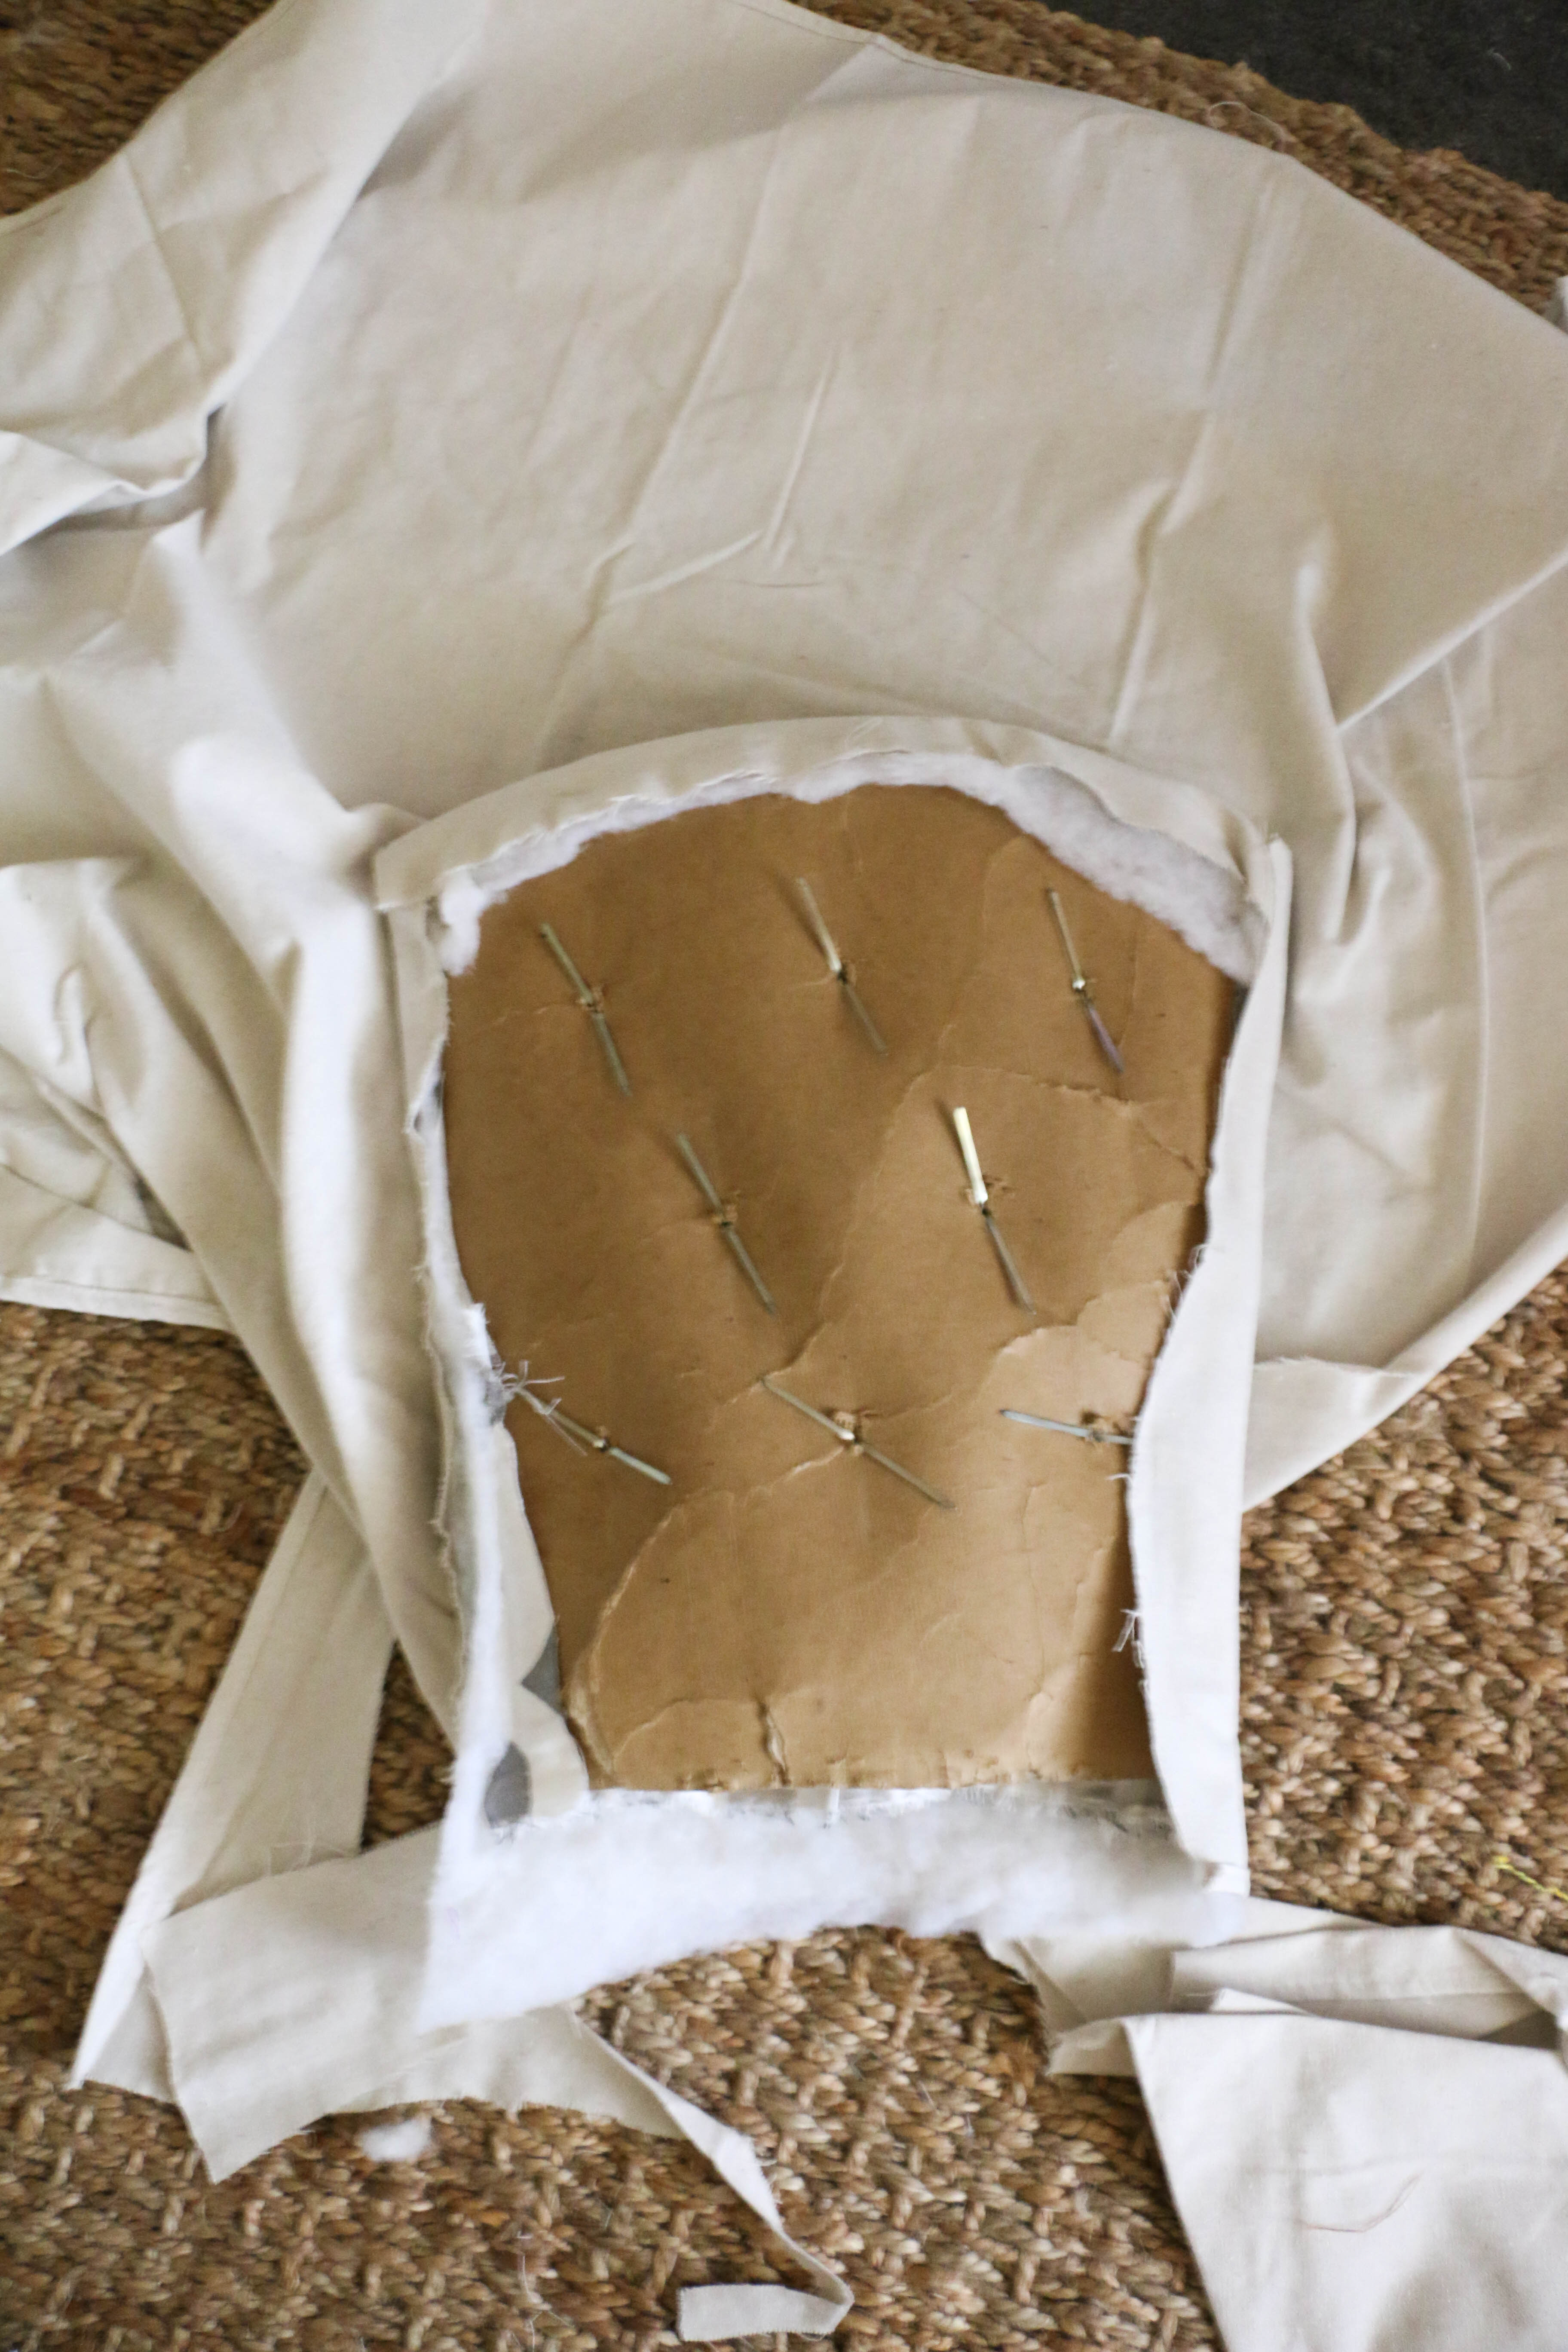
The seat bottom took probably a total of ten minutes, but the top section was a bit more involved.

chairmakeover4

I cut a piece of material the size of the chair back and stapled starting at the top. I found that the best way to keep it tight and even is to start at the top, then staple the bottom, and finish with the sides.

chairmakeover5

I then wrapped the chair back in quilting batting. I did this to make it a bit more comfy, and to conceal the buttons.

chairmakeover6

I then wrapped the seat back in the material, and hotglued the extra material to the backside.

chairmakeover7

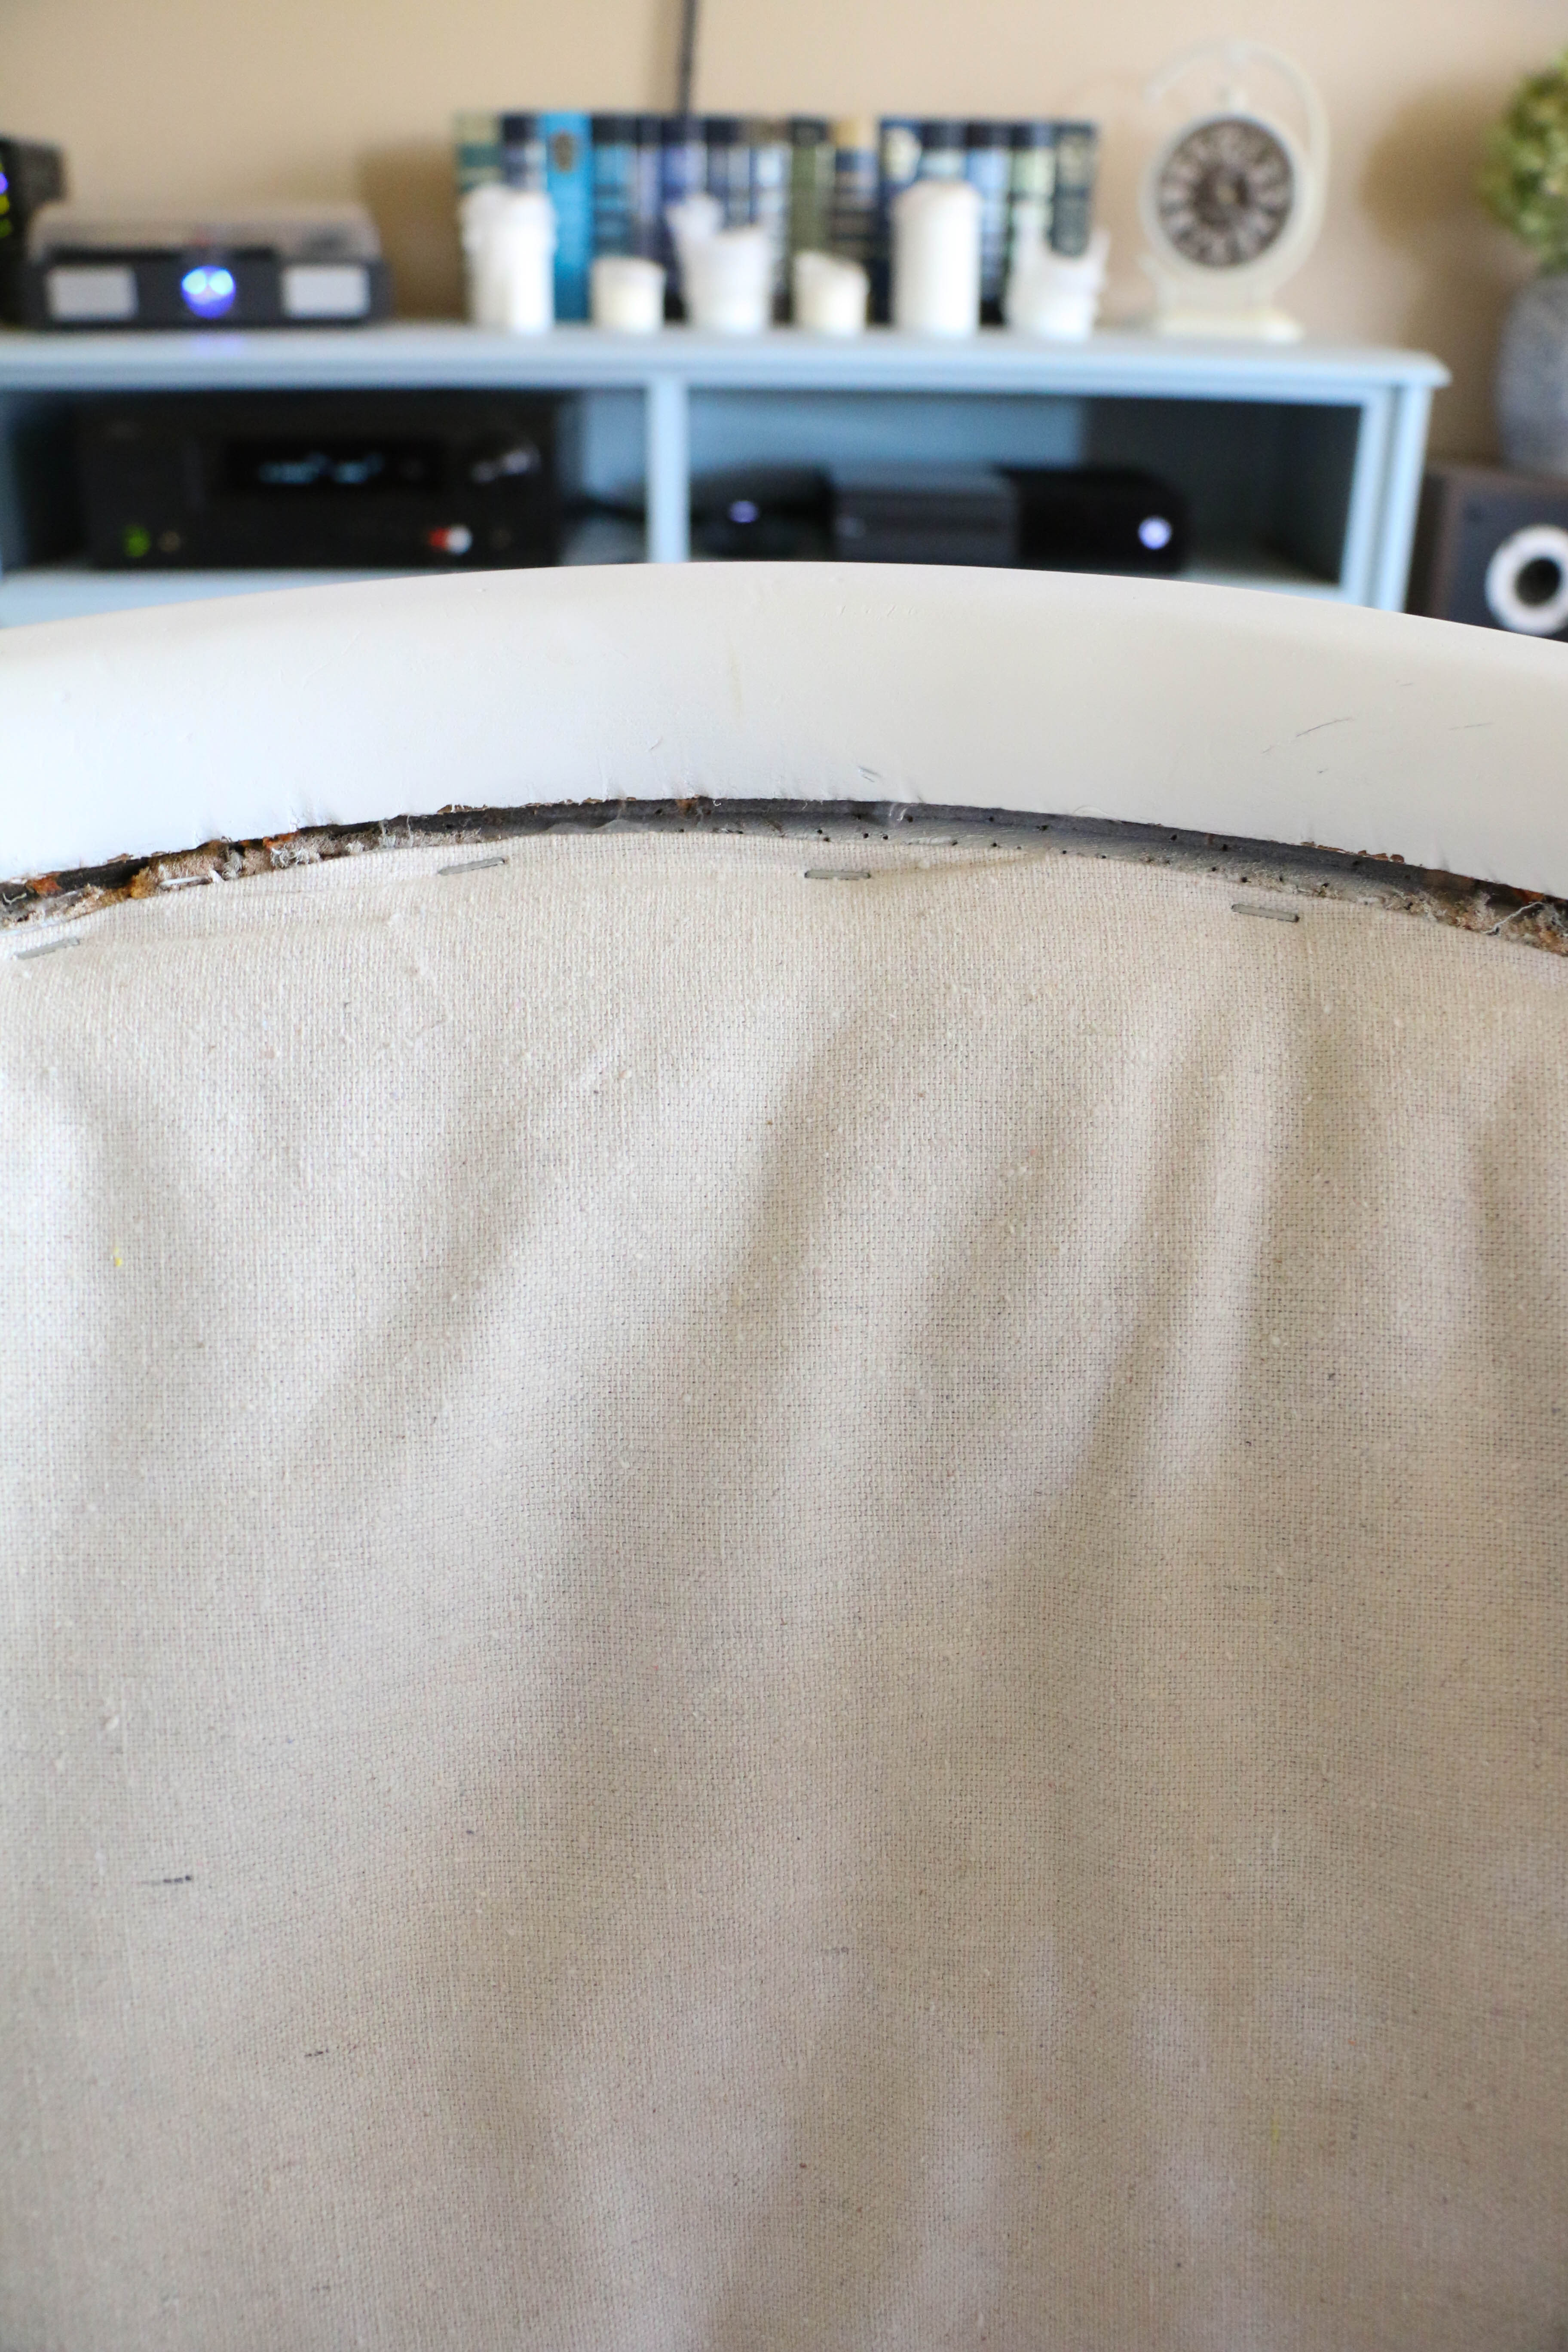
I then put the seat back up against the frame, and stapled as closely to the top as possible. This is tricky, and my staple gun was not kind to my hands.

chairmakeover8

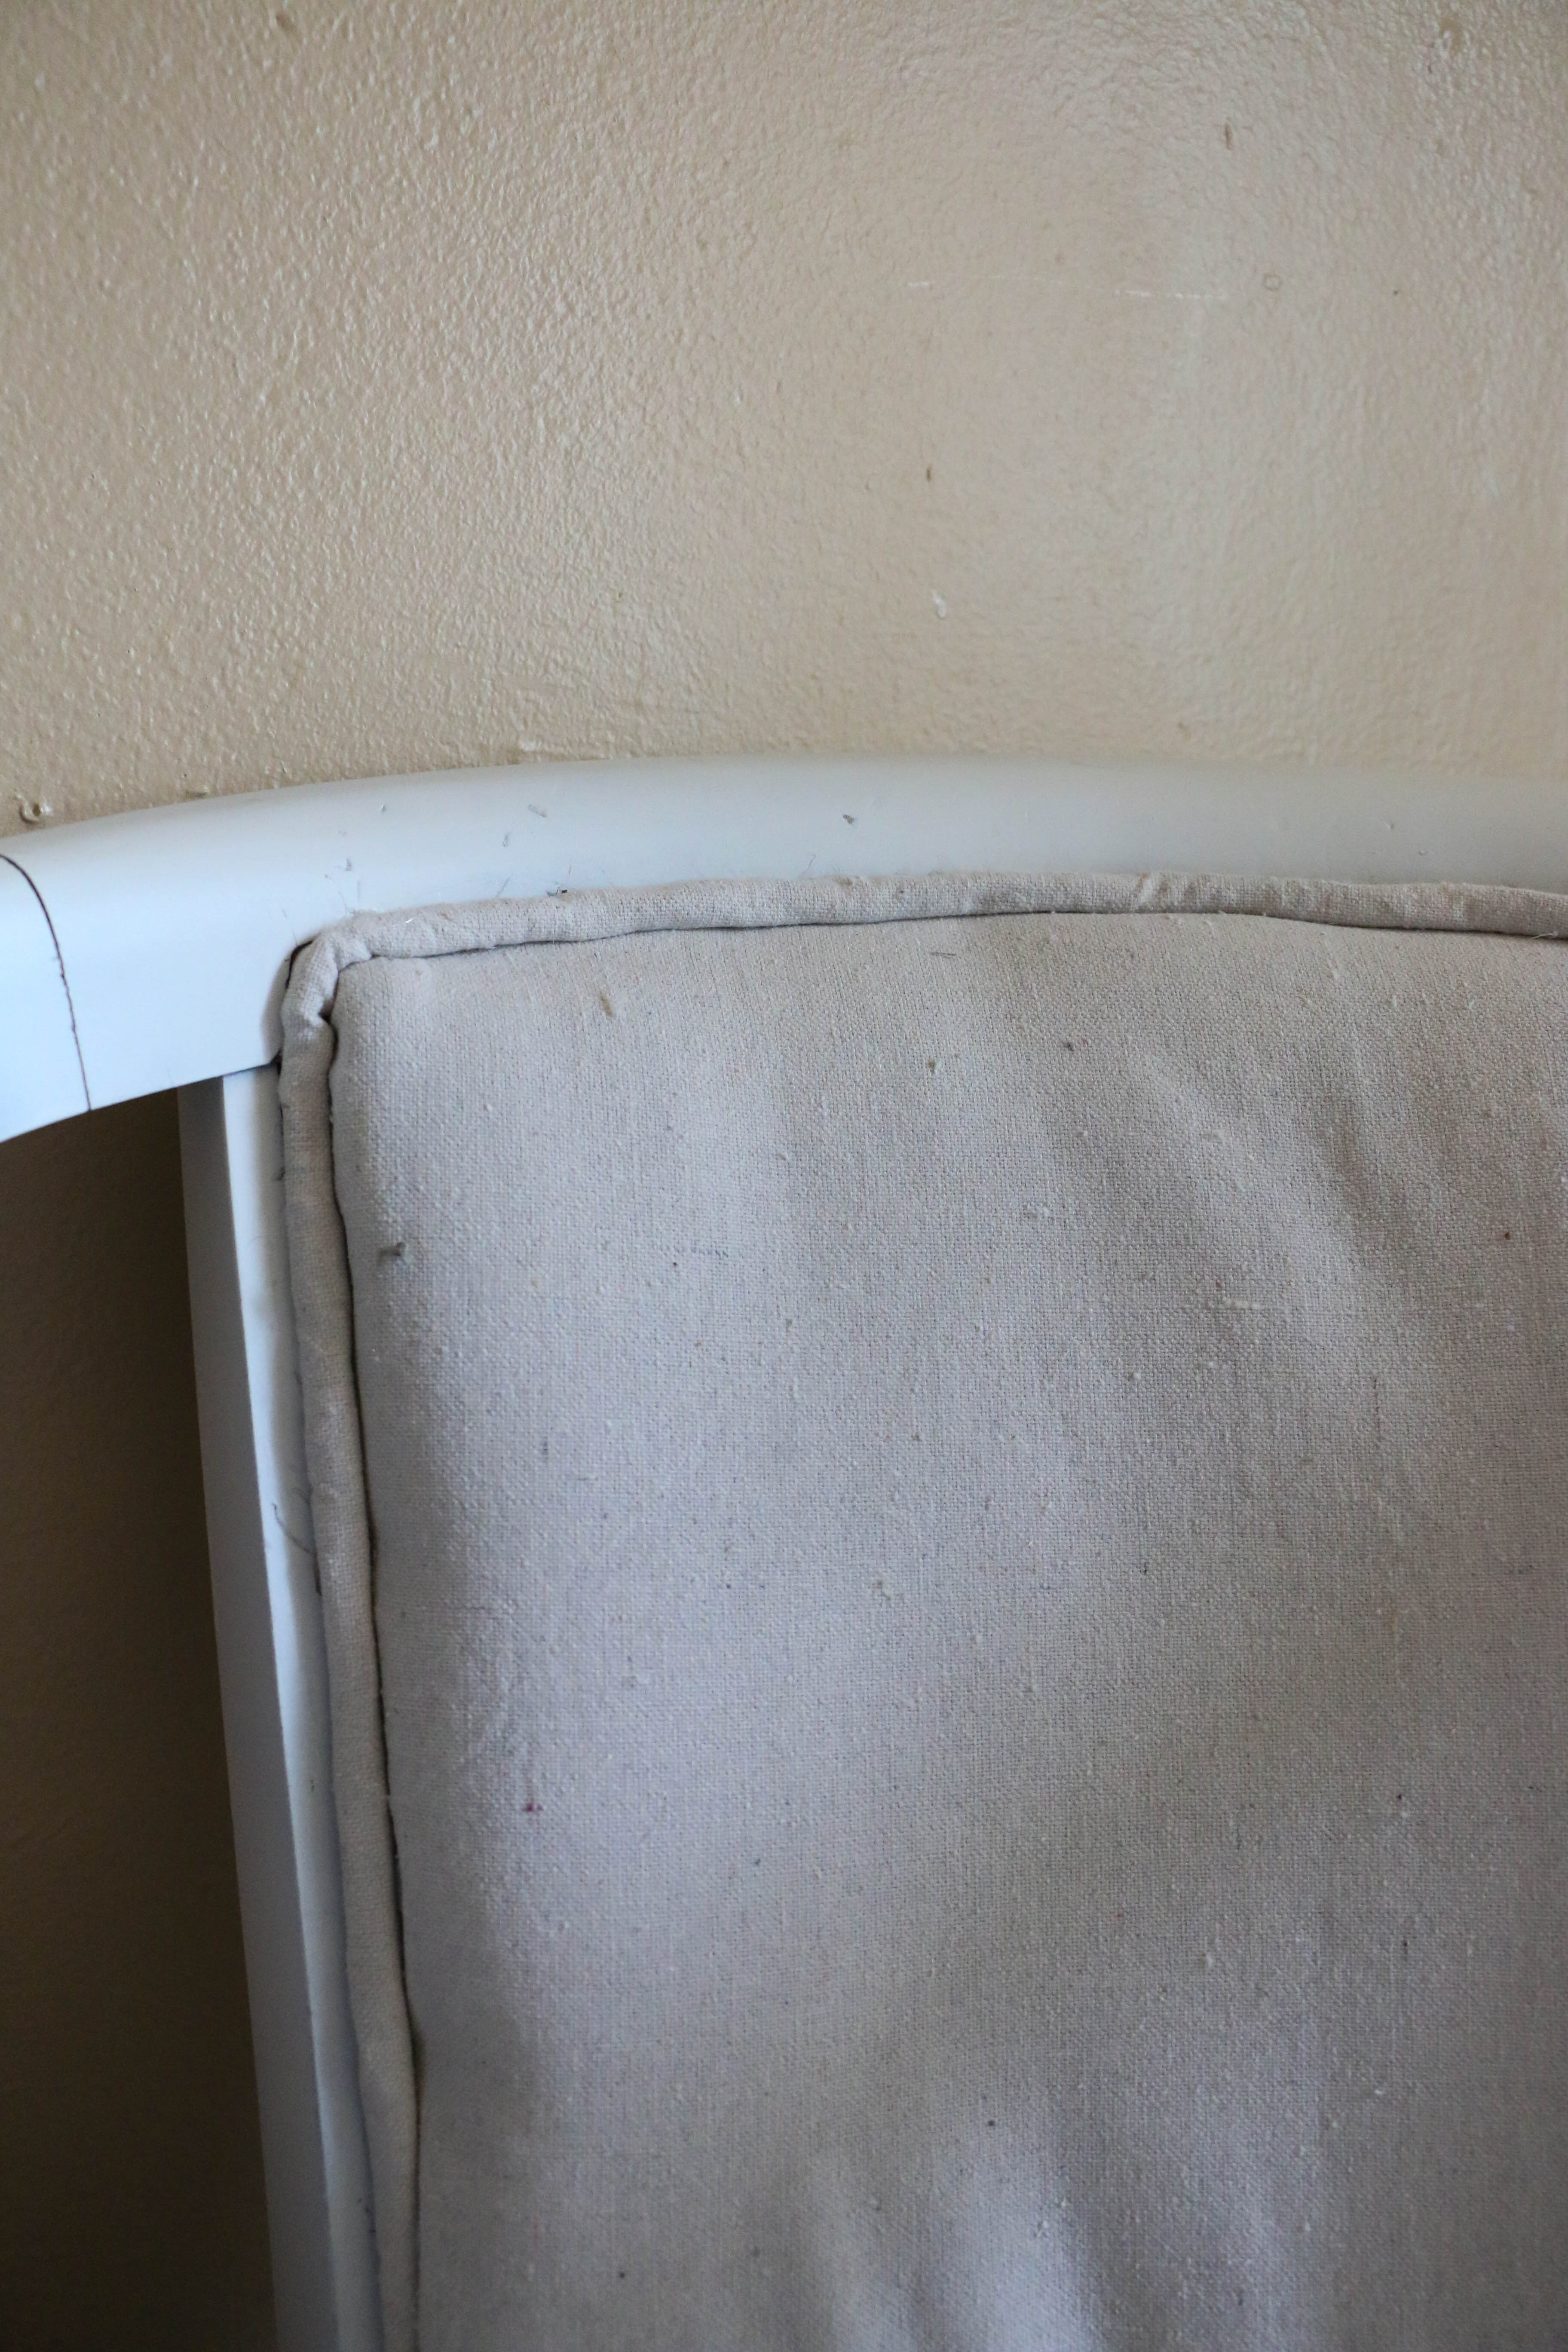
I then covered the staples with trim. I make the trim by wrapping the existing trim in the material and hotgluing it. Hot glue for the win.

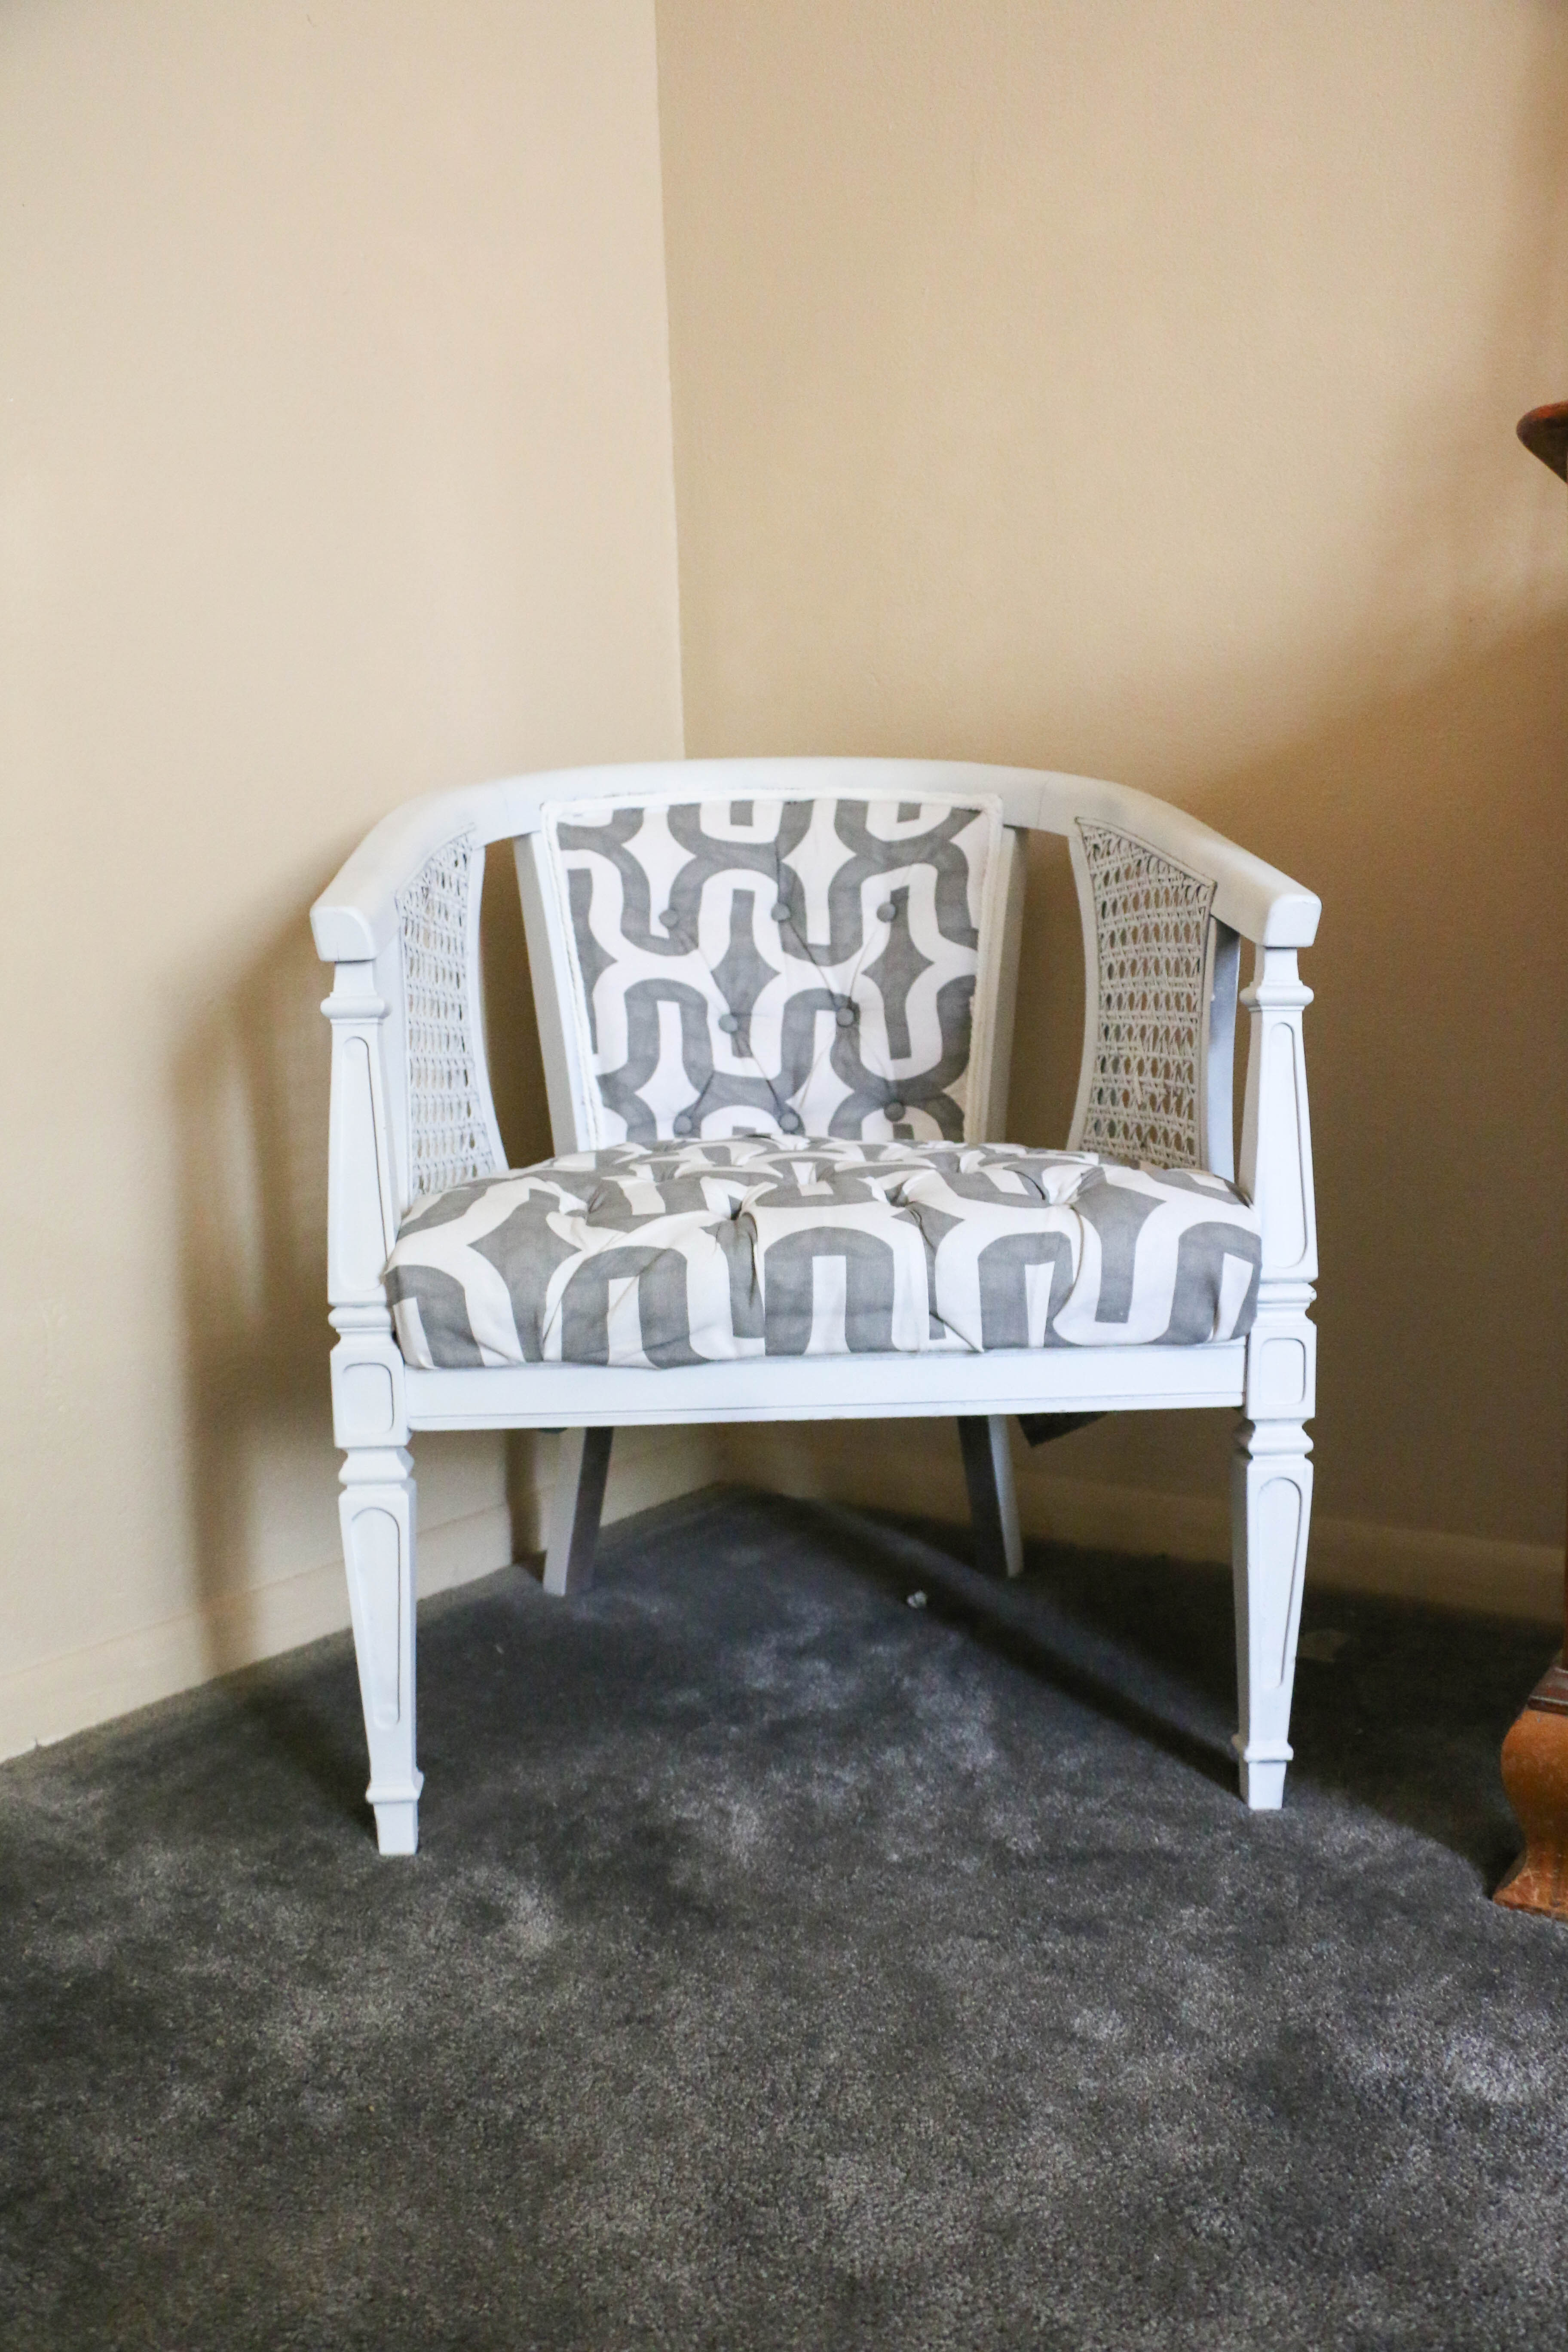
The new chairs are still not perfect, but they’re much simpler, and I can live with them now. This was only my second time with reupholstery (on the same set of chairs). I still don’t have it down, but I definitely appreciate these chairs a bit more now.

chairafter2

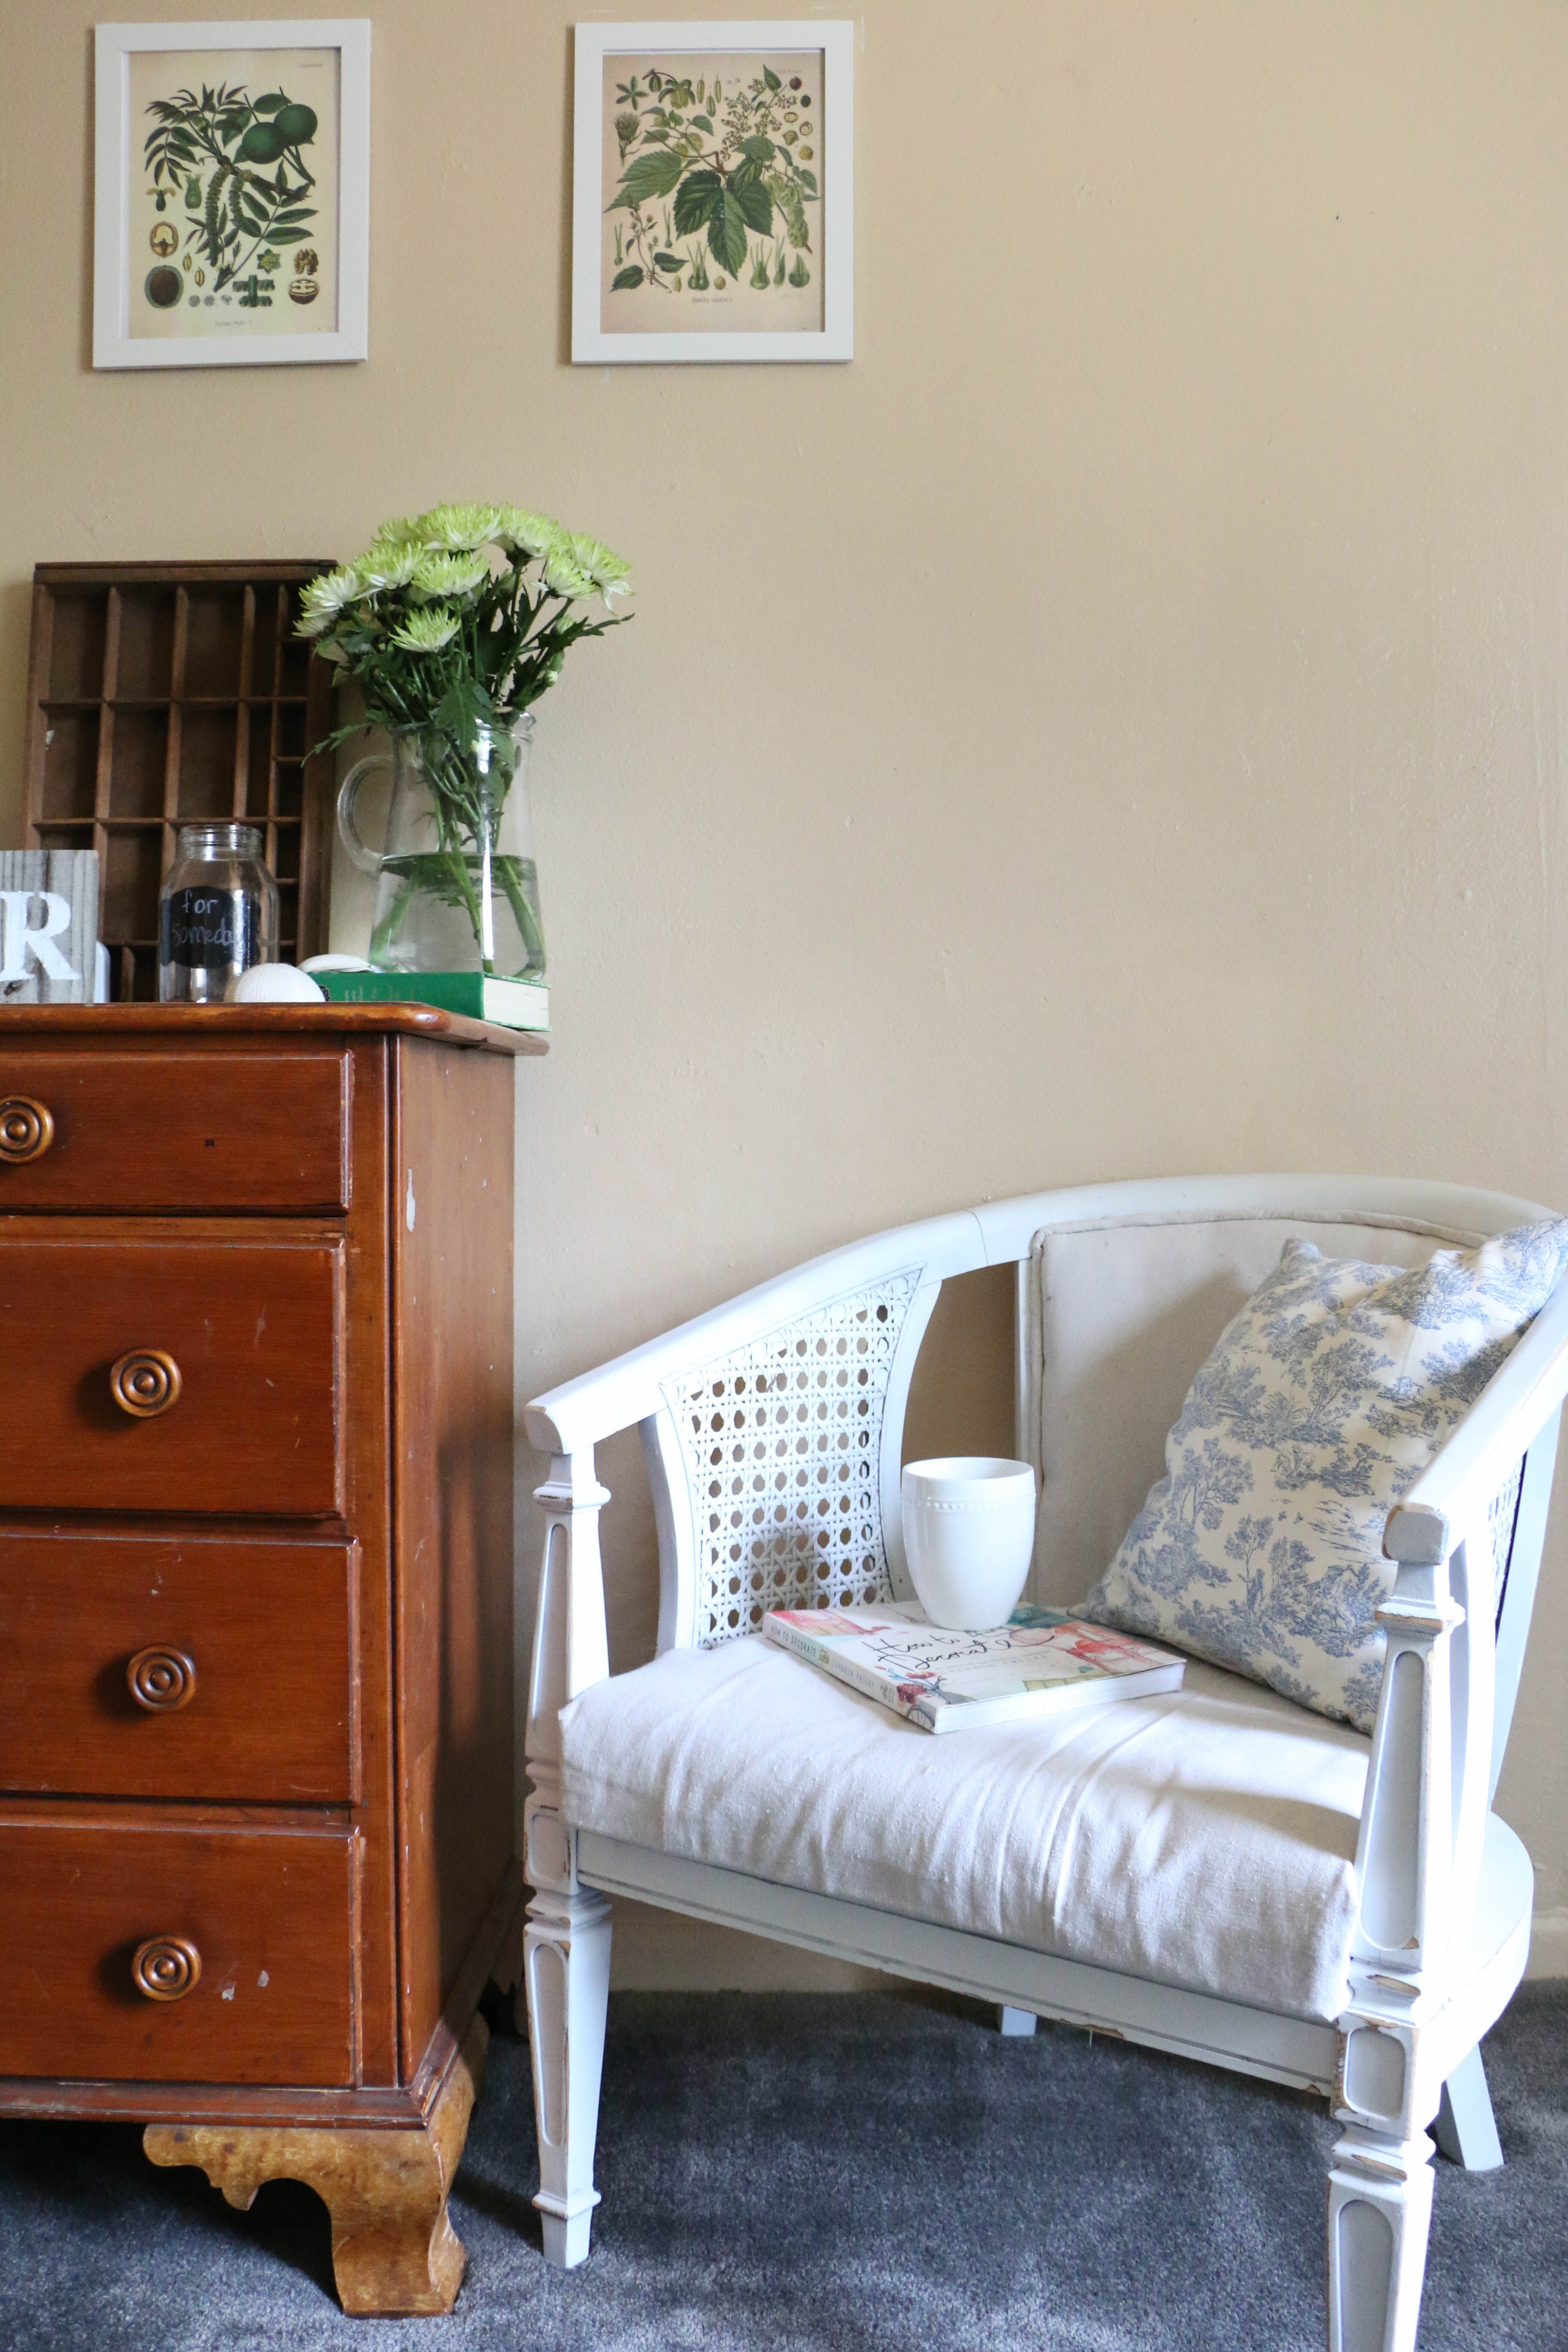
Overall, they just look cleaner, smoother, and more natural.

chairafter

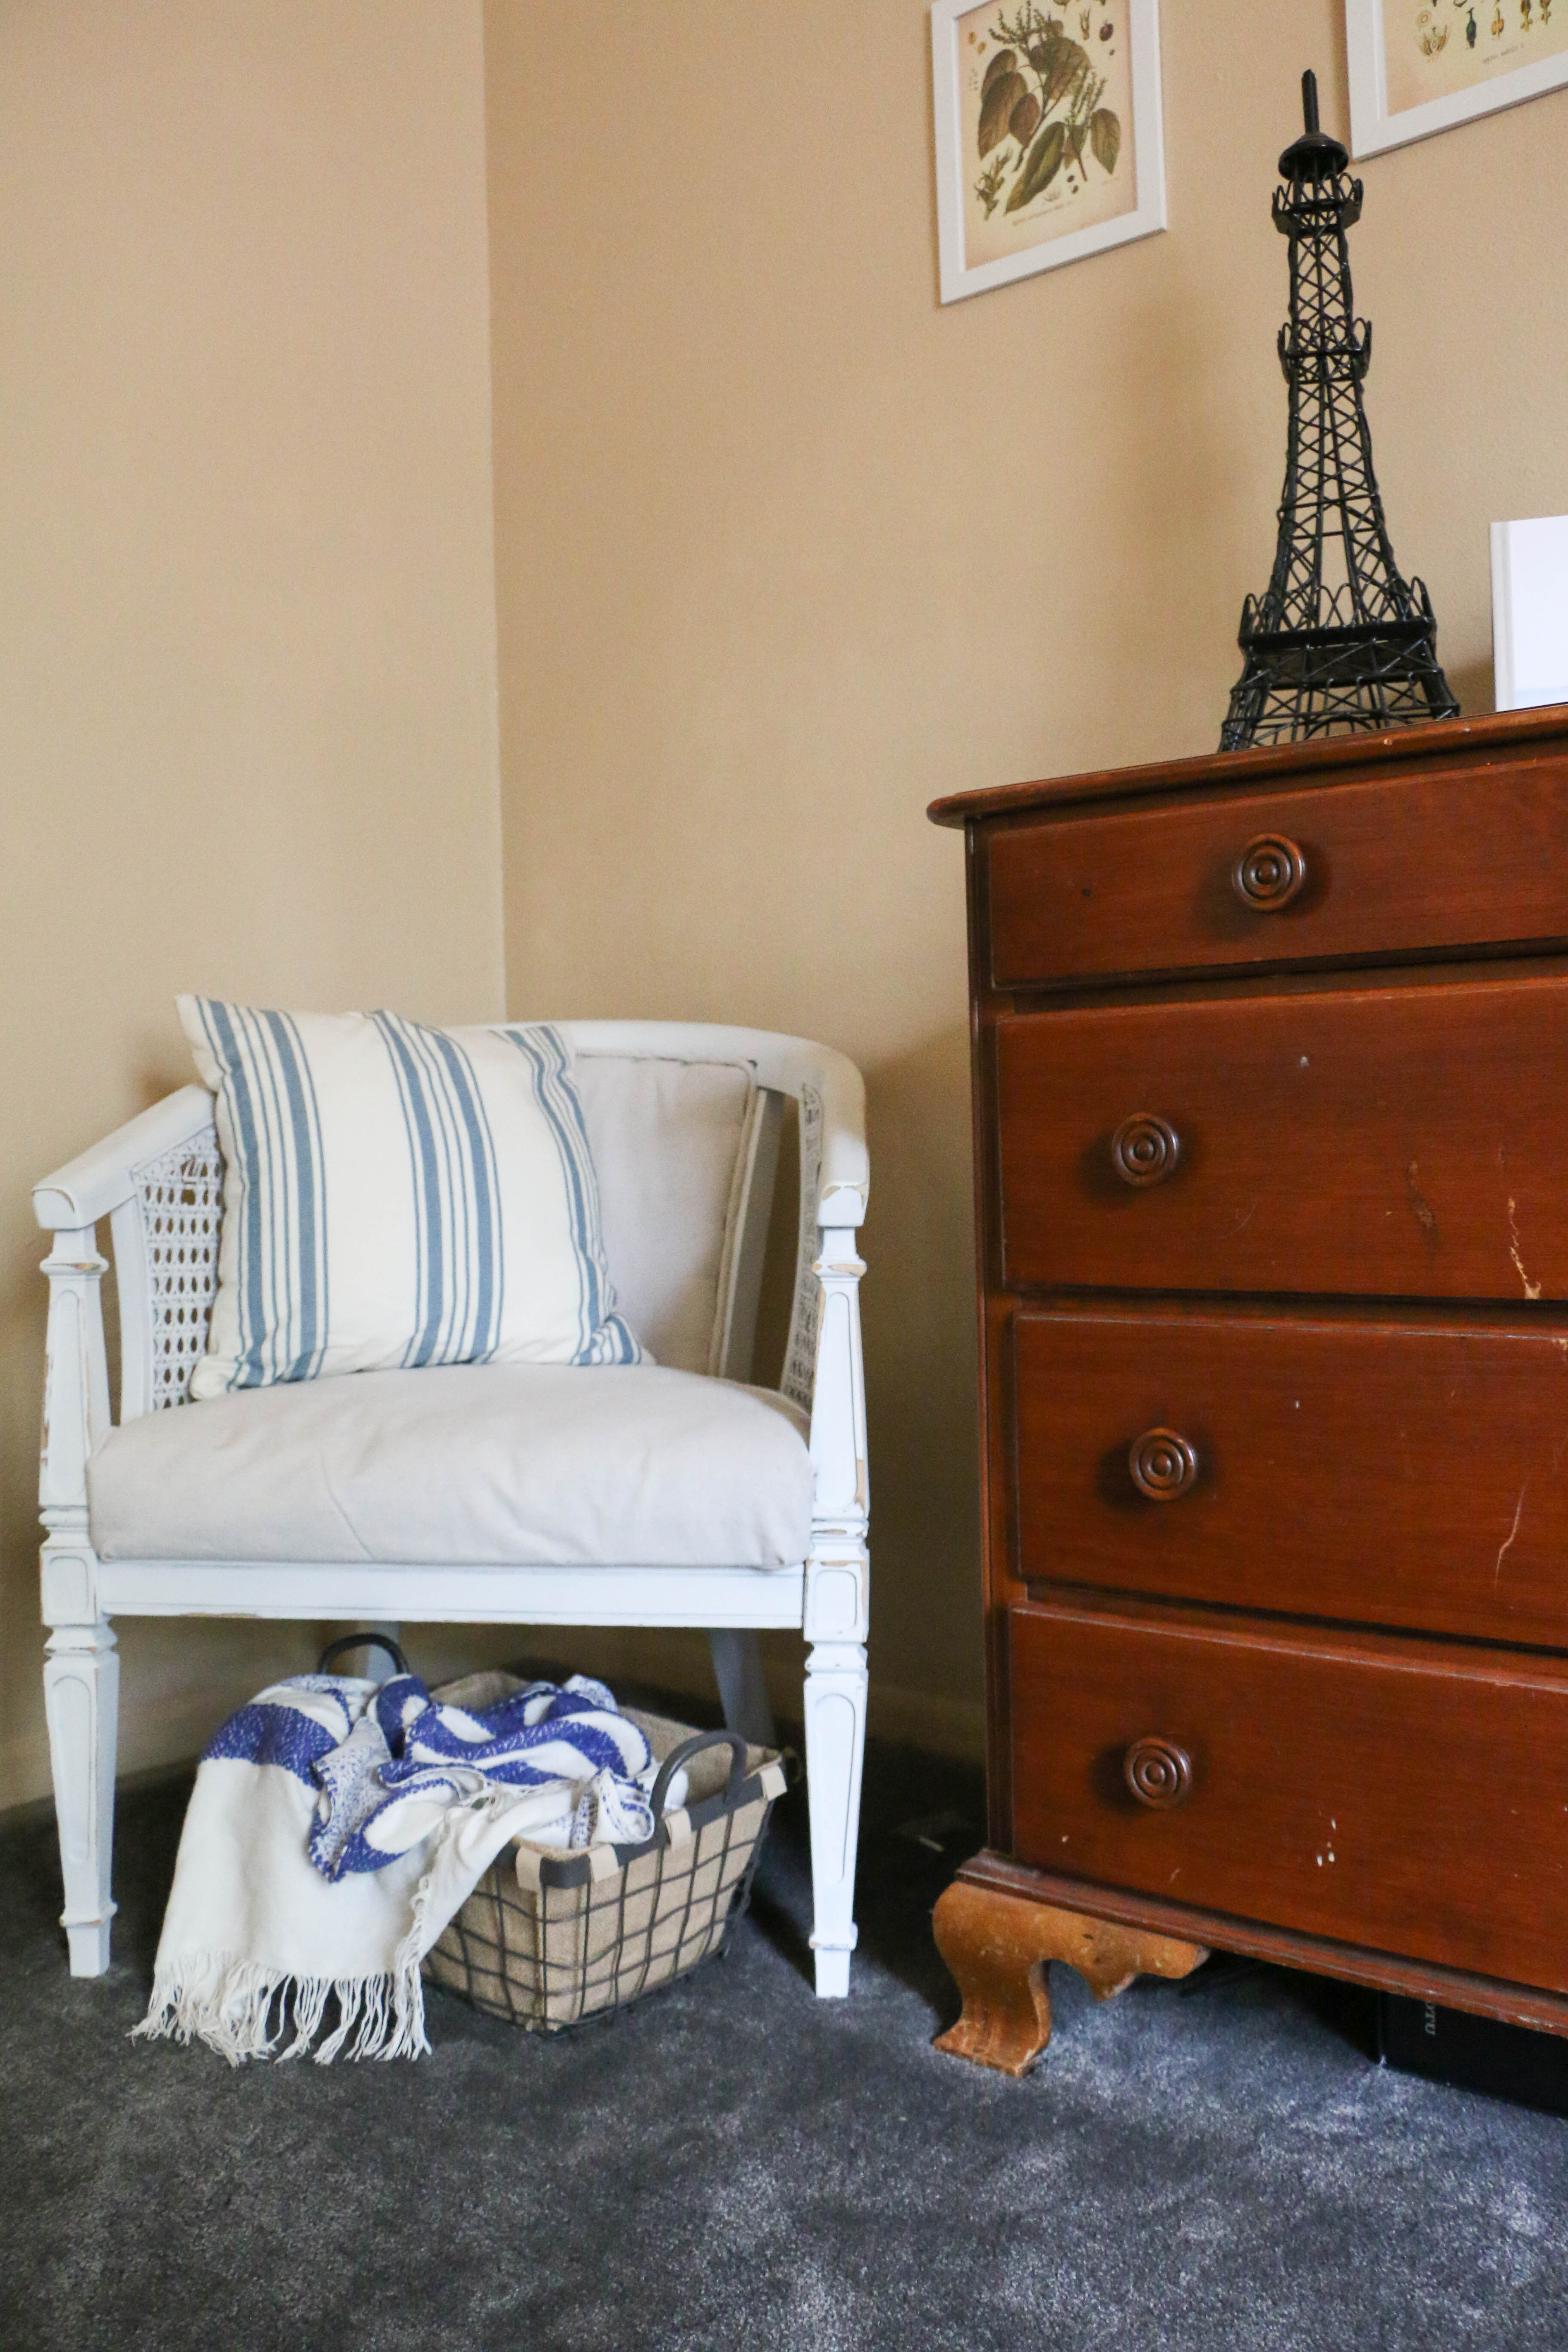
The neutral look will allow them to be moved anywhere around our home and work.

chairafter3

So the moral of this story is: if you don’t like something, change it! And if you still don’t like it, change it again! I can’t say that these are perfect, but they’re working SO MUCH BETTER than before.

Have you ever done something you hated? What did you do? I’d love to hear about it! That’s all for today, friends. Have a fabulous day!

DIY Projects, Furniture Makeover

Coffee Table Makeover

Hello all! Happy Monday from me to you! I hope you’re having a fantastic morning. Are you drinking your coffee as you’re reading this? I hope so!

Summer is in full swing for me here. I’m a teacher, and even though my summer break started a few weeks back, I spent the first bit of that away from home visiting different family members. I didn’t feel like my summer break had fully begun until this last week. I don’t have any kiddos to keep me busy (that is definitely not a complaint), so my days range between mindlessly watching Netflix for an embarrassing number of hours and finding odd projects around the house to keep me busy.

This week these old tables we have in our living room became the object of choice (I swear, nothing is safe from the paintbrush in this house. Except for the walls, because, landlords). These two tables were my husband, Ethan’s from his bachelor days. Who knows how old they are or where in the world they came from. Classic newlyweds, amiright?

tablebefore2

I painted the bases white when we first got married, and that was good for a while. But you can see how scratched and janky (I can use that word right?) they are. They weren’t looking so hot.

tablebefore1

So obviously I had to do something about it (which if you’re reading this and you still haven’t figured out that I am about to paint this table, then I’m sorry I ruined the surprise for you).

The first thing I did was put a fresh coat of Annie Sloan Old White over both tables. I’ve written previously more details about using this paint, which you can find here.

paintedtable

Don’t mind this background of this picture. It’s our totally-unfinished-not-fully-furnished-guestroom/paint studio. We all have that one room we don’t want anyone to see. Except you just saw mine. Don’t judge me, please keep reading.

painterstape

I wanted to go for a “farmhouse style” look, so I wanted to paint a grainsack stripe on each of the tables. I spaced a four inch wide line in the center, and a one inch wide line on either side.

paintingduring

I then painted in the areas I had taped off. The color is Pencil Sketch by Behr. I bought a sample jar of it at Home Depot in a flat finish and had plenty left over. The paintbrush is the 2″ Wooster Shortcut. This is the first time using this brush and I can tell you that I absolutely loved it! It’s inexpensive and easy to use.

distressing

After painting my stripes, I got around to distressing lightly the edges of my table. I also sanded down over the gray stripes so that a bit of the white would show through. I wanted to give the stripes a bit of a worn look.

After distressing, removing tape, adding a finishing wax, and making a huge mess, my tables were done!

tableafter1

tableafter4

tableafter2

tableafter3

They make the room so much brighter, which I absolutely love. I also am really digging the rustic vibe they have. The best part about this project is that I had everything on hand except for the $3 paint sample I bought. That’s what I call a thrifty project! My favorite kind! That’s all for today. Have a fabulous day, friends!

CoffeeTableMakeover

DIY Projects, Tutorials

My Experience with Annie Sloan Chalk Paint

Hello everyone! I hope you’ve had a marvelous weekend, I know I have! I am in New York visiting some family, but I wanted to take a few minutes and make sure I wasn’t neglecting the old blog. 🙂

So last week I blogged about my new dining room table. If you haven’t checked that out, go ahead and do so. It’s cool, I’ll wait. I want you to have a frame of reference when reading this post. Okay, you read it? Cool, let’s continue.

I painted the table and chairs using Annie Sloan Chalk Paint. If you haven’t heard of this paint before, you are really missing out. Seriously, this stuff is awesome! It’s called chalk paint not because it creates a chalkboard finish, but because of its matte look. It has a “chalky” feel to it when the paint dries. There is no sanding or prep work required with this paint (can I get an amen?!), and it will adhere to most any surface. Did I mention it has no VOCs? Pretty cool stuff.

Annie Sloan is a company based in Britain, so while you can order online, there are only limited stockists in the United States. You can click here to find a stockist near you. I got mine from Nest, a cute little store in Mansfield, TX. It is suggested that you take a workshop to learn about the paint before tackling any big projects, but being the rebel that I am (mostly I’m just cheap), I opted to just try it for myself. I did do some internet research, and Lauren over at The Thinking Closet has a great tutorial on this topic as well. I referenced her post several times during my project.

So let’s get down to it, shall we? First off, I chose my color, Old White.

IMG_1426

This color is a not-quite-cream-not-quite-pure-white color that’s perfect for my space, so I went with it. The actual application of the paint is easy-peasy. I’m assuming you know how to dip a paintbrush in a can and slap it on something. I won’t insult your intelligence.

While the can states that one coat will be sufficient, I found this not to be true. Pardon the HORRIBLE lighting, but you can see here with just one coat, there were still visible areas. Now, these chairs are not solid wood, so that may be why it took more paint, I’m not sure.

IMG_1333

Overall, I did two complete coats, with a third coat over some small areas. If you look closely in this picture, you can see the defining line between one coat and two coats of paint.

IMG_1356

This paint dries quickly and is very easy to distress, if that’s the look you’re going for. If so, you would simply sand down the edges you want distressed and be done with it.

After your paint is fully dry and distressed, it’s time for the wax. I applied the wax the next day. This is the part that is unique to this type of paint, and the main reason a workshop is suggested. I however, did not attend a workshop and didn’t have any problems.

IMG_1386

There are suggested brushes for applying the wax. I used a regular old cheap brush from Home Depot. You will want to make sure the paintbrush you use will be solely for wax. You won’t want to mix your brushes used for paint with your brushes used for wax.

You will want to apply a small amount of wax to your brush, brush it onto your piece, and then immediately rub the wax into the piece using a dry cloth. This allows the piece to have the wax fully worked in. It also removes any excess wax. THIS IS SO IMPORTANT. If you have too much wax, it will leave a tacky residue on your finished project and that’s just no good.

It didn’t take me long to completely abandon the paint brush (this is not the professional way to do this, but it worked for me). I would dip the cloth into the wax, and apply directly from the cloth.

IMG_1412

In my opinion, this was much easier than using a brush, since I applied and worked in the wax in one cohesive step. It also eliminated brush strokes in the wax.

Wax During

By the time I was done, my cloth was pretty oily, so I took a clena cloth and wiped down the entire surface once more. I did not have any issues with tacky wax after drying. I waited another day after applying the wax to place my furniture back in my dining room.

IMG_1514

I am totally a novice with this product, but I’d say I had a pretty easy experience with great results. I would definitely recommend doing a little research, but if you’ve been hesitant to try it, DON’T BE! I had a really good experience with it, and I know you can too!

Annie paint text

That’s all for today! If you have any questions, please let me know, and I’ll try to answer them as best I can. Have a fabulous day, friends!