Browsing Category

DIY Projects

DIY Projects

How I Fake Calligraphy

Hey guys! Hope you’re having a great day! I just got in from mowing the lawn (yuck). It’s hot and sticky outside, and I’m pretty sure my outdoor quotient has been met for the day. Now that Memorial Day has passed, summer is here, and that means BBQ and fireflies and porch sitting and bringing a little red white and blue into the home.  Yesterday I took out a few patriotic decor items out of the closet, and I put a few things together. I made a little hand-lettered print, and I realized it’s totally something I should share!

Now, a little background. It seems like everyone is on this hand-lettered kick in decorating, and I’m all about it. I have seen some really beautiful calligraphy around, and I just don’t have that sort of talent. I’ve never taken a class or anything, I really would not consider myself someone who actually knows something about the matter. I do, however, love creating little prints for our house. It’s basically free art, and there’s no way I’m not getting on that train!

So here’s how I, someone who is totally not an expert, create simple hand-lettered pieces from my home. I bought a multi-pack of pens from Hobby Lobby. I don’t see them listed online, but it was a three pack of square tip pens in various sizes. Are they good? They work for me, and that’s good enough.

Calligraphy1

You may still be able to find this pen in the store, and with their 40% off coupon, it only cost me a few dollars.

calligraphy2

This pen has a square tip, which is pretty much the secret to creating pretty writing.

calligraphy3

When I’m writing something, I use a normal cursive font, the same that I would write with using a normal pen. The trick to using these calligraphy pens is holding them at about a 45 degree angle. It took me a little while to get used to holding the pens correctly without moving them.

For this little print, I used a page from my old hymnal, the page with My Country Tis of Thee on it. Perfect for the upcoming Fourth of July holiday. I printed a line from the song, and this is what I came up with:

calligraphy4 calligraphy5

Easy. (I think that might be my motto around here: do I do anything that’s not easy.) I have little prints around the house, and I love it because it’s so cheap and quick. And on the hymnal, I love it even more. It adds such a nostalgic touch for me. And the mini clipboard is from Hobby Lobby. I got it recently, and it’s perfect for switching out seasonal prints.

Have you ever tried hand-lettering? I promise, it’s much easier than it seems! Well, that’s all for today, friends. Have a fabulous day!

DIY Projects, Home Decor

Rusty Porch Bar Cart

Good Morning, friends! Today is my first official day of summer break, and as I’m typing this, I’m lounging around in my pajamas. I’m ready to have a nice refreshing break from work this summer!

Now that summer is officially here, I have lots of plans which include porch sitting, painting things, lounging, and not much else. 🙂 I’ve been working on making our porch a little bit more enjoyable this season, and I wanted to share a new addition to the front porch. A month or so ago, I added our cable spool table to the porch, and it has been wonderful! I knew that I wanted to add more, so when my father-in-law sent me a picture of a rusty old bar cart asking if I wanted it, I jumped at the chance.

Porch Barcart  7

I’ve been desperately trying to keep a few plants alive (not very well, I might add), and I knew an old bar cart would be the perfect thing to house my little plants. The problem was that it was so rusty, I couldn’t even tell what color it was originally. I wanted it to be rusted, but I wanted to see if there was a way to scrub some of the rust off so that some of the original paint was exposed.

I didn’t really want to buy anything to remove the rust with, knowing I would only use it for this project (assuming it even worked) and would then be destined to cluttering the back of my cleaning supply closet. So, I figured I’d do my own thing. Recently, I shared my DIY all-purpose household cleaner, and I’m happy to report that it truly does work for all purposes. You can check out the full article in the link above, but it’s what I used to expose some of the original paint on this little cart.

I generously sprayed the cart completely. I let it sit for about an hour, spraying a bit more at that time (the Texas heat didn’t quite allow for a soak, as it just dried it up). After about two hours of the solution on the cart, I began scrubbing with the same brush we generally use to clean the grill. As I would scrub a certain spot, I would hose it down. If it needed more scrubbing, I would spray a little more solution on it, and immediately continue scrubbing.

Porch Barcart 6

Eventually I began to see little spots of green paint emerge from behind the scrub brush. I’m not going to lie and say this was super easy; it took quite a bit of elbow grease. I did intentionally stop at this point, since I wanted the cart to keep a bit of it’s rusty charm. If you have a bit more muscle than I do, you could certainly scrub off more rust than I was able to.

Porch Barcart 5

Porch Barcart 2

Porch Barcart 8

This little cart makes the porch just a little bit more cozy! And I’m absolutely thrilled with how it turned out, with it’s rusty, chippy goodness. I think once I get up from this couch, I’ll make my way out there to enjoy this little spot. Do you have something old and rusty? I’d be willing to bet you can clean it up a bit with some elbow grease and some items you have around the house!

Well, that’s all for today, friends! Have a fabulous day!

DIY Projects, Home Decor

Cable Spool Porch Table

Hi guys! Thanks for stopping by! I’m so glad you did! It means so much to me that you would take a moment of your day to stop by my little corner of the internet. Anyway, enough of the sappy stuff. Is it getting warmer where you are? I hope so! Here in Texas we’re reaching some pretty high temperatures which have me itching for two things: summer break and outdoor life!

We have about six weeks left of school, but who’s counting!? 😉 We have a large front porch on our house, which is one of the only positive things about our sad little rental. I mean, for real you guys. Over summer break, I like to spend as much time on the porch as possible! Give me some magazines, some lemonade, and I’m good to go for hours!

Recently, I’ve been looking for a cable spool, but I really haven’t wanted to spend a lot on it. I know that the cable spool as an outdoor table is totally not my original idea, but stick with me. I know everyone and their next door neighbor is doing this, but I still wanted to share. The table we had on our front porch previously was a small glass top one, maybe only 18 inches across. It wasn’t really large enough to place a lot of stuff on it, which is why I was looking for a cable spool to use as a table.

For the past few months I’ve been looking, but I’ve only been able to find them for about $60, which was more than I wanted to spend on a piece like this. So imagine my delight when I found one on the side of the road for free?! Ethan was driving, and I totally made him do a real quick turn around to scoop that bad boy up. It was actually a little scary looking because there was some additional wood attached to the top, and several pieces of wire wrapped around various parts on the spool. I just cut off the wire and pried off the pieces of wood that were nailed to the top. Ain’t no thing.

So, without further ado, here’s what our front porch looks like now:

cable spool table 3

You might notice that the bottom piece it not a full circle. I actually found it this way, and was a little disappointed at first until I realized how much better this actually is. Since we have rocking chairs, the narrow bottom actually allows the chairs to fully rock while still being close to the tabletop.

cable spool table 5

There’s so much more room on the surface than there was on the old table, I’m loving it! I can just imagine some plates out here, maybe a little pie….I don’t know where pie came from. I’m just really ready for summer, okay?!

cable spool table 9

cable spool table 8 cable spool table1

If you have your own cable spool, I would reccomend cutting the bottom to be more narrow.

cable spool table 6

cable spool table 4

I case you were wondering, the rug is from Hobby Lobby, the chairs are from Cracker Barrel, the pillows are from Target, and the serving tray is from Walmart. This little outdoor area is fresh and cheery, and I cannot wait to get out here and enjoy myself. Especially since I’m so close to endless lounging during my carefree summer break. Ahhhh, summer. Alright, I’ll stop now y’all, I promise.

So what do you think of the cable spool as an outdoor table? Is this a trend you’re willing to go along with? I will say that even Ethan loves it! I am sensing some meals eaten out here together, and I cannot be more excited about that! That’s all for today, friends. Have a fabulous day!

DIY Projects

Antique Window Project

Hi you guys! I’m so glad you stopped by today! This week is flying by, and it’s hard to believe that Easter is just a few days away! Despite the weird highs and lows that we’ve seen in the tempurature the last few weeks, I’m so glad that spring is officially here!

I wanted to share with you guys a fun project I completed this week, which I think is in perfect timing for the upcoming Easter holiday. A few weeks back, I was roaming around my favorite flea market (why does it seem like half of my posts start with that sentence?), and I found  this super old, really pretty hymnal. It was way older than me, but it was still super nostalgic, because I grew up singing hymns from a hymnal. I grabbed it for five dollars, and I immediately had this project in mind.

I went through the book and found some familiar songs and cut those pages out. I know you may say that by doing that, I’m not respecting the integrity of the hymnal, but I think that I will enjoy what I’ve done with it far more than anyone else was going to use the hymnal for. If that even makes sense. I carefully sliced the pages I wanted with an X-Acto knife to be sure I had a clean cut.

Then I used scotch tape (very teeny tiny pieces) to tape the pages I had cut out onto the panes of an antique window I had. The window was something I already had, it was hanging on the wall previously with nothing on it. So here’s what I came up with: HymnalWindow5

Each hymn is a title that I’m familiar with, and each one is a sweet reminder of His love and all that He has done thoughout our lives. If you look super closely, you can see the tape, but I didn’t want to use another method that would either damage the pages or make it so that I was unable to recreate something using these materials.

I placed it above our bed, and I absolutely adore it.

HymnalWindow4

HymnalWindow1

HymnalWindow3

I really think it just adds a thoughtful touch to the decor in here. Really, what’s the point in putting together a home if it isn not meaningful? I’m already thinking of other projects I can do with the rest of the hymnal pages, seeing as how I’ve barely used a few.

There are Chrsitmas carols and classic American choruses, so the seasonal possibilities with this little hymnal are pretty endless. Plus, there’s just something about the yellowed pages of sheet music that is just beautiful. I seriously can’t get enough.  Can you tell I’m excited about this one?

What do you think of this project? It’s such an easy thing, I don’t know if it can actually be considered a a project! I hope you enjoyed this little project, and that it insires you to do something meaningful with the decor in your own home! That’s all for today, friends. Have a fabulous day!

DIY Projects, Home Decor

Easy DIY Wreath Vignette

Hello friends! I hope you’re having a great day! Today is my first day of spring break and let me tell you – it is fabulous! I love being able to wake up when I want to with no worries about what to do for the day! Not to make you completely jealous if you do have to go into work today. Sorry!

Anyway, I hope to complete a bunch of projects this week while I’m off work, this being the first of them. Last weekend, Ethan and I went to Canton Trade Days (my favorite flea market in the area) with his parents. We had  a great time and I brought home a few new treasures. One of which was this little screen window. I liked it because it’s a little different than the typical glass window panes everyone is using everywhere.

I brought it home, a little unsure of where to use it. But when you love it, you buy it, right? I sat on it for a few days before ultimately putting this together:

DIYWreath3

The little shelf there was an from an existing vignette, but it had just become a little bit out of my style. There had been a lot of gold in the previous vignette, and I think metalics are slowly phasing themselves out of my decor. Which I’m totally fine with.

DIYWreath7

What I really want to talk to you guys about is this little wreath. I made it completely out of items I had at home. I used what used to be a leafy garland, and a coathanger! Yes, you read that correctly, a coathanger! I got the idea from my fifth grade teacher. That sounds super weird, I know. But as I was thinking about what to do with this area, I remembered a peppermint wreath I made in fifth grade as a Christmas project made from (you guessed it): a coathanger.

I found a small drycleaners hanger (the thin metal ones) and began sto stretch it into a circular shape. It didn’t have to be totally perfect, since the garland kind of disguised the hanger anyway. I used wire cutters to cut off the part of the hanger that actually hangs over the rod. You know, the part that looks like a question mark? I’m sure there’s a more official term, but obviously I don’t know it. Whatever.

DIYWreath2

I wrapped the garland around the wreath form, and it fit about two times exactly. Easy enough. I didn’t even secure it with anything, I just sort of twisted it into itself and around the wire.

DIYWreath4

Here’s how it looks from our dining room table. I am loving the vibe it gives in here. It has a much more simple and monochomatic feel, which I love. Much better than the metallic party that was happening before.

DIYWreath1

DIYWreath5

In case you were wondering, the garland, the shelf, and the ribbon are both from Hobby Lobby, and everything else has been found/and or made by me. Thanks for stopping by today, I appreciate it so very much! Let me know what you think of this little project in the comments below.

That’s all for today, friends. Thanks for stopping by!

DIY Projects, Home Decor, Tutorials

DIY Boxwood Topiary

Hi you guys! I’m so glad you stopped by today! I don’t know if it’s feeling spring like where you are, but here in North Texas it definitely is! I was coming into the house after work the other day and I noticed little green buds popping up in the tree in the front yard. There’s no better sight! Not to mention that the weather has been warming up, which means it’s closer to time for front porch and grilling! I think it’s safe to say that spring is my favorite season (and it’s not just because I have a spring birthday…)!

Today I want to share with you guys a super fun super cheap DIY that totally has me ready for spring. I’ve been adding pops of greenery in the house everywhere, whether it be fresh flowers, or faux greenery I’ve collected from Ikea. I’ve been eyeing some of those adorable boxwood topiaries that seem to be everywhere (okay, maybe just Target and HomeGoods, but everywhere important!), but with my monthly free spending allowance, it didn’t seem worth it to pay for them. I’ve seen some at multiple places, usually anywhere from $20 – $30. Which isn’t a ton of money, I know. I’m just Cheapster McGee, as you all already know.

So I did what I do best, which is set out to make my own DIY version. So here’s what I came up with:

Topiary1

This is a very basic little craft that cost me just a few bucks.

Topiary7

I purchased all of my supplies at Hobby Lobby. The pots were under two dollars, and the boxwood balls (I’m fairly certain that’s not an actual phrase) were about five dollars for both, as they were seasonal clearance.

Topiary4

The rest of the supplies I had on hand. First, I put a coat of wax on the pots, mainly because I had never used strictly wax on something before, and I wanted to see how it would turn out. Since it was clear wax, it didn’t change the color at all. Duh, I should have known. However, I then immediately did a quick drybrush over the wax coat. Because the wax was not yet dry, it allowed me to wipe the whole thing with a rag, giving me the unfinished look I was going for.

Topiary3

I used sticks (the free kind from the front yard) and hot glued them to the bottom of my pot. The pots had a small hole in the bottom, which I covered with a small piece of duct tape so that the glue wouldn’t come out the bottom. After a few minutes, I filled in the pot with Spanish moss, something I had on hand already.

Topiary8

The boxwood balls have sort or a net texture under the leaves, which was perfect to just wedge them onto the stick. I did add a dab of hot glue just to keep them in place. Including paint and dry time (they dried incredibly fast, since I used my drybrushing technique), this project took me about fifteen minutes.

The cost of supplies I had to purchase was about seven dollars, making these cute little topiaries about $3.50 each. As opposed to the $20-$30 range. So I consider this little DIY a definite win.

I love how the fresh, springlike vibe they have. Even Ethan commented on how cool they looked, so I’m pretty pleased with how this one turned out. I think the best part is how well they’ll transition into summer as well. I do hope you try this one! It was definitely a fun project for me, and just about anyone can do this!

I hope you have something awesome planned for today! That’s all for today! Have a fabulous day, friends!

DIYTopiaries

DIY Projects

DIY Magnolia Market Inspired Wreath

Hey y’all! I hope you had a fabulous Valentine’s weekend! We had a low key weekend that was just perfect. Now that Valentine’s Day is over, I’d be lying if I said that I don’t have spring on my mind. Since Christmas, our front door has been bare, and I knew I needed something fresh for the door. Today I want to show you guys what I did for my front door on the cheap. Because if it wasn’t cheap, it wouldn’t be for me!

It’s no secret how much I adore Magnolia Market in Waco, TX. I’ve been several times, and each time I come home feeling refreshed and inspired. A few weeks ago, we drove down to visit their Scratch and Dent sale. I was able to snag a few things, but there was one thing I’ve really been wanting that I wasn’t able to find on sale. I’ve been eyeing their signature Magnolia wreaths for a while, but with the $95 pricetag, I couldn’t quite get on board.

While I was there, I realized, duh! Why don’t I just make my own wreath? So that’s exactly what I did. wreath3

All I did was hot glue some leaves onto a wreath form. Not even worth the explanation.

wreath2

The wreath was something I had already at home, and just took off what was on the wreath previously. So the cost of that was free. The florals came on a stem from Hobby Lobby that were priced at $4.99. Since Hobby Lobby rotates their inventory to be 50% off every few weeks, I was able to snag two stems for the price of one. To make this wreath, it took exactly two stems, making the grand total $4.99.

wreath6 (2)

The leaves were all the darker green, but I turned some of them around to make it more dimensional.

wreath6 (1)

I am simply in love with this little DIY! It took me maybe ten minutes to glue everything on, and the total cost to me was five dollars. Can’t beat that!

And sure, the quality of the leaves isn’t quite the same you would get from the original wreath. I’ll be the first to admit that. However, this was about 5% of the cost of the original. And that’s good enough for me.

 MagnoliaWreath

Have you ever made a knock-off version of home decor? Us budget conscious girls gotta do what we gotta o!

I hope you have a wonderful Monday! Thanks for stopping by! That’s all for today, have a fabulous day friends!

DIY Projects, Home Decor

How to Hide the Ugly Media Stuff

I am so so so excited to show you today’s project. This one has me absolutely giddy. Y’all know this has been the year of the trash bag, aka I’m getting rid of everything and despising clutter. I’ve been thinking long and hard about what “clutter” even is, and sometimes I think it can be anything that isn’t pleasing to the eye. Even if it’s necessary. So then the dillema becomes how do I get rid of the clutter if it’s necessary? Today I want to share with you some simple things I did in my living room that make everything look SO MUCH neater and cleaner and just all around better.

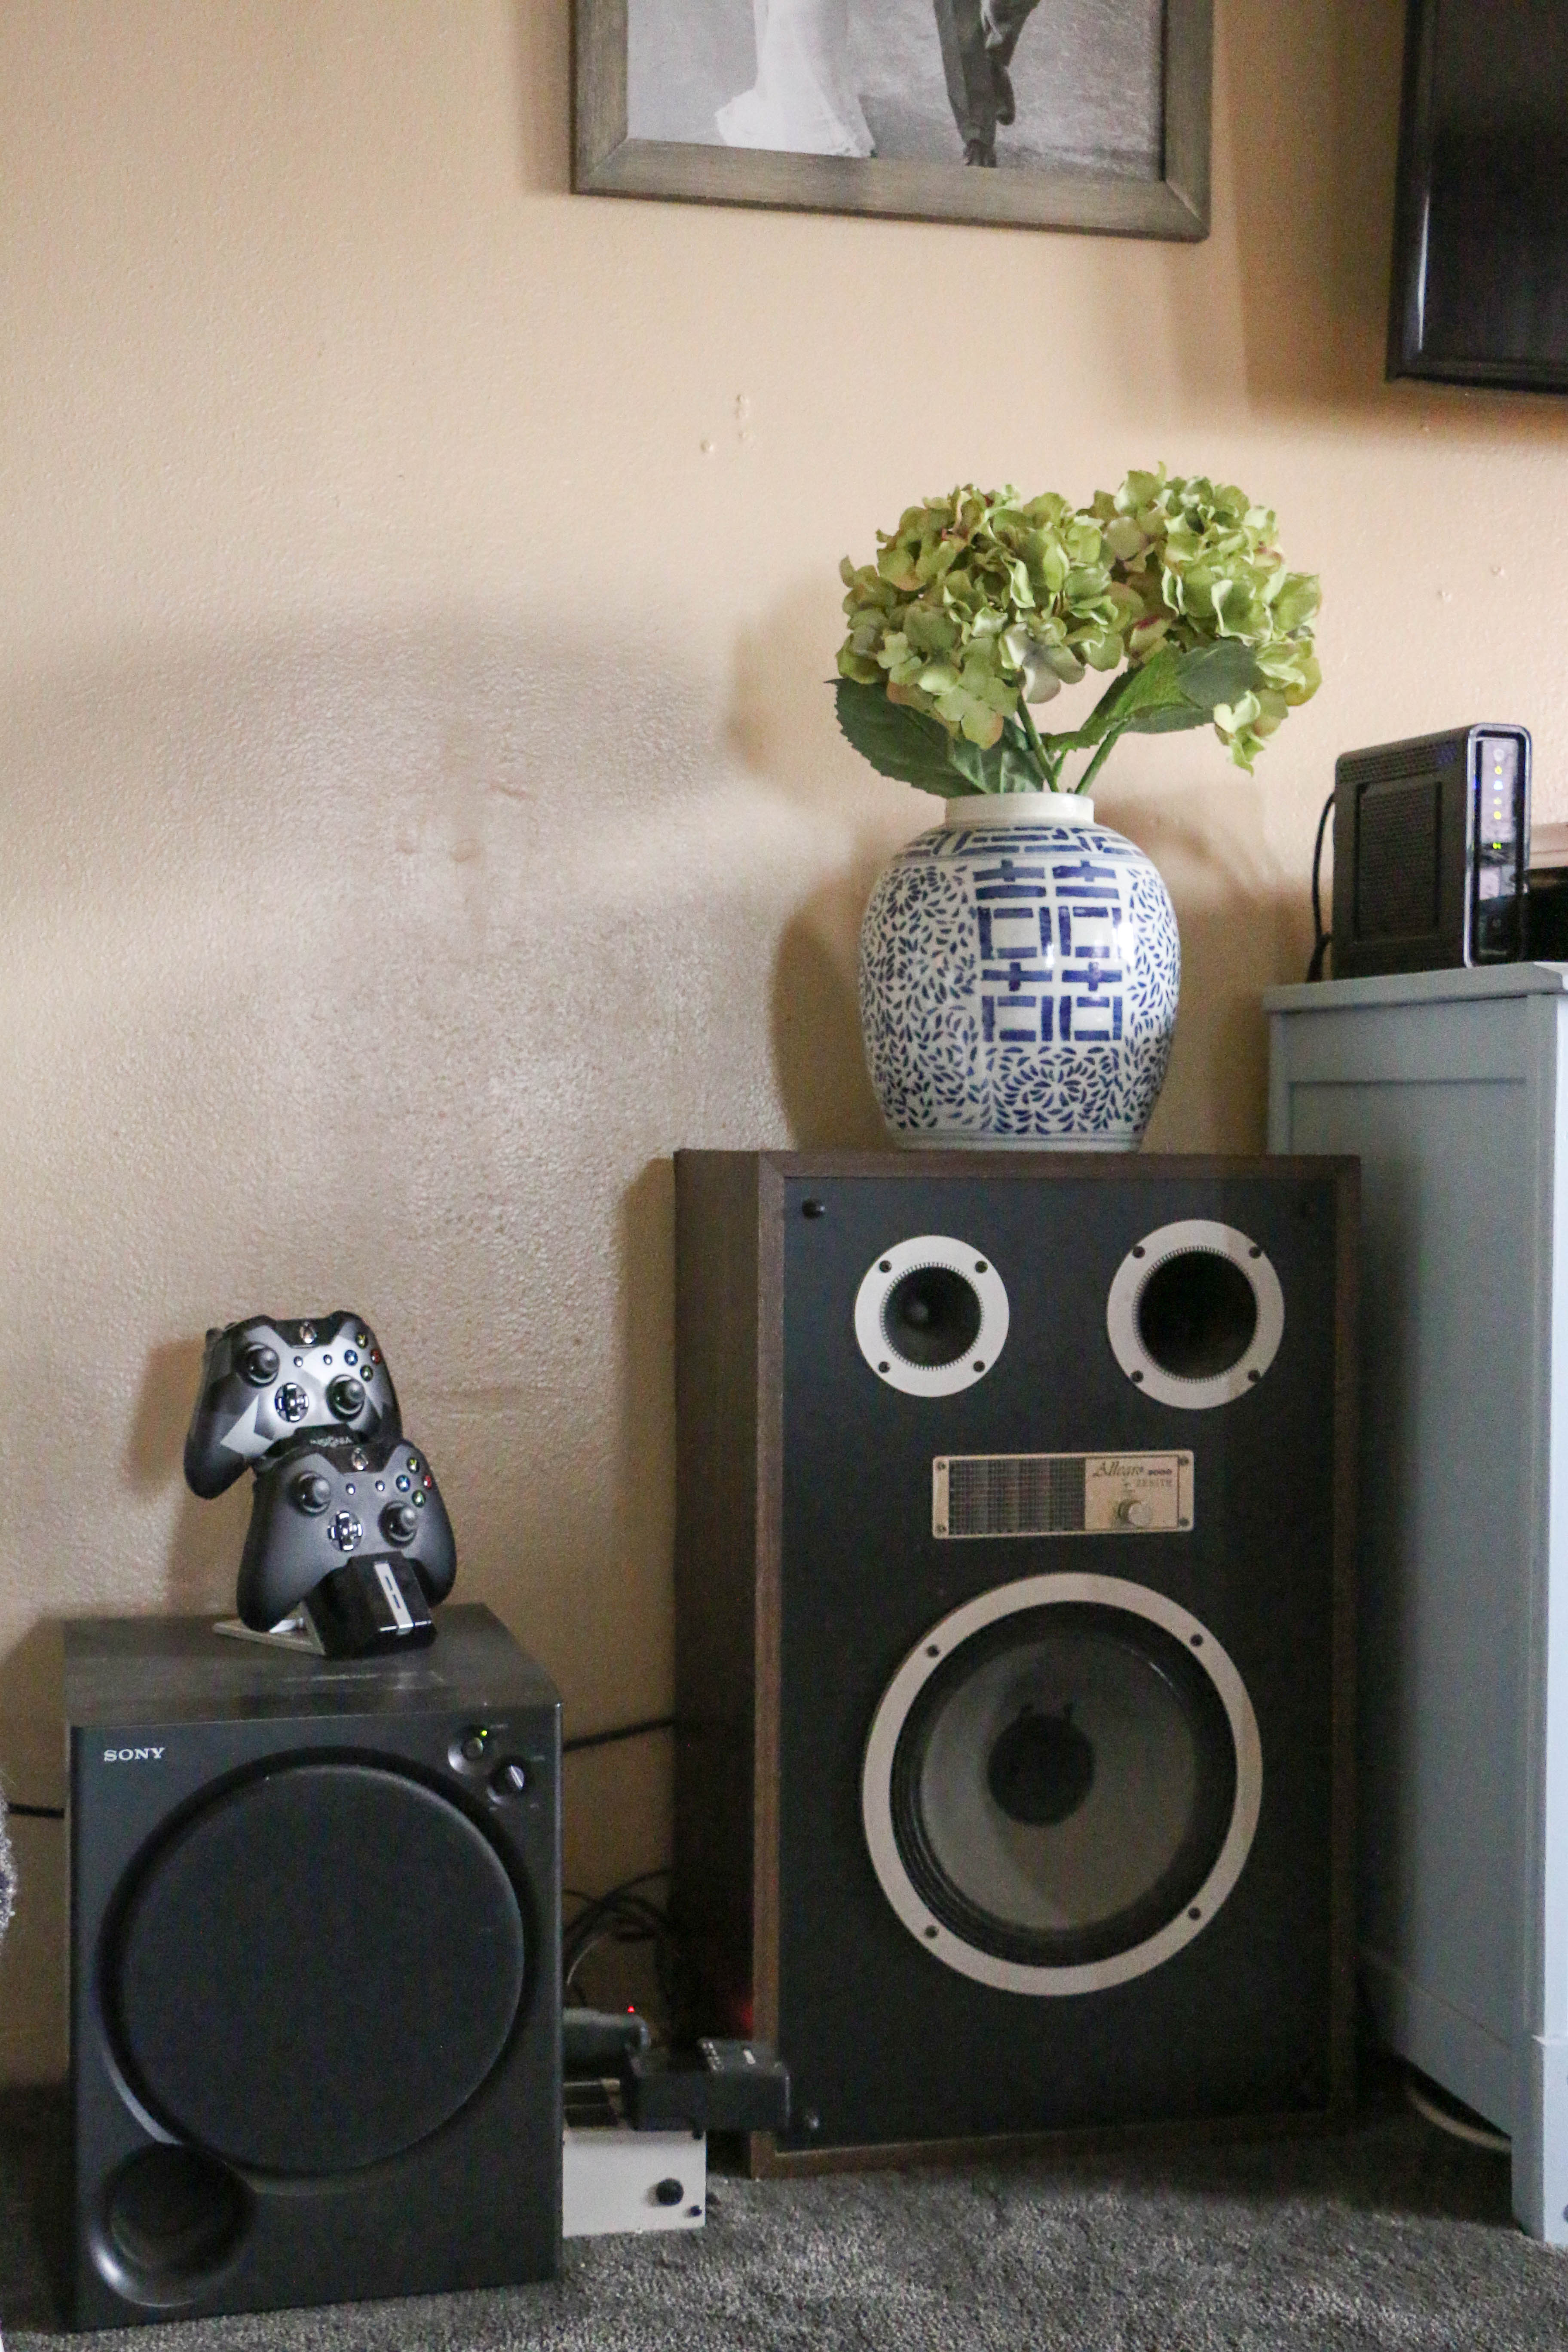
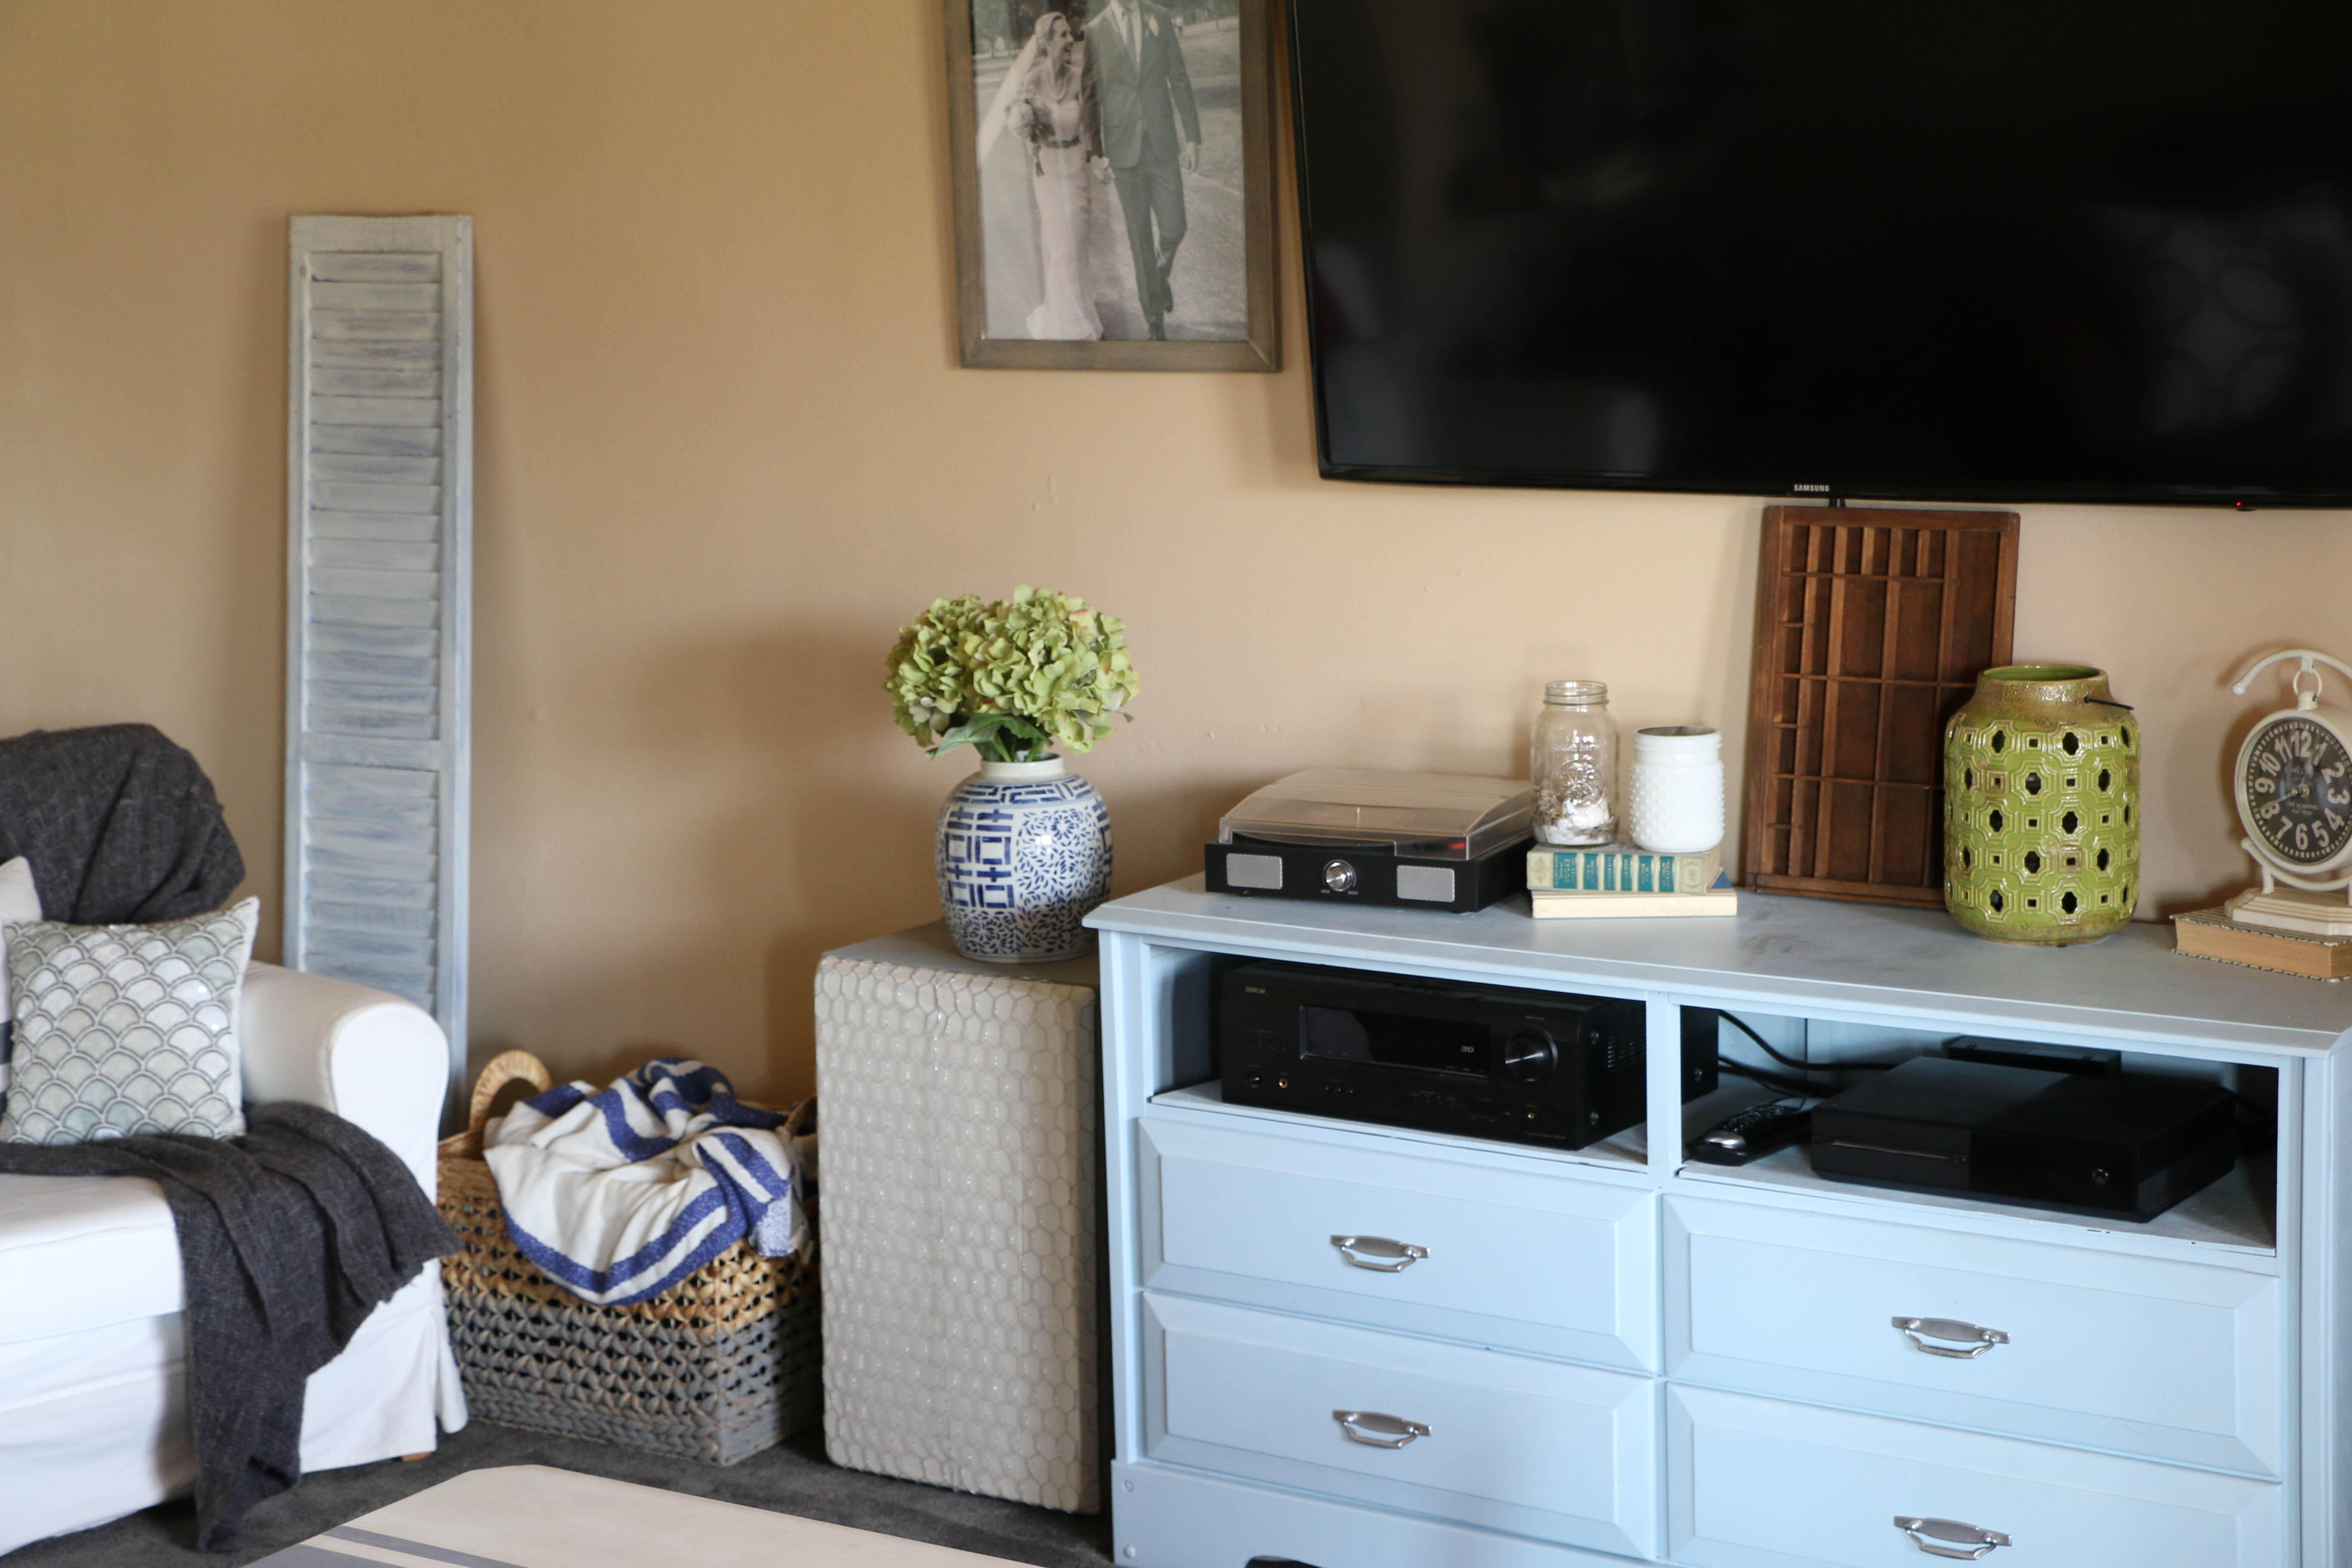
So Ethan is a media guy. He loves sound, and “equipment” is important to him. If it were up to me, I’d be listening to the TV sound from the speakers that are built into the TV. But apparently, my poor untrained ears don’t even know how awful that is. Needless to say, the large speakers and subwoofer weren’t going anywhere. Don’t know what a subwoofer is? You’re not alone. I didn’t either until I met my husband. Marriage is compromise people. But you can at least make the compromise pretty. First, let me show you what sort of equipment we were dealing with here.

speakerbefore1

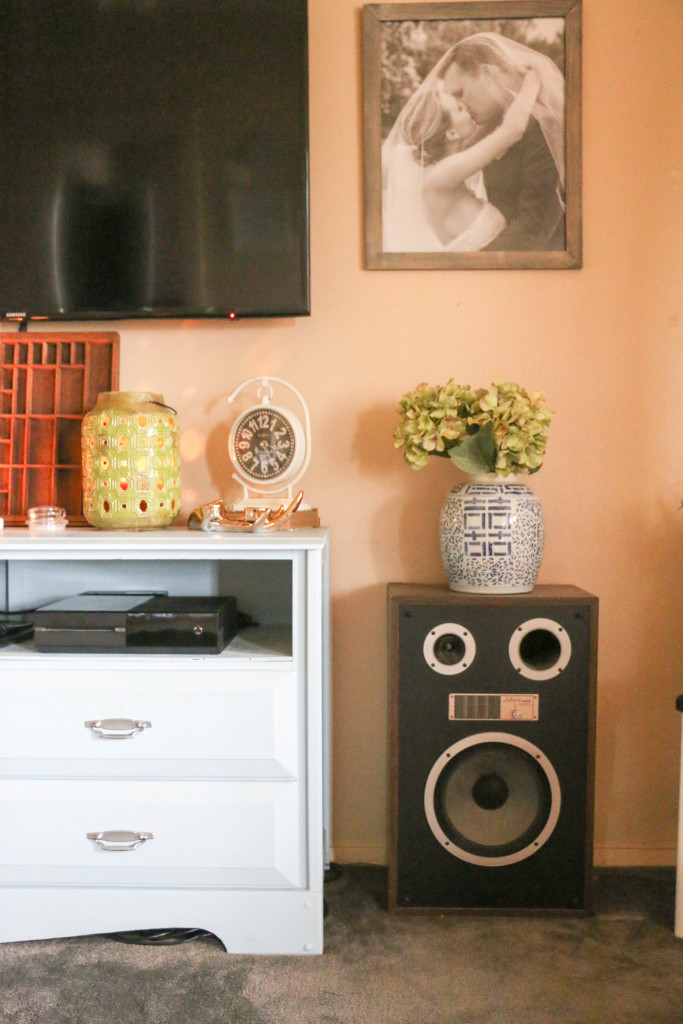
See how I tried to make it pretty with a vase on top? I wasn’t fooling anyone.

mediaconsolebefore

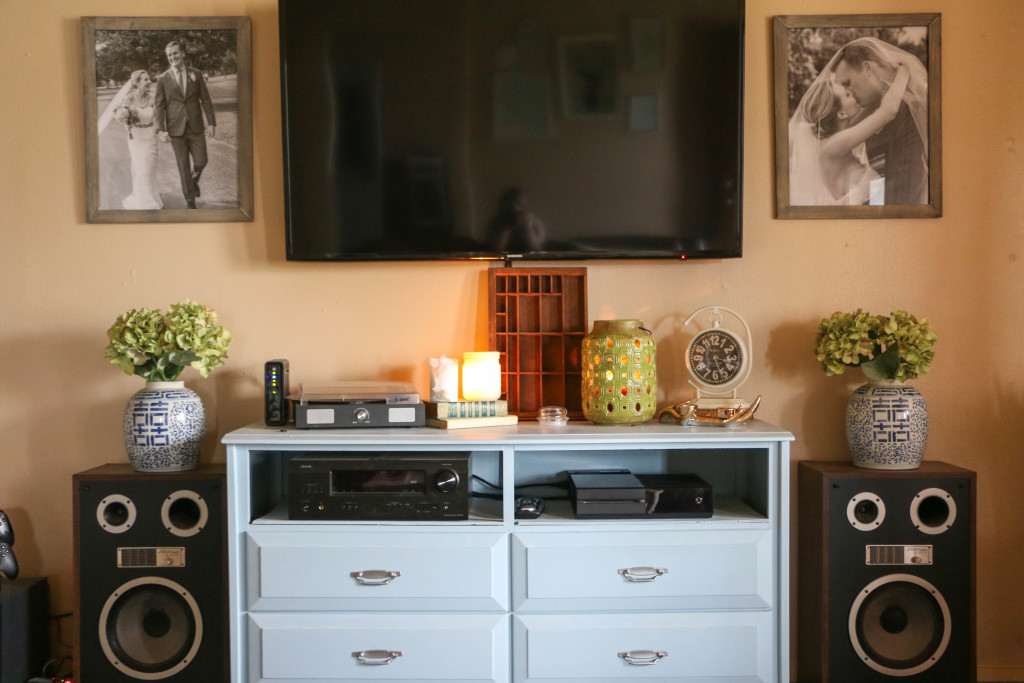
The media dresser was a project I completed a long time ago, pre-blog, when we first got married. It’s helping the situation, but in about the same way that a bandaid helps a broken arm.

speakerbefore2

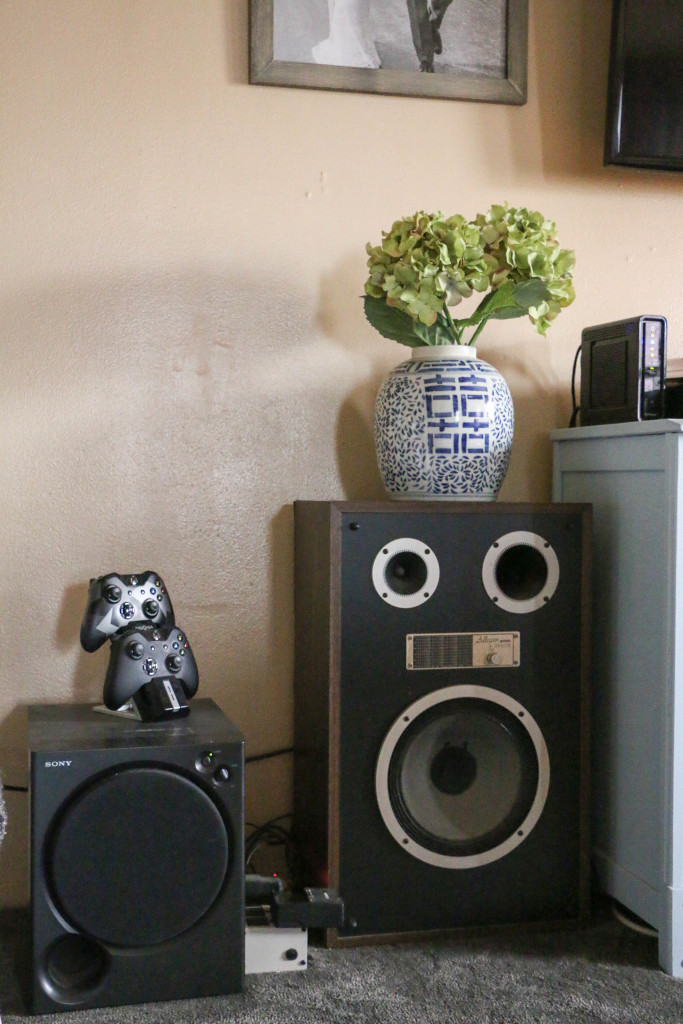
This side is the worst of all. (That on the left is the subwoofer, by the way. It’s the bass of speaker sound. Or something like that.) The power strip, the X-box controlers, all of it.

We tossed around the idea of building a completely new unit that would fit the speakers into it, but ultimately decided against it for two reasons. First, it would end up being extremely long were it long enough to keep the storage we currently had in the drawers and hold the excess equipment. Knowing this house is not our permanent home (thankfully), we didn’t want something so long that its use would be limited in another house. Second, the cost would be higher to build something new entirely than to fix what we already had. So, you know me. I was on a mission to DIY the heck out of this thing.

mediaconsole3

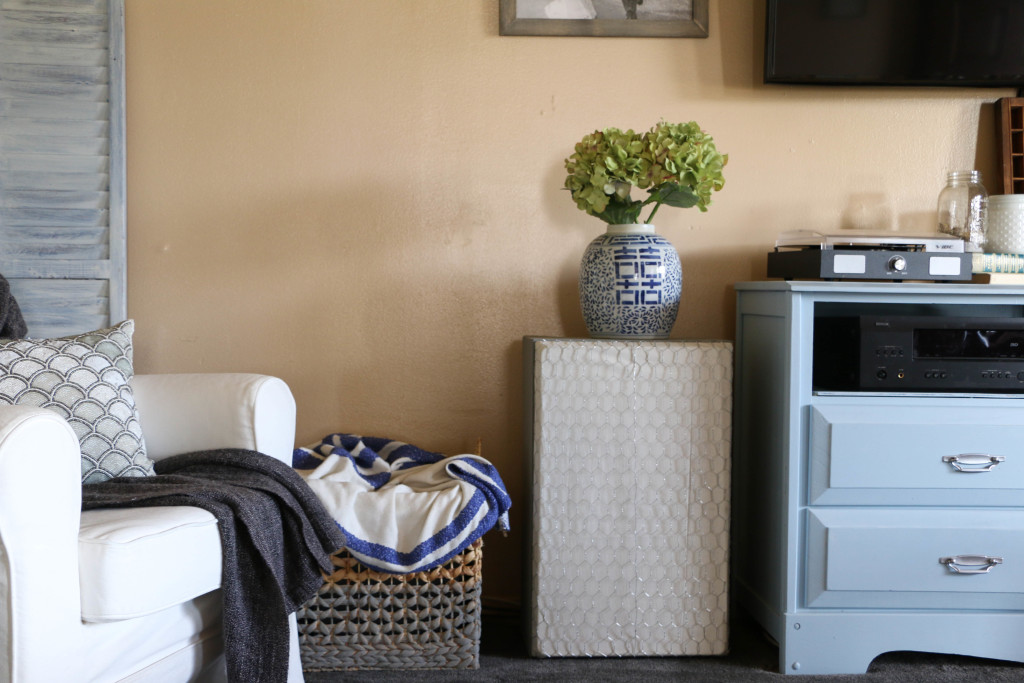
Here’s a closeup of one of the speakers when I finished it. Using the old coverings for the speakers (they were not pictured in the original photo, but luckily we had them stored in a closet), I tore off the old black material. I recovered the frames with a cream colored muslin. With my 40% off coupon at Hobby Lobby, it cost me under two dollars. I then added chicken wire over that just to add some texture. The chicken wire cost about six dollars at Home Depot, bringing my project up to a grand total of eight dollars.

mediaconsole4

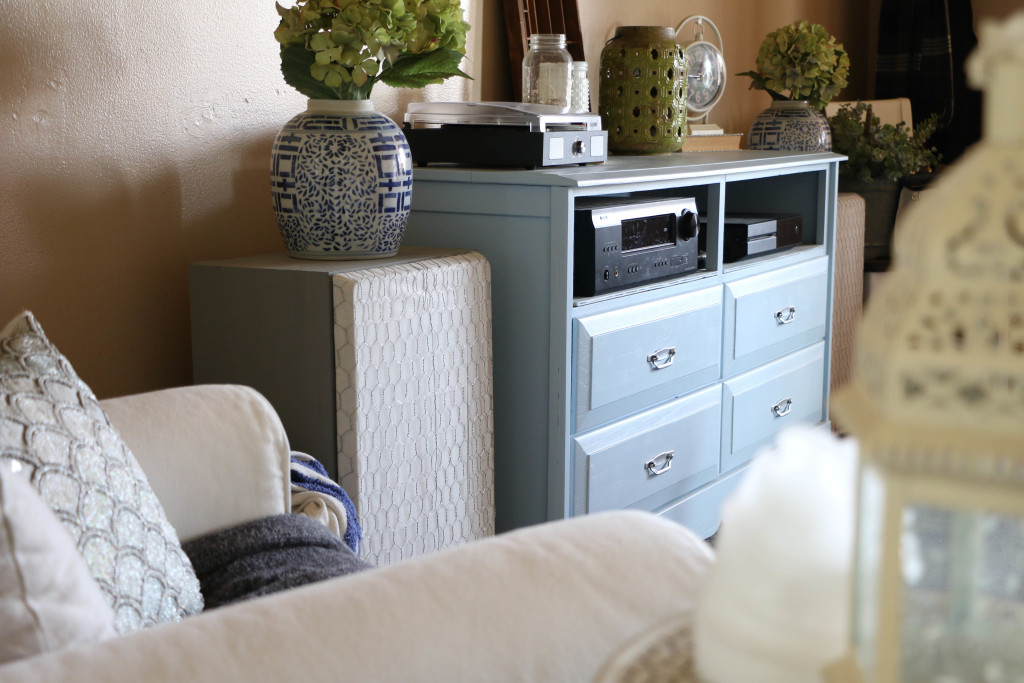
The sides of the speakers got a coat of gray chalk paint. The paint was a new-to-me brand from a local shop, and I really liked the way it turned out. Goodbye dark wood veneer!

mediaconsole11

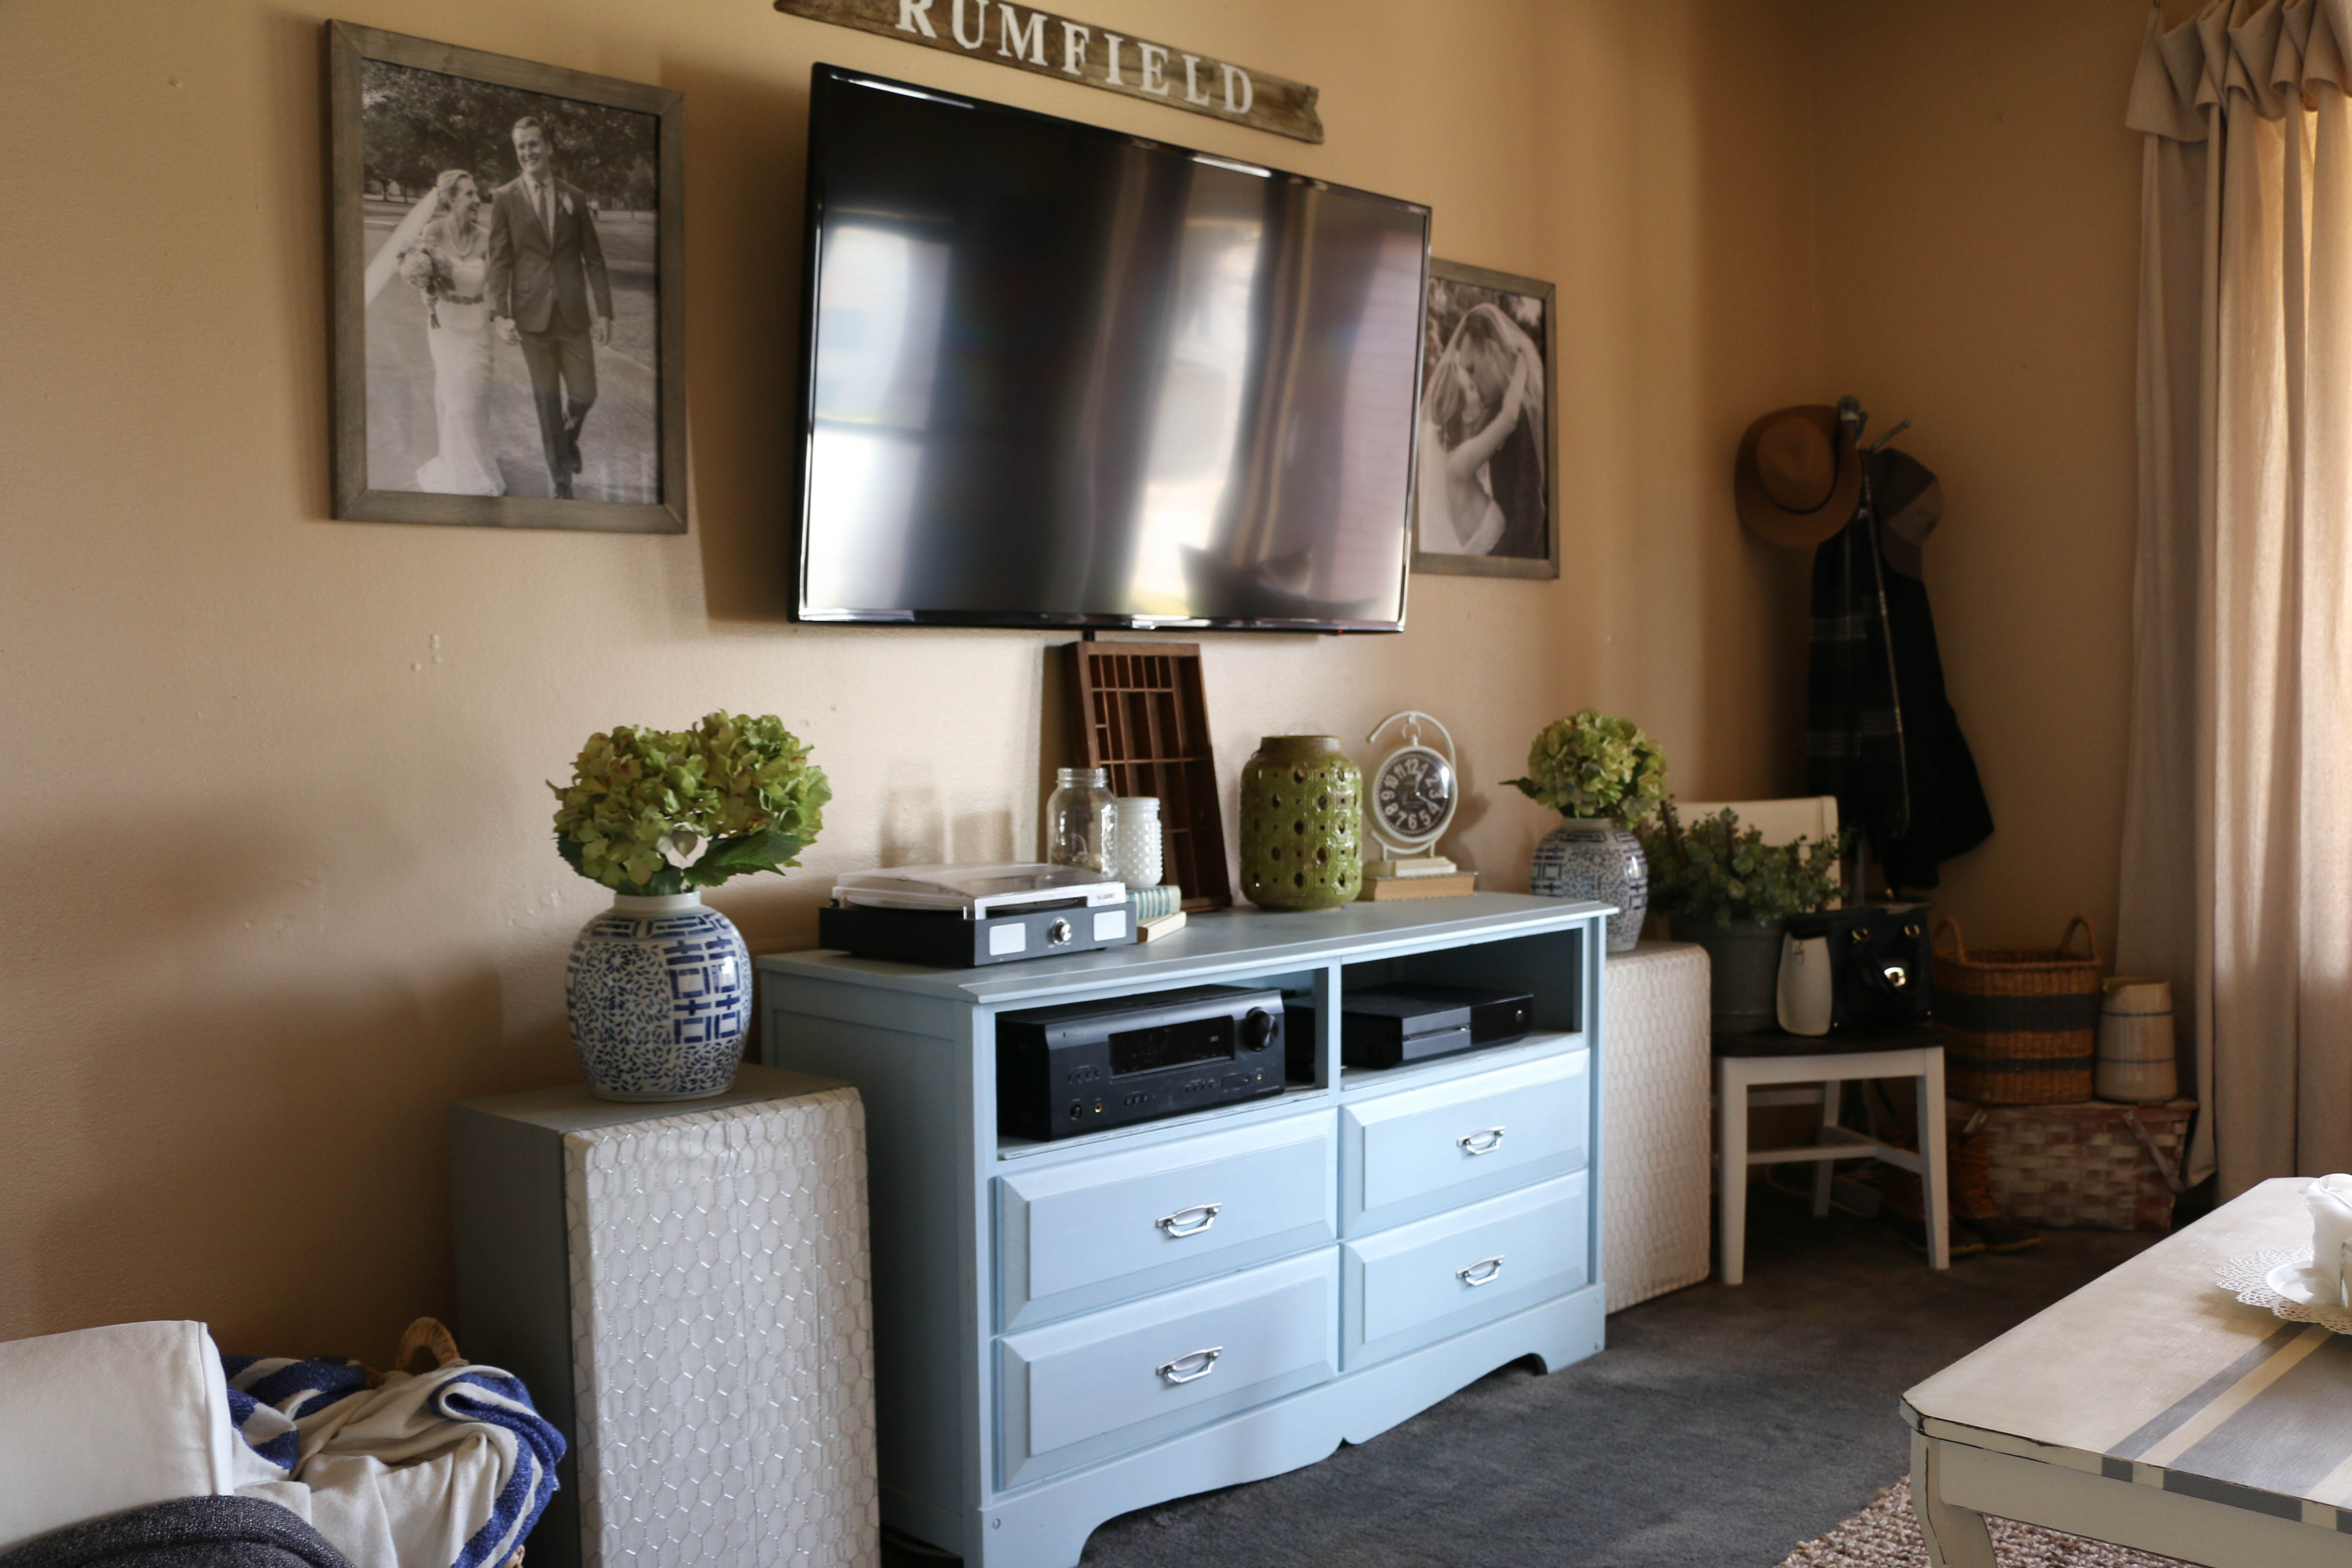
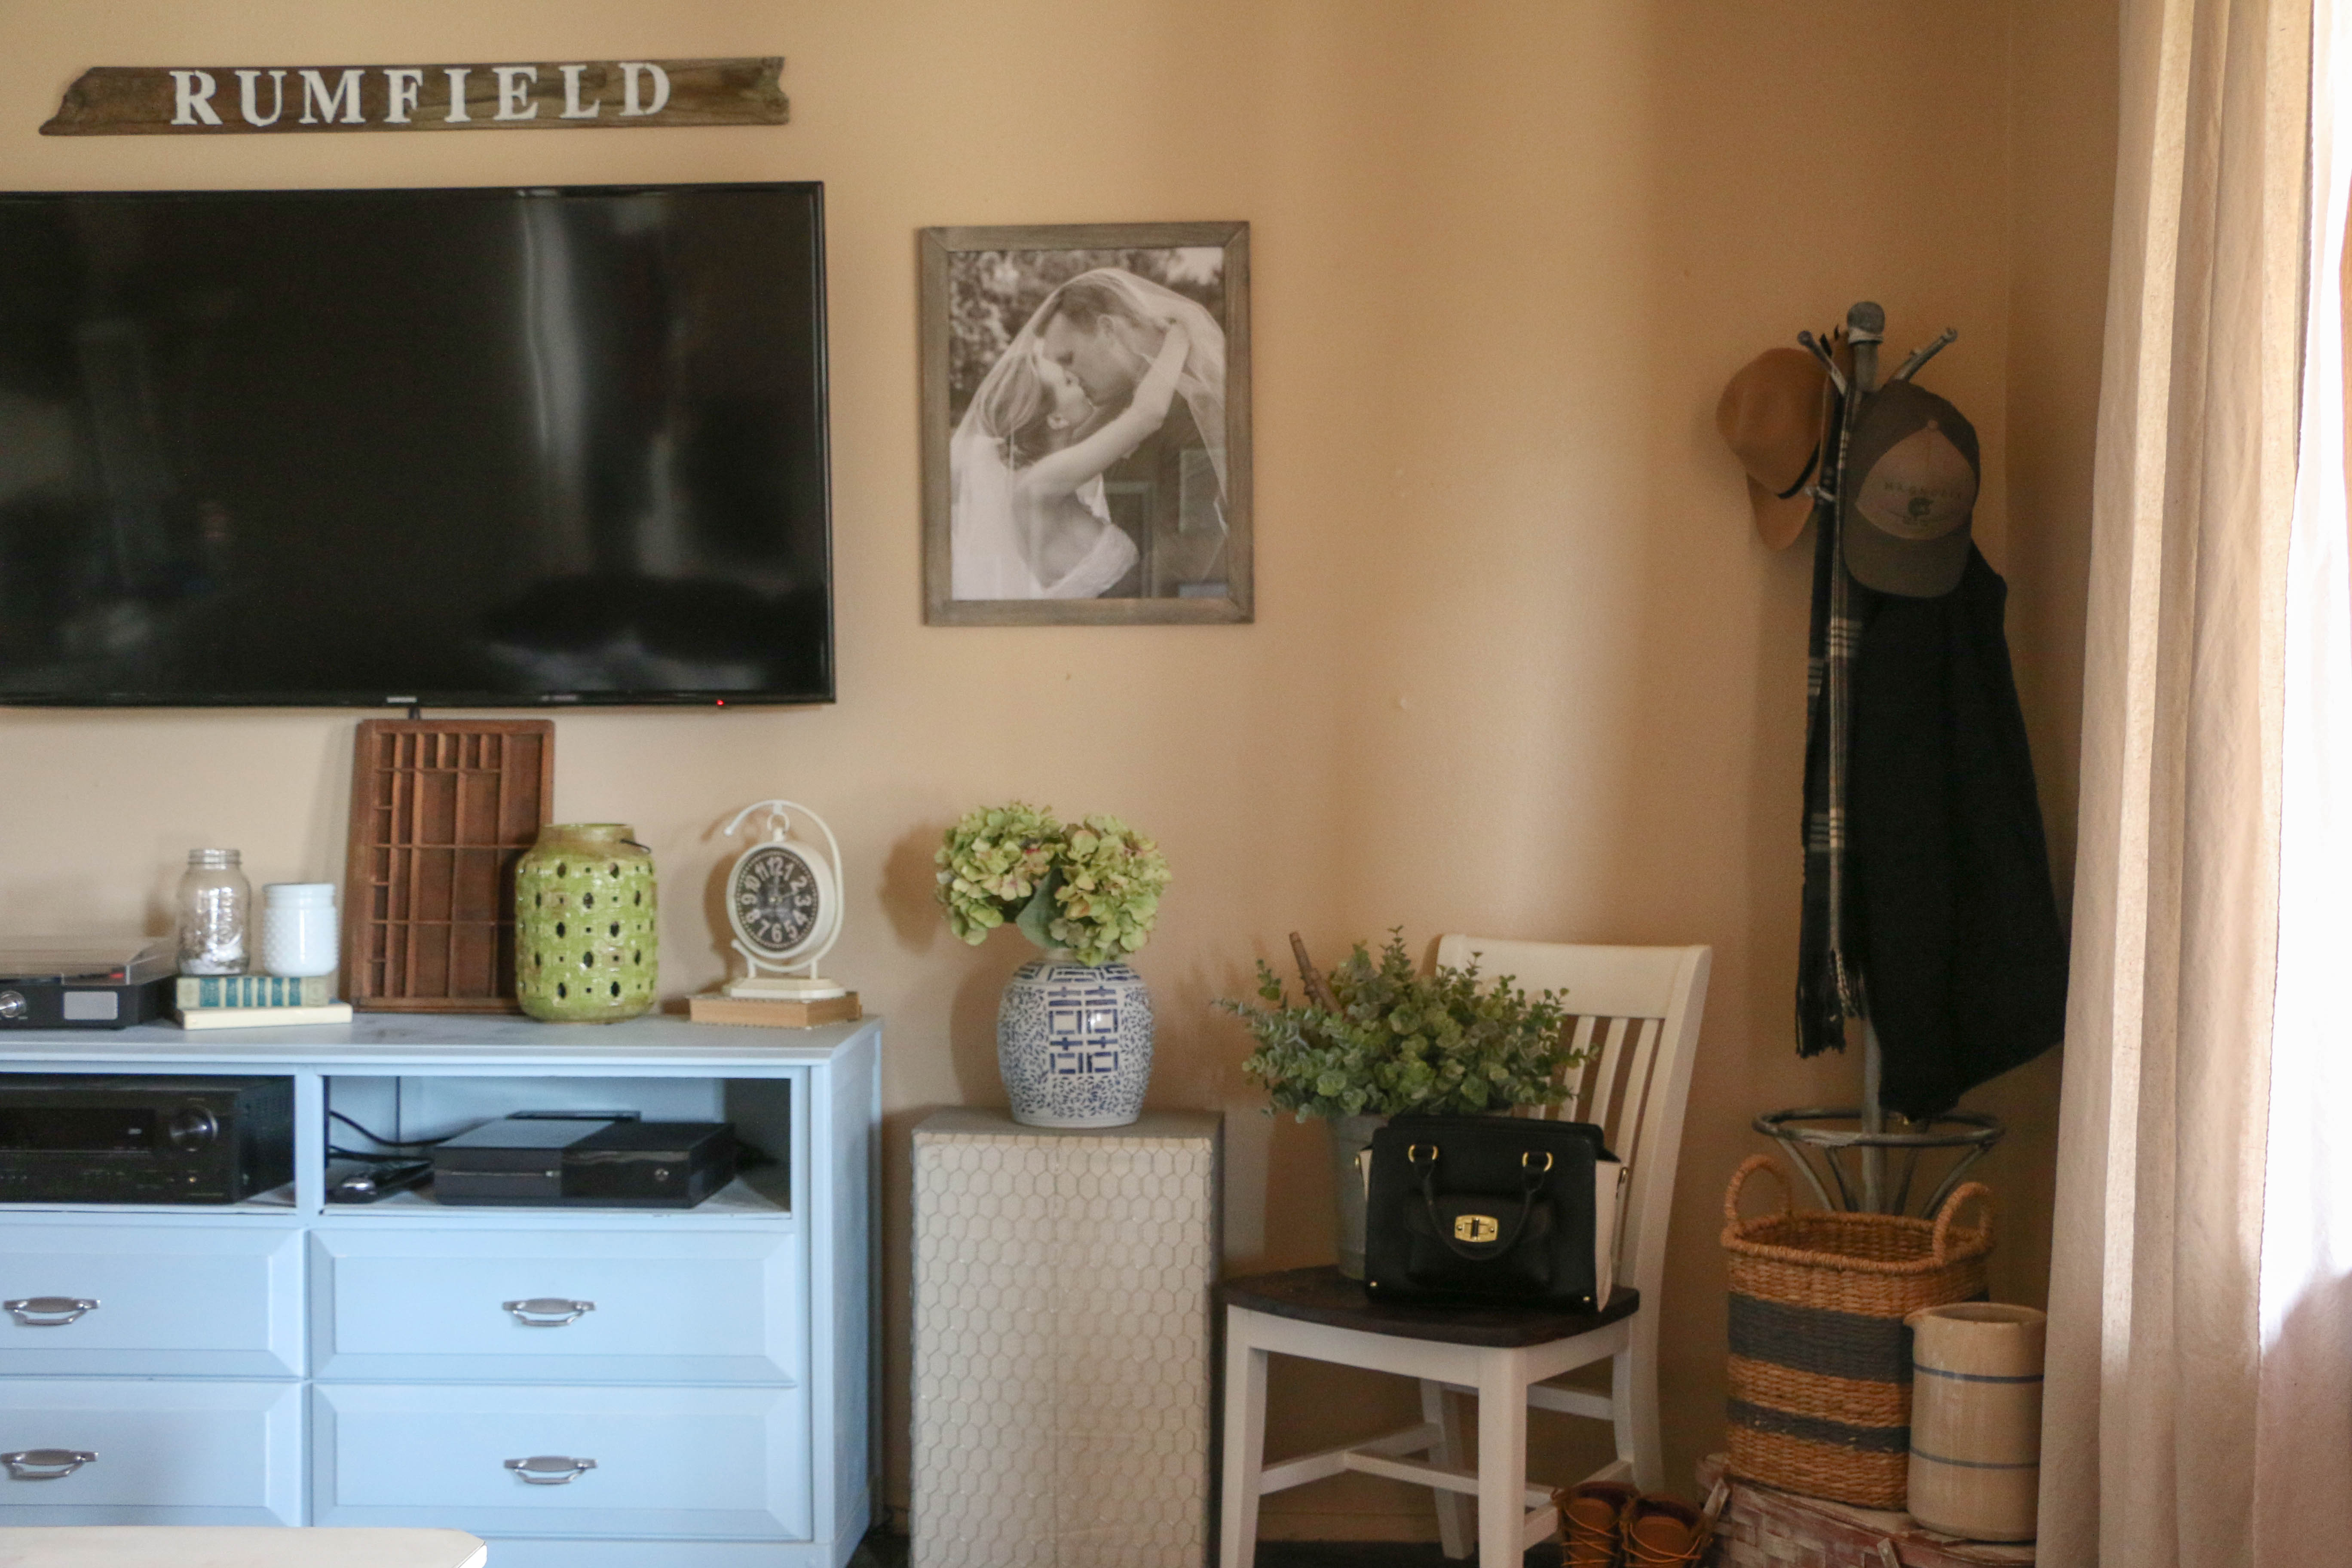
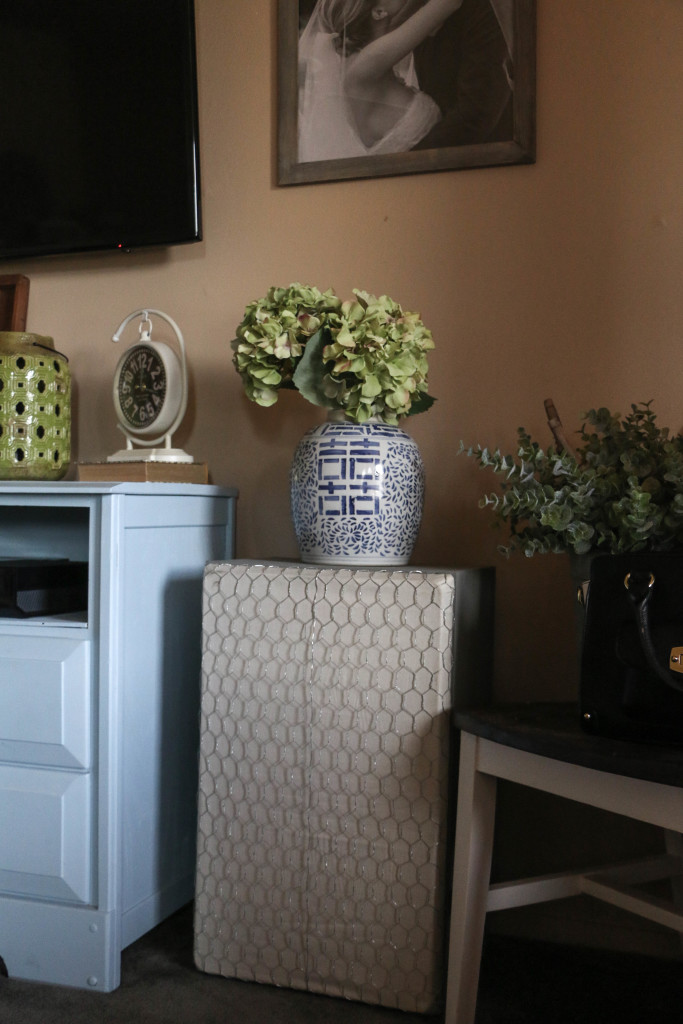
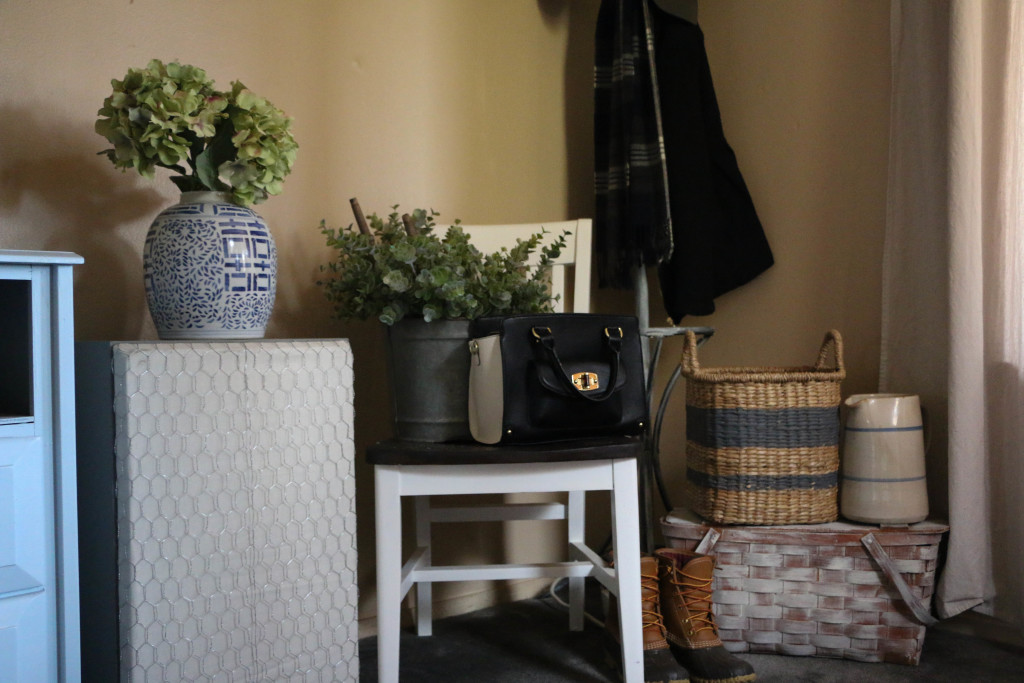
The last and most important (in my opinion) part was the basket on the far left. It took me a couple of weeks to find a basket big enough, but I finally found one large enough to fit the subwoofer, power strip, and X-box controllers. I painted the bottom half of it the same color as the speakers just to break up so much of the tan color on the front. On the backside of the basket I used wirecutters to cut just enough of the weaving to push power cords through. Topped with a blanket, you cannot even see all the necessary uglies inside!

mediaconsole9 mediaconsole7

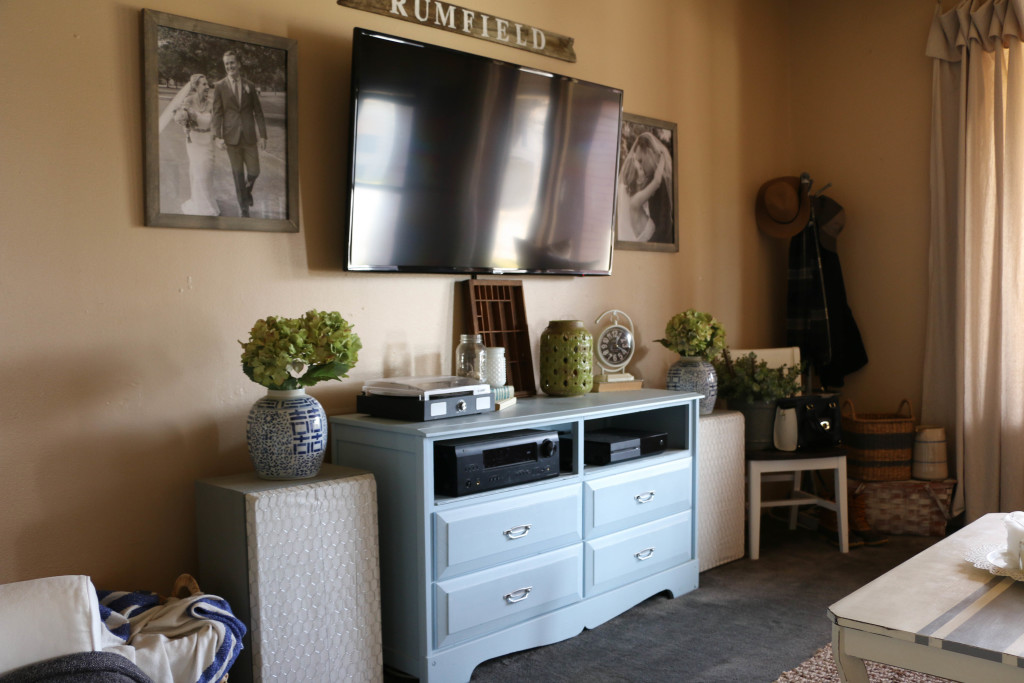
My goal was to make the speakers look more like a piece of furniture that belongs in the room, rather than an eyesore that I have to crop out of photos.

mediaconsole12 mediaconsole1

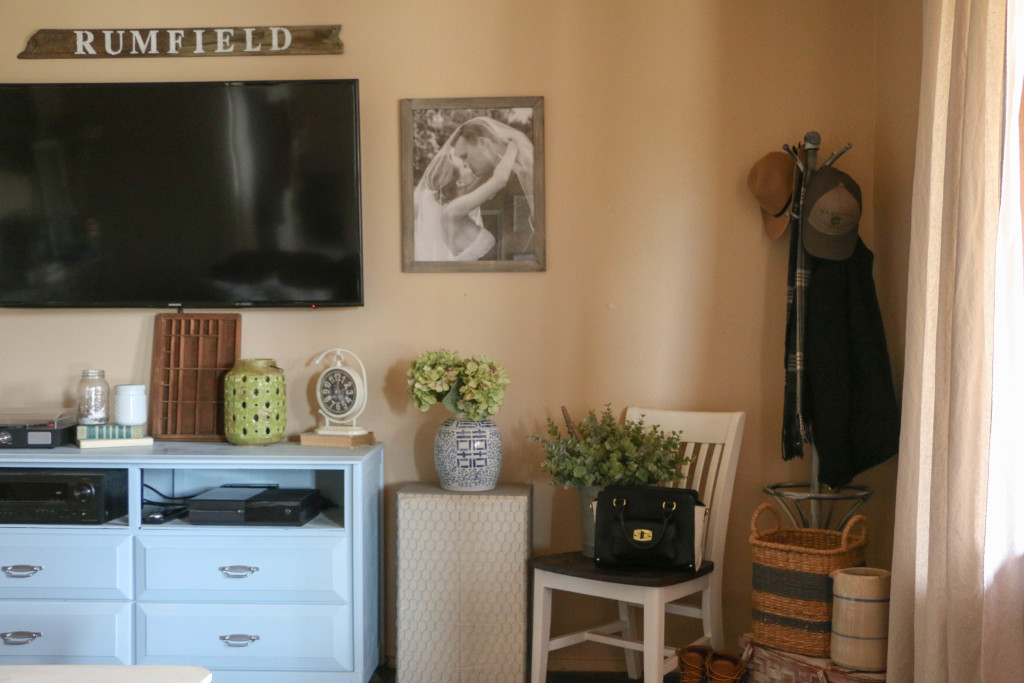
Ethan even agrees that they look better, and luckily for me, it doesn’t affect the sound quality having the chicken wire over the speakers. Also note the printer’s drawer? That conveniently covers the cord that hangs from the TV.

Maybe I’m crazy for thinking this, but technology is just ugly. If it were up to me, I wouldn’t have any of this stuff in the house at all. What a beautiful sight that would be! But alas, this is the life we live. The remaining visible pieces are the few that I don’t mind having out. The record player on top is where I play my Julie Andrews and Johnny Cash, and the other stuff needs to be accessible for the remote. Overall, I am so happy with the way this area looks.

It only took a year and a half, but I do love how this turned out.

And just for fun and a good laugh, here’s a throwback to what this area looked like when I first moved in after we got married. (Ethan lived here alone before we were married and I moved into his turf.)

AB7D9B71-D413-44FD-9E18-A7EFE8ECE9CC

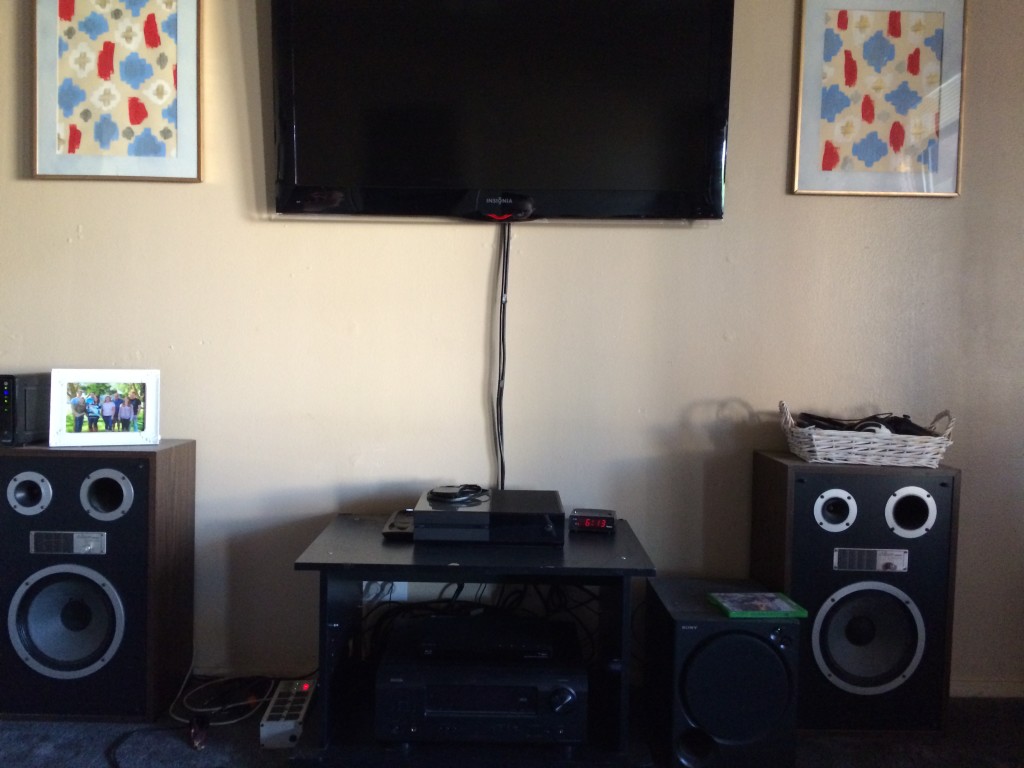
YIKES. I know. I may not know much about design, or have a beautifully furnished house that I’m completely in love with, but at least I can sit back and be proud of the fact that we’re not living like this anymore.

Okay, enough of my ranting. I hope you’ve gained some ideas for yourself. I am so much happier with our new setup! How do you organize your media area? I’d love to hear about it! That’s all for today, friends. Have a fabulous day!

DIY Projects, Home Decor

DIY Gallery Wall Update

Hello there friends! I hope you’re having a wonderful Monday! It’s a three day weekend for me, so you know I’m having a great Monday! This past weekend has been really really awesome. I’ve gotten SO MUCH done, and I’ve been inspired to do several new projects. On Saturday, Ethan and I took the trip down to Magnolia Market (Joanna Gaines, Fixer Upper, fabulous home decor, my idol, you get the point). It’s only about an hour drive for us, but it was the first time we had been since they’ve opened their larger store.

I bought two small items while I was there, and it inspired me to update a little gallery wall we have in the corner of our bedroom. Now, since I had spent all my money at Magnolia Market, I didn’t have any more money to buy anything new. So, I had to get creative.

GalleryWallBefore

This is what this little corner of the room looked like before. I made/put together most of these pieces immediately after moving into the house when we got married. Let’s not talk about the multicolored canvas with washi tape all over it. Just, don’t even mention it. Obviously, this isn’t really my style. So when I brought home something new, I knew I needed to update this whole little corner. Here’s how it looks now:

GalleryWall8

The entire theme is a bit more neutral and monochromatic, which fits in this room SO MUCH BETTER. As you can see, some of the pieces stayed the same, but the overall look is something I’m much happier with. So let’s talk about how I got my creative on without any money.

GalleryWall5

This is what I purchased from Magnolia Market this weekend (pardon this blurry picture, I don’t really know what was going on). The frame and the wreath came separately, but I attached the wreath with some thin black ribbon to the back of the frame.

GalleryWall1

The hand lettered sign on the top right was something I whipped up with a Sharpie. Nothing fancy at all. The frame was something I had in storage with something else inside. I had never hung it because I wasn’t a fan of what was previously in the frame, but with a little art swap, I was good to go. I also moved the burlap arrow frame to the other side of the wall and painted the frame from a metallic silver to a matte gray. Just another way to go a bit more neutral.

GalleryWall7

This piece is the biggest statement on the wall, and my personal favorite. It took Ethan a bit to figure out what “all those numbers mean,” but it’s our anniversary date. I used the same canvas from the first photo, peeled off the washi tape, and painted white over the cringe-worthy painting. I used stencils and a Sharpie to create the numbers, which was so easy anyone could do it! I believe this canvas was originally a picture of Audrey Hepburn I had in my college dorm room. It has now lived many lives! No one will be able to say that I didn’t recycle!

The other pieces from the original wall got trashed, as they had been reused one to many times, with the exception of our wedding photo, which will be relocated. GalleryWall3

This little corner may not look totally different to everyone, but to me, the entire mood has changed now that it’s underwent its little makeover. It look me maybe an hour to update and make the three pieces, and aside from the new mirrored frame, it didn’t cost me anything.

Bringing new life to old gallery walls doesn’t have to be expensive! Look at the pieces you have already, and imagine new ways to rework them. Canvas can always be painted over, frames and always be painted. I’ve been known to hang wrapping paper in frames as cheap art, or free printables found online. Handwritten notes or drawings can also make great (free) additions to gallery walls. If you’re strapped for cash, look around your home and see what you can come up with! You might be surprised at what you find you already have.

What’s your go-to piece for artwork? Have you ever made a gallery wall mistake like I have? I’d love to hear about it! That’s all for today, friends. Have a fabulous day!

DIY Projects, Holidays

The Importance of Wrapping

When I was a kid, Christmas Eve was a big deal. Our family tradition was that everyone would sleep in the living room on Christmas Eve night, so that on Christmas morning, we would wake up right next to the tree. I remember how much I loved this tradition. I remember the year I pretended to still be sleeping as my parents rolled our new bikes into the living room from the garage. I also remember sitting in my nightgown on my sleeping bag opening my first “grown-up” tape recorder (and by grown up, I mean that it was a normal tape recorder, and not a Fisher-Price one). I spent hours in my room with that tape recorder making my own “radio show,” where I would be the DJ, playing my favorite songs, talking about my favorite things, and interviewing very interesting people (my brother and sister). I wonder if I still have those tapes somewhere.

We all have childhood memories associated with “the best gift we ever received.” Now please don’t hear me say that giving and receiving gifts is the most important thing about the holiday, because we all know it’s not. However, as we do give and receive gifts, we form emotional memories of years past. The feeling you have as a child of tearing open the package is a beautiful feeling. To me, giving gifts is a way of showing you love and appreciate someone.

So why in the world would we not do our best to make our gifts as presentable and beautiful as we can? Again, I am not implying that gifts must be perfect, or that pretty wrapping makes a gift any more meaningful. For me, it is simply another creative outlet. So here are a few of my tips for pretty (and inexpensive) gift wrapping.

giftwrapping3

giftwrapping8

giftwrapping1

giftwrapping5

This paper came from Hobby Lobby last year or the year before, and everything else I had on hand.

Gift wrapping has three important factors: the paper, the ribbon, and some type of embellishment.

Let’s talk paper. I never pay full price for wrapping paper. I re-use the same paper from previous years most of the time. I also pick up a roll or two the day after Christmas when everything is marked down 50-70% off normal retail prices. If you’re without holiday paper, have no fear! One of my favorite things to use is plain brown craft paper because it works for all occasions. Baby shower? Check. Christmas? Check. Birthday? Check. Wedding gift? Check. You get the point. You can also use black and white newspaper (I have seen some GORGEOUS wrapping using newspaper), wrap your gift in a scarf (both pretty and reusable!), or in a real pinch, use any themed paper on its opposite side so that it simply shows white.

Next up is ribbon. The options are unlimited! I do occasionally use normal cloth ribbon, but my favorite things to wrap a gift in is regular twine, or colored baker’s twine. My suggestion is to look around your house and see what you can find. Thinly sliced strips of a coordinating wrapping paper can work as ribbon as well. A thin scarf can work here as well. Don’t go out and buy something new every time you have a gift to purchase. Look around your house and I’m sure you can come up with some thing to wrap your gift in. There’s a reason Julie Andrews mentions “brown paper packages tied up with string” as one of her favorite things…the string is an important detail!

Lastly, let’s talk about embellishments. I think a gift looks perfectly topped off with anywhere from one to three finishings. The amount, of course, depends on what it is that you’re using. I like to use a lot of natural things, such as small pinecones, sticks, dried citrus slices (see my tutorial for that here), cinnamon sticks, leaves, pine clippings, wood slices. The possibilities are endless. I also often add a name tag of some kind, just so that I don’t forget who the gift is for after I finish wrapping it. For kids, you can add a tiny toy as embellishment, or a pretty piece of candy. This is the step that brings it all together, so it’s an important thing to add. The good news is that you can add just about anything you want here, so you can certainly find something you have at home or go out into your yard and find something just as easily.

How do you wrap your gifts? What’s your go-to accessory for finishing your wrapping? I’d love to hear about it! Be sure to follow me on Instagram @rumfieldhomestead for the latest updates on what I’m doing! That’s all for today, friends! Have a fabulous day!